One of Apple's best products is iMessage, which allows for quick, creative, and free messaging between iOS and Mac devices. However, users are reporting that conversation threads in the Messages app are occasionally out of order, which is equal parts confusing and annoying. Luckily, we have some ideas on how to fix the problem.
While the bulk of usercomplaints surrounding the random order of messages seems to have happened since the iOS 11.2.1 update on Dec. 13 (which is when I started experiencing the issue, too), there have been similar reports for the iOS 11.2 update on Dec. 2 and even some when iOS 11 first dropped back in September — and even in earlier iOS versions.
Apple had not publicly acknowledged the bug until they issued patches on January 23 and then again on May 29 (see Method 1 below). Even then, you may still be experiencing issues, so there are some other options you can try out to get messages back in the right order. If you're lucky, the first potential fix may solve your issue, but if not, just keep going down the list and one of them will likely help.
Update to iOS 11.4
Apple has issued a "fix" that may solve all of your problems, but you'll need to update your iPhone to the latest software version, iOS 11.4. We first saw Apple address this bug in iOS 11.2.5 and then again in iOS 11.3, but users were still having issues. If you have already updated and are still experiencing issues, keep running down this list for more things you can try to get messages back in the right order.
If you're worried that a wireless update may not do the trick, try updating to iOS 11.4 via iTunes instead. While the exact same update, a small amount of users report that updating manually through iTunes squashes all bugs properly and causes less issues overall. Whatever you choose to believe, updating to the newest iOS version is always the first thing to do, whether it's wirelessly or via iTunes.
Force-Close Messages
The first and easiest option you should try is simply force-quitting the Messages app. This method is universal for any app of yours that seems to be acting up.
If you have an iPhone X, swipe up from the bottom of your screen, hold for a second, then release to open the app switcher, then long-press on Messages and either hit the red X or swipe up on the card. For all other iPhones, simply double-click the Home button, then swipe up on the Messages card.
Now, just reopen Messages. If successful, your iMessages should be arranged in the correct order, and you hopefully won't experience the problem again. However, if neither one of those cases is true, move onto the next method.
Restart Your iPhone
When was the last time you shut down your iPhone? It's likely you can't remember. While day-to-day iPhone usage makes it seem like a full reboot isn't necessary, sometimes a quick restart is exactly what your device needs to get back on track.
To shut down your device, hold the Side button down until you see the "slide to power off" option. If you have an iPhone X, you'll need to hold down the Side button with one of the Volume keys. Alternatively, go to Settings -> General and tap on "Shut Down" to access the same option. Slide the power icon all the way to the right side of the display to power down your iPhone.
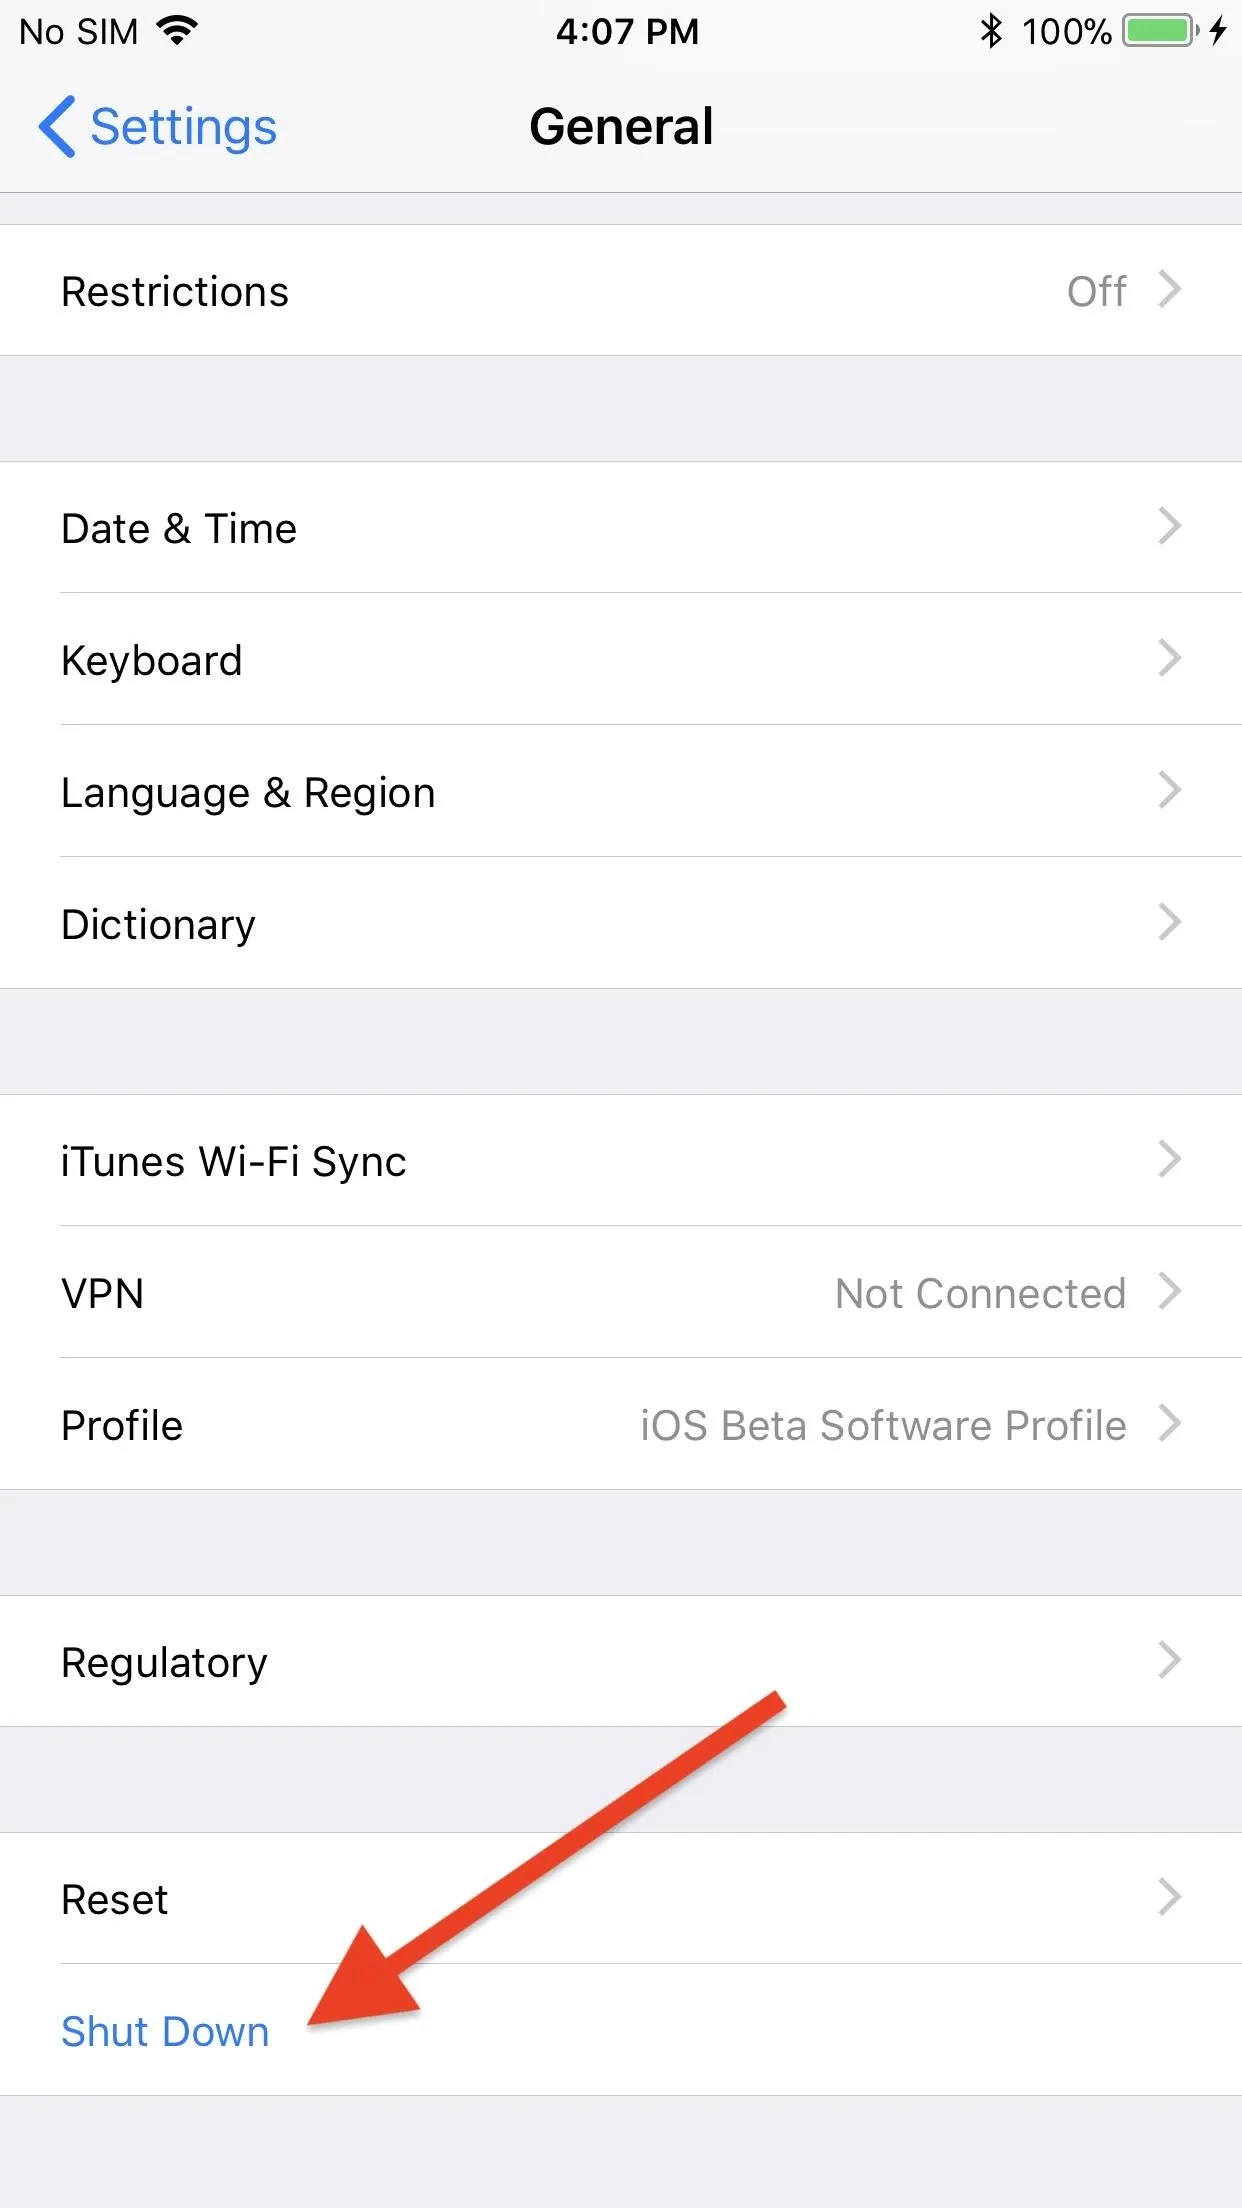
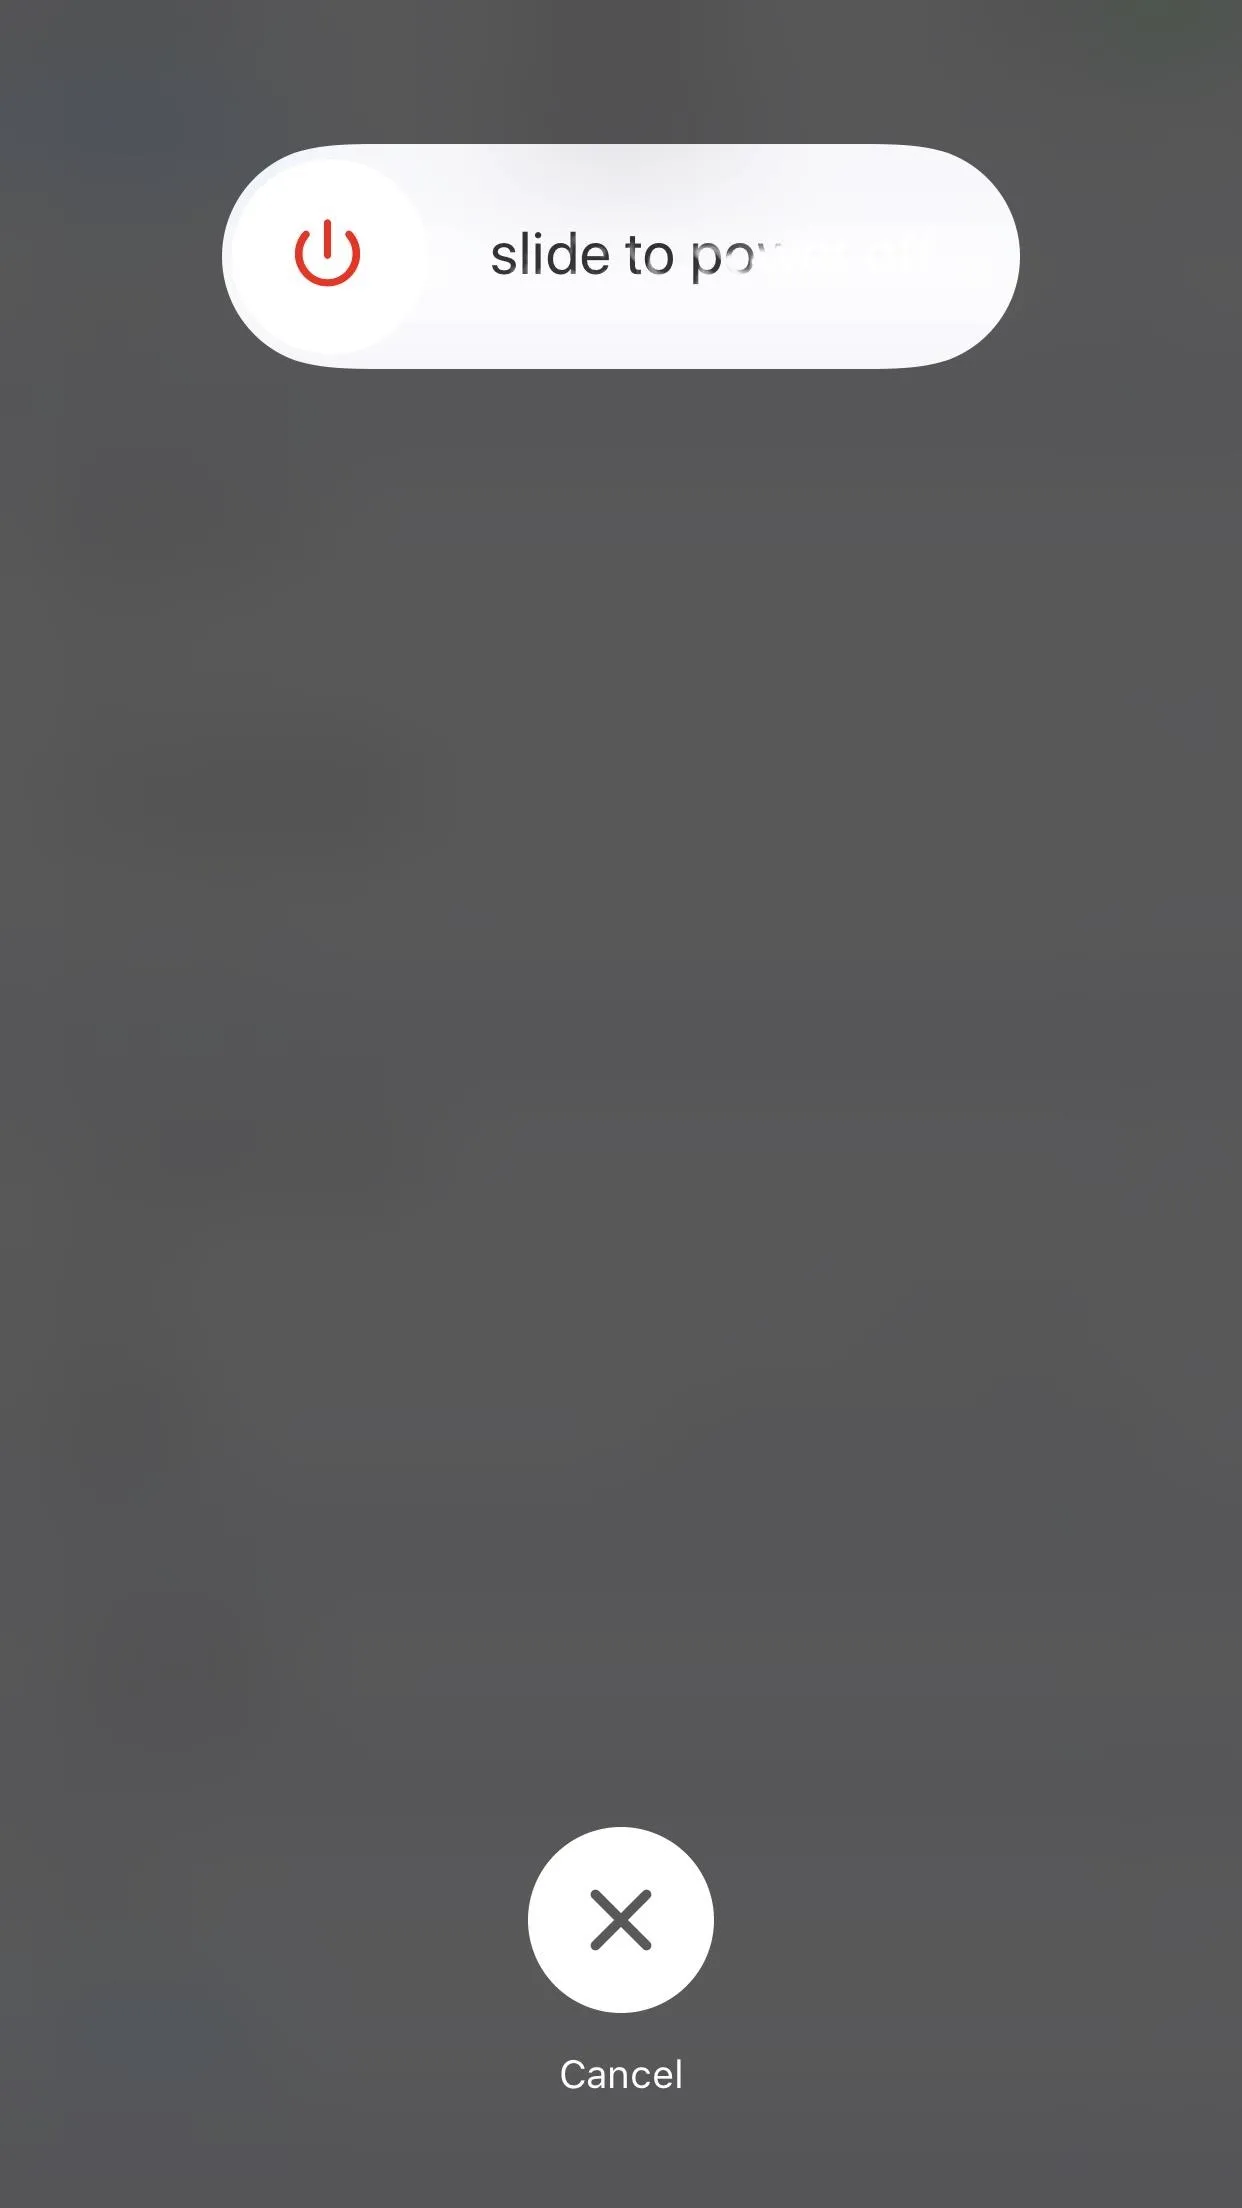


Once the device has shut down, press and hold the Side button for a few seconds until you see the Apple logo. Simply wait until your iPhone powers up to the lock screen to unlock your device. Then, open Messages to see if this method fixed the problem. If not, keep going.
Force Restart Your iPhone
Sometimes, a normal reboot just doesn't do the trick. If your iMessages are still acting up, try a force restart instead. The process for a force restart varies depending on your iPhone model.
- iPhone X, 8, and 8 Plus: Quickly press and release the Volume Up button, then do the same for the Volume Down button. Finally, hold the Side button down until you see the Apple logo.
- iPhone 7 and 7 Plus: Press and hold the Side button and Volume Down button together for about 10 seconds, until you see the Apple logo appear.
- Earlier iPhone models: Press and hold the Side button and Home button together for about 10 seconds until you see the Apple logo appear.
Once you see the Apple logo, you know you've completed the force restart.
Reboot Automatic Date/Time Settings
Many of us likely have no need to manually set our iPhone's date and time (except when cheating iOS games) — that's why the default setting is for your iPhone to adjust its internal clock via the internet, based on your current location. However, in iOS 11, this setting might be stopping you from seeing your iMessages properly.
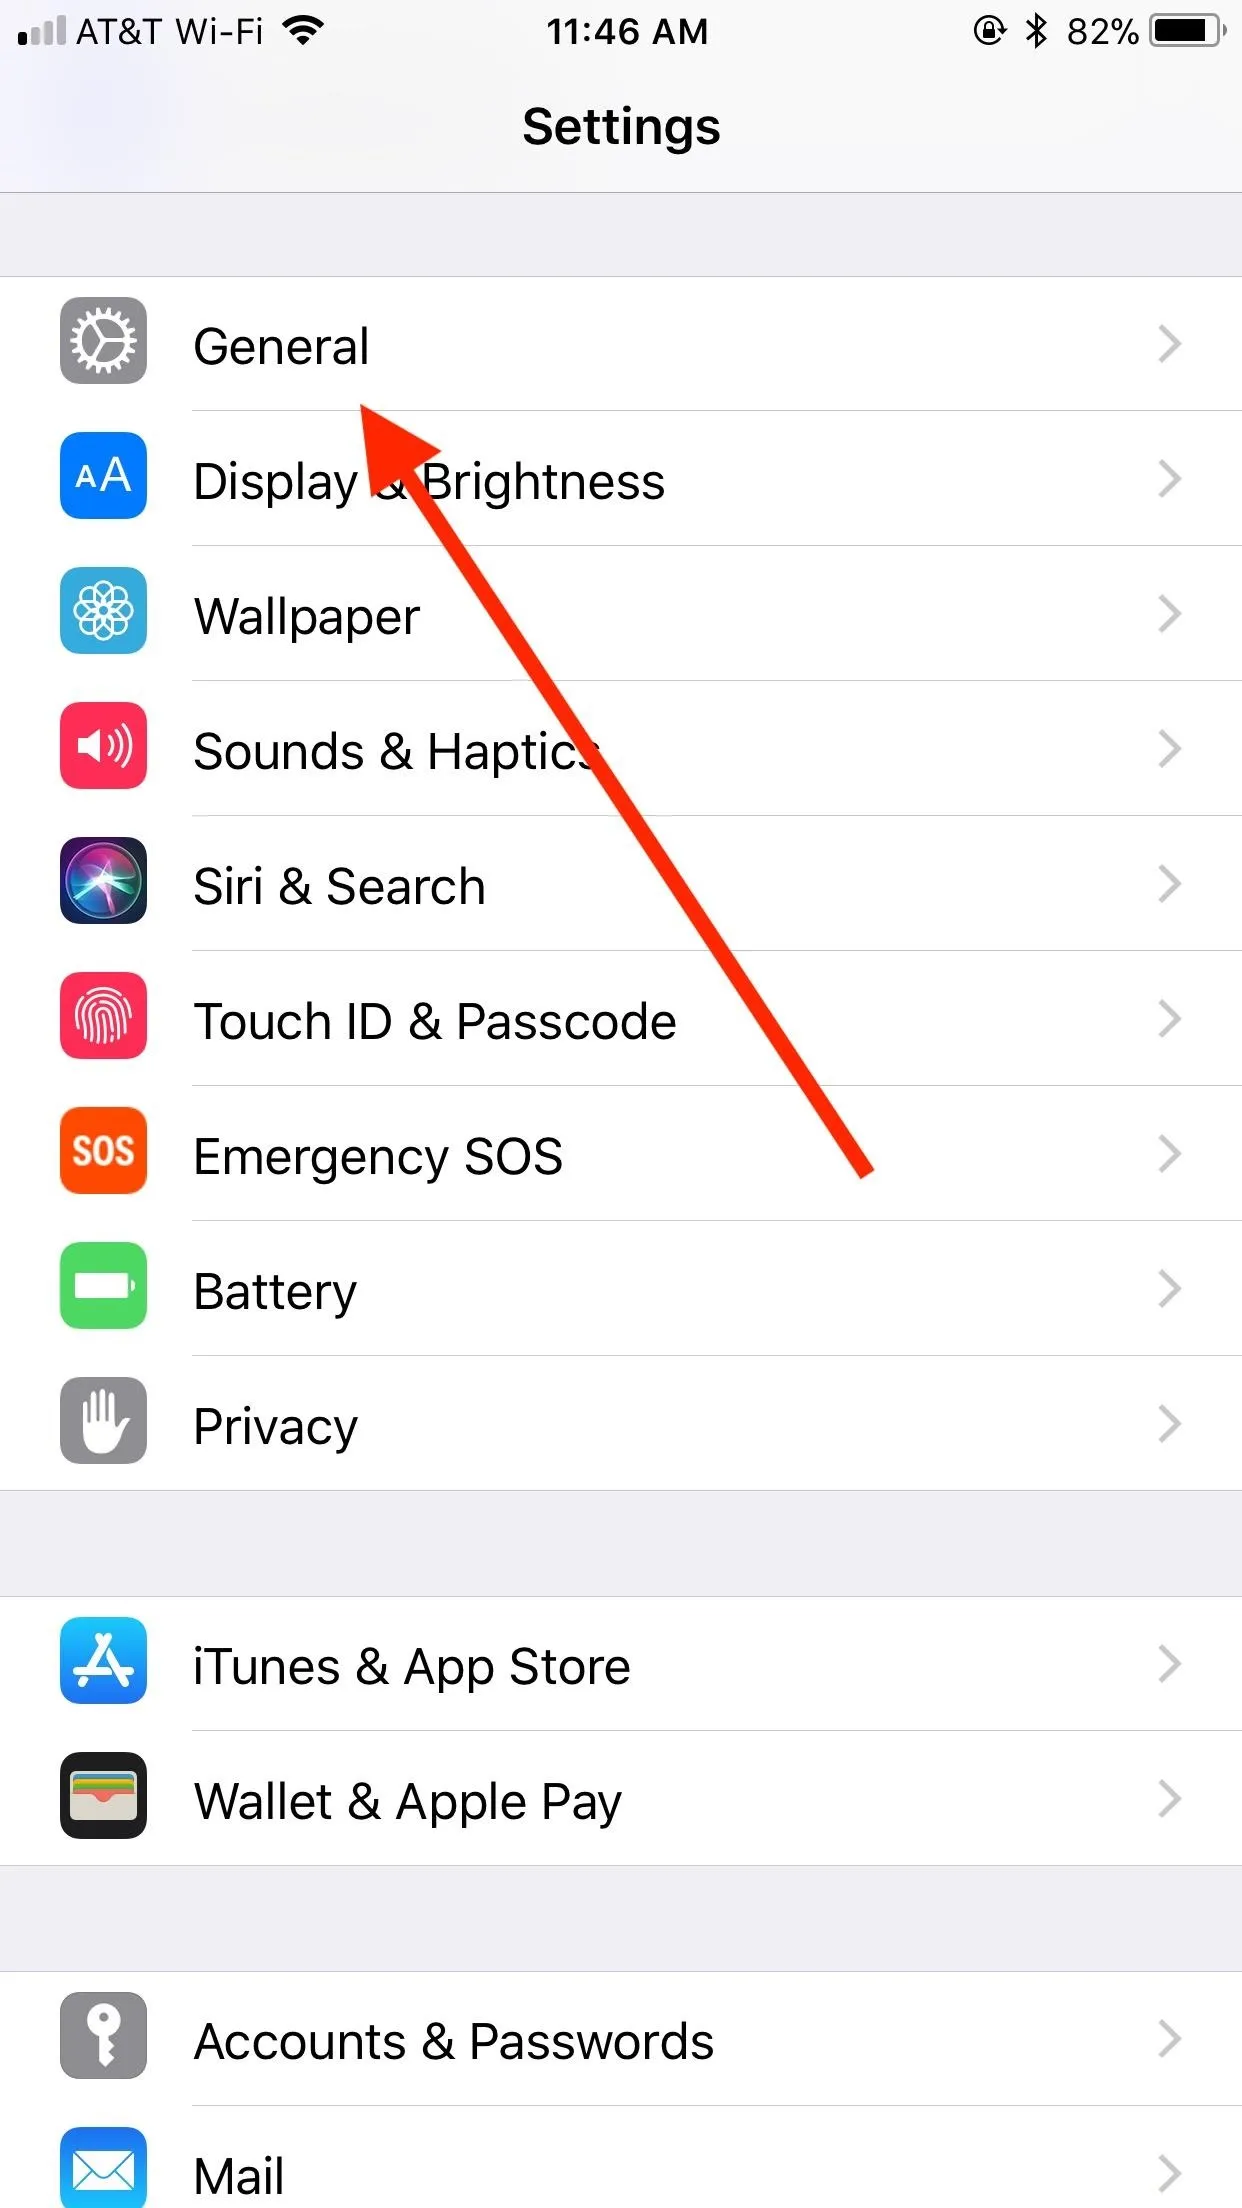
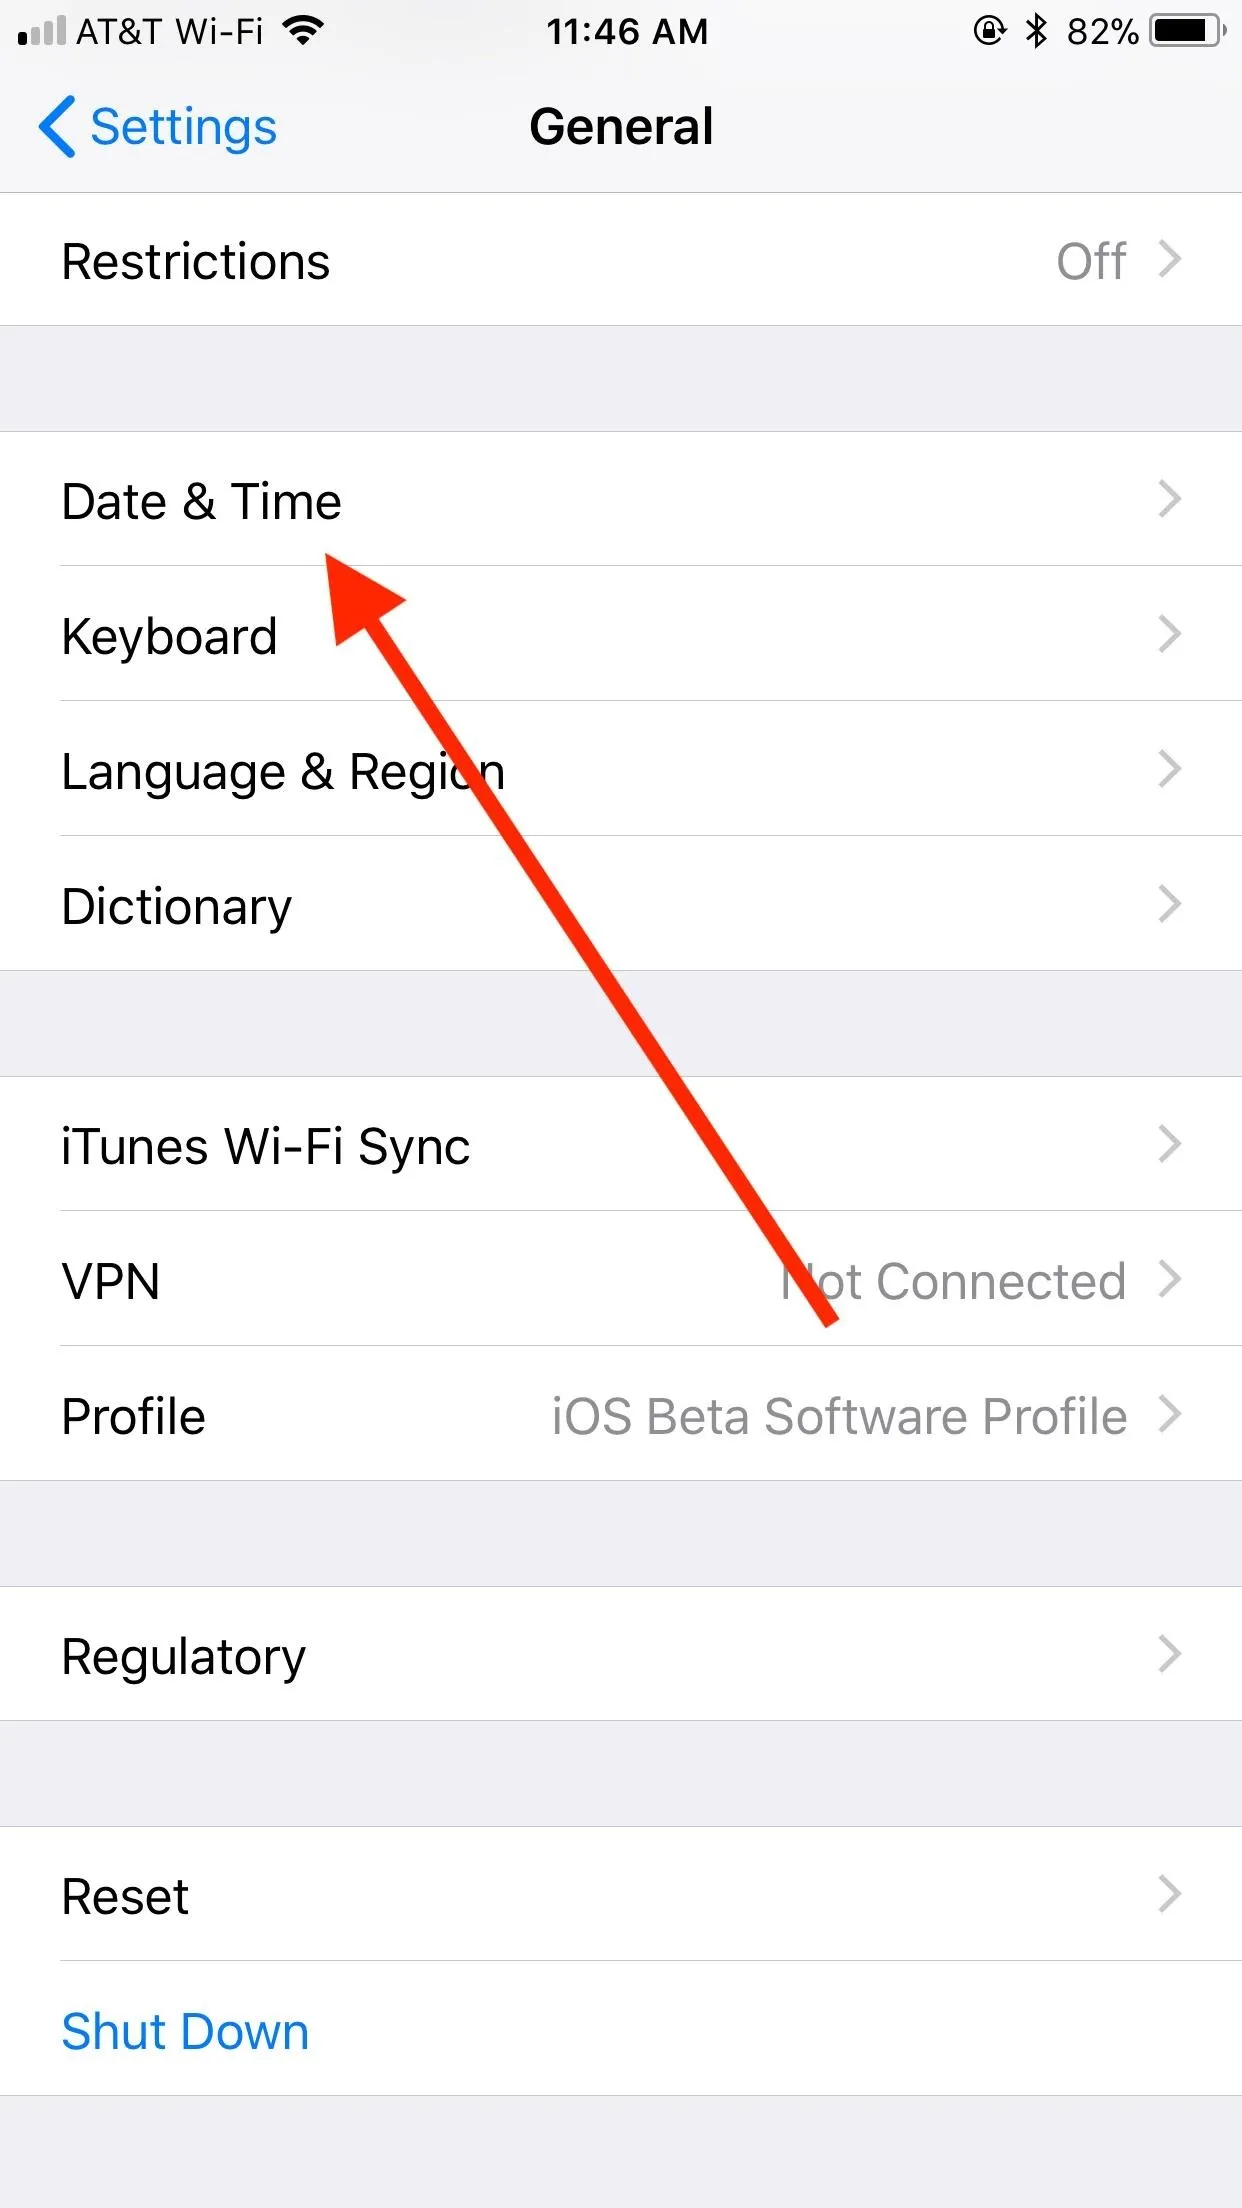
You don't need to disable this setting permanently in order to see potential results. It's more like a reboot. Open your Settings app, tap "General," then "Date & Time." On the following page, tap the slider next to "Set Automatically" to disable the setting. Wait for 10–15 seconds, then enable the setting again.
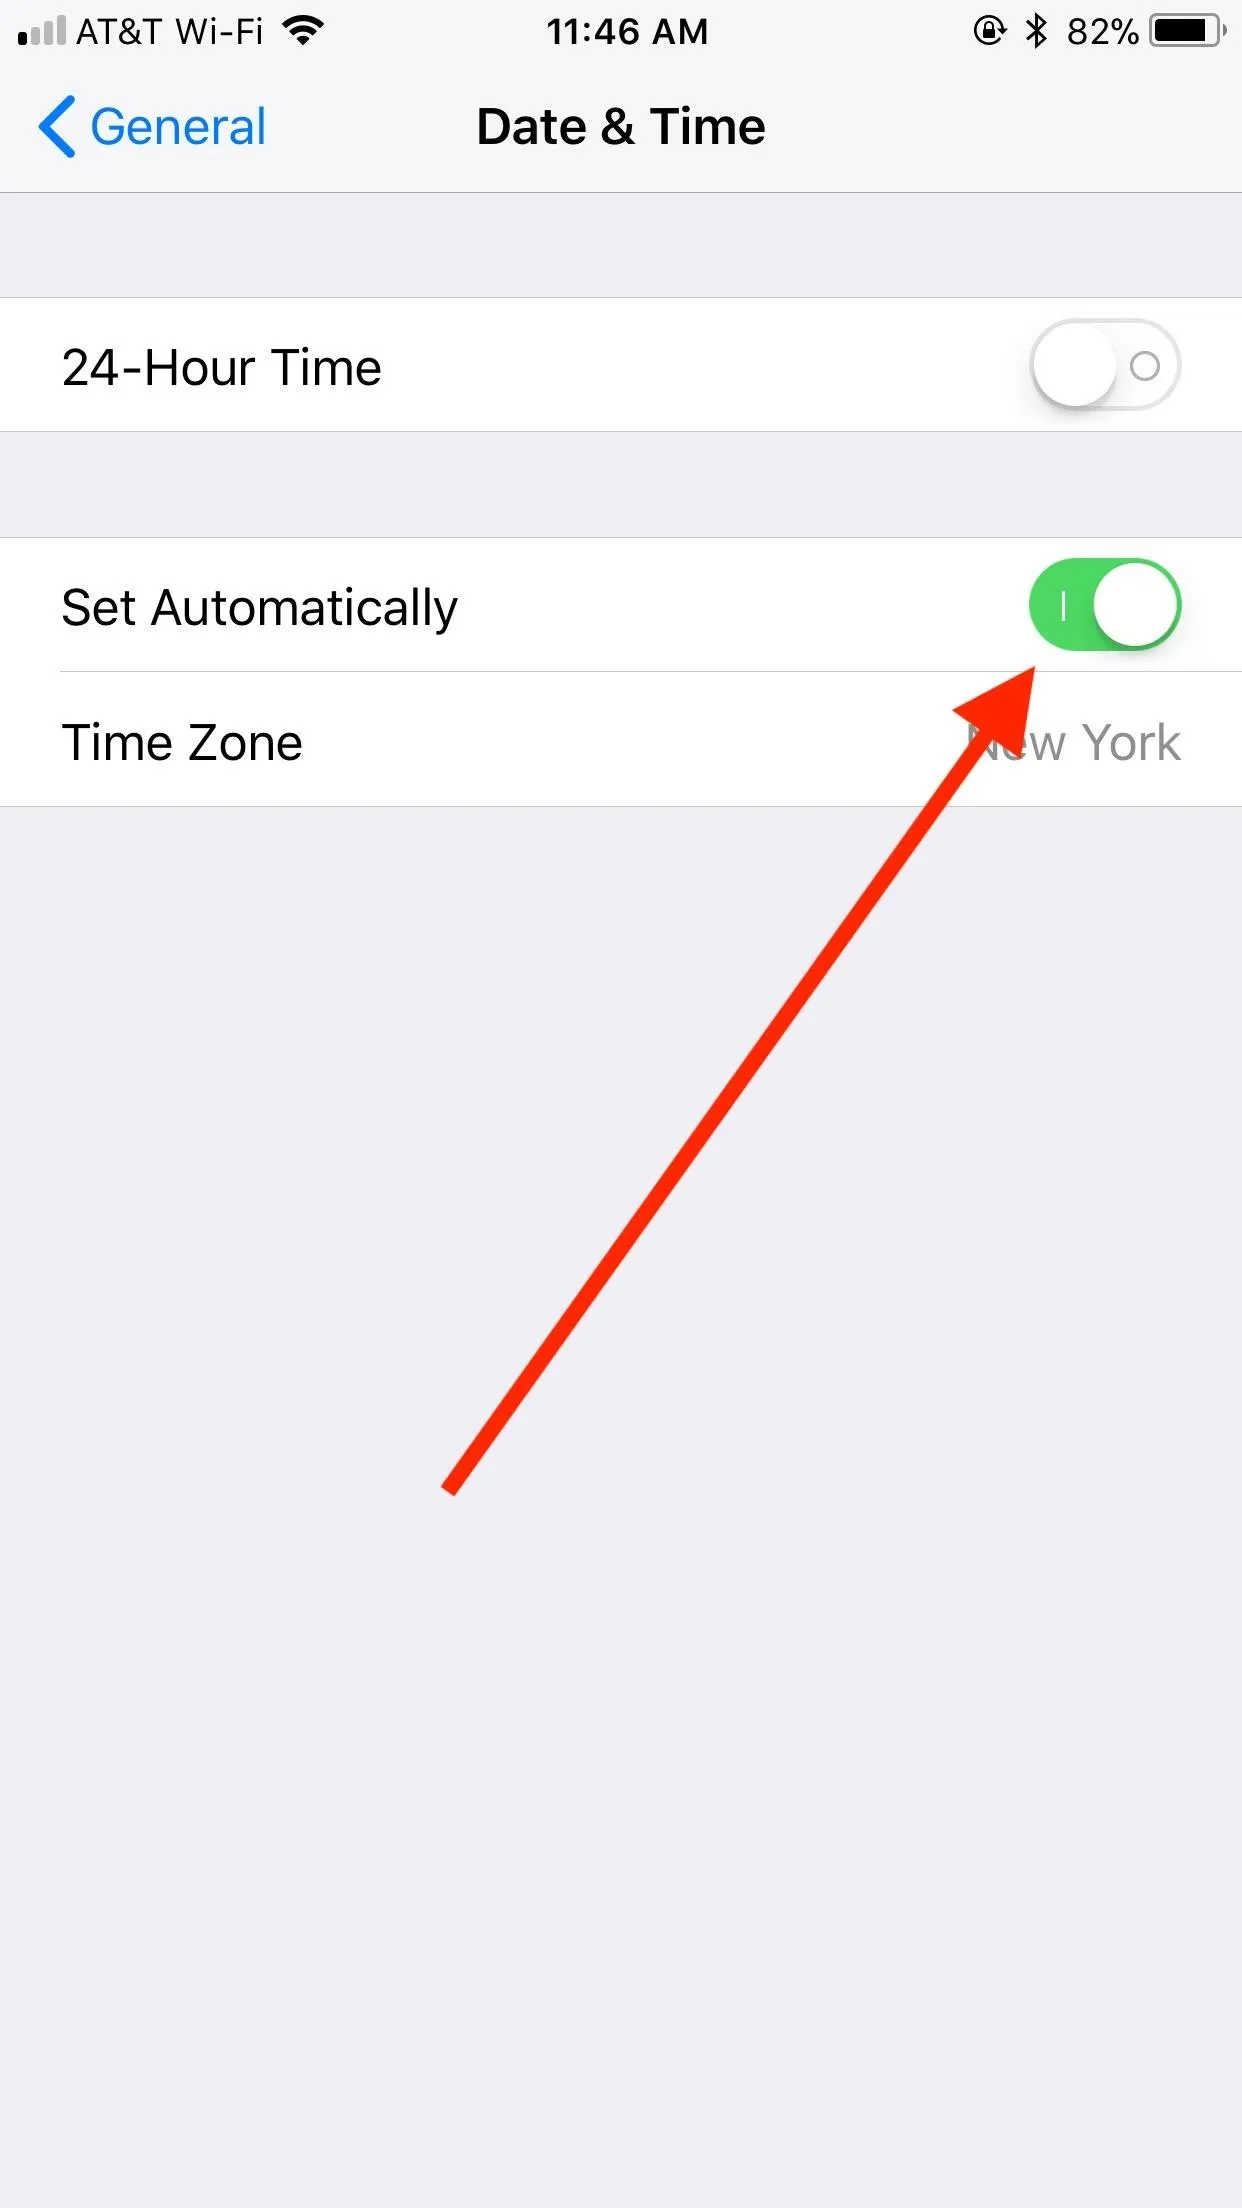


According to user erikbock on the Apple support forums, the above came to him as official advice from Apple. This user claims this method worked for him and solved his iMessage problems. However, if you still find your iMessages out of order, there's still something else you can try.
Toggle 'iMessage' On & Off
If none of the methods above work, it might be time to try rebooting iMessage entirely. iMessage itself can actually be disabled, so when other iPhone users attempt to message you, all dispatches are pushed through as text messages instead (green bubbles). This method, similarly to Method 4, requires you to reboot the iMessage setting on your iPhone.
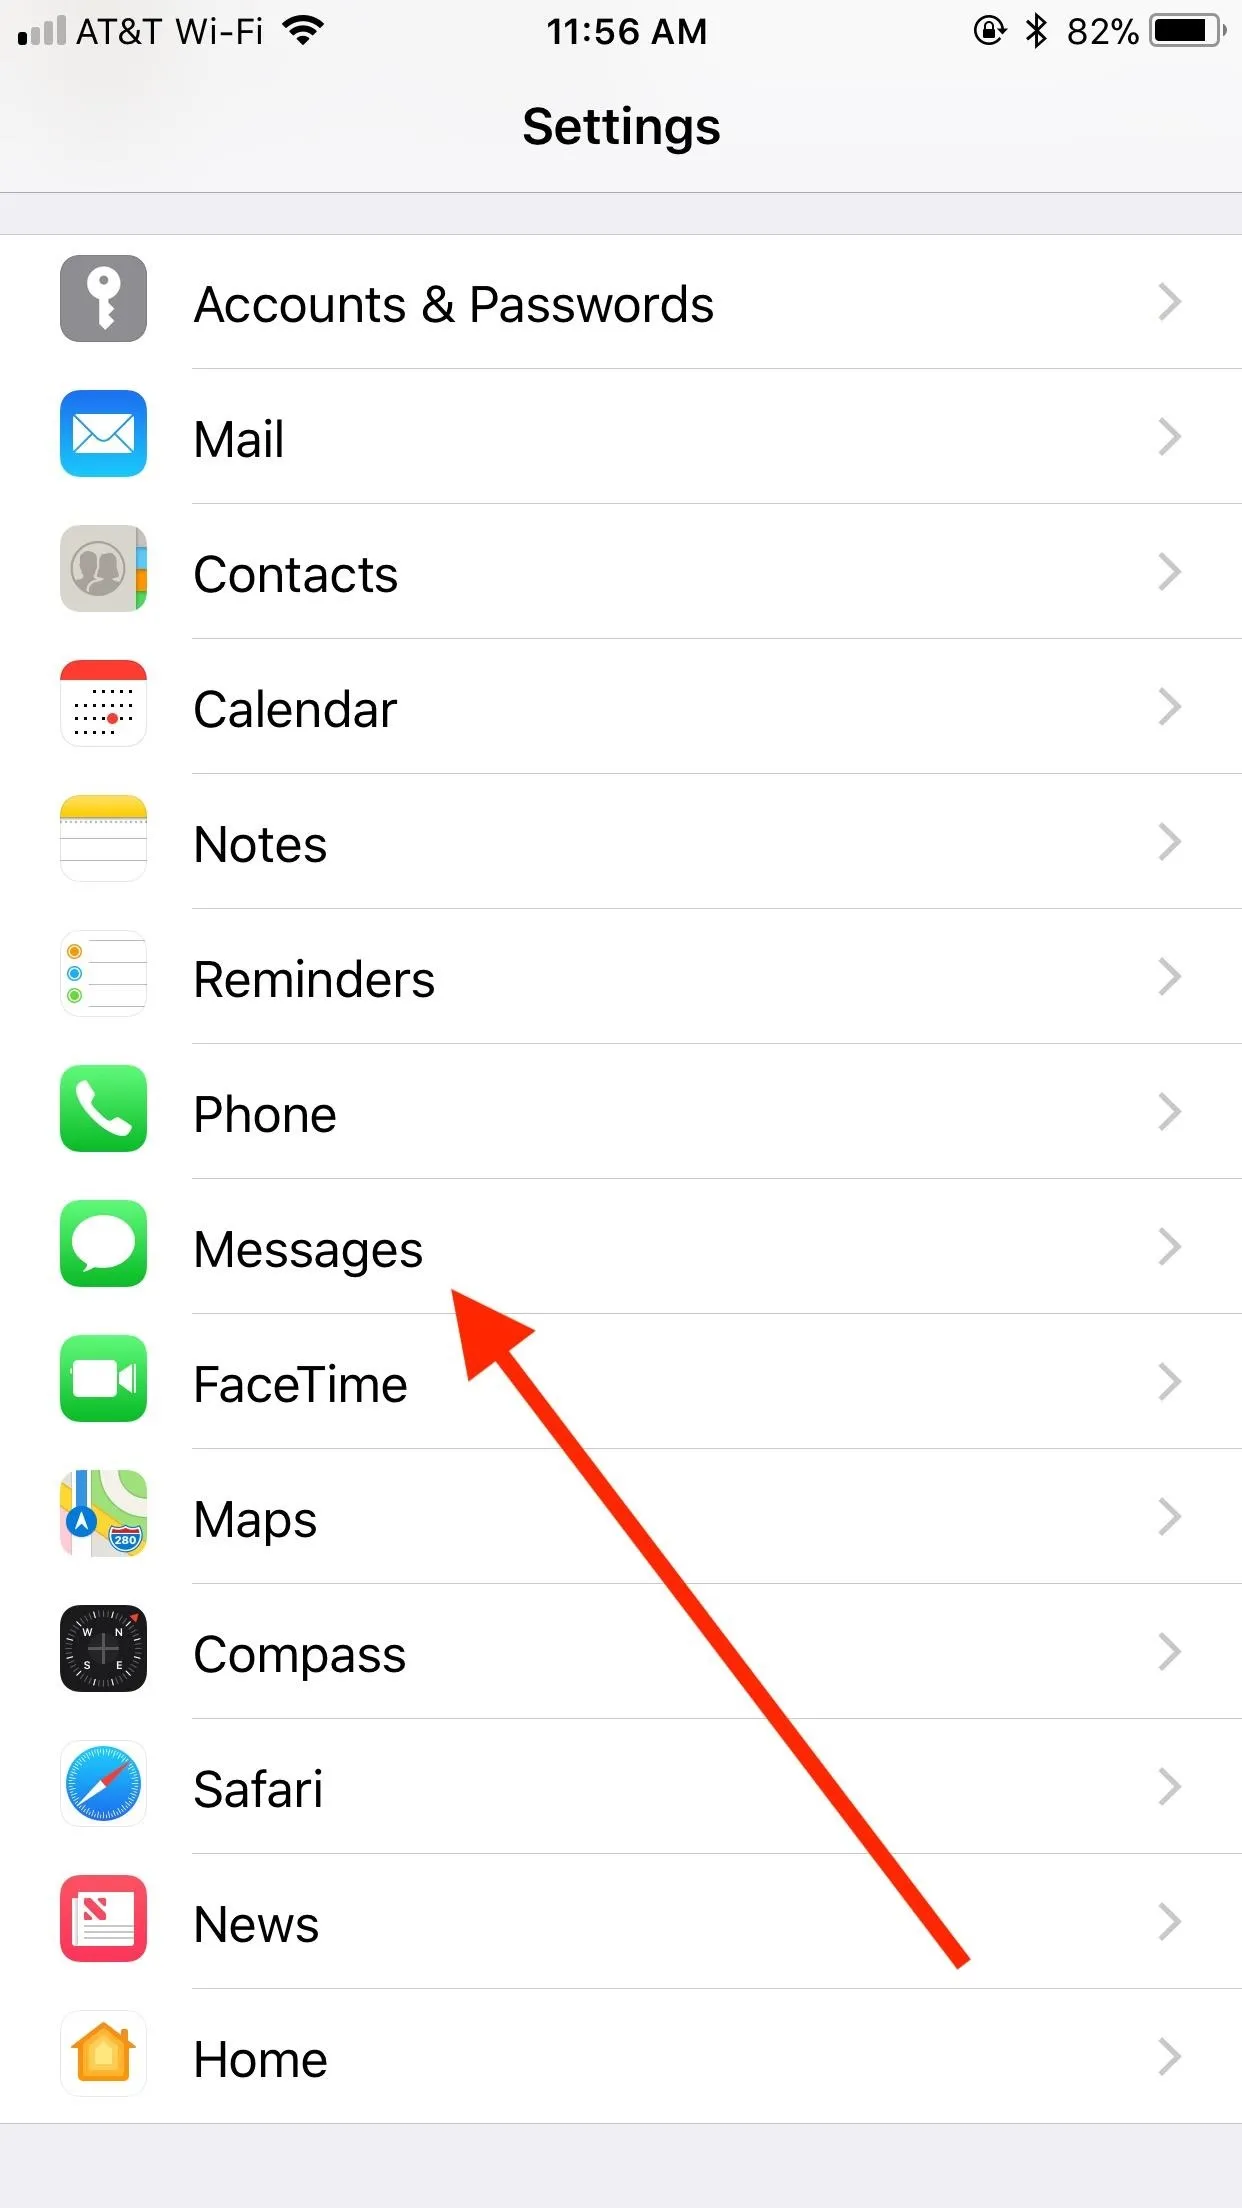
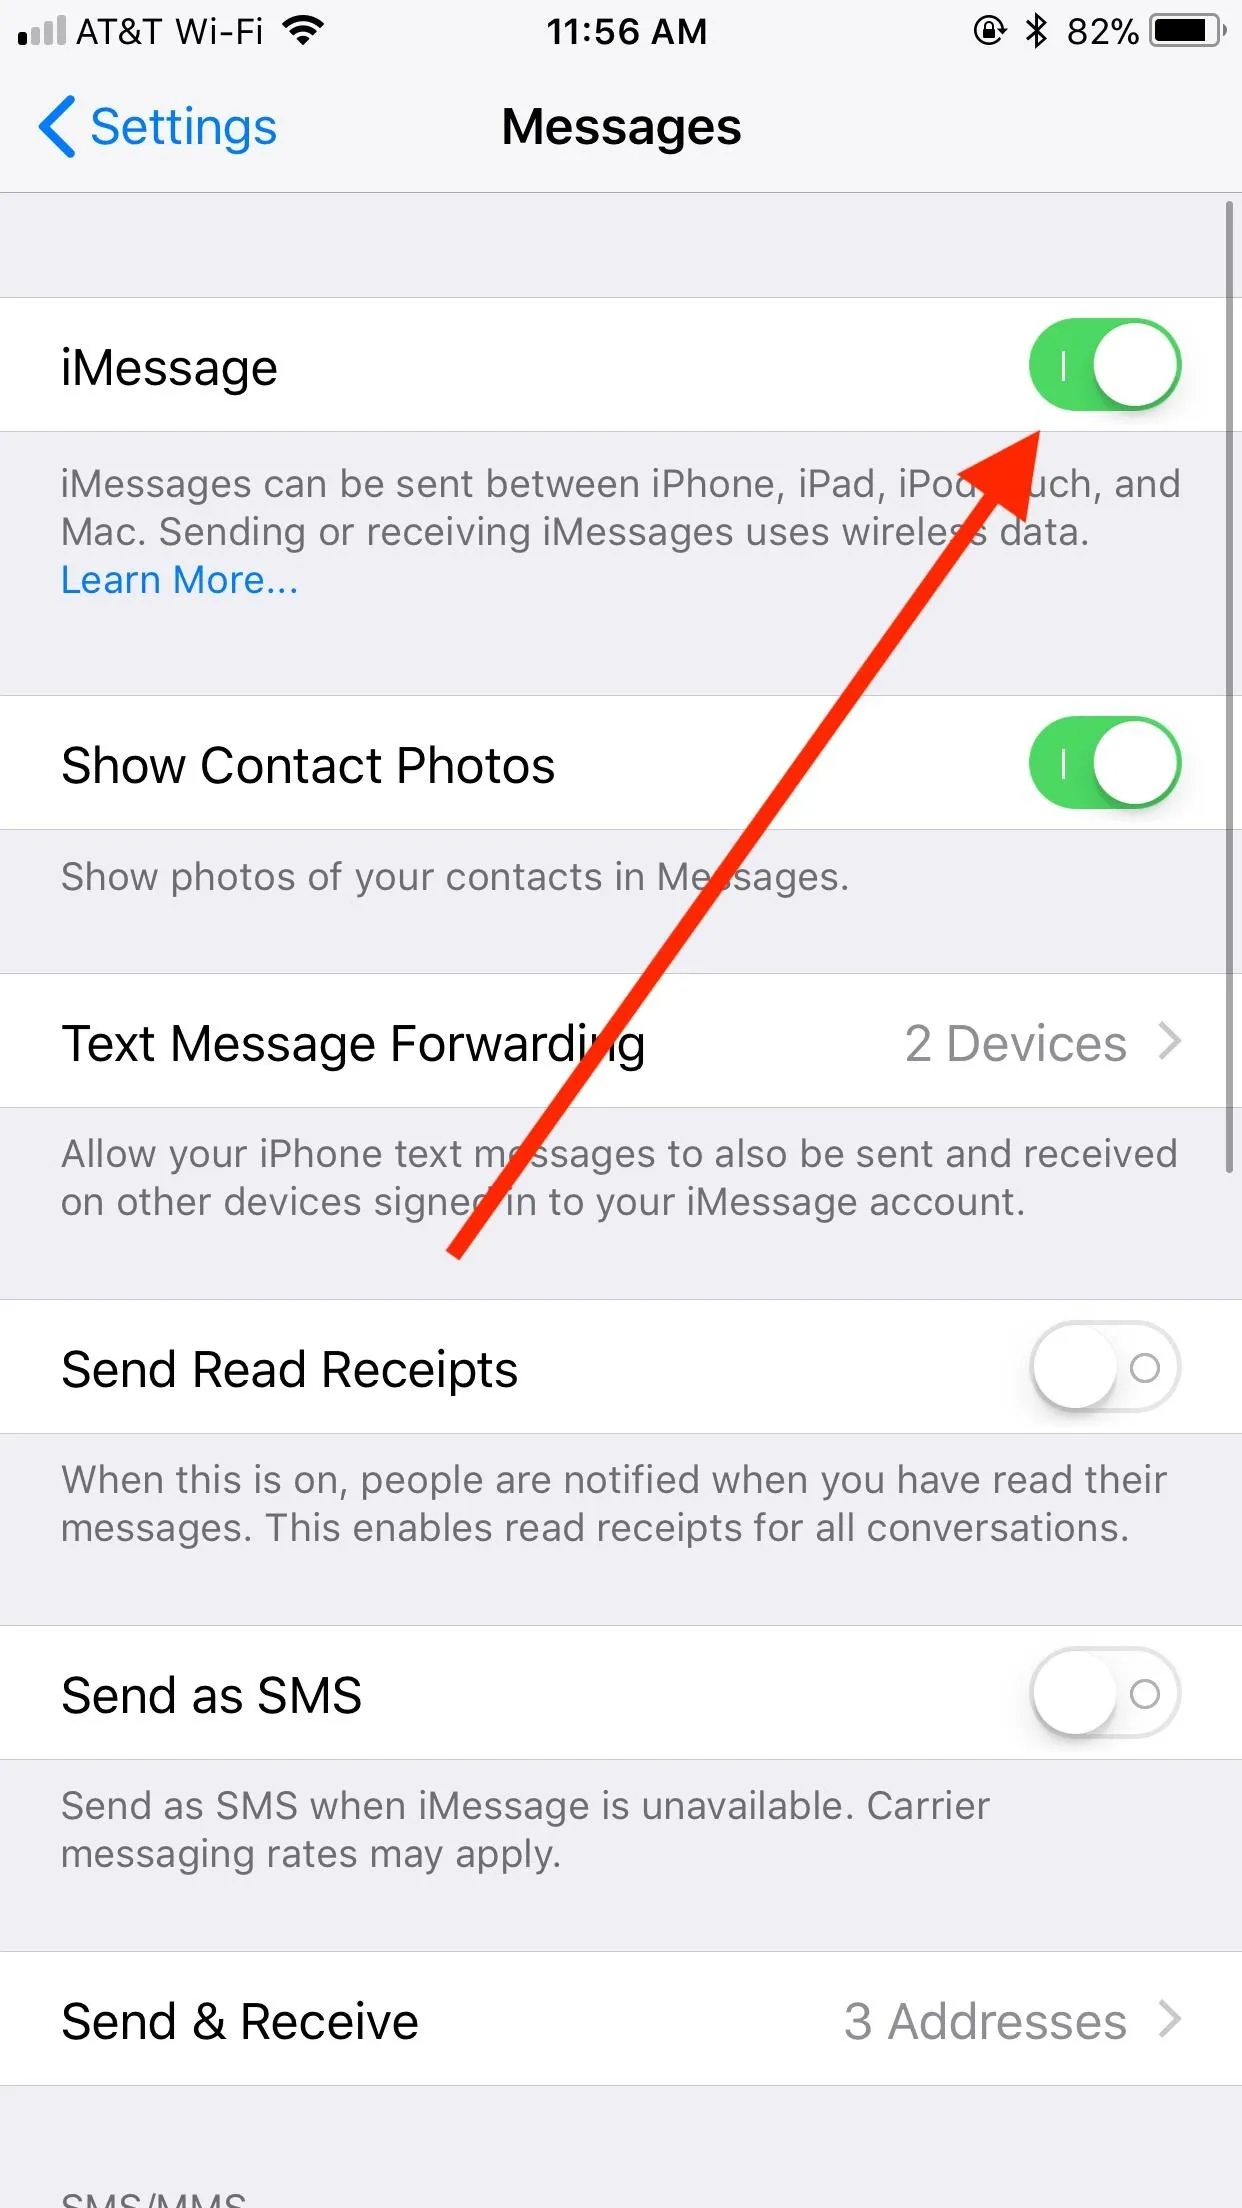
Jump into the Settings app, then tap "Messages." You will see "iMessage" as the first option on this following page. Just as with Method 4, disable this setting for 10–15 seconds, then re-enable it.


Reset All Settings
A last-ditch effort that will hopefully solve your issues, if none of the above already did, requires you to reset all of your device settings. All of your settings, including Wi-Fi passwords, dictionaries, Bluetooth connections, Apple Pay, etc. will be pushed back to factory settings.
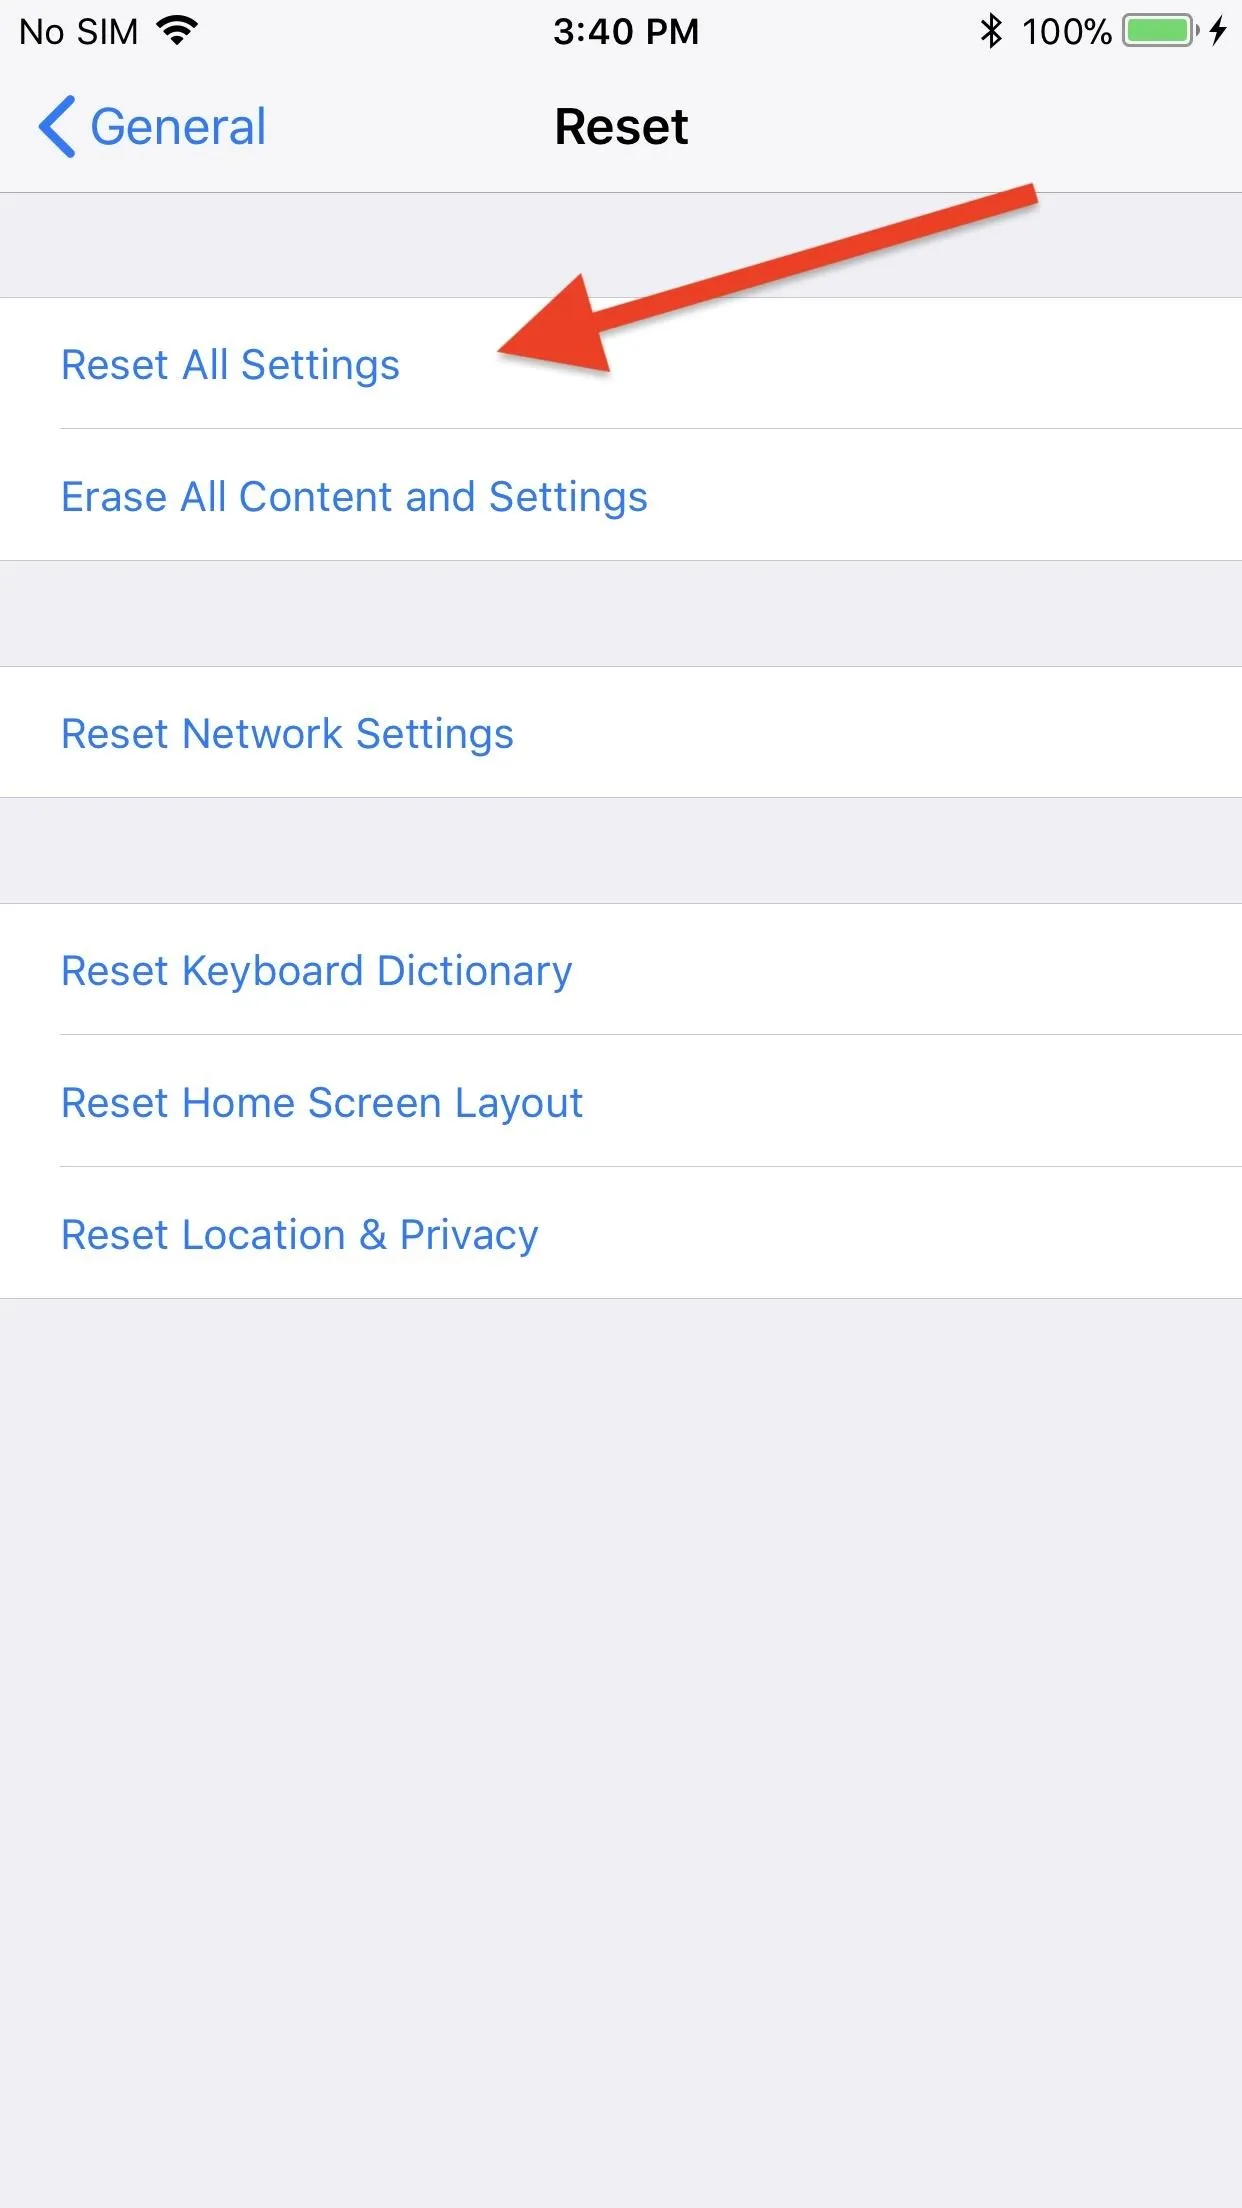
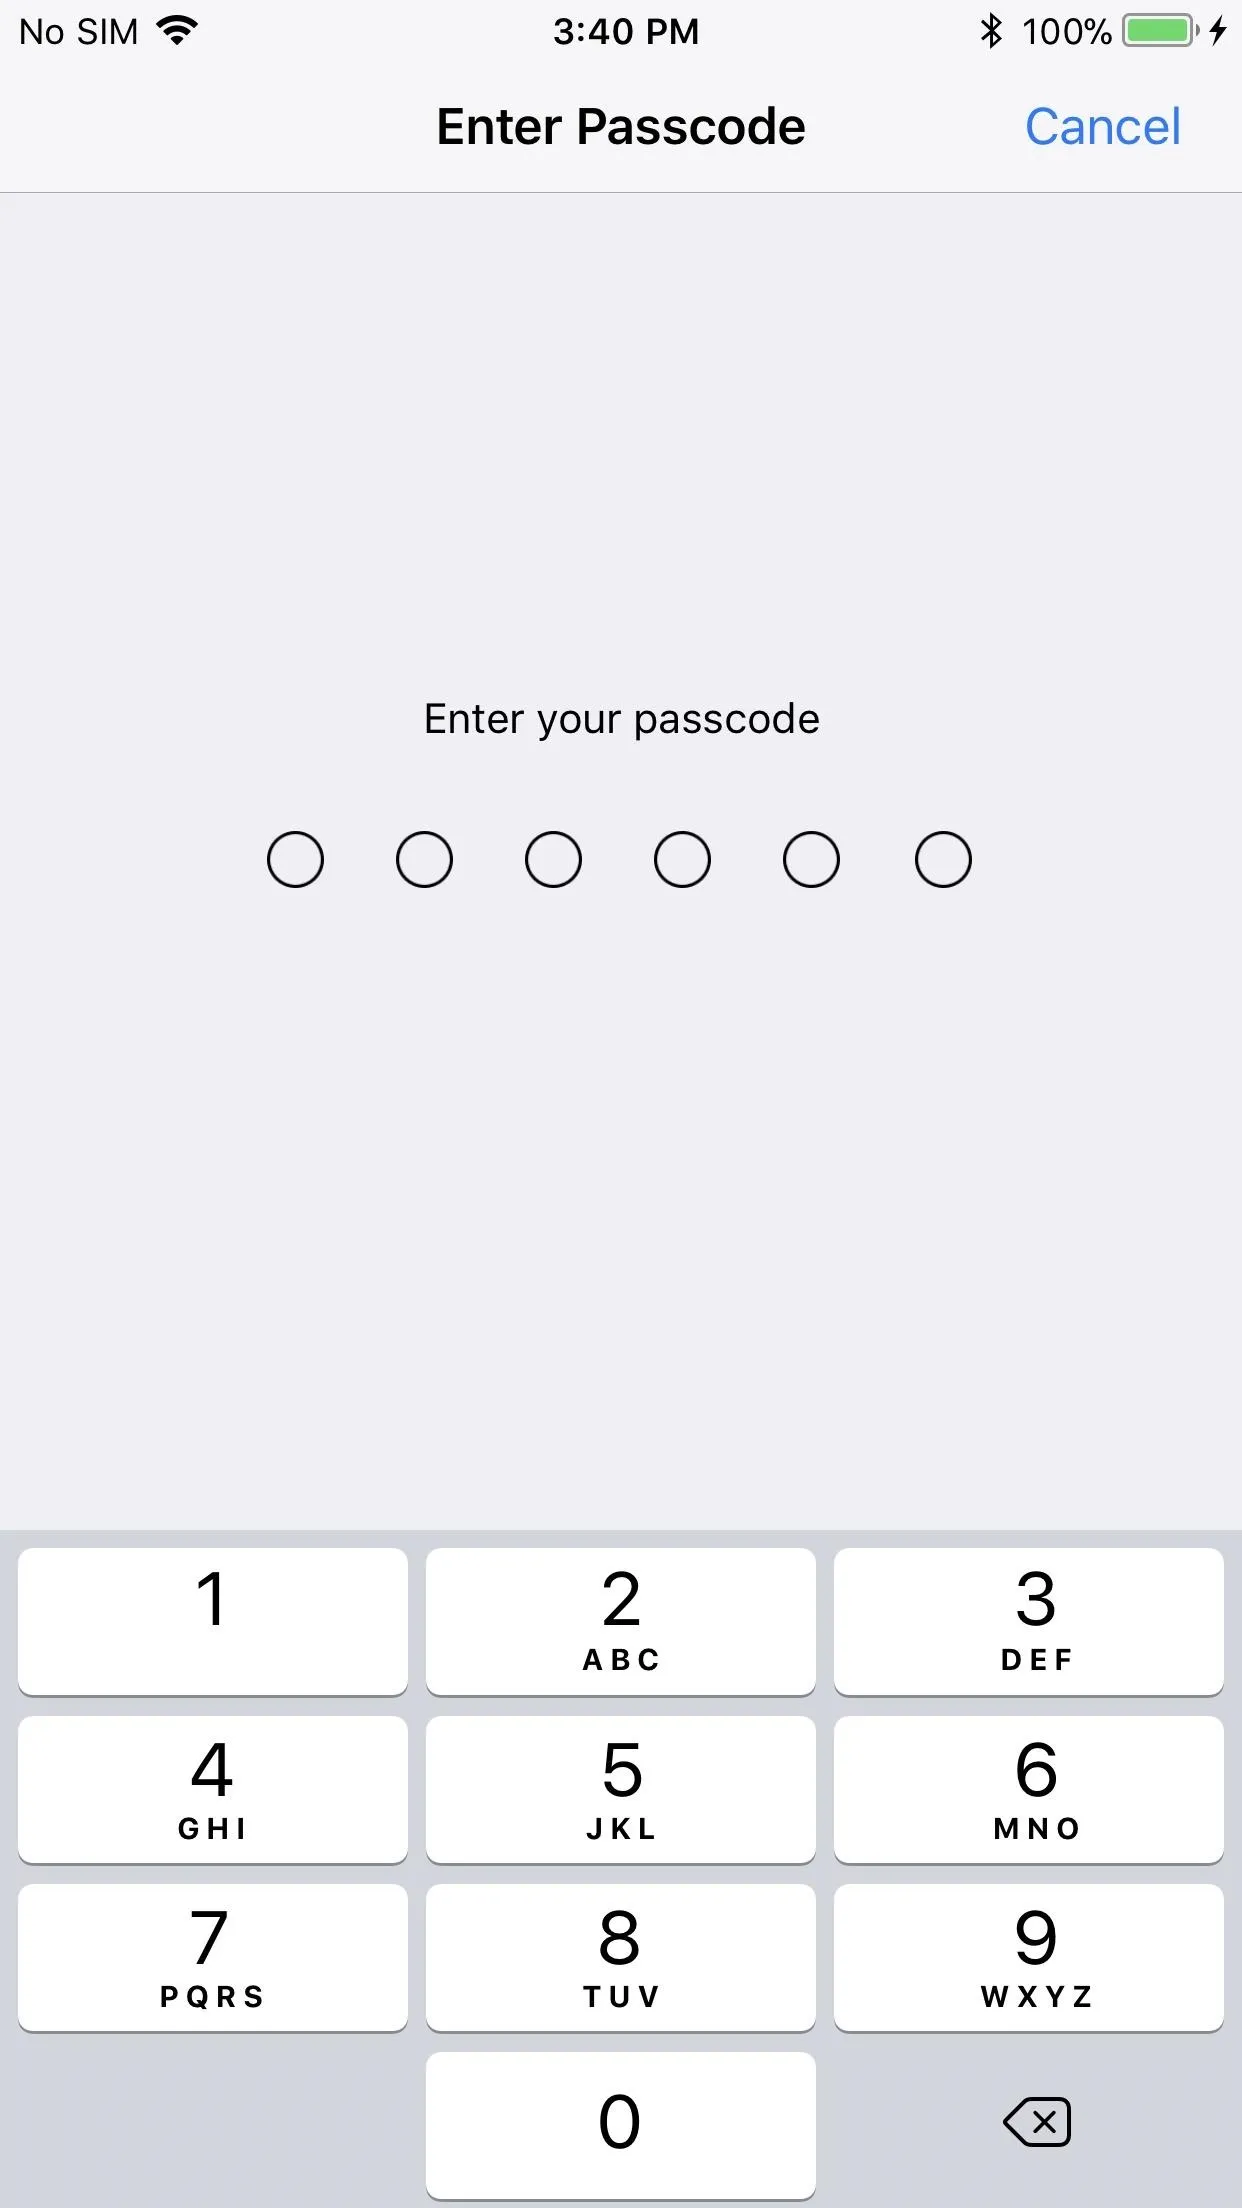
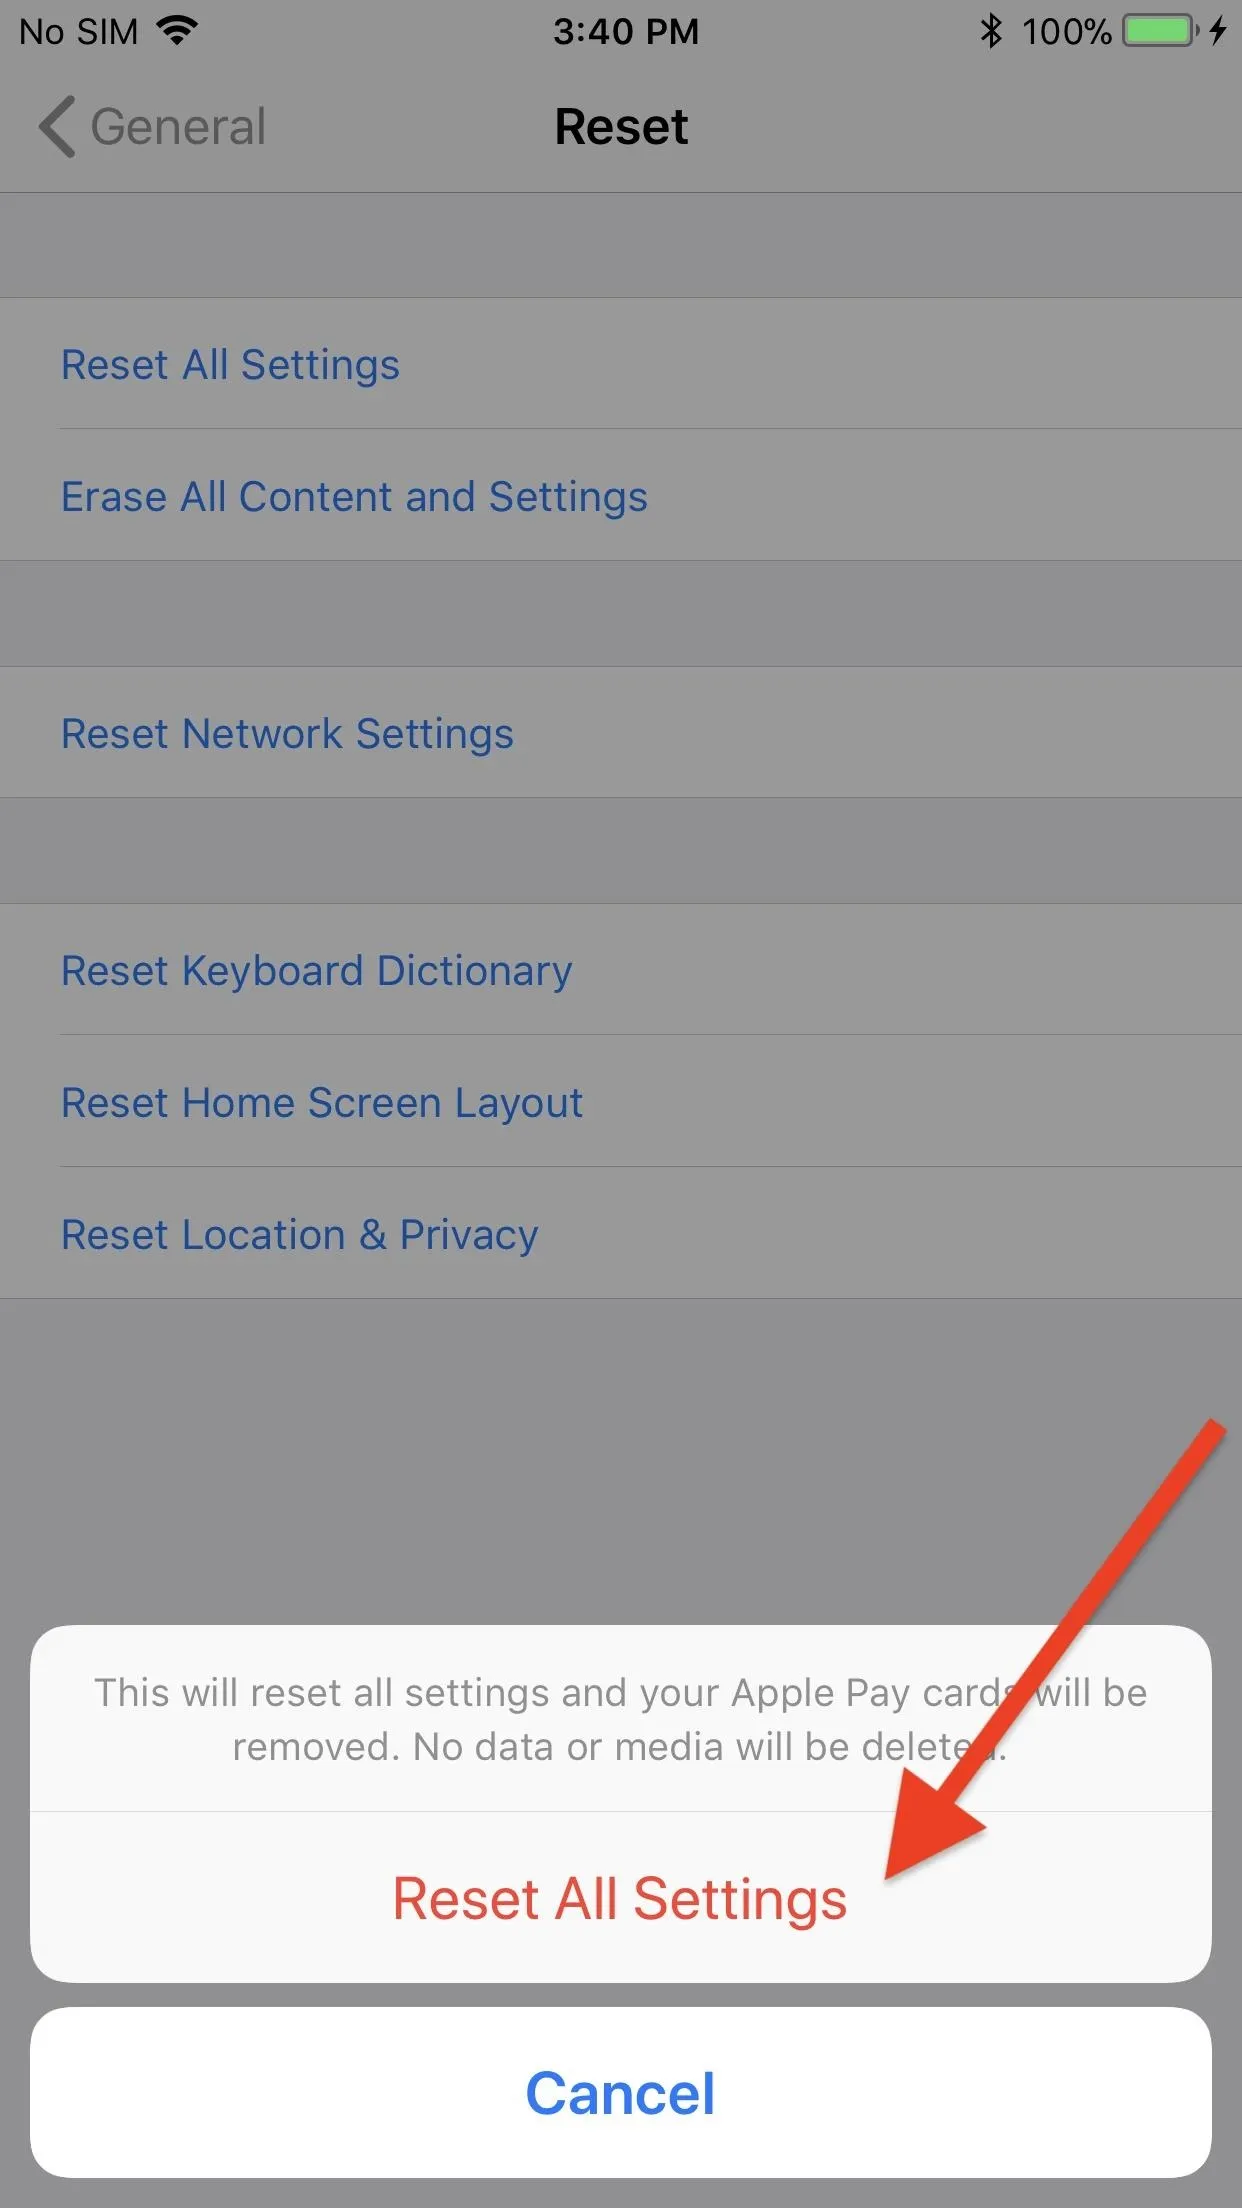
To try this one out, open up the Settings app, then hit "General," followed by "Reset." Tap on "Reset All Settings," enter your passcode to confirm, then tap "Reset All Settings" once again. Your iPhone will restart, and once back up, things should be back in order, though, you'll have to reconnect to Wi-Fi and all of those other menial tasks.


While we know at least some of the methods above have worked for other users, it is possible that none work for you aside from a factory reset (which we'd hate to recommend).
- Follow Gadget Hacks on Facebook, Twitter, YouTube, and Flipboard
- Follow WonderHowTo on Facebook, Twitter, Pinterest, and Flipboard
Cover image and screenshots by Jake Peterson/Gadget Hacks


Comments
Be the first, drop a comment!