Face ID does an excellent job with keeping your iPhone safe, boasting a million-to-one odds against unauthorized access when compared to Touch ID, which is 20 times less secure. However, it's far from being truly hands-free, as you still need to swipe up the lock screen once it detects your face to access apps. But if you have a jailbrokeniPhone X, this issue can easily be remedied.
For an older iPhone model, when you raise it to wake it, the lock screen appears, and when you press or rest your finger on Touch ID, depending on the settings, it automatically opens to the home screen or whatever app you were last in. For the iPhone X, the lock screen appears, it scans your face to "unlock" the lock screen, then you swipe up, which doesn't really make Face ID any faster.
Yes, it's really useful to unlock the lock screen if you have notification previews disabled while locked, where the messages will appear once your face is scanned. But if you're not utilizing that, wouldn't you just like your iPhone to open after a scan without any swiping? Thanks to SparkDev, you can.
Fittingly named AutoUnlockX, SparkDev's jailbreak tweak is free to use and can be further adjusted according to your privacy and security preferences. When enabled, it gives you the ability to bypass the swipe up gesture entirely, instantly unlocking your iPhone in the same vein as the frighteningly fast Face Unlock functionality found on OnePlus devices.
Install Spark's Repository
Before you can install AutoUnlockX, you'll first need to add an external repo to either Cydia or Sileo, as the tweak isn't natively available within either app. When using the add source functionality, input the following URL. Just be sure to also add an "s" after "http" to ensure the repo downloads successfully in the app.
https://sparkdev.me/Also, keep in mind that adding the SparkDev repo in Cydia won't automatically add it in Sileo, and vice versa, so you'd have to manually add it for both apps if you frequently switch back and forth between the two. Be sure to read through the guides below for more details about the process.
- Full Instructions: How to Add Outside Repos to Cydia
- Full Instructions: How to Add Outside Repos to Sileo
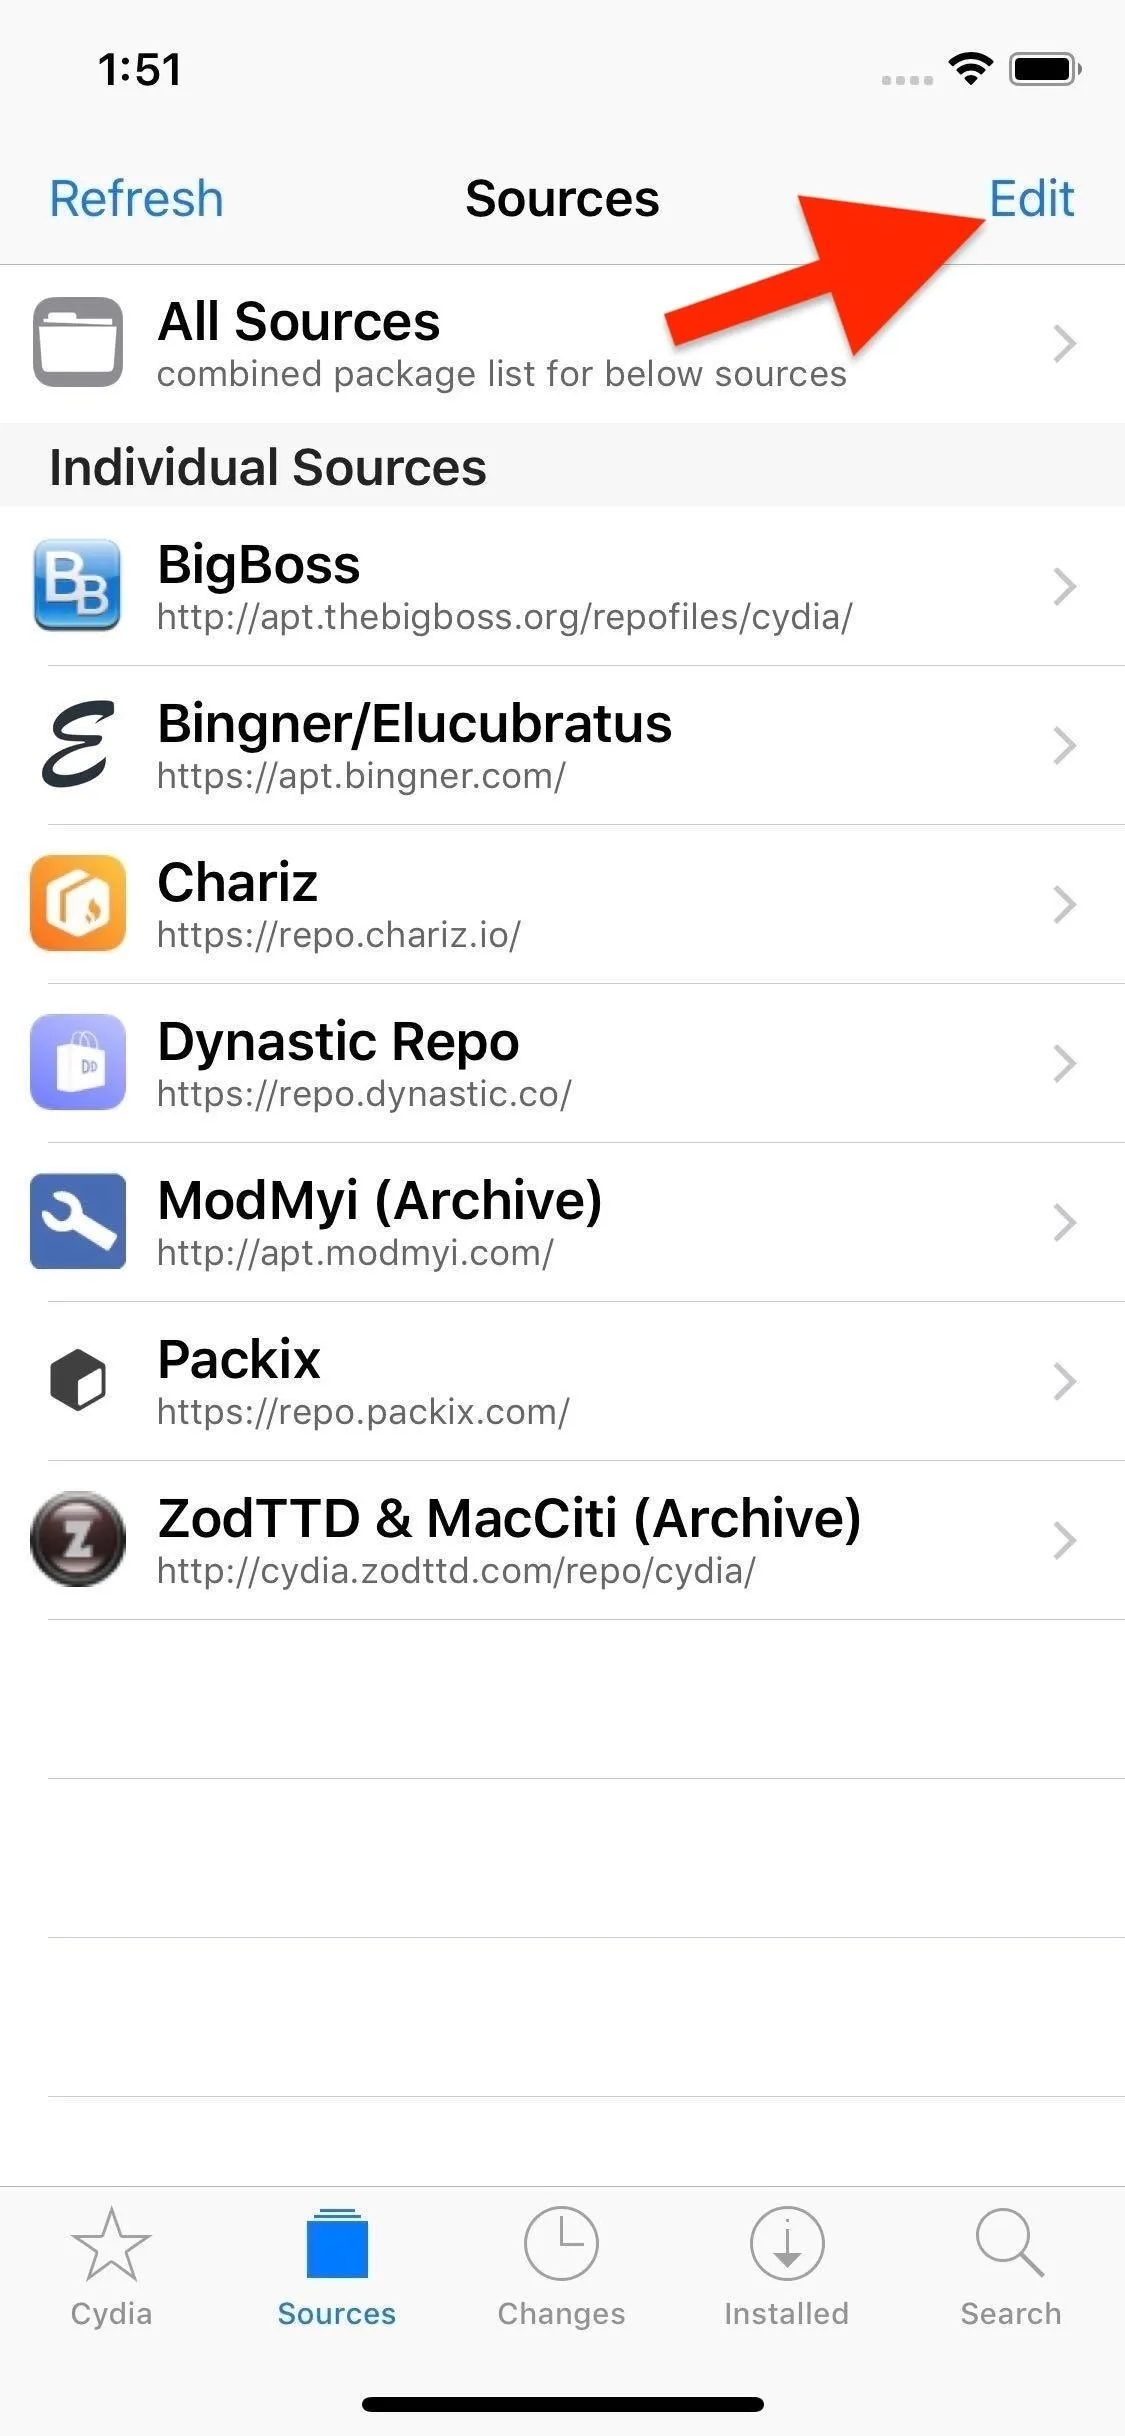
In this example, I'm using Cydia to install the new repo containing AutoUnlockX.
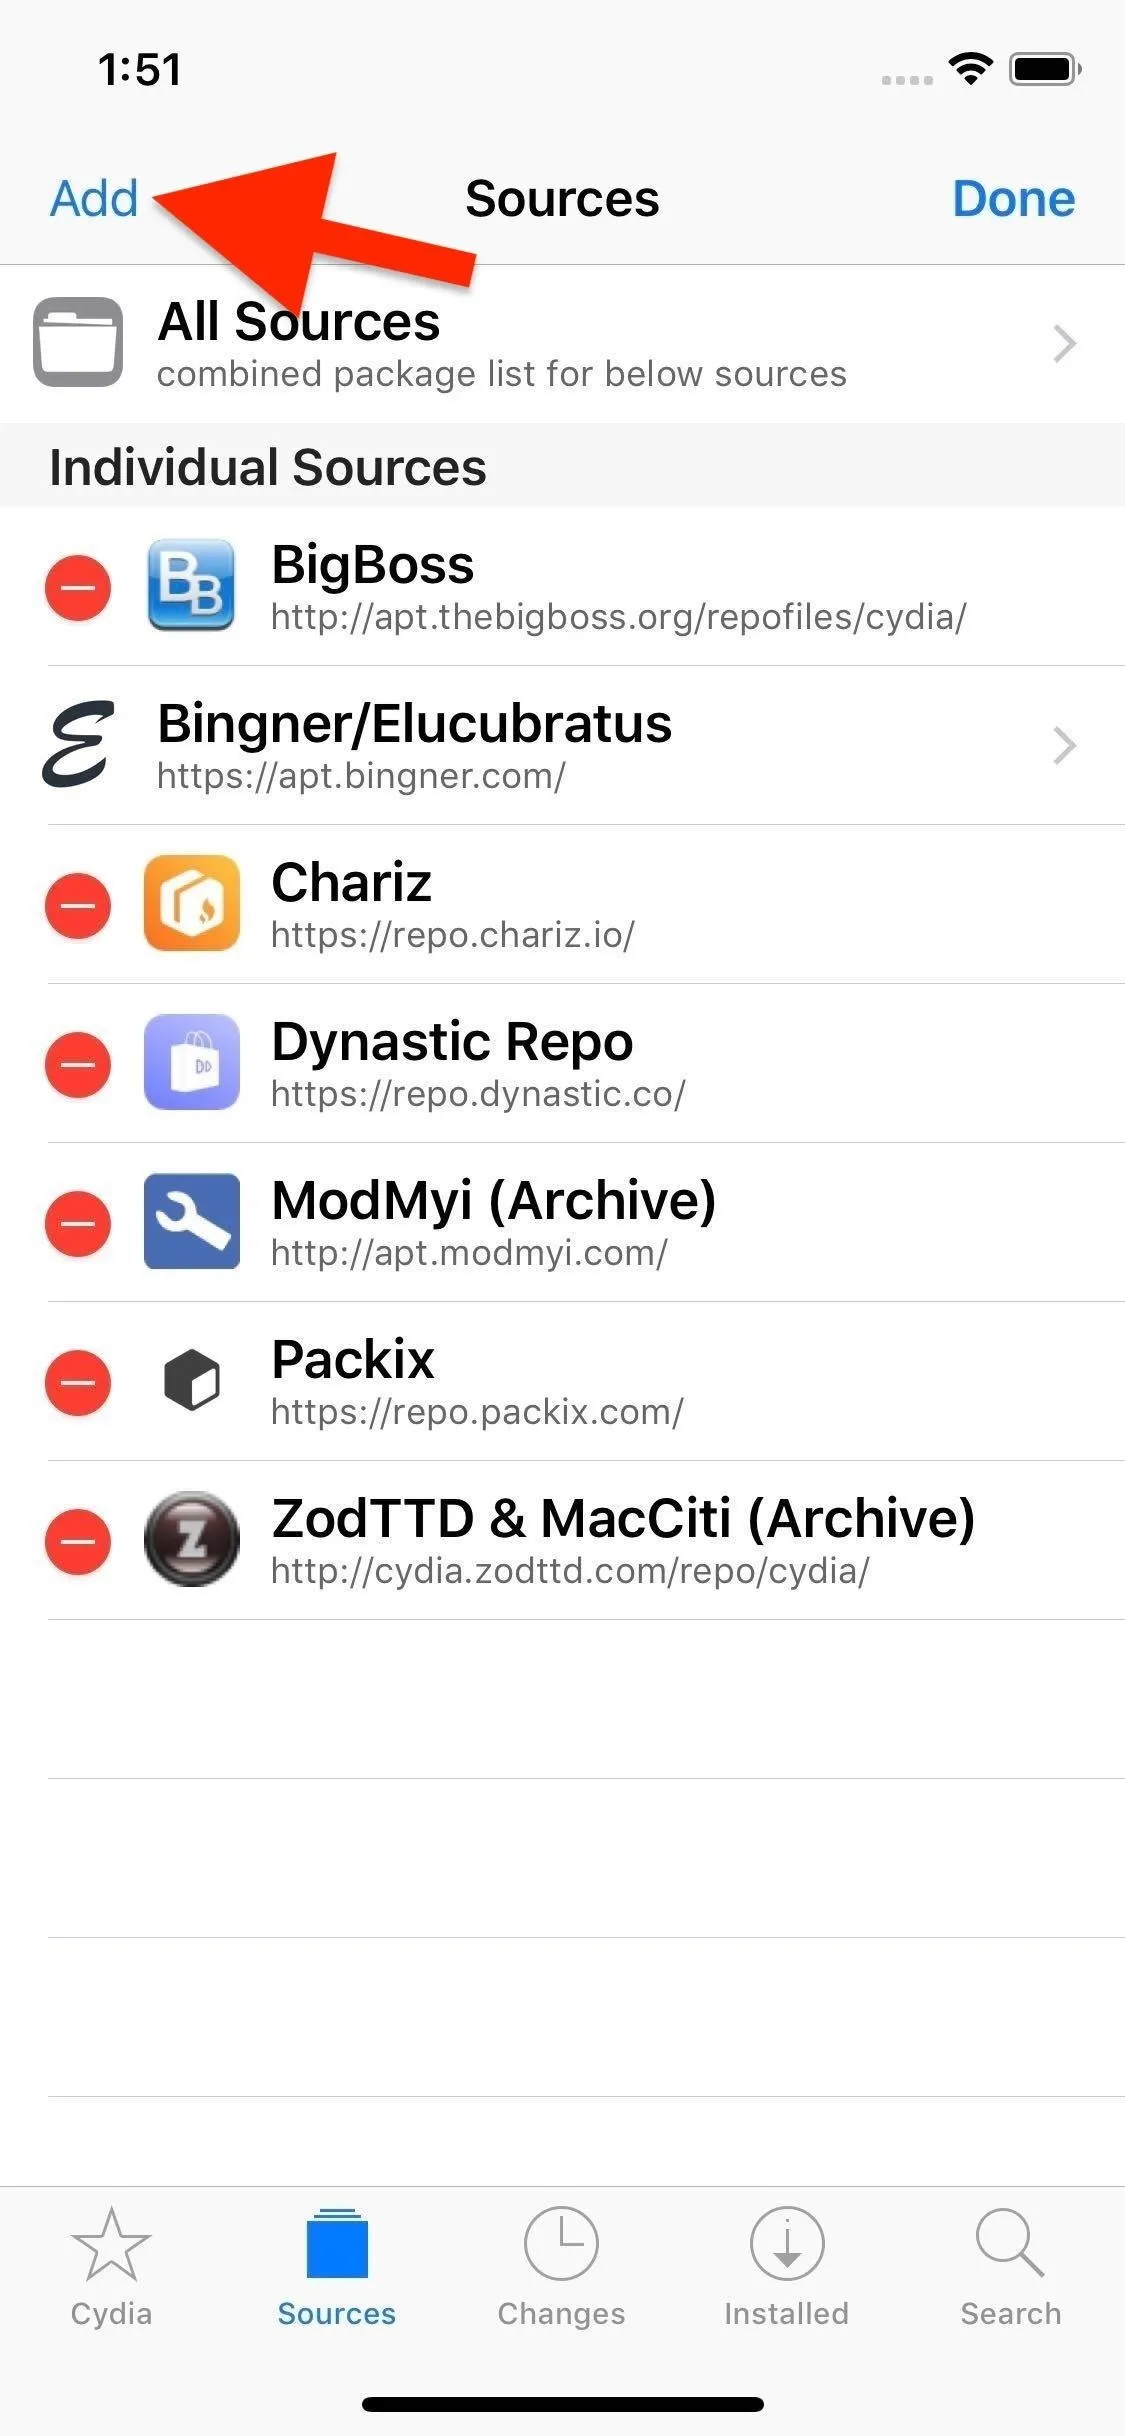
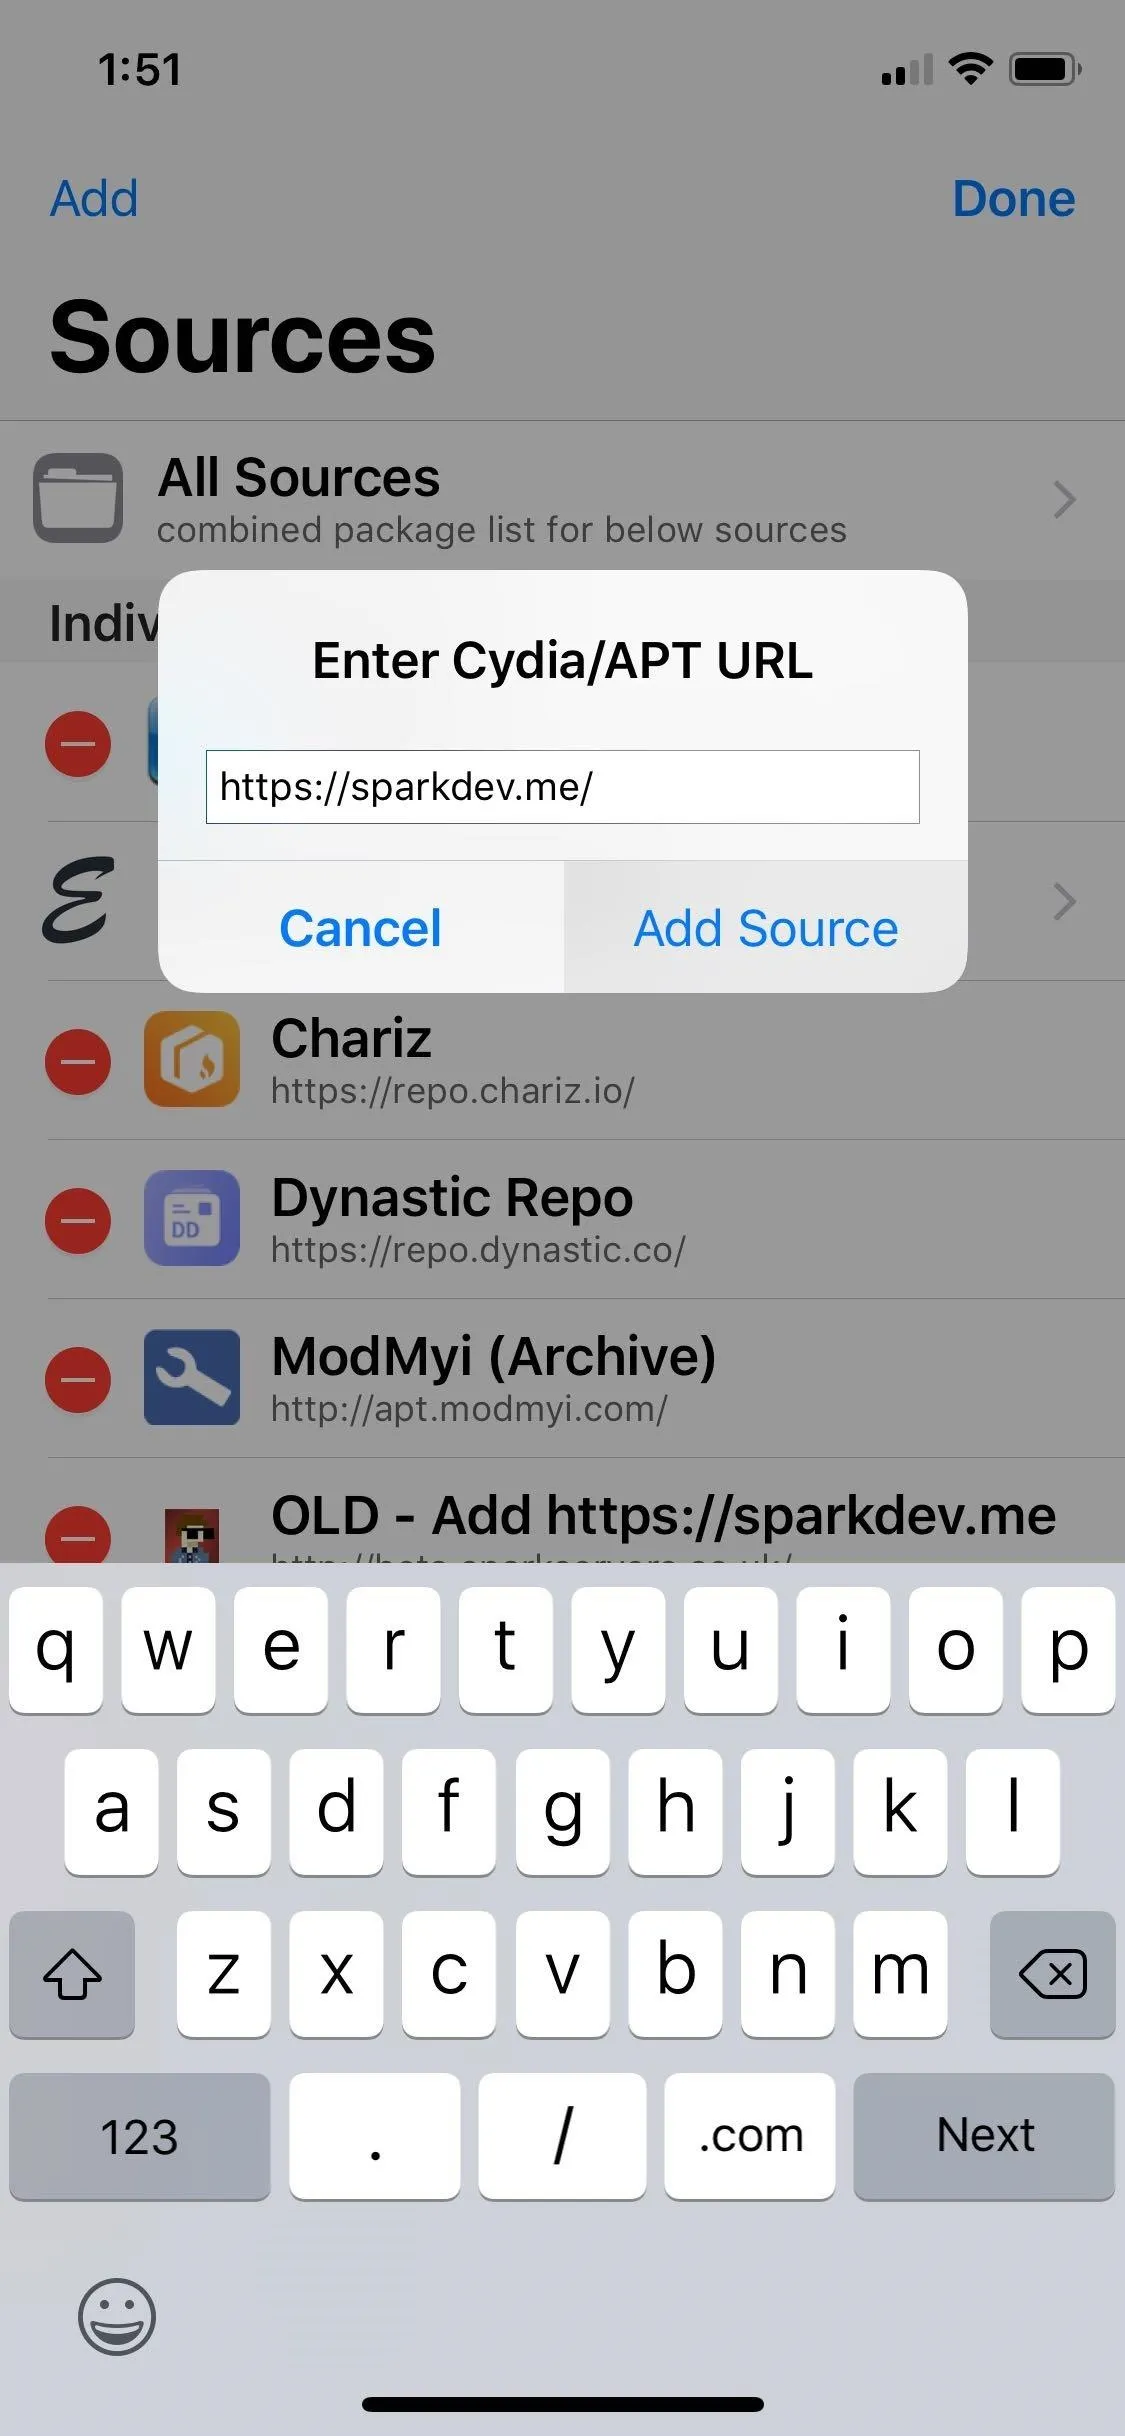

In this example, I'm using Cydia to install the new repo containing AutoUnlockX.


Install AutoUnlockX
Go into the "Search" page for either Cydia or Sileo, type "AutoUnlockX" in the search field, and select the tweak once it appears. From there, either tap on "Install" (Cydia) or "Get" (Sileo) from its Details page.
Now, either tap on "Confirm" (Cydia) or swipe up on the bottom of the "Queue" card and hit "Confirm" next to it (Sileo). Afterward, sit back and wait a moment or two for the tweak to install, then tap "Restart SpringBoard" to wrap up installation.
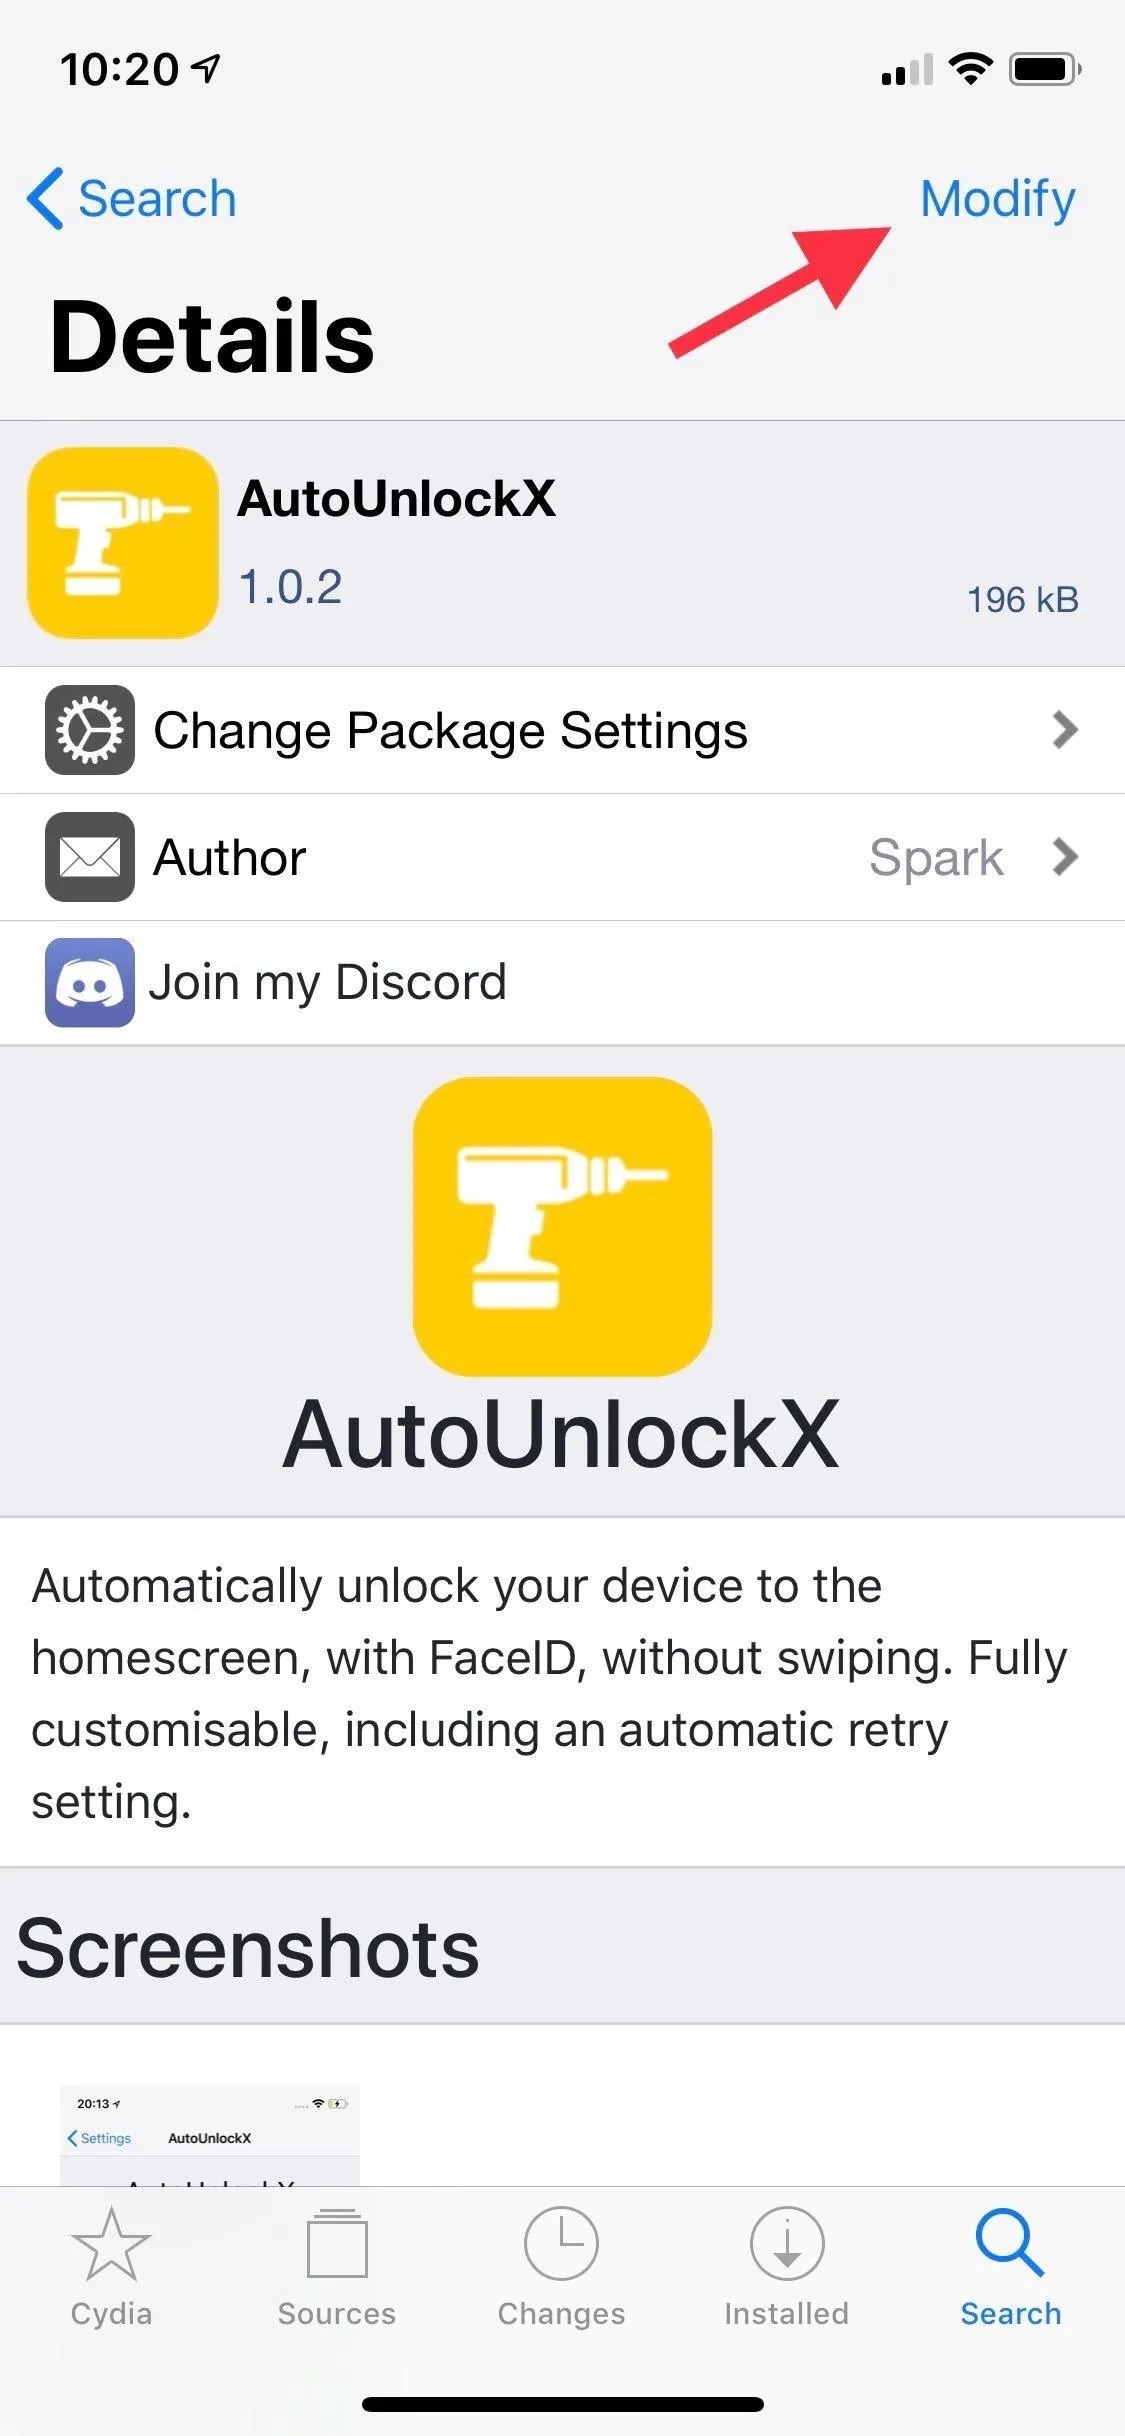
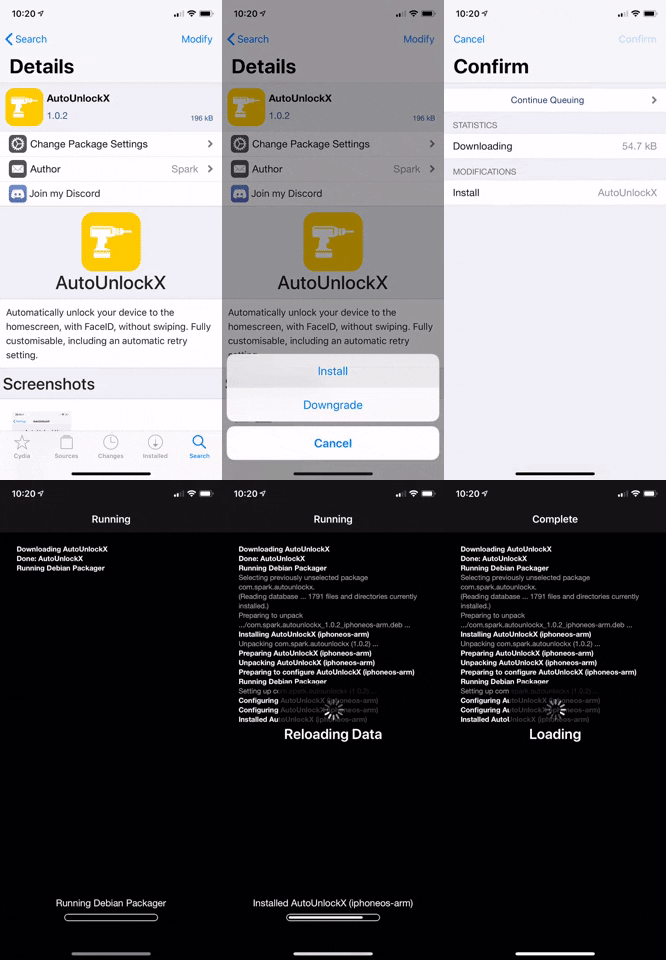


Tweak AutoUnlockX
After your iPhone resprings, you'll still need to enable AutoUnlockX, so open the Settings app and select "AutoUnlockX" from the main page. Next, tap on the toggle next to "Enable Auto Unlock" to turn it on.
Beyond that, you also have the option to keep the swipe up screen by disabling the tweak whenever your iPhone has notifications, is playing music, or has the flashlight on — simply by tapping on their corresponding toggles. In those cases, you likely won't want to go beyond the lock screen since you can interact with the content right there.
You can also swith on "Enable Auto Retry," along with setting its interval with the slider, to automatically try scanning your face again after unsuccessful attempts.
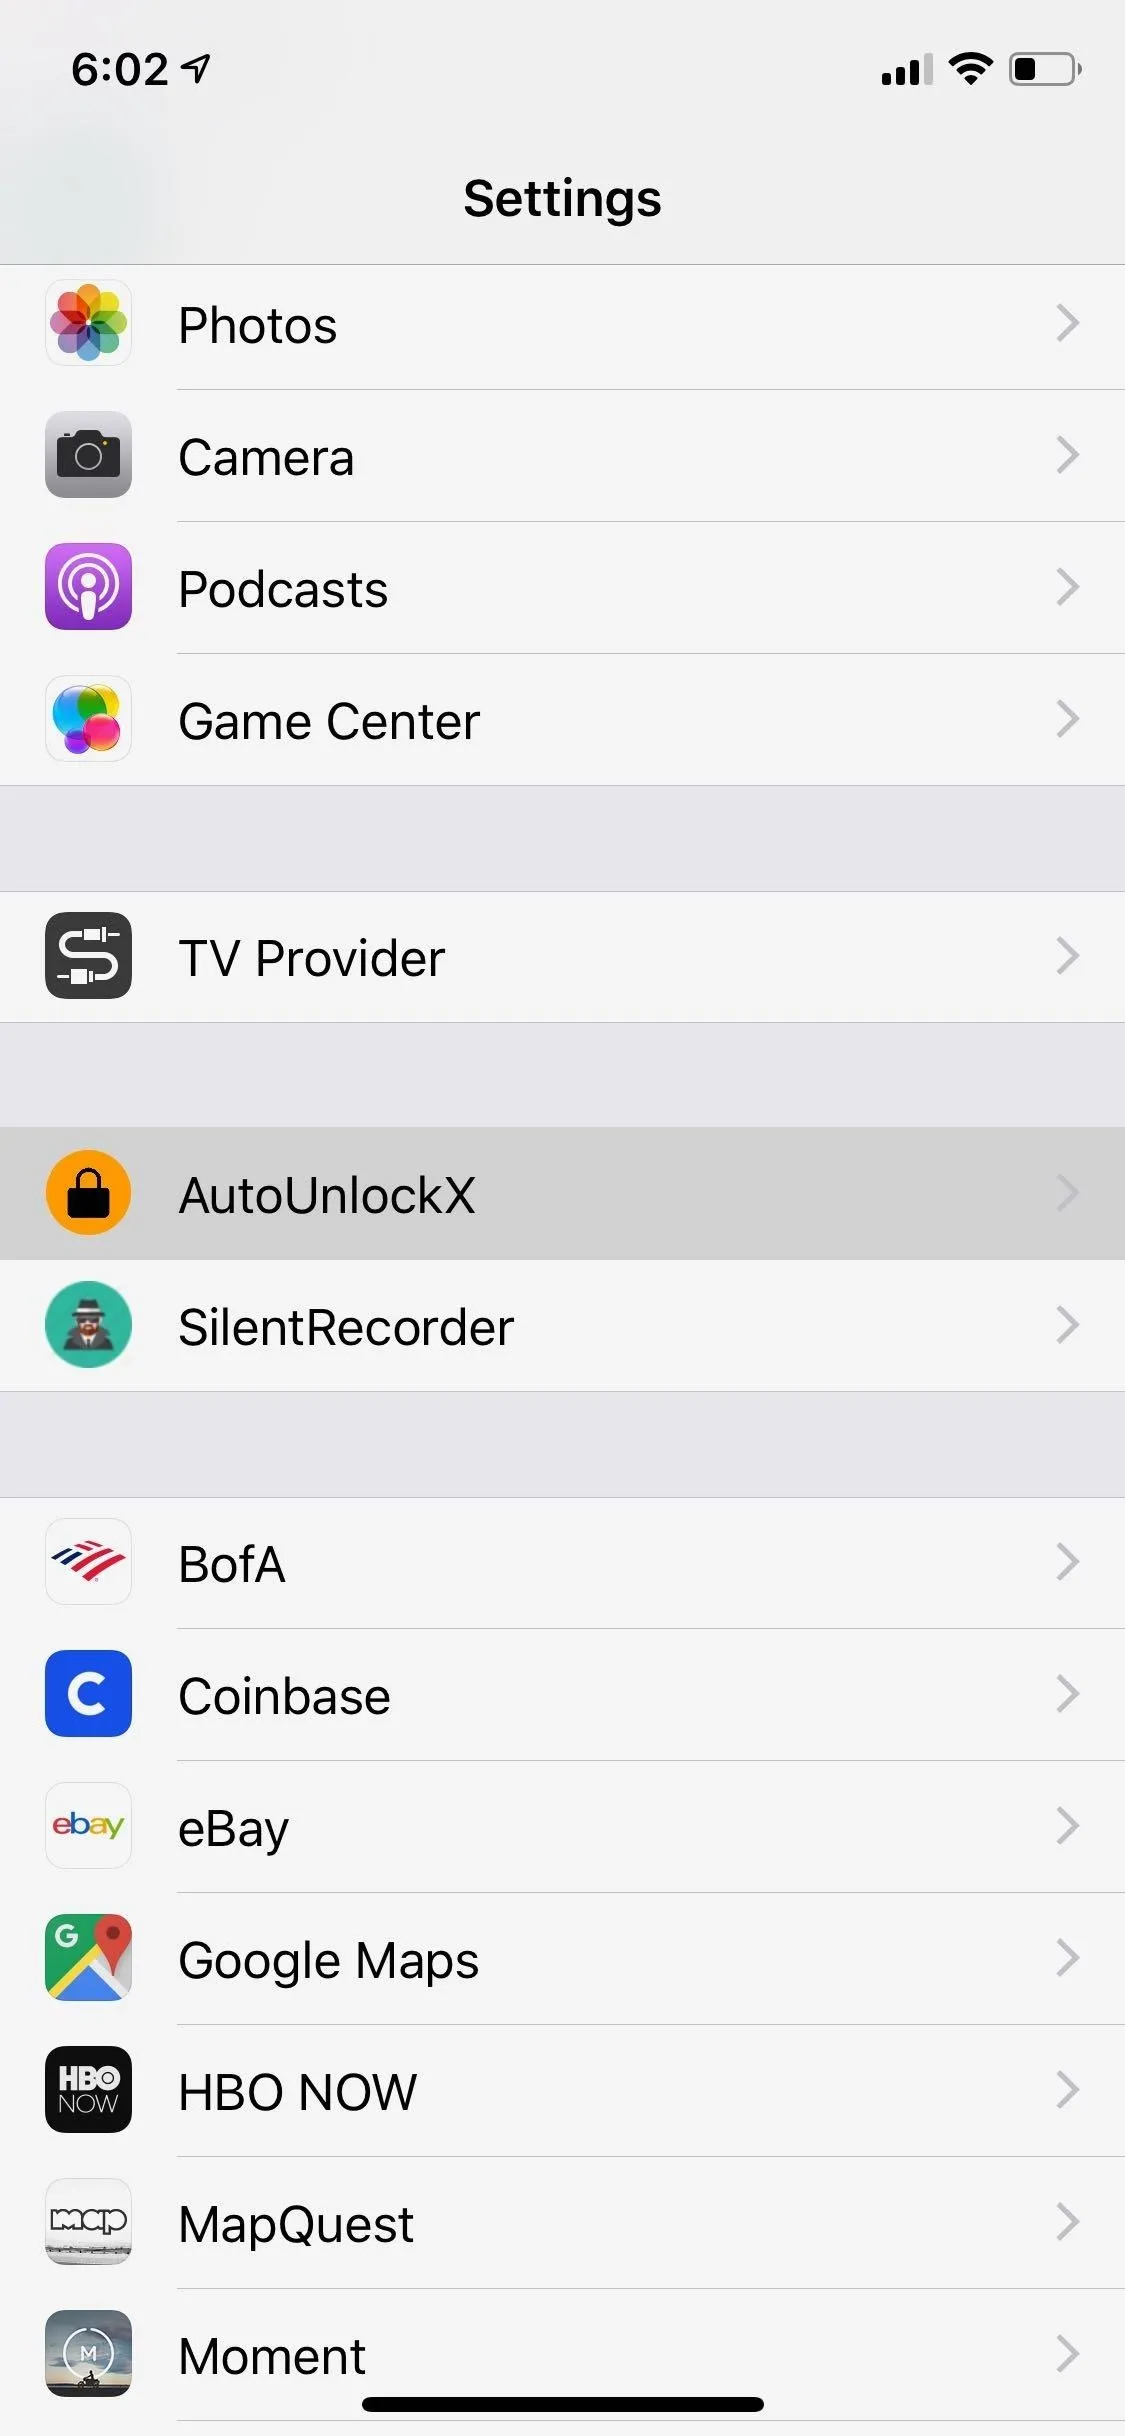
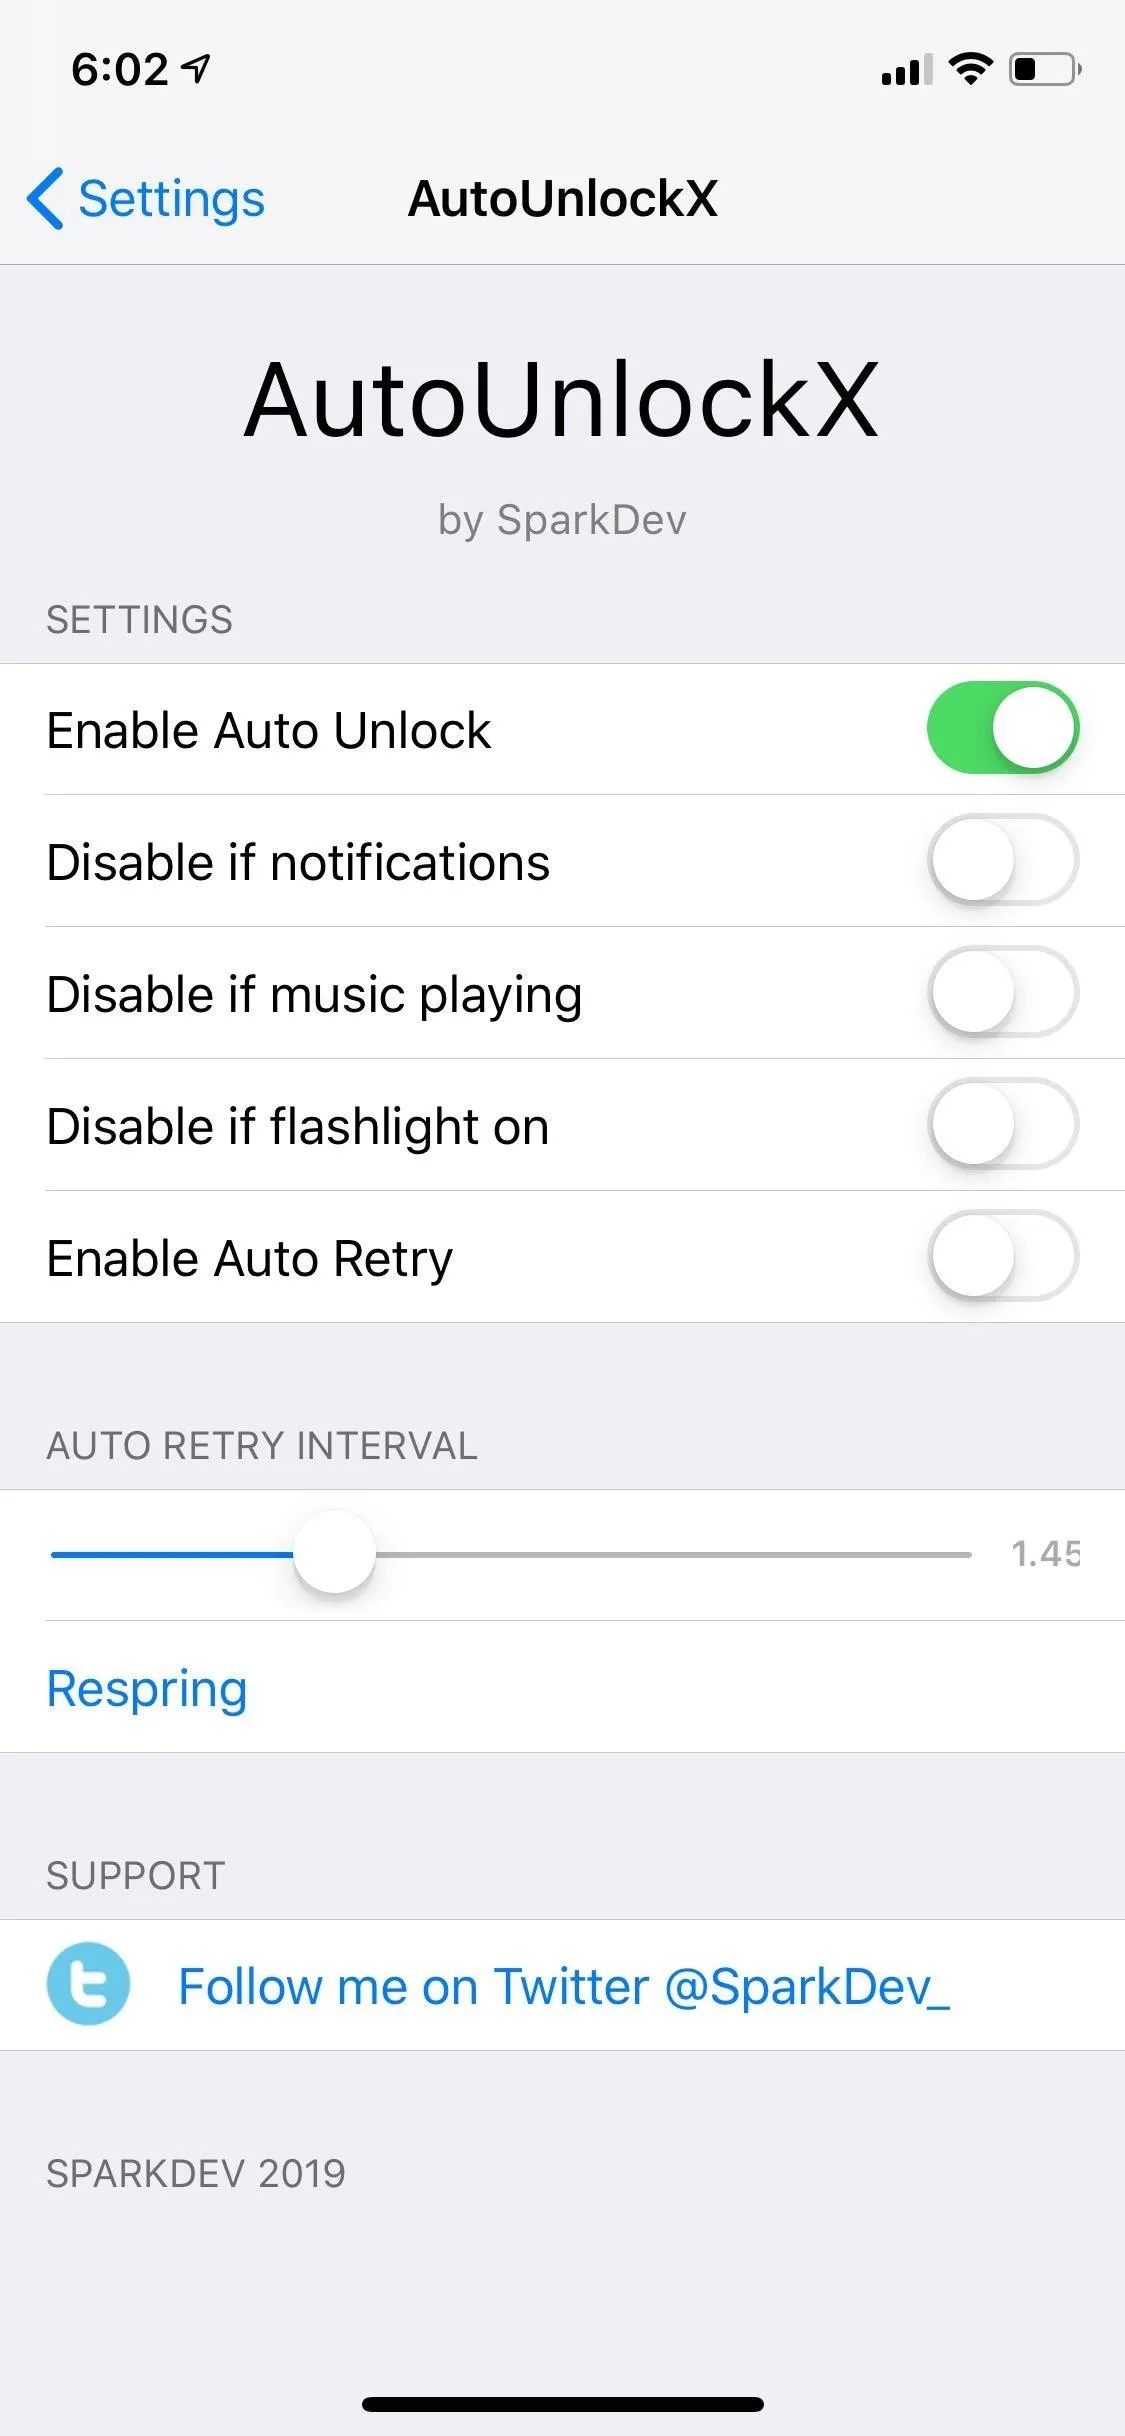


So make your selections according to your preferences, and tap on "Respring" once you're satisfied to set your changes. After doing so, use Face ID to unlock your iPhone as you normally would, and enjoy your newfound ability to instantly access the home screen or the recent app without the need to swipe up.
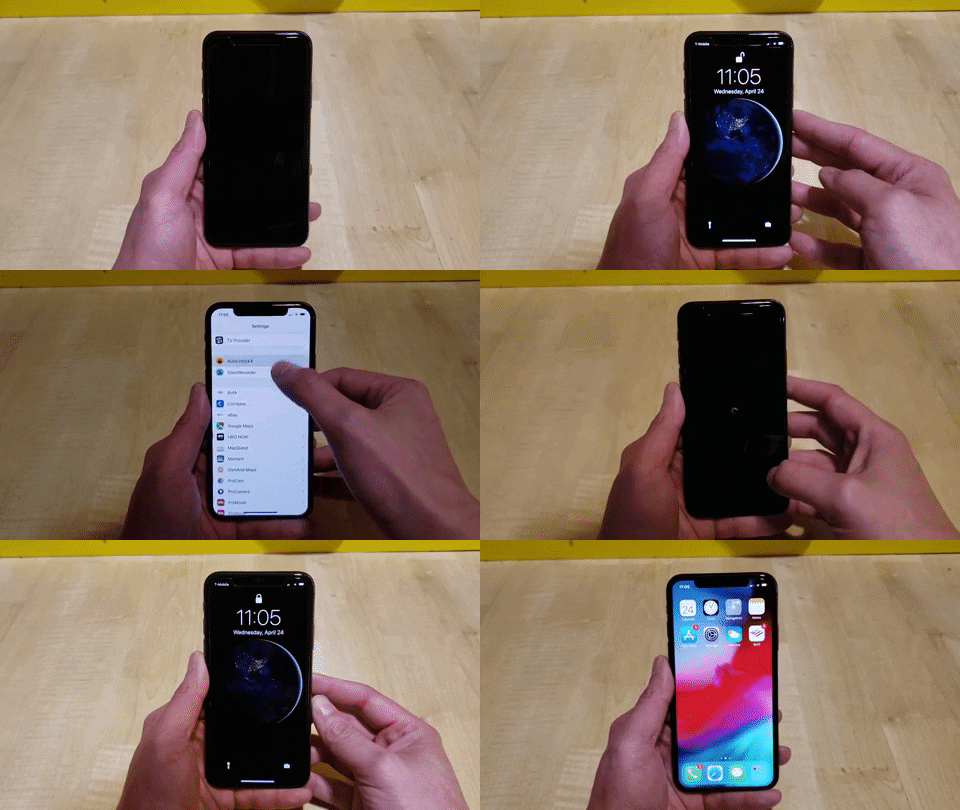
Before and after enabling AutoUnlockX.
- Follow Gadget Hacks on Pinterest, Reddit, Twitter, YouTube, and Flipboard
- Sign up for Gadget Hacks' daily newsletter or weekly Android and iOS updates
- Follow WonderHowTo on Facebook, Twitter, Pinterest, and Flipboard
Cover image, screenshots, and GIFs by Amboy Manalo/Gadget Hacks


Comments
Be the first, drop a comment!