Two-factor authentication has been around since iOS 10. It's a handy option that adds an extra layer of security to your iPhone and makes its almost impenetrable security even stronger. This feature has remained intact in iOS 11 and iOS 12, and thanks to the straightforward nature of iOS, is relatively easy to enable.
Colloquially known as "two-step verification," this security feature is ideal for people who use multiple devices besides their iPhone or iPad. With two-factor authentication enabled, Apple will text you a temporary six-digit code to use in addition to your Apple ID and password when you're signing in from a new device. This goes a long way towards preventing unauthorized access to your precious data.
Though it's simple enough to turn on, disabling two-factor authentication requires a bit more elbow grease to keep things secure. As such, we've detailed the process for turning this feature on and off, so if you're interested in learning more, keep reading further.
Enabling Two-Factor Authentication
The process of activating Apple's two-factor authentication feature is done through your iPhone's settings. To enable it, simply tap on your name at the top of the main settings page, then select "Password & Security." From there, tap "Turn On Two-Factor Authentication."
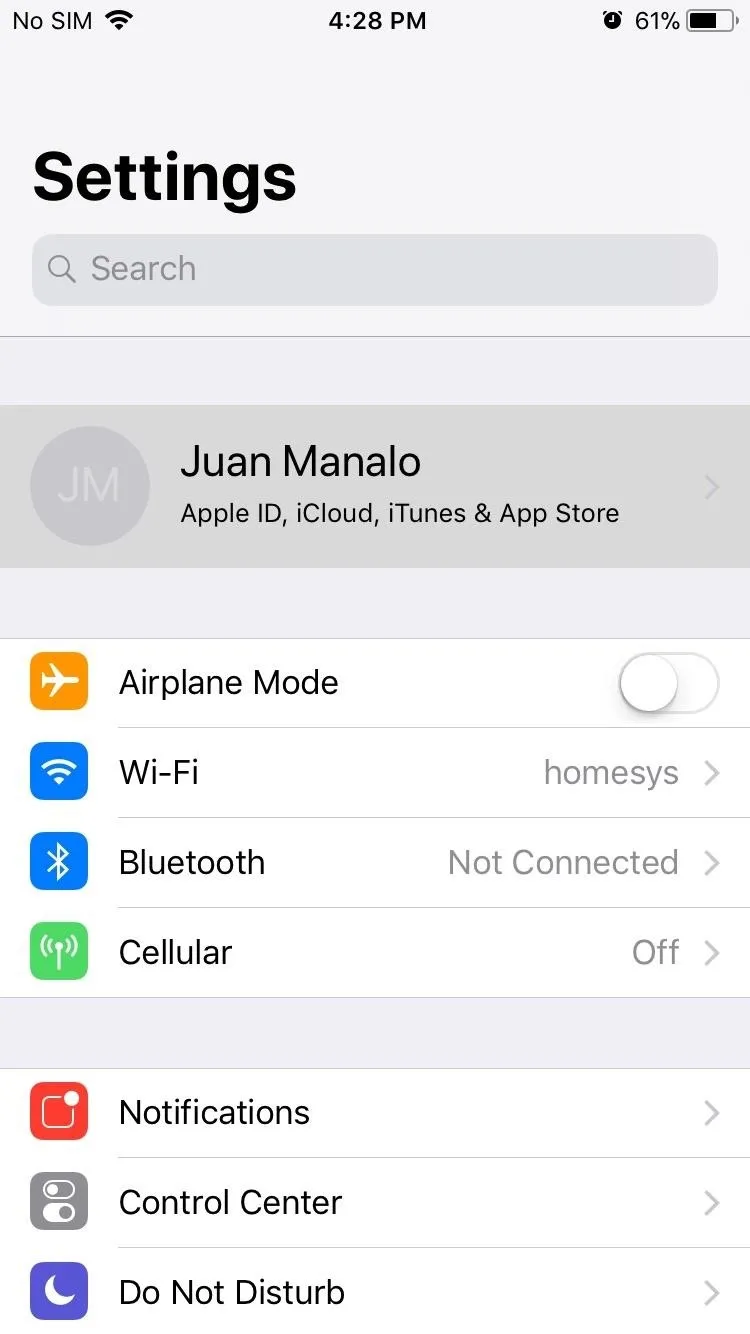
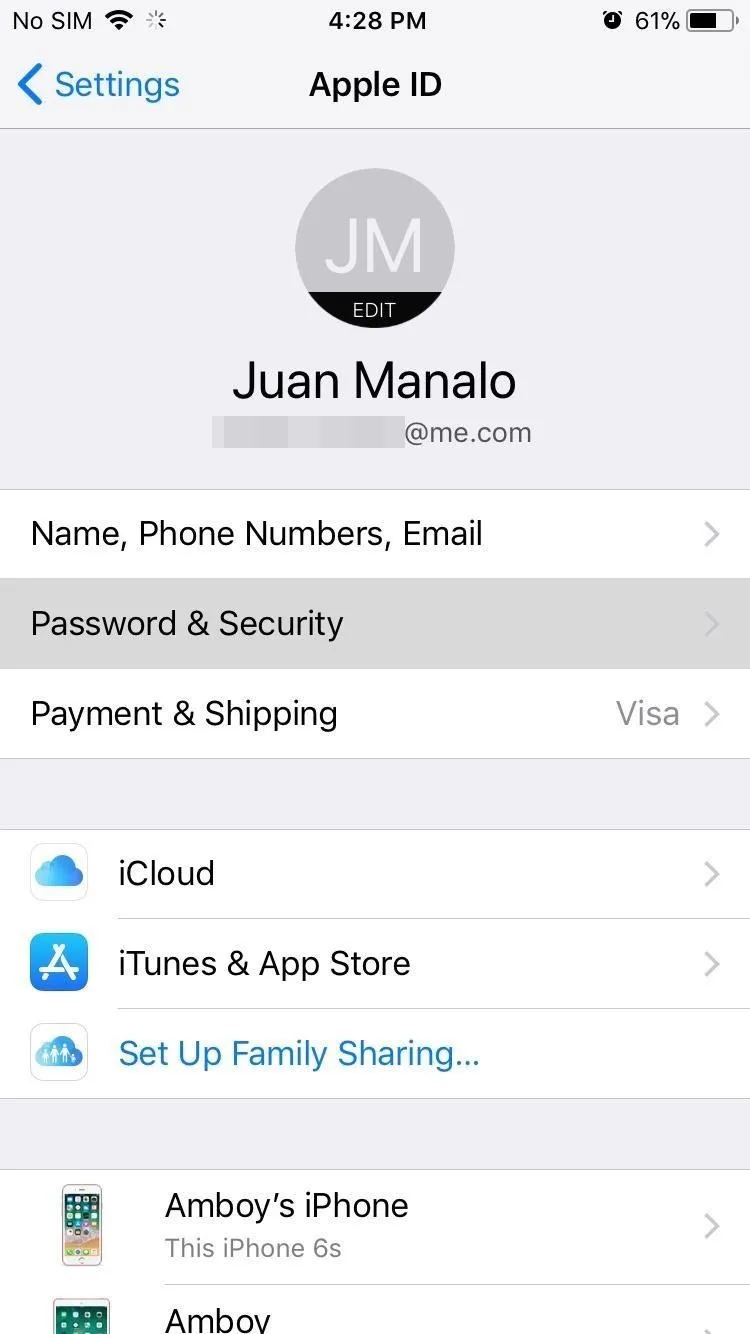
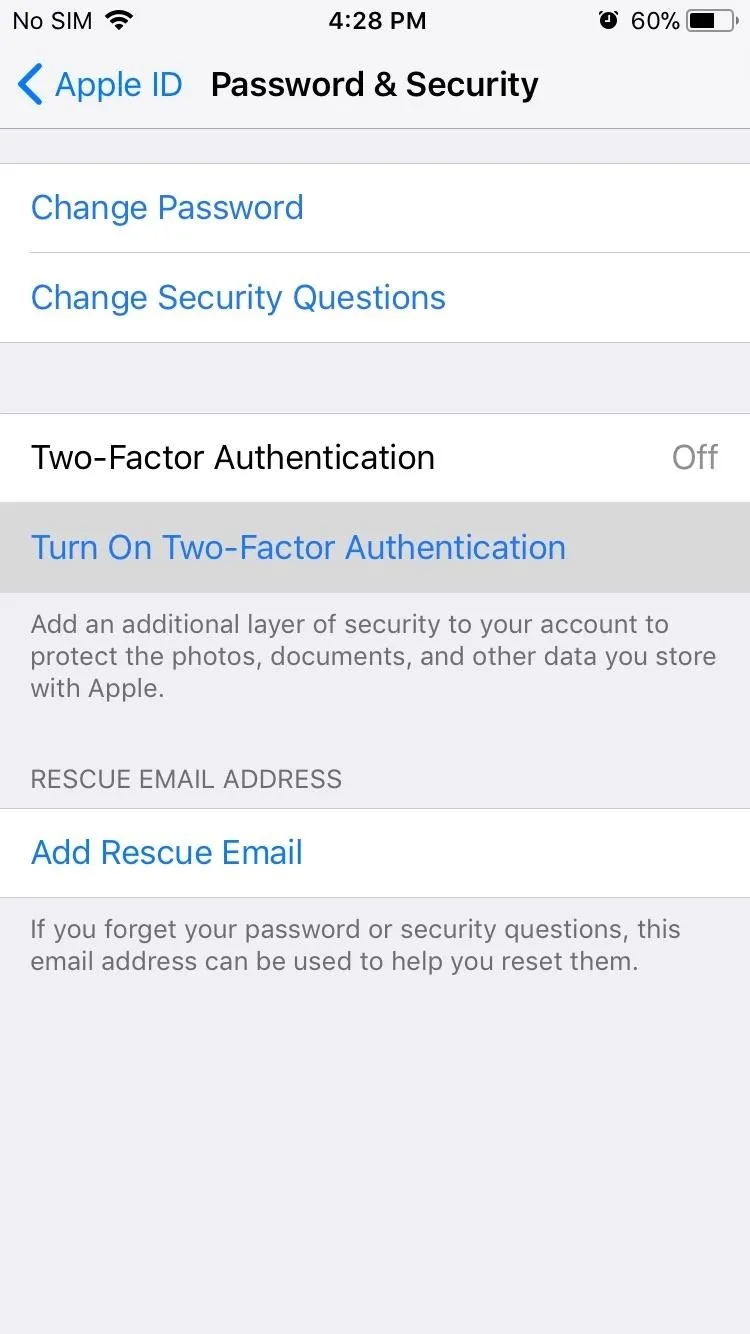


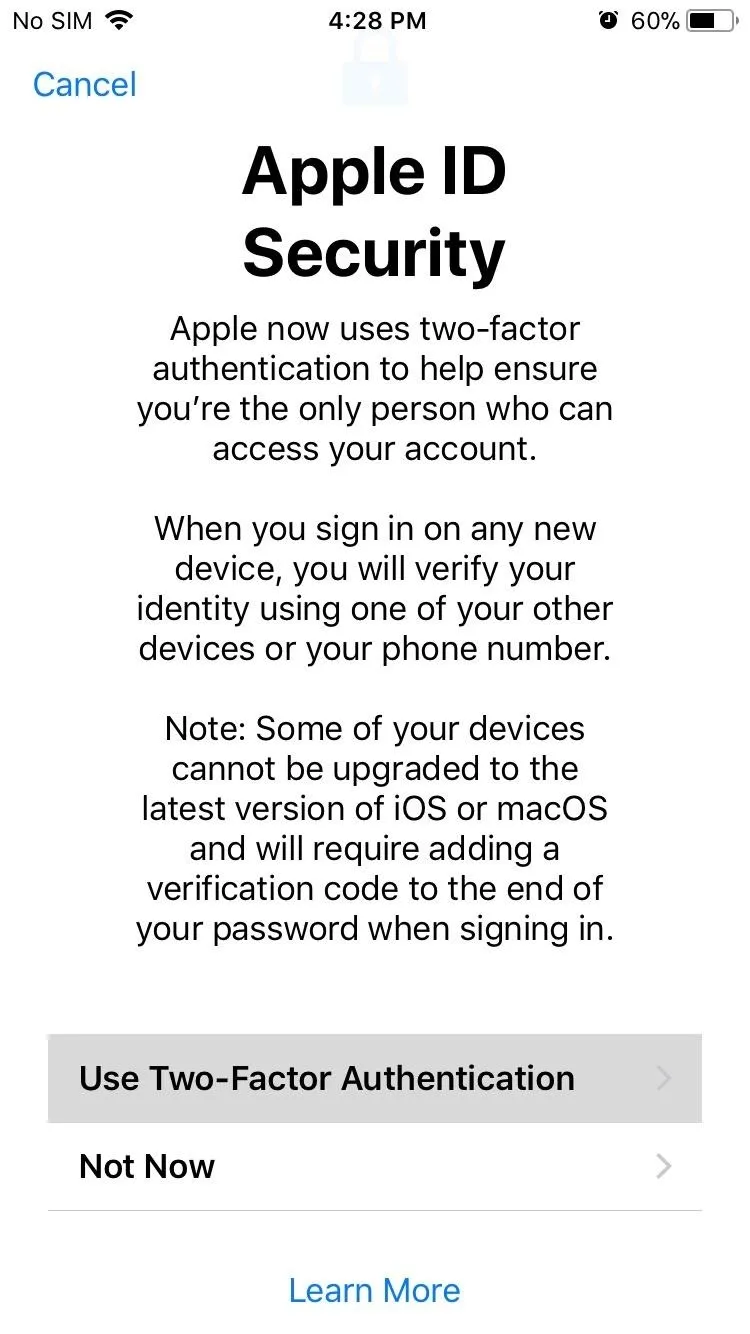
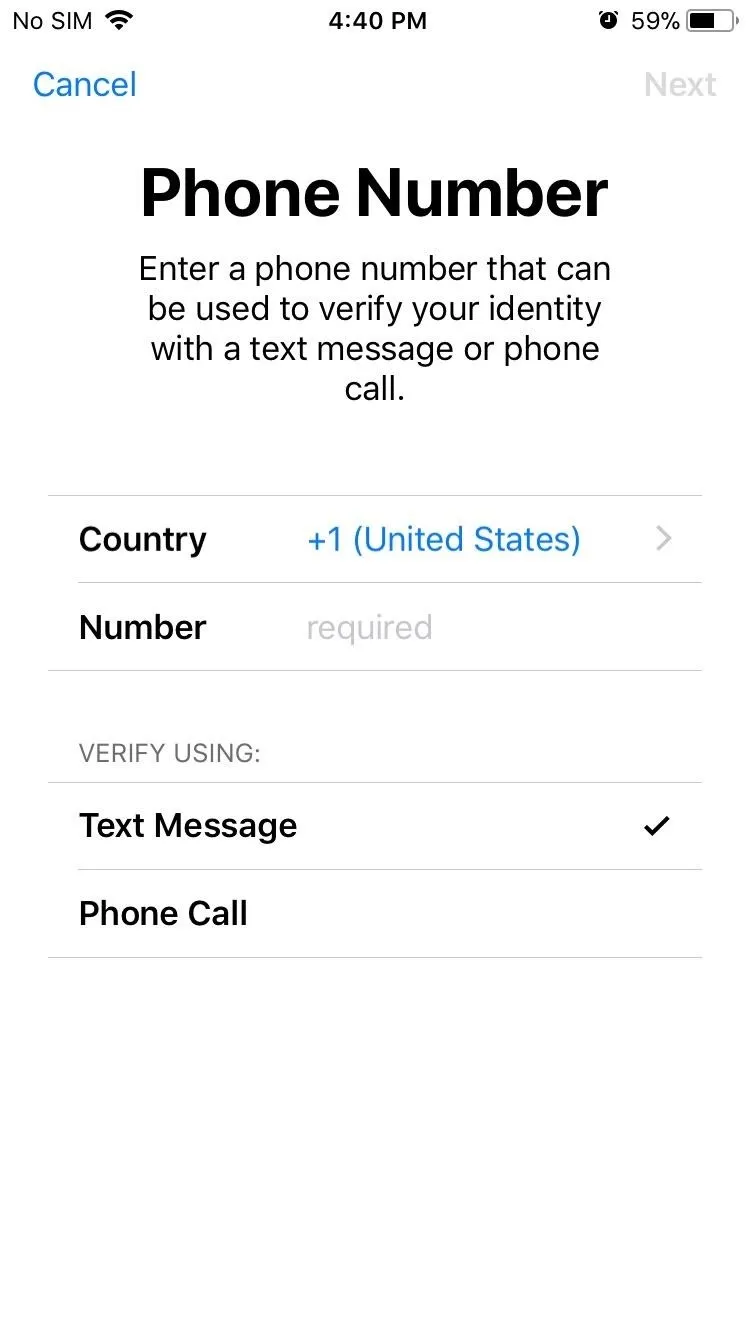
You'll now be taken to a page that briefly explains the feature, so tap on "Use Two-Factor Authentication" once you've read through the details. You'll be given an option to either use a phone number that Apple has detected as linked to your account, or enter a new one that you'd wish to use instead.
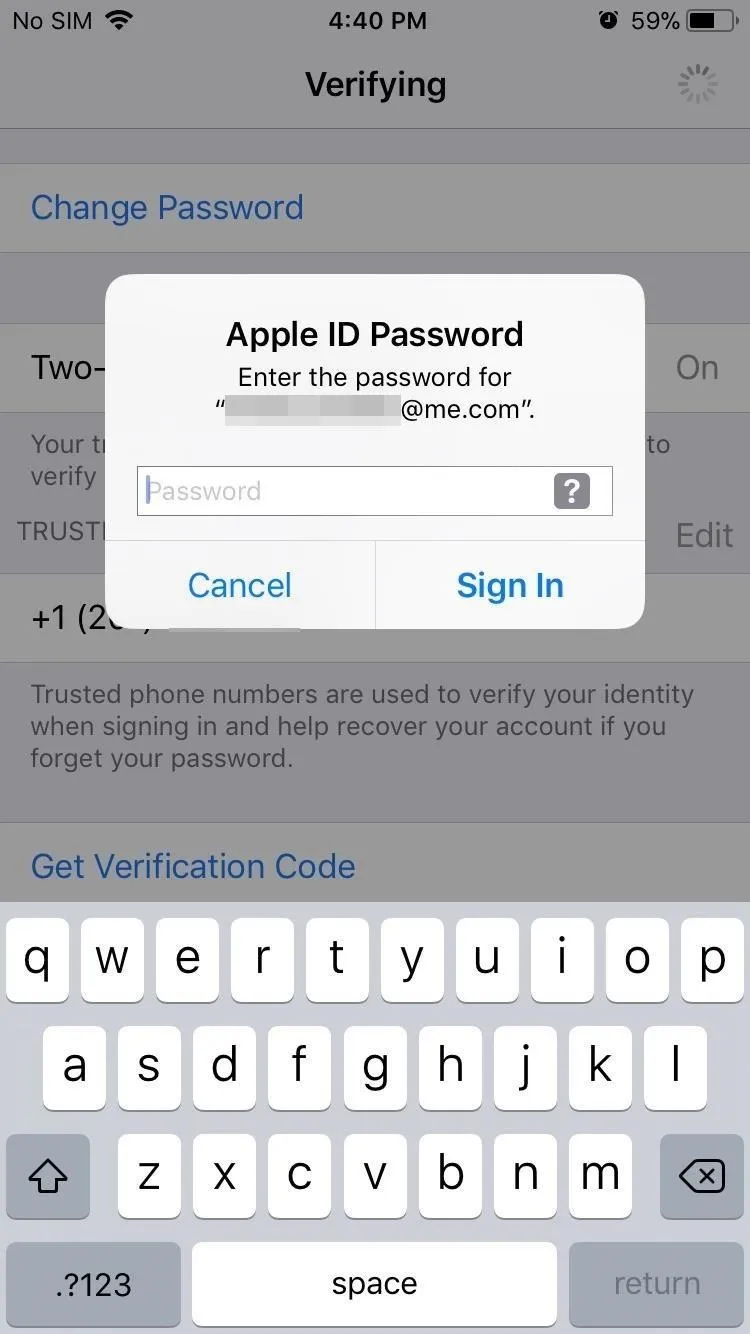
Verification codes will be sent to the number you register with, and you'll be given a choice as to whether you want to receive them as either a text message or an automated phone call. Once you've set it up, you'll be asked to enter the password for your Apple ID, followed by a six-digit code. The two-factor authentication feature will be fully enabled upon successful input of both.


Disabling Two-Factor Authentication
For security reasons, the process of disabling two-factor authentication on your iPhone is a little bit more involved. So you can't just turn it off by going into your iPhone's settings — instead, you'll actually have to go to your Mac or PC. To get started, open up the browser on your computer, then head over to iCloud.com and sign in with your Apple ID and password.
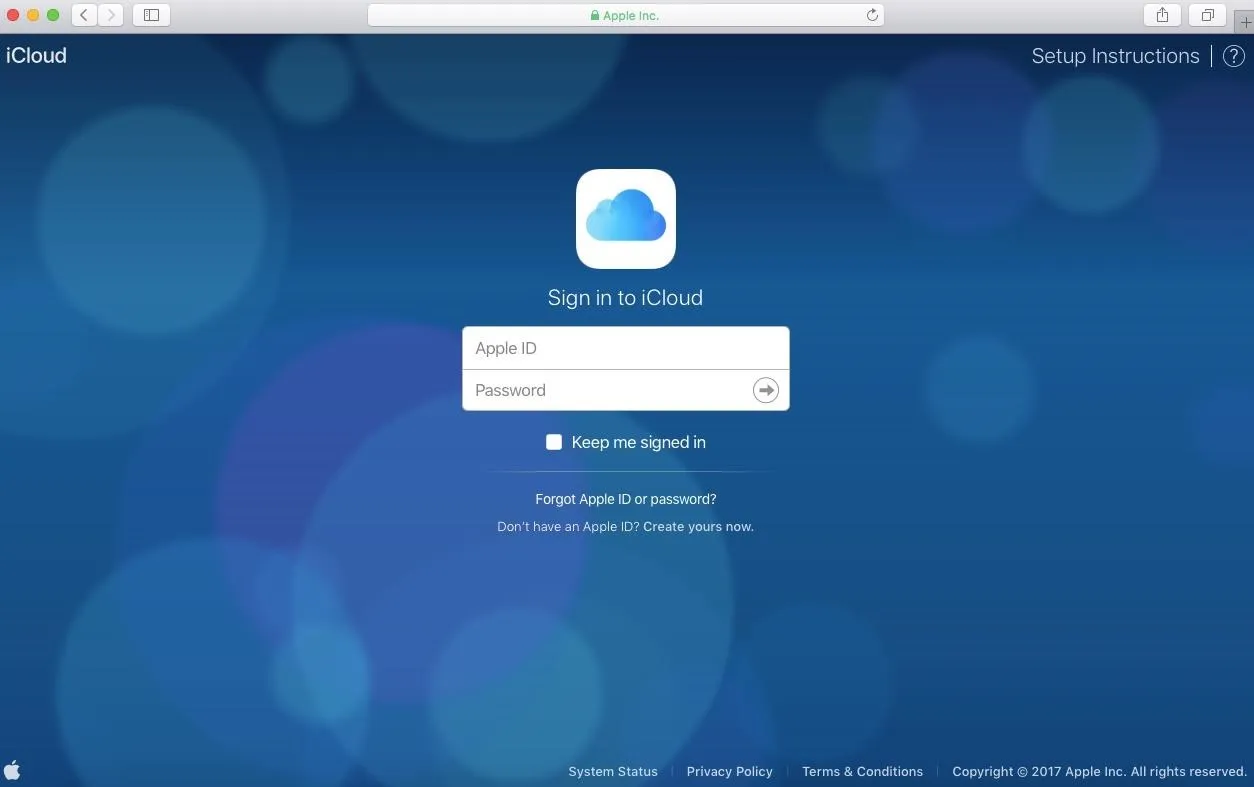
Since two-factor authentication is enabled, iCloud will naturally ask for a six-digit verification code before it allows you to sign in. So go back to your iPhone and approve of your login by tapping on "Allow" on the request prompt to get the code.
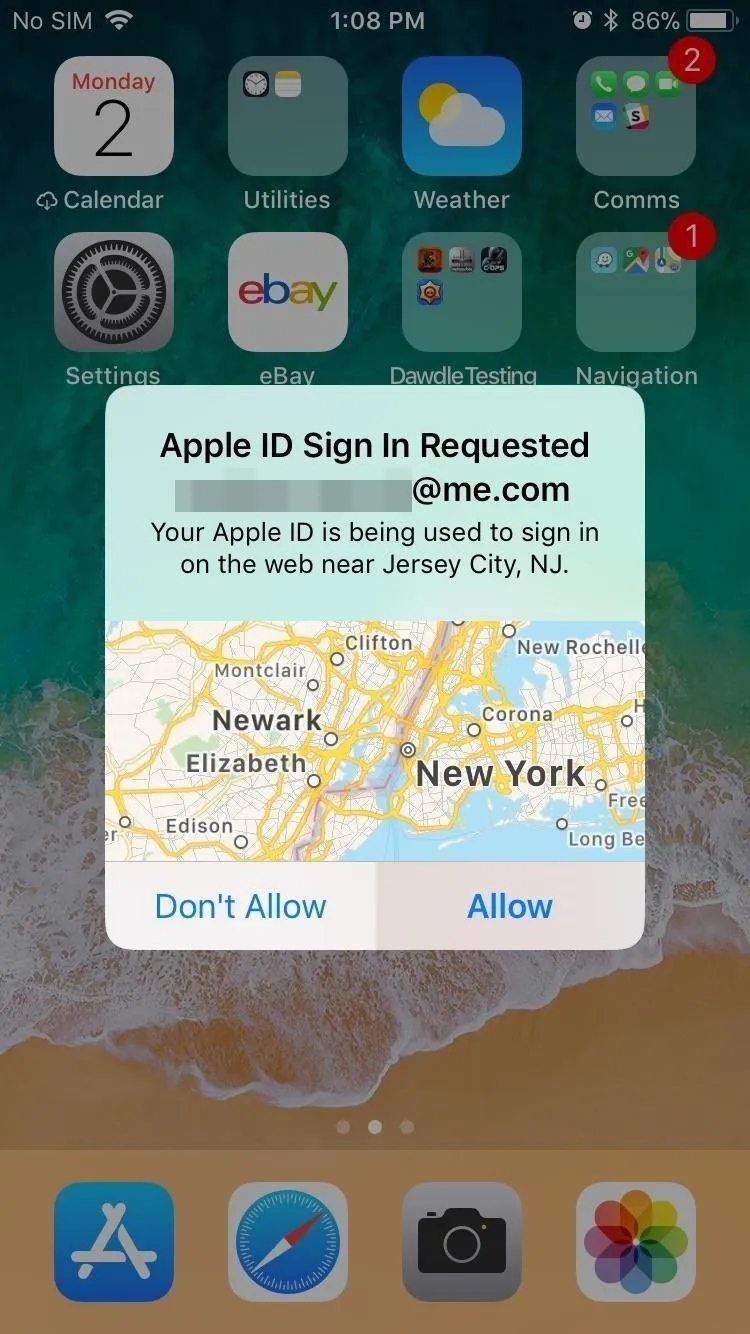
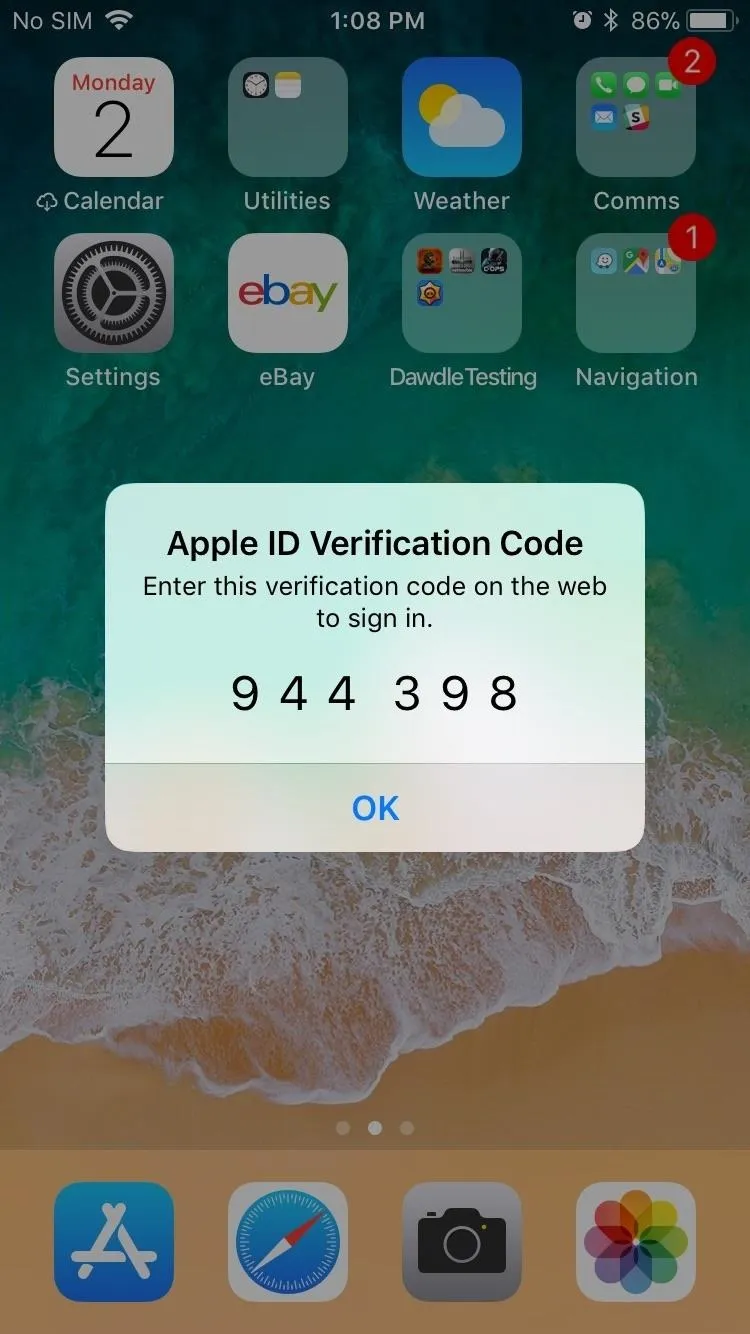


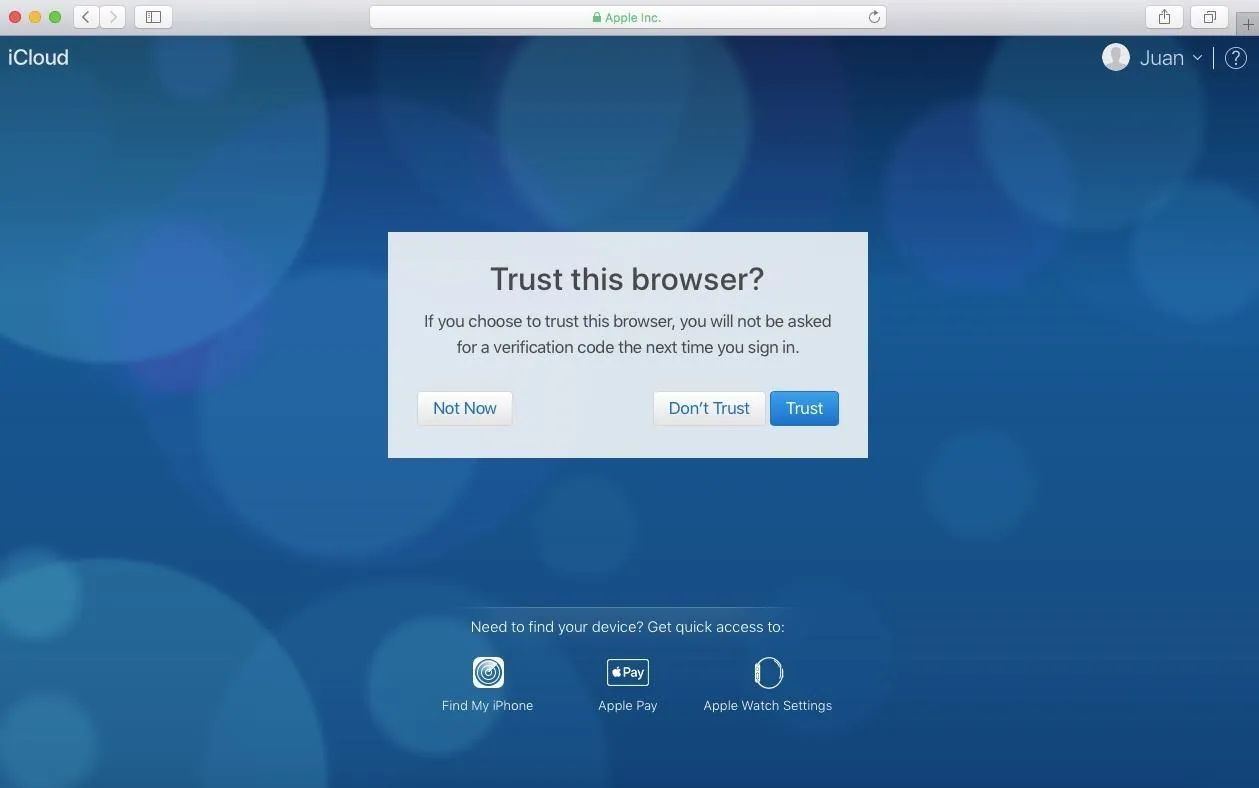
With the six-digit verification code on hand, type it into the iCloud page in your computer's browser. Then click on "Trust" on the following prompts to complete your login and finally bring you to your iCloud account's main page.
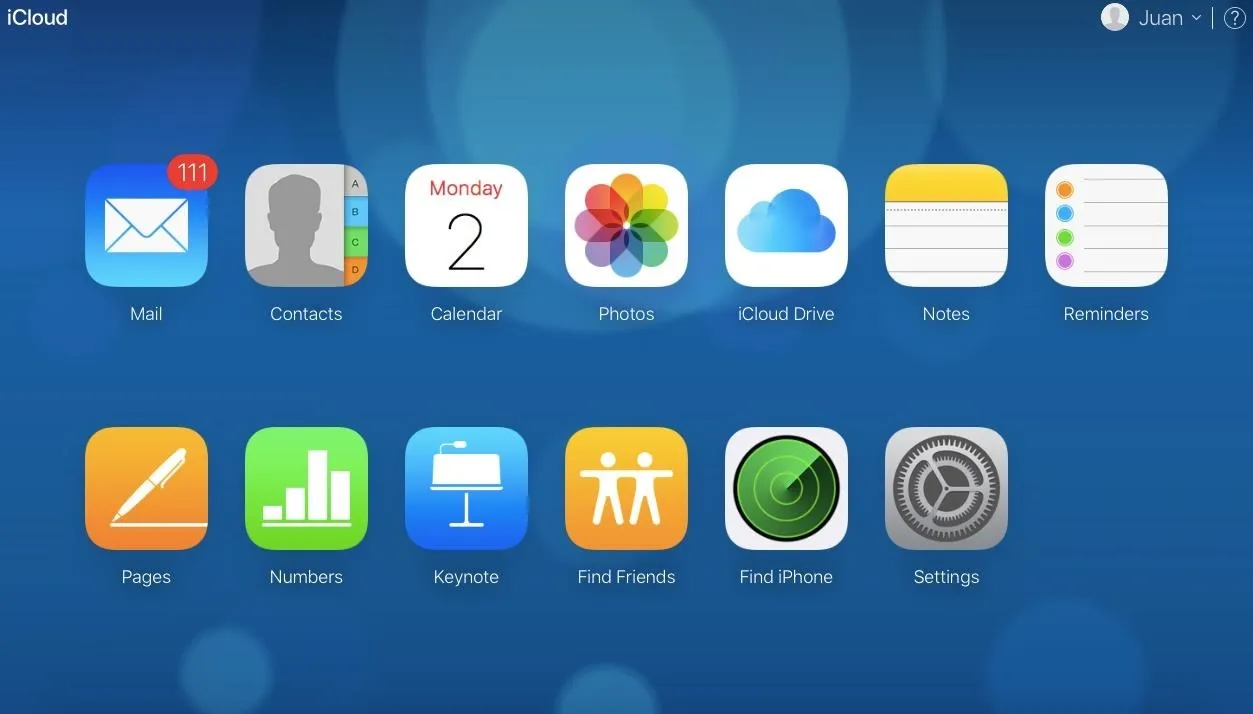
Inside your iCloud account's home page, click on "Settings."
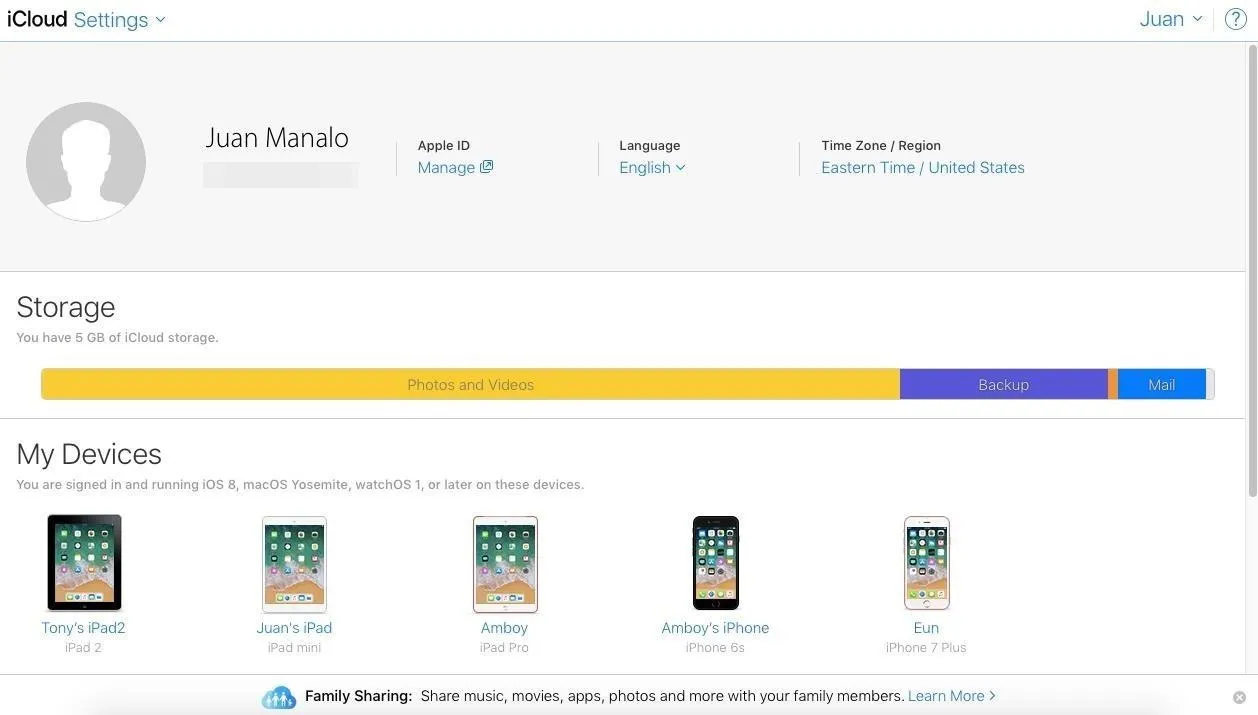
Now, select "Manage" (located right under "Apple ID") near the top of the settings page next to your name. You might be taken to another login page to proceed, so re-enter your Apple ID credentials followed by another six-digit authentication code that you can get off your iPhone as mentioned previously. Either way, you'll be taken to your account's information page.
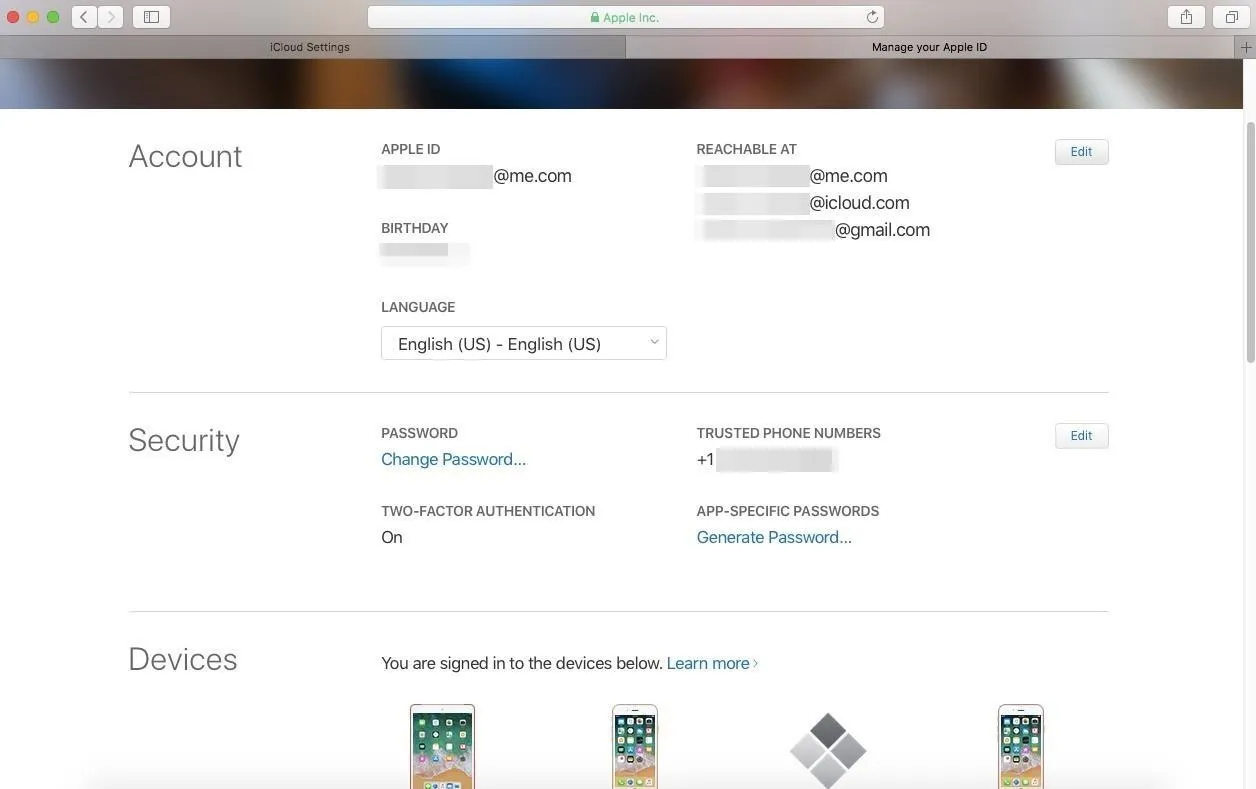
Inside the "Manage your Apple ID" page, click on the "Edit" button on the right side located in the "Security" tab containing password, two-factor authentication, and trusted phone numbers.
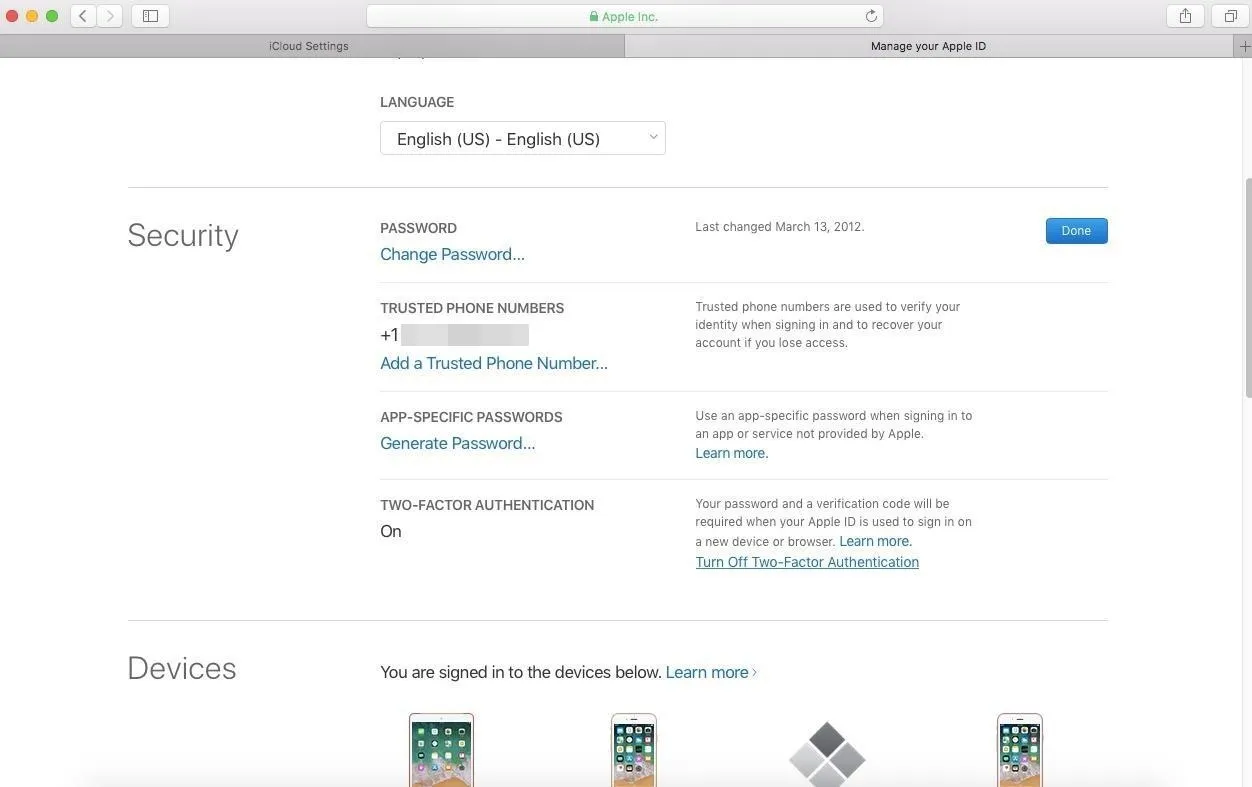
Once in the security page, head over to the two-factor authentication tab and click "Turn Off Two-Factor Authentication" to turn the feature off for good.
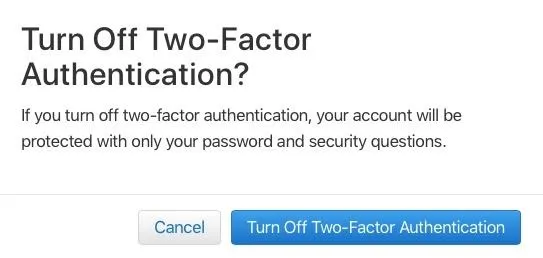
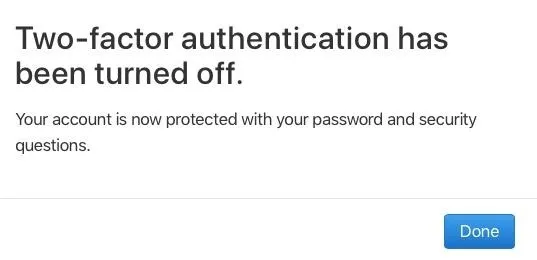
Finalize your selection by clicking on the confirmation prompts to turn the feature off. You might be asked to create three new security questions before it turns off, so go ahead and create them if you haven't already done so. After confirming, you'll receive a final prompt notifying you that the feature has been disabled, so hit "Done" and exit out of iCloud on your computer.


Now that you know how to turn two-factor authentication on or off, are you more likely to use the feature? Let us know in the comment section below.
- Follow Gadget Hacks on Pinterest, Reddit, Twitter, YouTube, and Flipboard
- Sign up for Gadget Hacks' daily newsletter or weekly Android and iOS updates
- Follow WonderHowTo on Facebook, Twitter, Pinterest, and Flipboard
Cover image and screenshots by Amboy Manalo/Gadget Hacks


Comments
Be the first, drop a comment!