Apple's update for iOS 13 is not without bugs and other issues, and if those problems become annoying or impede your ability to use your iPhone like usual, you may want to downgrade. Hundreds of new features may not matter if you can't use your iPhone like it's meant to be.
There's also the chance that you just don't like the iOS 13 update as it stands right now, whether that's iOS 13.0, 13.1, 13.1.1, or 13.1.2. If that's the case or your iPhone has become increasingly unusable as you'd like to use it, you're not stuck with iOS 13 — you can downgrade back to iOS 12.4.1 if you hurry.
Apple released iOS 13 on Sept. 19, iOS 13.1 on Sept. 24, iOS 13.1.1 on Sept. 27, and iOS 13.1.2 on Sept. 30, so there's not a lot of time before the company stops supporting the latest version of iOS 12. Based on past trends, we think Apple will probably stop signing the newest iOS 12 software updates sometime in October of this year. Once it does, you won't be able to downgrade from iOS 13 unless you happened to save your SHSH2 blobs. (Last year, Apple stopped signing iOS 11.4.1 three weeks after the release of iOS 12.)
Until that fateful day, you can downgrade from iOS 13 in a couple of different ways. If you want to keep all the data on your iPhone, you would have to have made an archived backup before you upgraded to iOS 13. If you didn't make a backup, you could still downgrade, but you'll have to start fresh.
Disable 'Find My iPhone'
Before you can restore your iPhone, you need to disable Find My iPhone. You don't need to do this now since iOS will prompt you to disable the feature down the line, but it makes things easier to sort this out now, so you don't run into problems later.
- Don't Miss: 200+ Exciting New iOS 13 Features for iPhone
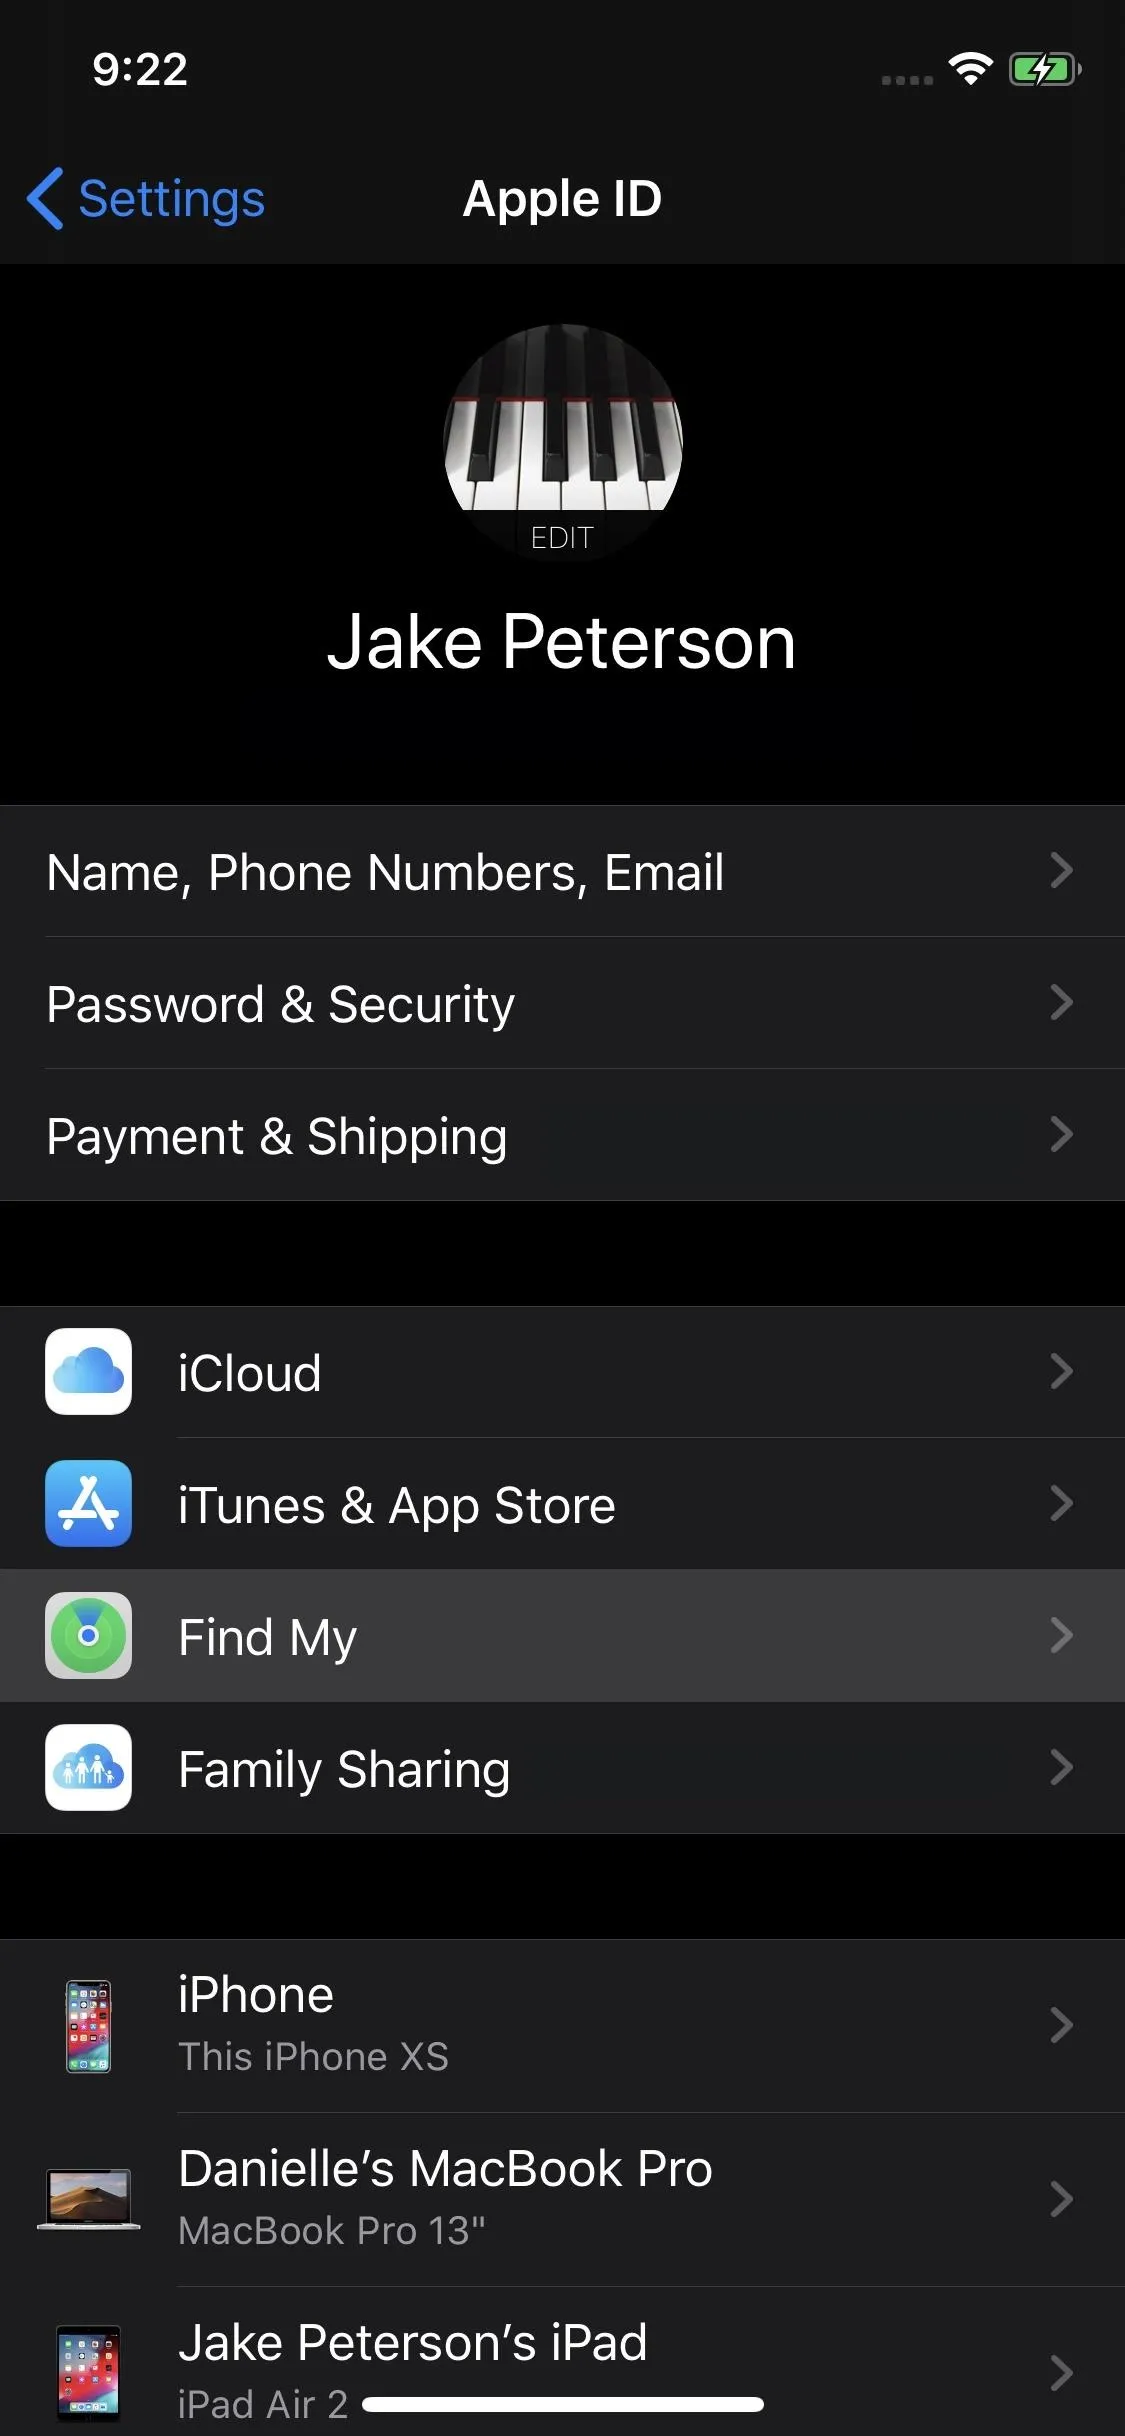
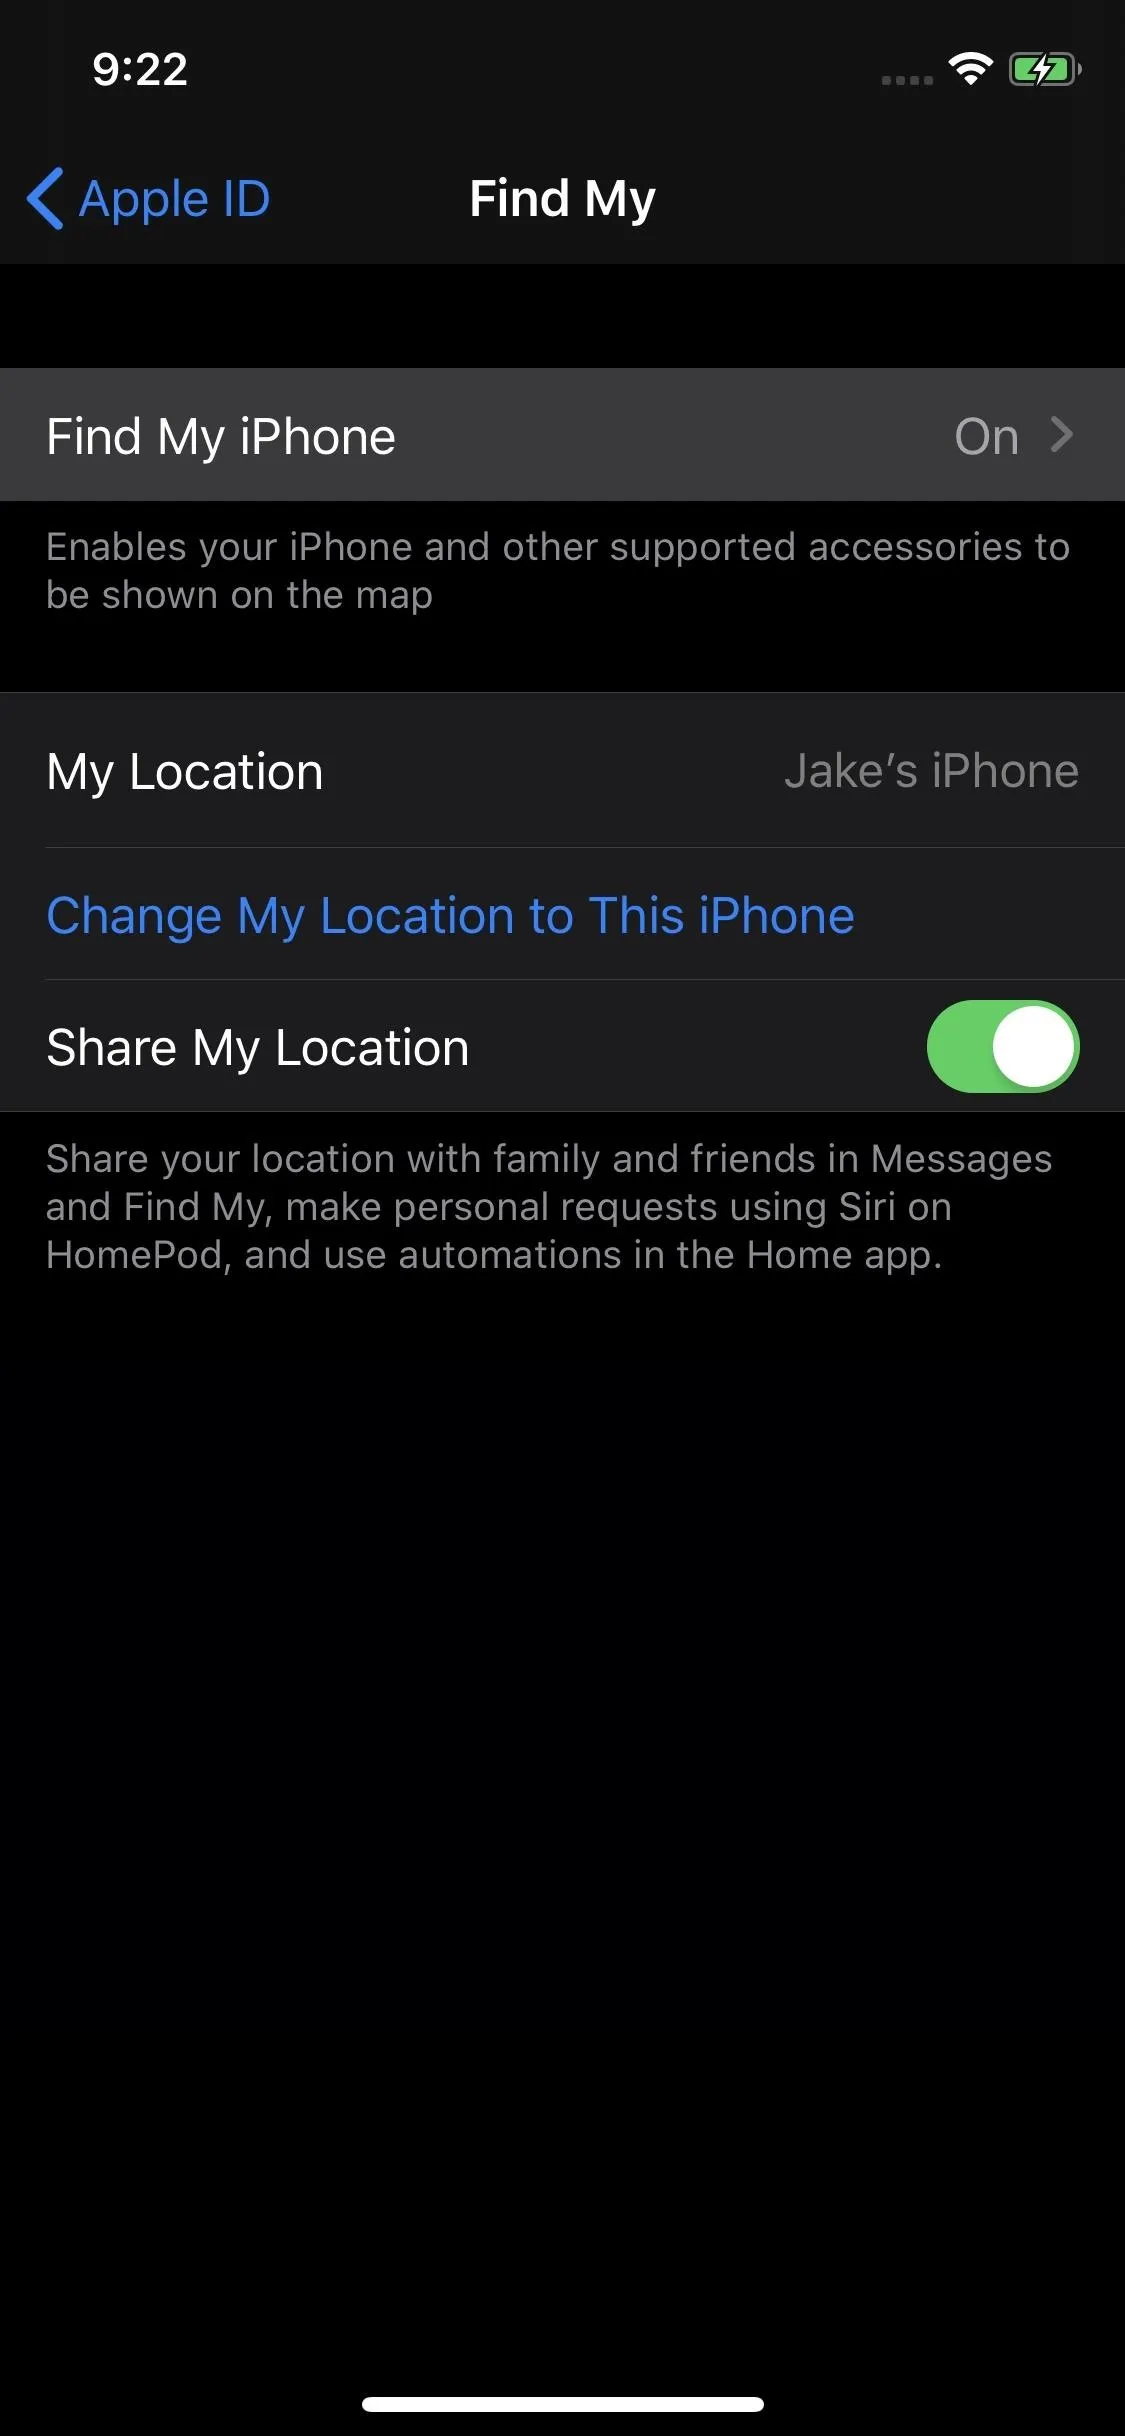
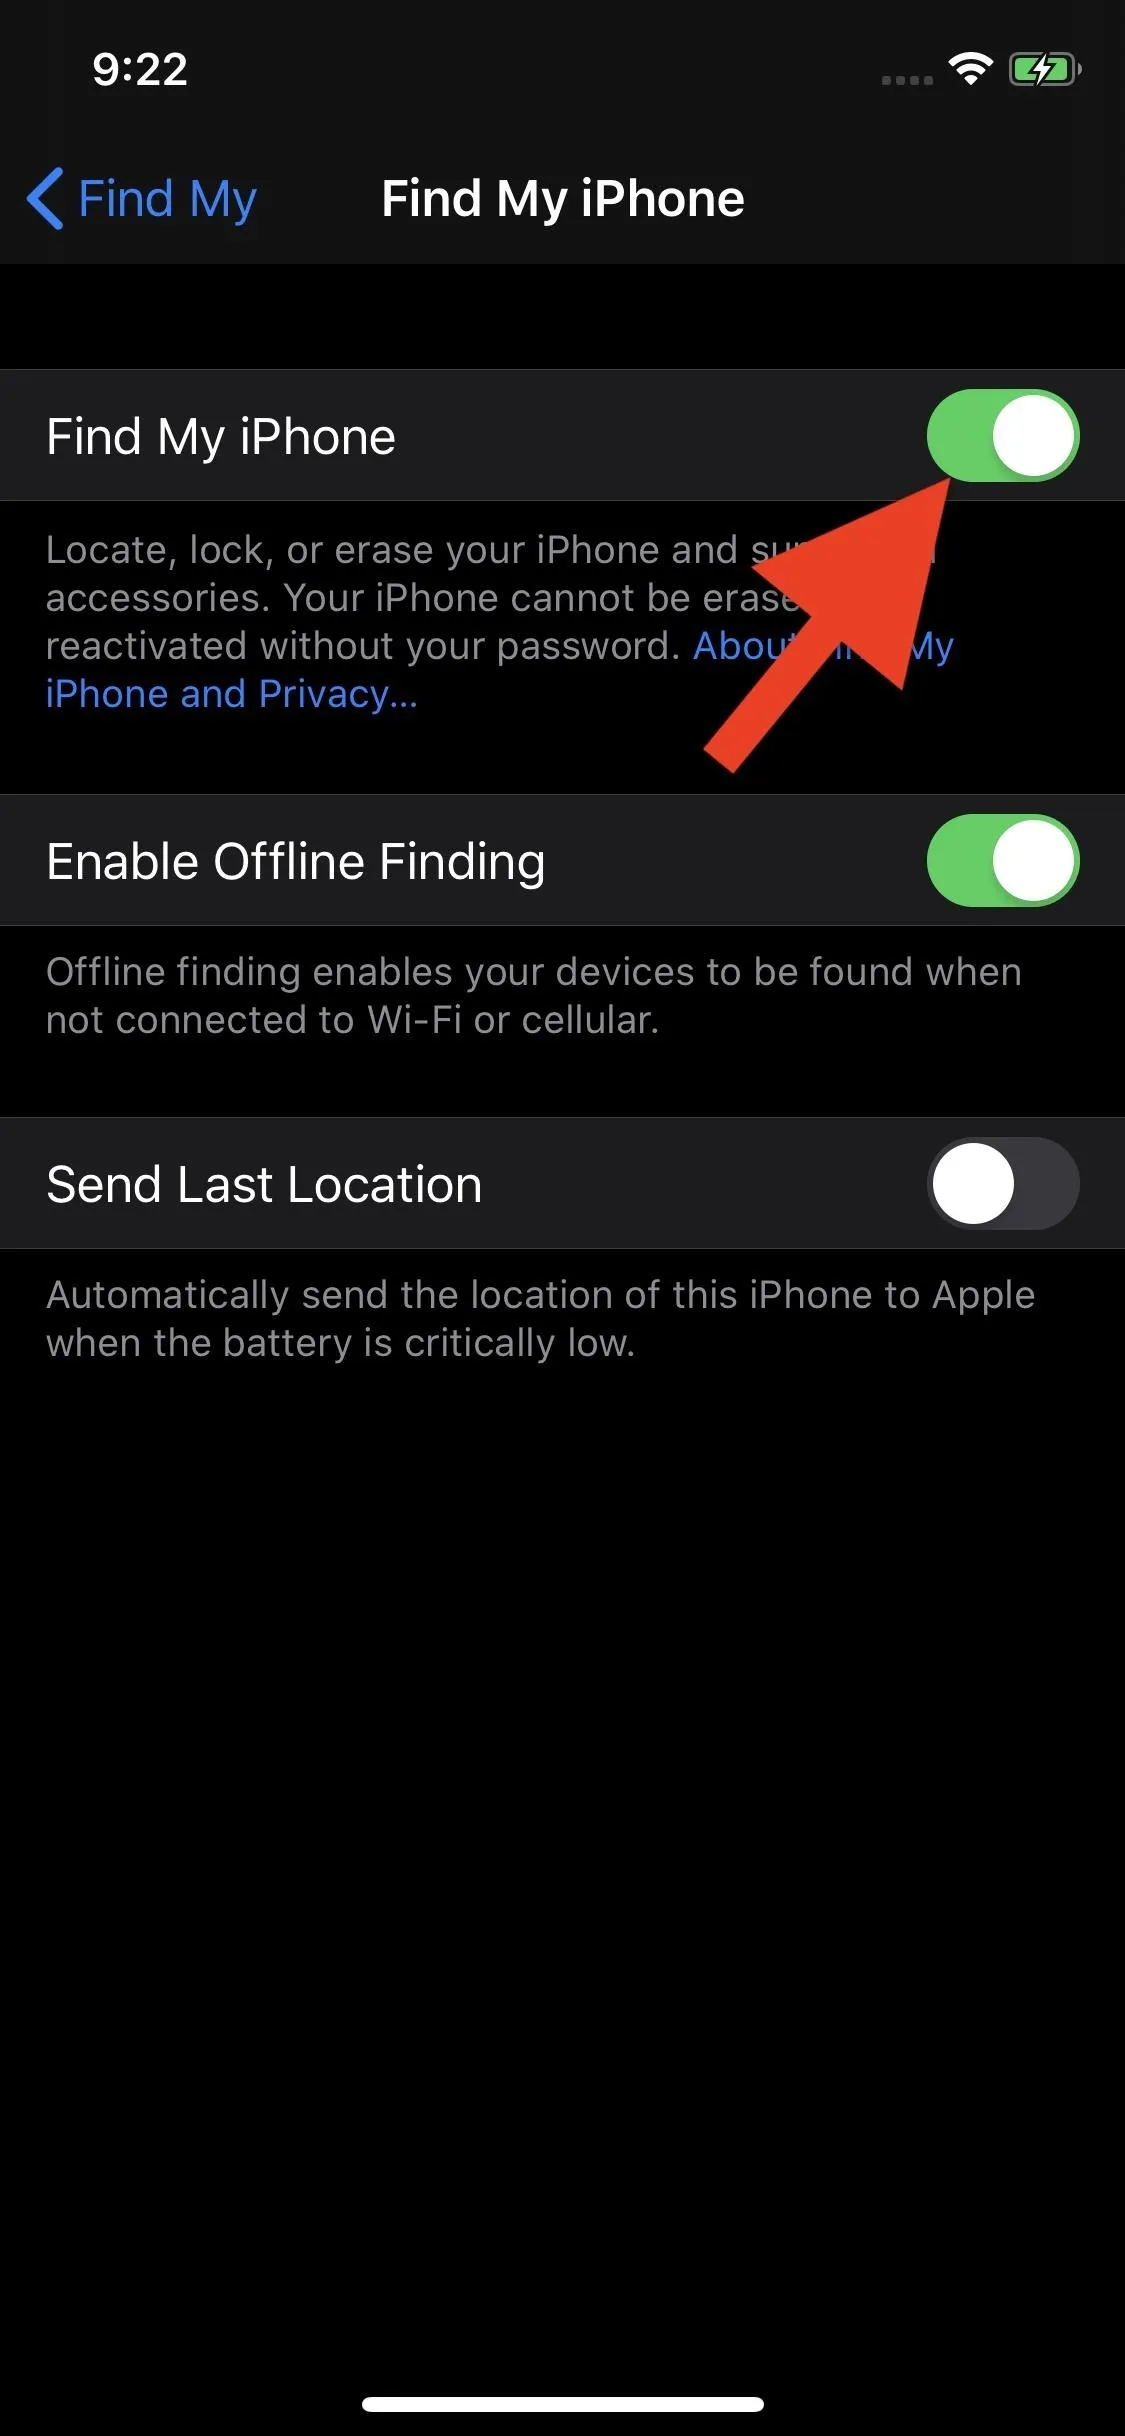
First, open "Settings," then tap your name at the top of the display, and choose "Find My" from the list. Next, tap "Find My iPhone," then tap the slider next to "Find My iPhone" to toggle it off. When prompted, enter your Apple ID and password, and iOS will disable Find My iPhone.


Download the Right Restore Image
Now, you need to download the restore image for your specific iPhone model onto your computer for iOS 12.4.1, which will be an IPSW file. Apple stopped signing iOS 12.3, 12.3.1, and 12.3.2 nine days after pushing out iOS 12.4 on July 22, as well as iOS 12.4 sixteen days after iOS 12.4.1's release on Aug. 26, so iOS 12.4.1 is all you can downgrade to.
While this guide focuses on iPhone, the process is the same for iPad and iPod touch when those updates are available, so we've included the restore images for those iOS devices as well. Don't be afraid if your download time is long — these files are large. On both macOS and Windows, you'll find your downloaded file in the "Downloads" folder.
iOS 12.4.1 Restore Images
- iPhone XS
- iPhone XS Max
- iPhone XR
- iPhone X
- iPhone 8
- iPhone 8 Plus
- iPhone 7
- iPhone 7 Plus
- iPhone 6s
- iPhone 6s Plus
- iPhone SE
- 12.9-inch iPad Pro (3nd generation)
- 12.9-inch iPad Pro (2nd generation)
- 12.9-inch iPad Pro (1st generation)
- 11-inch iPad Pro
- 10.5-inch iPad Pro
- 9.7-inch iPad Pro
- 9.7-inch iPad (6th generation)
- 9.7-inch iPad (5th generation)
- iPad Air (3rd generation)
- iPad Air 2
- iPad mini (5th generation)
- iPad mini 4
- iPad mini 3
Connect Your iPhone to iTunes or Finder
Once your IPSW has downloaded entirely, plug your iPhone into your Mac or Windows computer via a Lightning to USB or Lightning to USB-C cable.
Using iTunes
When using Windows or macOS 10.14.6 Mojave or lower, iTunes should open automatically. If it didn't, take a look at your iPhone's lock screen; If you find an "Unlock iPhone to Use Accessories" notification, unlock it. Additionally, you may see a prompt asking to "Trust This Computer" if it's the first time connecting to the machine — follow the on-screen instructions to trust it. Furthermore, iTunes might ask you to update iTunes to connect your device, so do so if you see that.
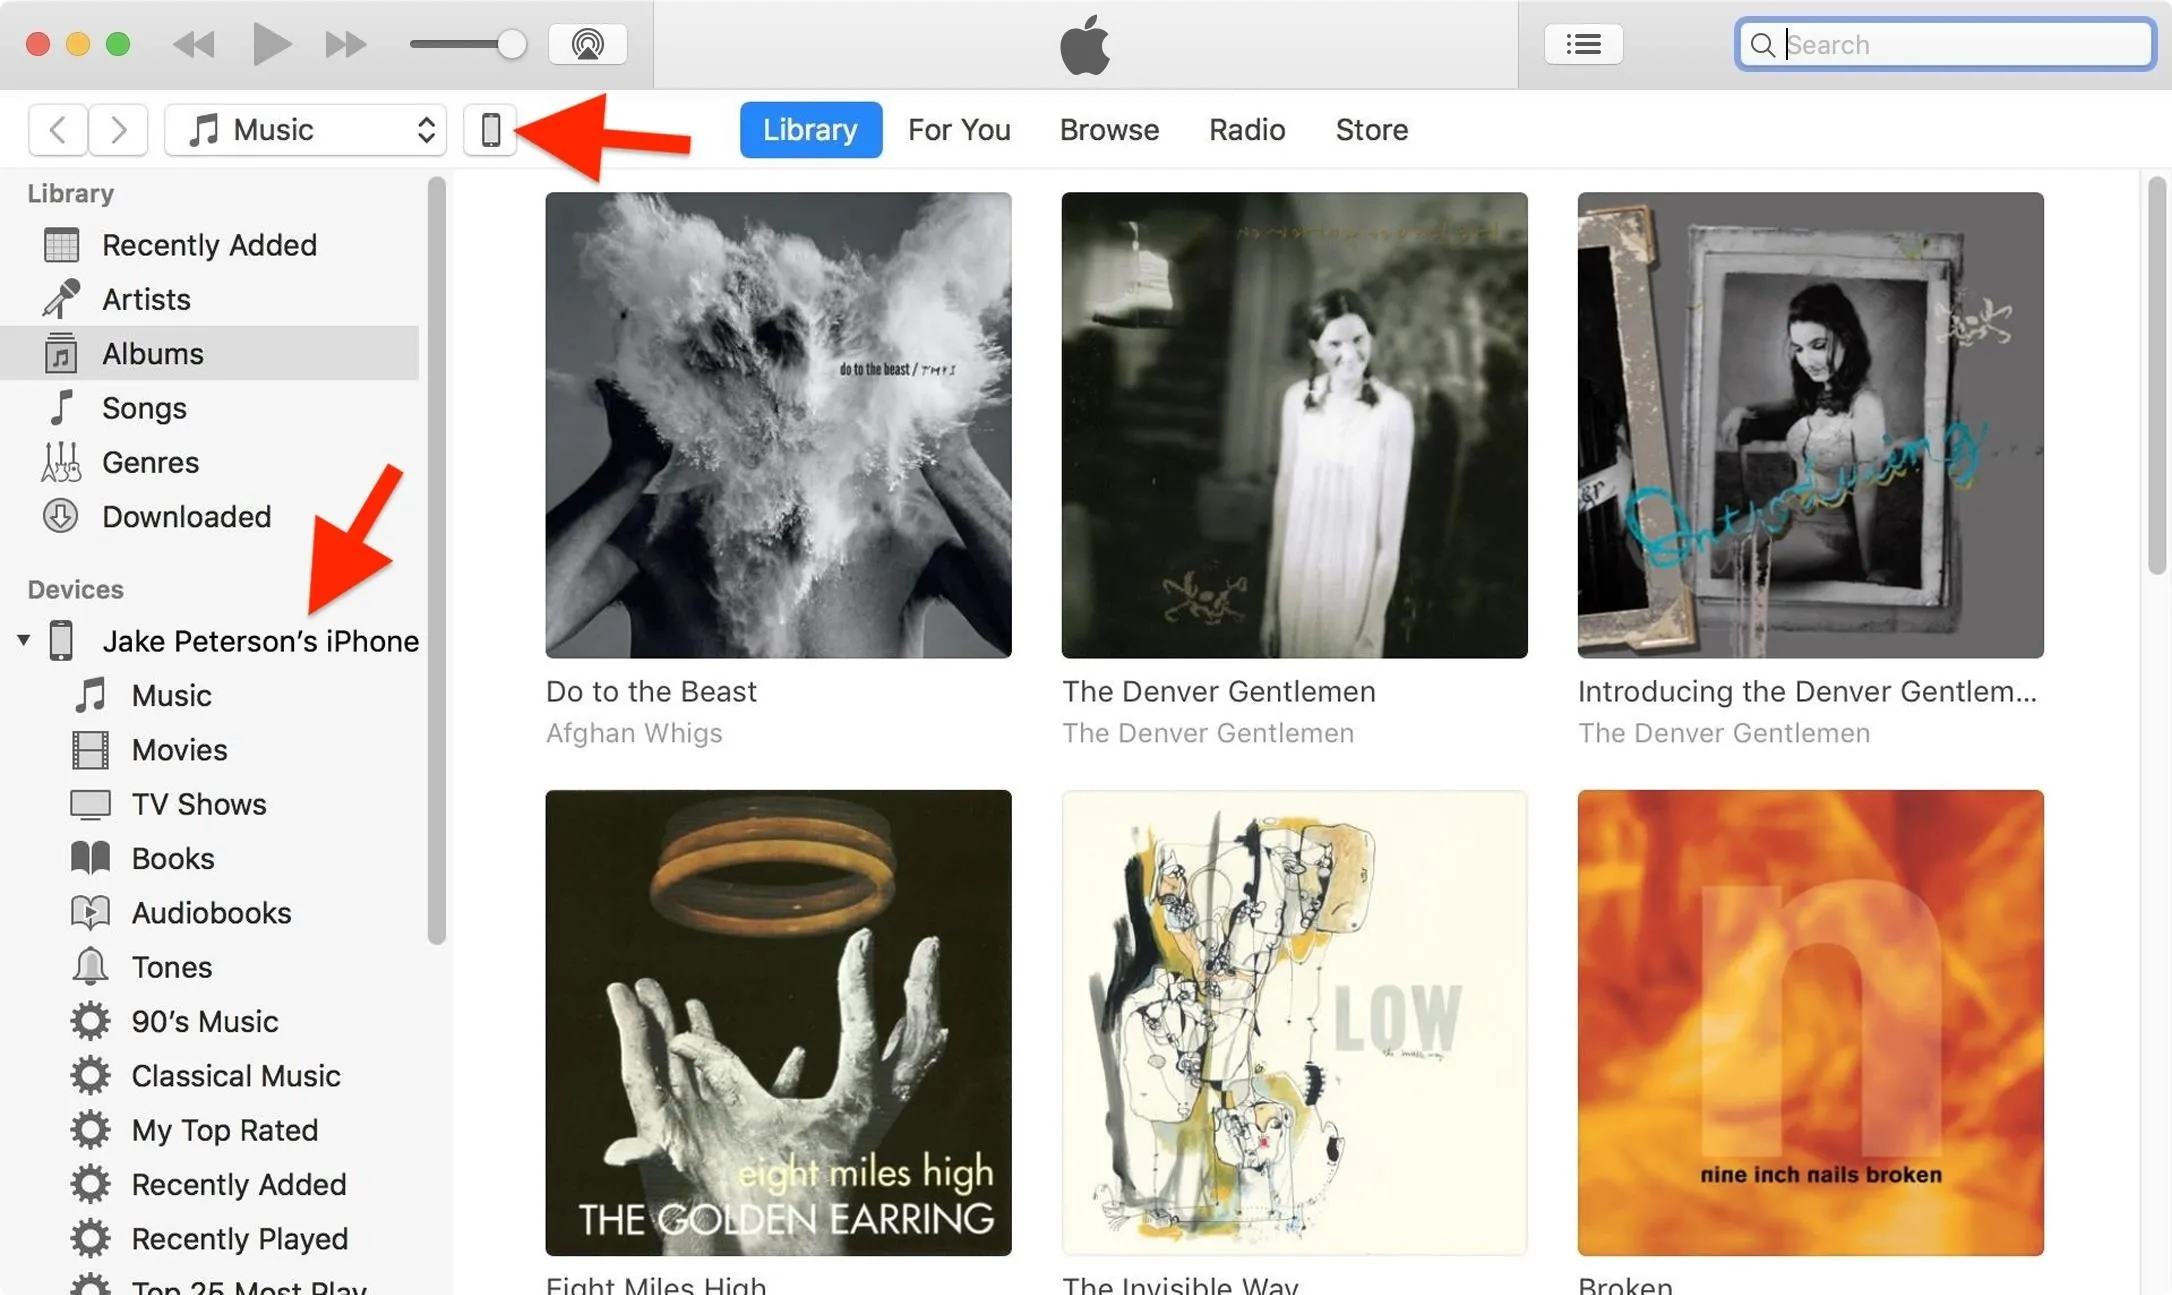
Once connected, the phone icon appears under Devices in the sidebar as well as next to the media dropdown. Click on either to open your device's Summary screen.
Using Finder
If you're running macOS 10.15 Catalina, you should see the iPhone appear as a drive in Locations in the Finder, since there is no iTunes app. As with iTunes, if it doesn't appear right away, look for an "Unlock iPhone to Use Accessories" notification on your iPhone, then unlock it.
Additionally, you may see a prompt asking to "Trust This Computer" if it's the first time connecting to the machine — follow the on-screen instructions to trust it. ("Trust iPhone" may also appear when you select your iPhone in Finder.) Furthermore, iTunes might ask you to update iTunes to connect your device, so do so if you see that.
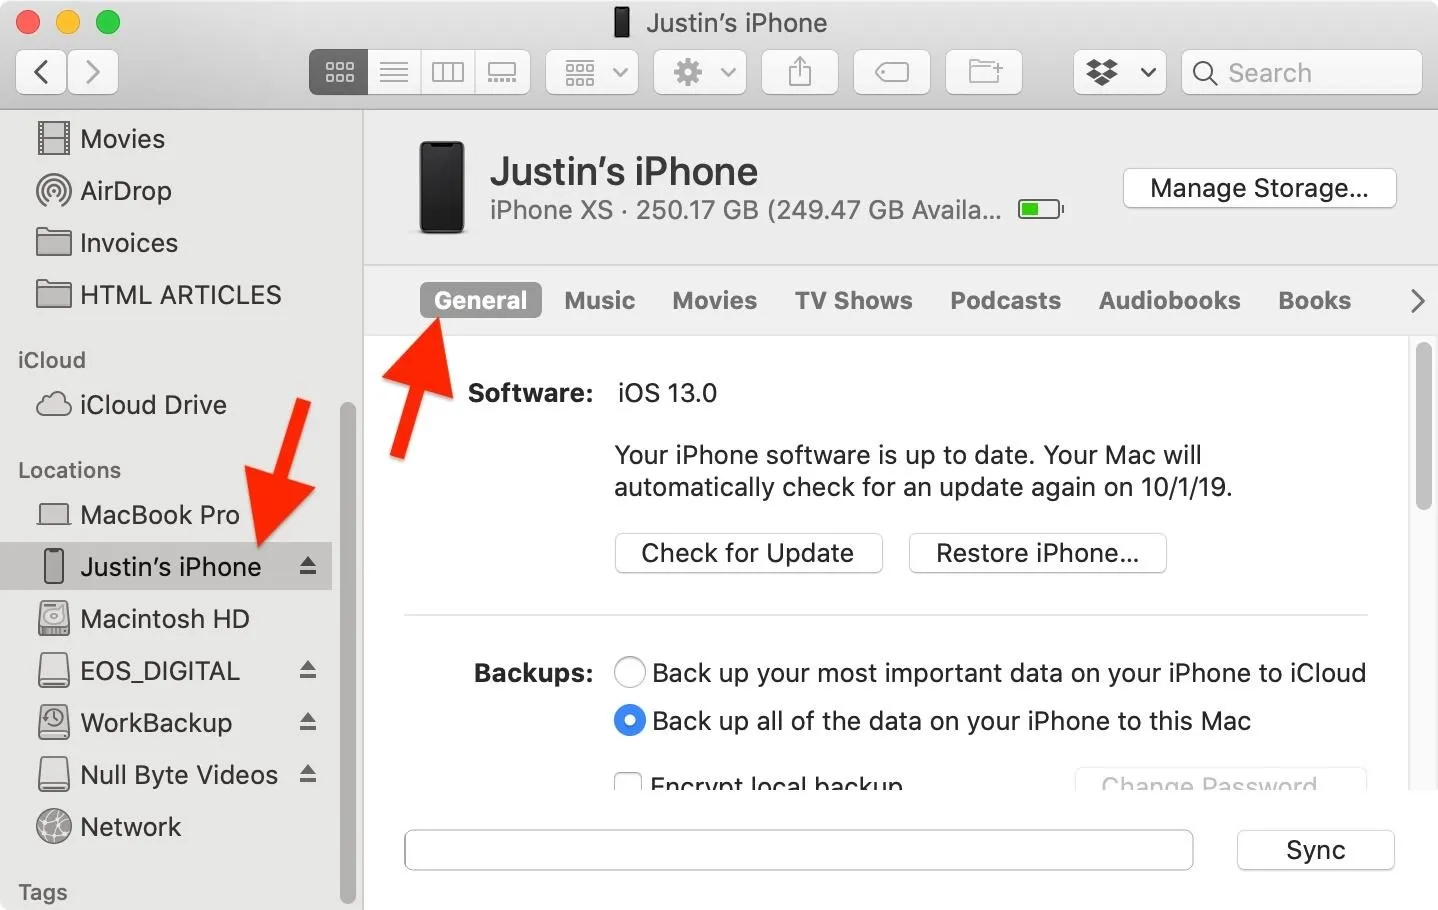
Click on your iPhone from the sidebar in Finder, which will show up under the Locations section, or double-click on it from your Desktop. Then, make sure you're on the "General" tab.
Install the Older iOS Version
Whether you're using iTunes or Finder, the process is pretty much the same, but we've separated the directions to make it easier to follow along.
Using iTunes
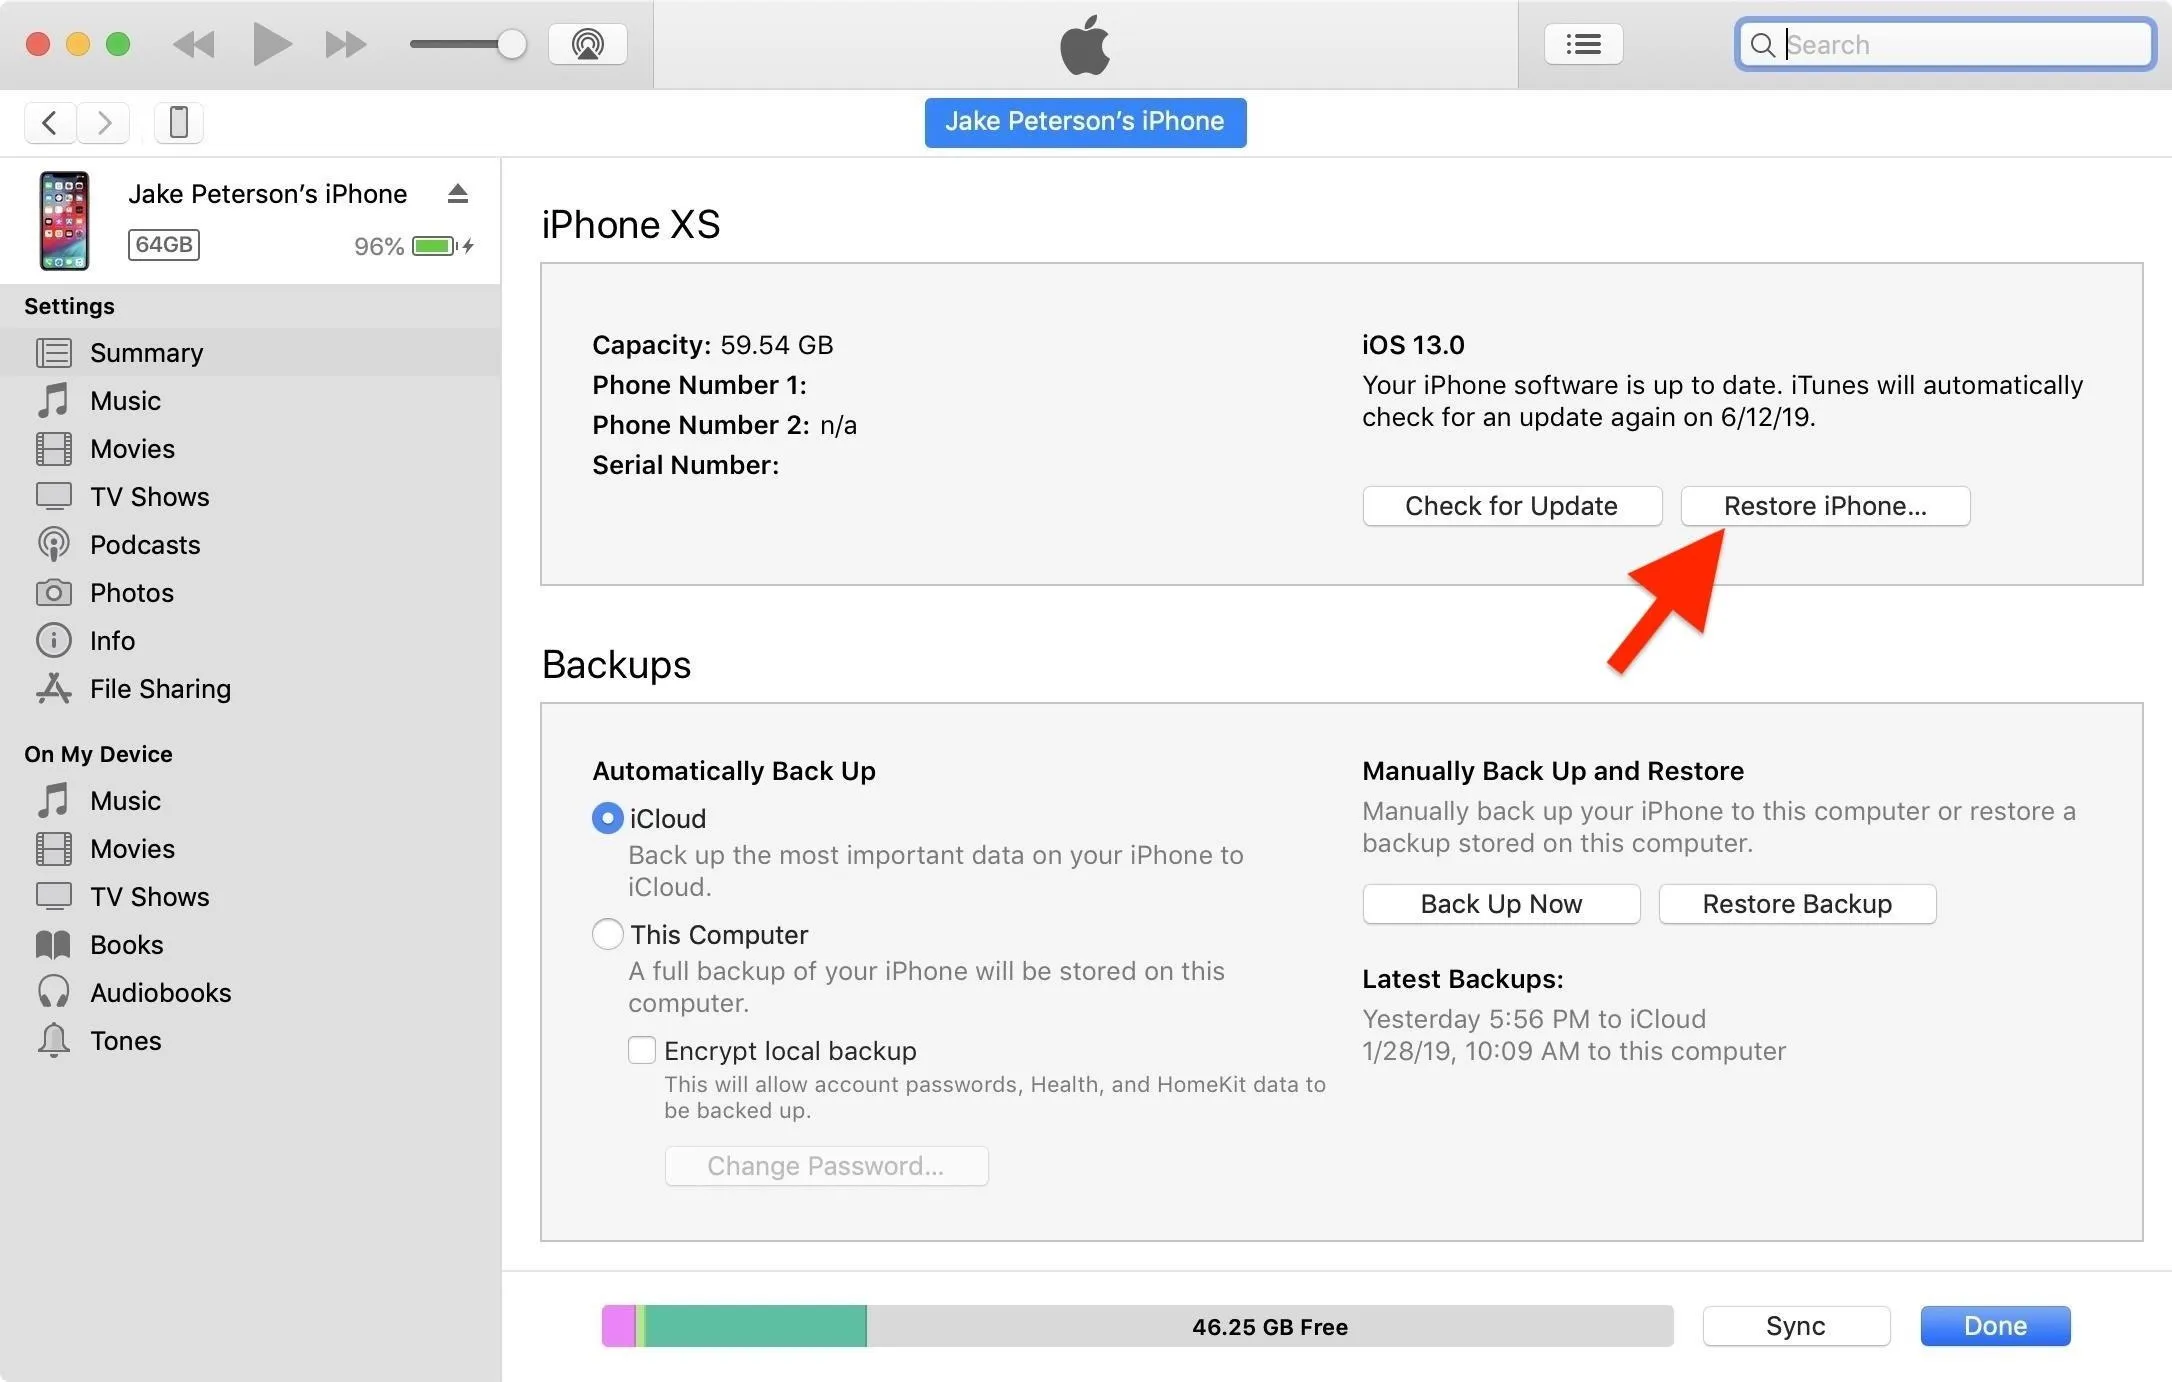
If on a Mac, hold down the Option key, then click "Restore iPhone" in the Summary page in iTunes. On a Windows PC, do the same but hold down Shift instead.
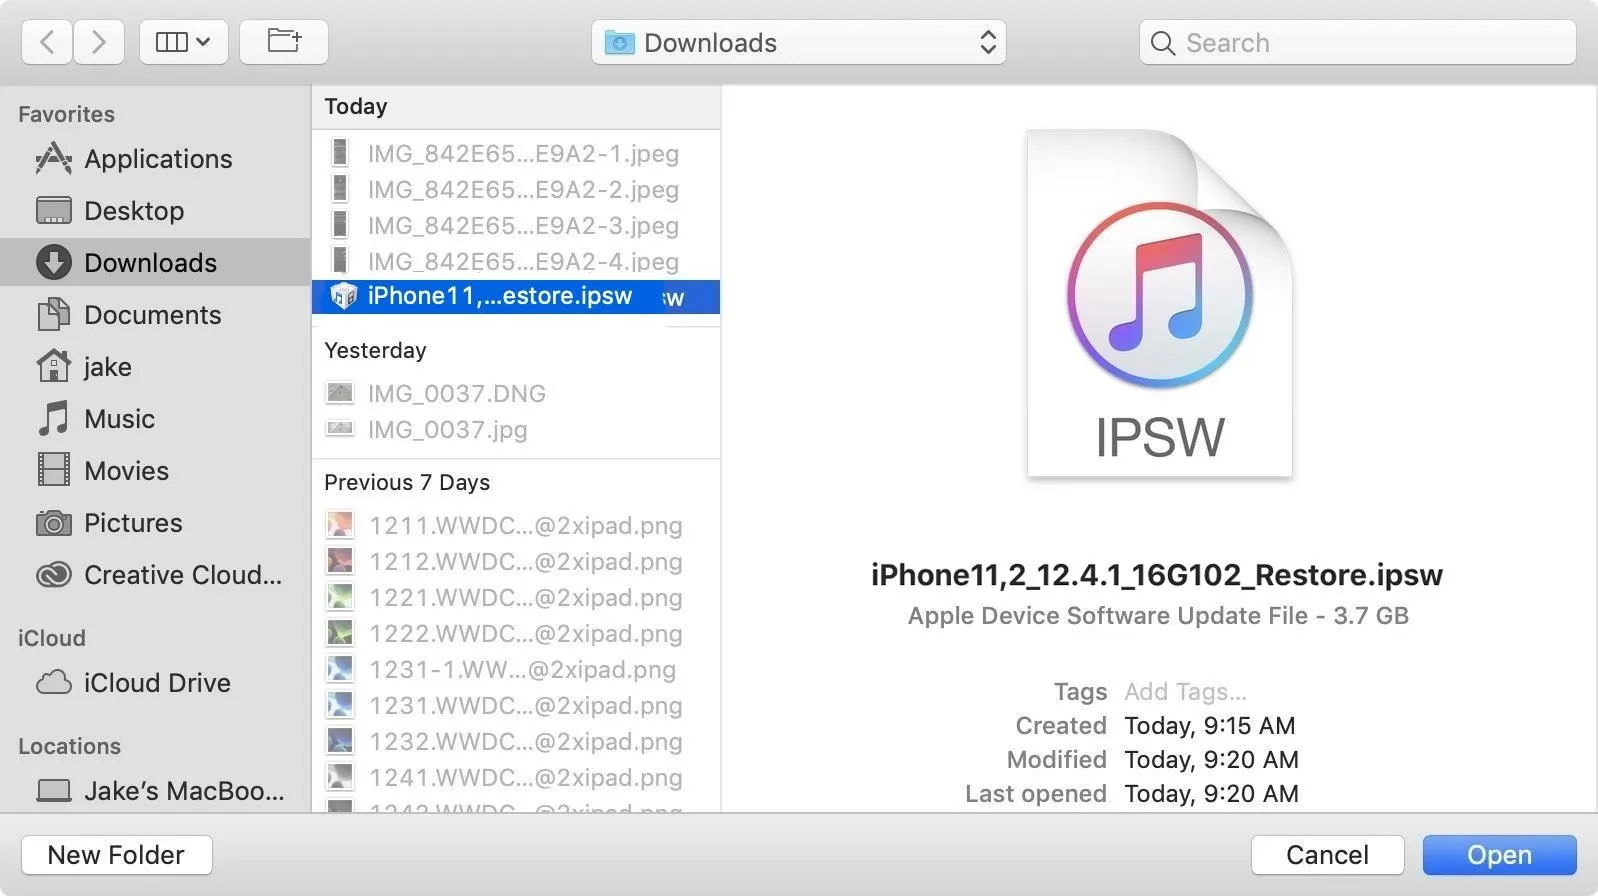
Here, you'll see a file browser menu pop up. Locate your downloaded IPSW file, select it, then click "Open."
Now, you'll see a pop-up letting you know that iOS 12.4.1 will be installed on your iPhone, overwriting iOS 13. Select "Restore" here to confirm the process. Make sure to keep an eye on your iPhone, as it might as you to enter your passcode somewhere during the installation.

Don't unplug your iPhone from your computer until it reboots, and the iOS 12.4.1 welcome screen appears. Once that happens, feel free to disconnect.
Using Finder
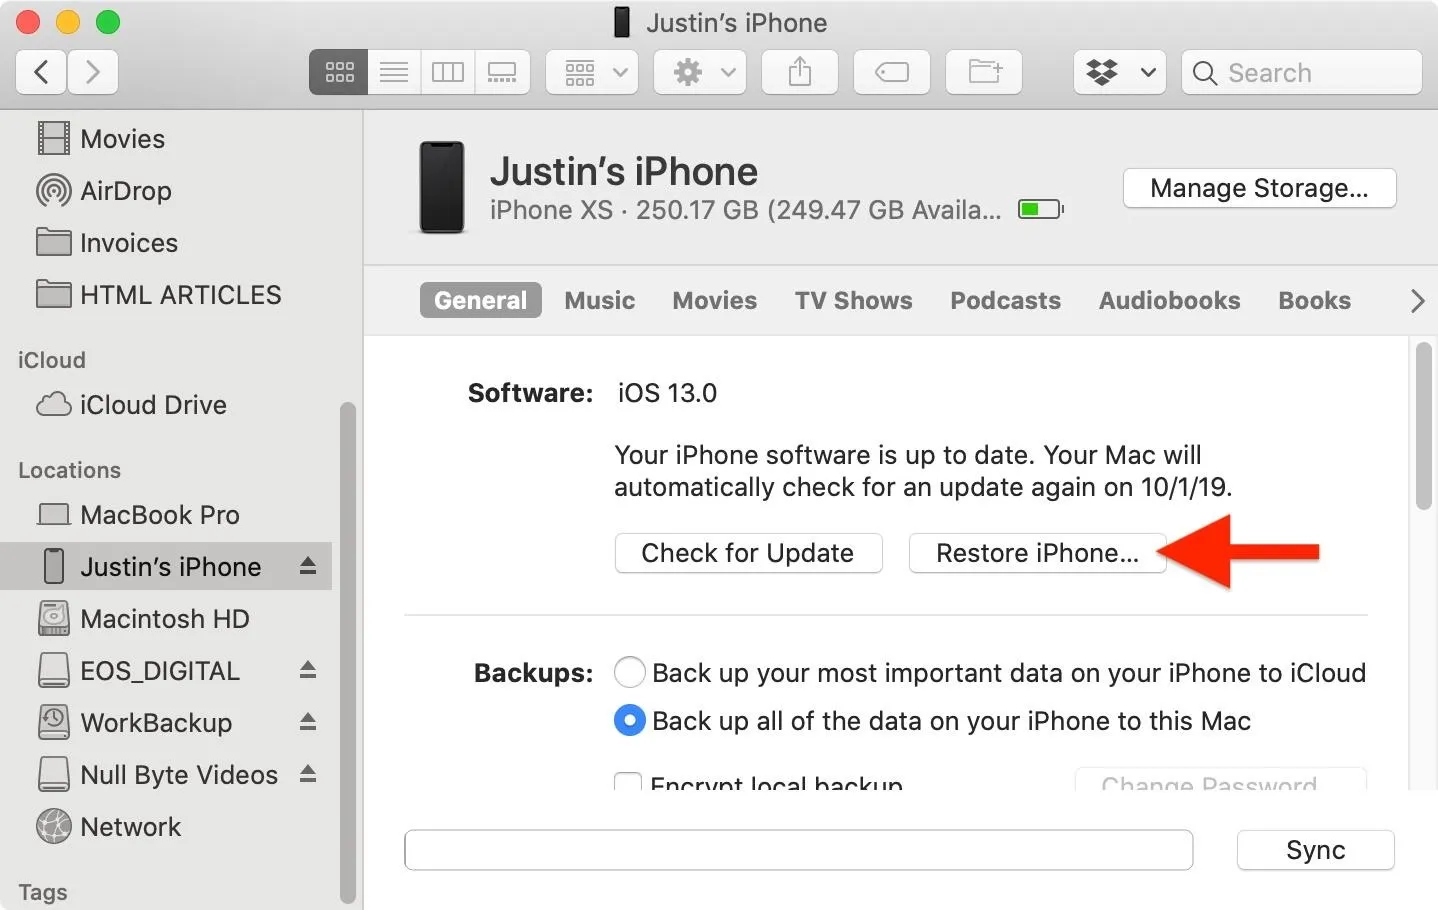
If on a Mac, hold down the Option key, then click "Restore iPhone" in the General page in Finder.
You'll see a file browser menu pop up. Locate your downloaded IPSW file, select it, then click "Open."
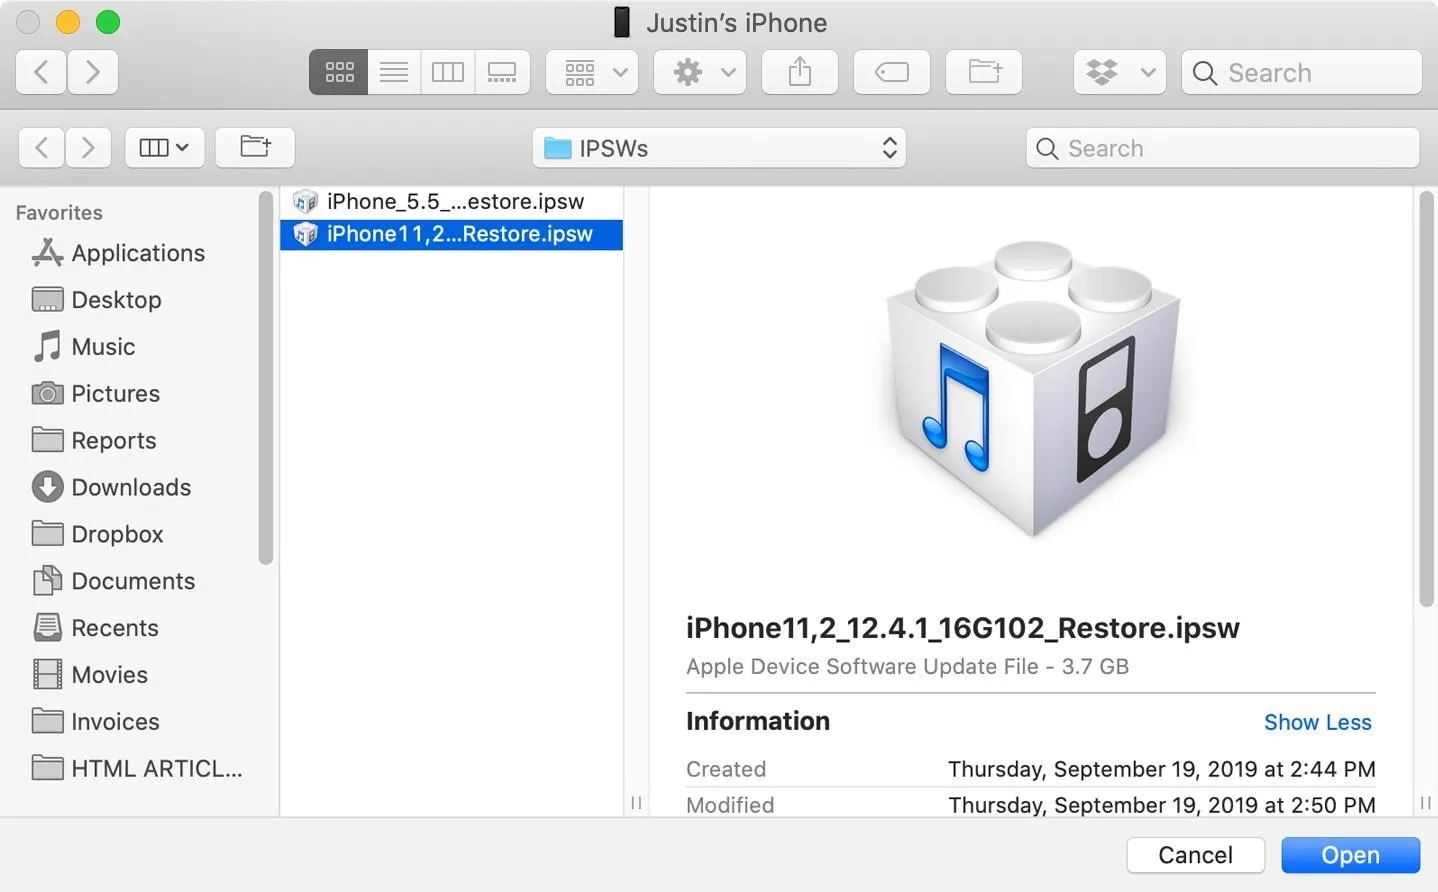
Now, a pop-up appears to let you know that iOS 12.4.1 will be installed on your iPhone, overwriting iOS 13. Select "Restore" here to confirm. Make sure to keep an eye on your iPhone, as it might as you to enter your passcode somewhere during the installation.
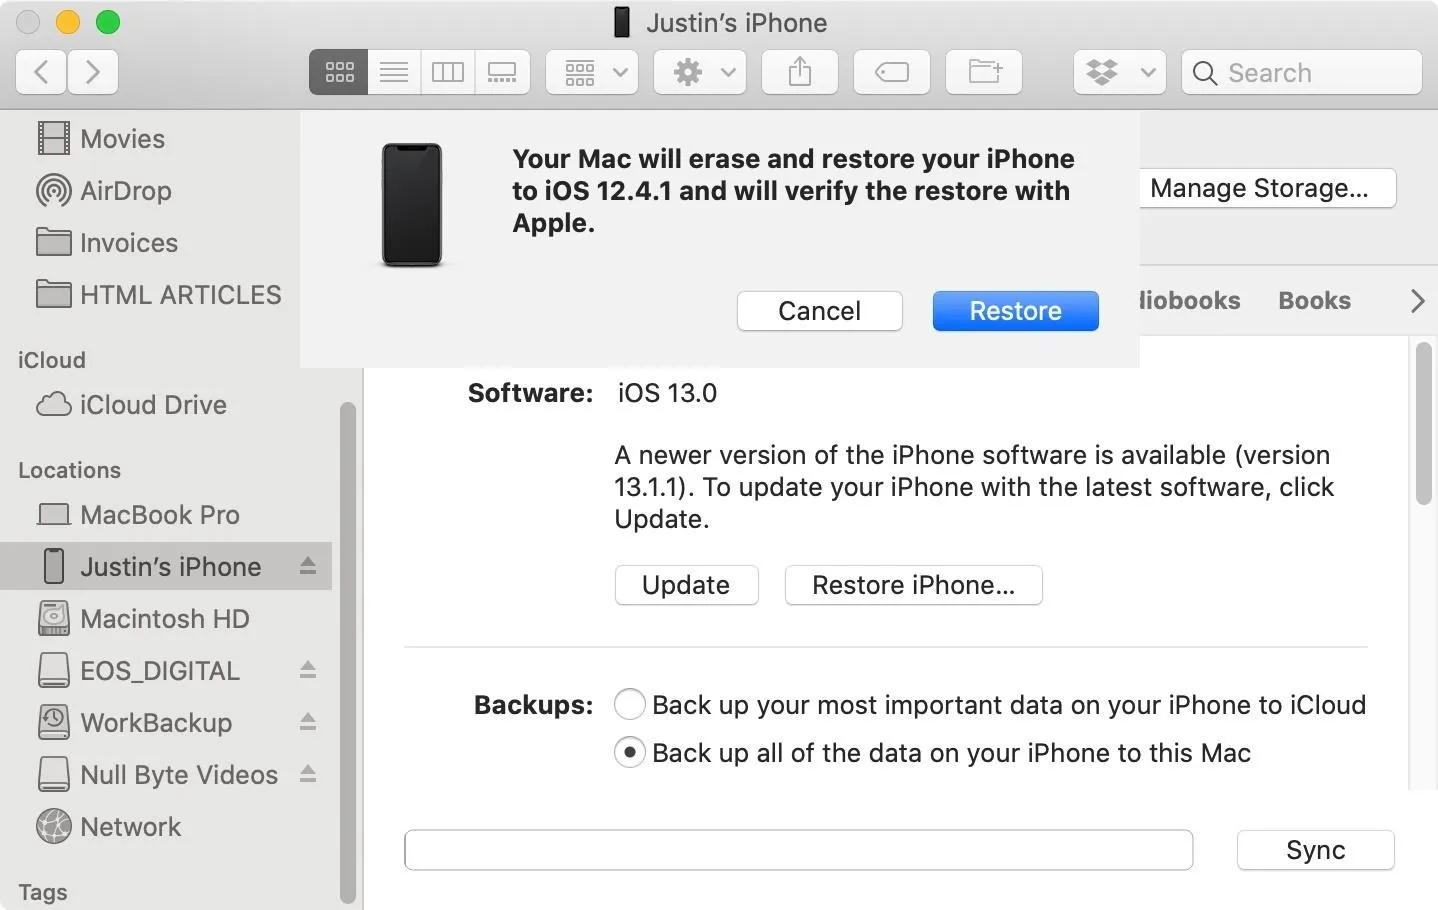
Don't unplug your iPhone from your computer until it reboots, and the iOS 12.4.1 welcome screen appears. Once that happens, feel free to disconnect.
Restore Your iPhone from a Backup
Since you downgraded your iPhone with a restore image, all of your data will be lost. If you have a compatible backup, either in iCloud or iTunes, use the following steps to get back up and running with all your photos, settings, and other data.
- If you want your iPhone to feel fresh-out-of-the-box, select "Set Up as New iPhone."
- If you want your saved apps and data restored, try "Restore from iCloud" if you have a completed backup for iOS 12.4 or 12.4.1. If your backup was made with iOS 13, iOS would make you update back to iOS 13, so you may have to start from scratch anyway with "Set Up as New iPhone."
- If you made an archived backup in iTunes for 12.4 or 12.4.1, you can try "Restore from iTunes Backup."
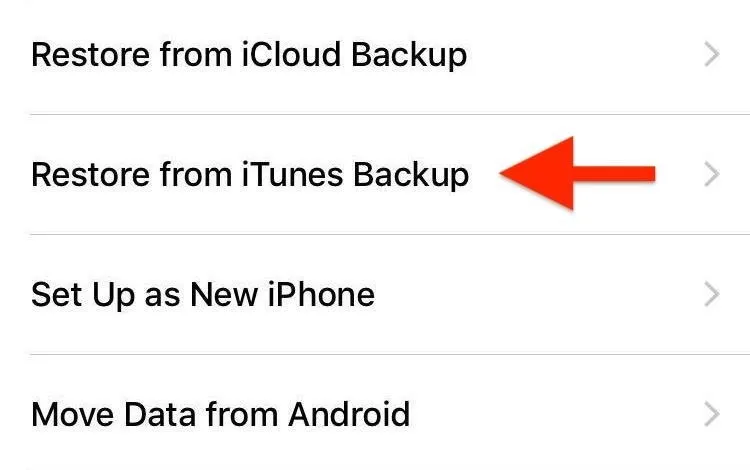
If you choose to restore your iPhone from an archived backup, you'll need to stay connected to iTunes and select your iPhone on the display. This time, however, click "Restore Backup," select your archived backup from the list, then click "Restore." You'll know if it's an archived backup if you see the date and time in the actual backup name itself.
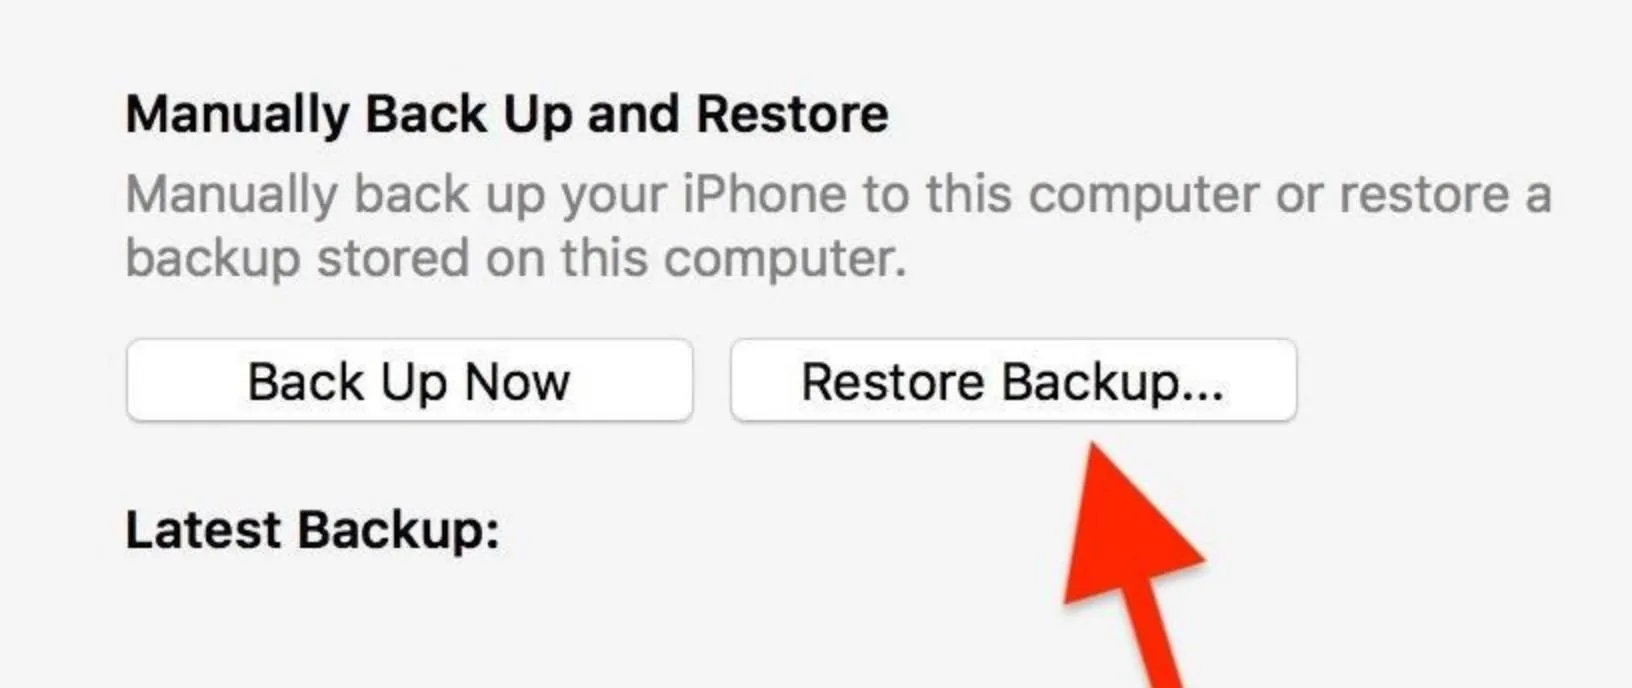
If you encrypted your 12.4 or 12.4.1 backup, you'd need to enter your password to continue. Now, wait for the restore to finish before unplugging your iPhone from your computer. Once syncing is complete, your iPhone will be running your iOS 12 version with all data restored.
Cover image and screenshots by Jake Peterson/Gadget Hacks


Comments
Be the first, drop a comment!