Many apps on your iPhone want to use your location, most of which are for valid reasons. But some apps can function perfectly fine without location permissions, while others have no business even requesting it. If you want to be more selective about which apps and services you give away your coordinates to, the best thing you could do is start from scratch.
Most navigation and weather apps need location permissions to function correctly, while social media apps may want it to help you discover things around you or to help geotag photos and videos that you post. For everything else, it pays to be suspicious of their intentions. Even for the apps that need it to work as intended, you may want to research as to why they need your geocoordinates.
To go back manually and check every app that has your permission to use location data, you have to go Settings –> Privacy –> Location Services, then open each app in the list and read the "app explanation" each app gives. If you have hundreds of apps, it could take a while to verify which apps you want and don't want to know your position in the real world. Plus, the reasons given aren't always to be trusted. Those apps still could use, store, and sell your private location information to advertisers, investment firms, and more.
If you have a better sense of how you want to share your location with apps and services, it's easier just to reset all of your location settings. That way, every app will ask for location permissions again, so you can give or deny it on a case by case basis — just whenever you need to use the app next.
View Location Permissions for Each App (Optional)
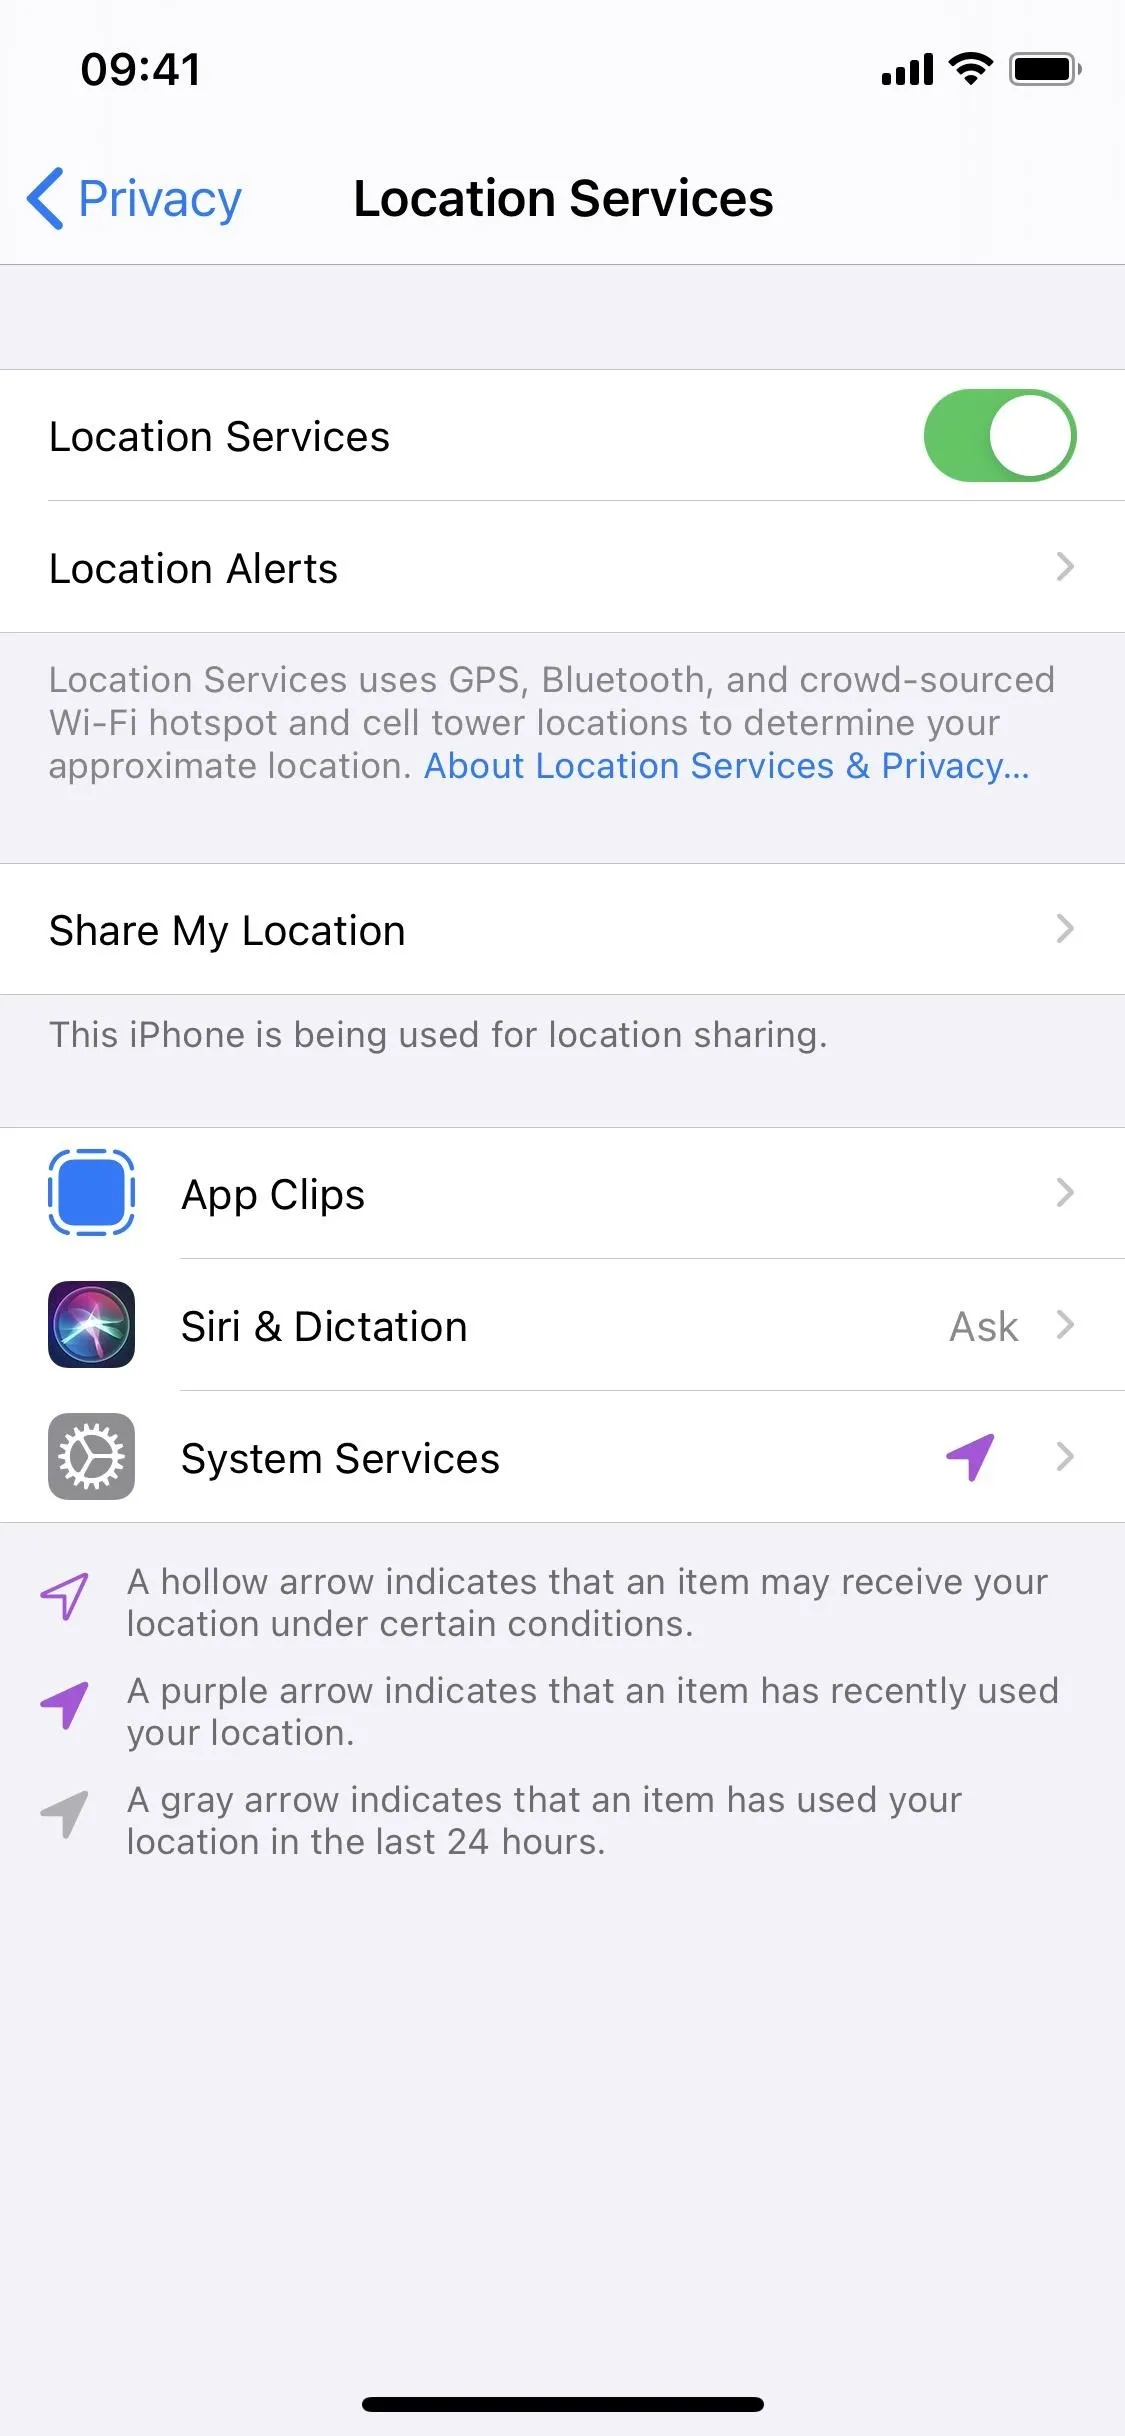
You can skip this step, but if you're interested in knowing every single app that's using your iPhone's location, you can at least browse the Location Services settings via Settings –> Privacy.
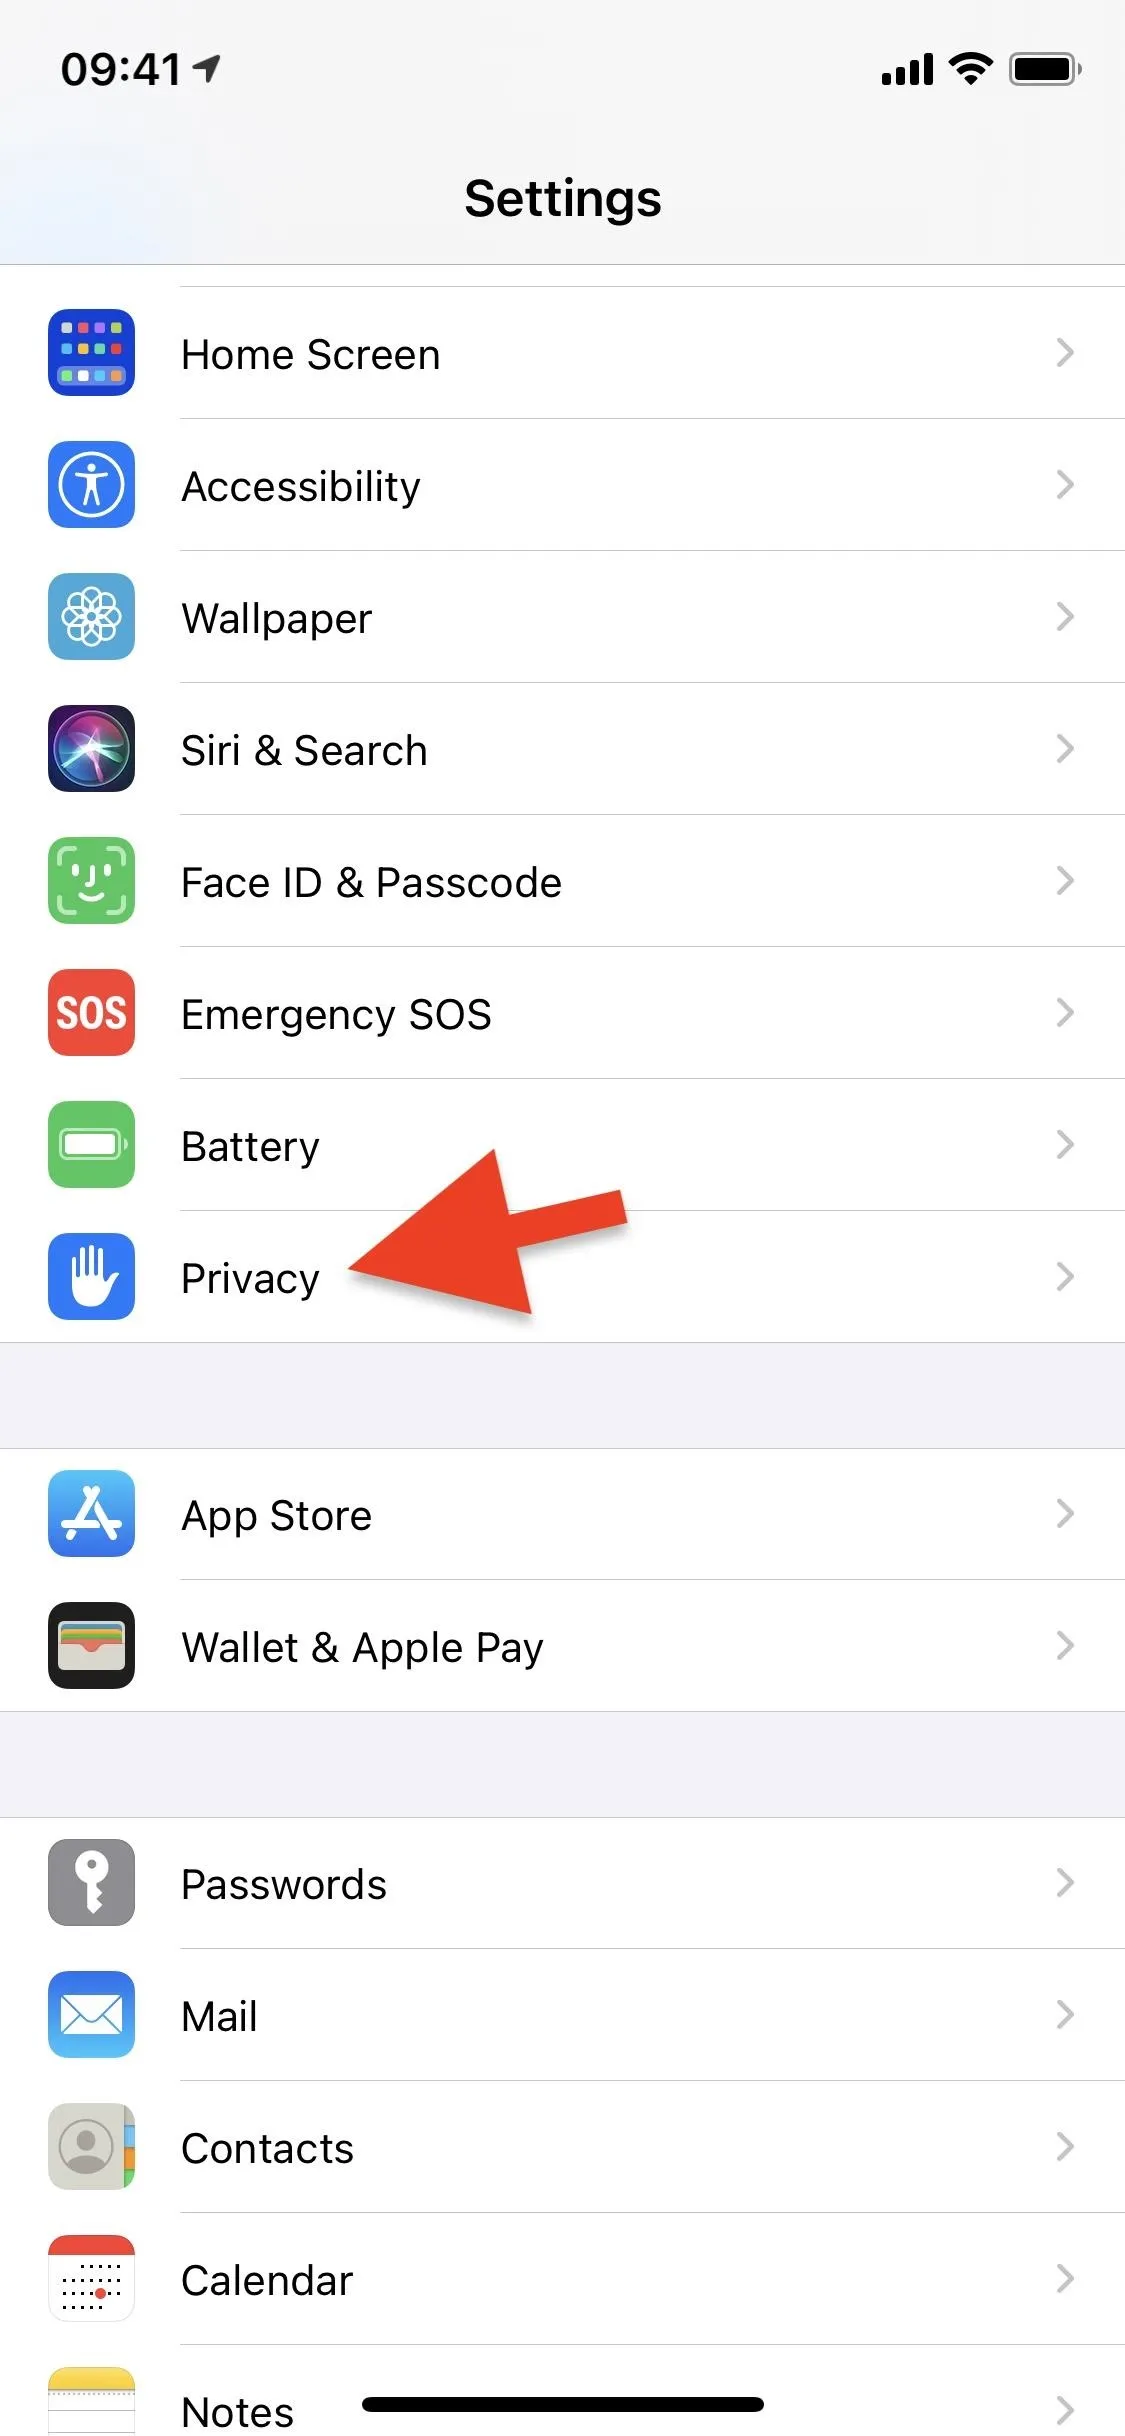
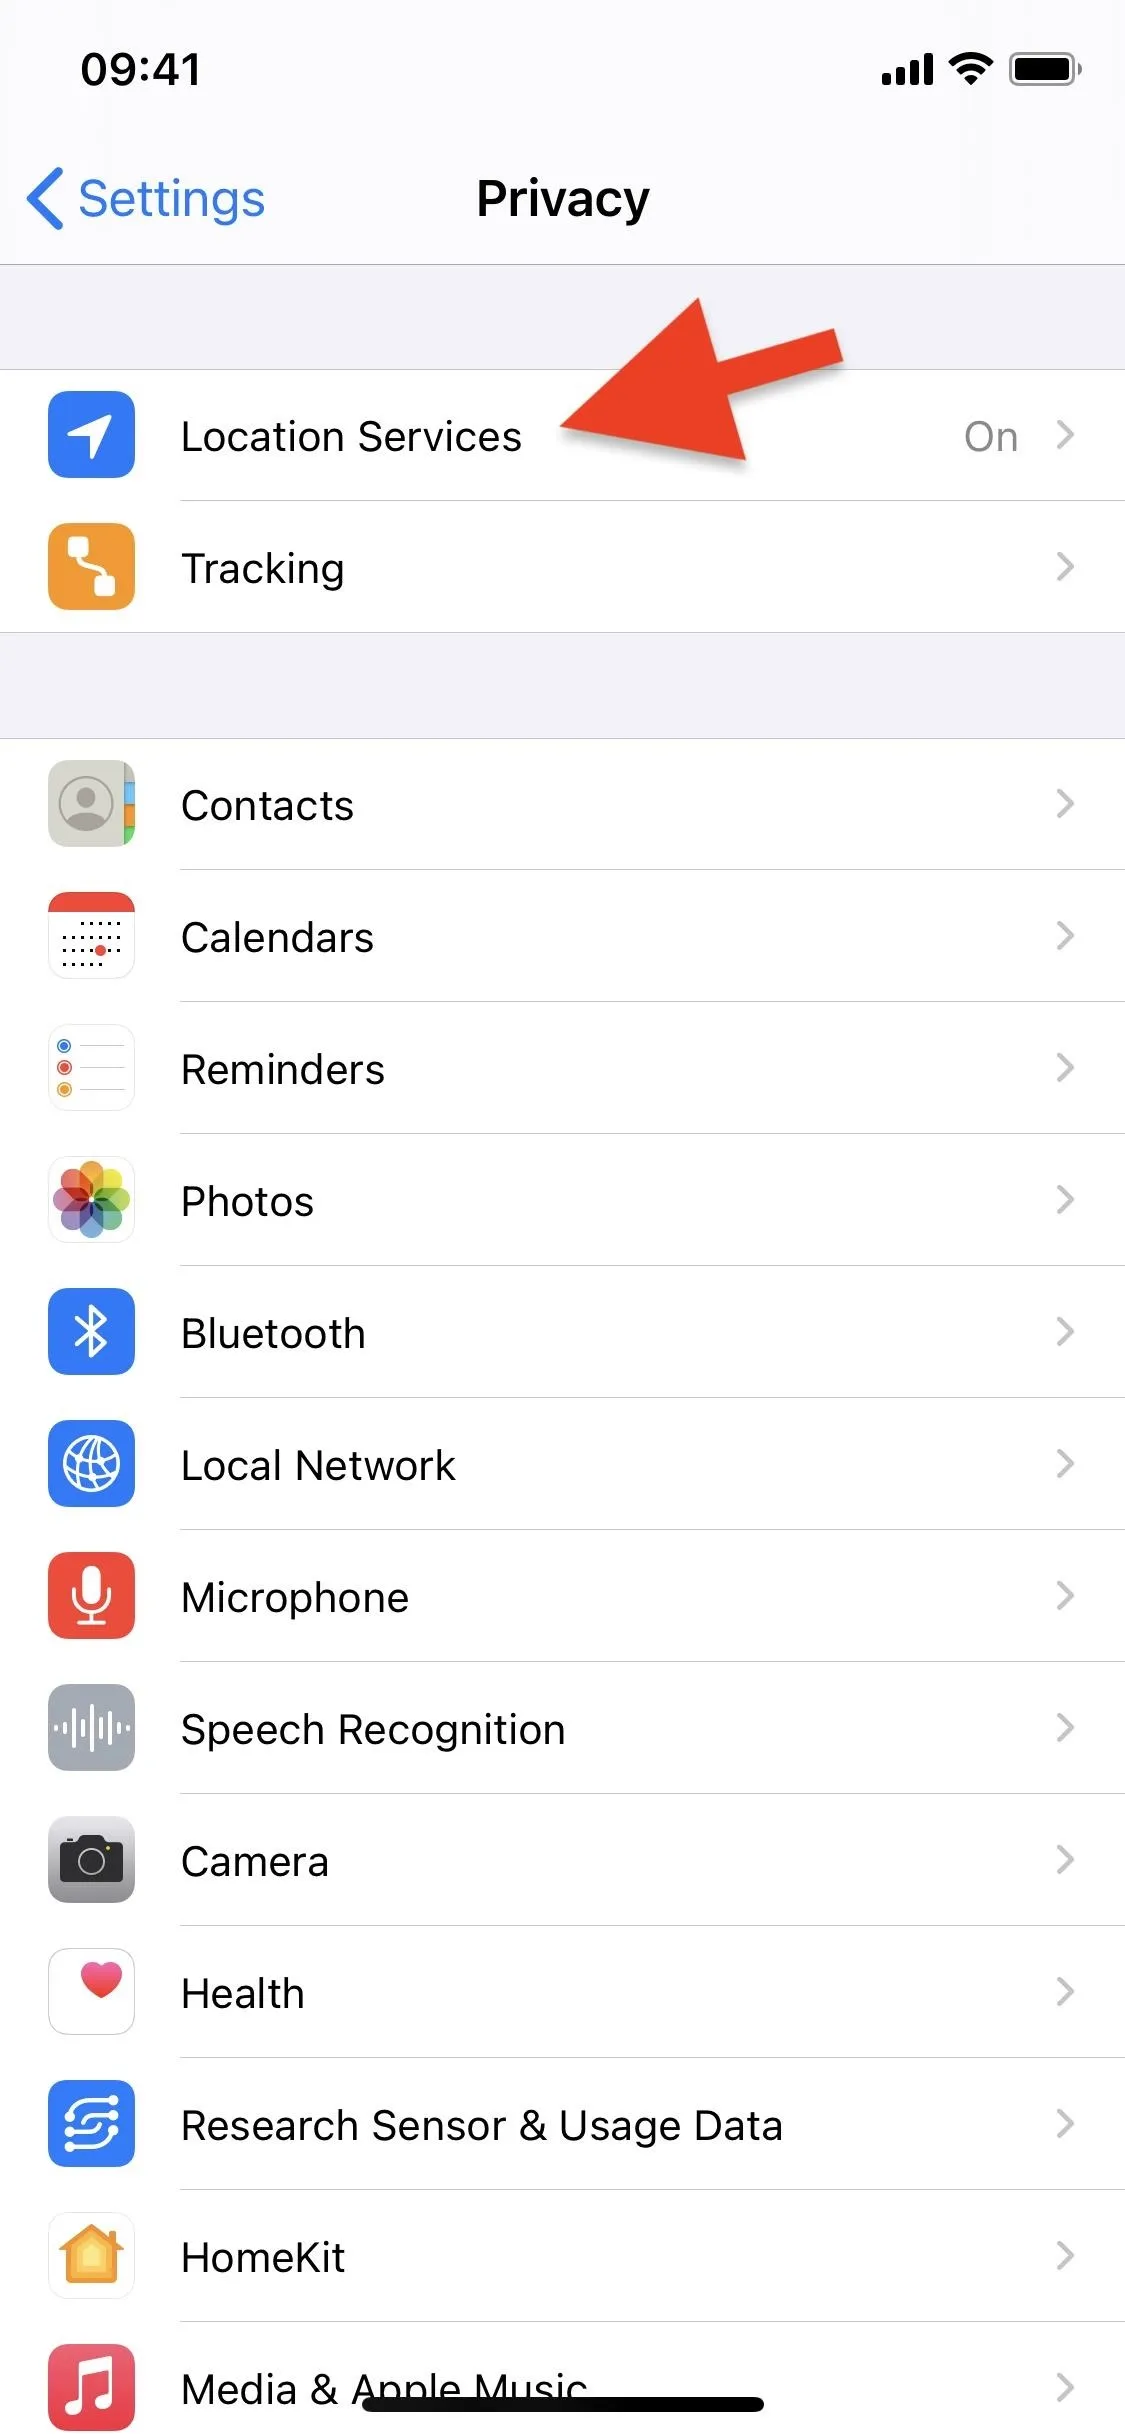


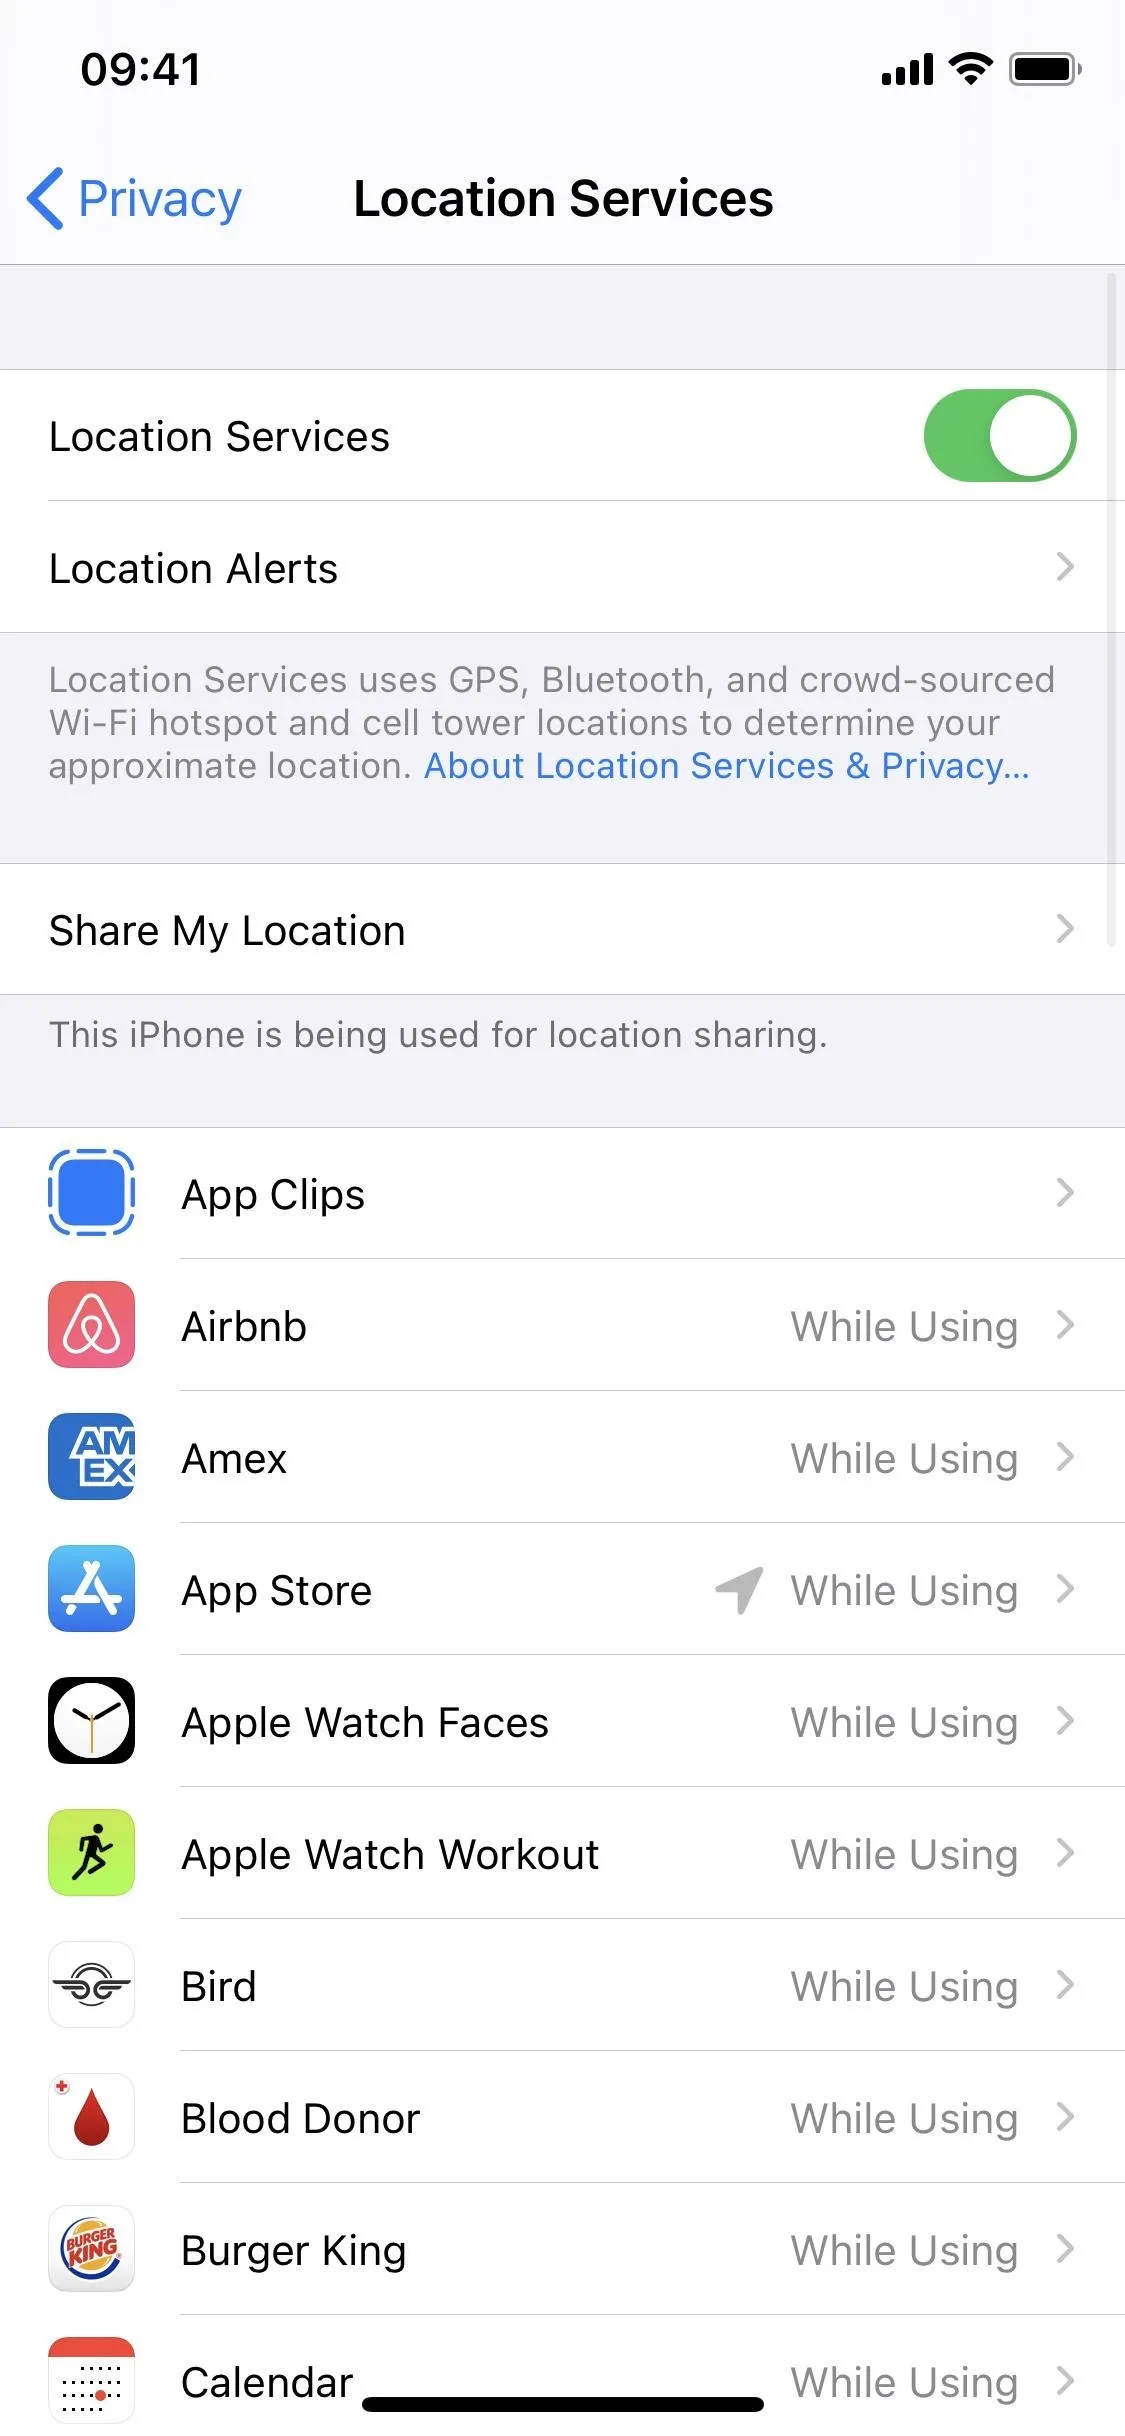
Here, you'll see every single native and third-party app using your location. You can even disable location services altogether, but we don't recommend that since a ton of your apps would stop working correctly.
As mentioned before, there's also the option to manage location services on a per-app basis, and it should tell the reasoning behind each request. But if you have hundreds of apps, doing so could take a while. That's why you might want to reset everything simultaneously so that every single app has to ask for permission to track your location again.
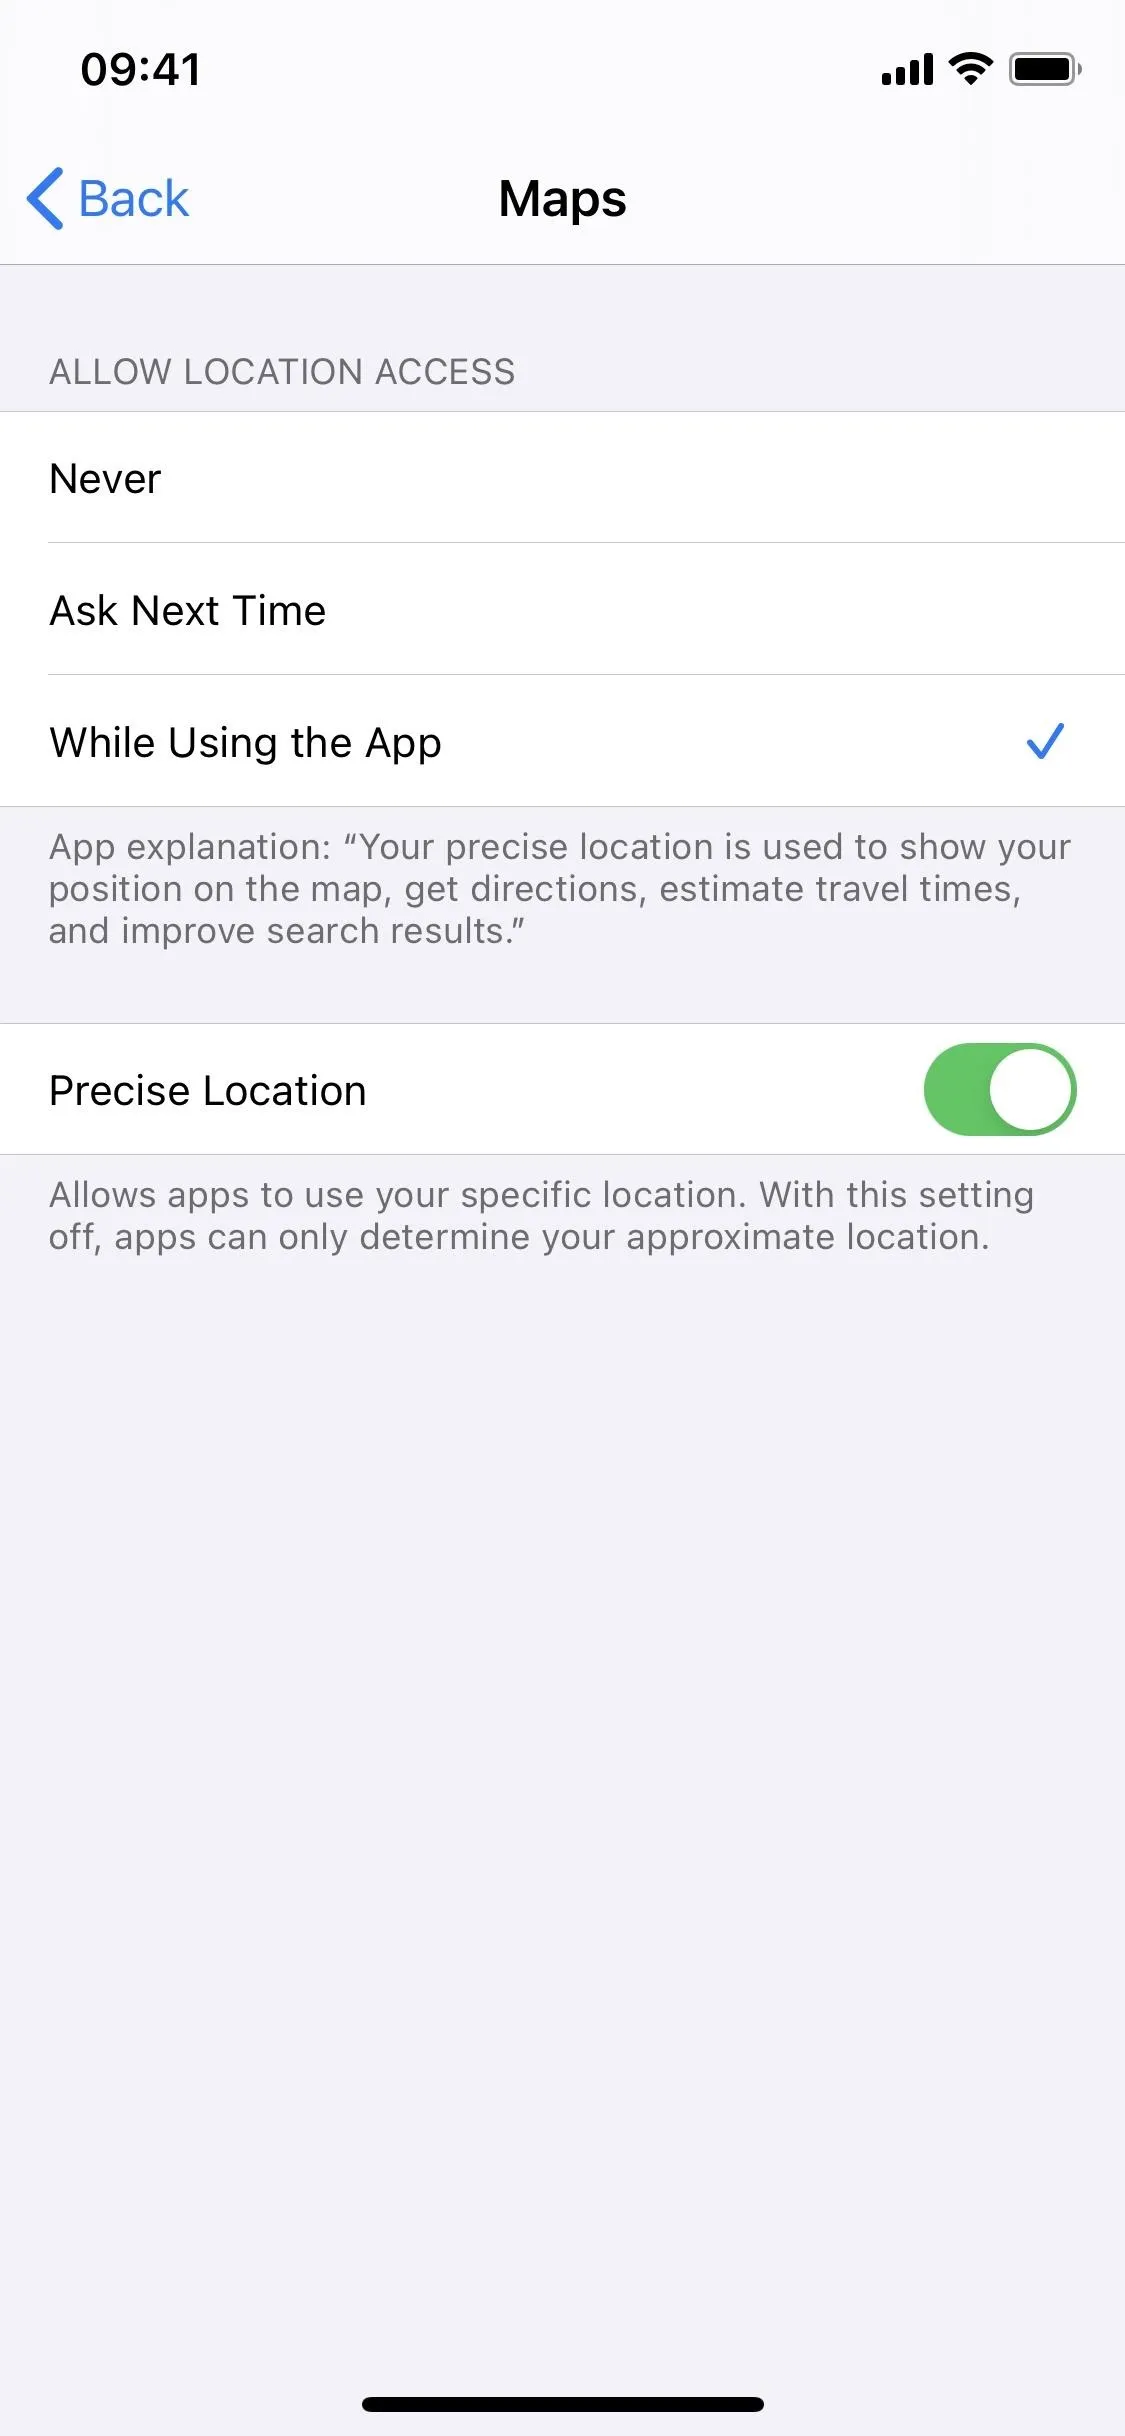
If you're running iOS 14, there's a new setting for apps called "Precise Location," which gives you even more fine-tuned control over how apps can access your location. Without it toggled on, the app can only get a general idea of where you're at, not an exact ping.


Reset Your Location & Privacy Setting
To stop every app on your device from using your location, you must reset your location and privacy settings. First, go to Settings –> General –> Reset.
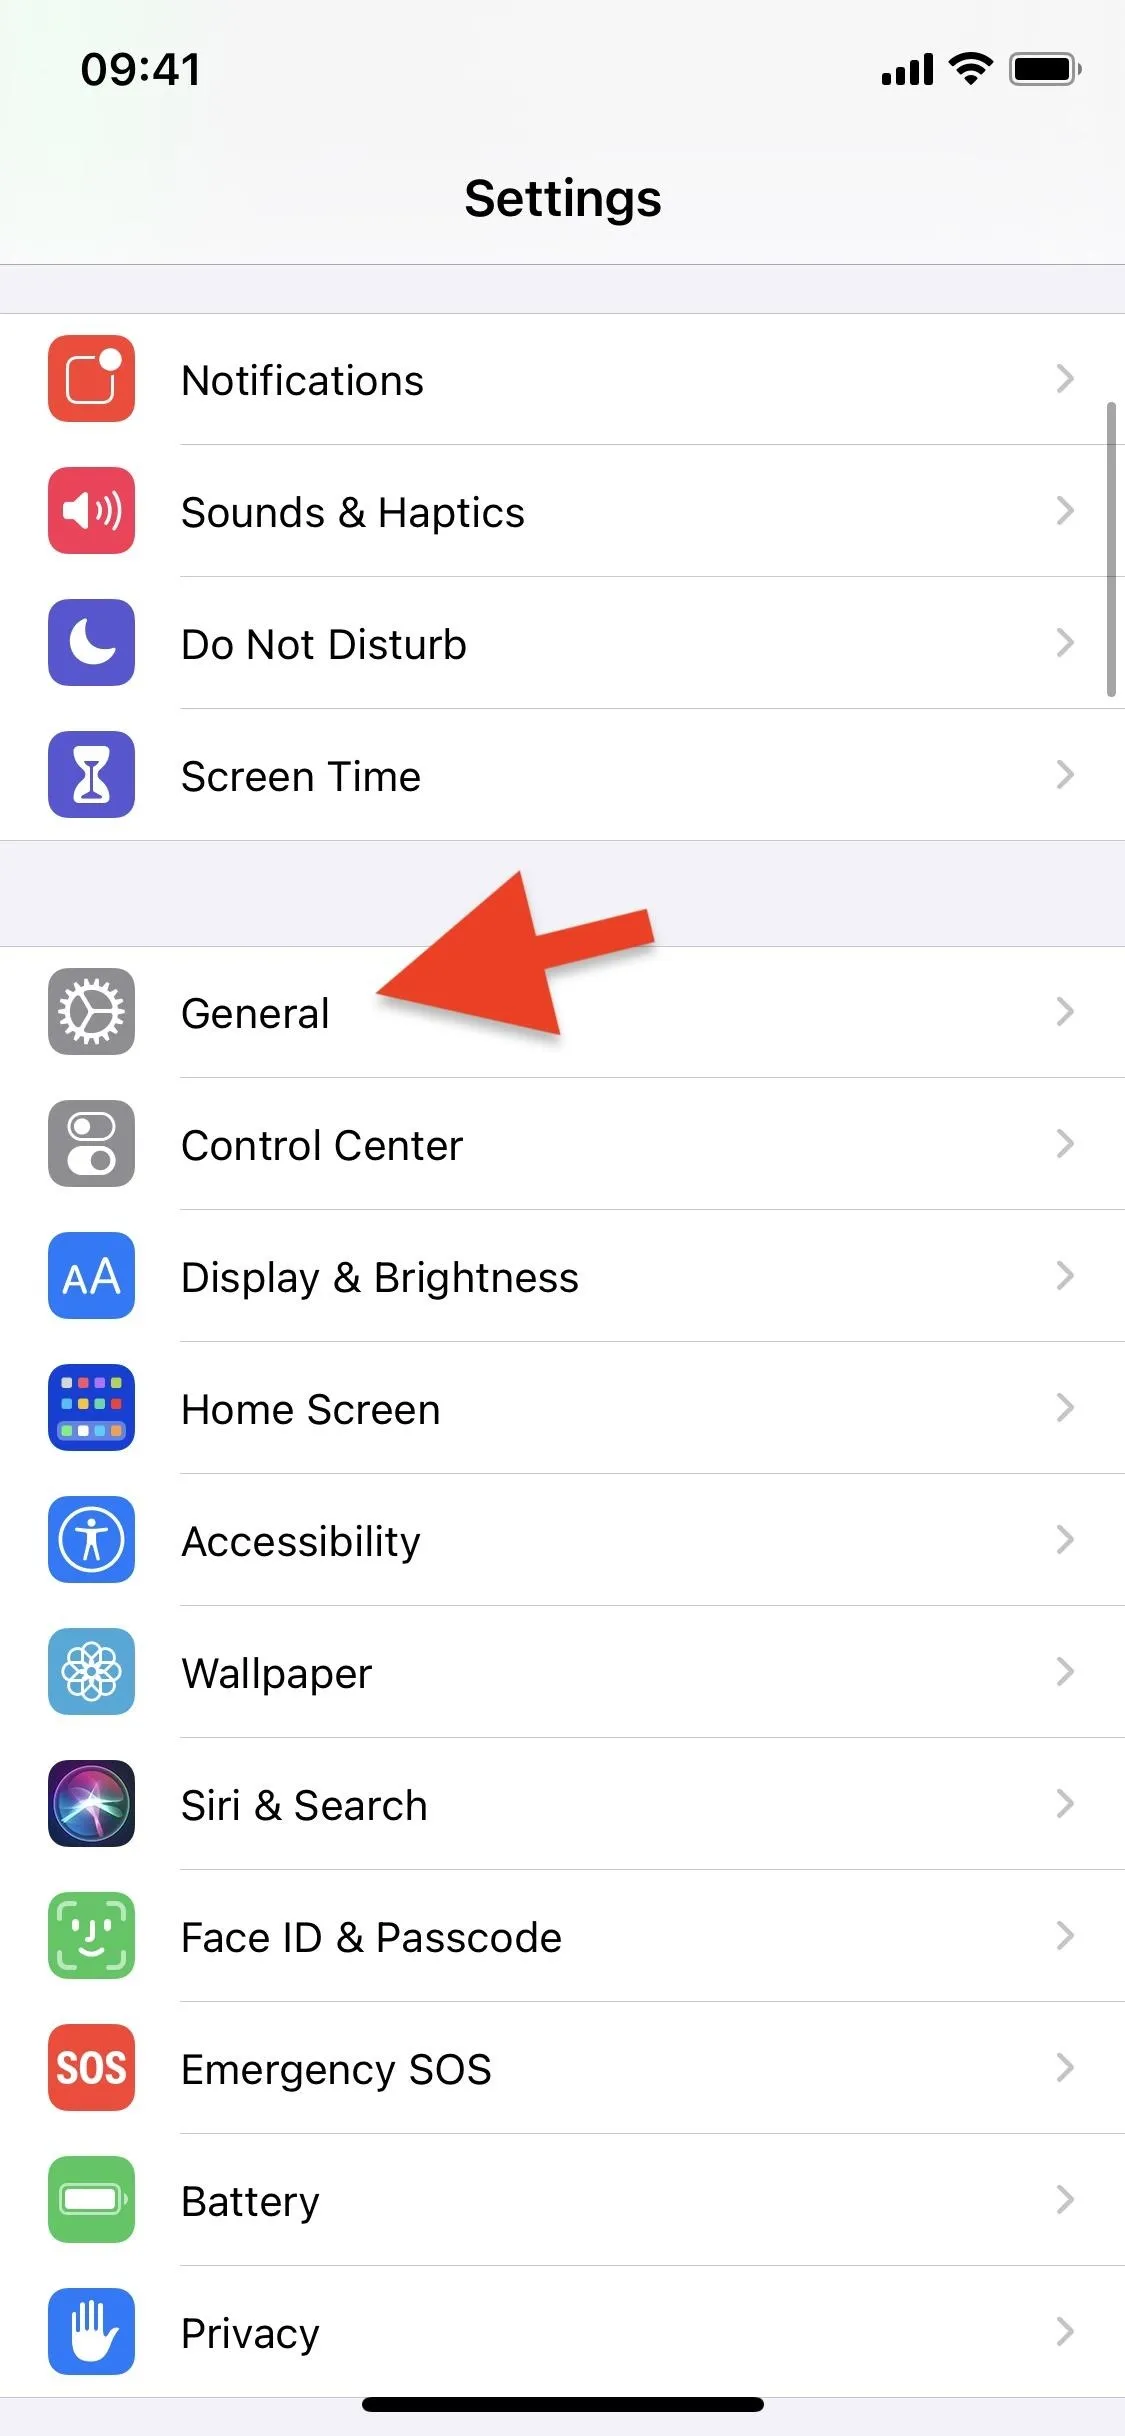
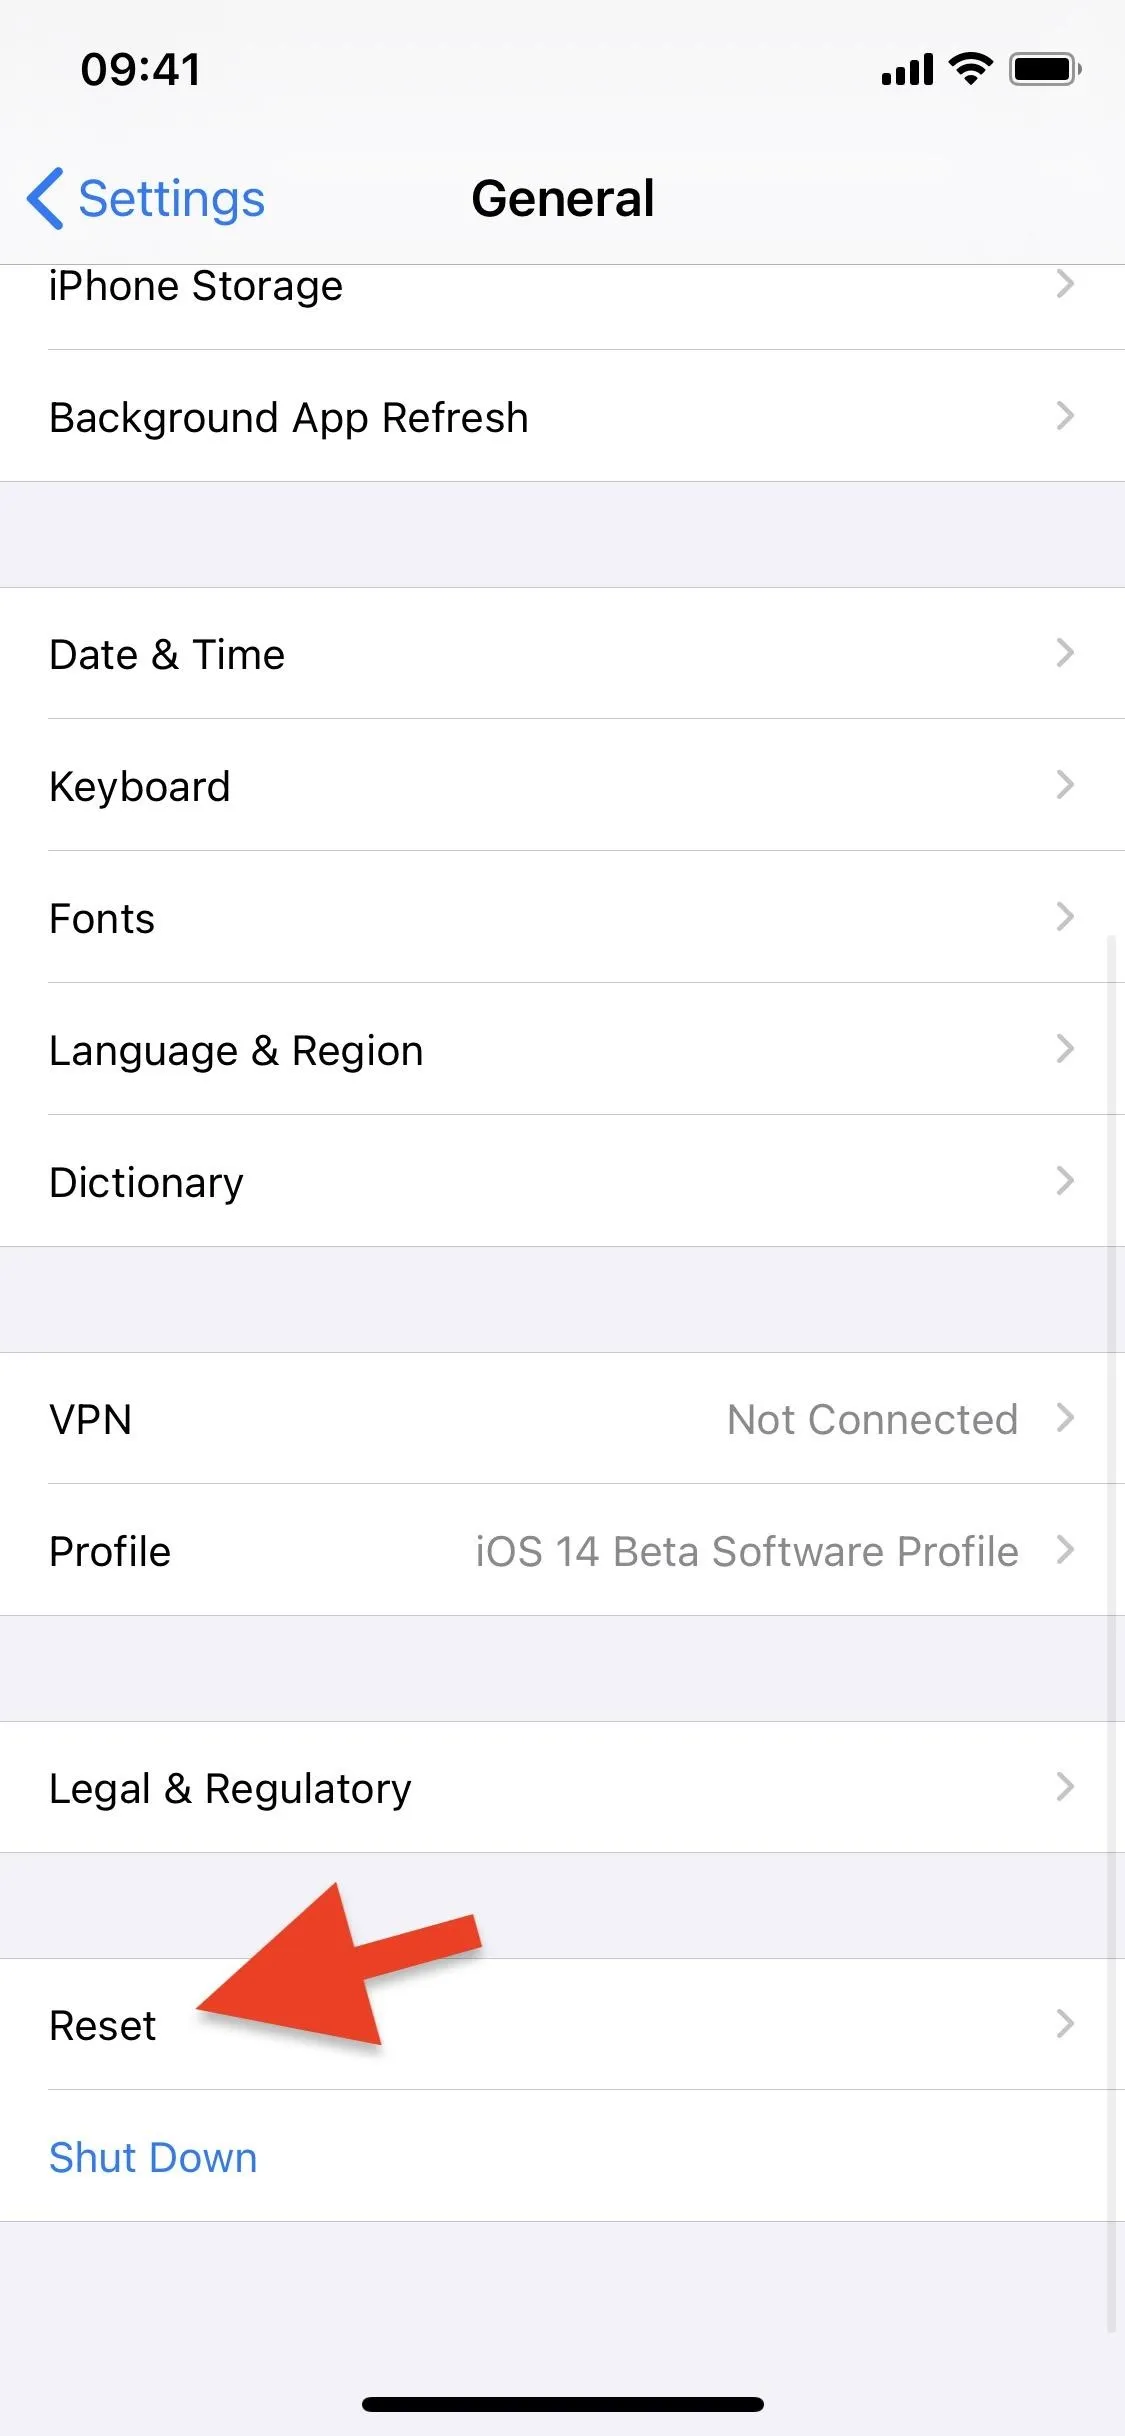


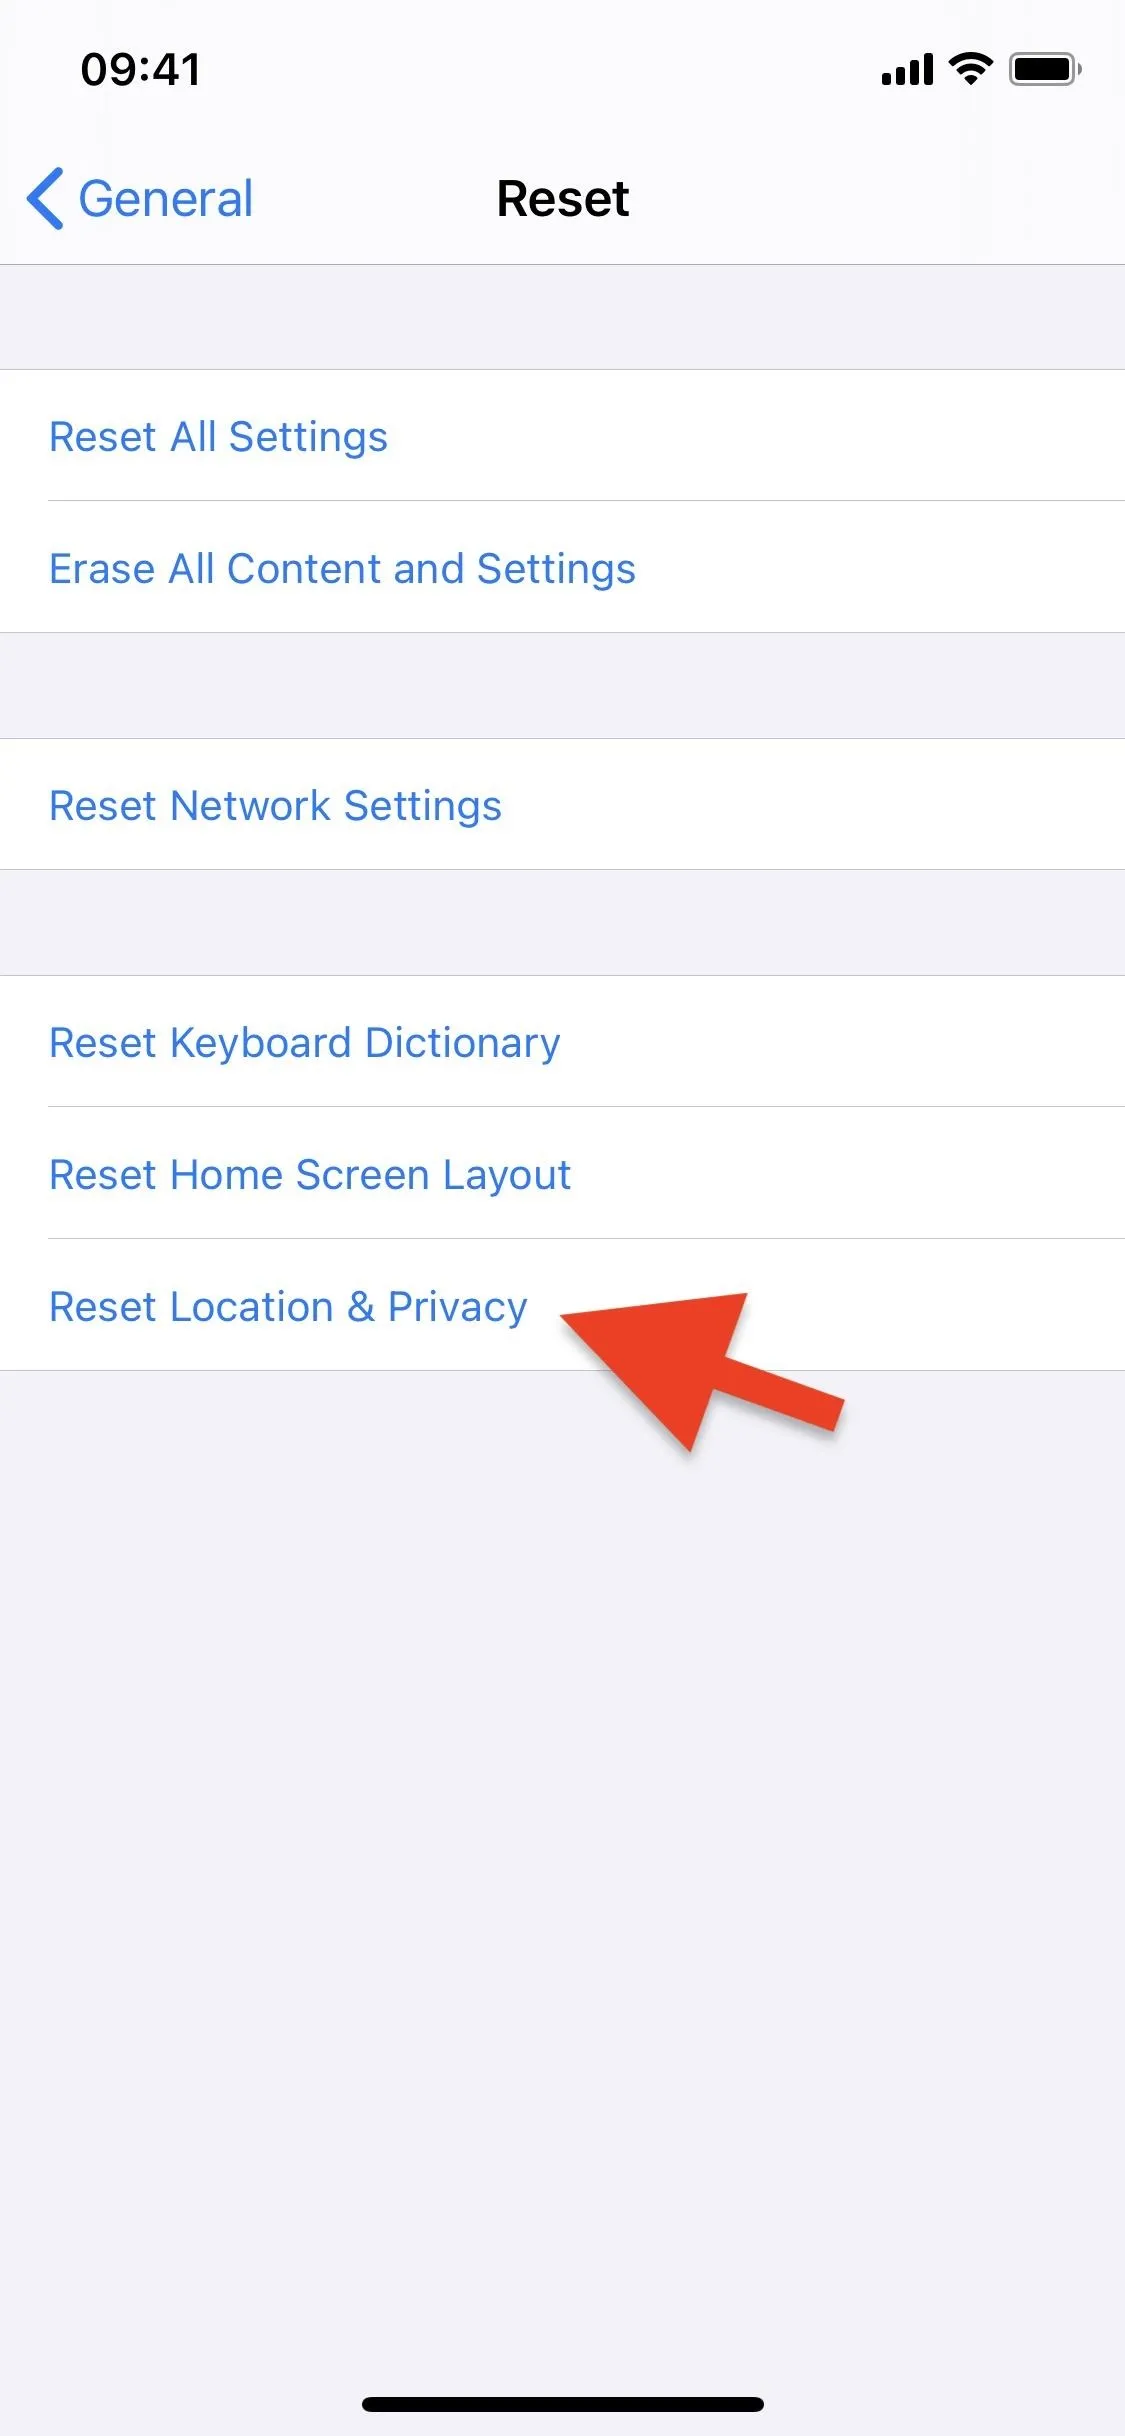
Then, you'll see several options for resetting your device and its settings. The one we're interested in is "Reset Location & Privacy."
Before you reset your location and privacy settings, it's crucial to note that this setting will not just reset your apps' location access to the defaults. It also resets their access to other Privacy settings such as Contacts, Calendars, Reminders, Photos, Bluetooth, Local Network, Microphone, Speech Recognition, Camera, Media & Apple Music, and Files & Folders.
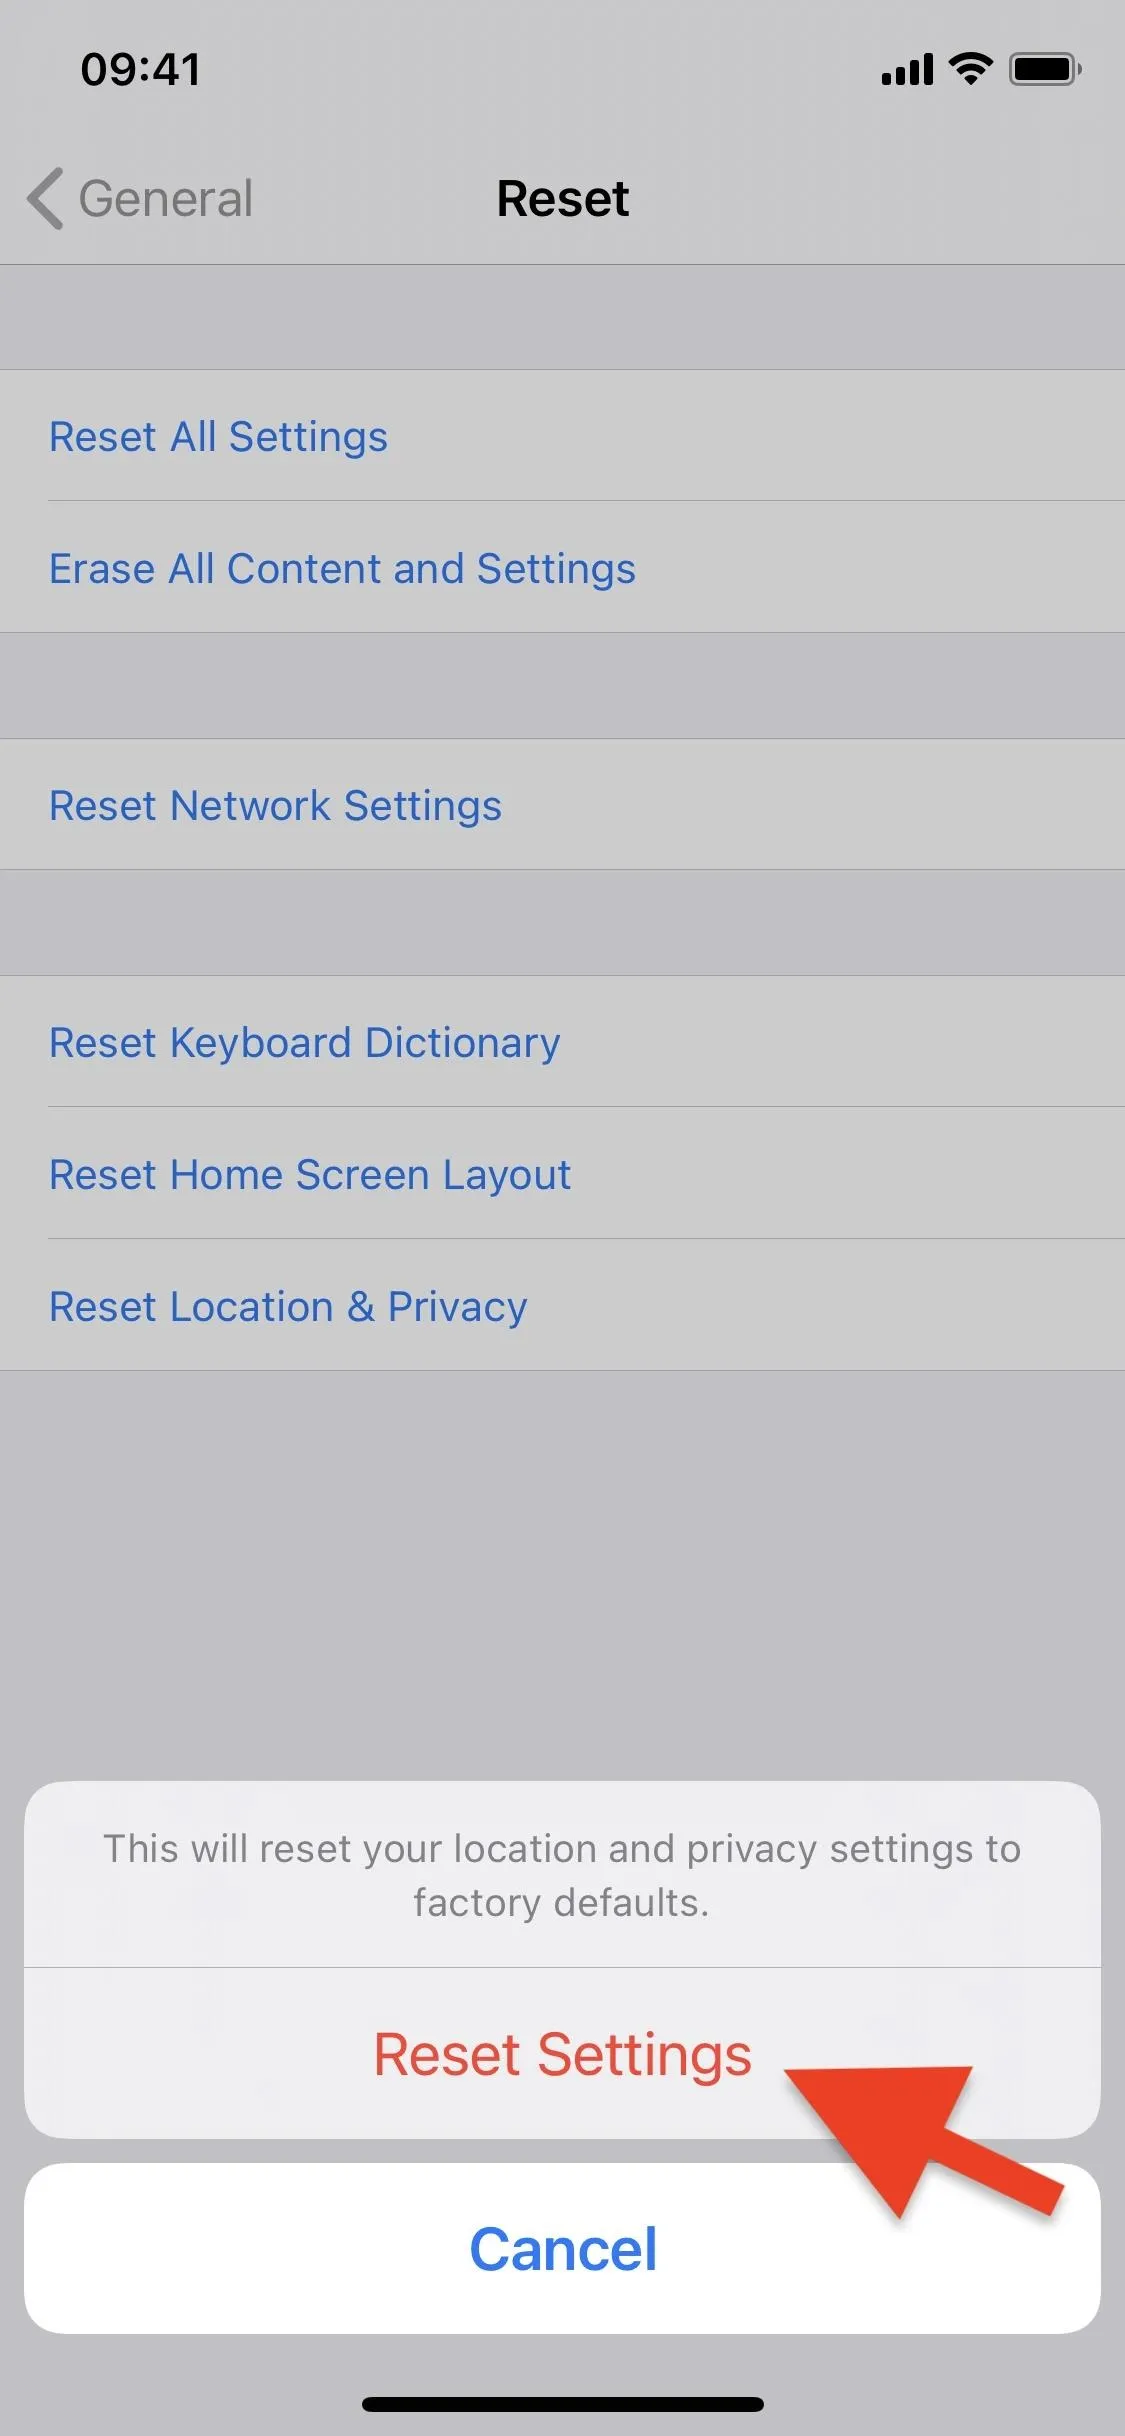
If you're okay with that, tap on "Reset Location & Privacy," enter your passcode (if prompted), and tap on "Reset Settings." Your iPhone won't restart after doing so; instead, it resets everything in the background instantaneously.


Verify Location Permissions Were Revoked
Although it's guaranteed that your apps will no longer have access to your location, it doesn't hurt to check. Go back to Settings –> Privacy –> Location Services. Now, virtually zero apps should appear in the list besides Siri & Dictation and System Services.
If you're running iOS 14, "App Clips" may still appear since it's a default setting, but you can even go into that and toggle off "Confirm Location" for mini-apps that need to confirm your exact coordinates.
- Don't Miss: 200+ New Features & Changes in iOS 14 for iPhone
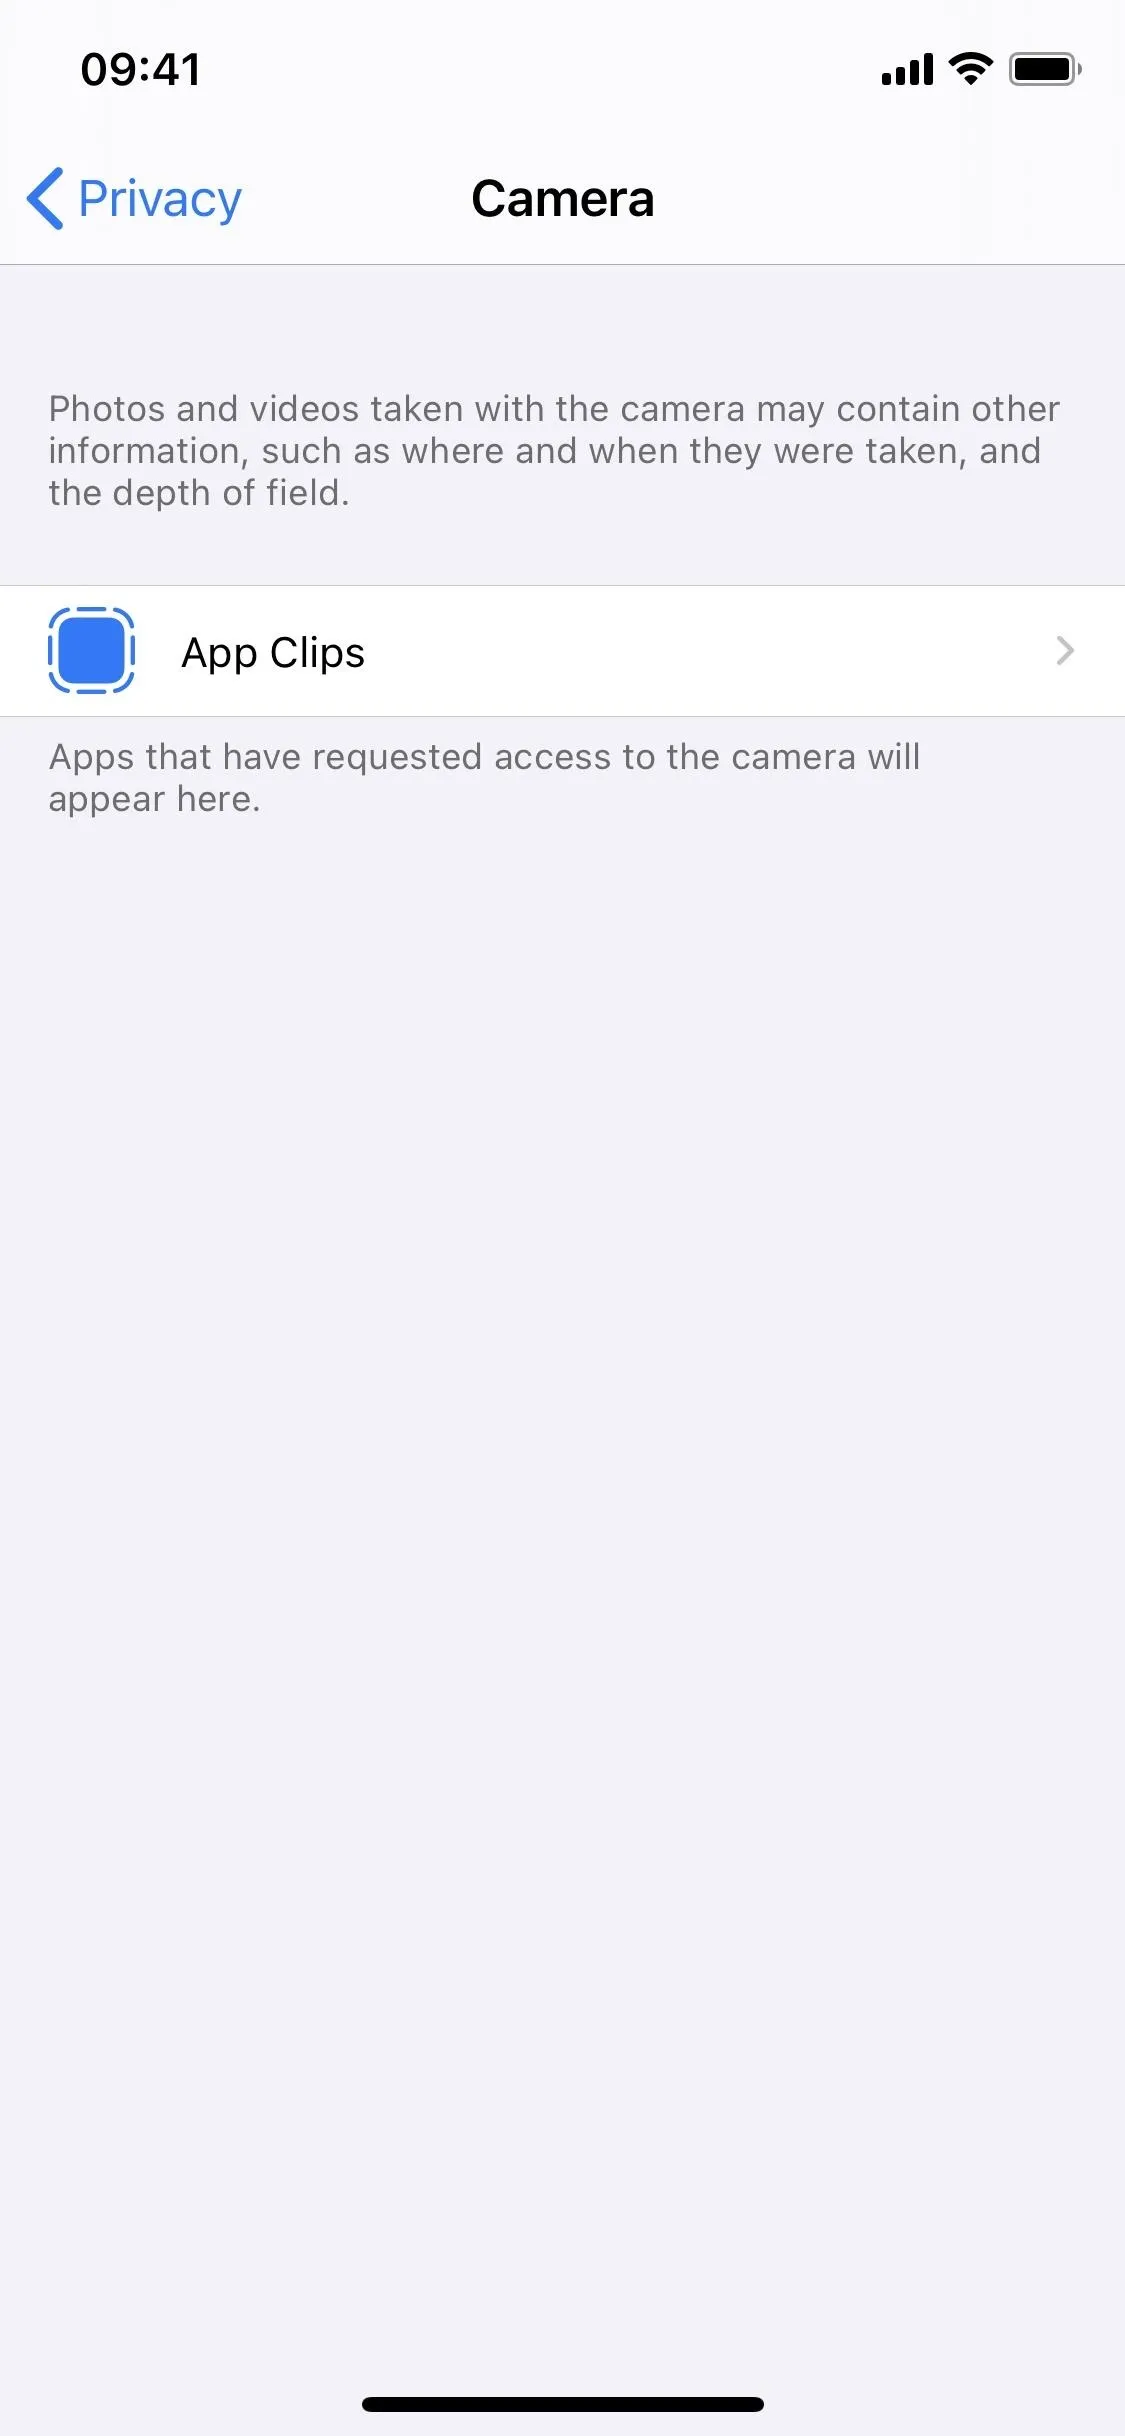
Additionally, you can go into other settings in the "Privacy" menu, such as Contacts, Calendars, Reminders, Photos, Bluetooth, Local Network, Microphone, Speech Recognition, Camera, Media & Apple Music, and Files & Folders, to see that apps no longer have access to these features as well.


Give Location Access Back to Apps When Needed
Now that no apps are accessing your location, whenever you're using an app the wants to use your location, it will ask you for permission. You don't have to go hunt down every app — just open the apps naturally when you need them, then decide then.
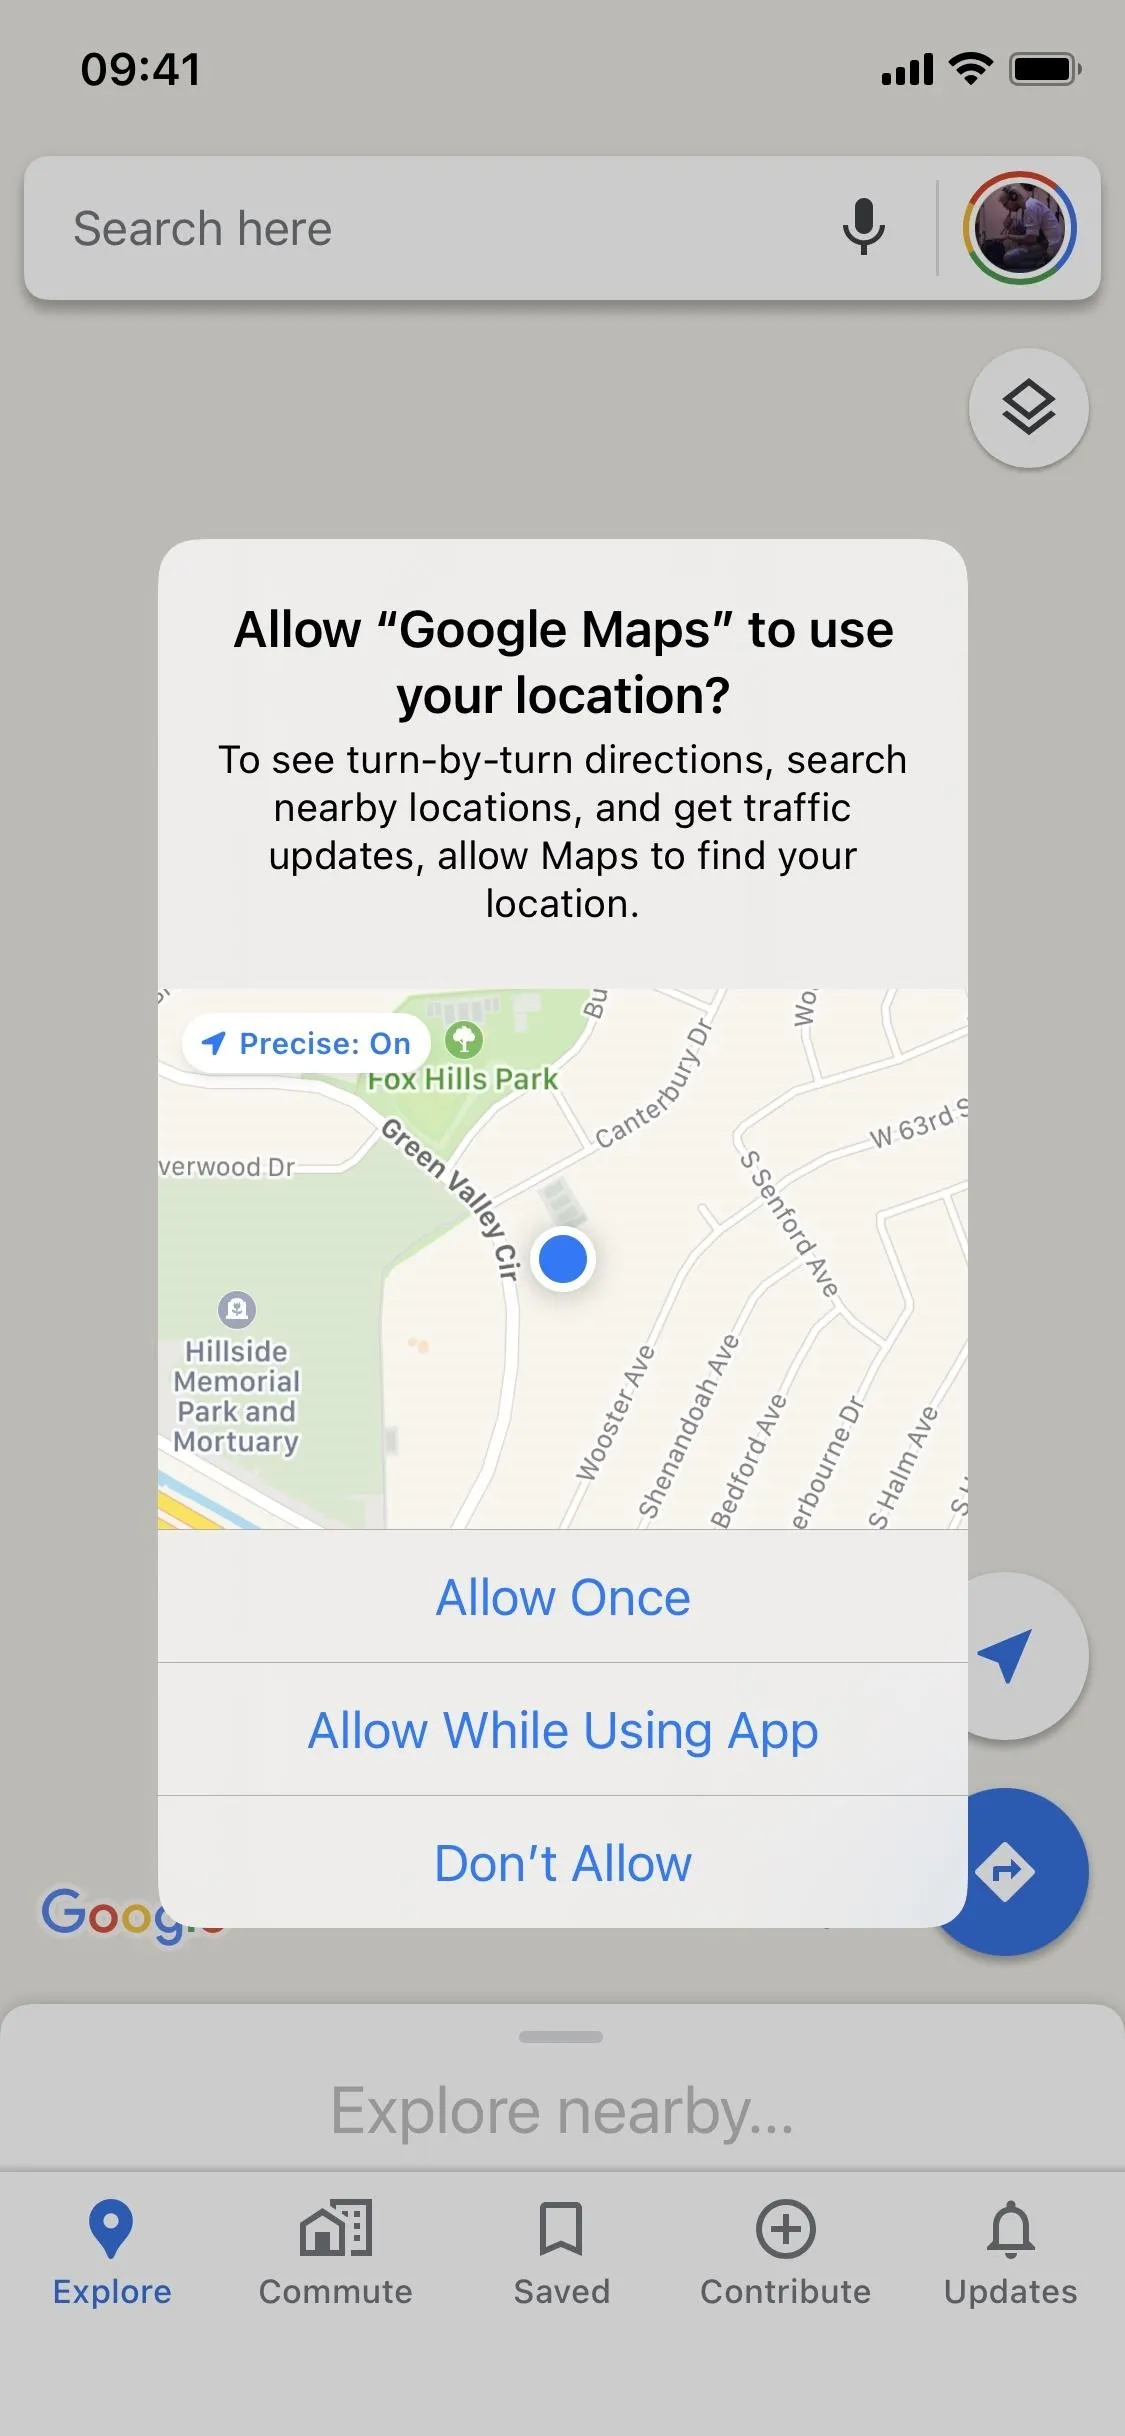
For any app, you can choose to "Don't Allow" access if you're iffy about them, and they'll never have permissions. If you know that you'll need the app to use your location, even in the background, choose "Always." For apps where you'll want to be able to use location without giving it blanket permissions, select "While Using the App." And if there's only one time when you want an app to use your location, choose "Allow Once," and you'll be asked every time the app needs it.
And if you're running iOS 14, before granting location access to any app via the dialog box, you can also toggle off "Precise Location" in the Maps representation to only give the app an approximate location.
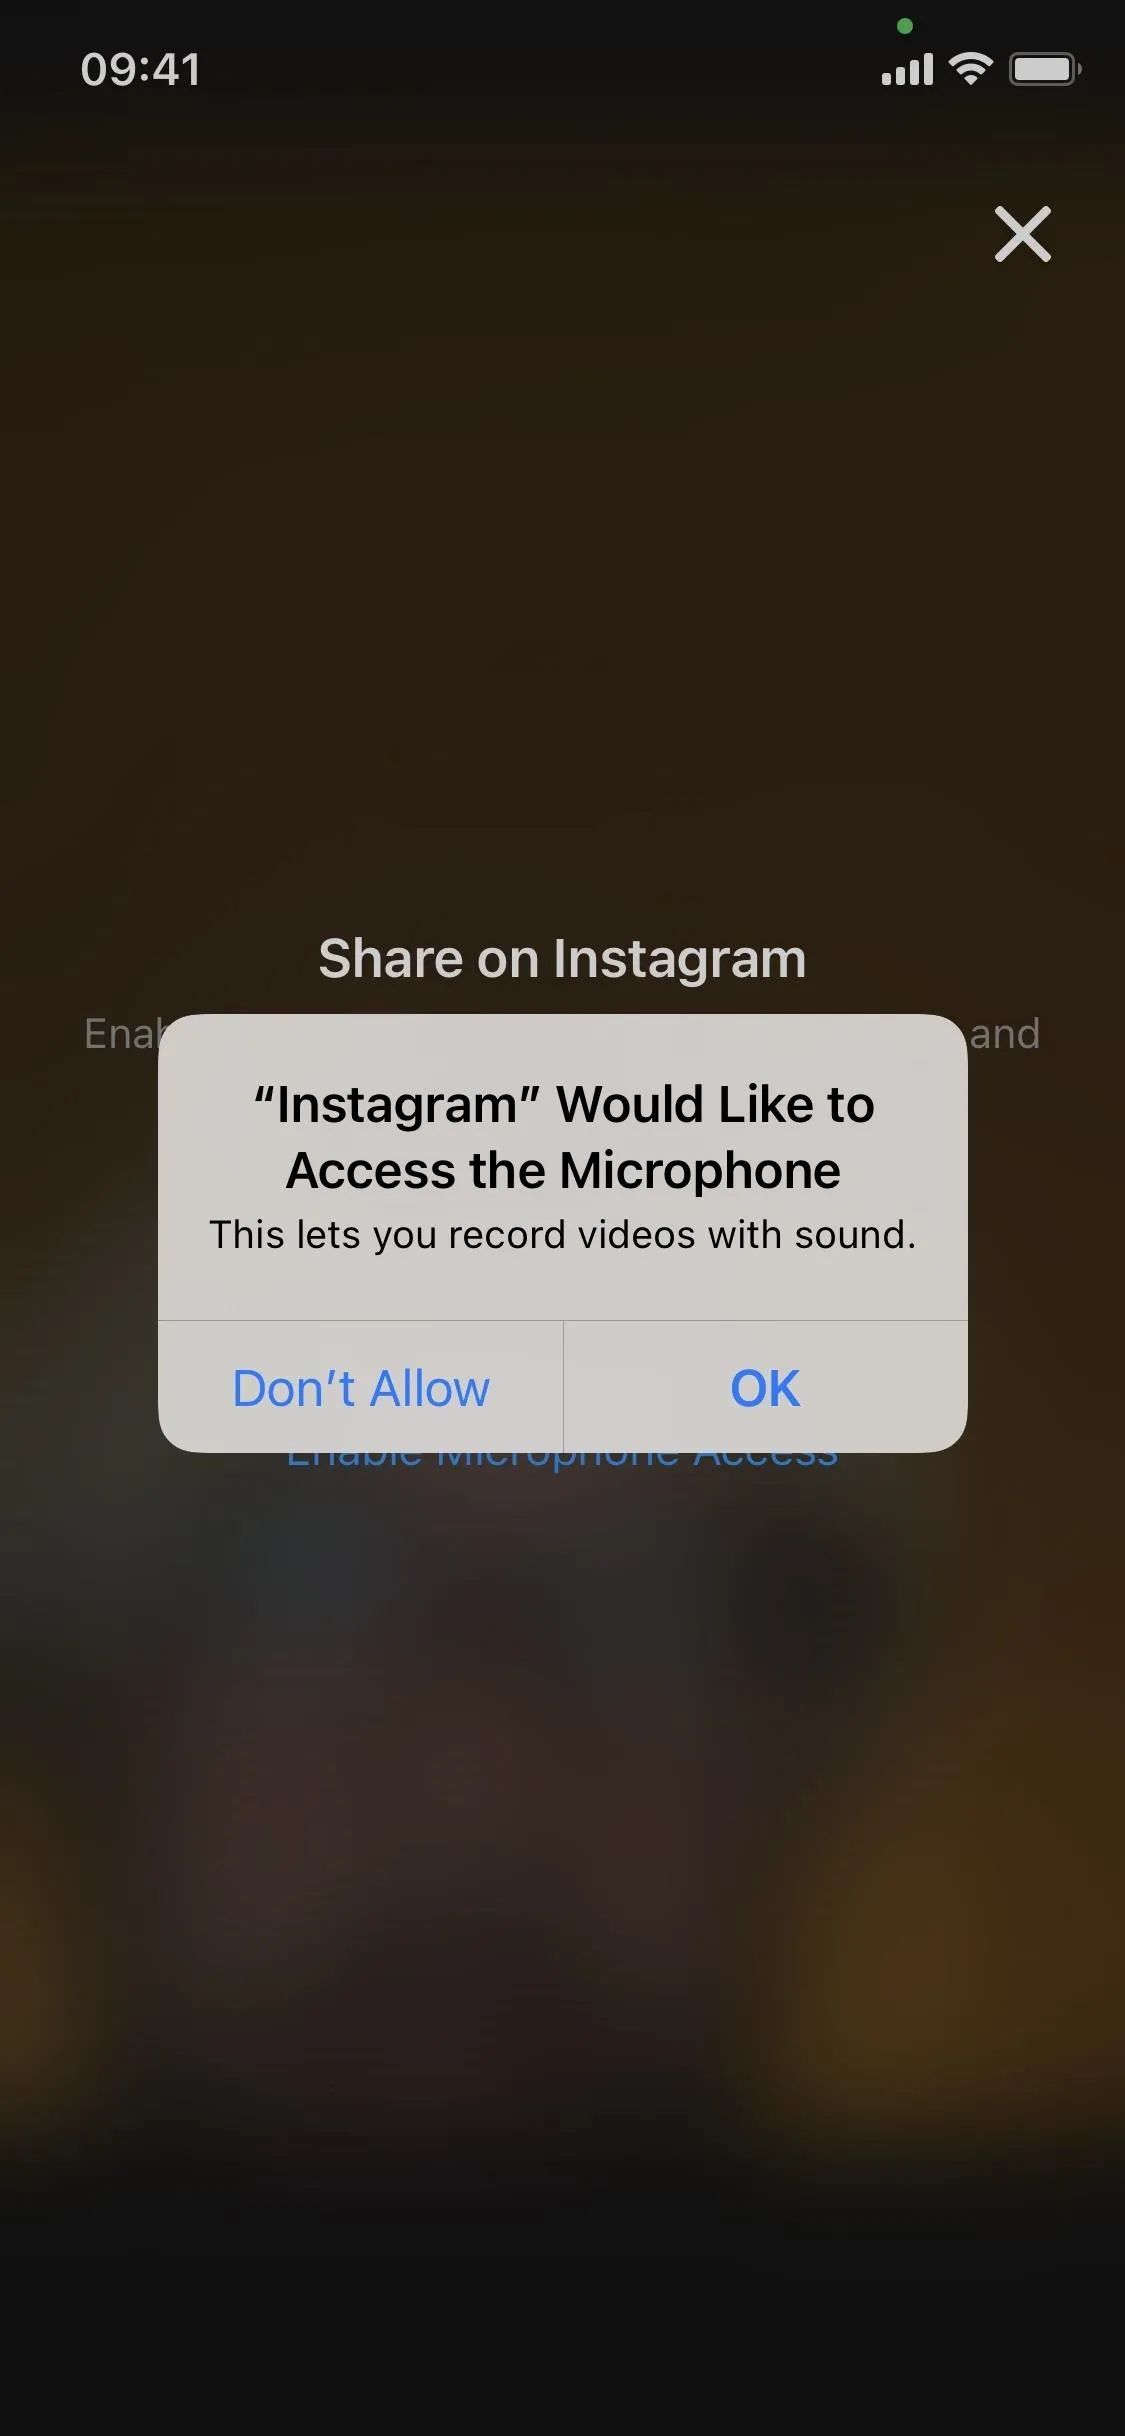
Additionally, you'll have to give permission again to apps that need access to Contacts, Calendars, Reminders, Photos, Bluetooth, Local Network, Microphone, Speech Recognition, Camera, Media & Apple Music, and Files & Folders. For instance, for an app like Instagram, you'll need to give it permission to Camera (to take pictures and videos), Microphone (to record sound during videos), and Photos (to save files or find files).


Cover photo and screenshots by Nelson Aguilar/Gadget Hacks


Comments
Be the first, drop a comment!