While the iPhone XS and XS Max come equipped with 4 GB of random access memory, and the iPhone XR with 3 GB of RAM, Apple's latest flagships are still susceptible to occasional slowdowns in performance in iOS 12. This can be fixed by clearing RAM, but the process is now a little trickier compared to iPhones with Home buttons.
In terms of memory management, the iPhone XS, XS Max, and XR are solid choices, as they perform this essential task with precision, and they can allocate which system services and apps are using their fair share to ensure efficient operation. Even having a full RAM usually won't bog down your device, thanks to iOS 12's ability to automatically purge some RAM to make way for processes in need.
Despite this, there are apps and services that consume way more RAM than they're supposed to, which can result in erratic performance — or worse. While you have the option of force-closing a problematic app from the app switcher, it may not completely kill it, and it still may continue to consume some of your iPhone's resources without you knowing.
To take things a step further, you can perform a hard reboot on your iPhone XS, XS Max, or XR to bring its system back to peak efficiency. Unfortunately, the button combination required to force restart your iPhone is not as intuitive as its Home-button equipped predecessors, but you still have the ability to clear your iPhone's RAM without the need to reboot it.
Activate AssistiveTouch
Like the iPhone X, Apple's latest batch of flagships now rely on the Side button for a whole slew of tasks, though it can't be used to clear the RAM like the familiar Home button can on past iPhones. Because of this, we'll need to enable the virtual Home button found within AssistiveTouch to perform this task.
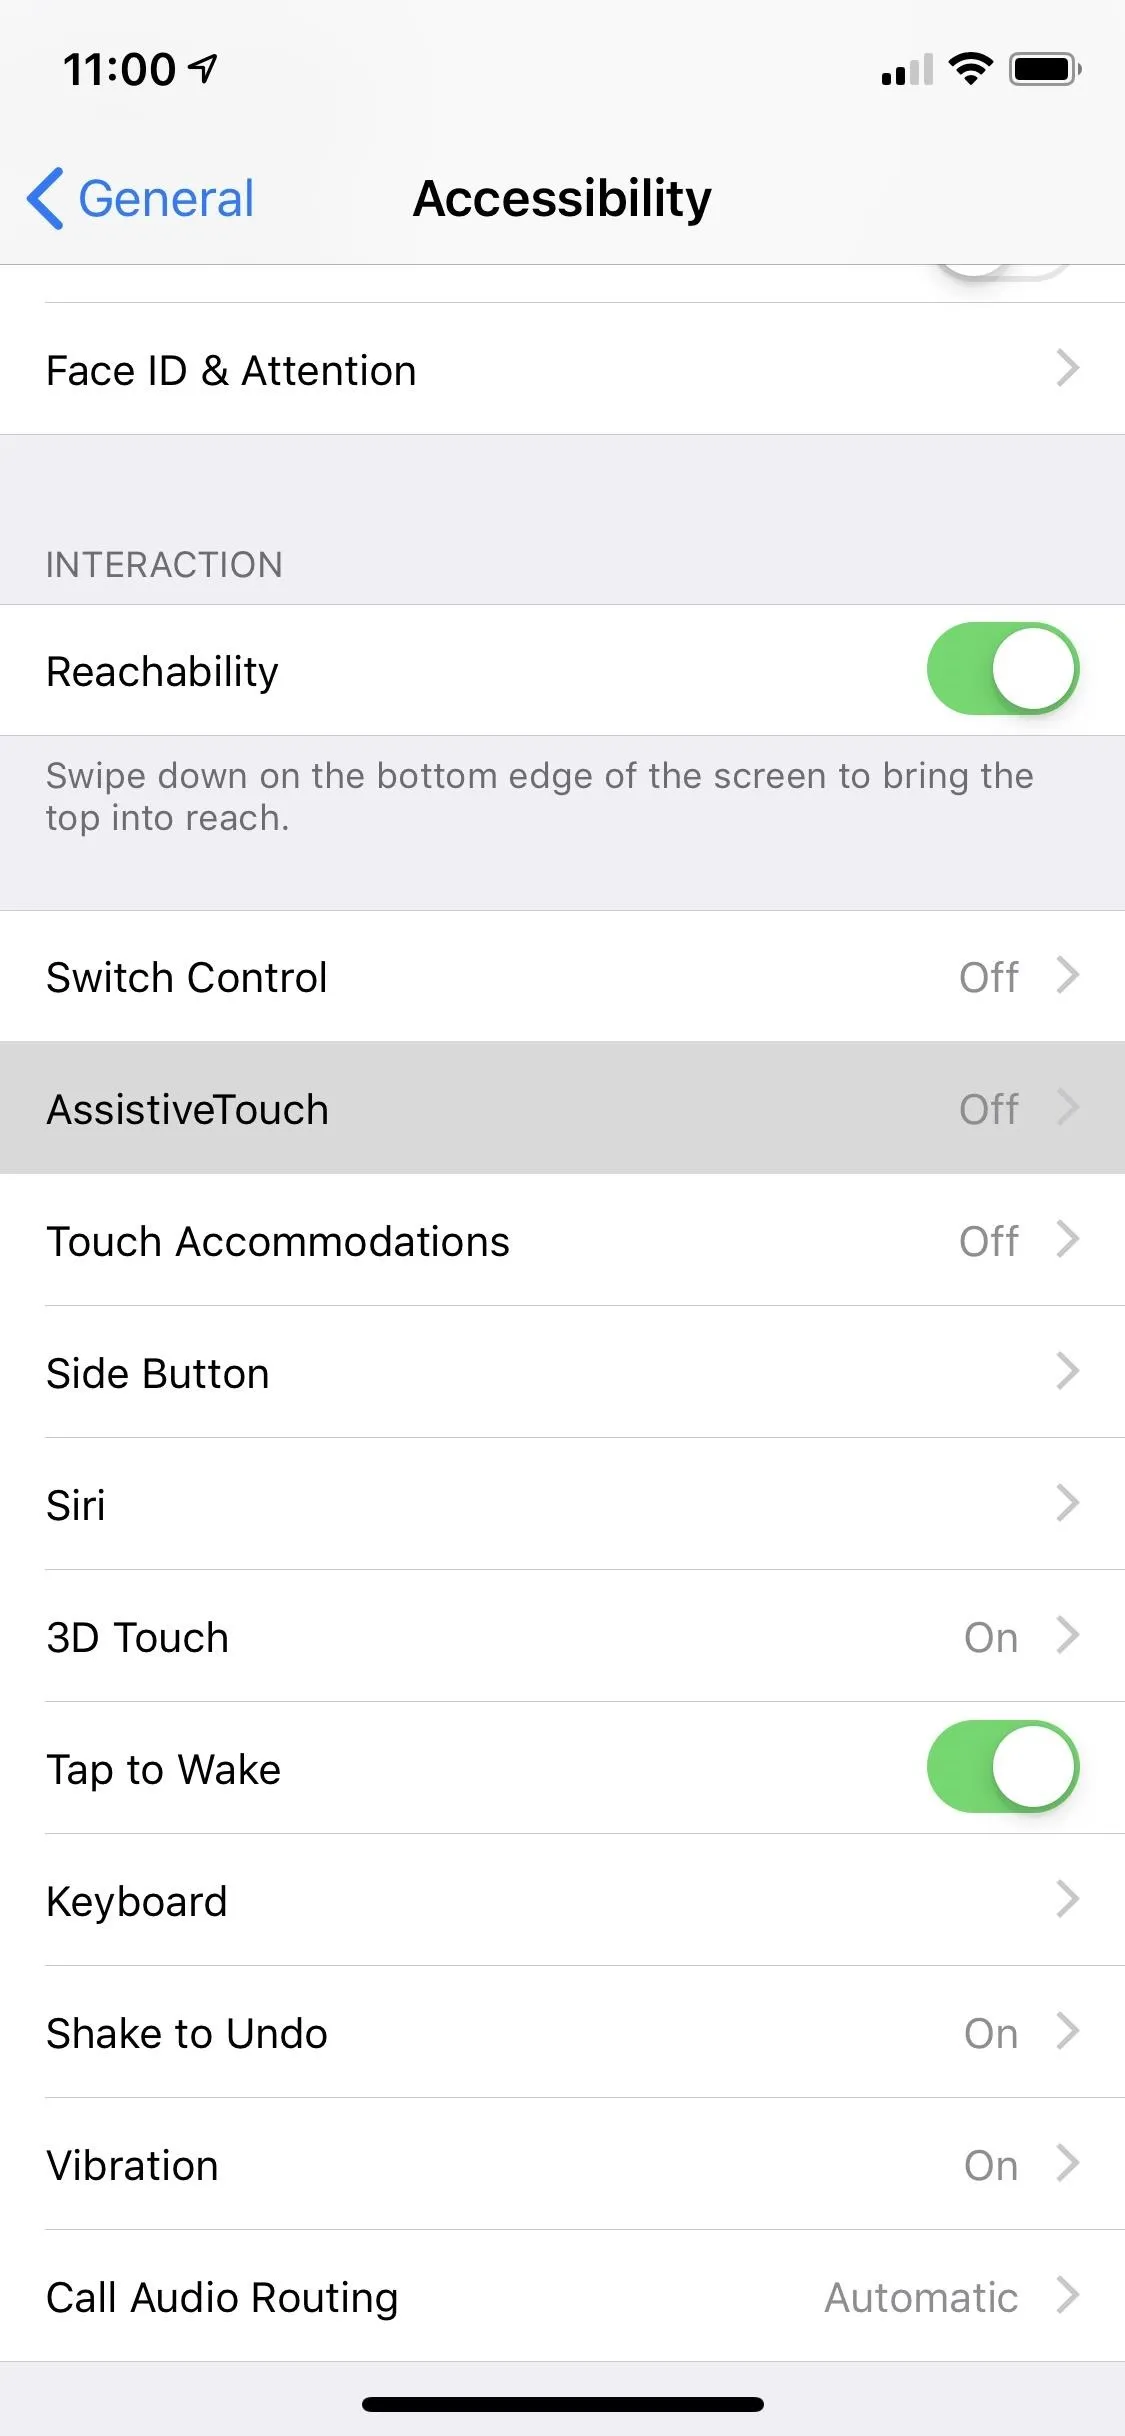
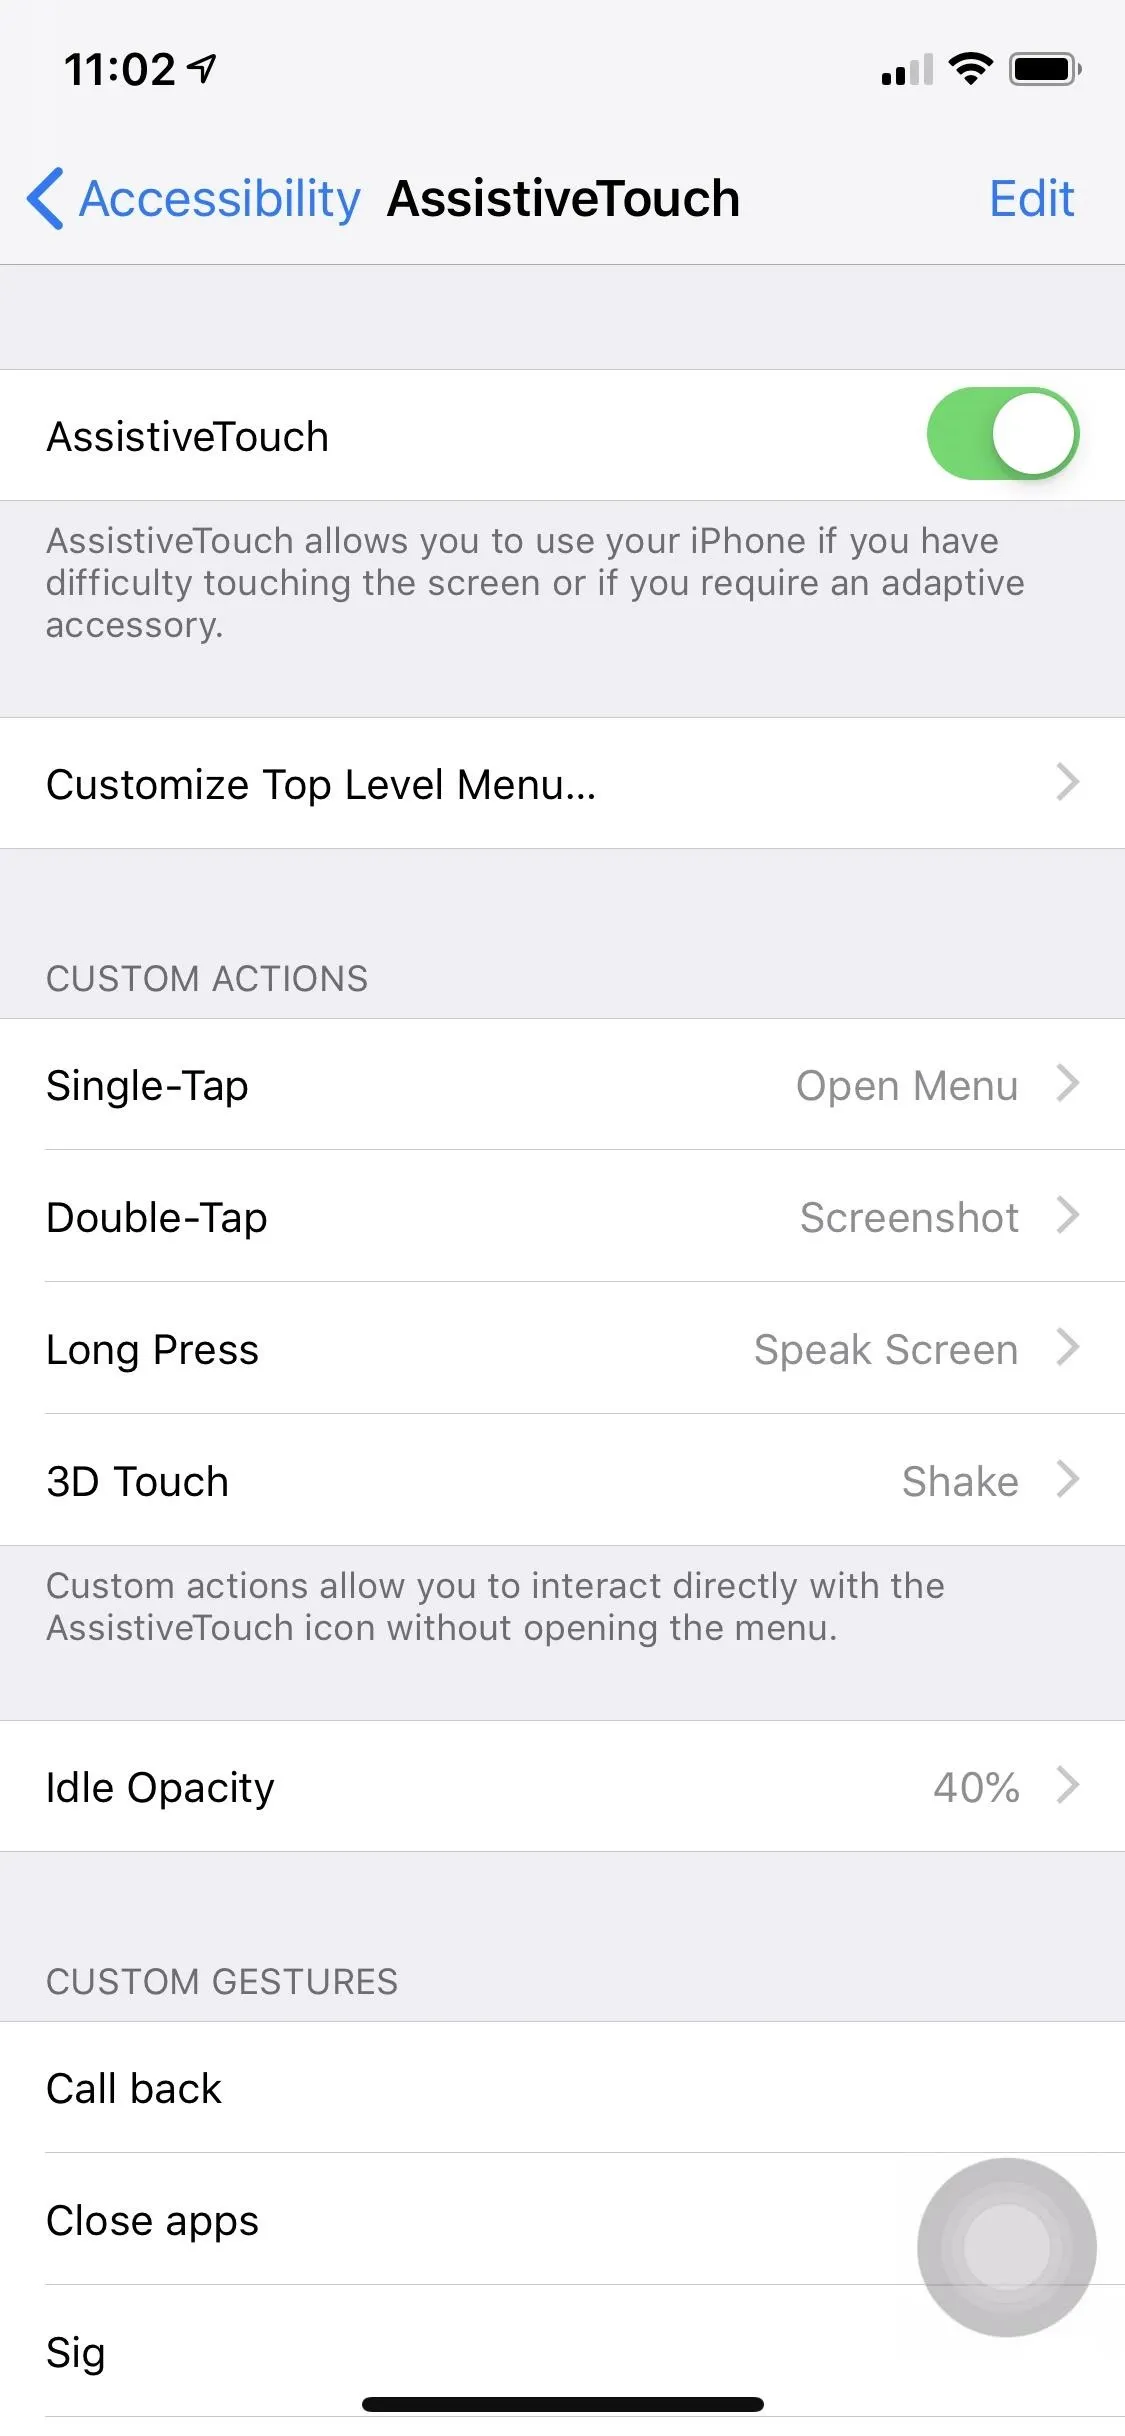
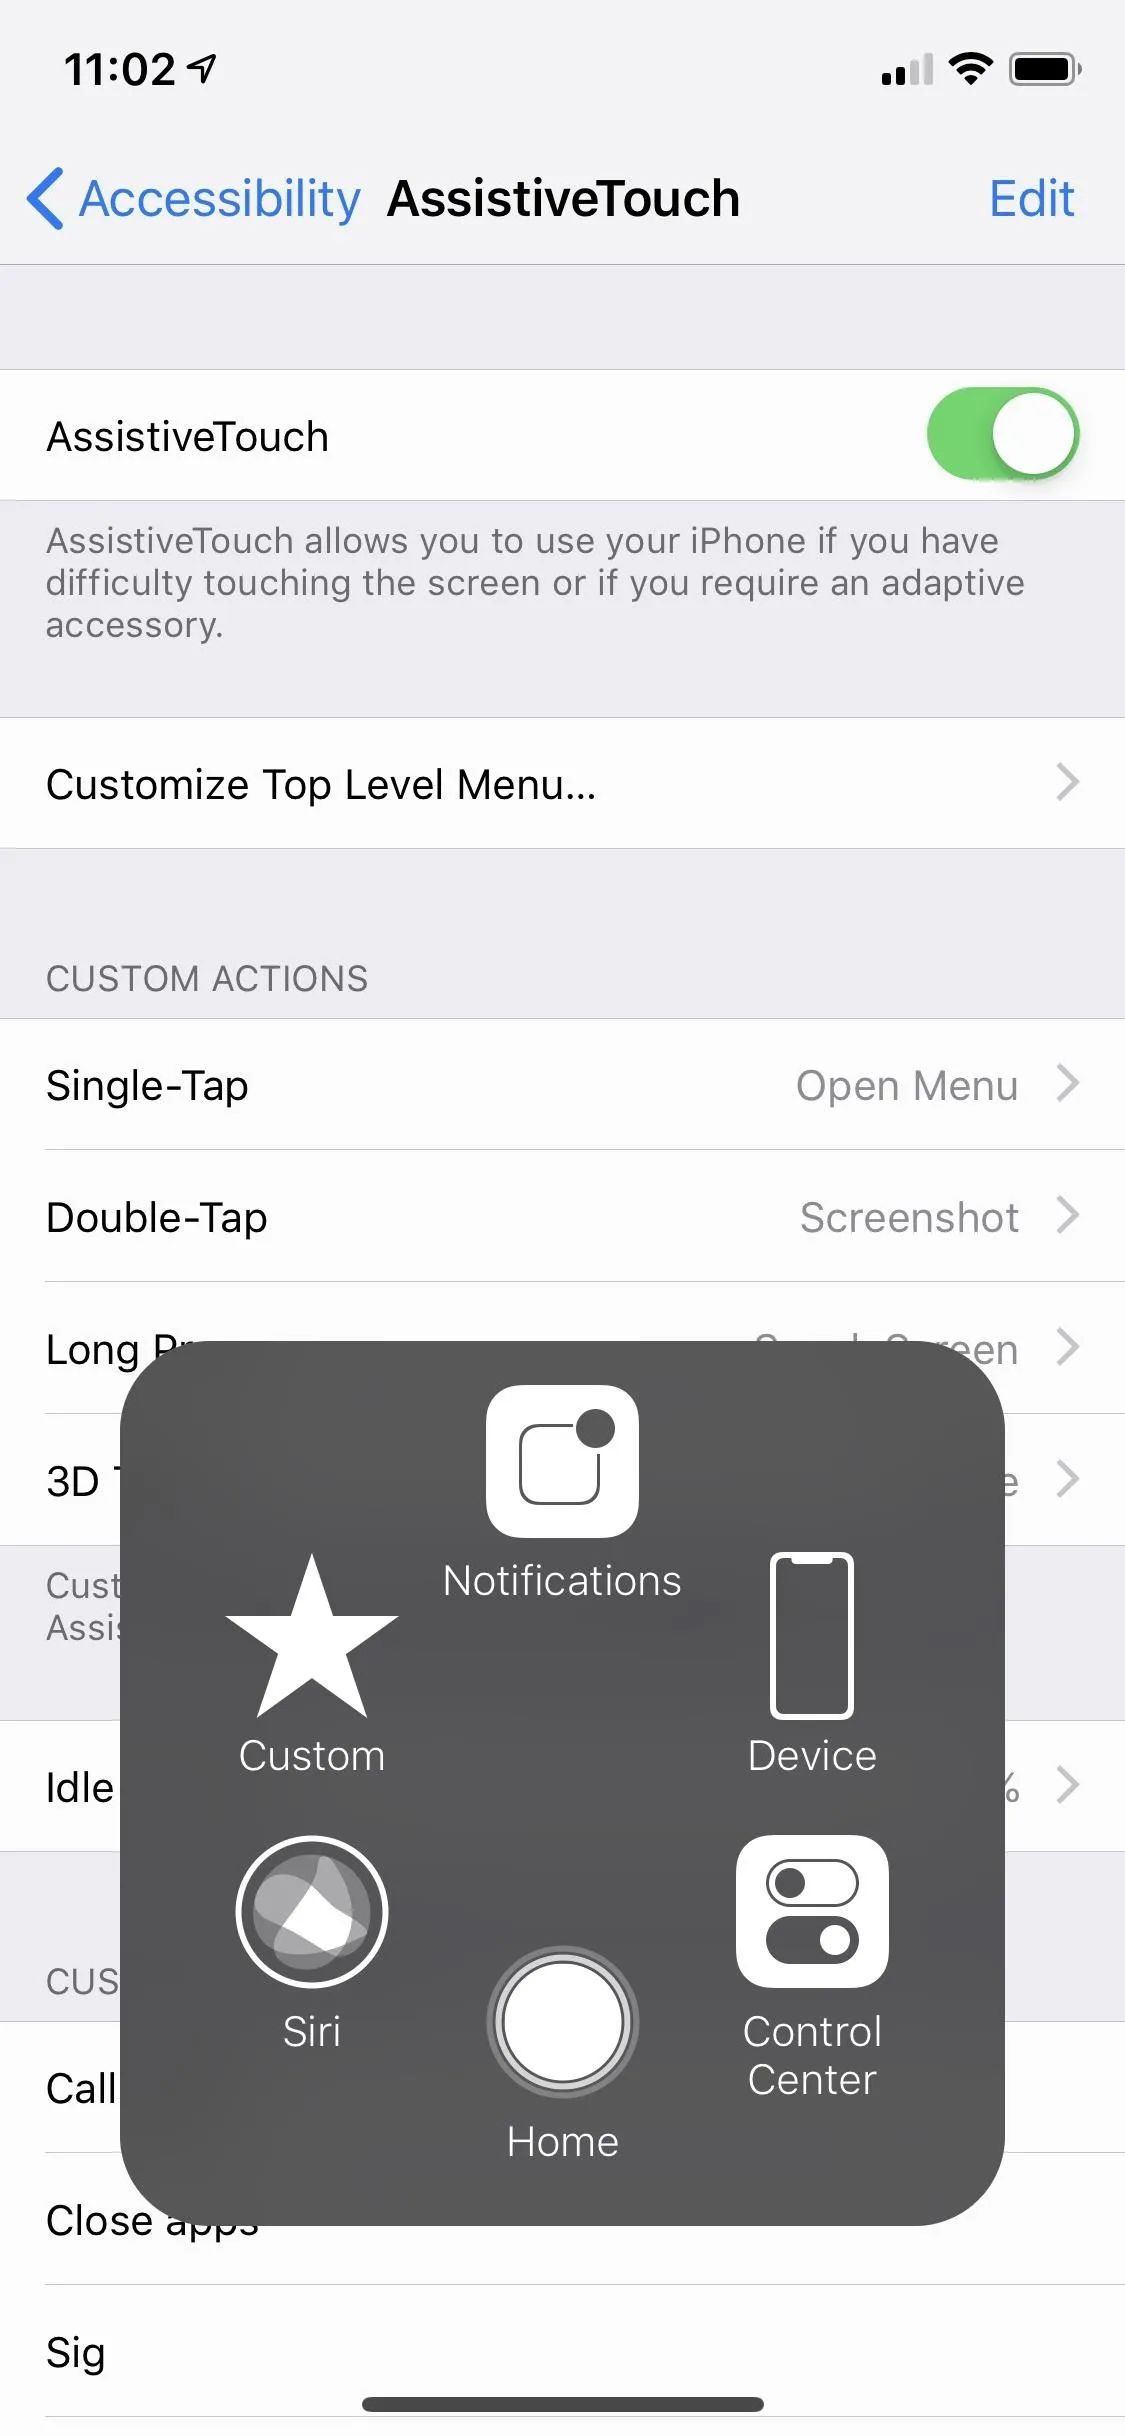
To get started, open the Settings app, tap "General," then select "Accessibility." Now, tap on "AssistiveTouch" within the Interaction section to view its preferences. From there, you'll be able to set some custom actions and gestures, but to keep it simple, toggle on "AssistiveTouch" to summon a gray and white circle resembling a Home button on your screen. Hit the button to reveal the menu for AssistiveTouch.


Make a Shortcut for AssistiveTouch (Optional)
If you're not planning on using this RAM-clearing on a frequent basis, you can go ahead and scroll down to the third step. But if you want to make a habit of regularly employing this trick, we highly recommend setting up a shortcut to instantly enable and disable AssistiveTouch on your iPhone on the fly without having to access the Settings app each time.
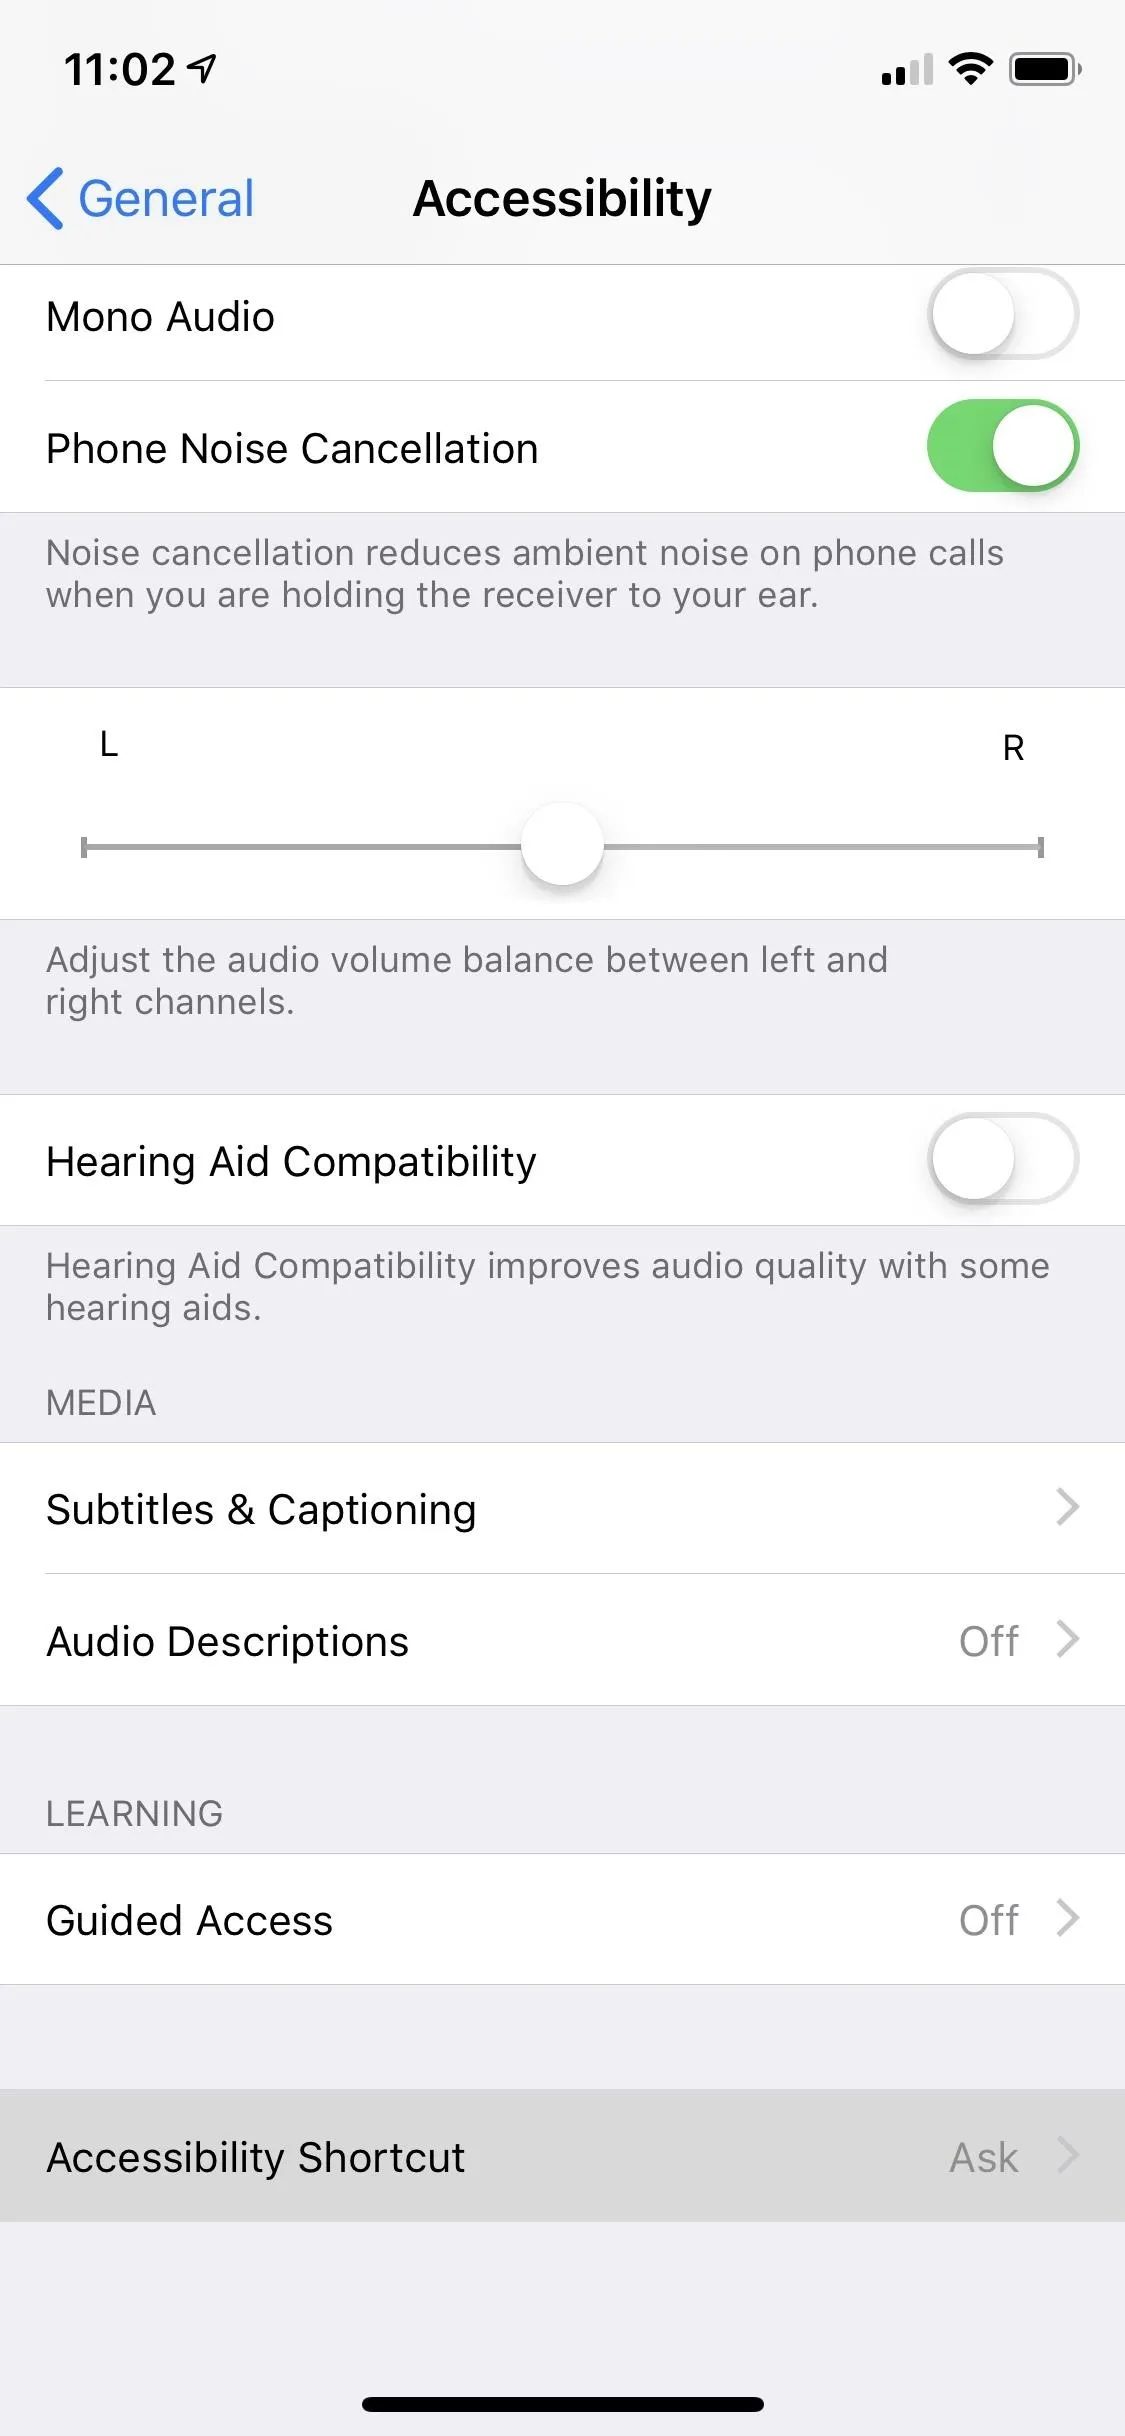
To do so, go back to "Accessibility," scroll all the way down to the bottom, and hit "Accessibility Shortcuts," then make sure "AssistiveTouch" is checked on the following page. Now, the AssistiveTouch icon will instantly open or close whenever you triple-click the Side button.
It's worth noting that if you have Accessibility Shortcut enabled for other features besides AssistiveTouch, triple-clicking on your iPhone's Side button will yield a menu from which you can select "AssistiveTouch" to enable or disable the feature, as you can see in the screenshot below.
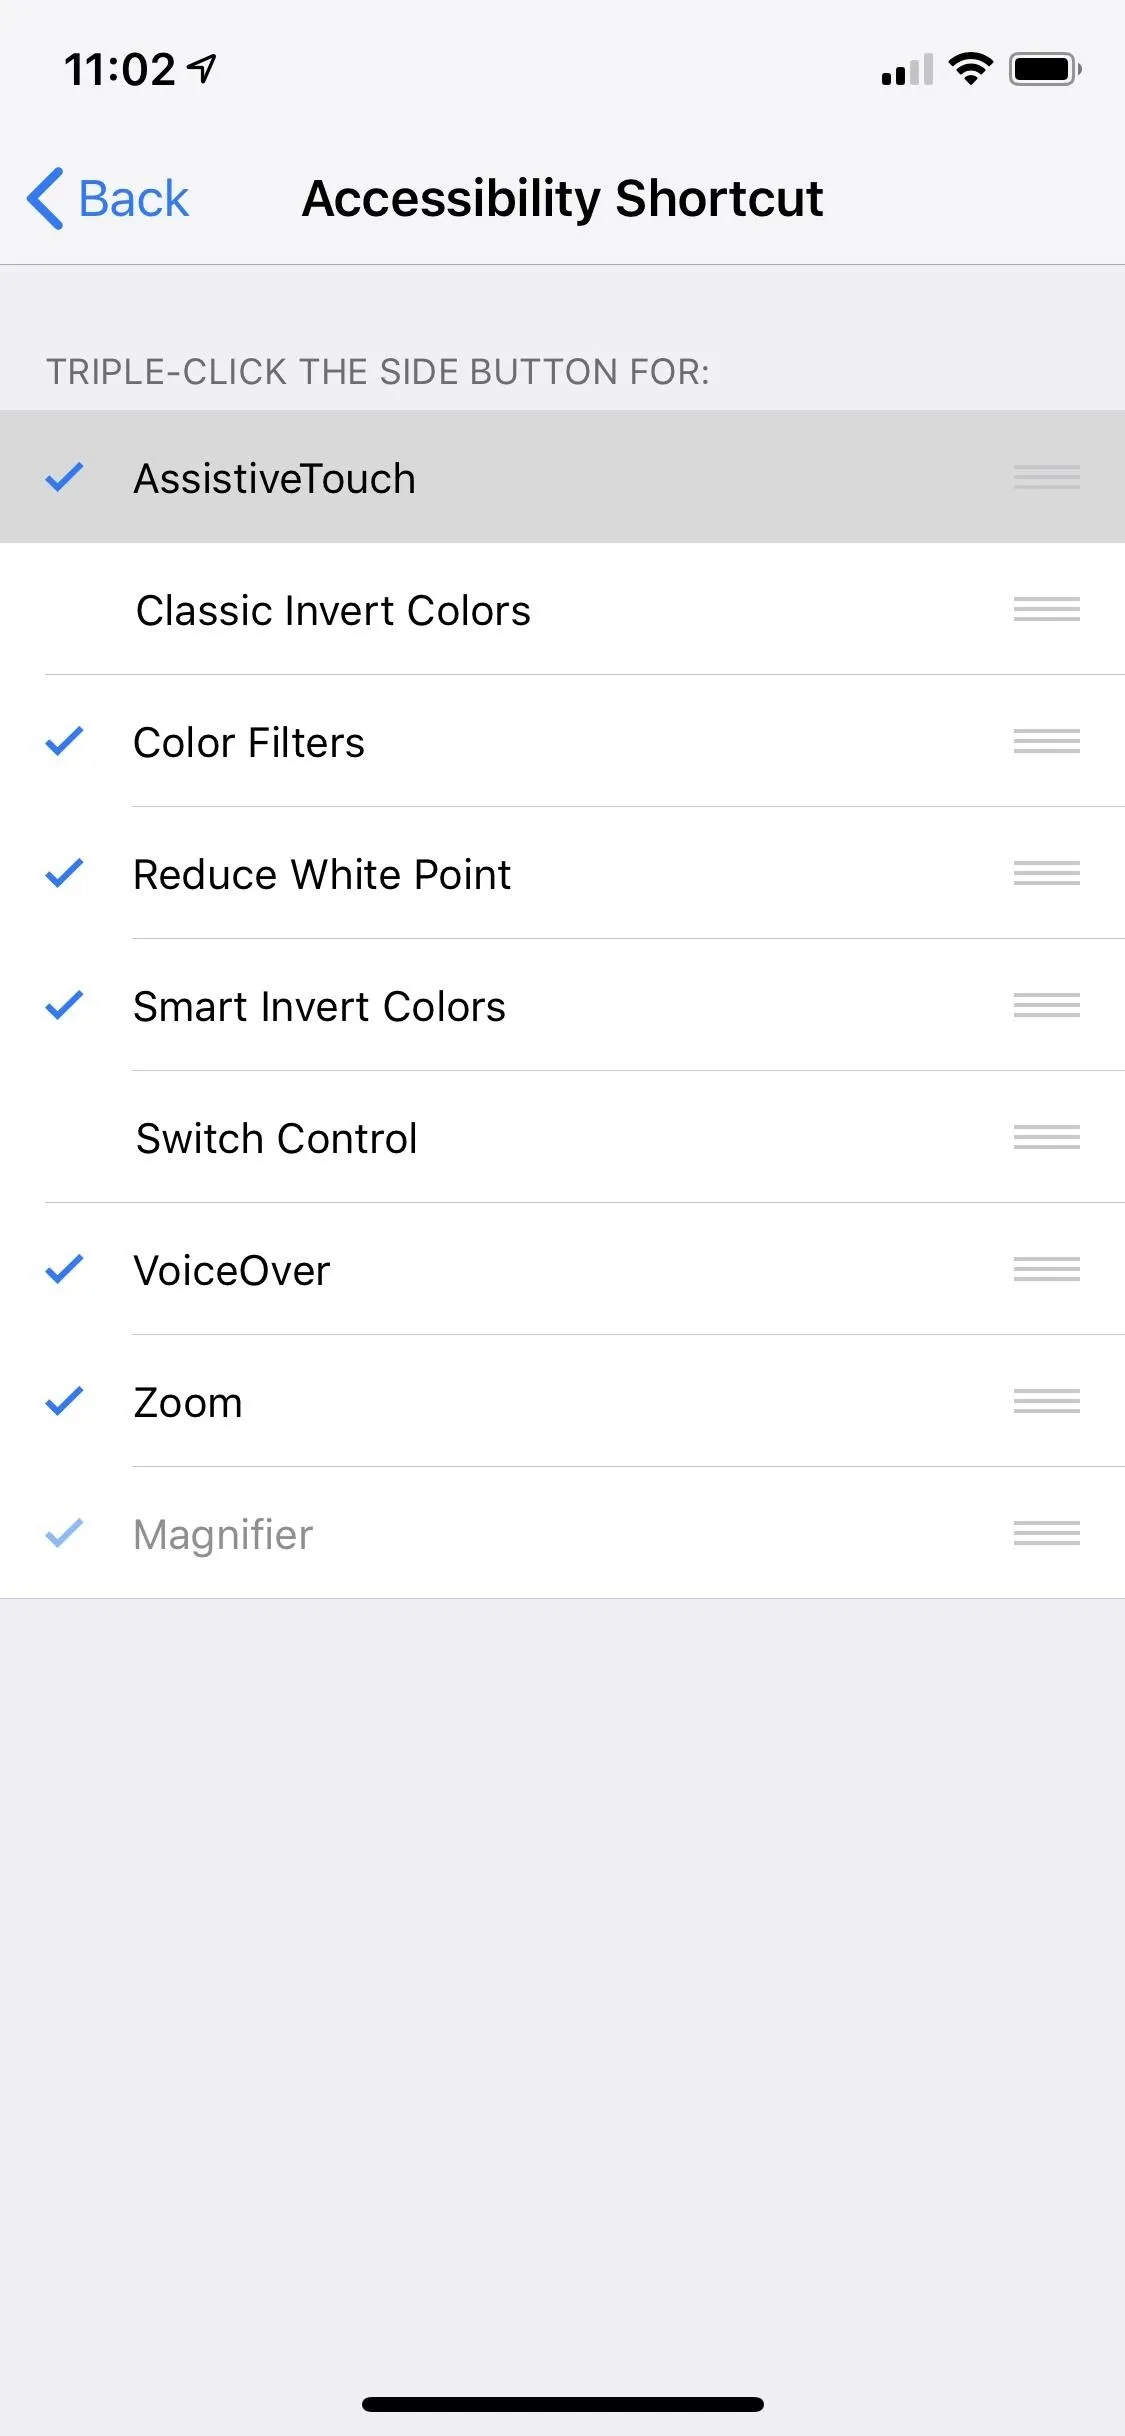
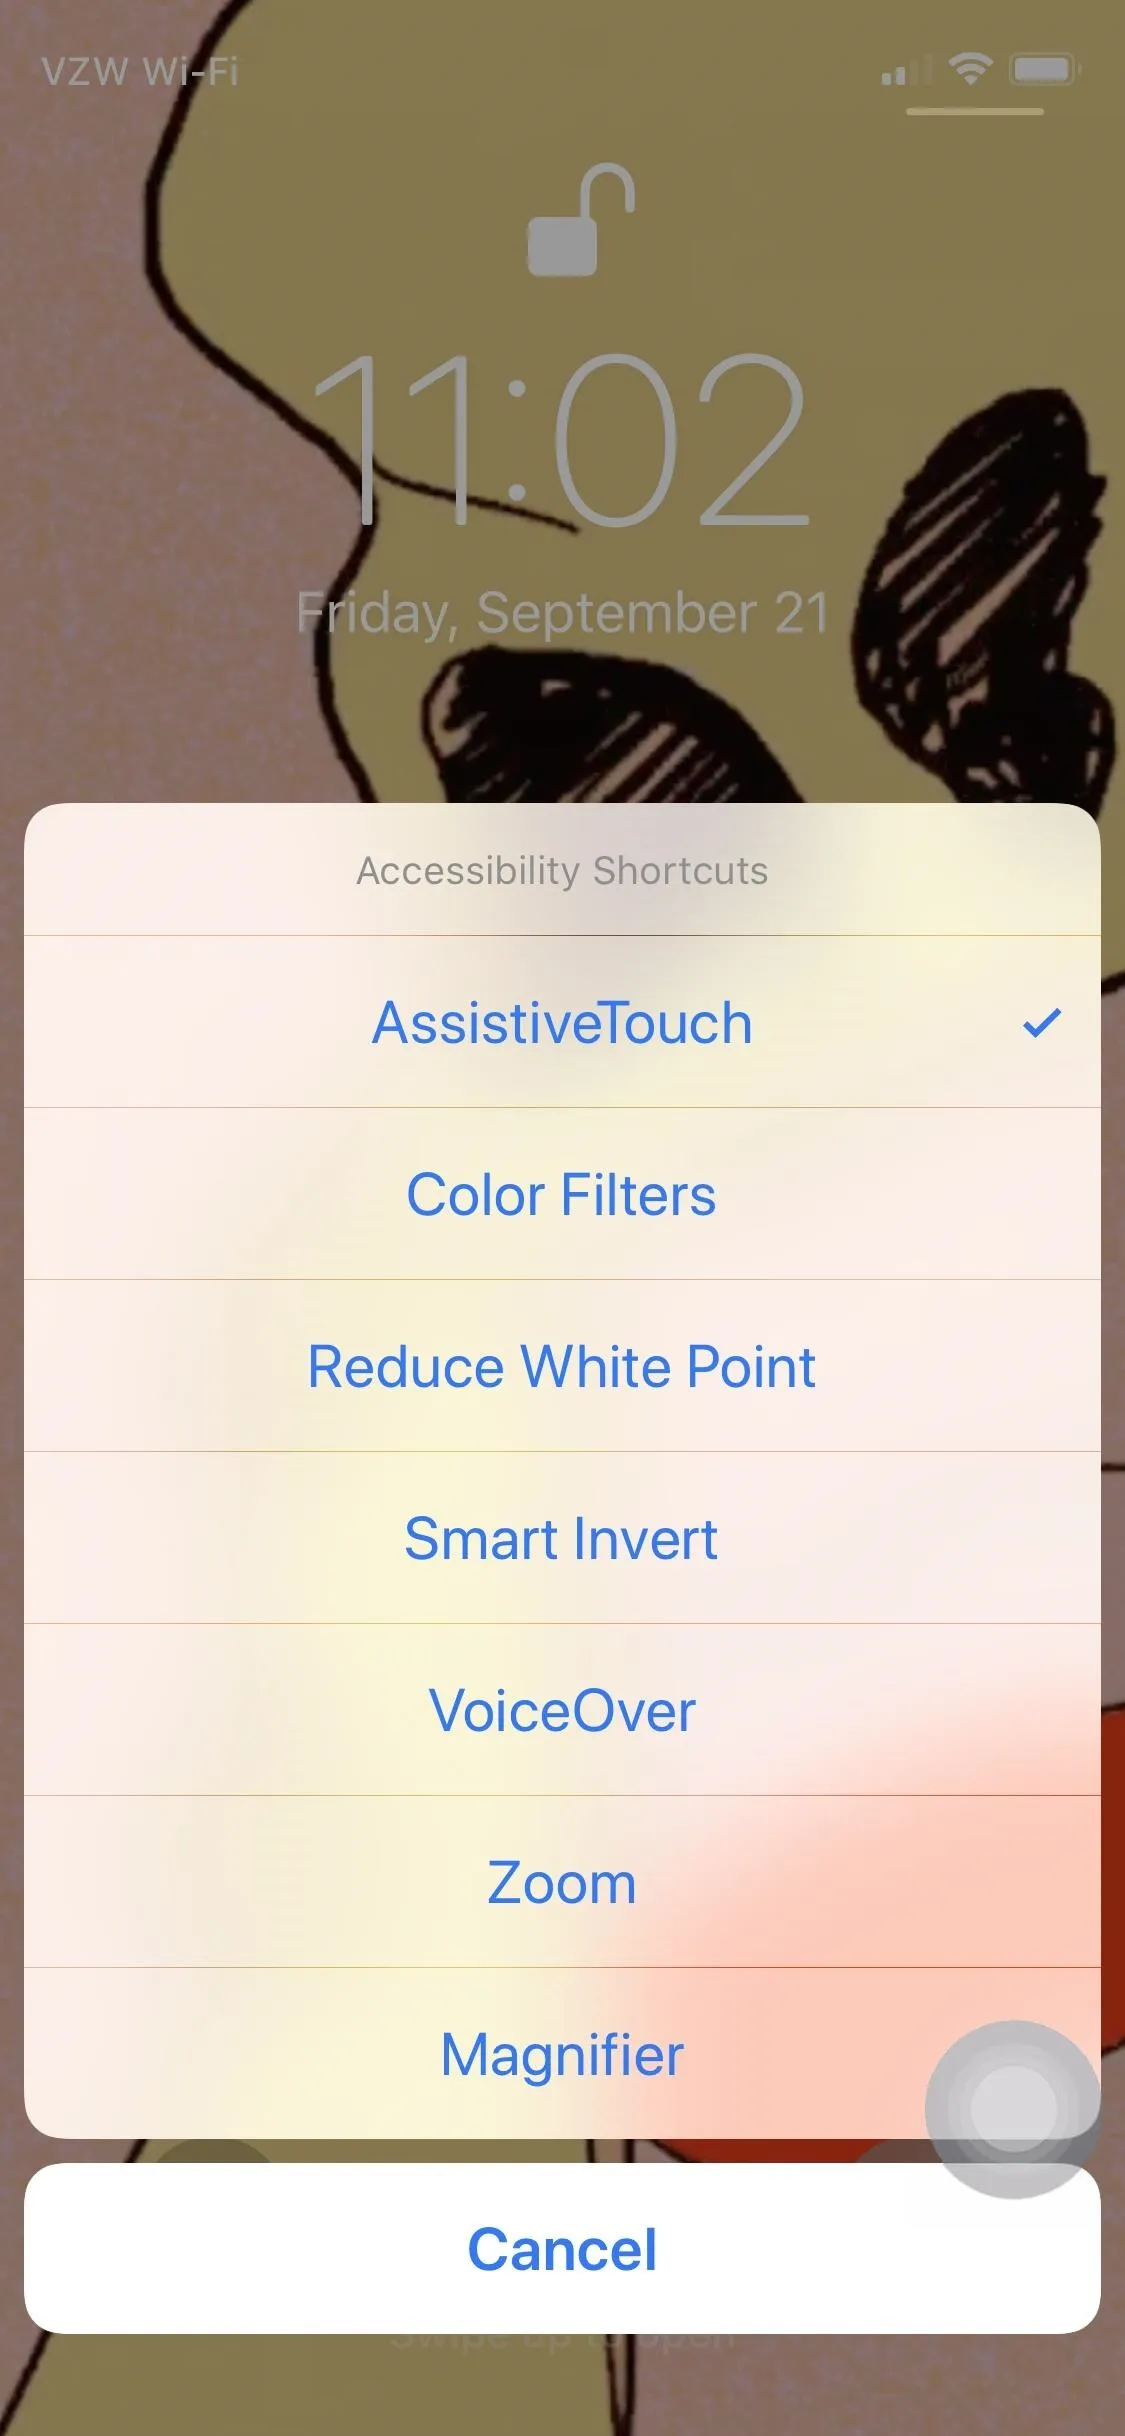


Once you have "AssistiveTouch" enabled an accessibility shortcut, you also have the option to enable the "Accessibility Shortcuts" toggle in the Control Center for even more access to AssistiveTouch. It's also great if you just don't find the Side button command to your liking.
Shut Down Your iPhone
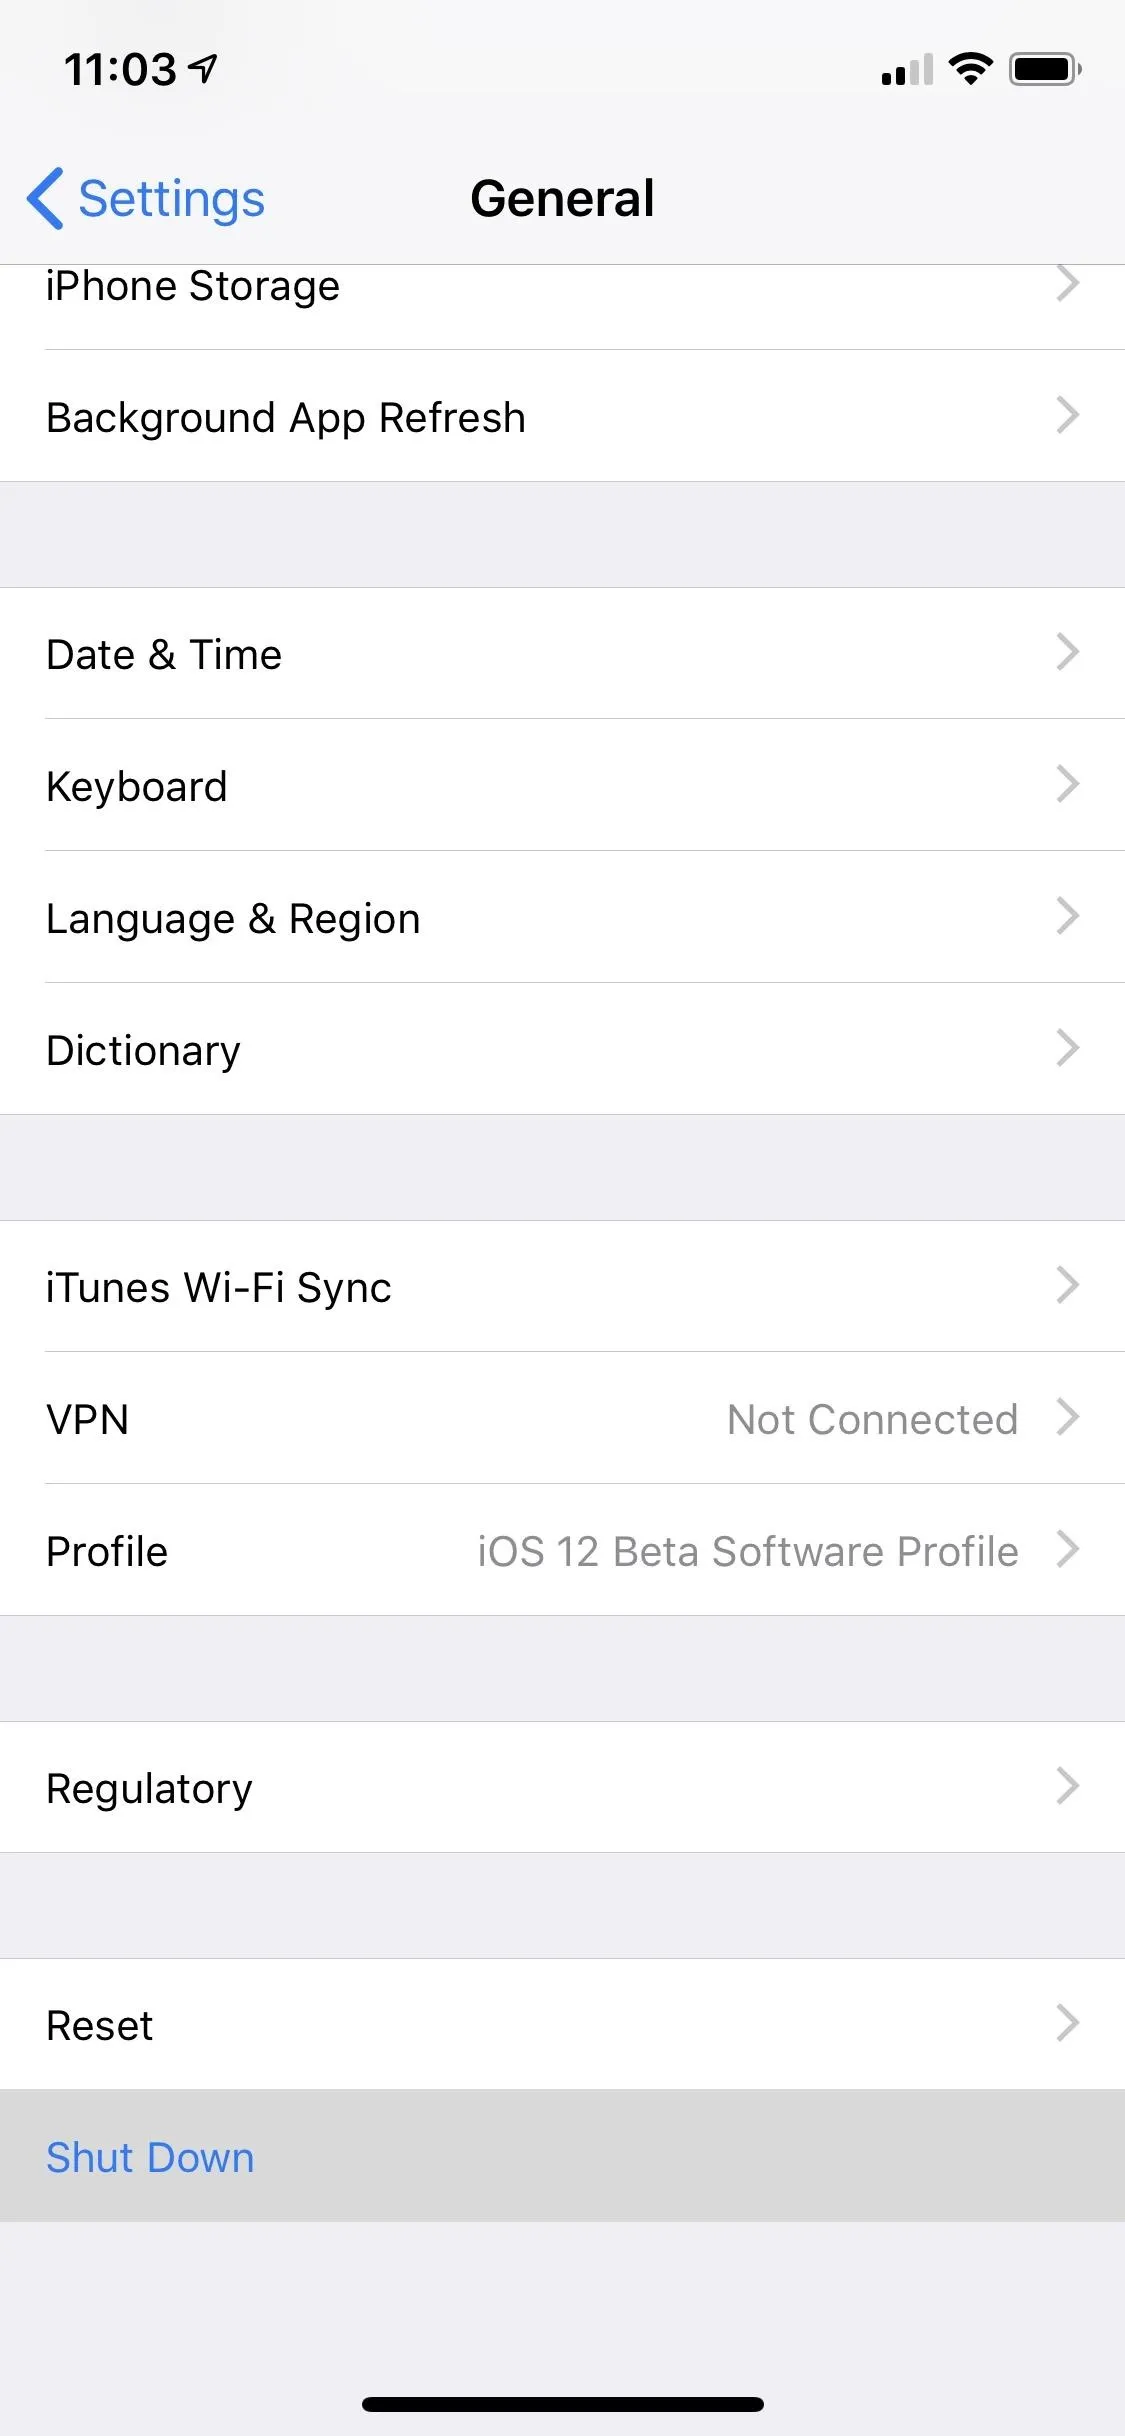
Now comes the crucial step — like the iPhone X, you'll need to stay within the Settings app of your iPhone XS, XS Max, XR to power it down, unlike past iPhones which let you initiate this command from any screen as long as it isn't locked or on the lock screen.
That said, head to "General" within the Settings app, and select "Shut Down" on the bottom of the page, as using the shortcut with the button presses will merely lock your iPhone and disable Face ID. Seeing the "Emergency SOS" option along with the "slide to power off" on the screen means you've used the button-press method, and that won't work, so shut down your iPhone directly from the Settings app.


Clear Your RAM with the Virtual Home Button
With the AssistiveTouch menu on hand, you're now free to clean out your RAM, so tap on the AssistiveTouch on-screen icon (or 3D Touch, long-press, or double-tap it if you customized the "Open Menu" action in Step 2).
Next, tap-and-hold on the virtual Home button within the expanded AssistiveTouch menu. Keep holding onto the button, and wait until the screen turns black and followed quickly by a white flash. You'll be instantly returned to the previous screen once the process is complete.
Performing this not only flushes your iPhone's RAM of almost all background processes, but it also wipes any temporary files from the temporary storage — all while leaving essential system processes, along with apps that have special permission to continue running as is, unscathed. Recent apps available on your app switcher will still remain intact, though most of them will be refreshed upon reopening.

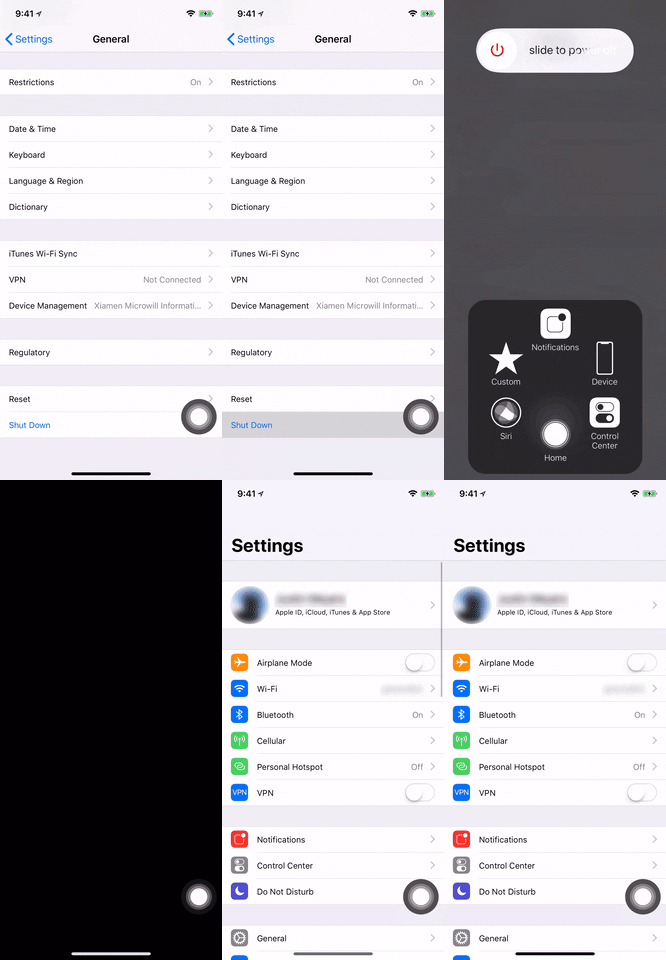


The iPhone XS, XS Max, and XR are the fastest iPhones to date, and it shows. As a testament to their overall speed, any recently wiped app you access either via app switcher or 3D Touch shortcut will refresh so quickly that it's almost certain to escape your attention. Usually, a reopened app will refresh back to its initial page, though sometimes, you're taken directly to where you left off.
It's worth mentioning that this nifty trick extends well beyond Apple's latest batch of iPhones, and will work on other iOS devices, as long as they're running on iOS 11 up to iOS 12. Devices that are on iOS 10.3.3 or lower can just use the tried-and-true Home button method to achieve the same results.
The RAM-clearing trick is most likely a diagnostic tool to help troubleshoot devices to help zero-in on slow or intermittent performance. We can't say for sure, however, since we've reached out to Apple multiple times without a proper response (all the people we contacted didn't even know what we were talking about).
- Follow Gadget Hacks on Facebook, Twitter, YouTube, and Flipboard
- Sign up for Gadget Hacks' daily newsletter or weekly Android and iOS updates
- Follow WonderHowTo on Facebook, Twitter, Pinterest, and Flipboard
Cover photo, screenshots, and GIFs by Justin Meyers/Gadget Hacks


Comments
Be the first, drop a comment!