Widgets can display essential information from an app right on your iPhone's Lock Screen, but there's an even bigger reason you should be using them: fast access to your most-used apps.
Thanks to iOS 16, you can add one widget above the time on the Lock Screen and up to four small ones below the time. And you can do that for each of your Lock Screen wallpapers. So you can have at-a-glance app details on all your Lock Screens, matching like-minded widgets with the themes and focuses of your wallpapers.
When you have a Lock Screen widget set, tapping it will open up the app on your iPhone, most likely straight to whatever the widget displays. For example, when you add a symbol widget for the Stocks app, tapping it will open Stocks directly to whatever stock you assigned.
- Don't Miss: This Hidden Trick Lets You Bold Text in Your iPhone's Status Bar for a Heavier Look System-Wide
That's part of the answer to fast access to your favorite apps. But what if you want the app to open to its home page instead of a specific view? Some apps may give you widgets that do that, but most do not, and there's a good chance the app you want a shortcut to doesn't even support Lock Screen widgets.
Adding Lock Screen Shortcuts for Any App
Unfortunately, Apple has not created any Lock Screen widgets for its Shortcuts app, which would probably be the best solution for opening apps from your Lock Screen. Until that happens, there are third-party apps that can fill the gap. One of those is Launchify.
- App Store Link: Launchify: Lock Screen Widgets
While Launchify is free to install, it does bug you to subscribe to a paid monthly or yearly plan. However, the app lets you create two app shortcuts for the Lock Screen for free. Similar apps may cost more, while others may give you more free app shortcut widgets. Here are a few alternatives you can check out:
- LockFlow·Lock Screen Launcher: No limit on the number of free app shortcut widgets you can make, and you can even create a widget for a folder that houses any number of app shortcuts. However, it costs $2.99 per month, $9.99 per year, or $32.99 once to unlock other features, like opening and selecting apps from a folder directly on the Lock Screen. The icons it automatically assigns apps are always off, and you can only swap them out with other symbols or image uploads.
- Top Widgets: There doesn't seem to be a limit on free app shortcut widgets, and there are a few different styles to choose from. However, you're stuck using Top Widgets' icon designs. The interface is pretty cluttered, so it's visually hard to find and pick something, and there are ads. But you can remove ads and unlock other features for $1.49 per month, $3.49 per quarter, or $8.49 per year.
- Lock Launcher - Screen Widget: Like Launchify, you're limited to two app shortcut widgets before you have to pay up. There are more customization options for the widget design, and you can use URL schemes to open unsupported apps for your two free app shortcuts. The app's pro version, which unlocks everything, costs $4.99 once, so there's no subscription. Currently, it's on sale for $0.99.
- Widgetable: Lock Screen Widget: As with Top Widgets, there doesn't seem to be a limit on free app shortcut widgets. It chooses a user-submitted icon for you, but you can change it to a symbol. The interface is also pretty cluttered and very similar to Top Widgets' design, so it's visually hard to find and pick something, and there are ads. You can remove ads and unlock other features for $1.99 per month or $19.99 per year, and there is a free three-day trial.
- Widgetsmith: If you can get past the clunky and confusing UI, you can probably add as many free app shortcut widgets as you want, but you need to know the URL scheme as it doesn't offer any prepopulated options. You can select from your own photos, symbols, or a predesigned theme. Some themes require the pro version for $1.99 per month or $19.99 per year. There are ads that the pro version removes too.
- ScreenKit- Widget, Themes,Icon: As seems to be the norm, the UI is pretty confusing to use. Free app shortcut widgets appear endless, but you're limited in their designs. One cool feature lets you use GIFs, though. ScreenKit charges to unlock various themes, ranging from $2.99 once to $49.99 per year.
While Steps 1 to 3 below on designing your widgets will be different from app to app, Steps 4 to 7 will be very similar when it comes to actually adding them to your Lock Screen. However, most of them use URL schemes to open apps, and you can submit your own if you can't find one for your app; Visit my URL schemes lists for Apple apps and third-party apps to explore.
Choose an App
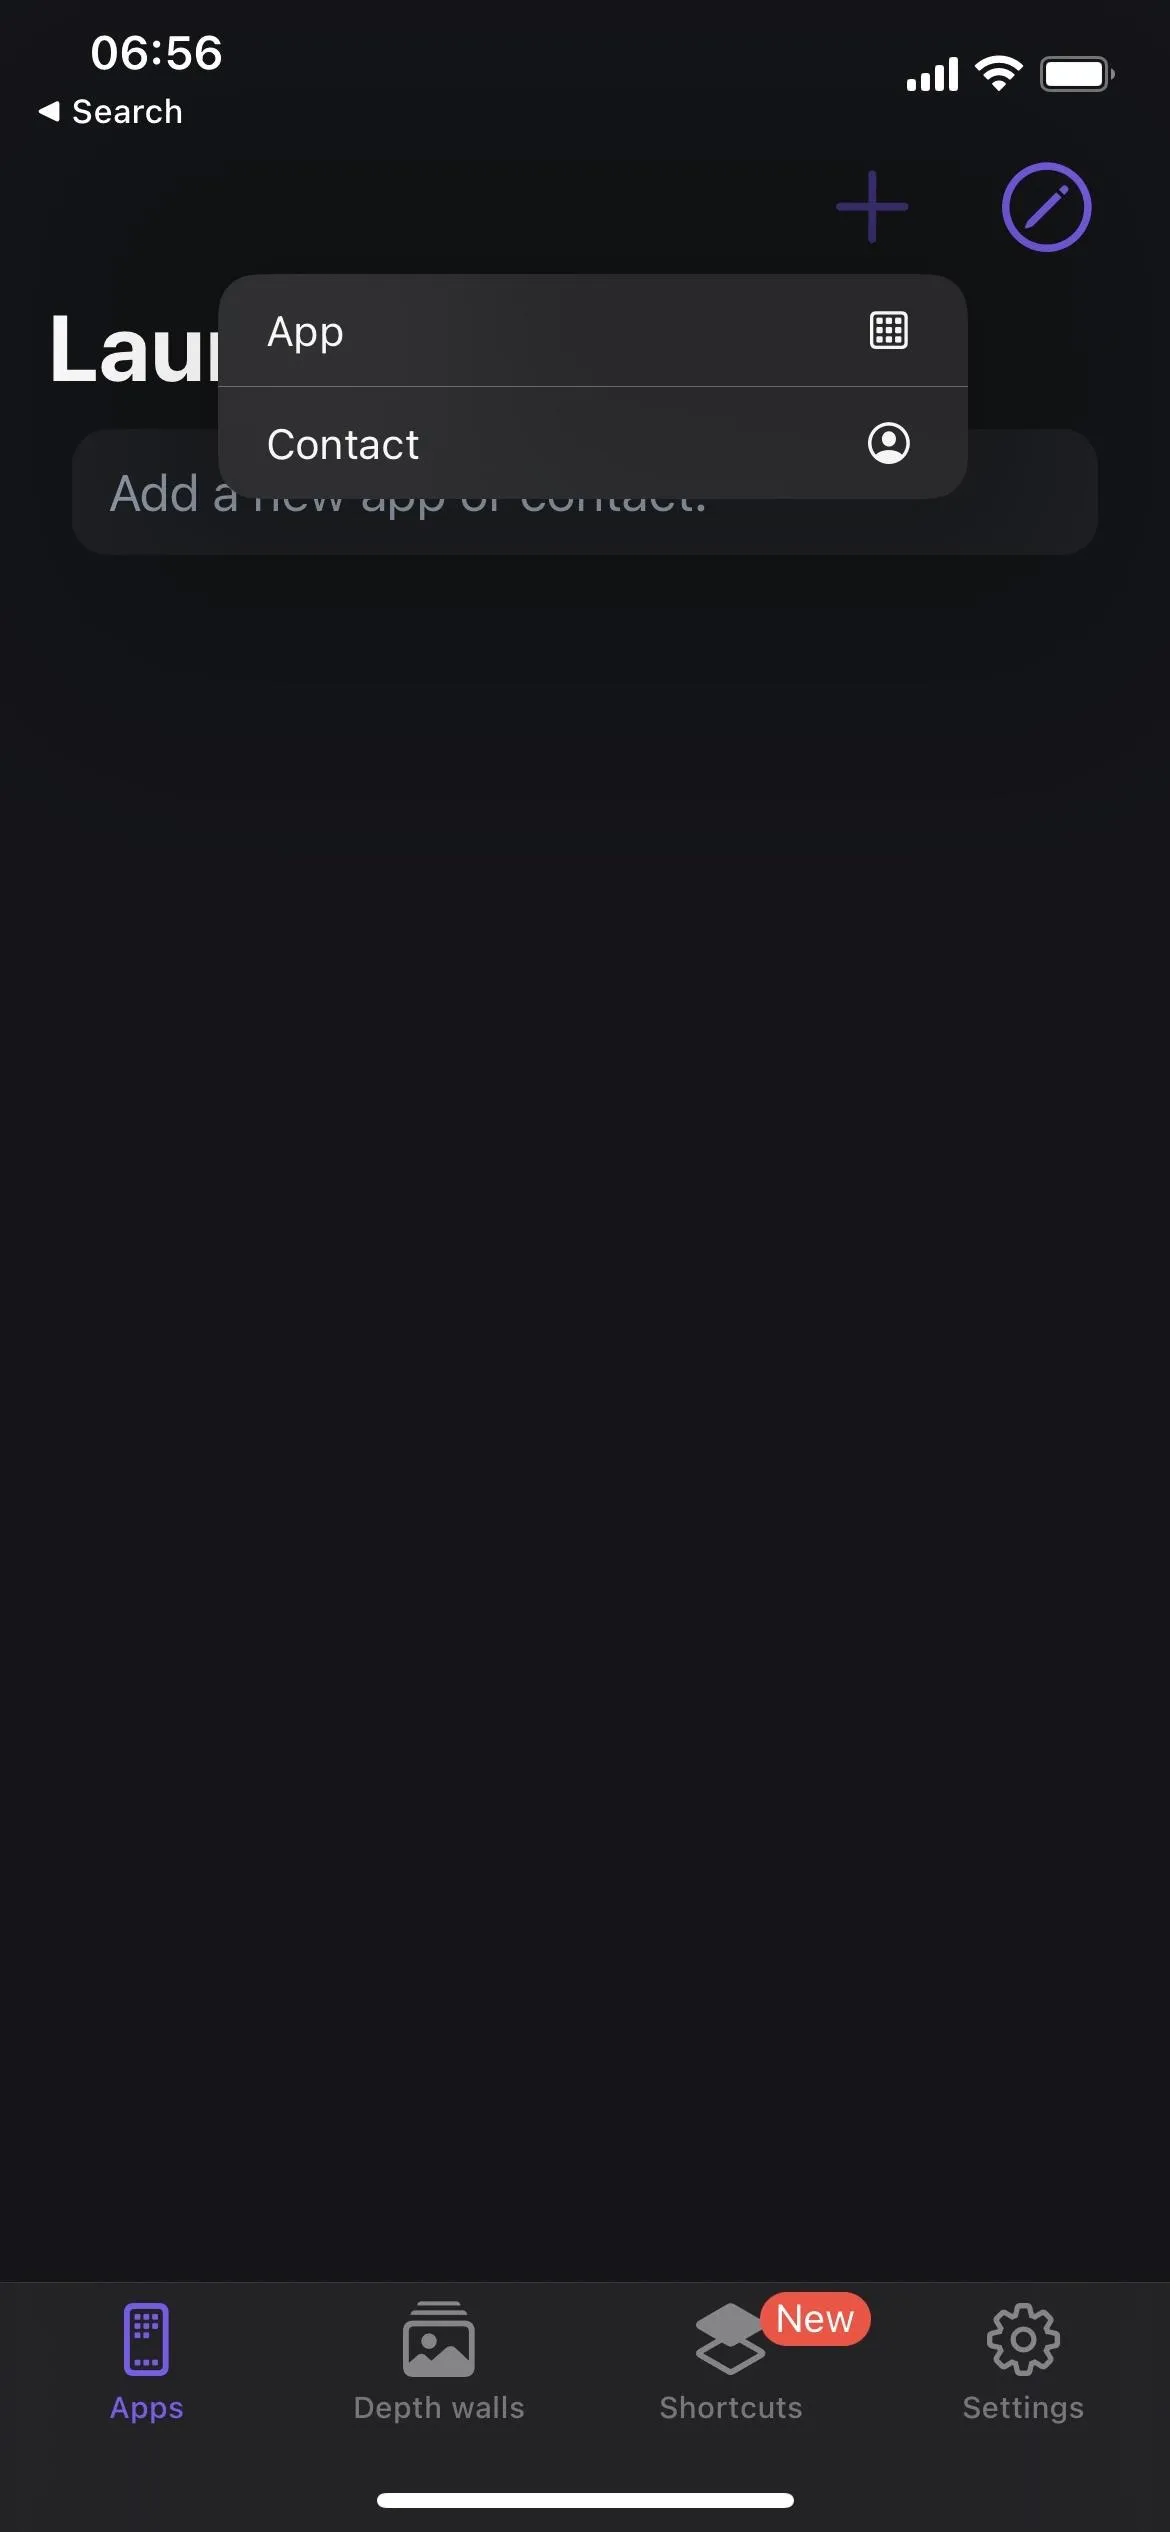
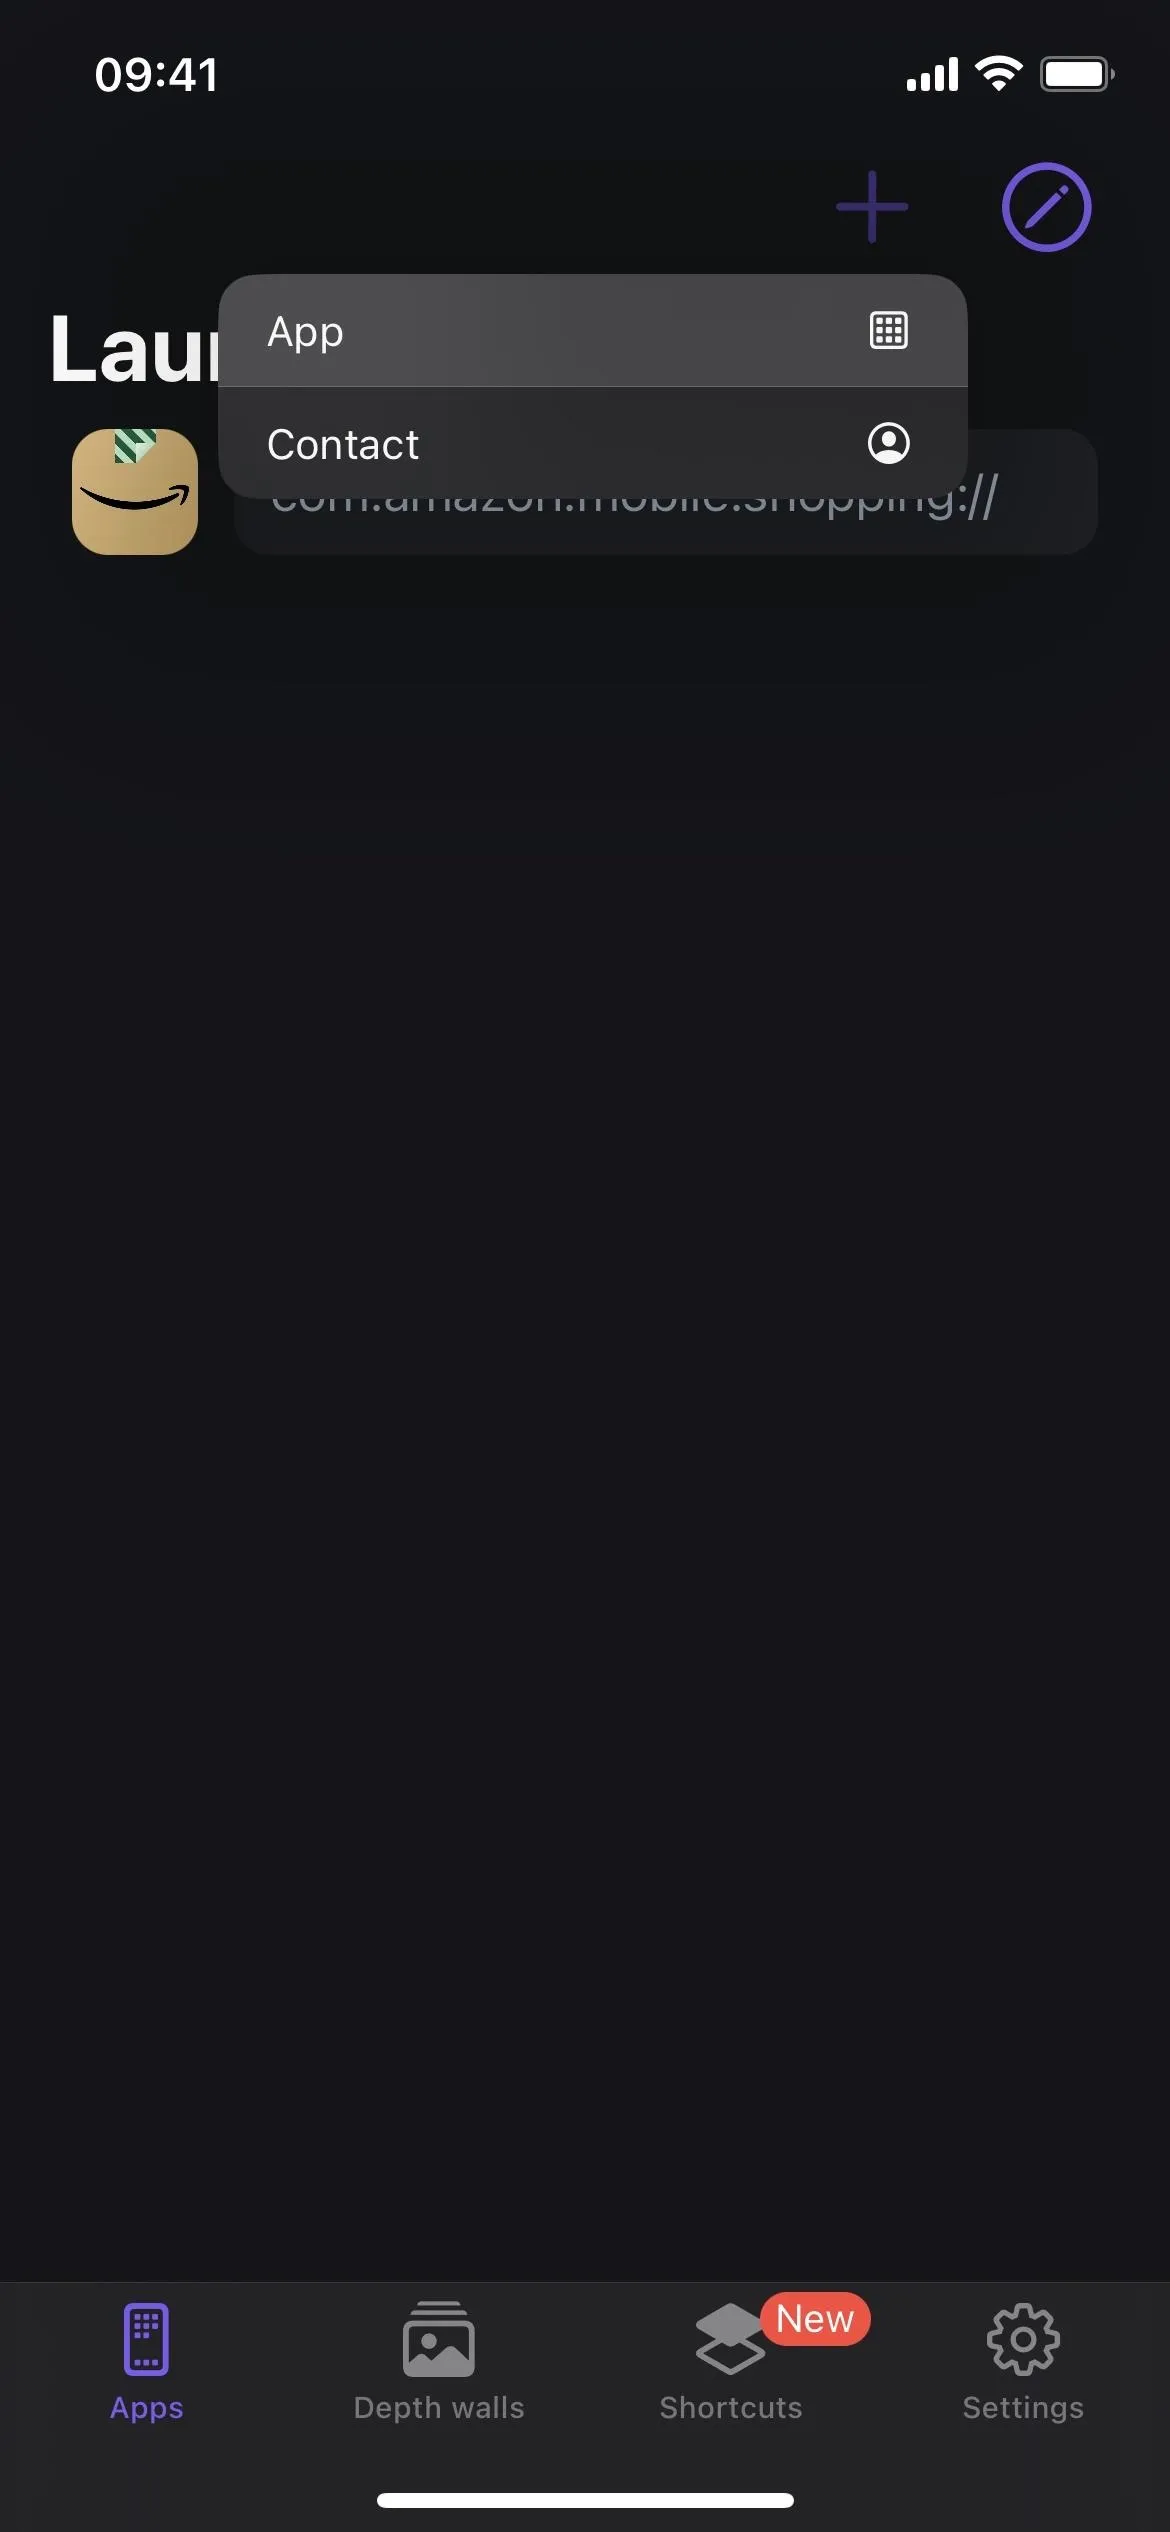
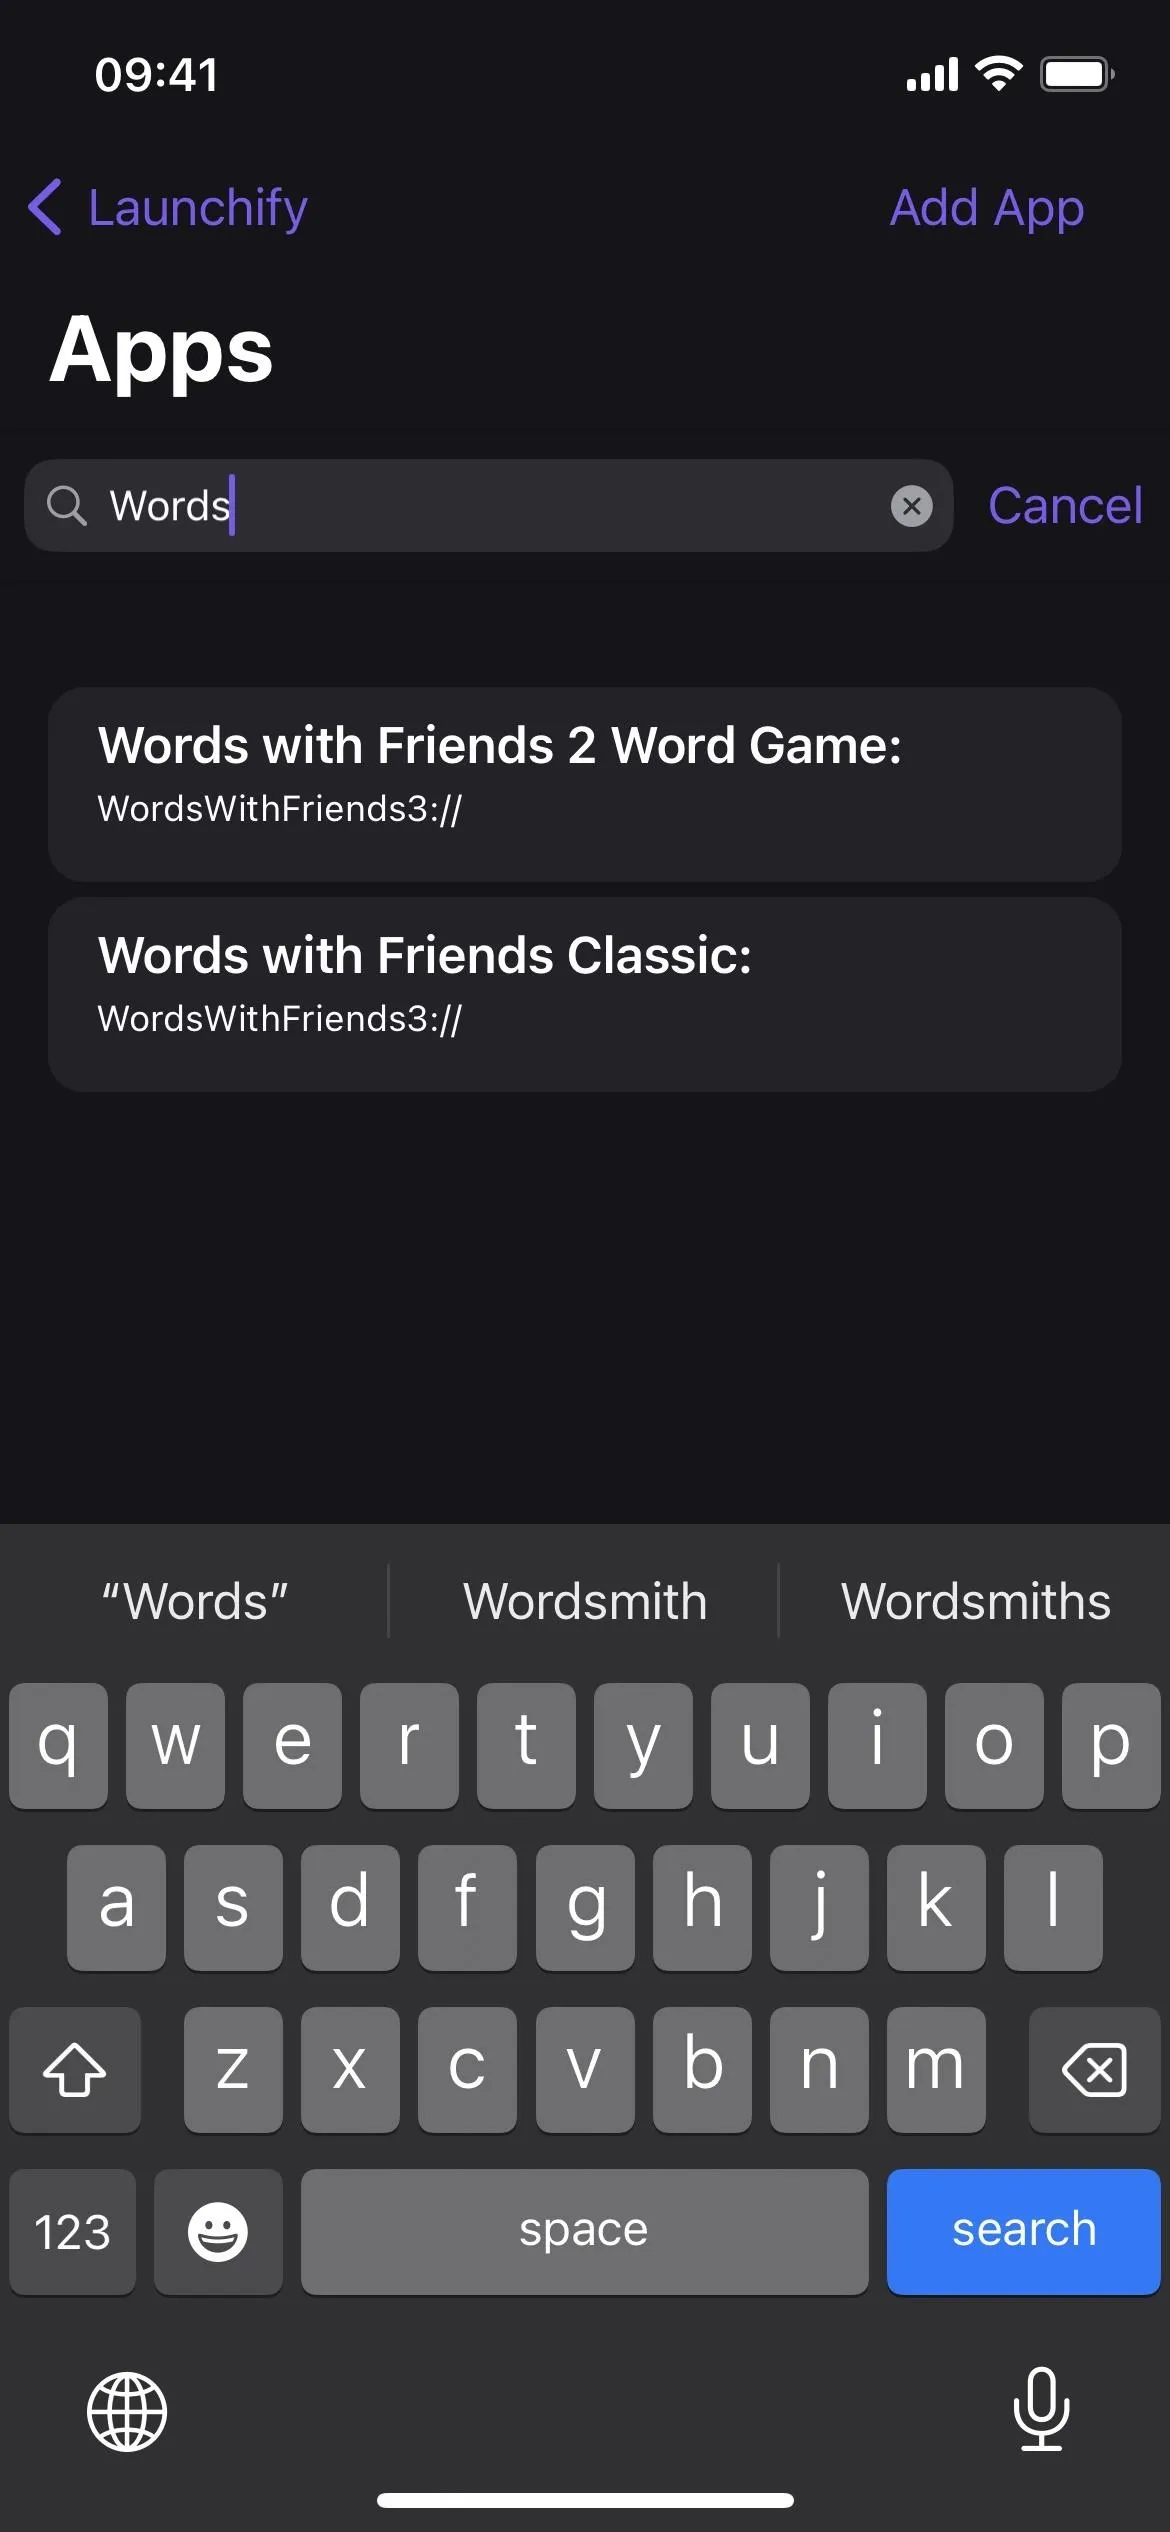
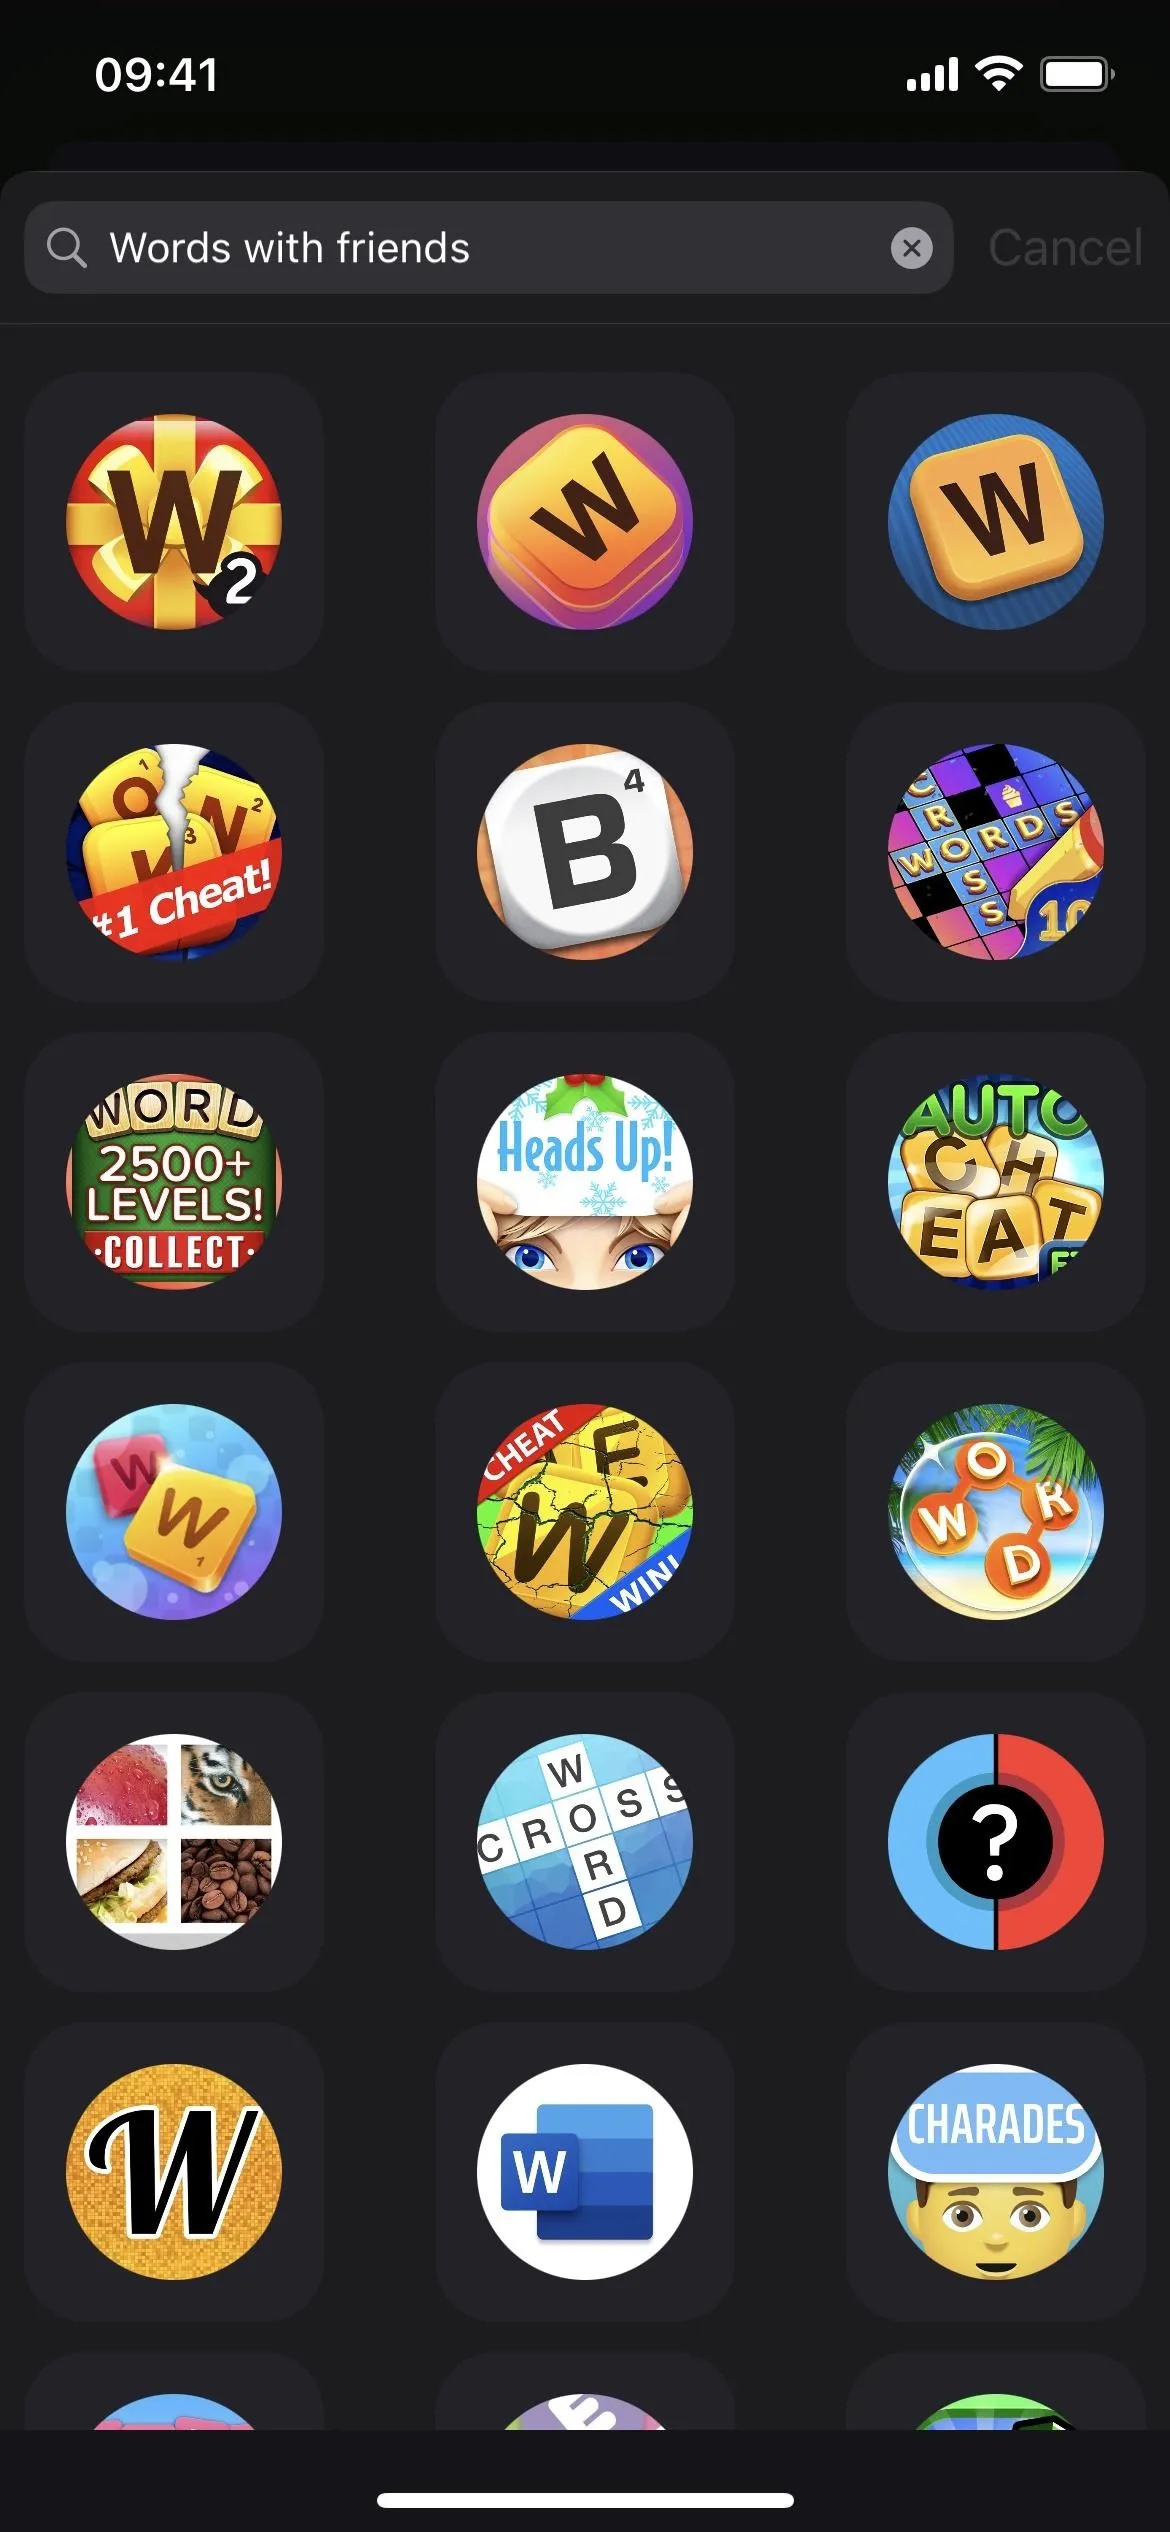
In Launchify, tap the plus (+) sign on the Apps tabs, then choose "App." You'll then see the complete list of apps supported by Launchify, and you can use the search tool to find your app faster. Launchify uses URL schemes to launch apps, so any app that assigns itself a scheme name will work.
Don't see your app listed? You can tap "Add App" to add one yourself, but this is a premium feature. If that doesn't bother you, visit my URL schemes lists for Apple apps and third-party apps to find the app you want.


Assign an Icon
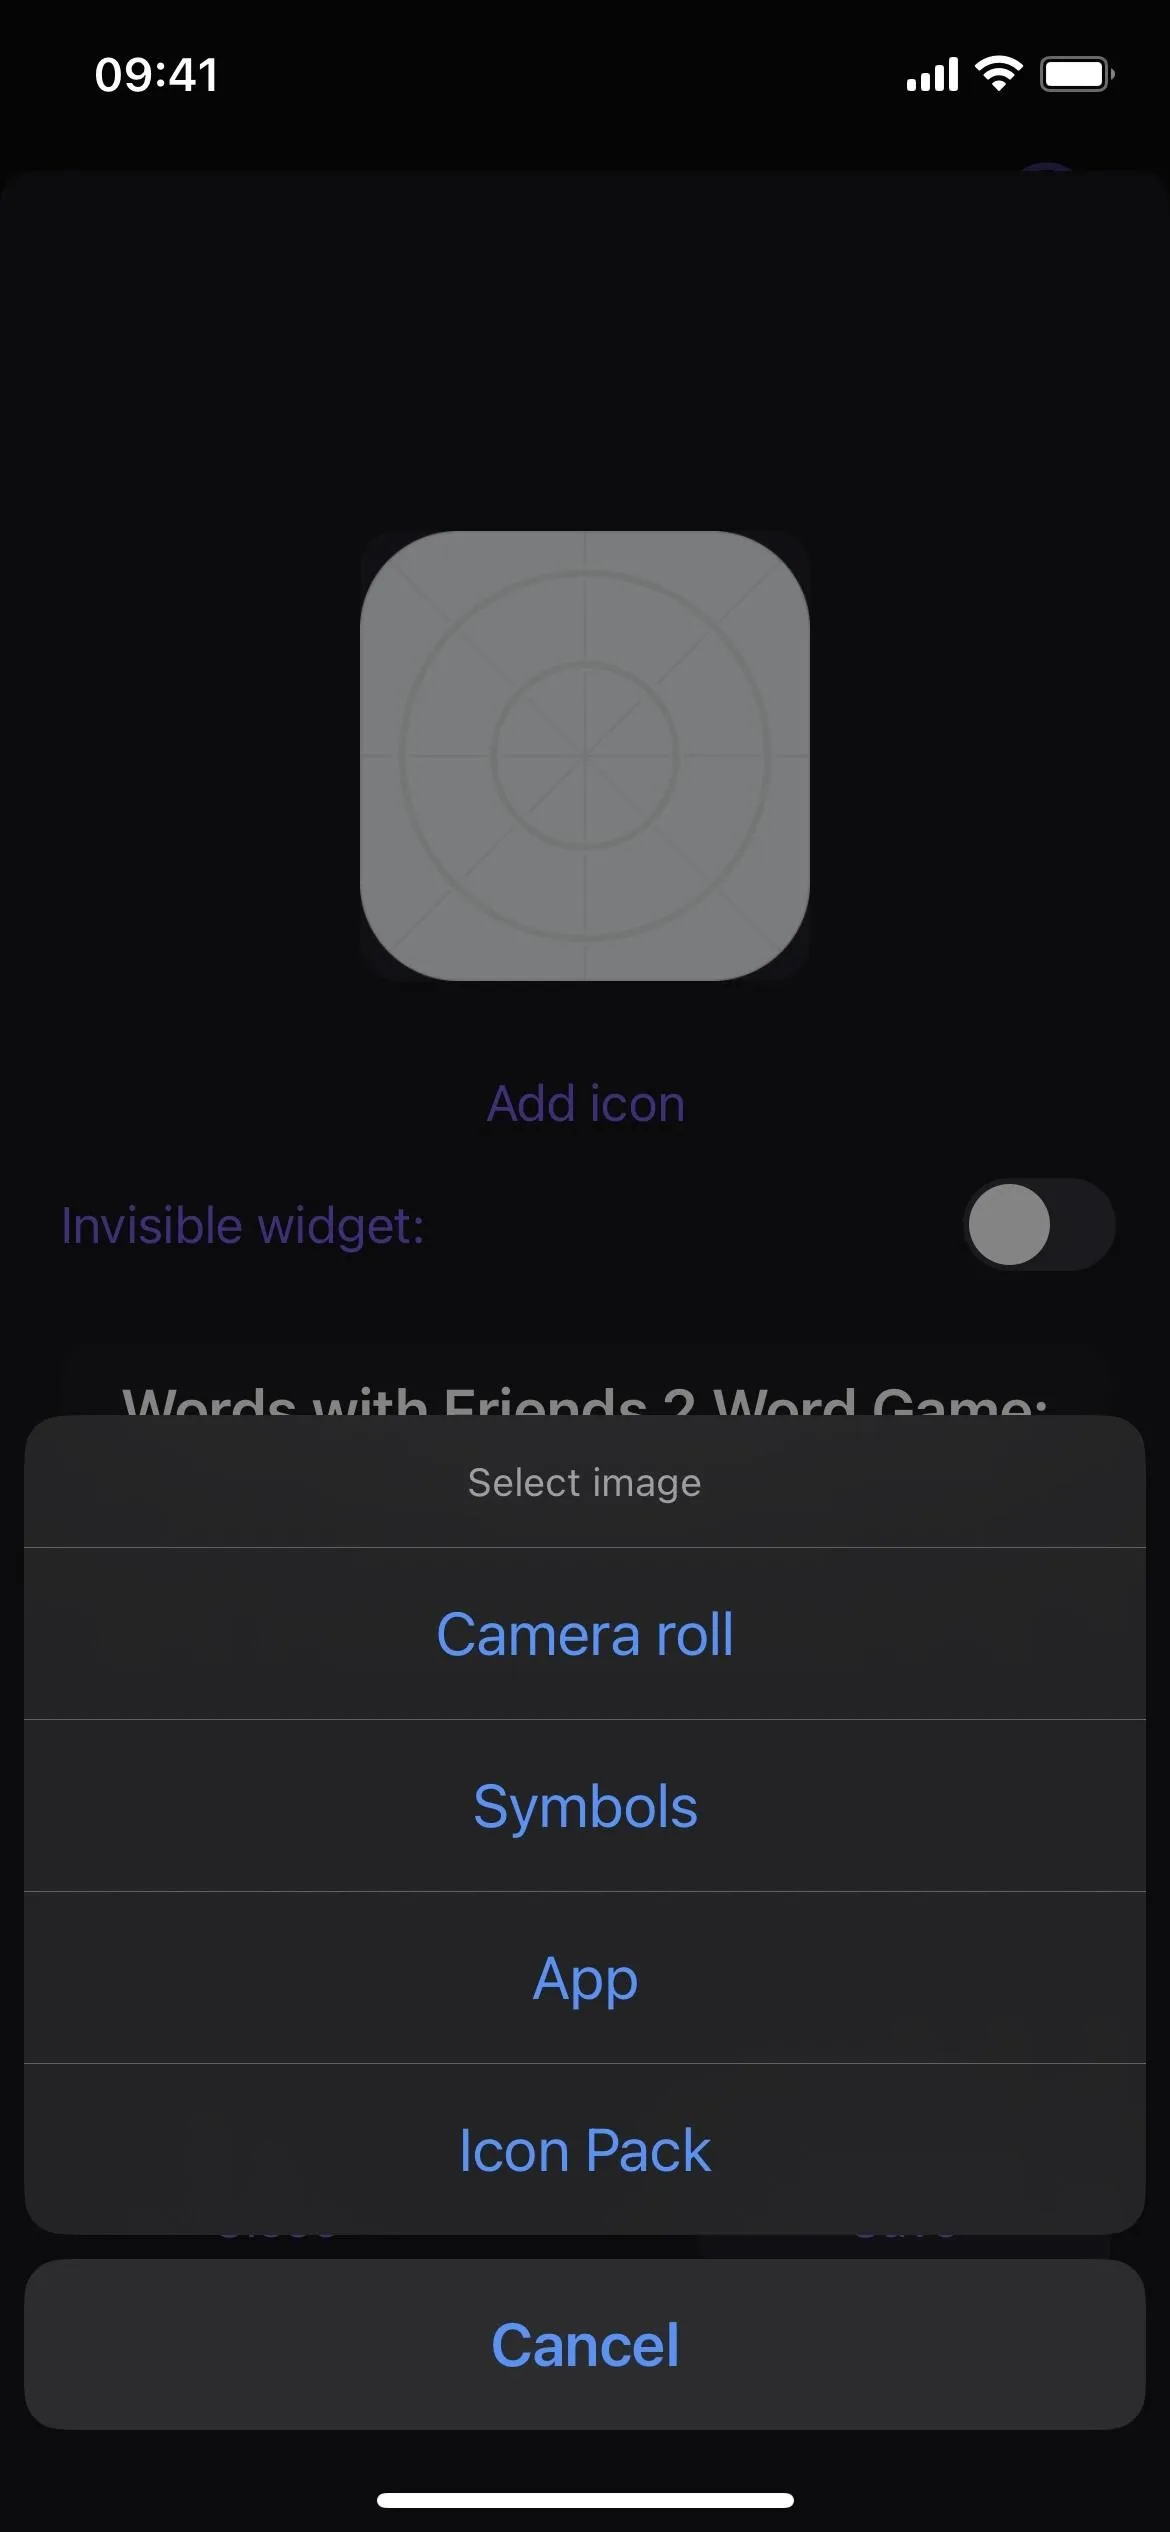
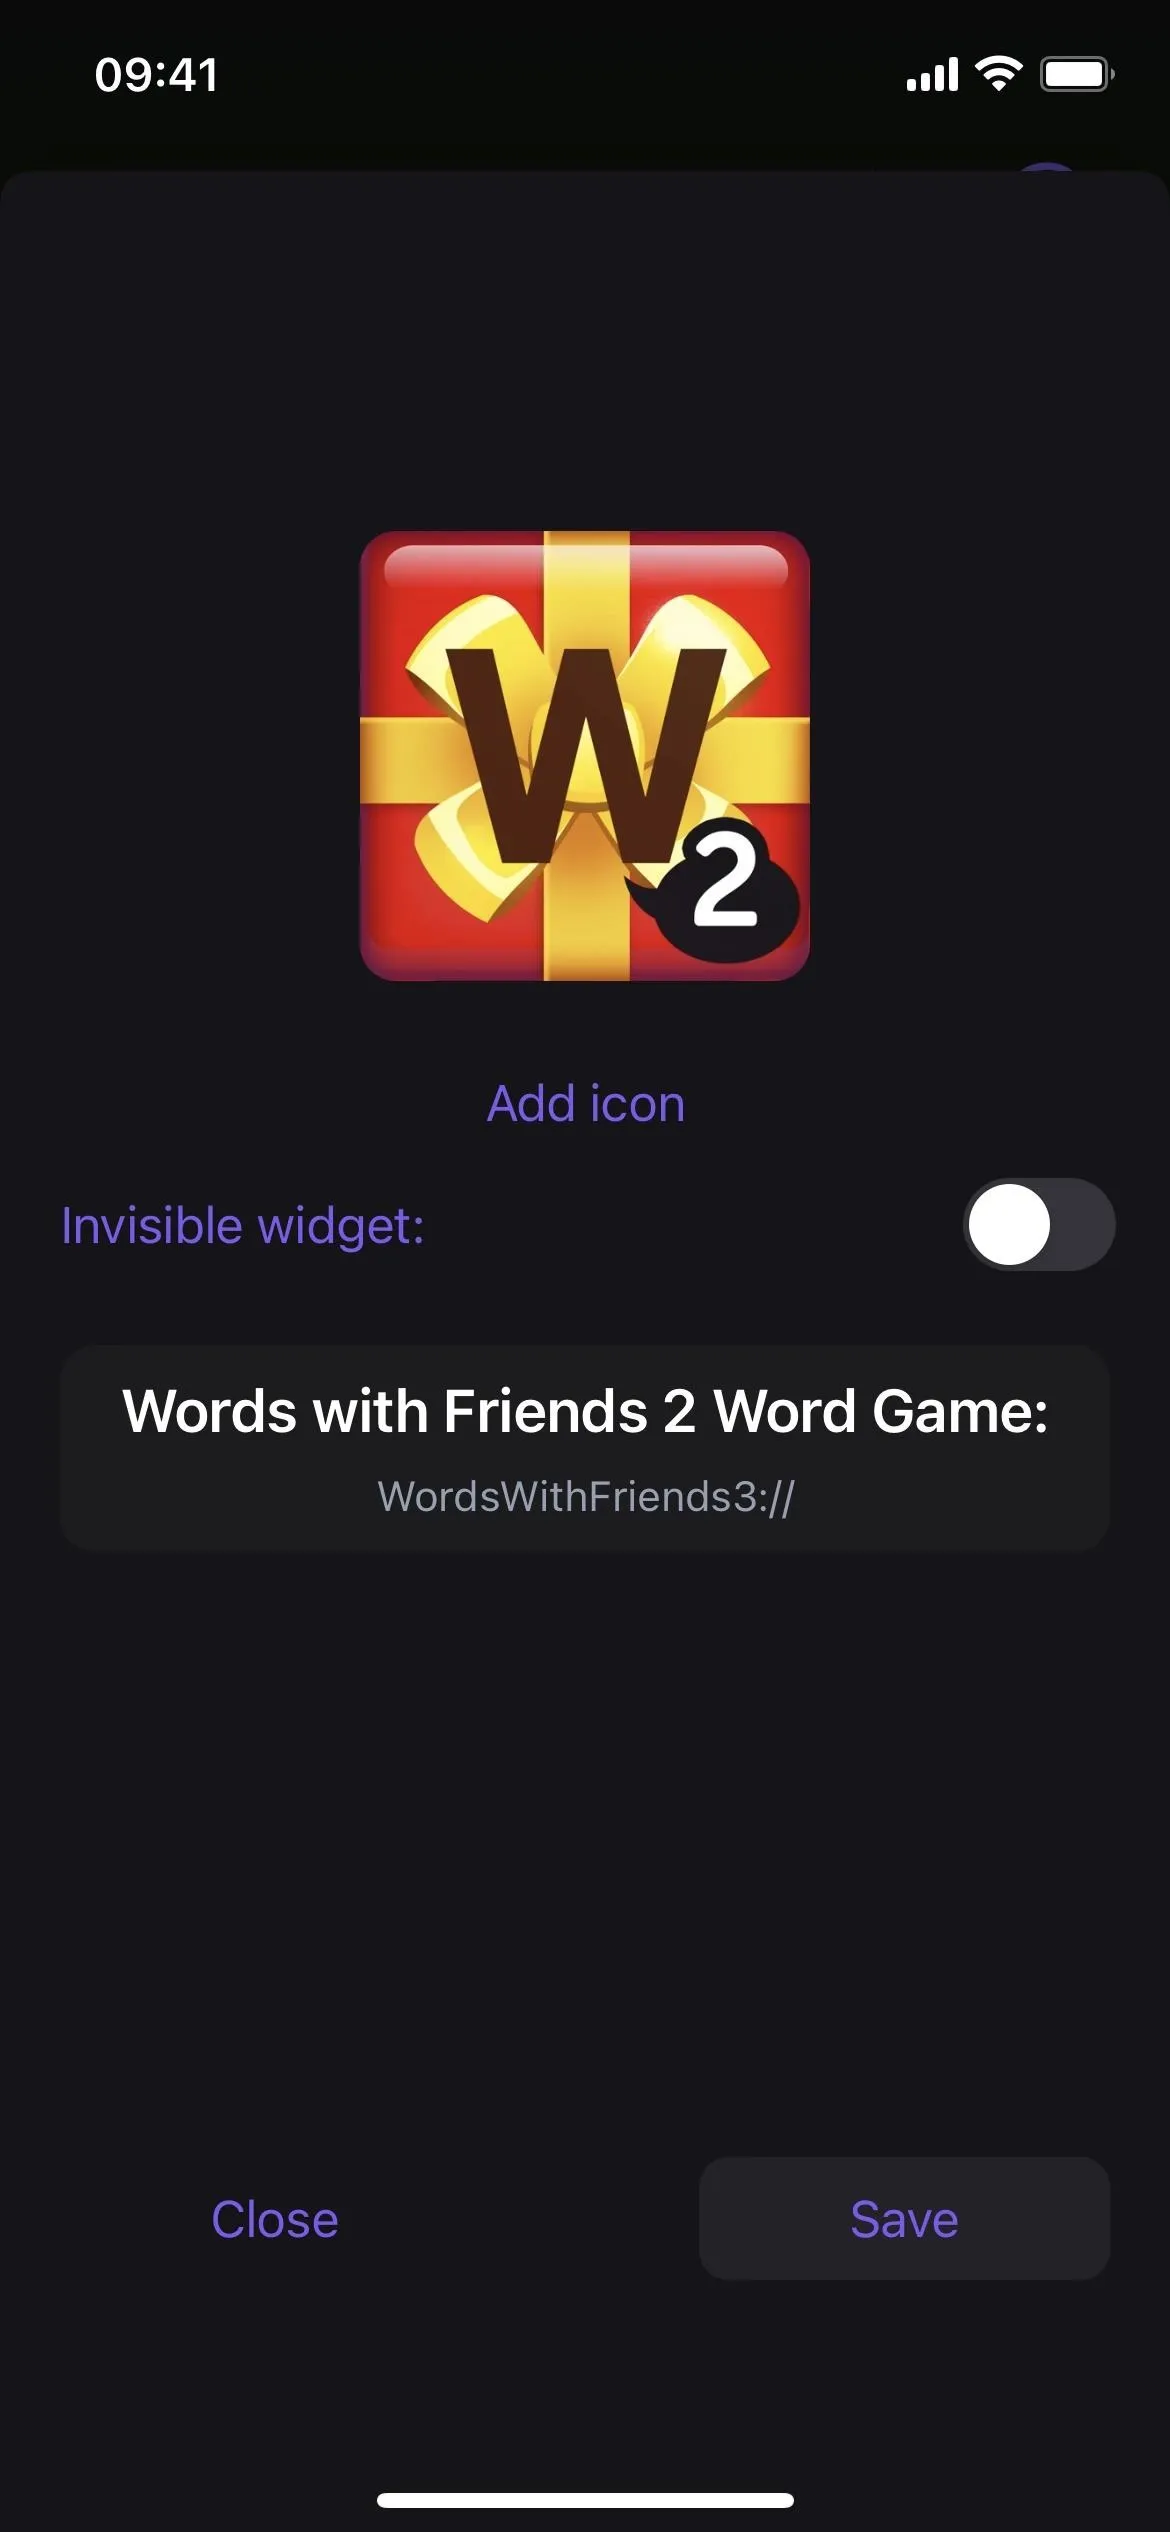
After you select a URL string for the app you want, tap "Add icon" and choose a way to add an image. To keep the same app icon, choose "App" from the menu, search for the app, and select the icon, which is pulled straight from the App Store. You can also upload your own picture, choose an icon from Apple's SF Symbols library, or pick an image from Launchify's icon pack.
When done, hit "Save," and you're ready to add Launchify's widget.


Repeat for More Apps (Optional)
Before adding Launchify's widget, remember that Launchify only allows two free app shortcuts before you have to pay for a subscription. So if you want a second app icon on your Lock Screen, repeat Steps 1 and 2 above. If you want more than two, Launchify charges $0.99 per month or $7.99 per year.
Open the Lock Screen Editor
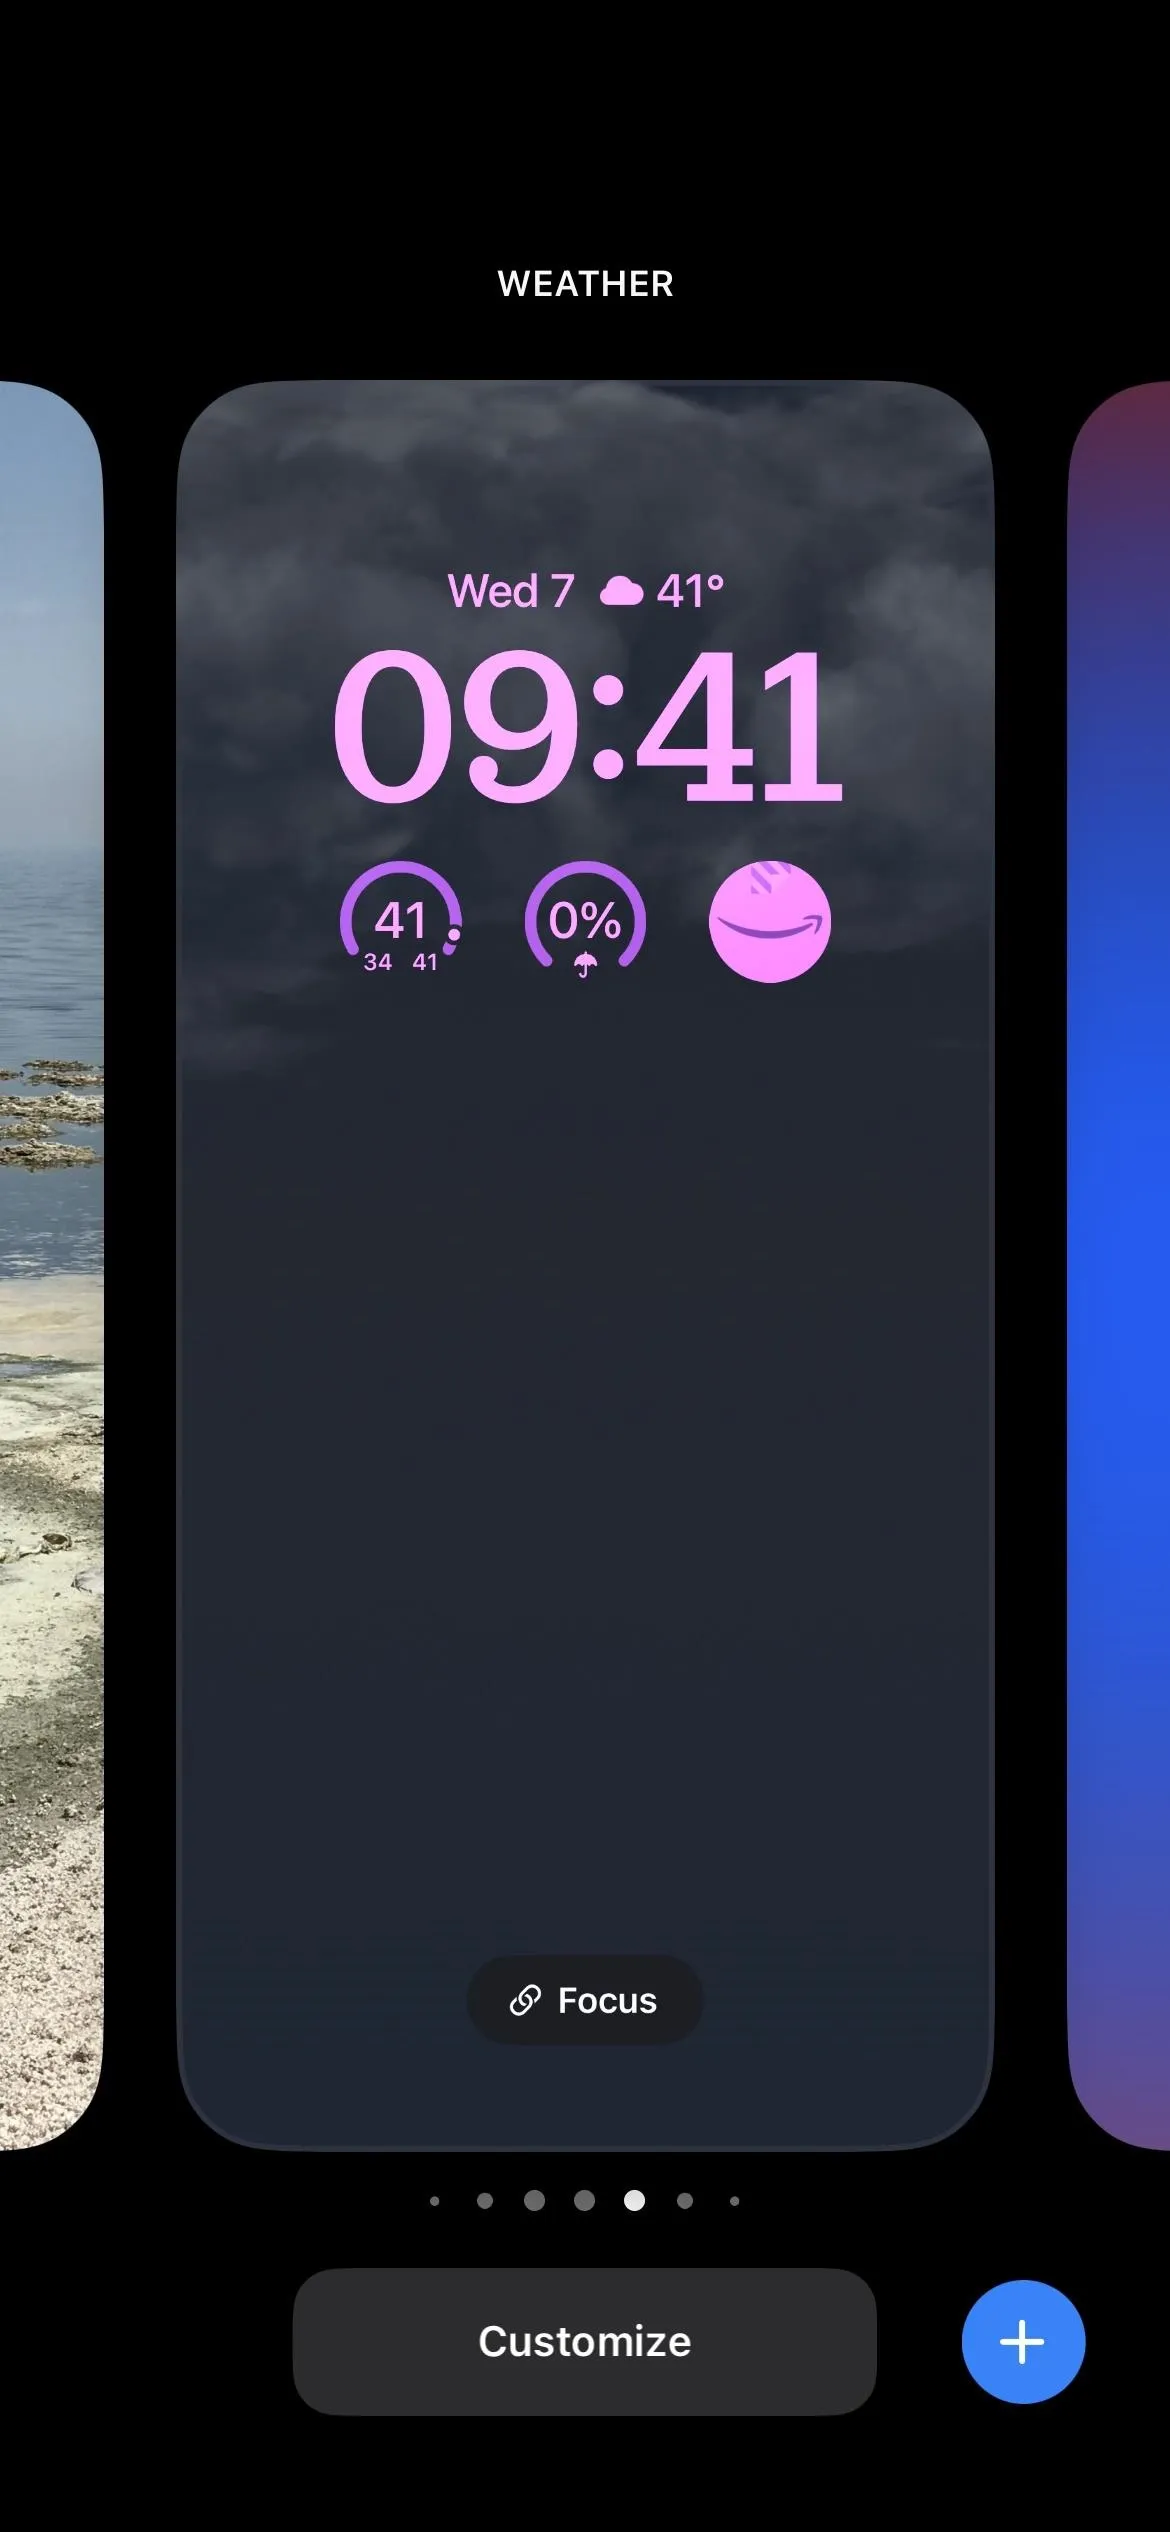
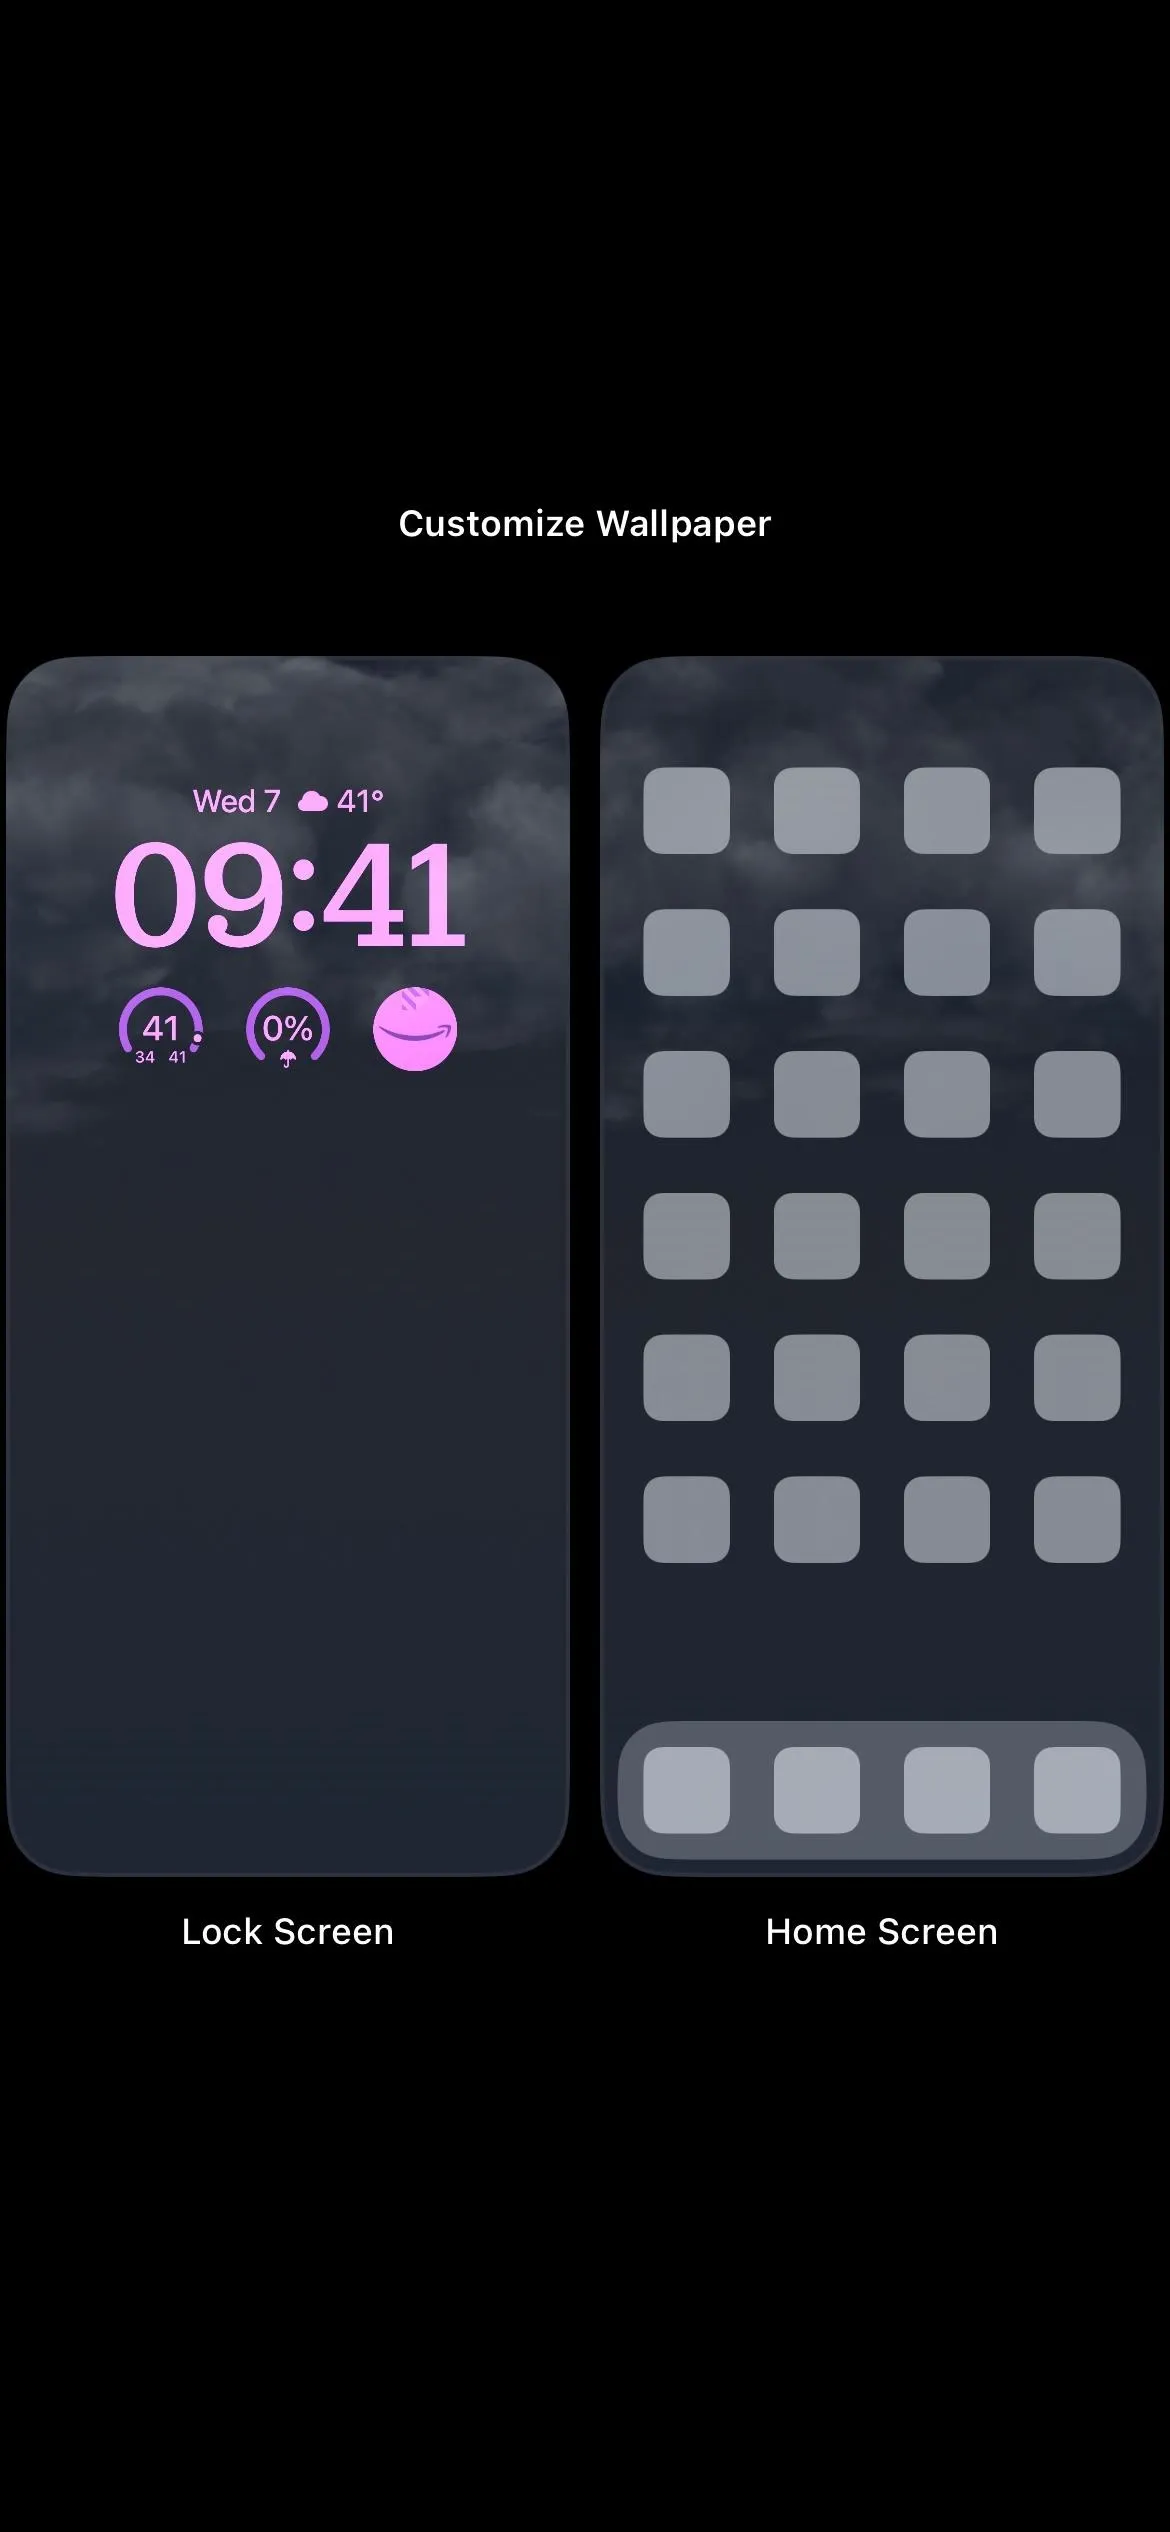
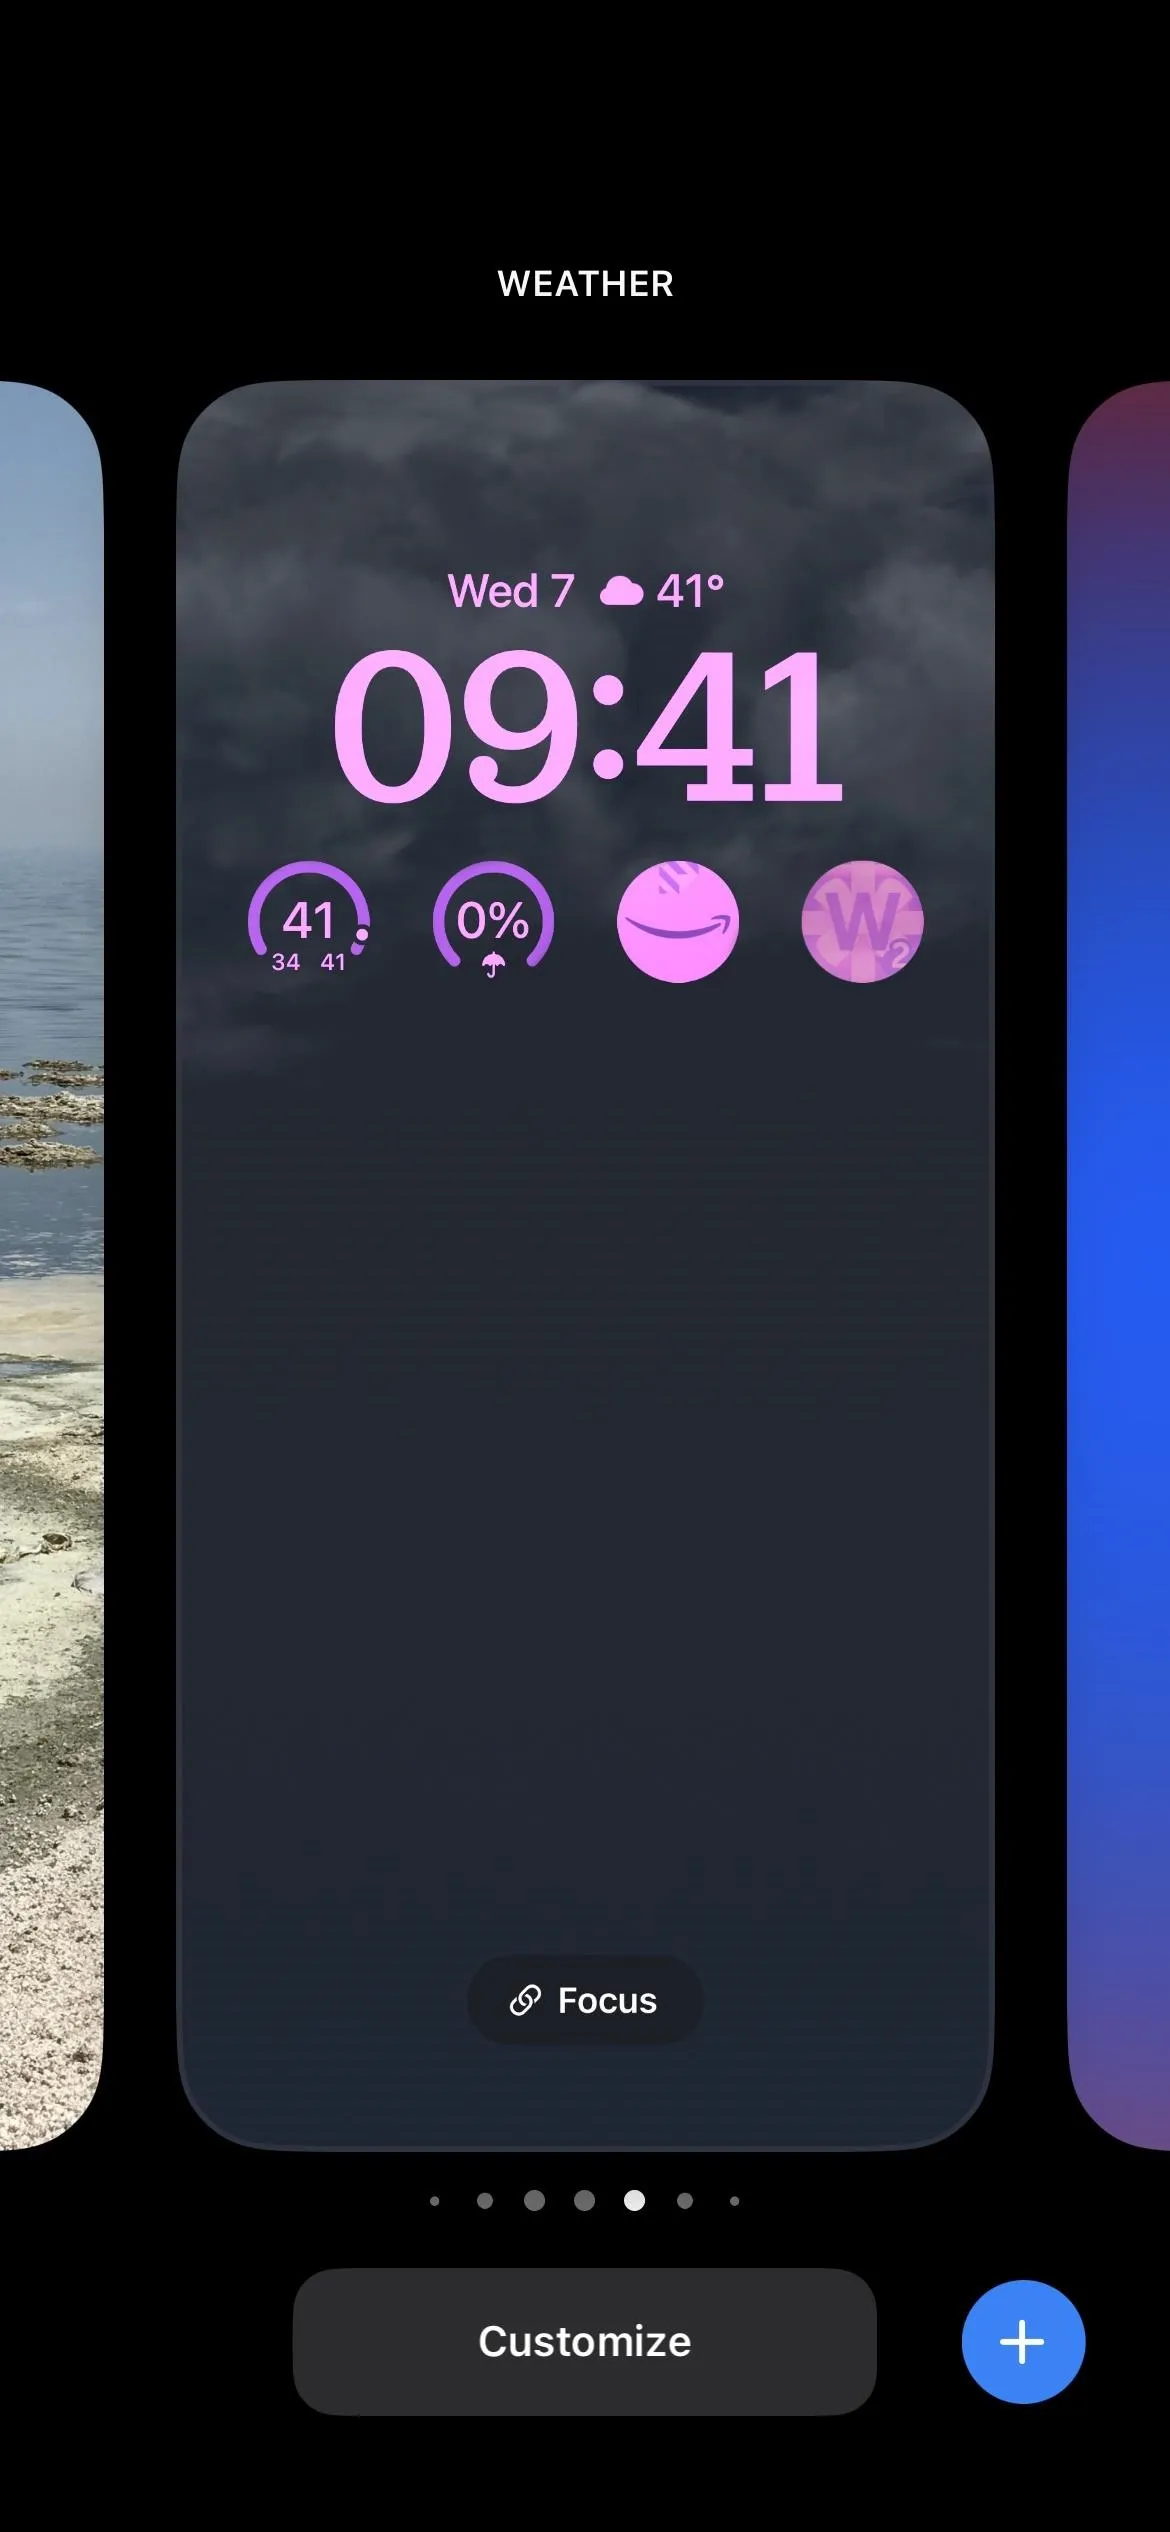
To add a Lock Screen widget, long-press the Lock Screen to open the Lock Screen selector. Note that you need to authenticate yourself before the Lock Screen selector opens. Next, pick the appropriate Lock Screen if you have more than one. Then, choose "Customize" underneath it, and open the editor for the Lock Screen.


Add Launchify's Widget
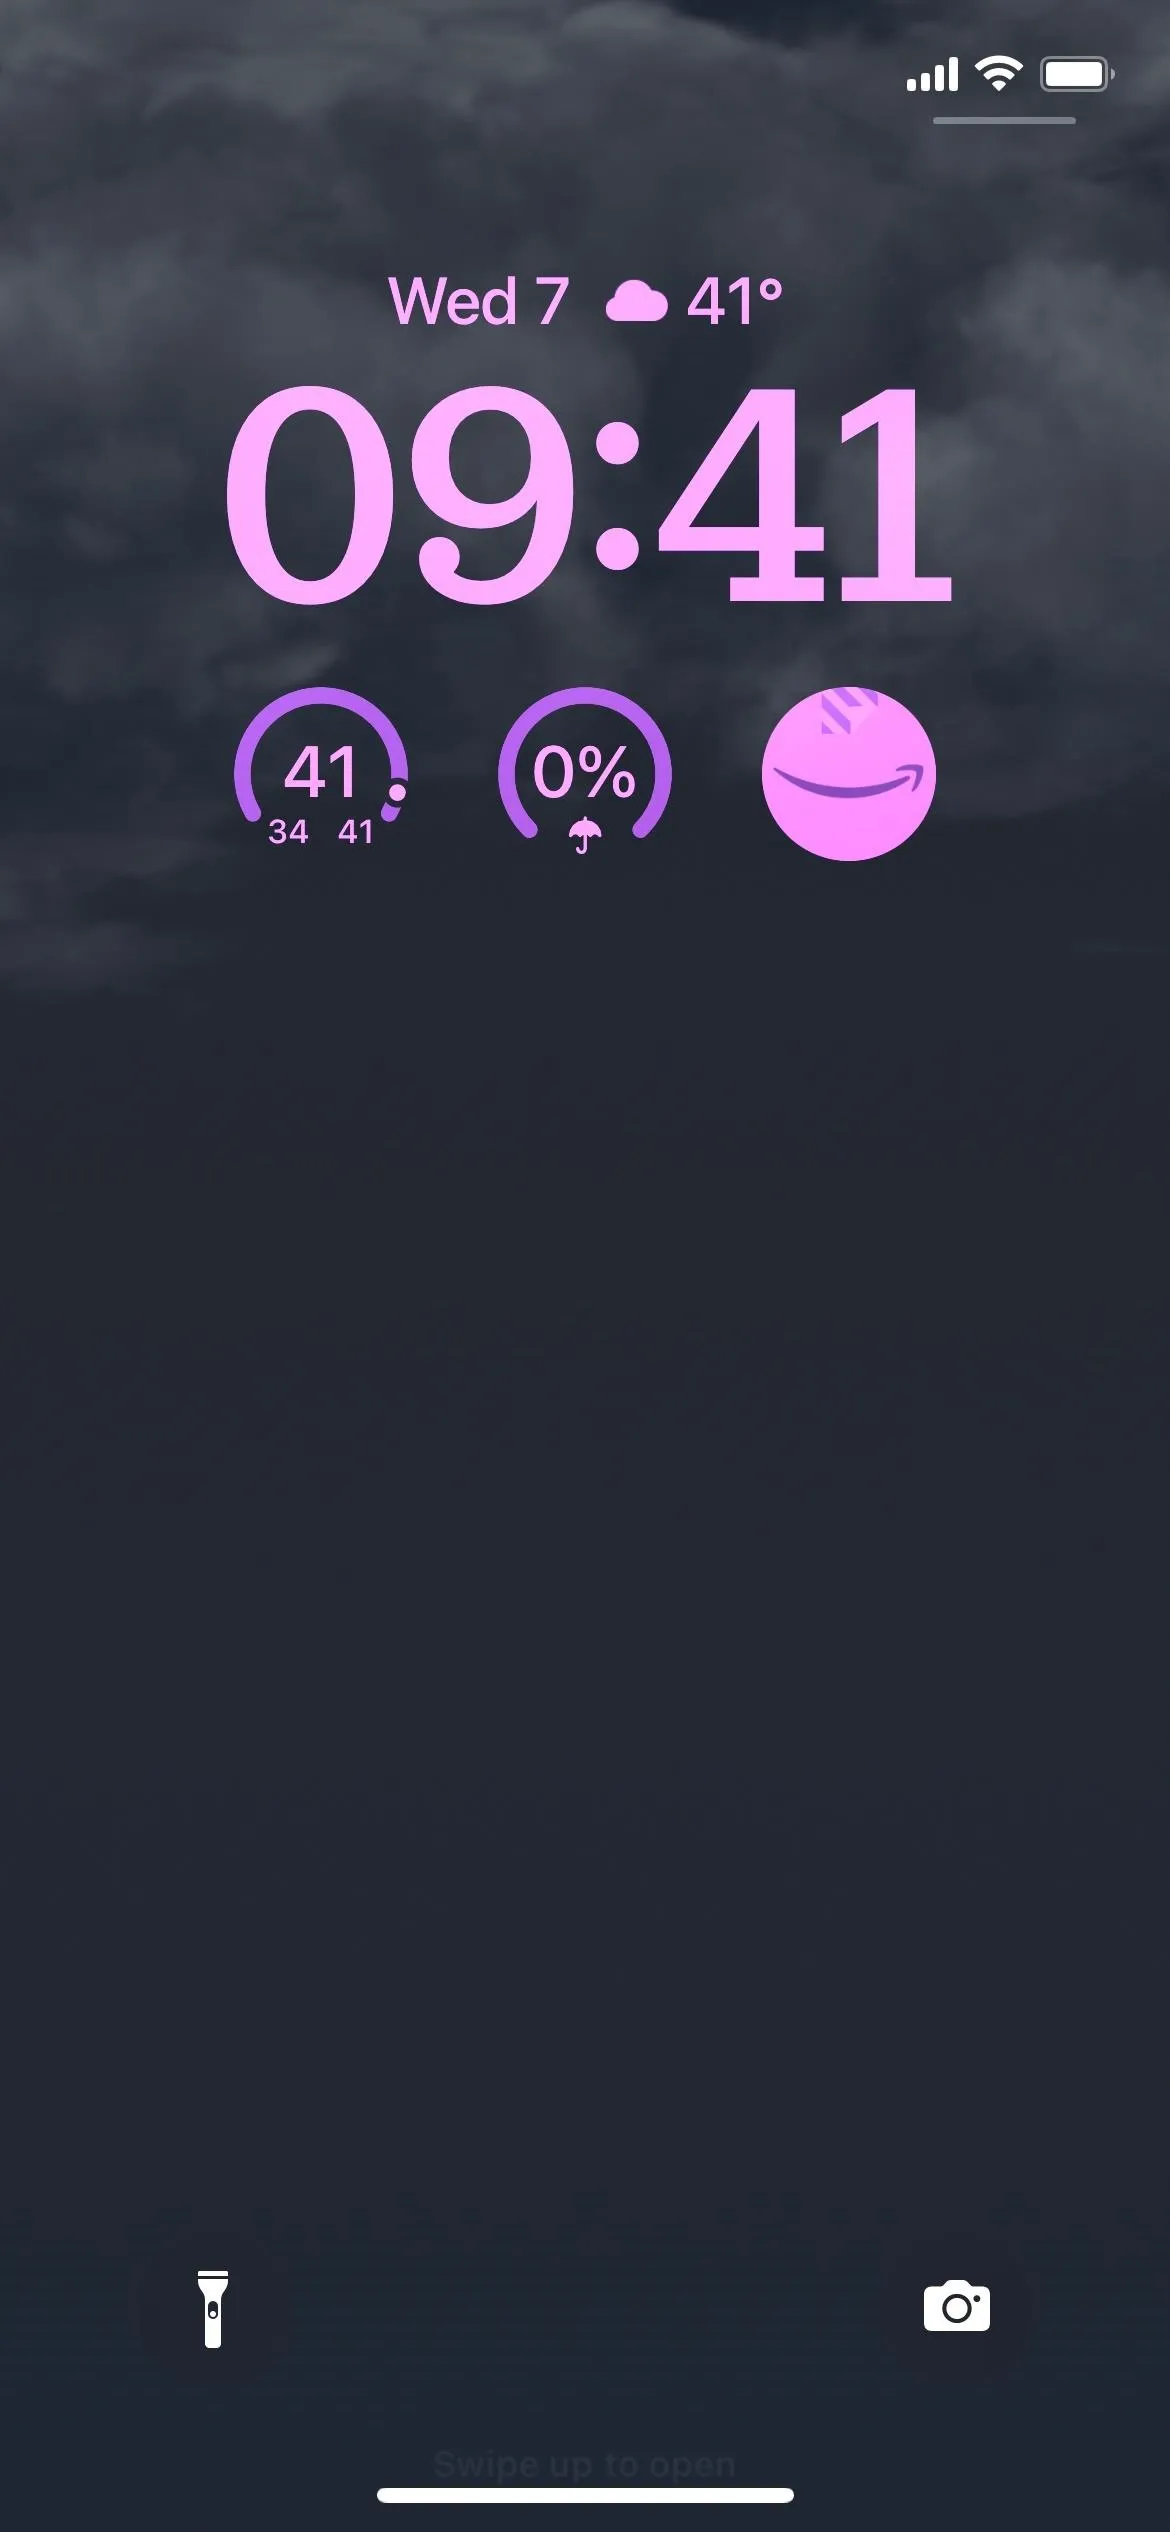
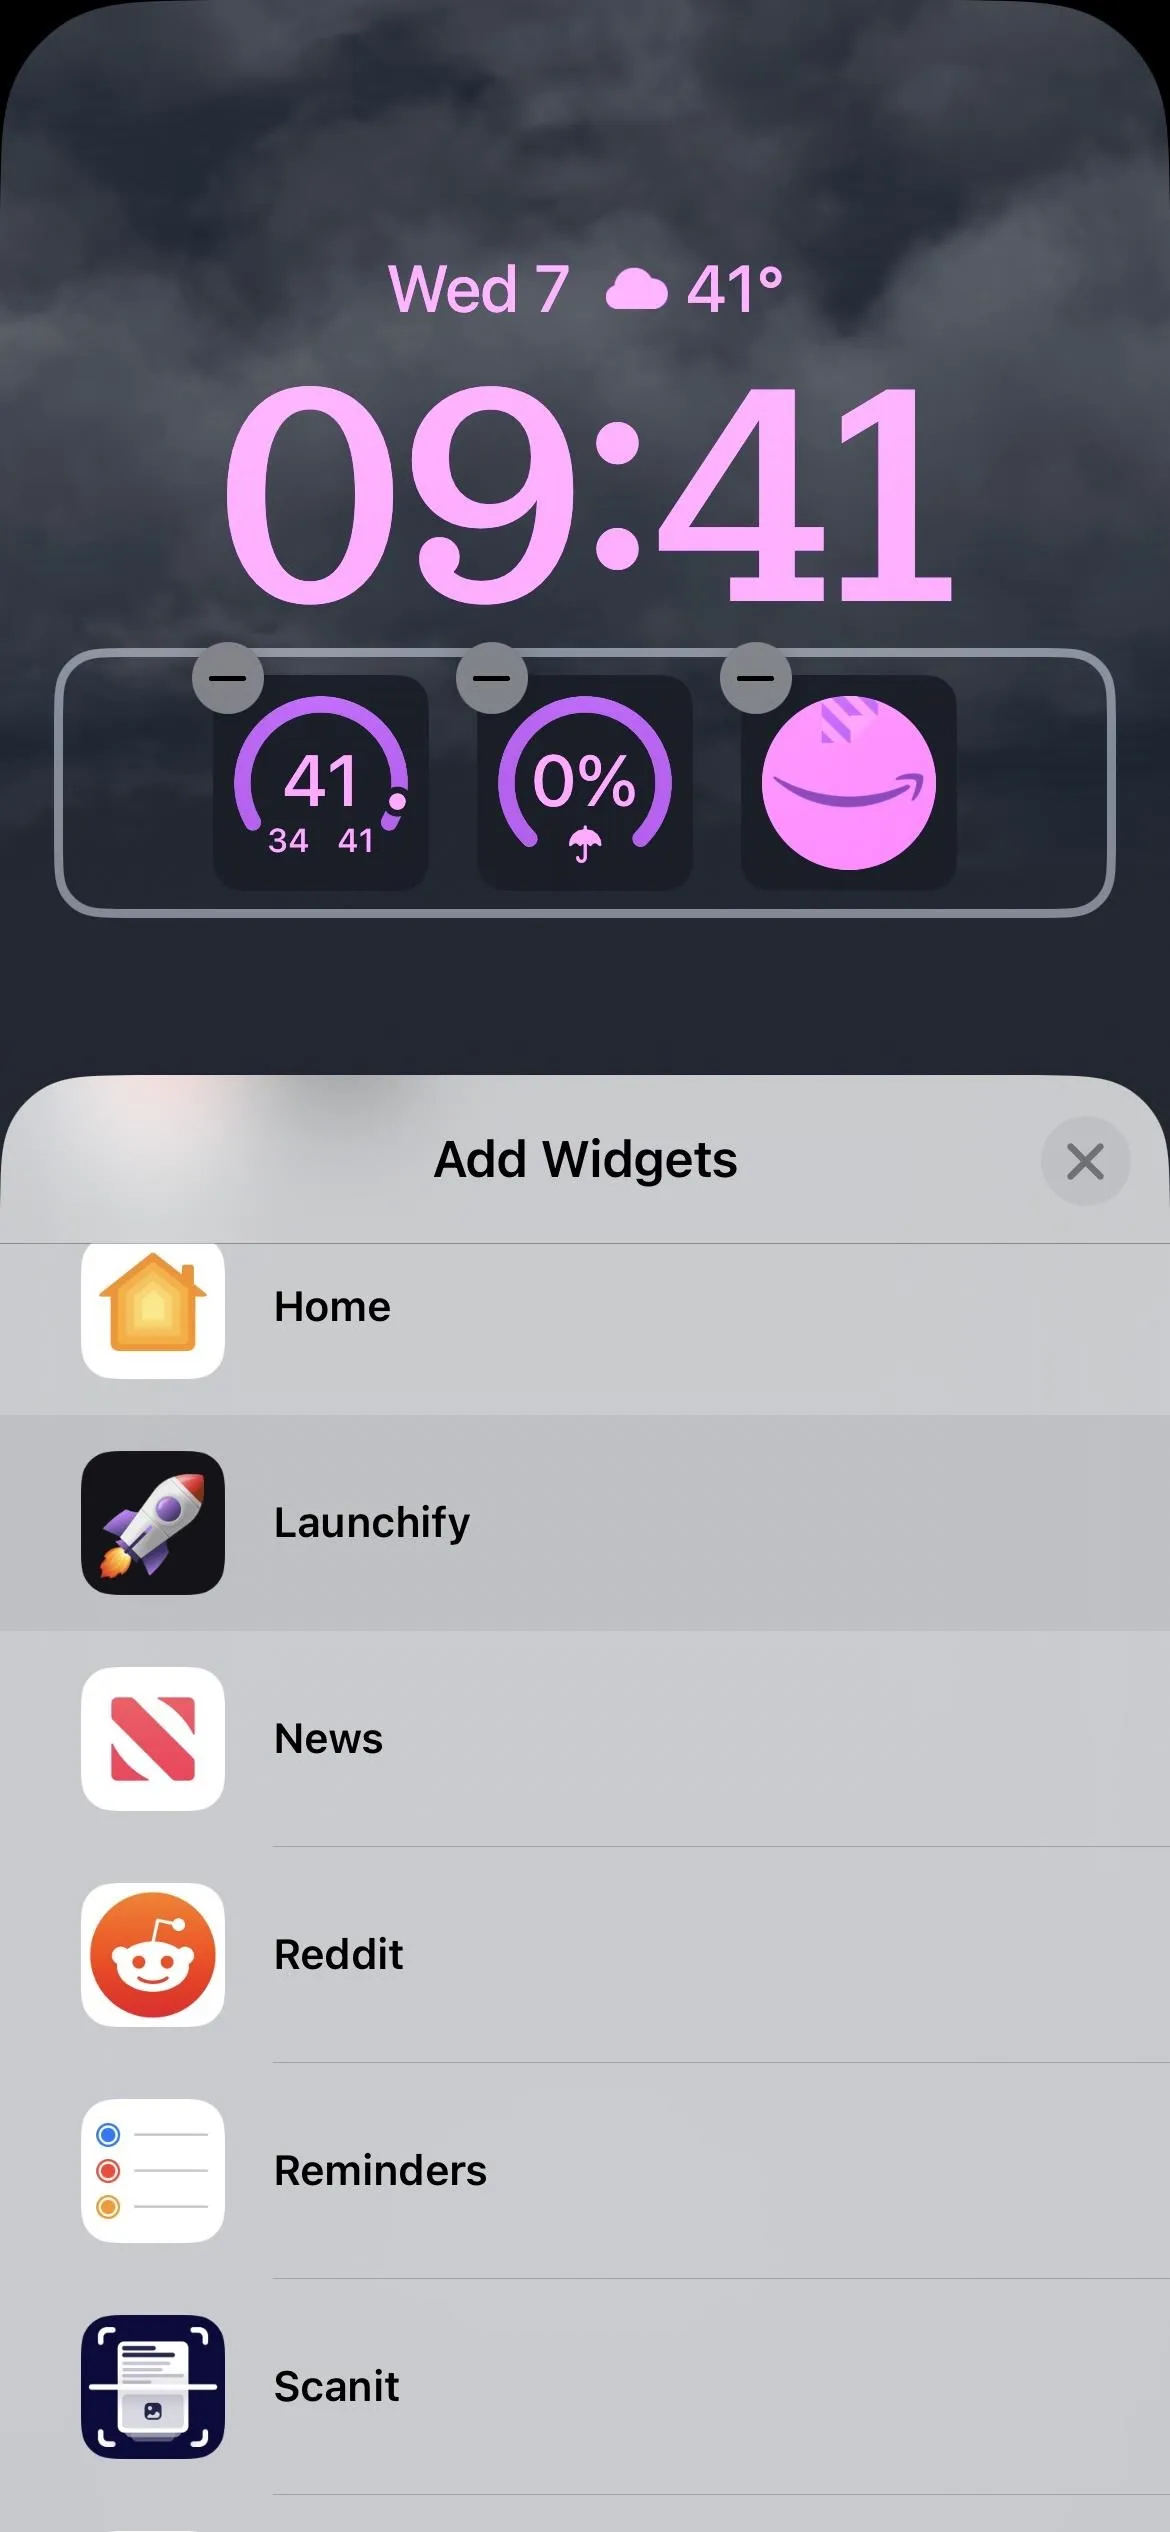
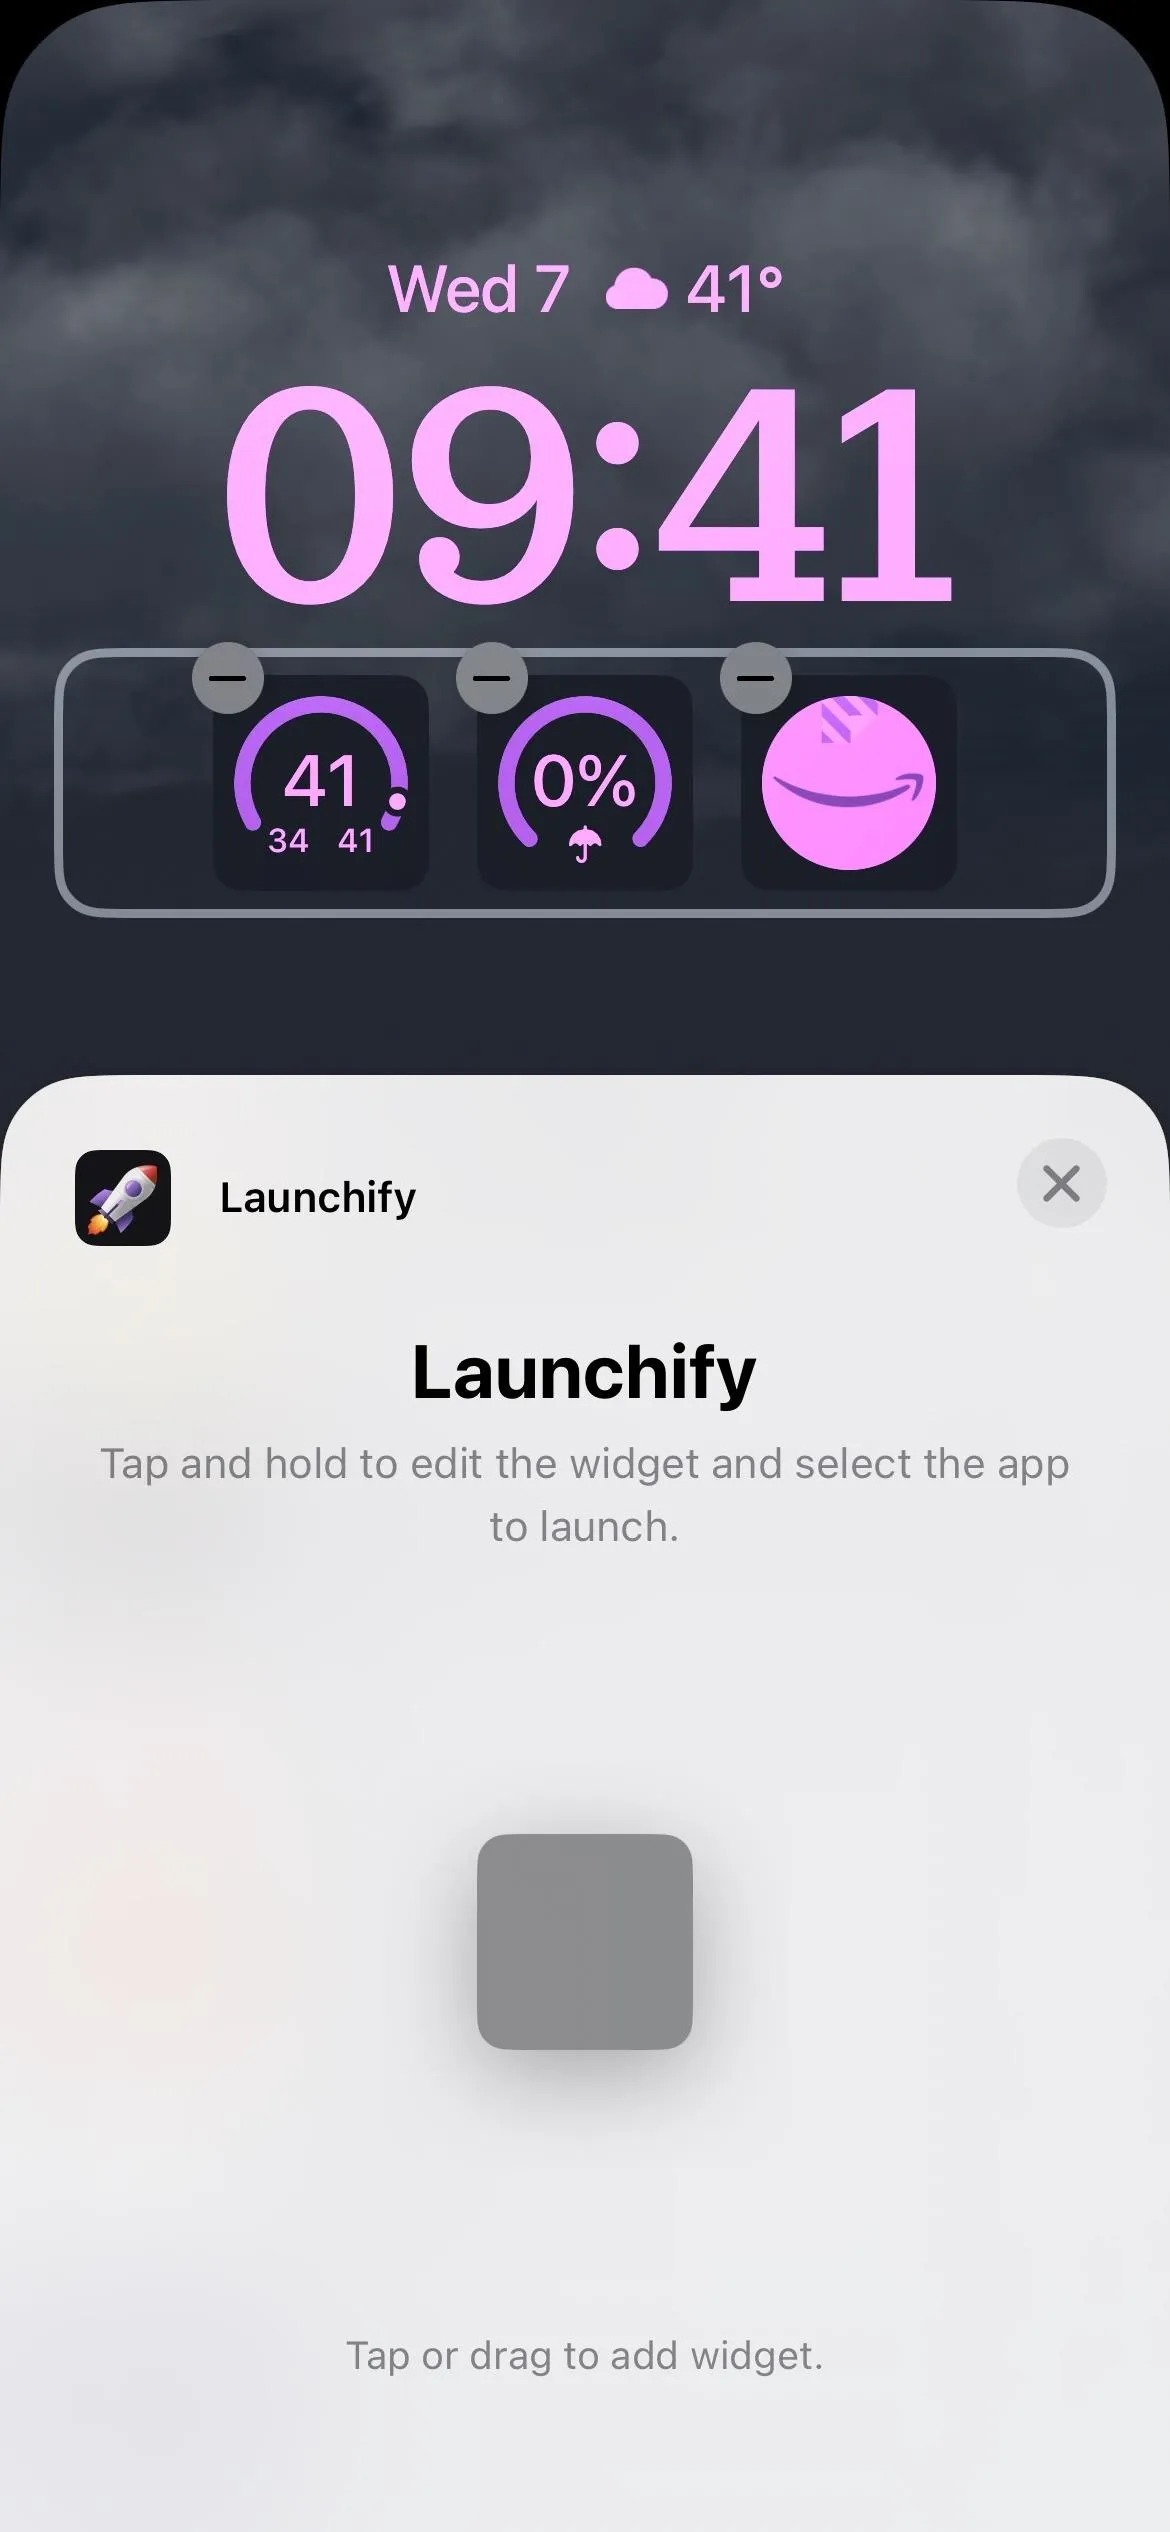
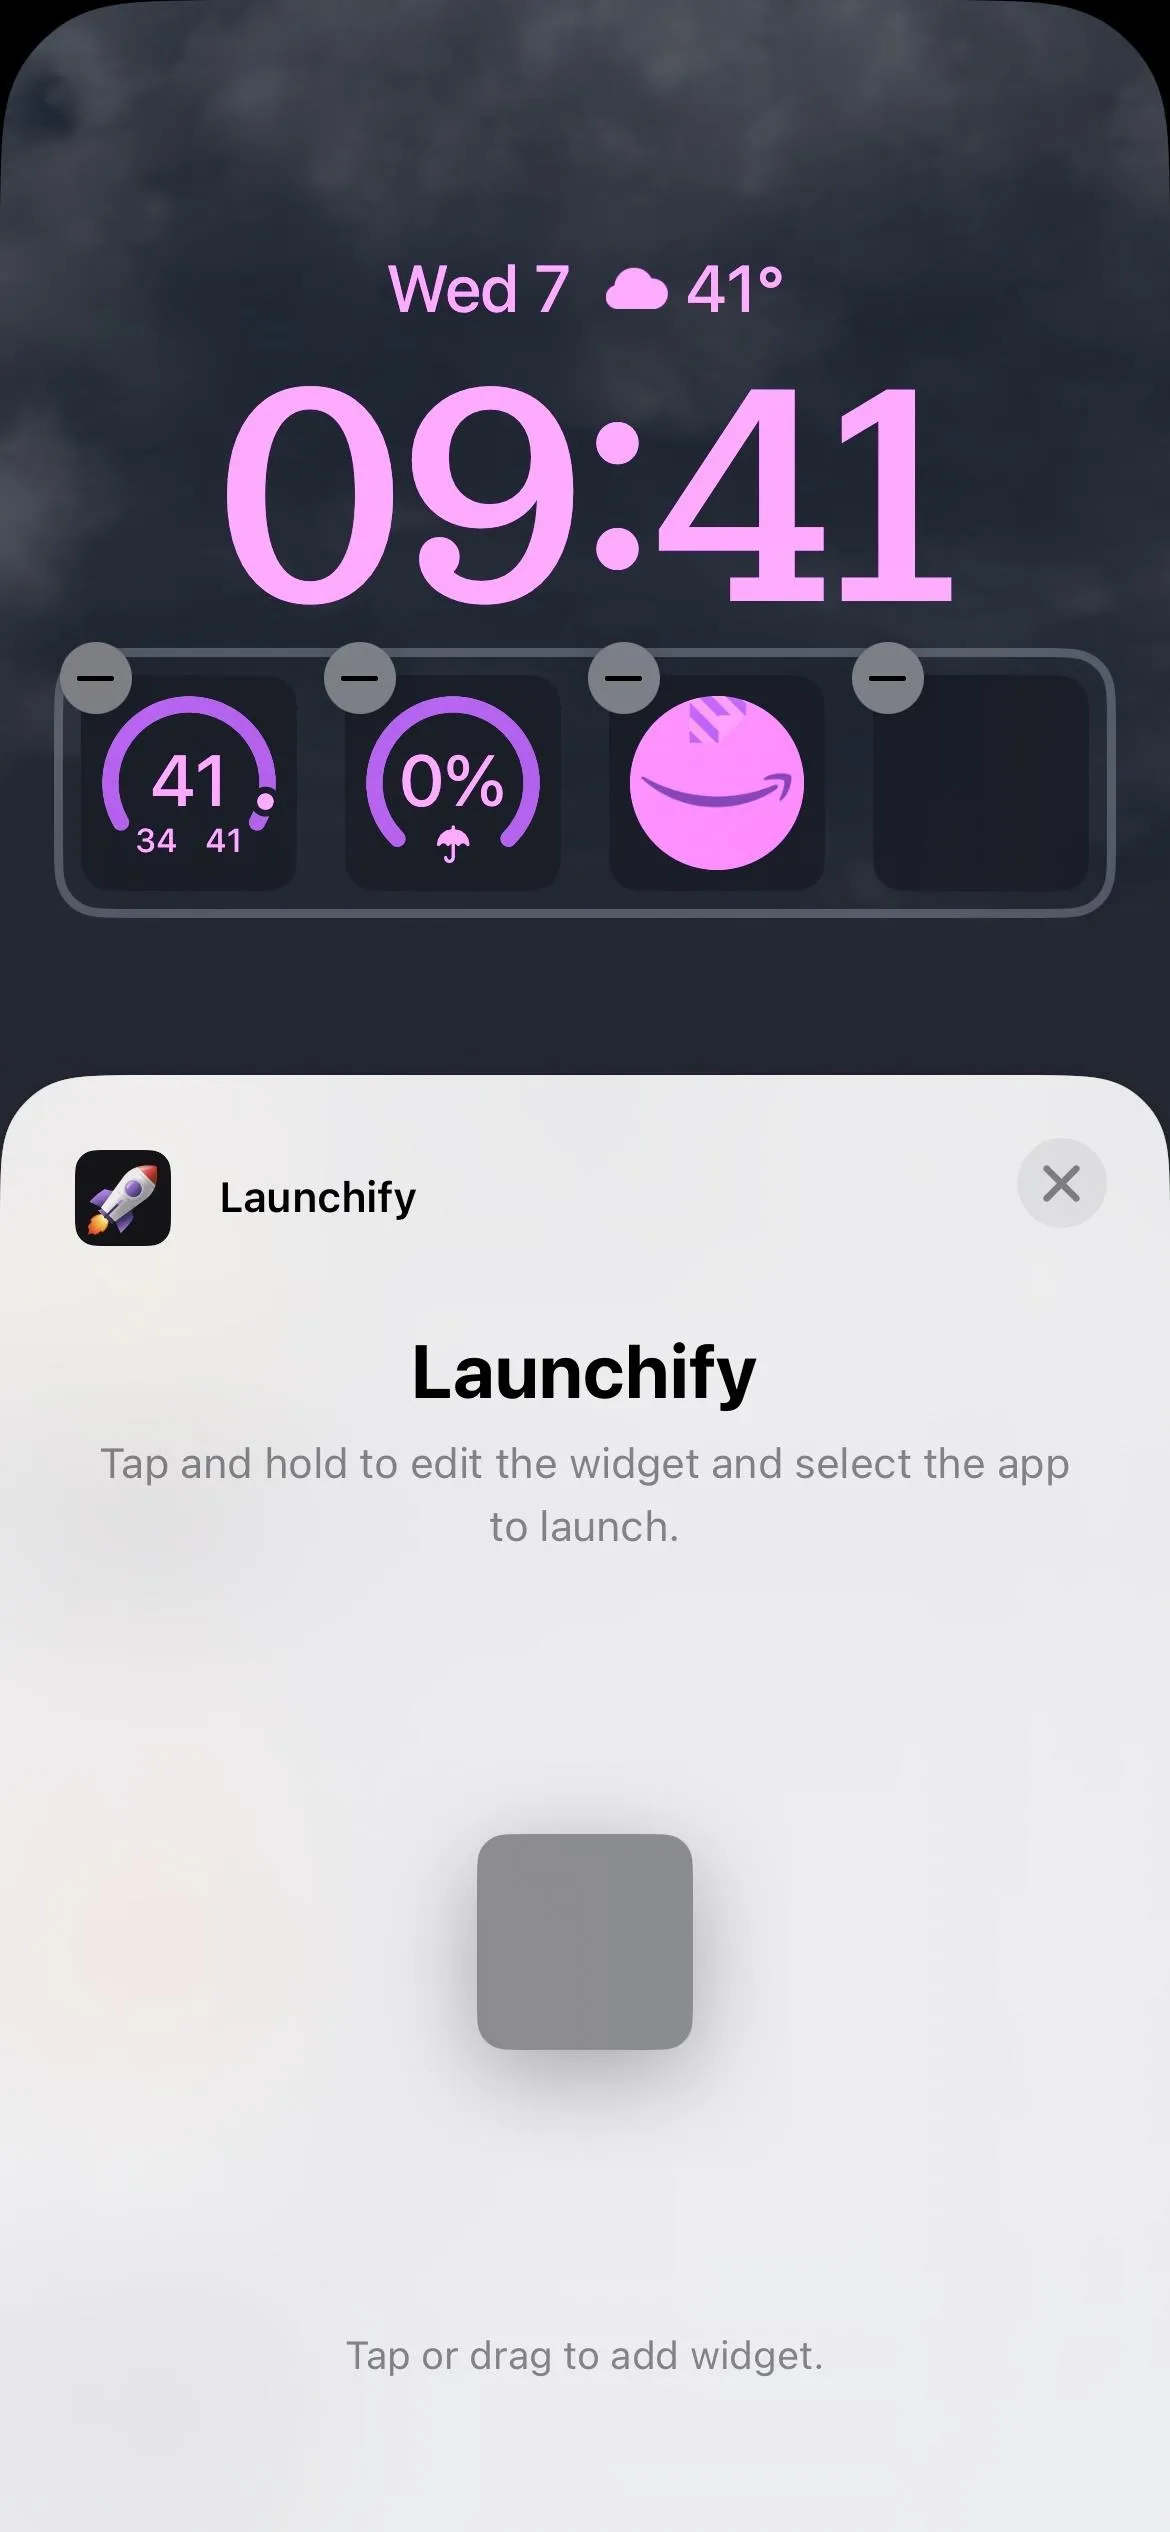
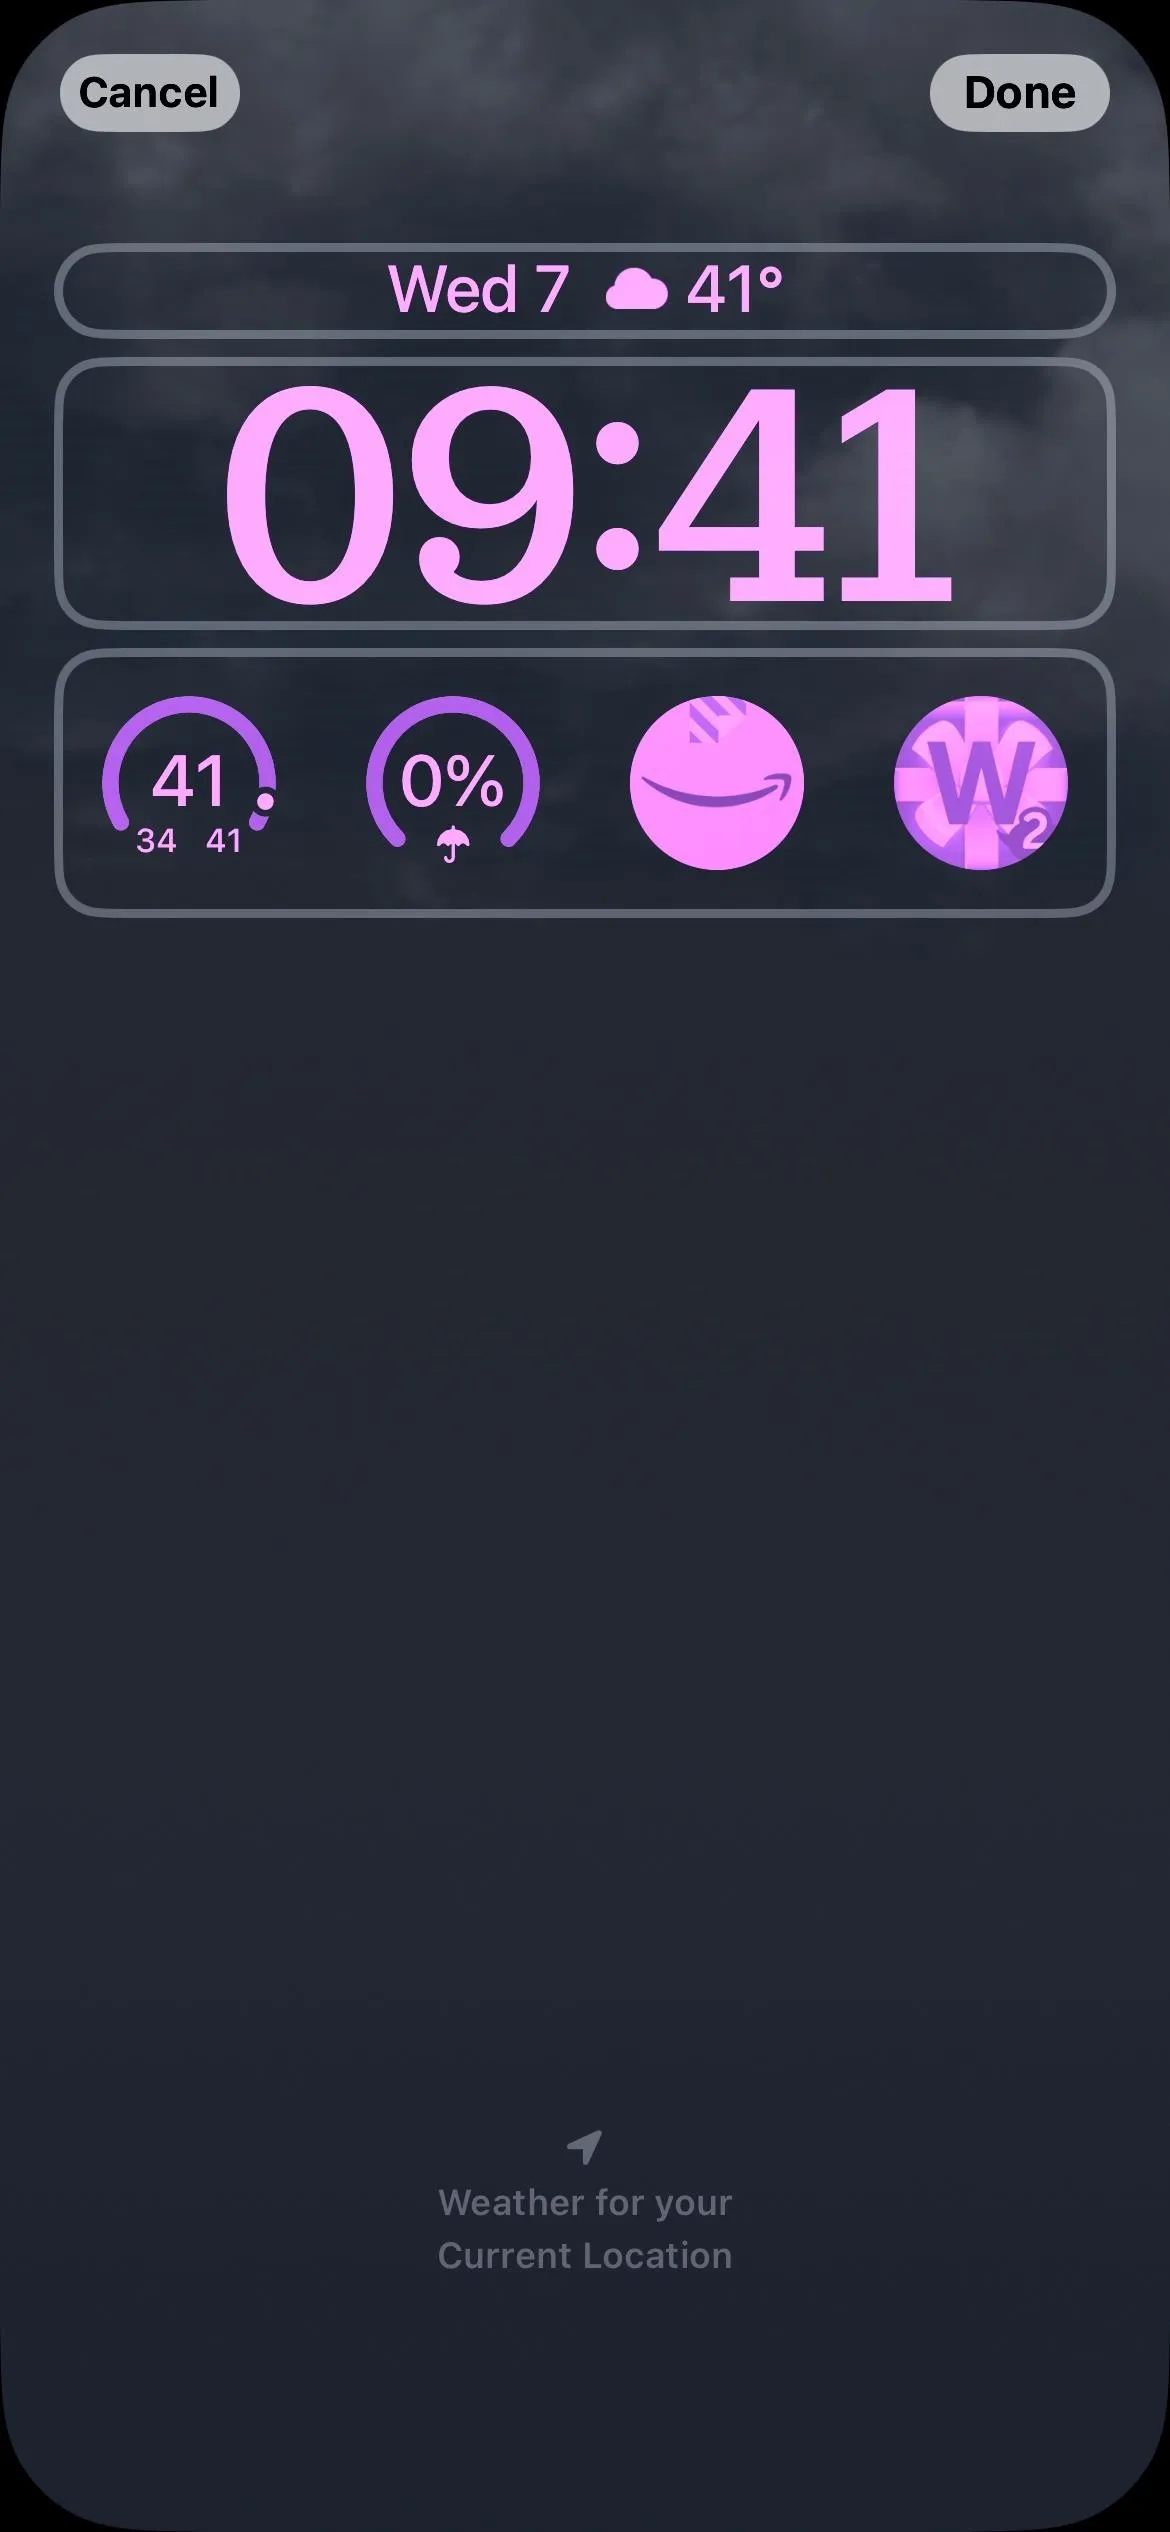
Tapping the spot above the time lets you add a small widget, but Launchify does not support this space. Instead, tap the widget row below the time, then choose Launchify from the list. In the preview, tap or drag the widget into place to add it to the bottom widget row. The Launchify widget should be blank since you haven't assigned an app yet.


Assign Your App to the Widget
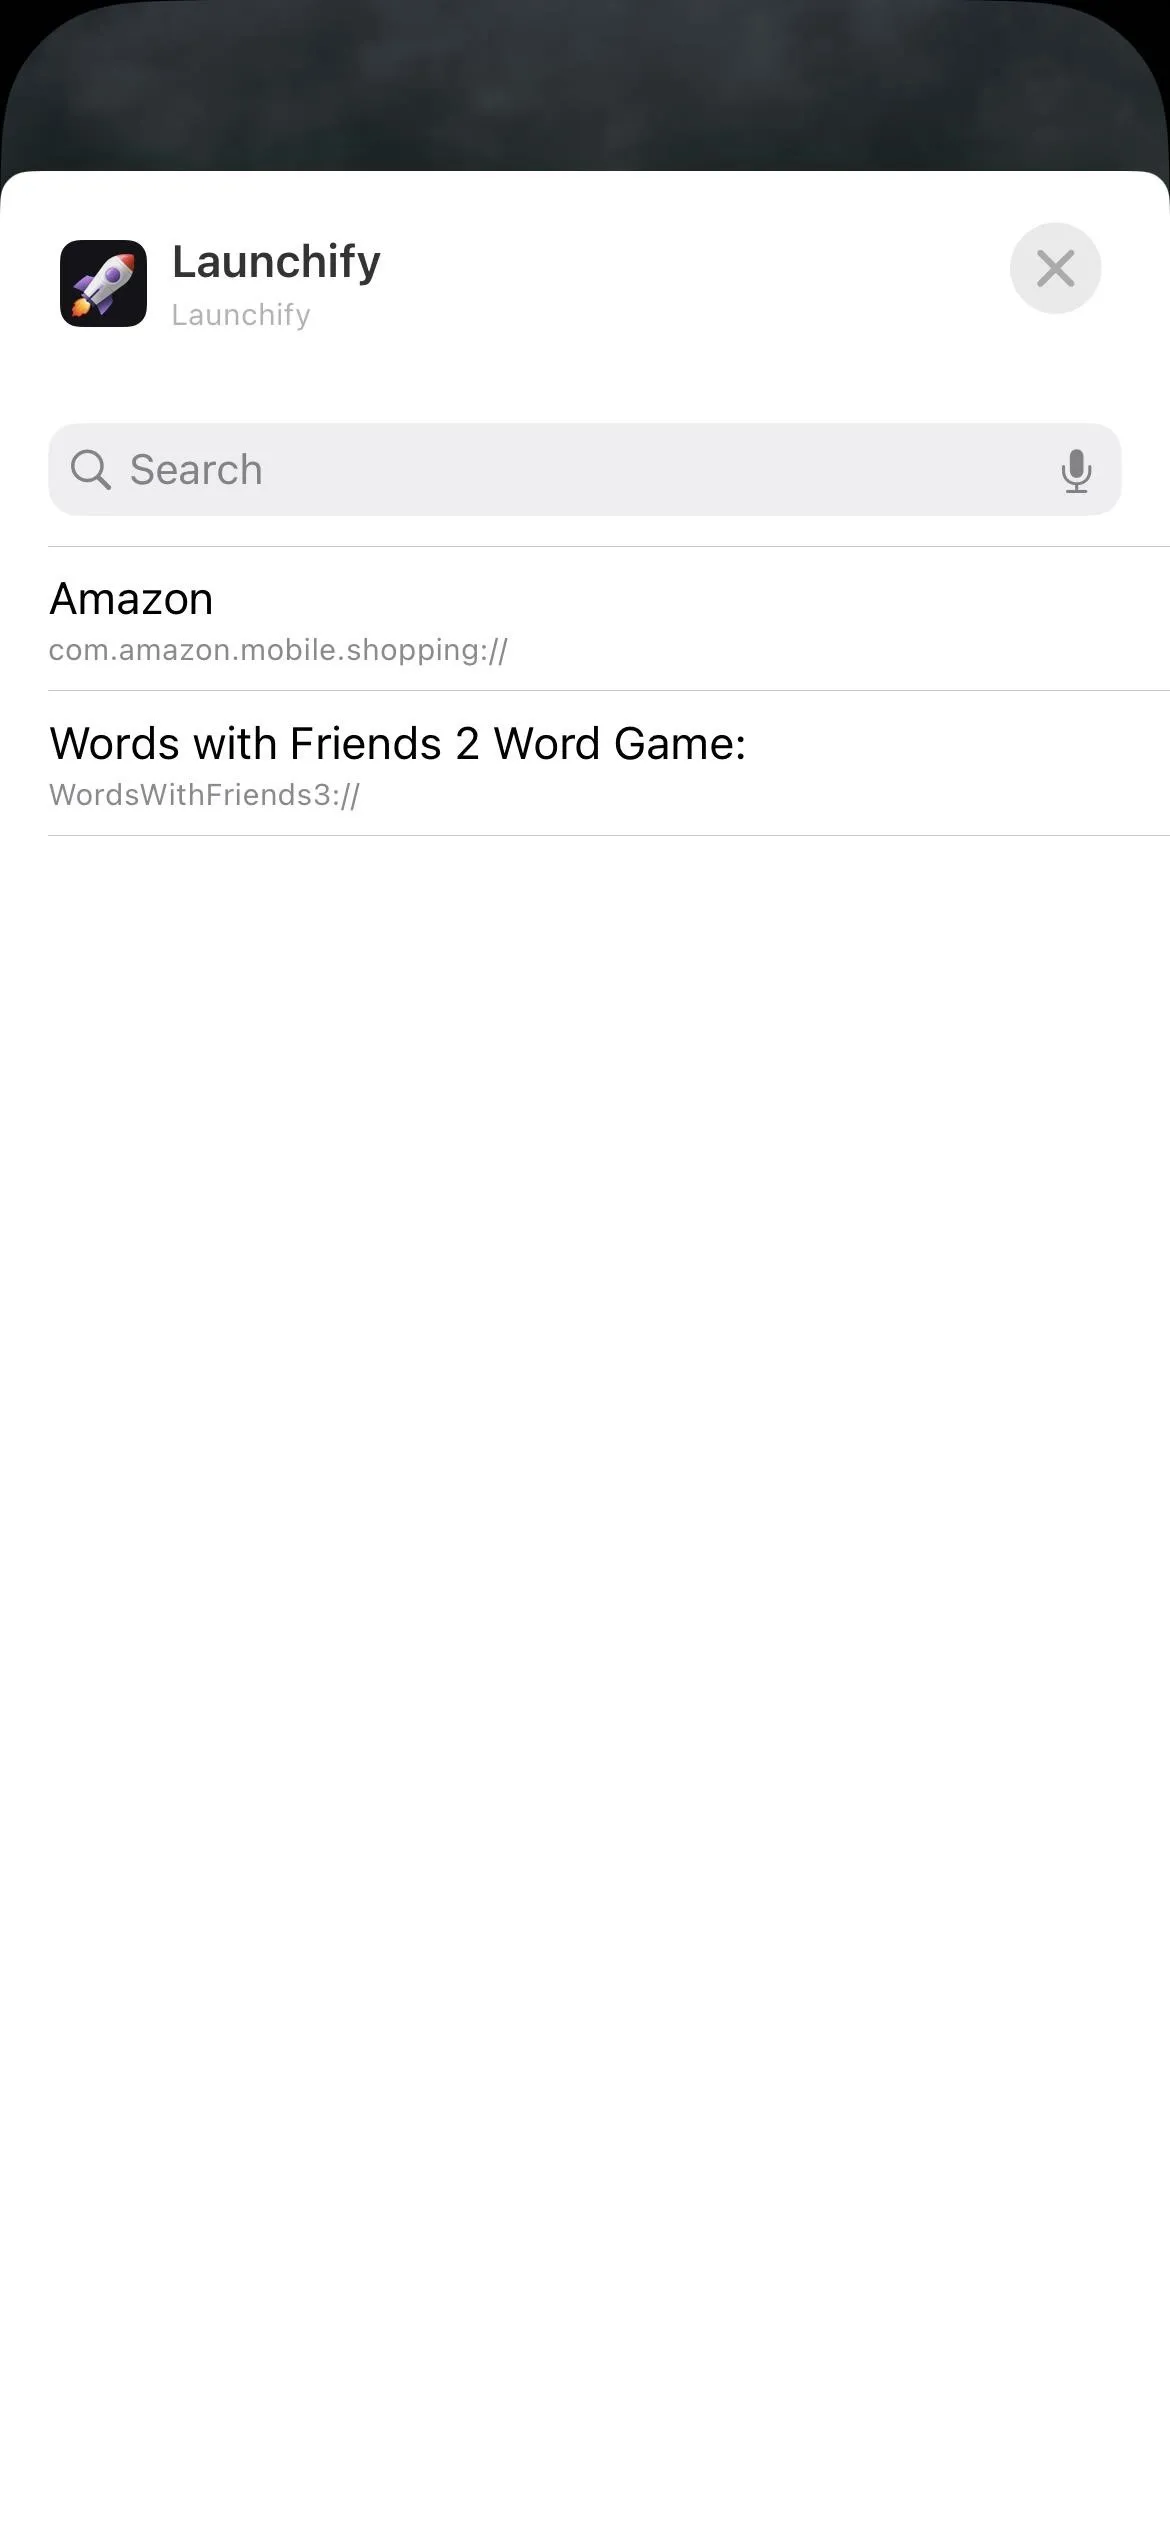
Tap the blank Launchify widget to bring up the app picker. The app shortcuts you created in Steps 1 to 3 will show here. Select the one you want, and its icon will replace the blank one. Tap "Done" to finish, then select the Lock Screen to load it.


Launch Your App from the Lock Screen
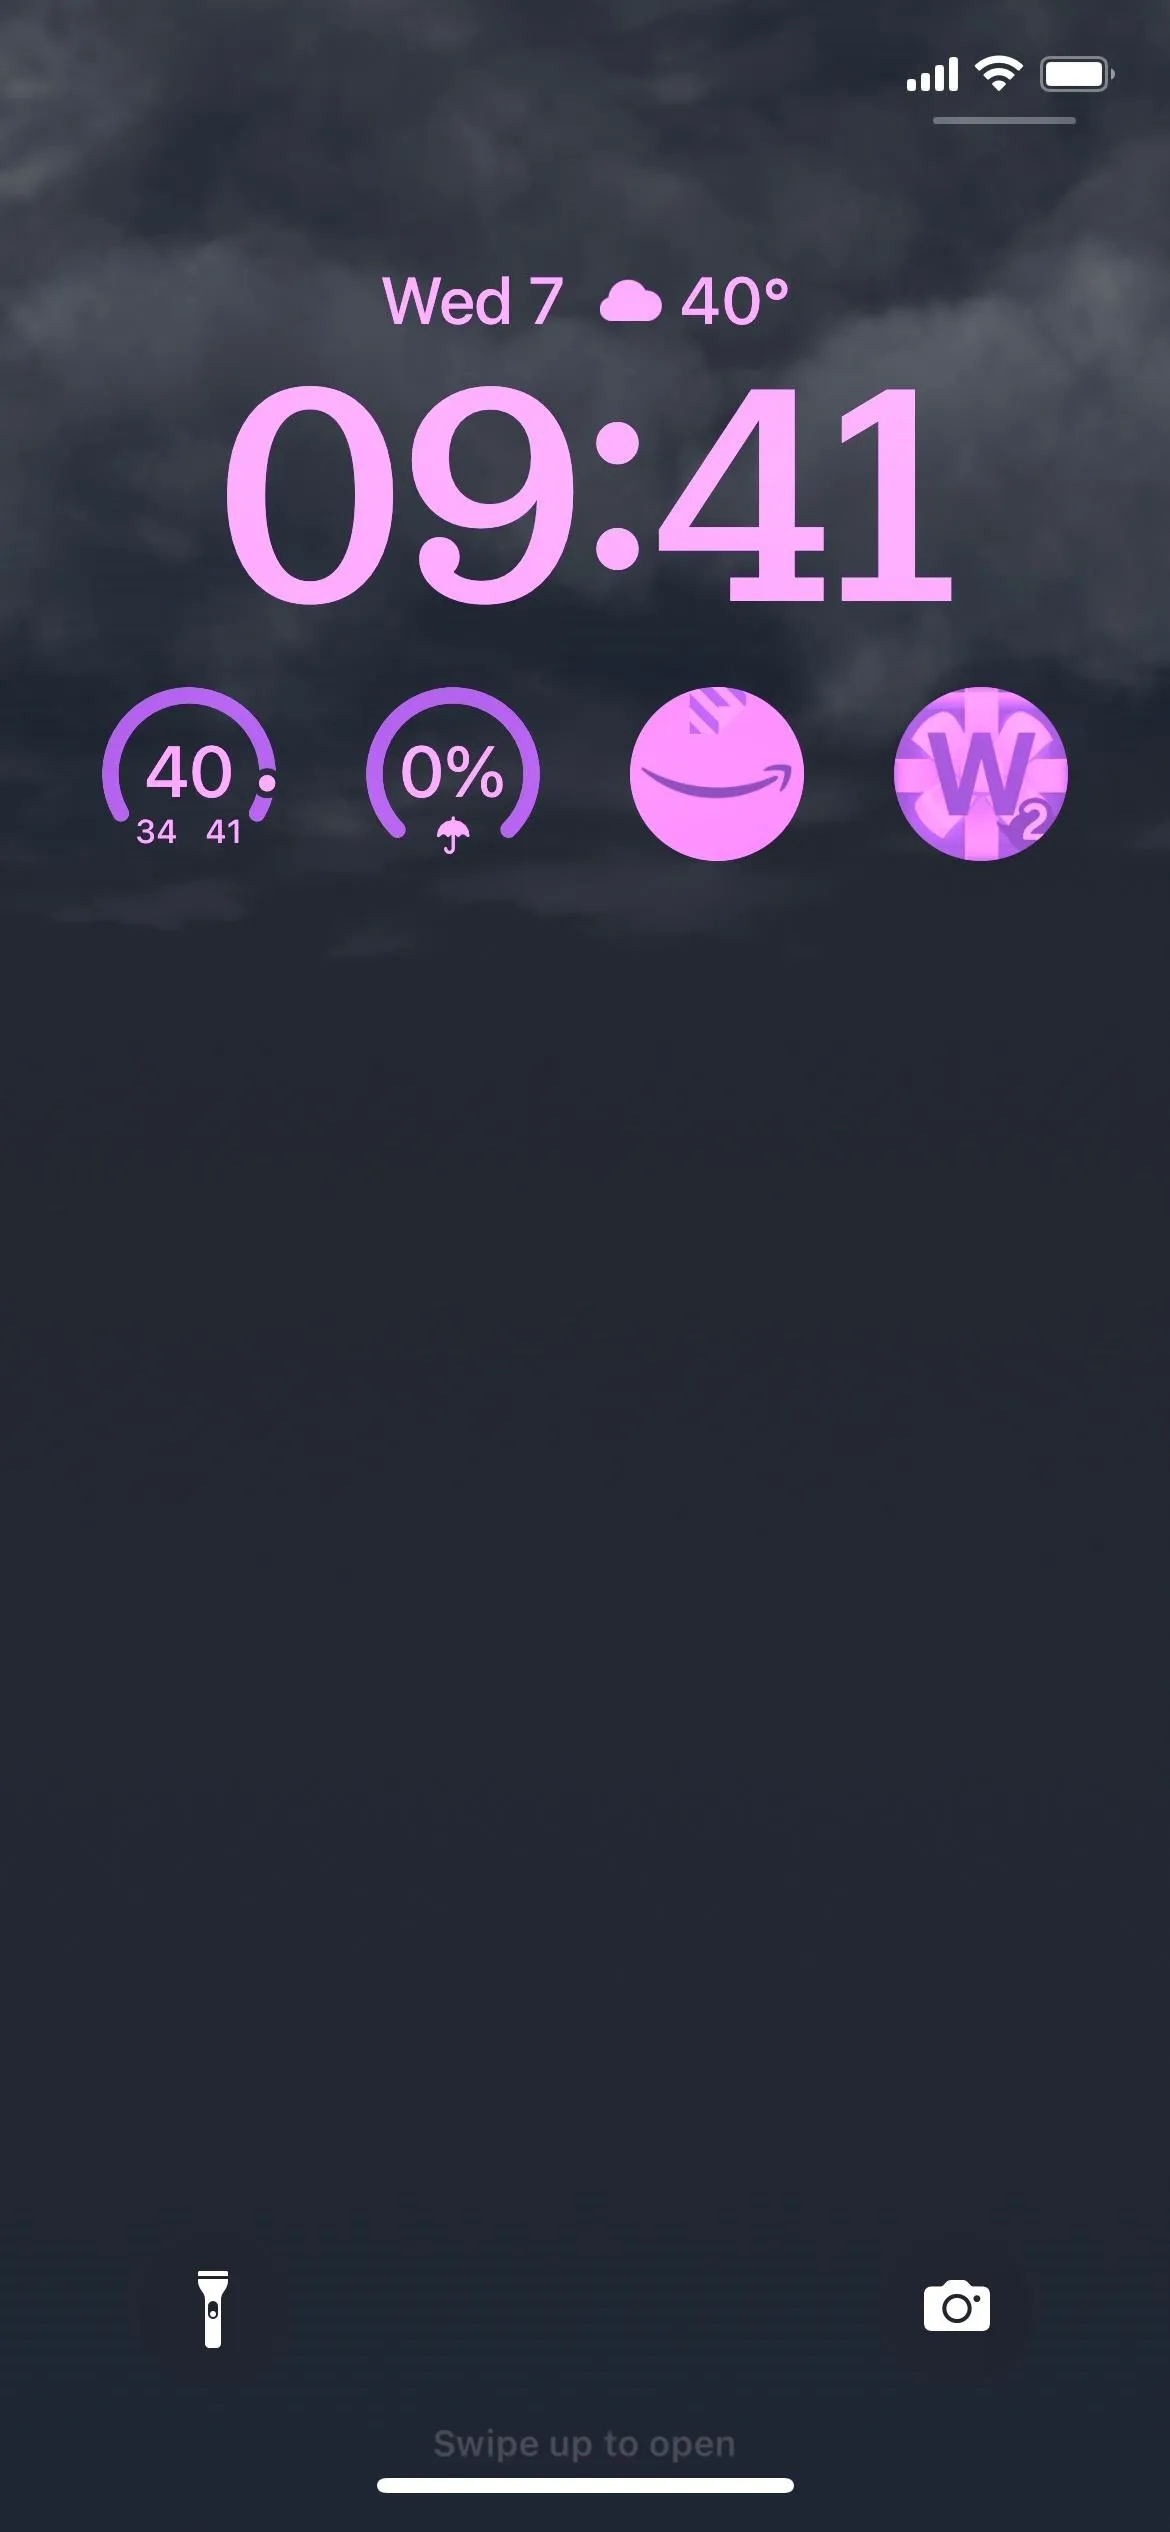
Back on the Lock Screen, tap one of the app shortcut widgets you added with Launchify to open the app. Because of iOS 16's security features, the Launchify app will open first with a prompt letting you know that Launchify wants to open the app you chose via the URL scheme. Tap "Open" to proceed.
In the future, you won't have to authorize Launchify again to open that particular app. However, the security prompt will appear whenever you open a new app with Launchify.
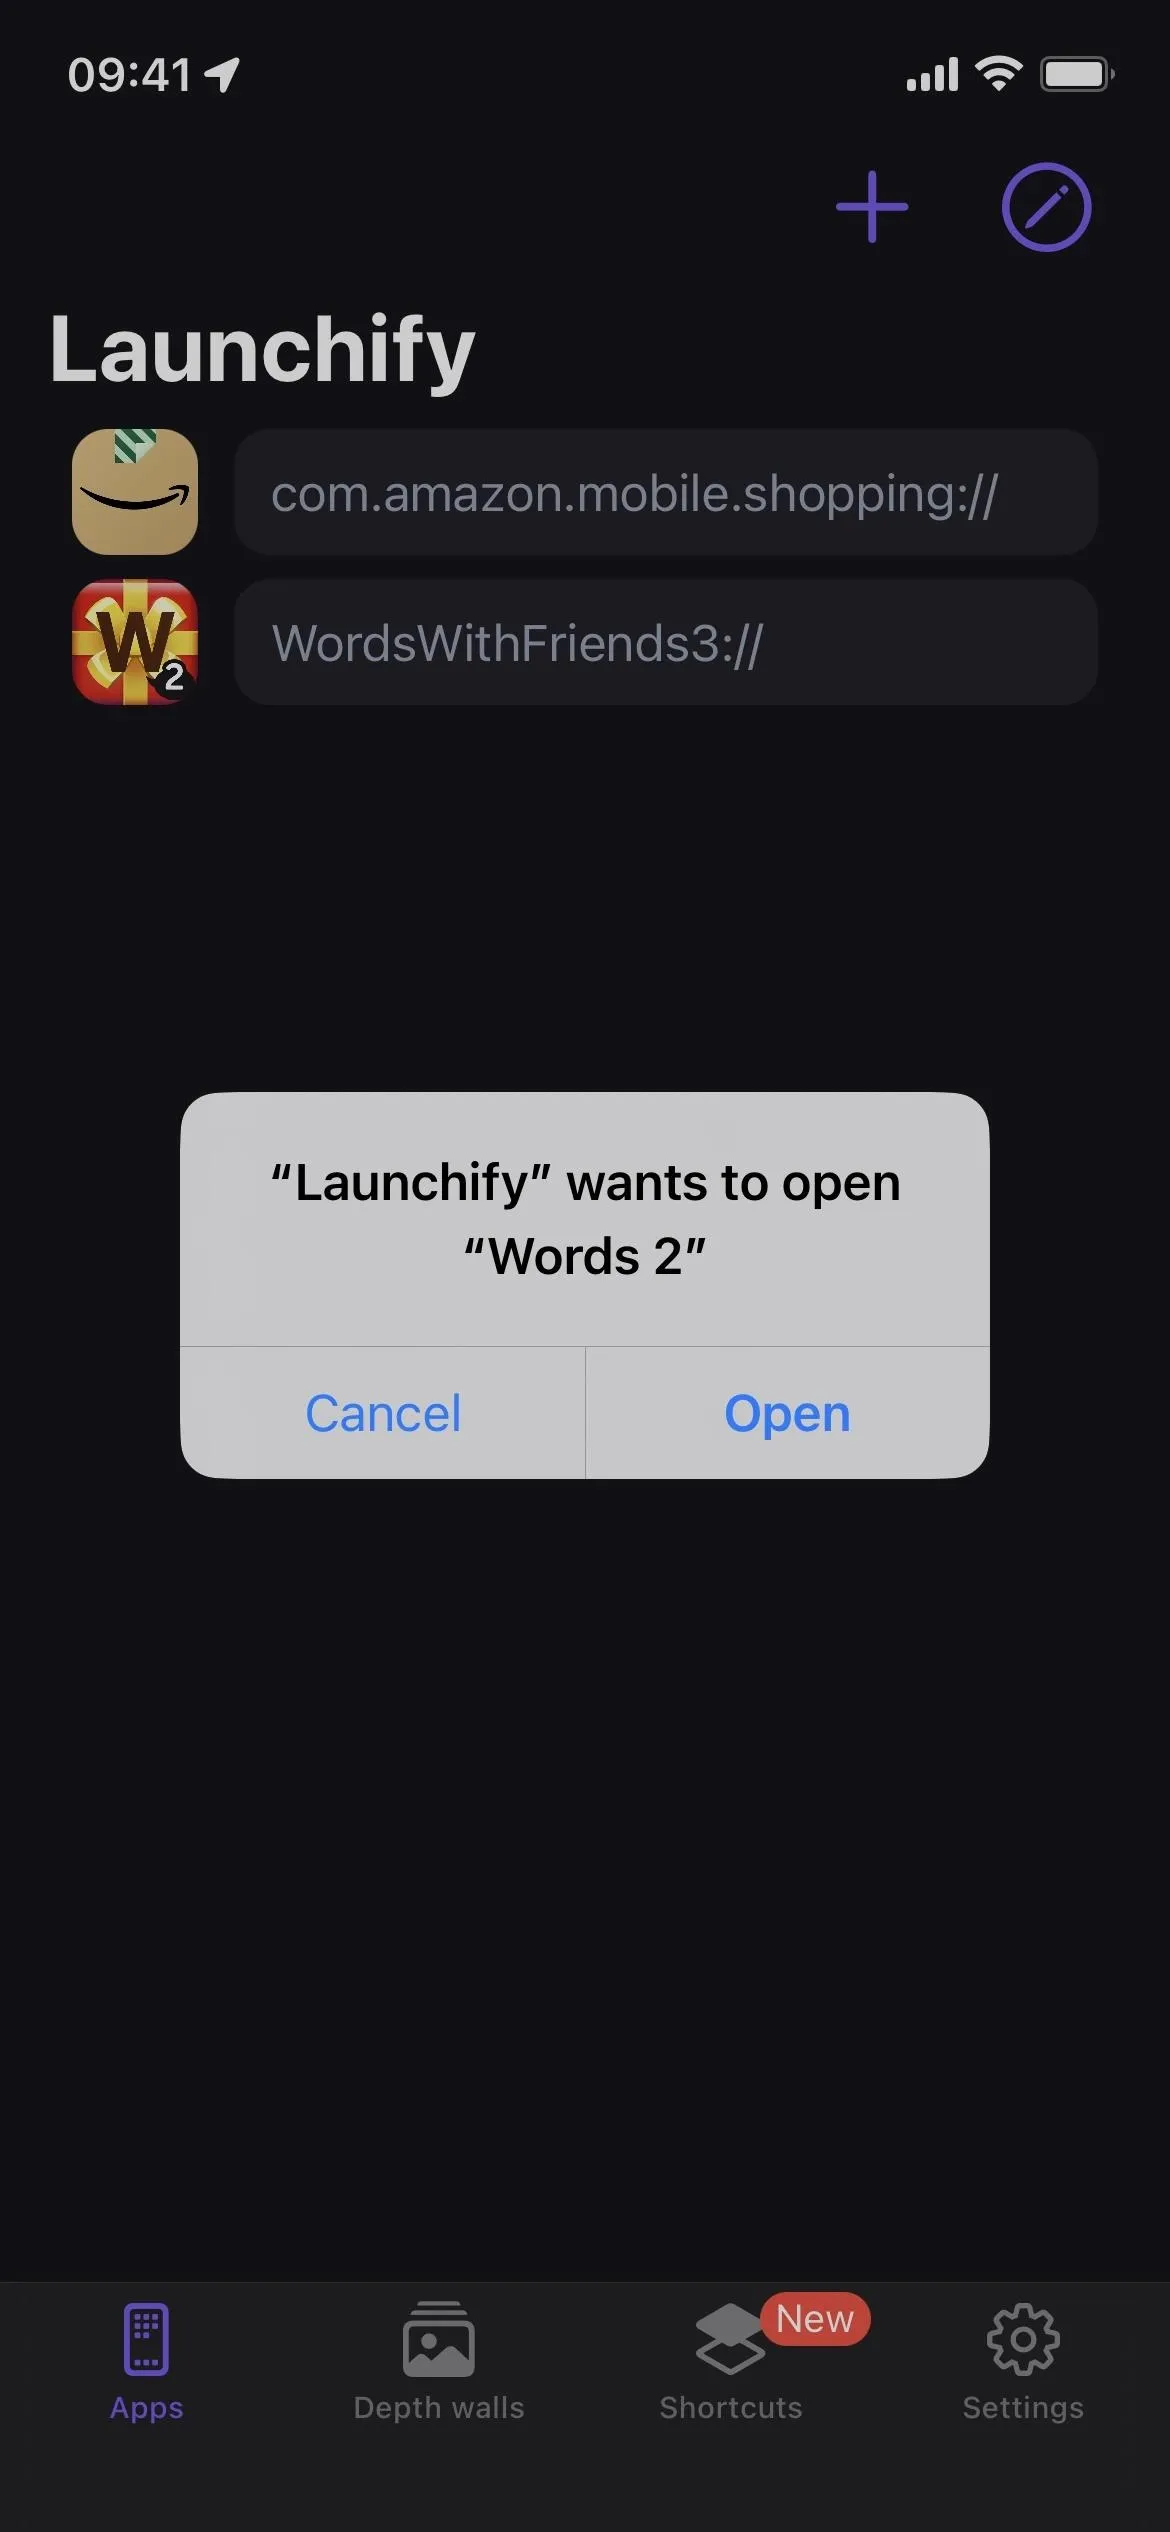
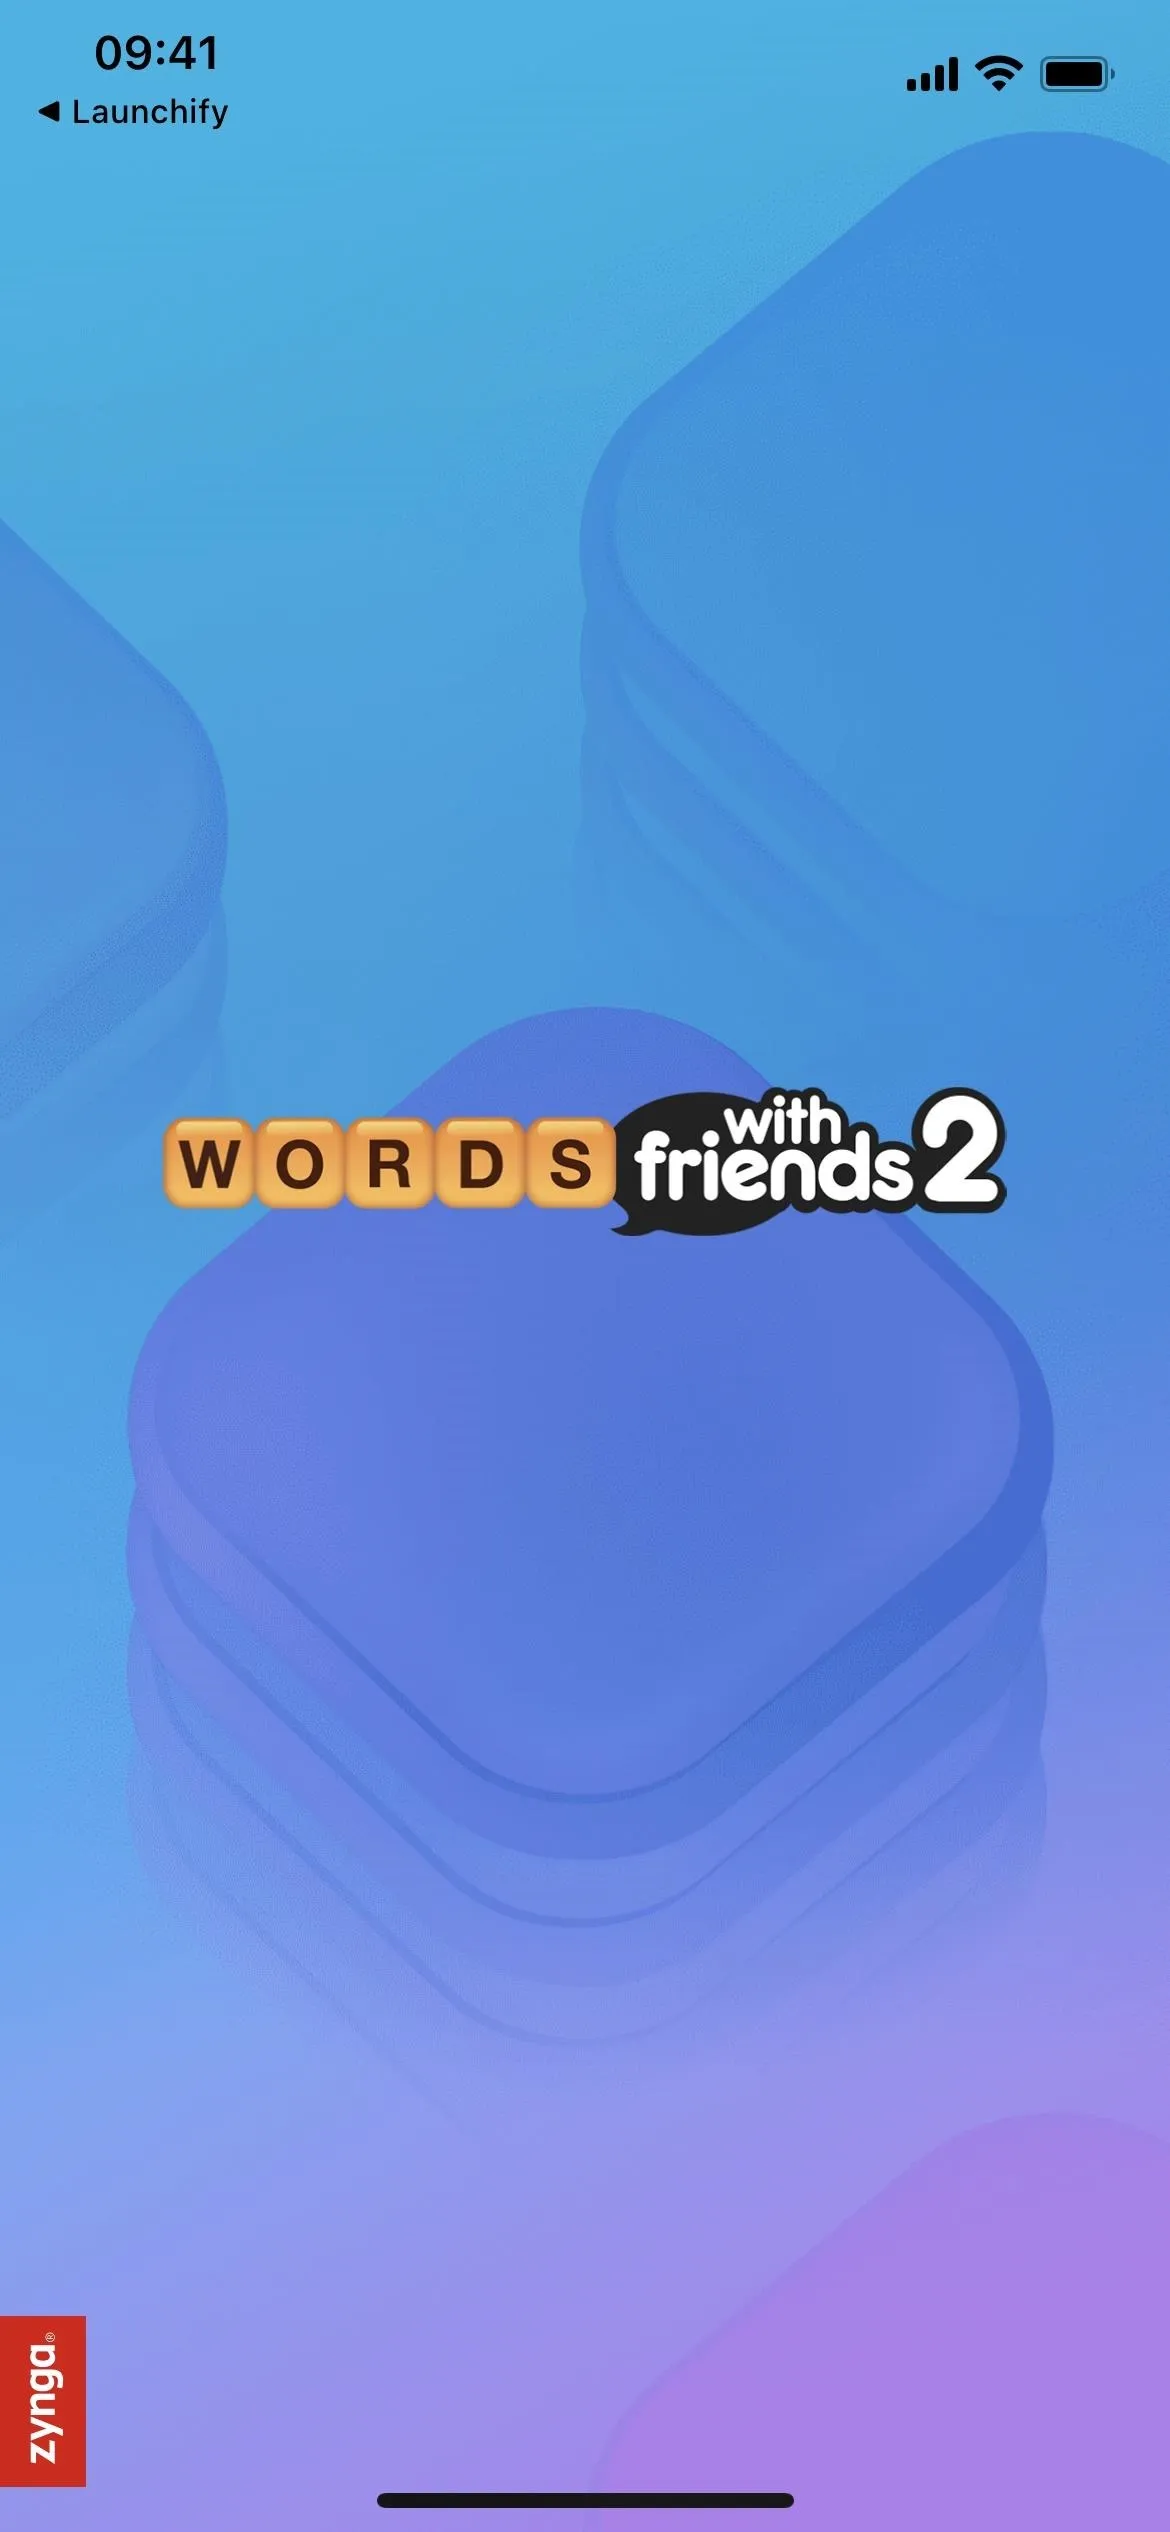


Once the assigned app opens, you'll notice that Launchify is listed in the top left as a back-to-the-previous app button. Your iPhone will show this back button every time you open an app from Launchify's Lock Screen widget since it technically uses the Launchify app to call up the URL scheme to switch to the assigned app. This is an iOS feature that cannot be disabled.
Cover photo and screenshots by Justin Meyers/Gadget Hacks


Comments
Be the first, drop a comment!