
By default, iMovie for iPhone adds a dissolve (also called a crossfade) in between all of the video clips in your movie project's timeline, which is an effect that transitions gradually from the end of one clip to the beginning of another. However, iMovie does not add any beginning transitions to your first video clip or ending transitions to your last video clip. But that doesn't mean you can't.
While films can start or end abruptly with no transition, many fade in from black to the first shot in the video and fade to black on the last image. It's similar to a dissolve, but instead of transitioning between two different video clips, it's just a transition from one clip to a blank screen, usually black.
Apple's iMovie makes it easy to add these beginning and ending transitions to your movie project. Also, unlike other video editors such as Adobe Premiere Clip, you can add fades-throughs in between video clips. These transitions will fade the first clip out to black or white, then fade in from black or white to the next clip in the timeline.
How to Add Fade-Ins & Fade-Outs to Your Movie Project
First, let's cover the most straightforward option: adding a fade in from black or fade out to black for your entire movie project. In your movie project, tap on the cog then toggle on either "Fade in from black" or "Fade out to black." You can also select both if you want. Tap "Done" to finish up.

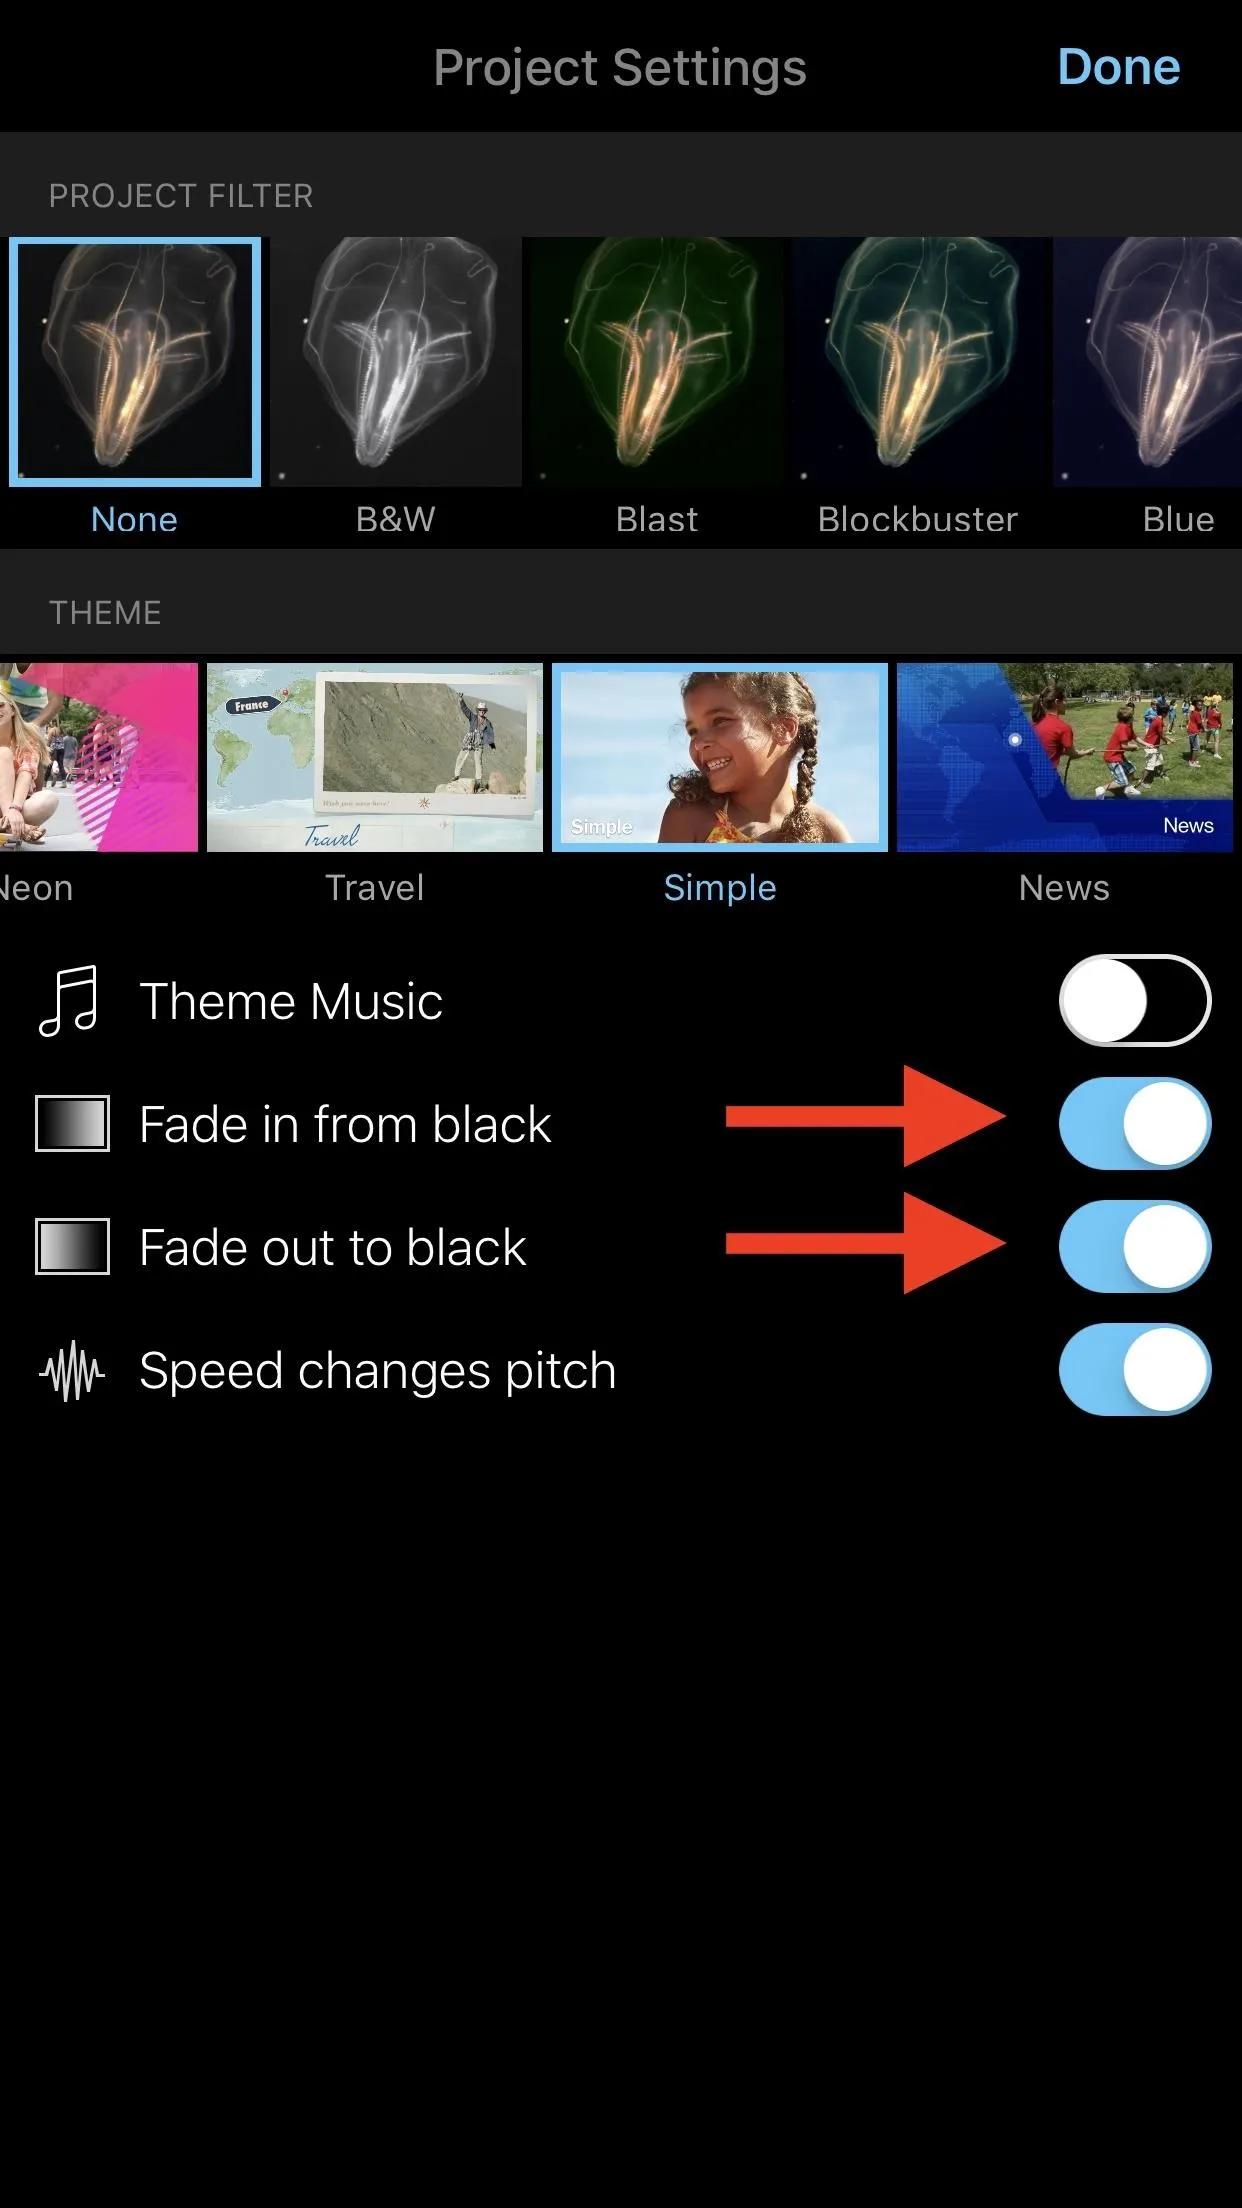


Below, you can see a few examples of a short movie project without the fade-ins and fade-outs (left side) and with them applied (right side). Unfortunately, the effect happens quickly, and there's no way to control the speed of the fade-in or fade-out transition like you can in apps such as Videoleap.


How to Add Fade-Throughs in Between Video Clips
While dissolves (crossfades) are suitable for indicating a short amount of time has passed in between clips, fade-throughs are useful for when a more significant amount of time has passed or for transitions in between acts. Really, you can use either of these for any reason you think is cool and looks good, so play around and see what works best.
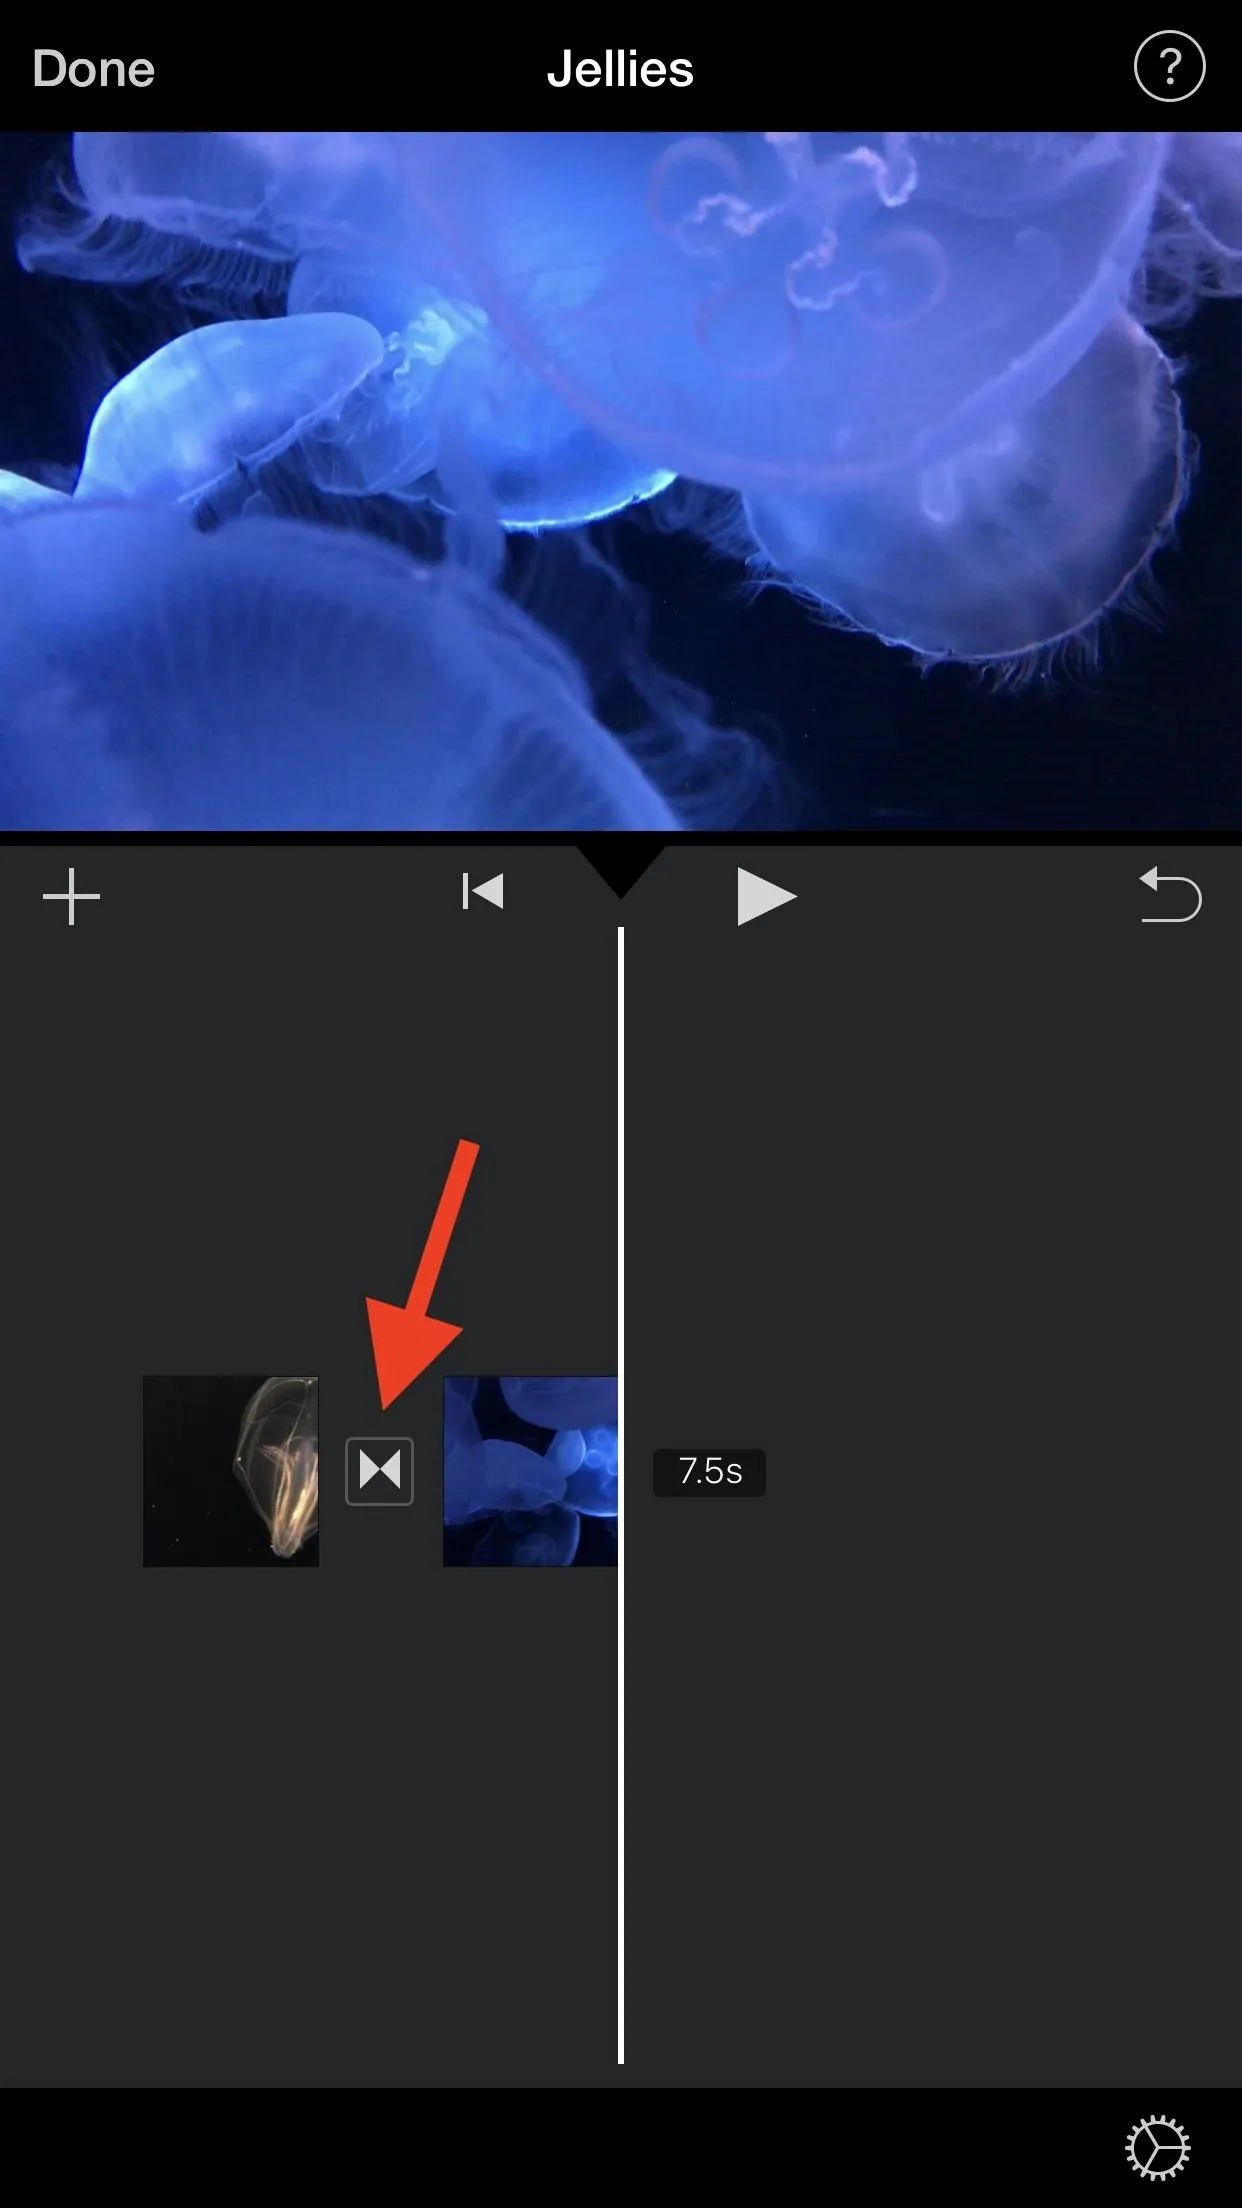
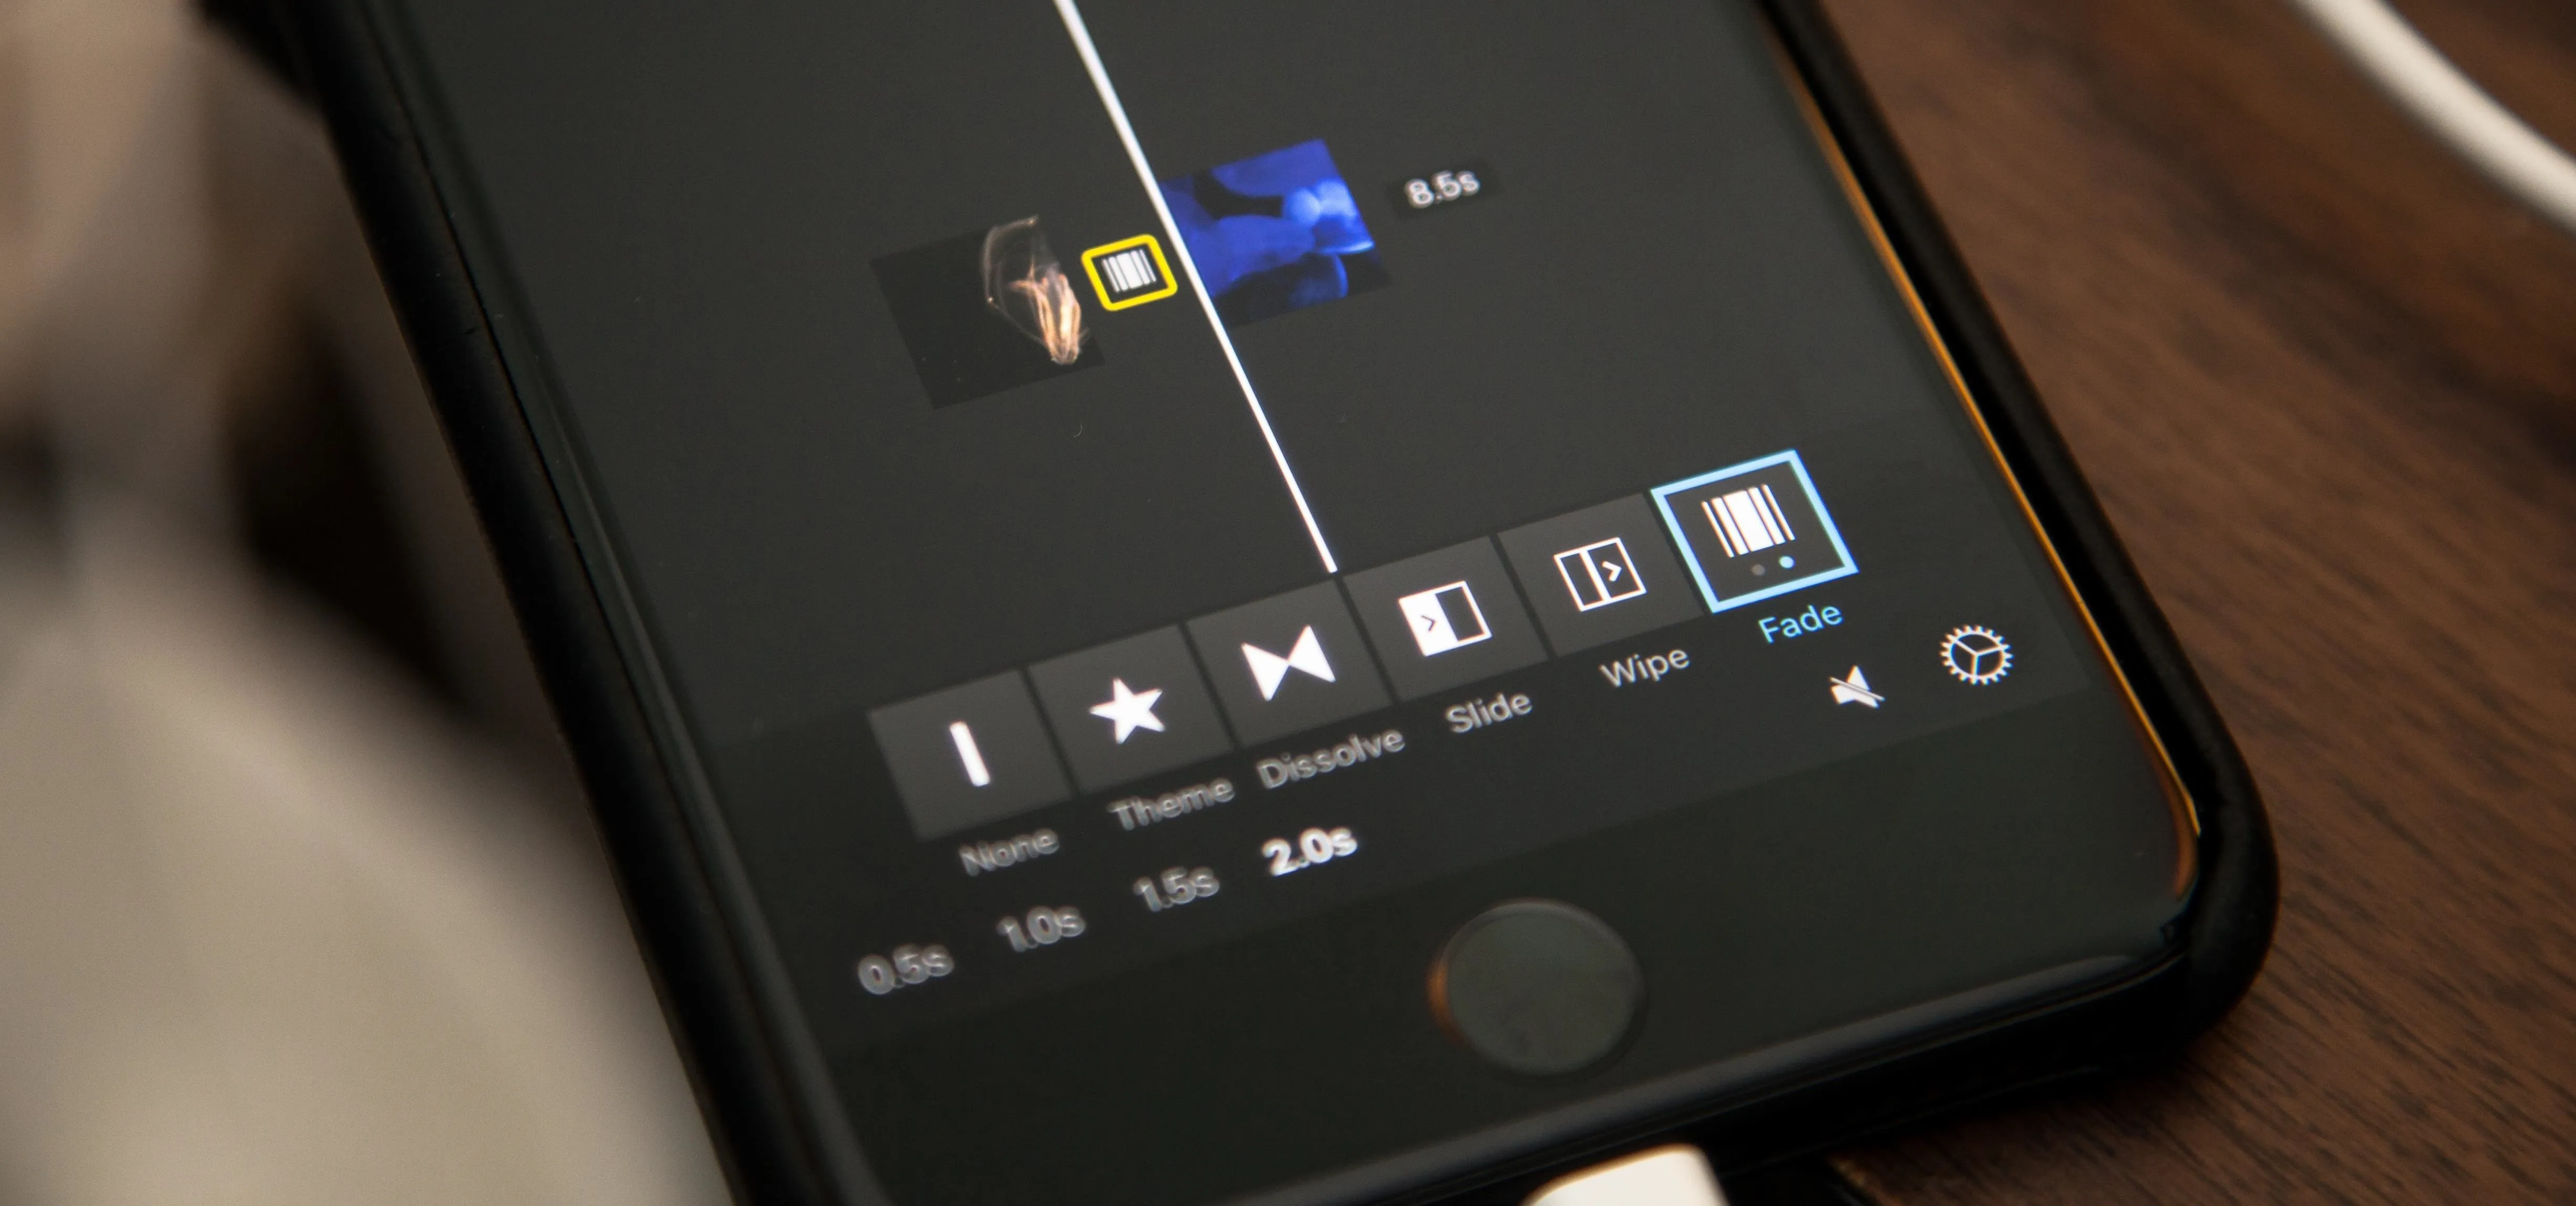
Since iMovie automatically adds a dissolve transition in between every video clip you add to the timeline, all you have to do is tap on the transition you want to change, then select "Fade" from the list of effects.
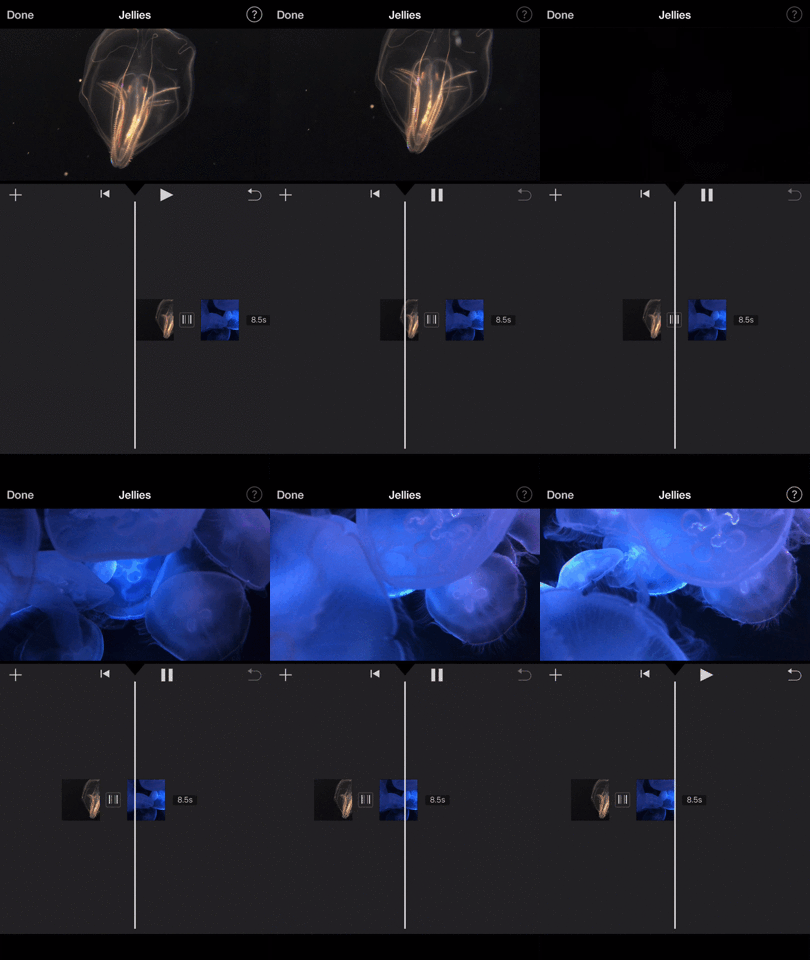
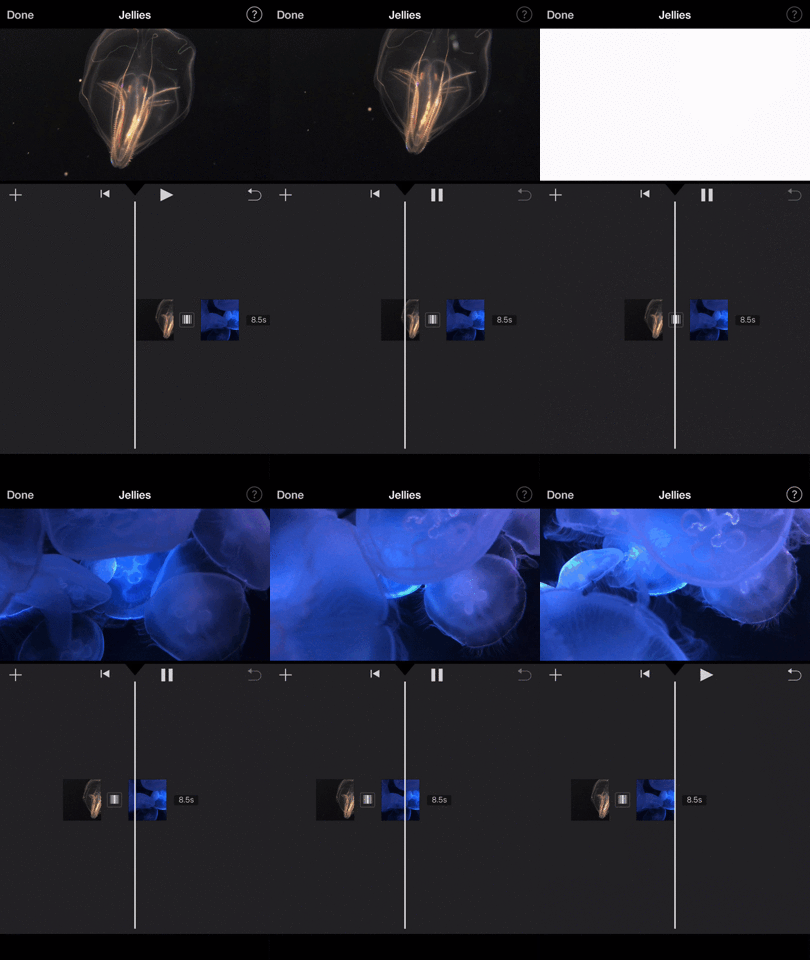
One tap on "Fade" (the first dot highlighted on the icon) will make the clips fade through black, i.e., make the first clip fade to black and the next clip fade in from black. Two taps on the "Fade" button (the second dot highlighted) will make it white instead of black.
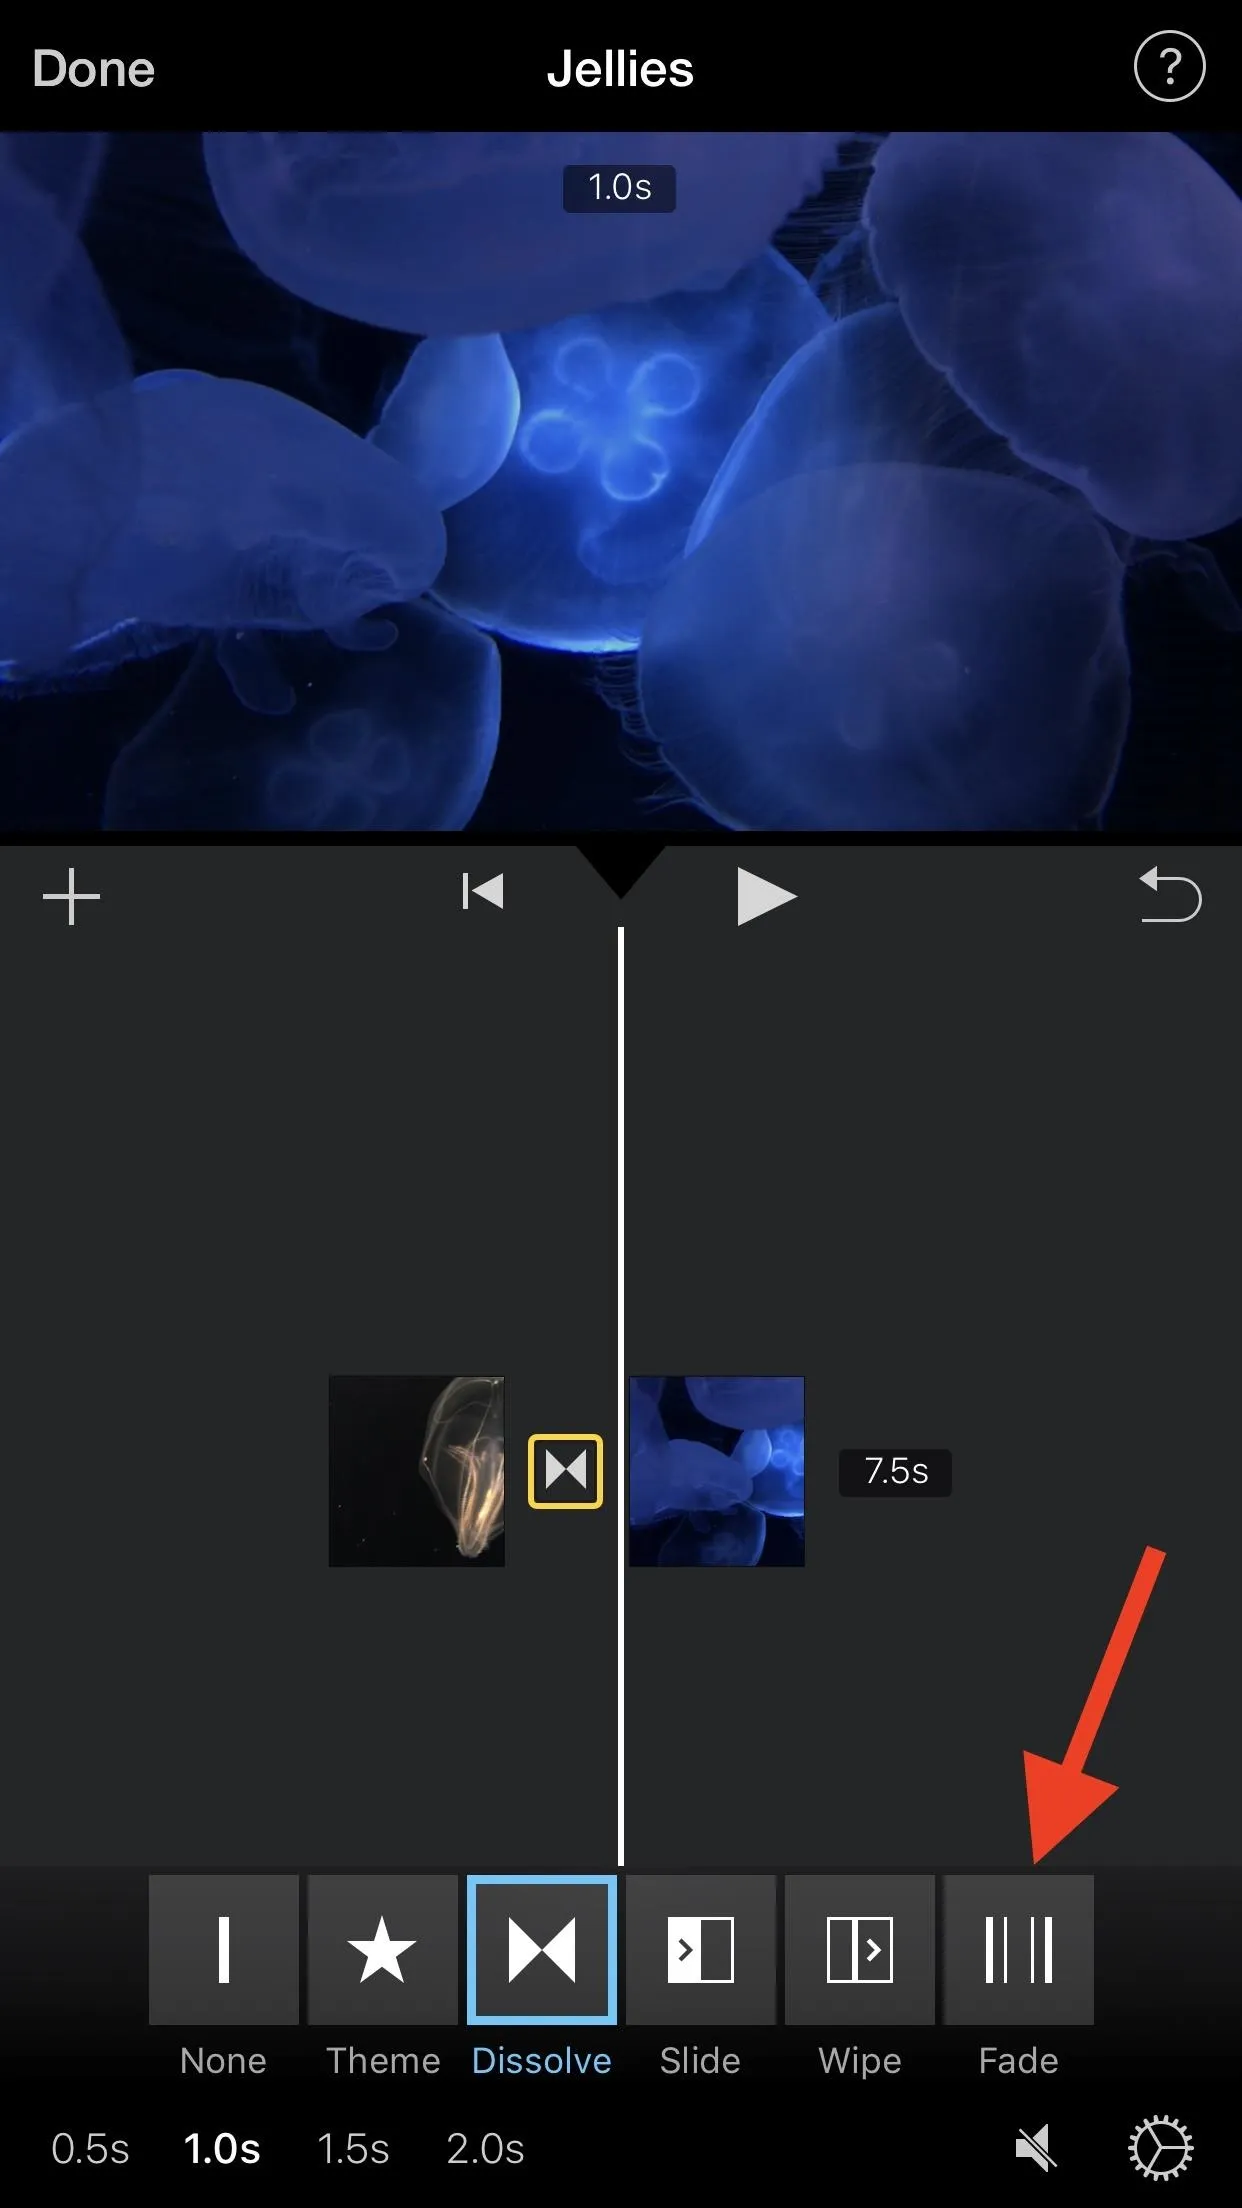
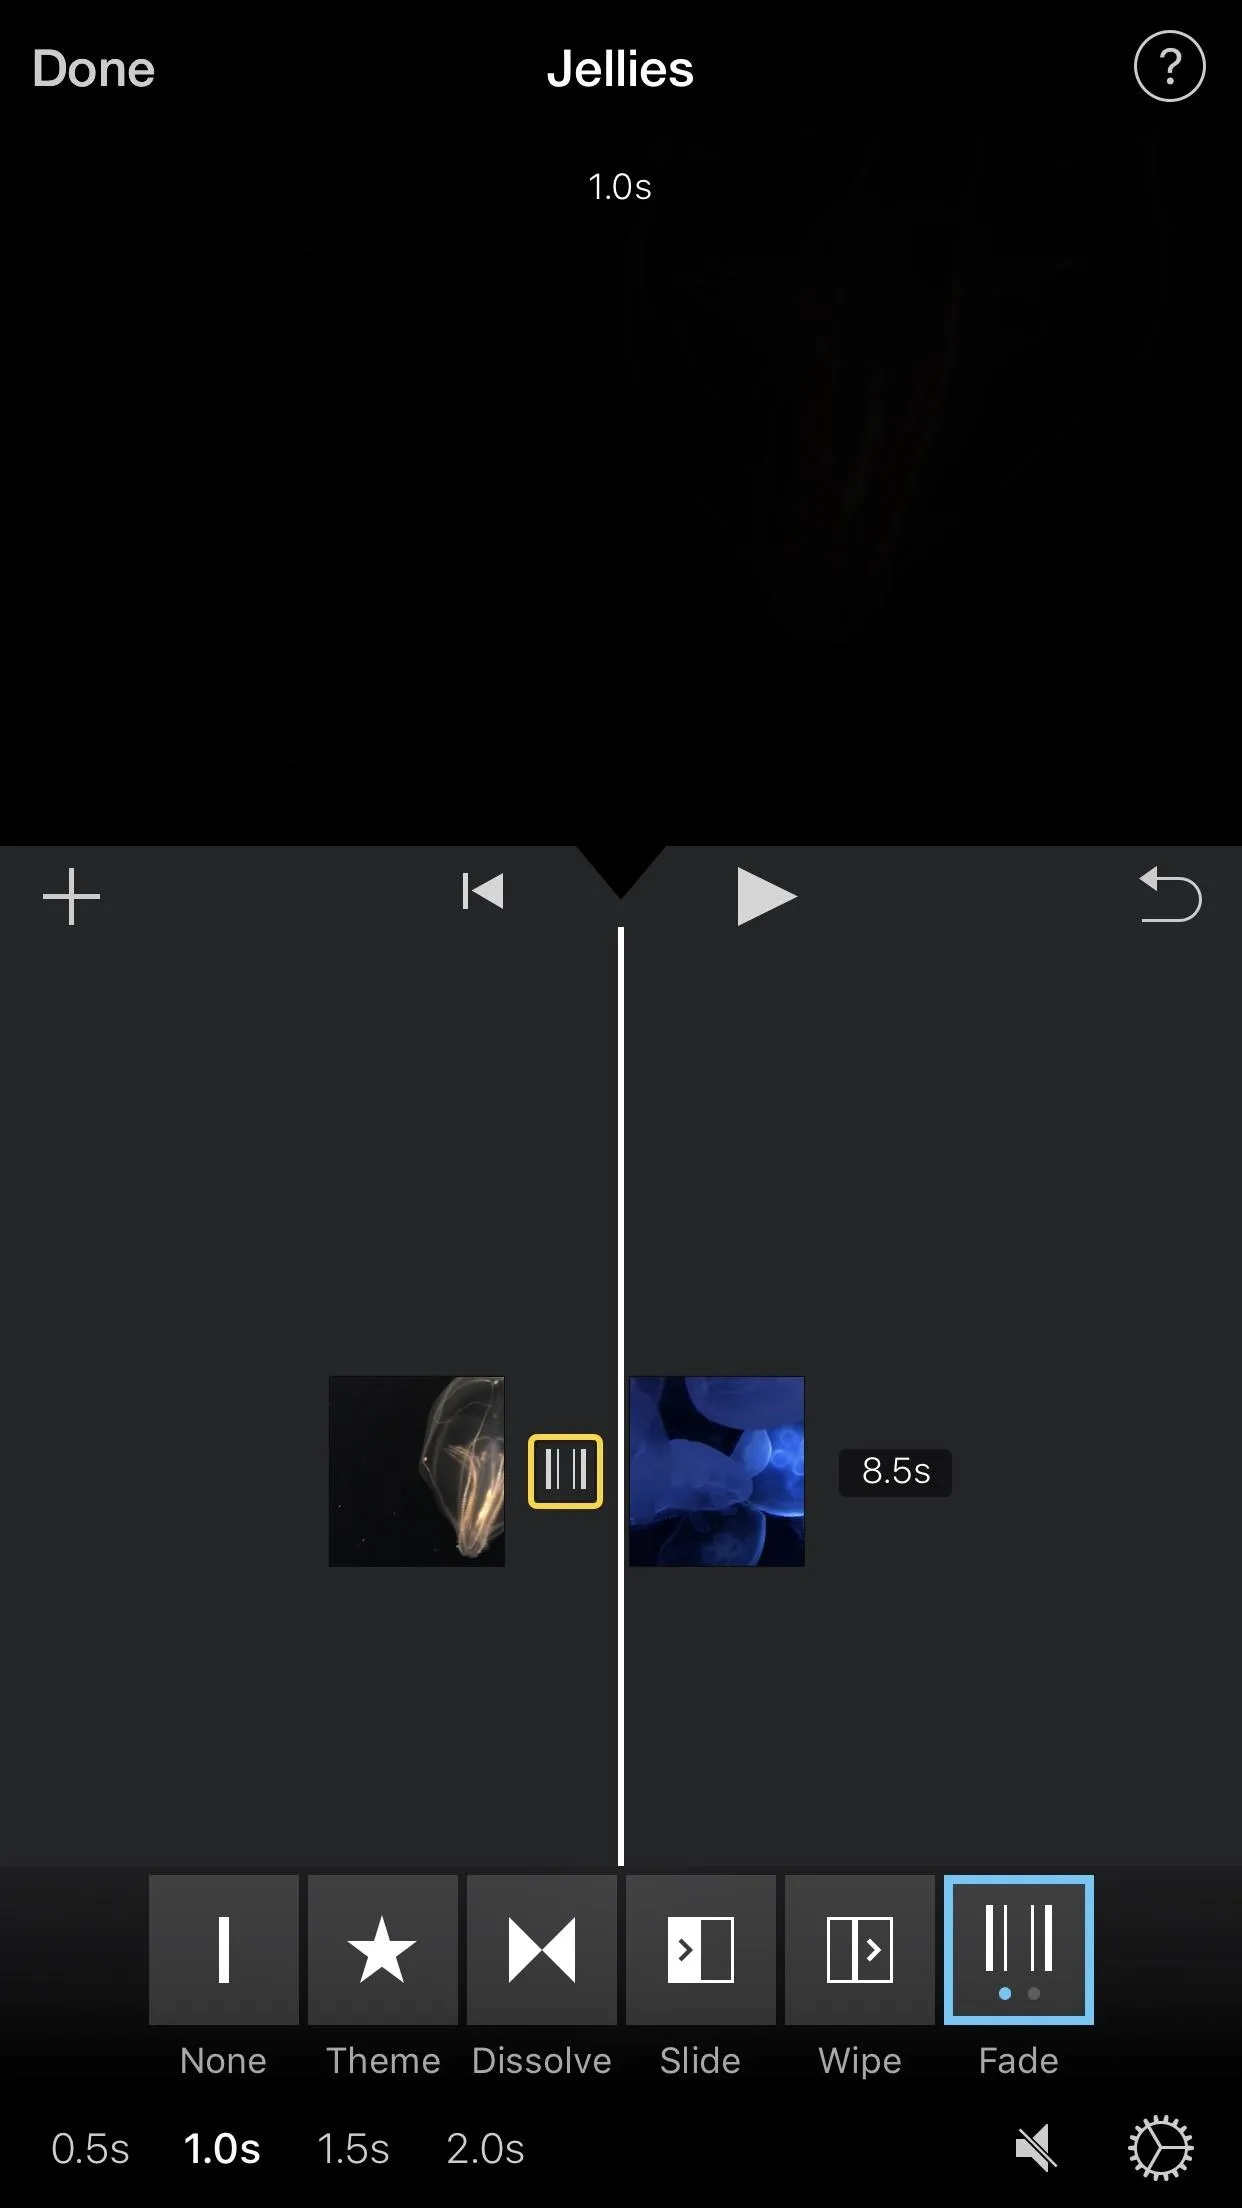


While in this menu, you can change the duration of the transition from the default one second to 0.5, 1.5, or 2 seconds. Half of it will apply to the end of the first clip, and the other half will apply to the beginning of the second clip.
Below, you can see a black fade-through applied in between two video clips (on the left side) and a white fade-through instead (right side). They have two very different outcomes.
Additionally, the "Fade" transition comes equipped with its own "Hollywood-style sound effect," as Apple calls it, which can be activated from the inspector at the bottom when the transition is highlighted — just make sure the speaker icon looks like it's playing audio. It's not the best sound in the world, but it's there if you want.


While Apple does include fade options in iMovie, you can't have a lot of control over them. For total customization of transitions, Videoleap is an excellent app to check out.
This article was produced during Gadget Hacks' special coverage on smartphone-based video creator tips for filming and editing. Check out the whole Videography series.
- Follow Gadget Hacks on Pinterest, Reddit, Twitter, YouTube, and Flipboard
- Sign up for Gadget Hacks' daily newsletter or weekly Android and iOS updates
- Follow WonderHowTo on Facebook, Twitter, Pinterest, and Flipboard
Cover photo, screenshots, and GIFs by Justin Meyers/Gadget Hacks




Comments
Be the first, drop a comment!