Apple's iOS 18 update brings powerful new features to your iPhone's Camera app, but some tools are easy to overlook yet incredibly useful once you find them. From new shooting modes to expanded preserve settings, iOS 18 adds more ways to capture and manage your shots exactly how you want.
While some enhancements are exclusive to newer devices, like the iPhone 15 Pro models or iPhone 16 series, there's plenty to explore on all devices compatible with iOS 18 — and some of them you won't want to miss. A few of these upgrades are even applicable to iPads with iPadOS 18.
- Don't Miss: Use Genmoji to Create Custom Emoji That Work Just Like Regular Emoji in Messages, Notes, and More
1. Control Your Camera with Camera Control
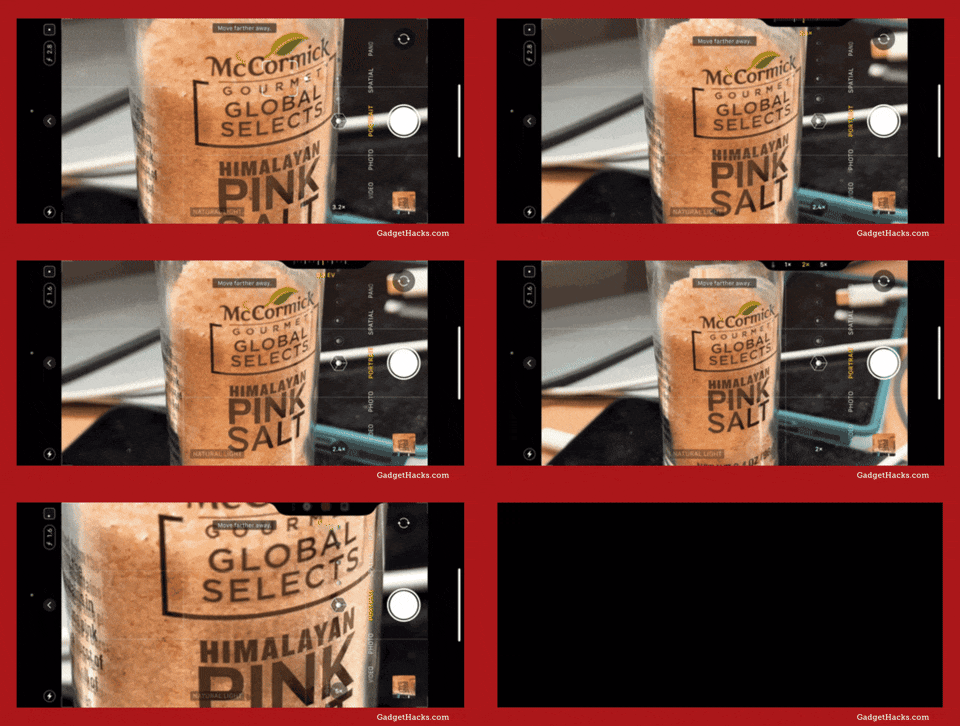
The iPhone 16 series takes camera accessibility to the next level with the Camera Control button, designed to launch the Camera app and access photo and video settings instantly. This button, integrated into iOS 18, allows you to adjust exposure, depth, zoom, cameras, styles, and tone in the Camera app on the fly. Think of it as a shortcut to capture moments as soon as they happen.
Third-party camera apps can also add support for Camera Control so you can switch between and adjust certain modes and settings. You can even switch Camera Control's open shortcut to open a third-party camera app like Halide, Instagram, or Snapchat. See how it all works.
2. Capture Spatial Photos and Videos
With iOS 17.2, Apple introduced spatial video capture in the Camera app for the iPhone 15 Pro and 15 Pro Max, which lets you view recorded moments in 3D on Apple Vision Pro.
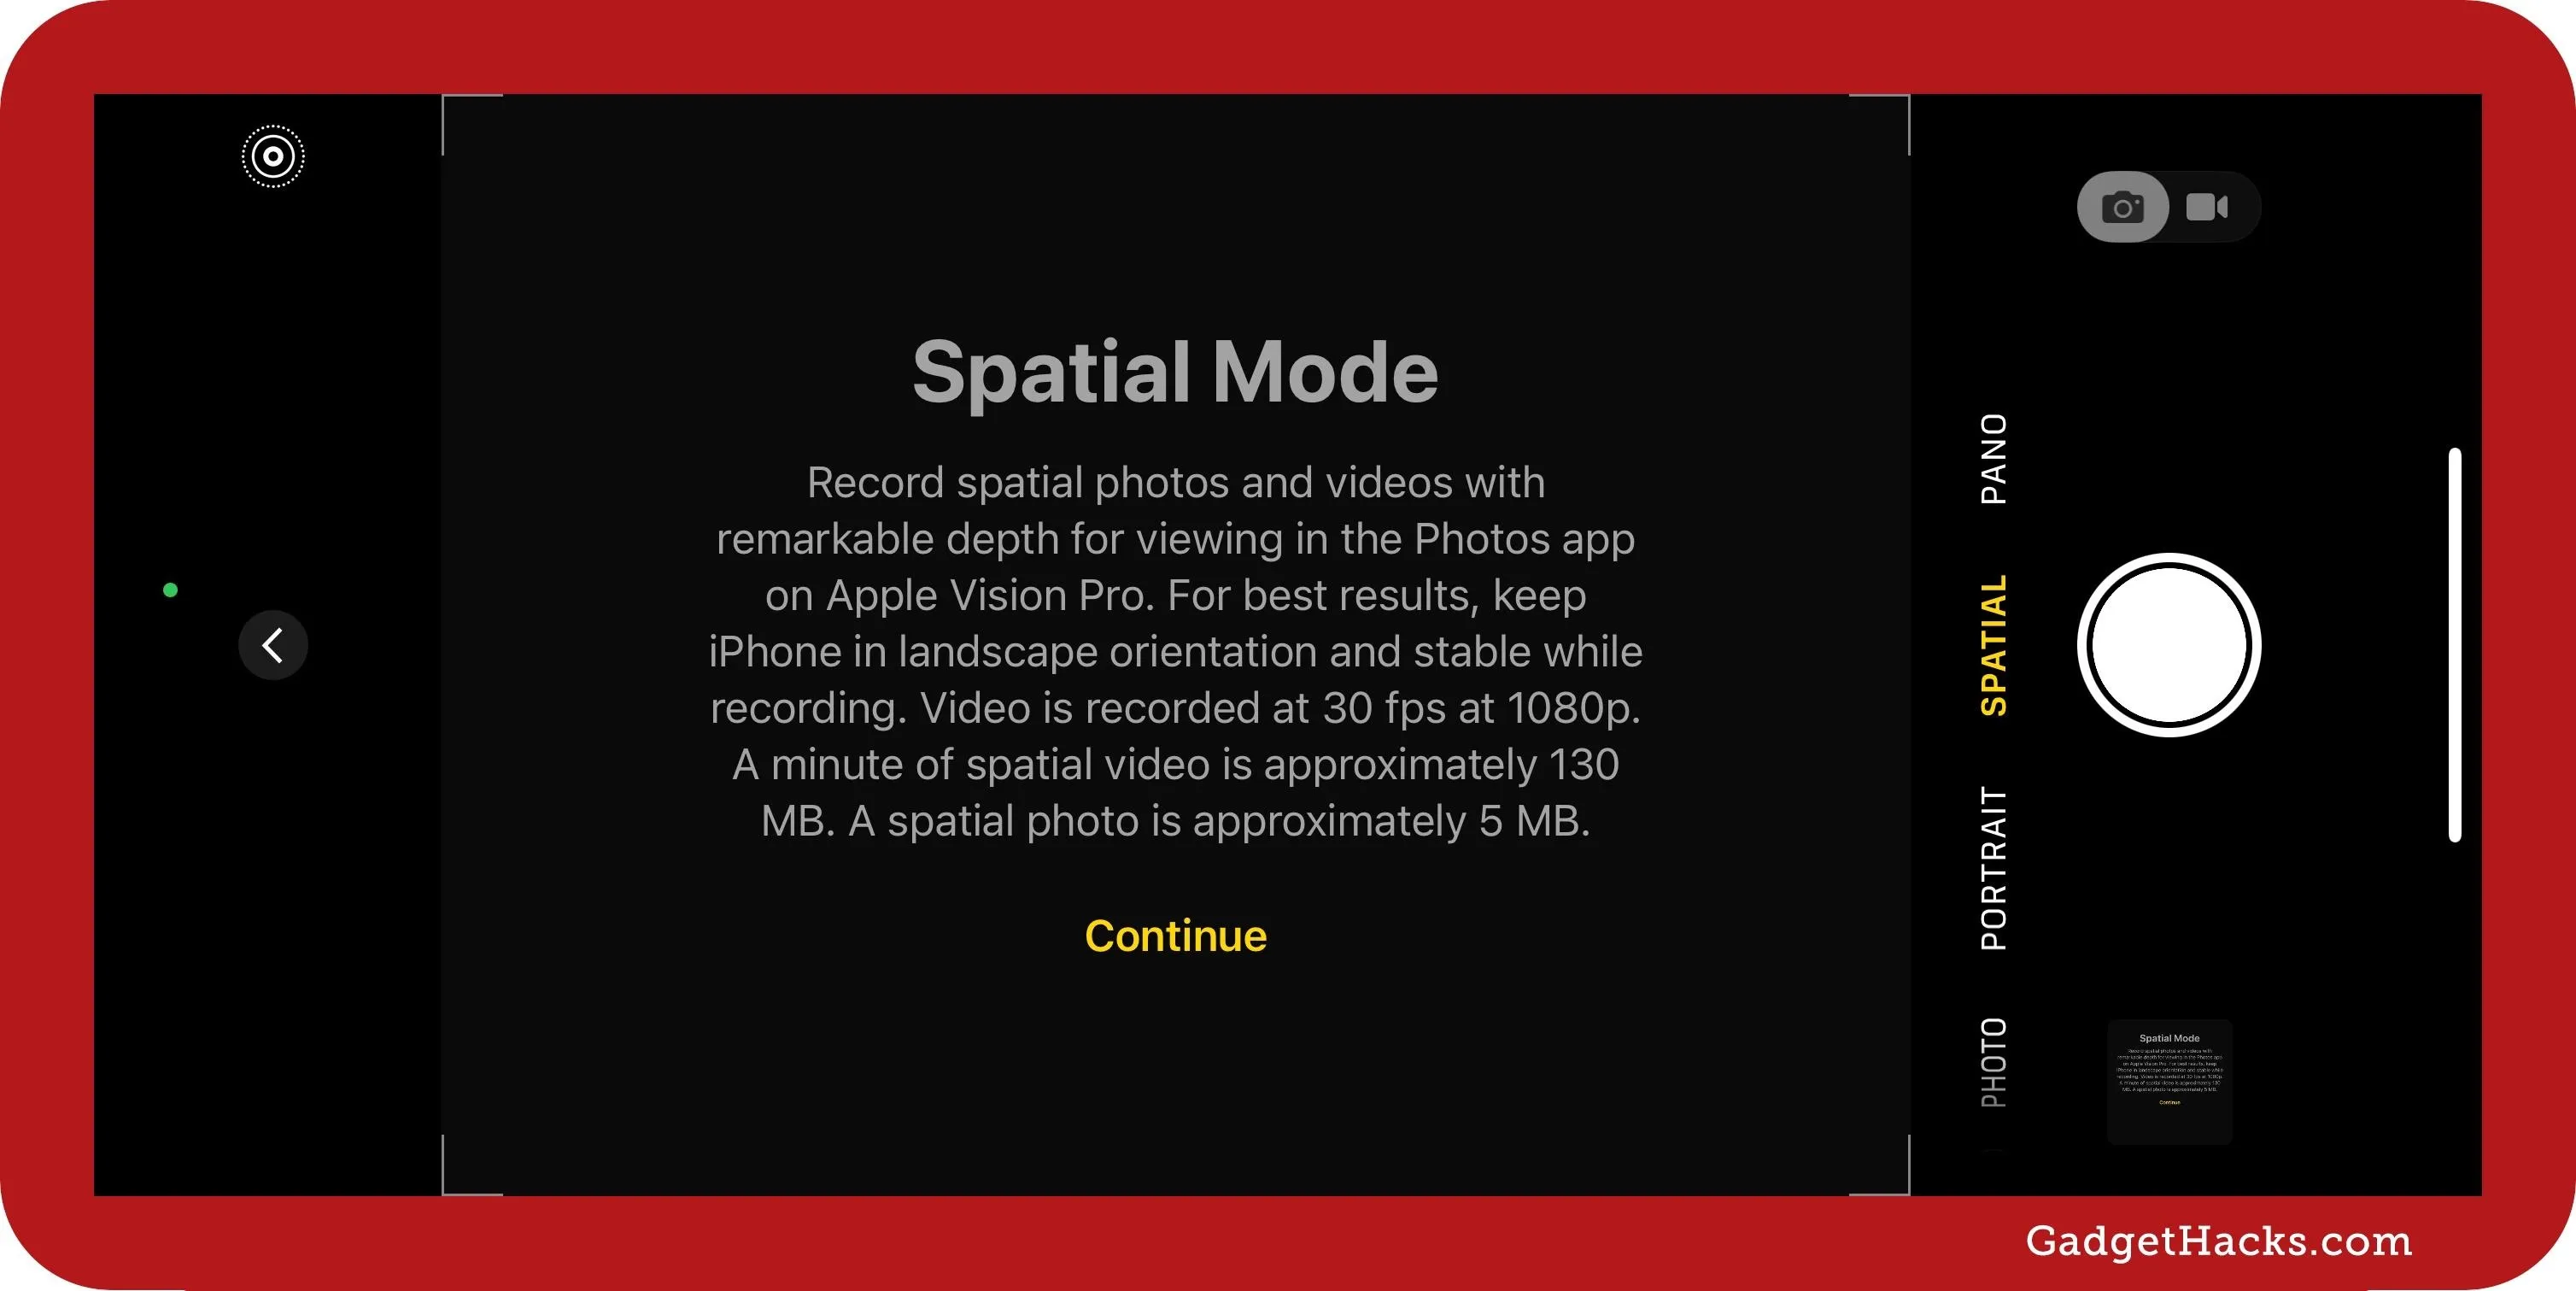
Recording spatial videos also made its way to the iPhone 16 series as an official shooting mode option that also lets you capture spatial photos. And with iOS 18.2, the iPhone 15 Pro and 15 Pro Max have this new shooting mode, too. Select "Spatial" from the mode selector, then tap the camera or video button to toggle between them.
3. Set a 5-Second Timer
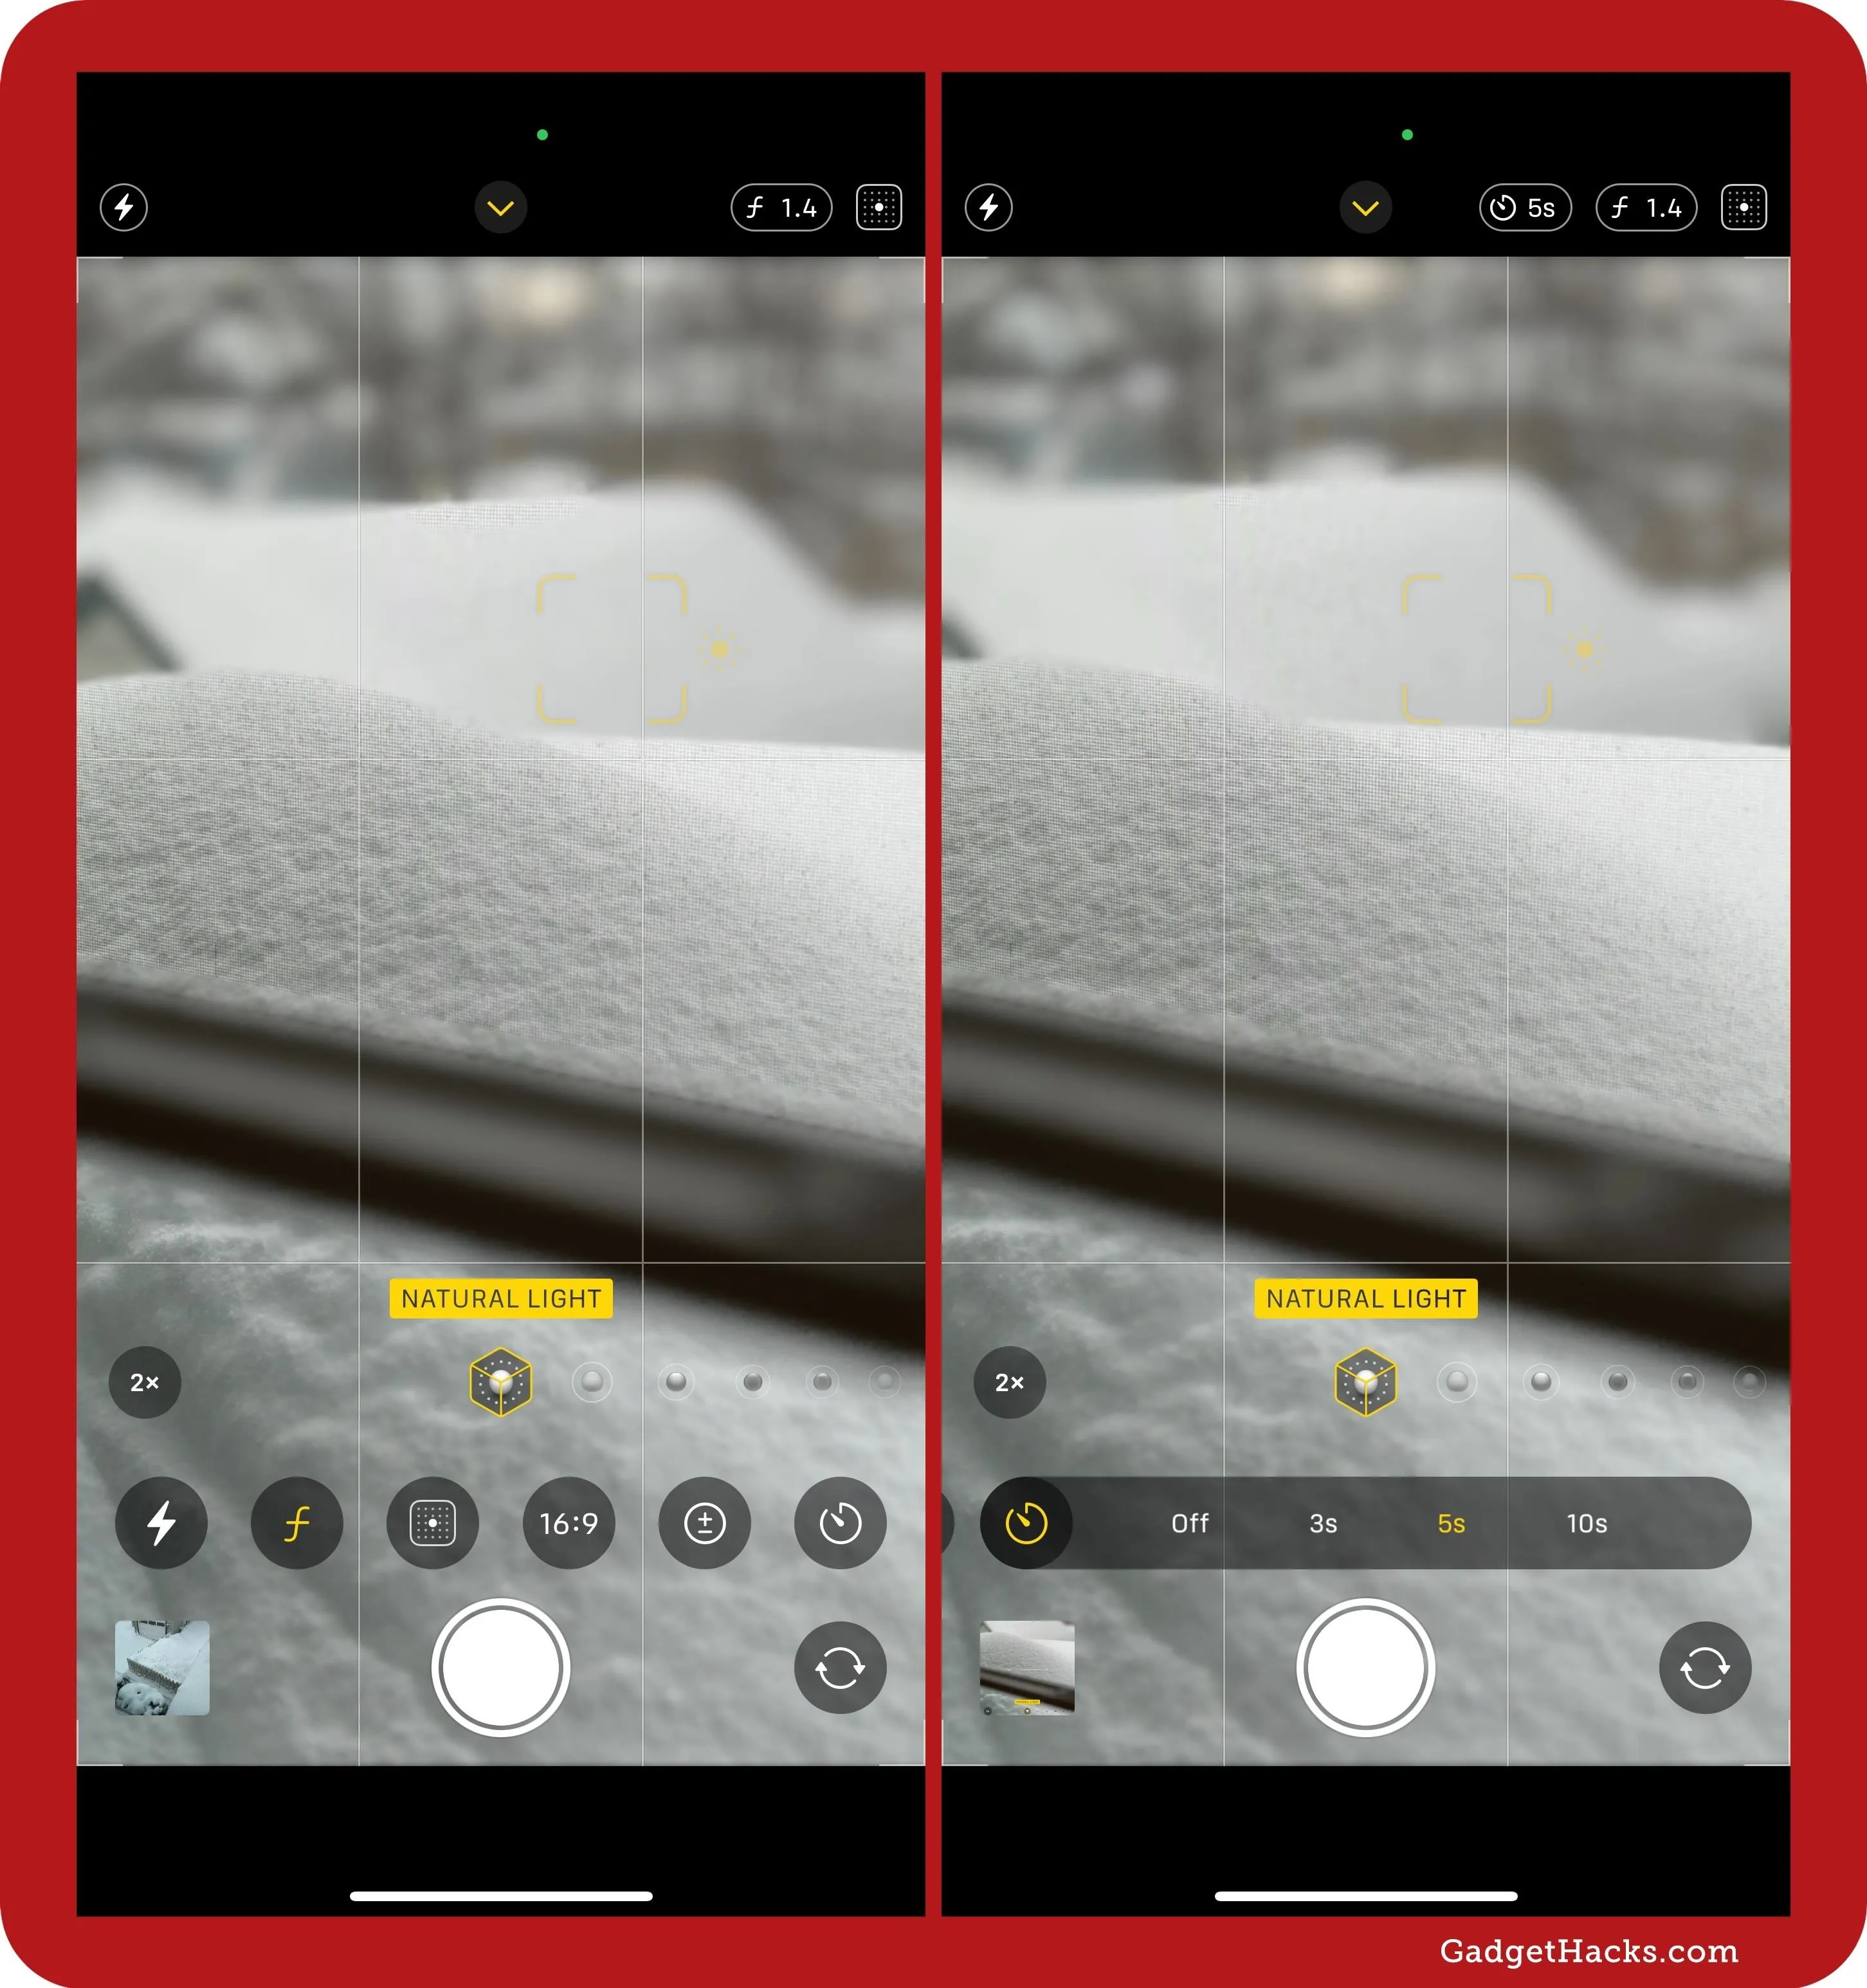
On both iOS 18 and iPadOS 18, the Camera app now includes a 5-second timer, adding to the existing 3-second and 10-second options. This new option offers an in-between delay that can be useful for timed shots where 3 seconds feels too short and 10 seconds is unnecessary.
The timer works in Photo, Portrait, and Spatial modes on iPhone and in Photo, Portrait, and Square modes on iPad. To unhide the timer on an iPhone, swipe up on the screen or tap the chevron by the front TrueDepth or FaceTime HD camera. The timer should already be visible on an iPad. Tap the clock icon to see the Timer Off, 3s, 5s, or 10s options.
Once selected, the timer will start as soon as you press the shutter button, allowing you time to get ready before your device snaps the picture.
4. Fire Up Your Flash Faster
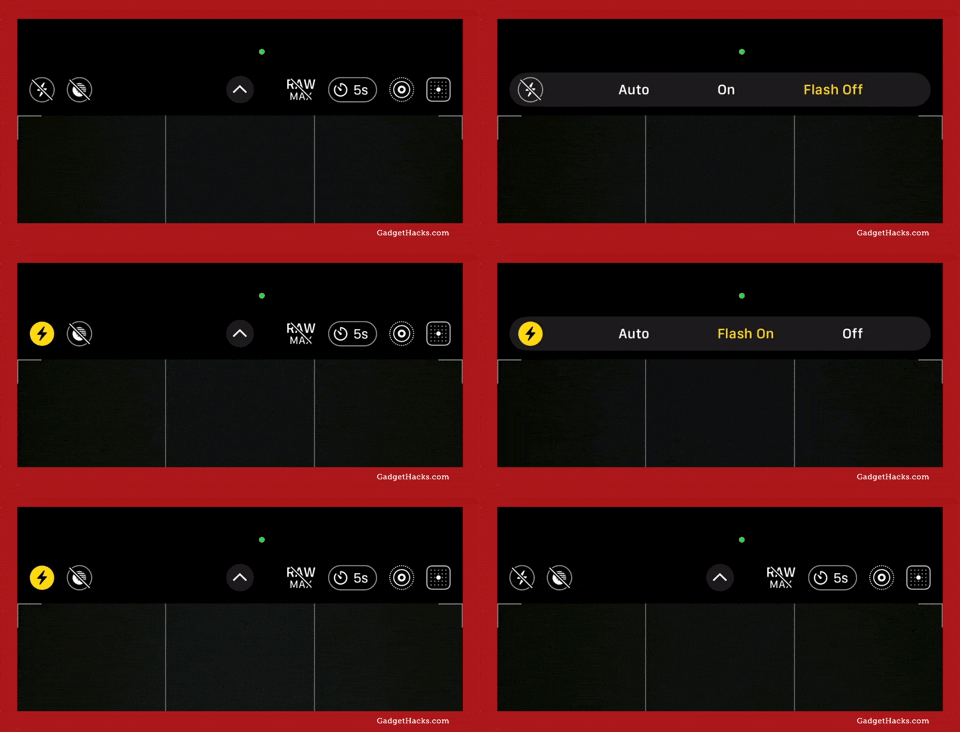
On iOS 17 and earlier, tapping the Flash button only lets you choose between the "Flash Auto" and "Off" options. If you want to turn it on manually, swipe up on the screen or tap the chevron by the front TrueDepth or FaceTime HD camera, tap the Flash button, and then choose "On."
Things are a lot easier on iOS 18. Now, you can touch and hold the Flash button outside the hidden menu to slide out the options there and tap "On," which means one less step overall than via the hidden menu Flash settings.
5. Capture Videos While Playing Audio
Recording a video used to mean saying goodbye to your music, but not anymore. With iOS 18, audio playback over your iPhone's speakers or AirPods won't automatically stop when you record.
When music or other audio plays over your iPhone's speakers, it will be recorded in mono and heard in your video, along with everything else you shoot. With AirPods, the audio won't pause automatically like before, so you can record video while listening to music, podcasts, and so on.
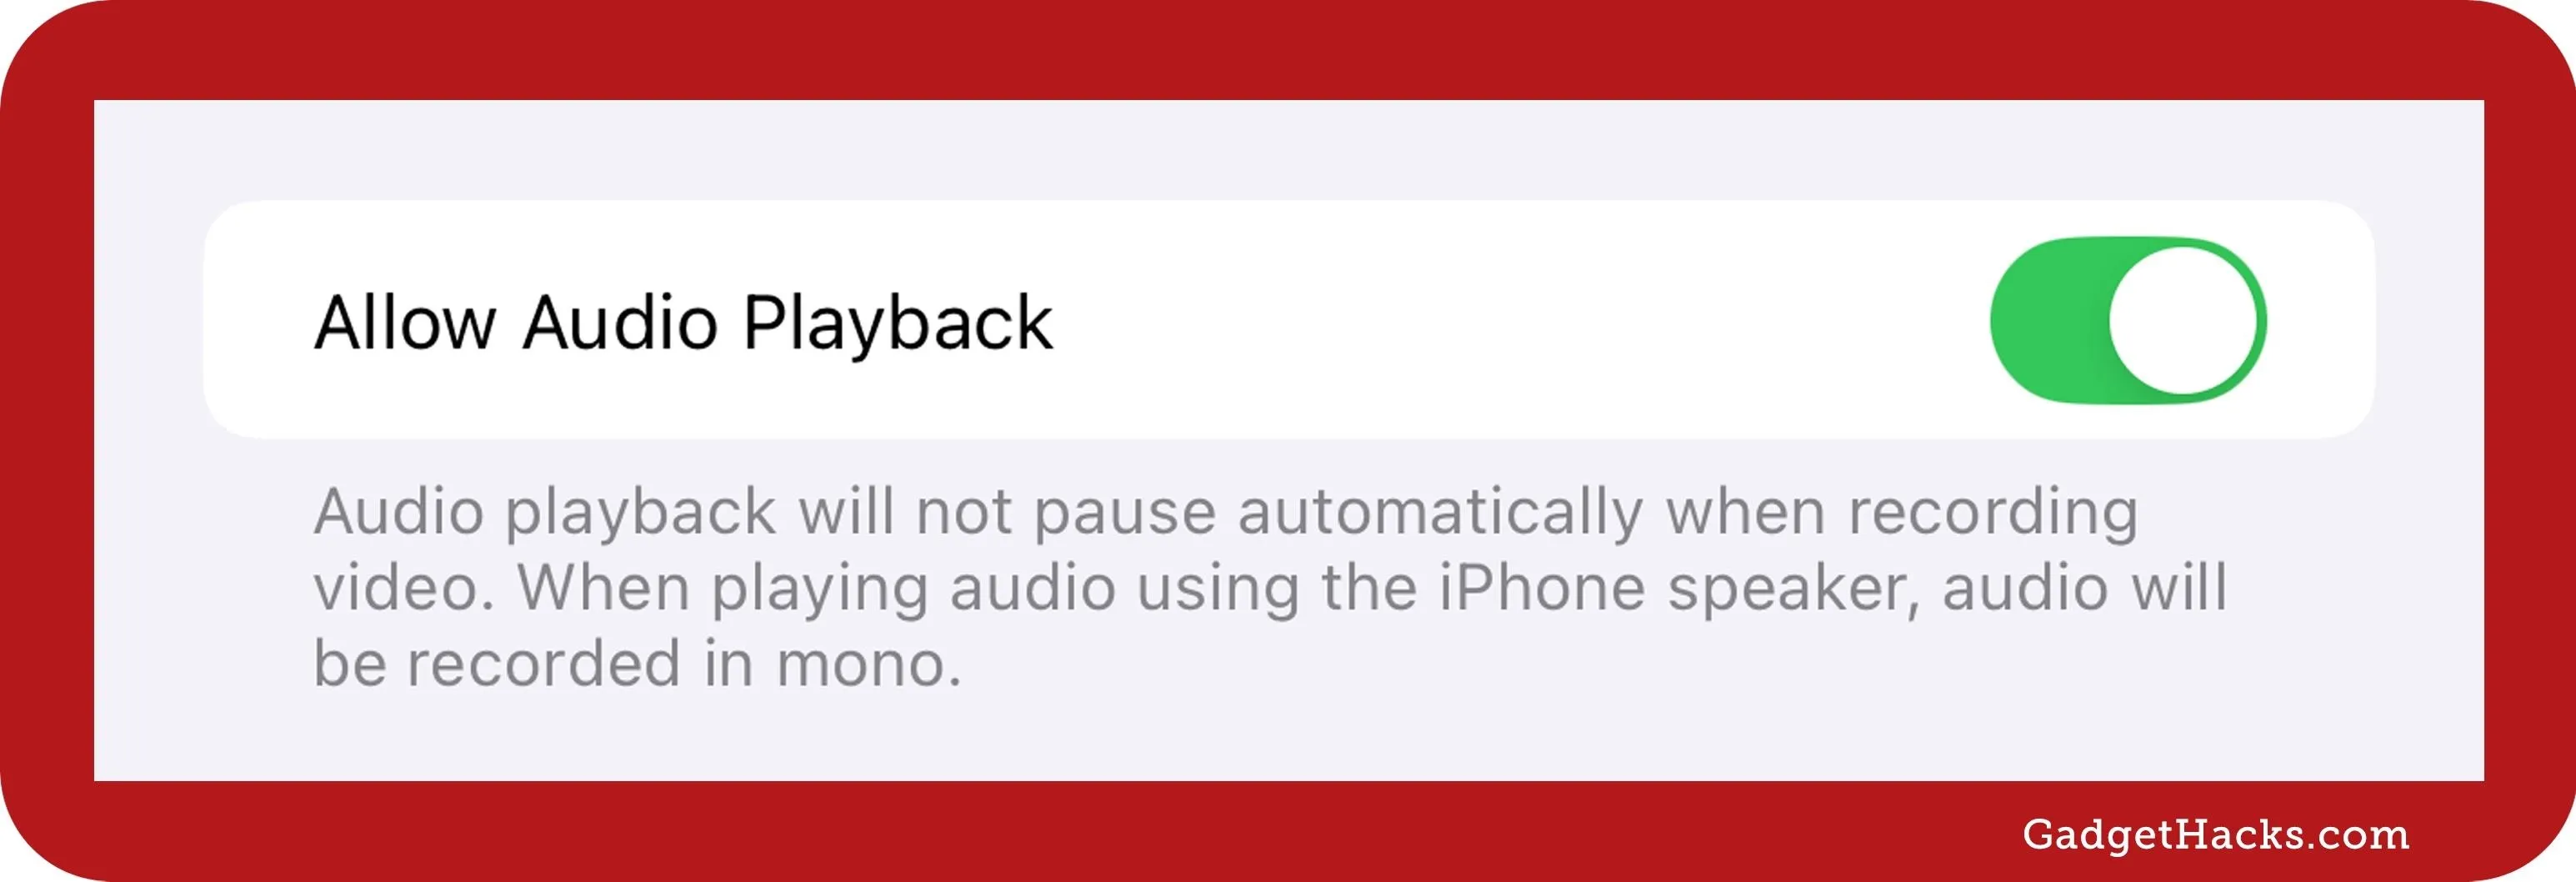
If audio playback is still being paused, go to Settings » Camera » Record Sound and toggle on the "Allow Audio Playback" switch.
6. Adjust the Wind Noise Setting for Videos
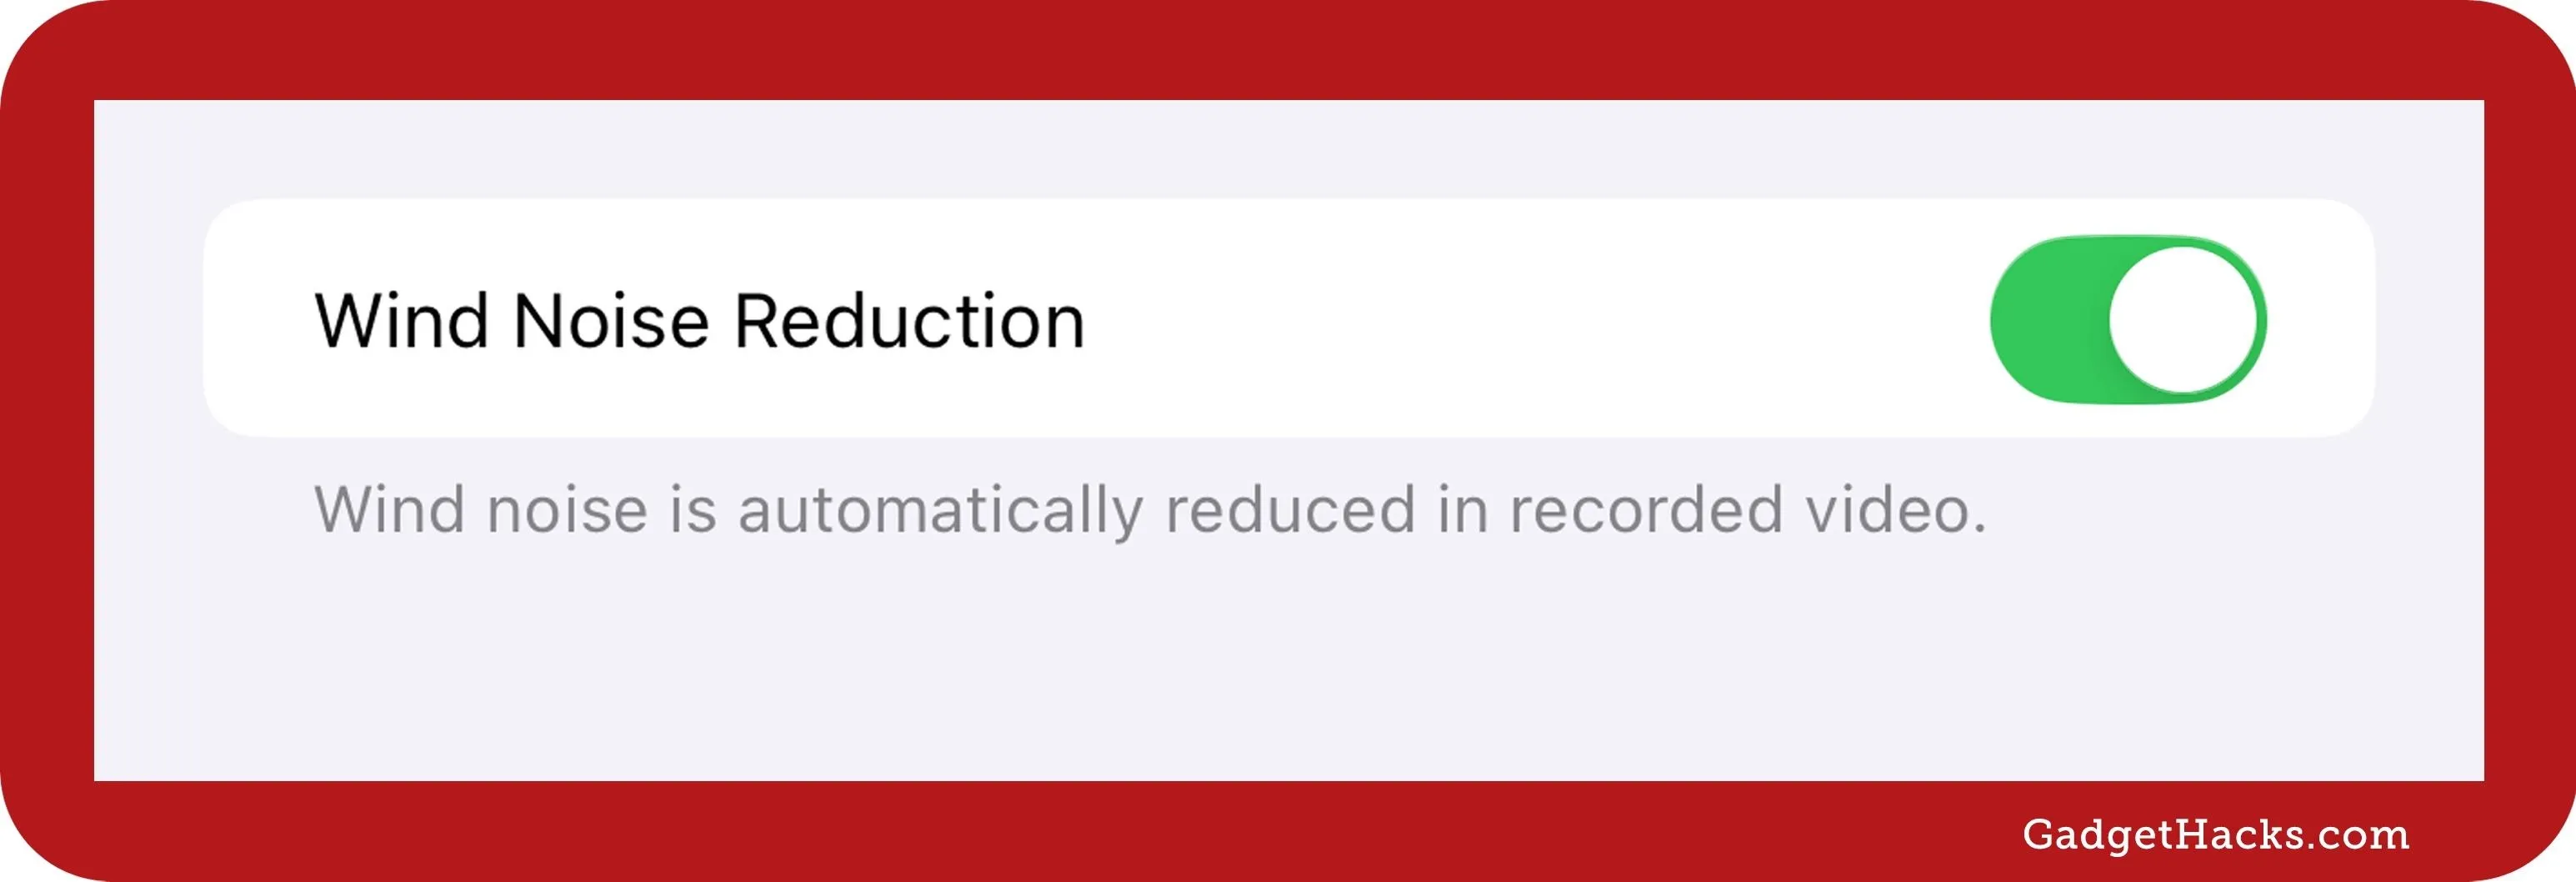
If you have an iPhone 16 series model, by default, wind noise is automatically reduced when recording videos with Spatial Audio or Stereo set. If, for some reason, you do not want wind sound reduced in your video recordings, you can go to Settings » Camera » Record Sound and toggle off the "Wind Noise Reduction" switch.
7. Use Photographic Styles to Get the Look You Want
If you have an iPhone 16, 16 Plus, 16 Pro, or 16 Pro Max, you can access Photographic Styles, which replaces Filters, giving you total control over the look and feel of your photos. However, limited Photographic Styles are available on the iPhone 13 and newer models (except the 16 series), which have been available since iOS 15.
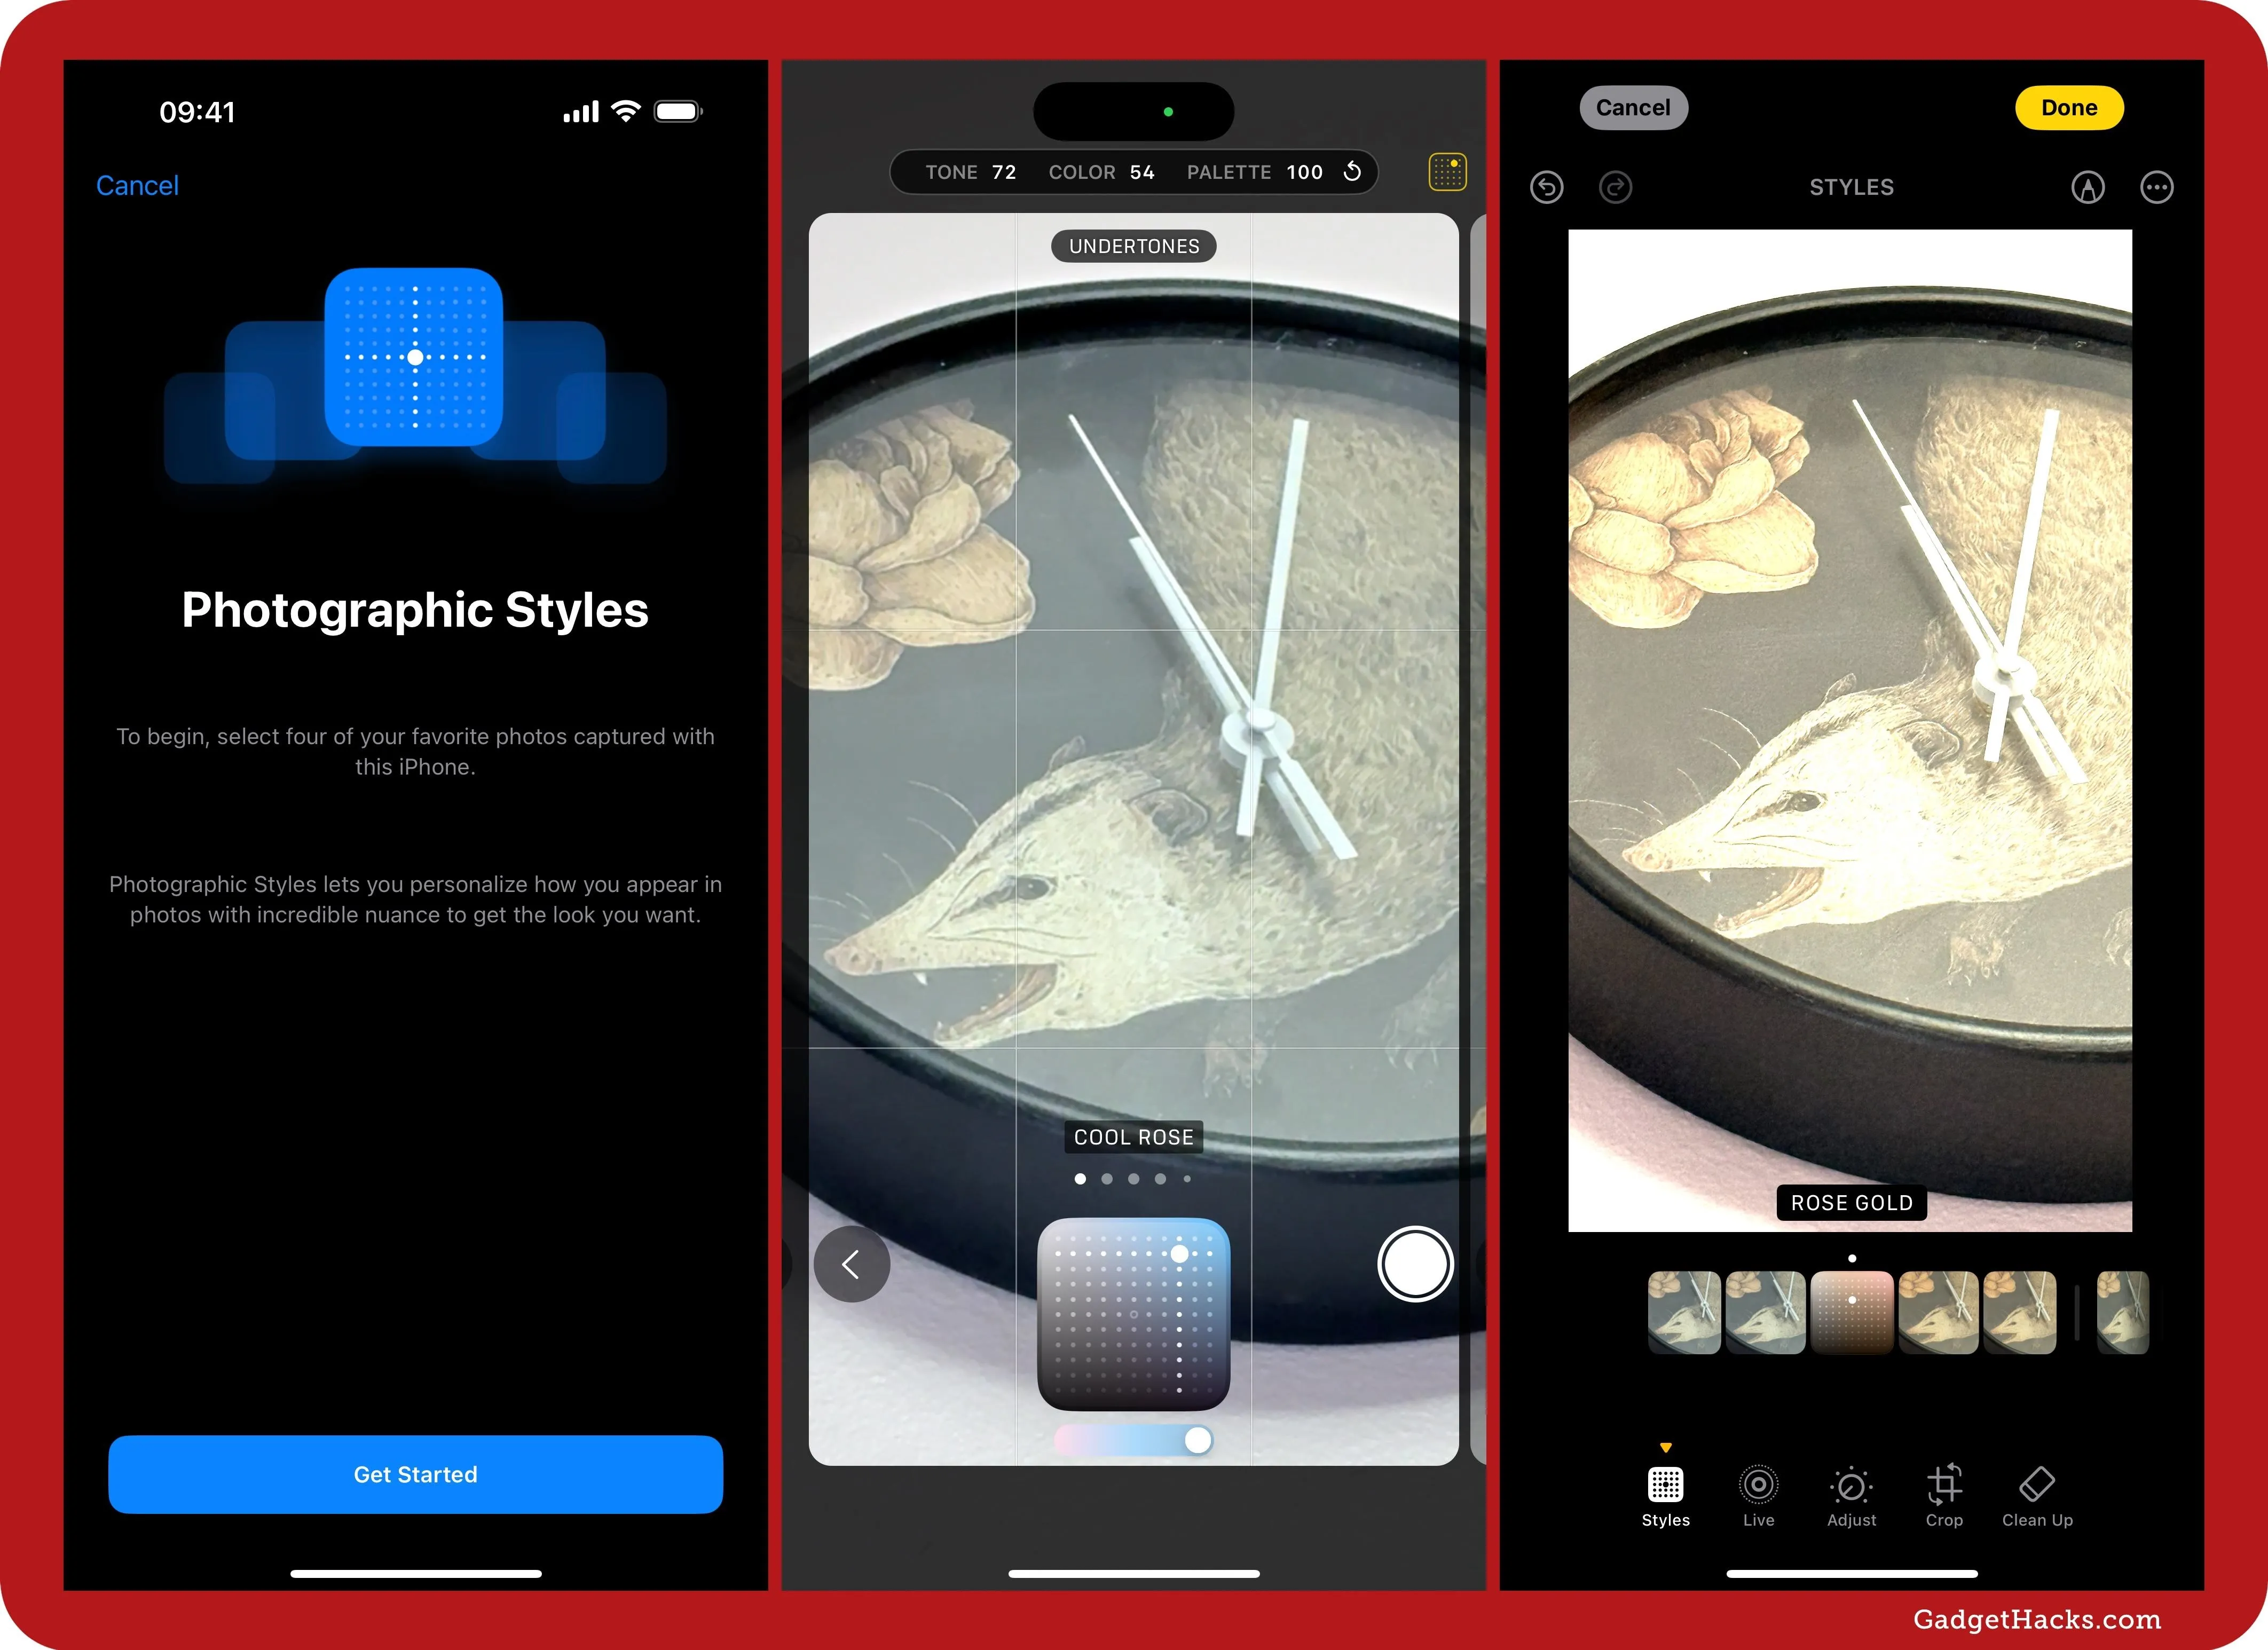
On iPhone 16 series models, the styles available include the Undertones (Amber, Cool Rose, Gold, Neutral, Rose Gold, and Standard) and Mood (Cozy, Dramatic, Ethereal, Luminous, Muted B&W, Natural, Quiet, Stark B&W, and Vibrant) options. You can adjust the tone and color of each style and the palette (intensity) for every style except Standard.
To choose your default style, go to Settings » Camera » Photographic Styles to train the Camera app with four of your favorite photos. To access Photographic Styles, tap its button near the TrueDepth camera or from the Controls Menu. If you want to edit the style in the Photos app, ensure you have High Efficiency selected in Settings » Camera » Formats.
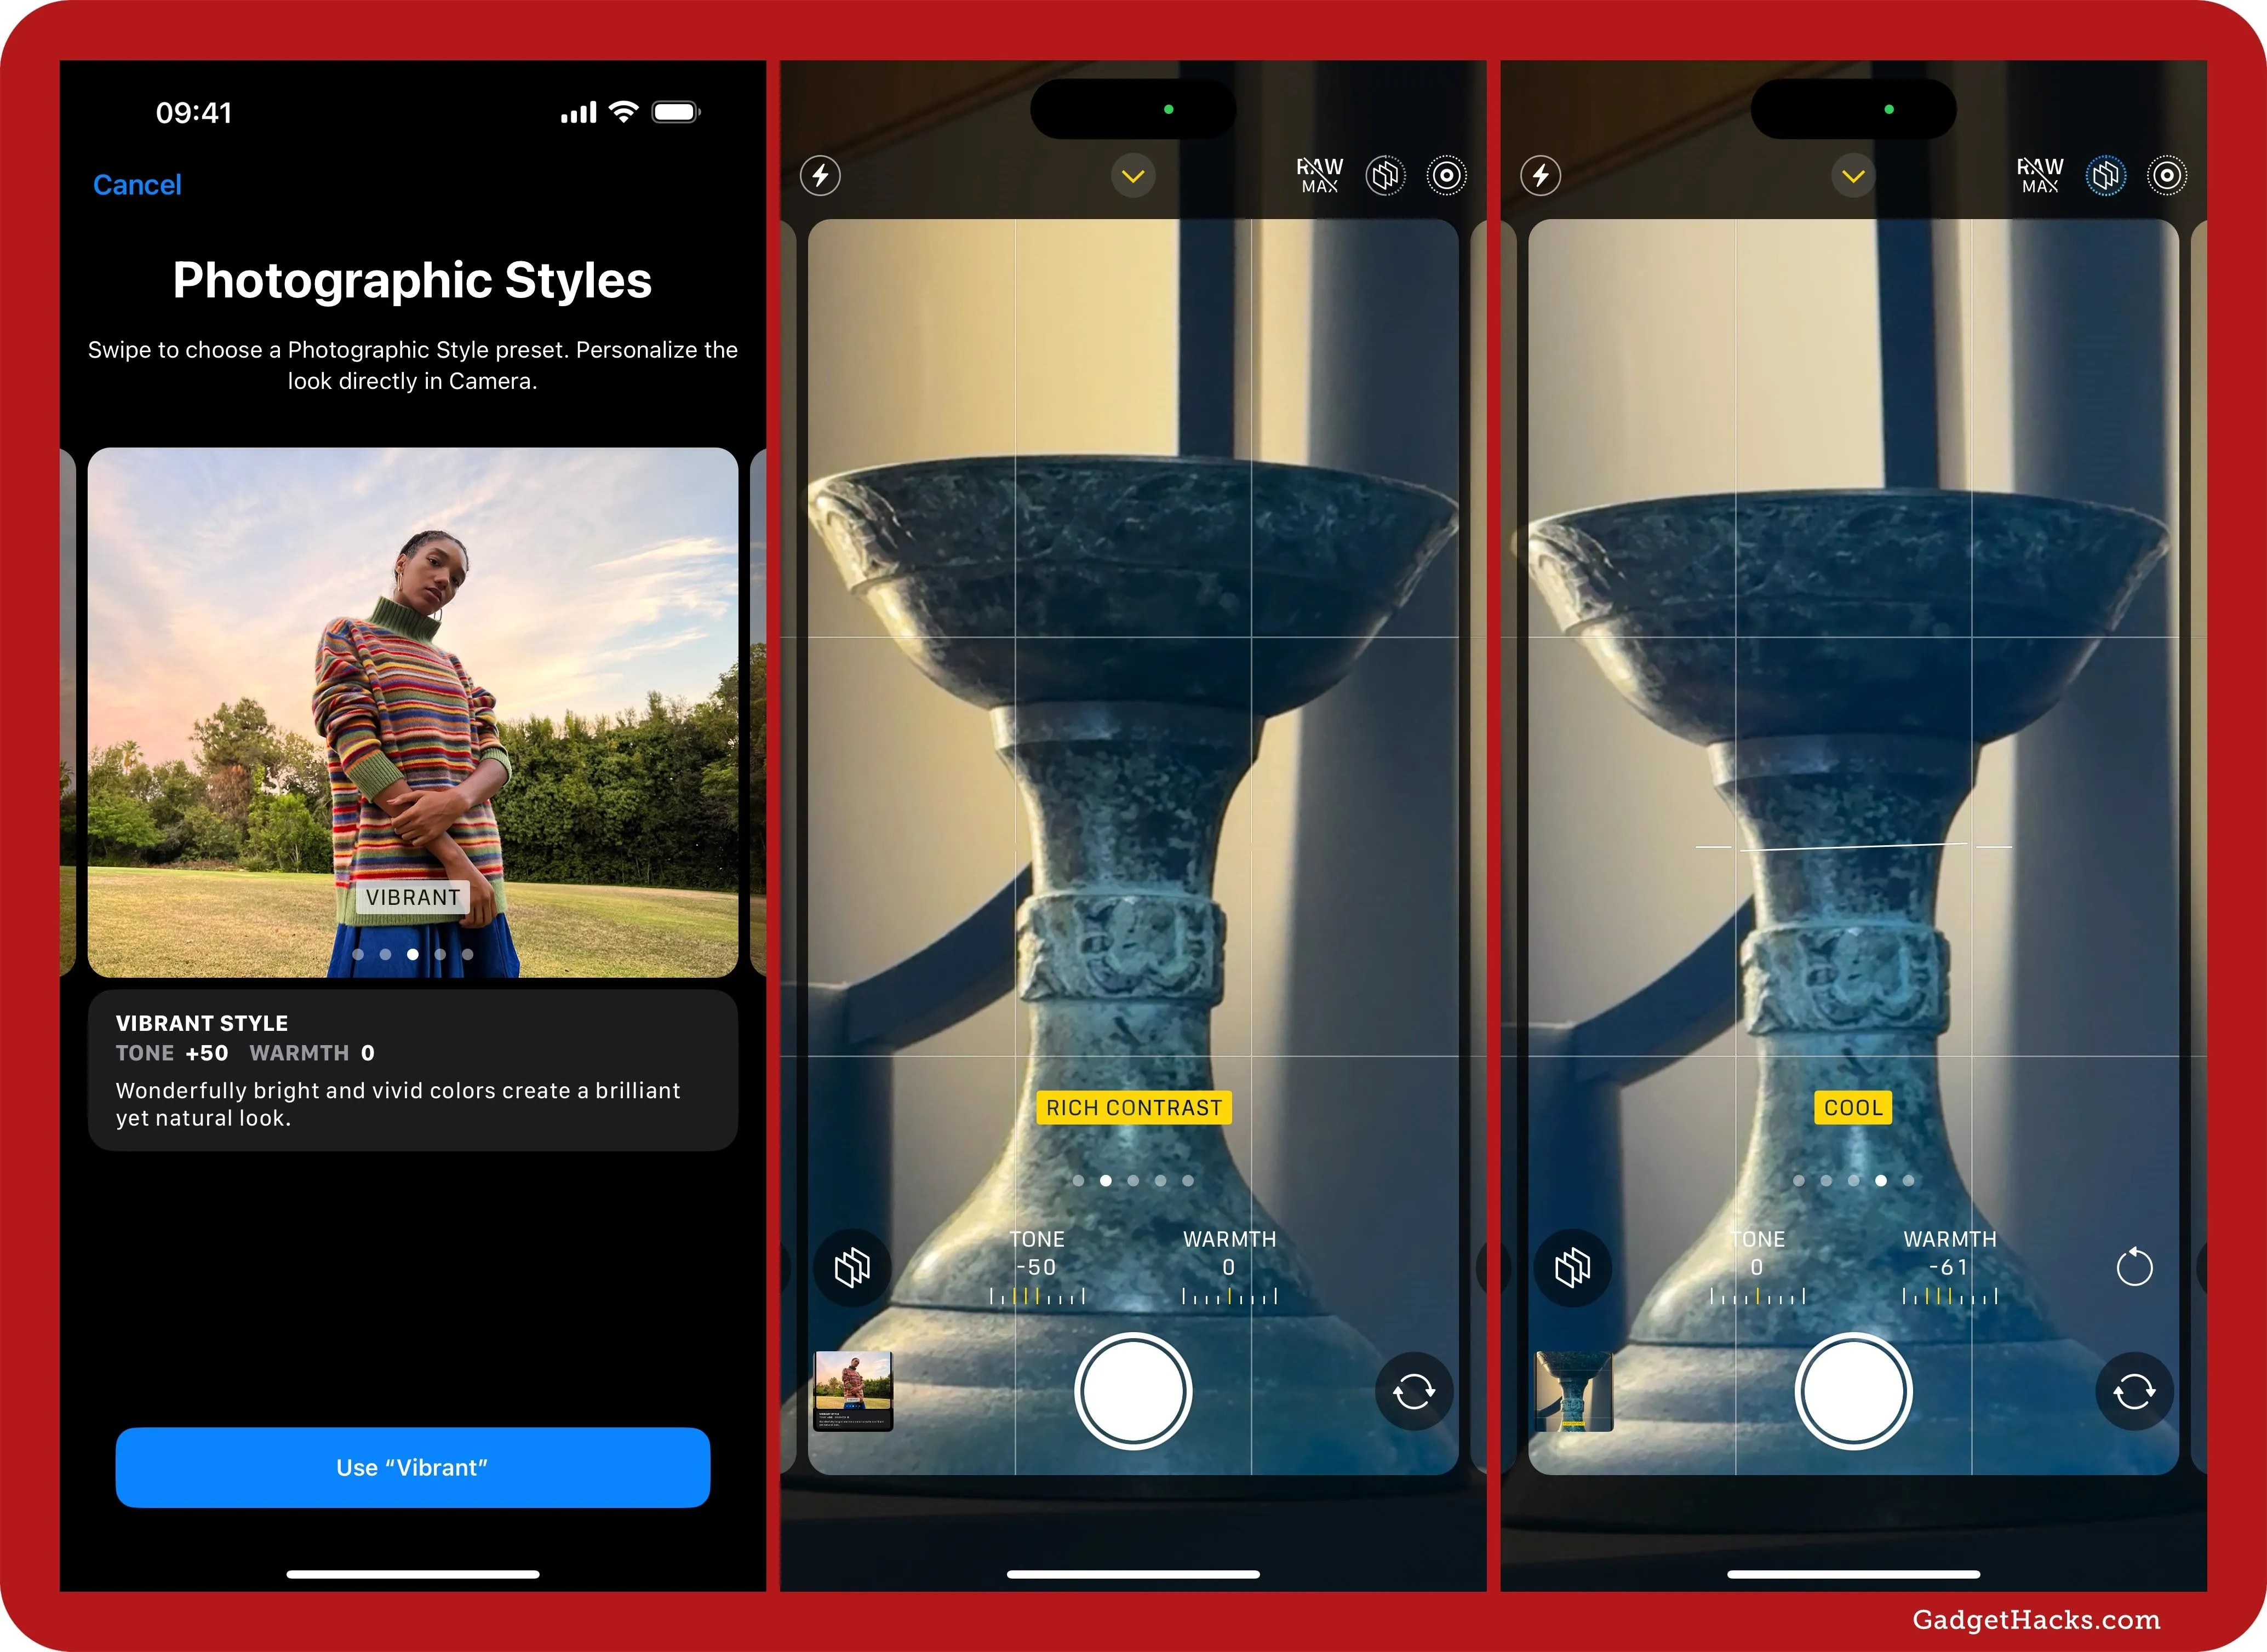
On older iPhone models that support Photographic Styles, which have been available since iOS 15, you only have four presets to choose from: Rich Contrast, Vibrant, Warm, and Cool, and you can adjust the tone and warmth of each. To select your default style, go to Settings » Camera » Photographic Styles. To access Photographic Styles, tap its button from the Controls Menu. If you see its button near the TrueDepth camera, you can also use that.
However, you cannot edit styles after you take a photo, so make sure the style is what you want when you take the picture.
8. Add Lighting Effects to Photo Mode-Captured Portraits
If you own an iPhone 15 or newer, iOS 18 lets you add Portrait Lighting effects to portraits captured using Photo mode. On other models, you can only add Portrait Lighting from images shot using Portrait mode — even if the picture comes from an iPhone 15 or newer.
9. Take Night Mode Portraits in Photo Mode
Another enhancement you get on an iPhone 15 or newer is Night mode portraits shot using Night mode in the Photo shooting mode. While you could get portraits via Photo mode on iPhone 15 models since iOS 17, you couldn't get Night mode portraits in the same way until now.
10. Pause During Video Recording
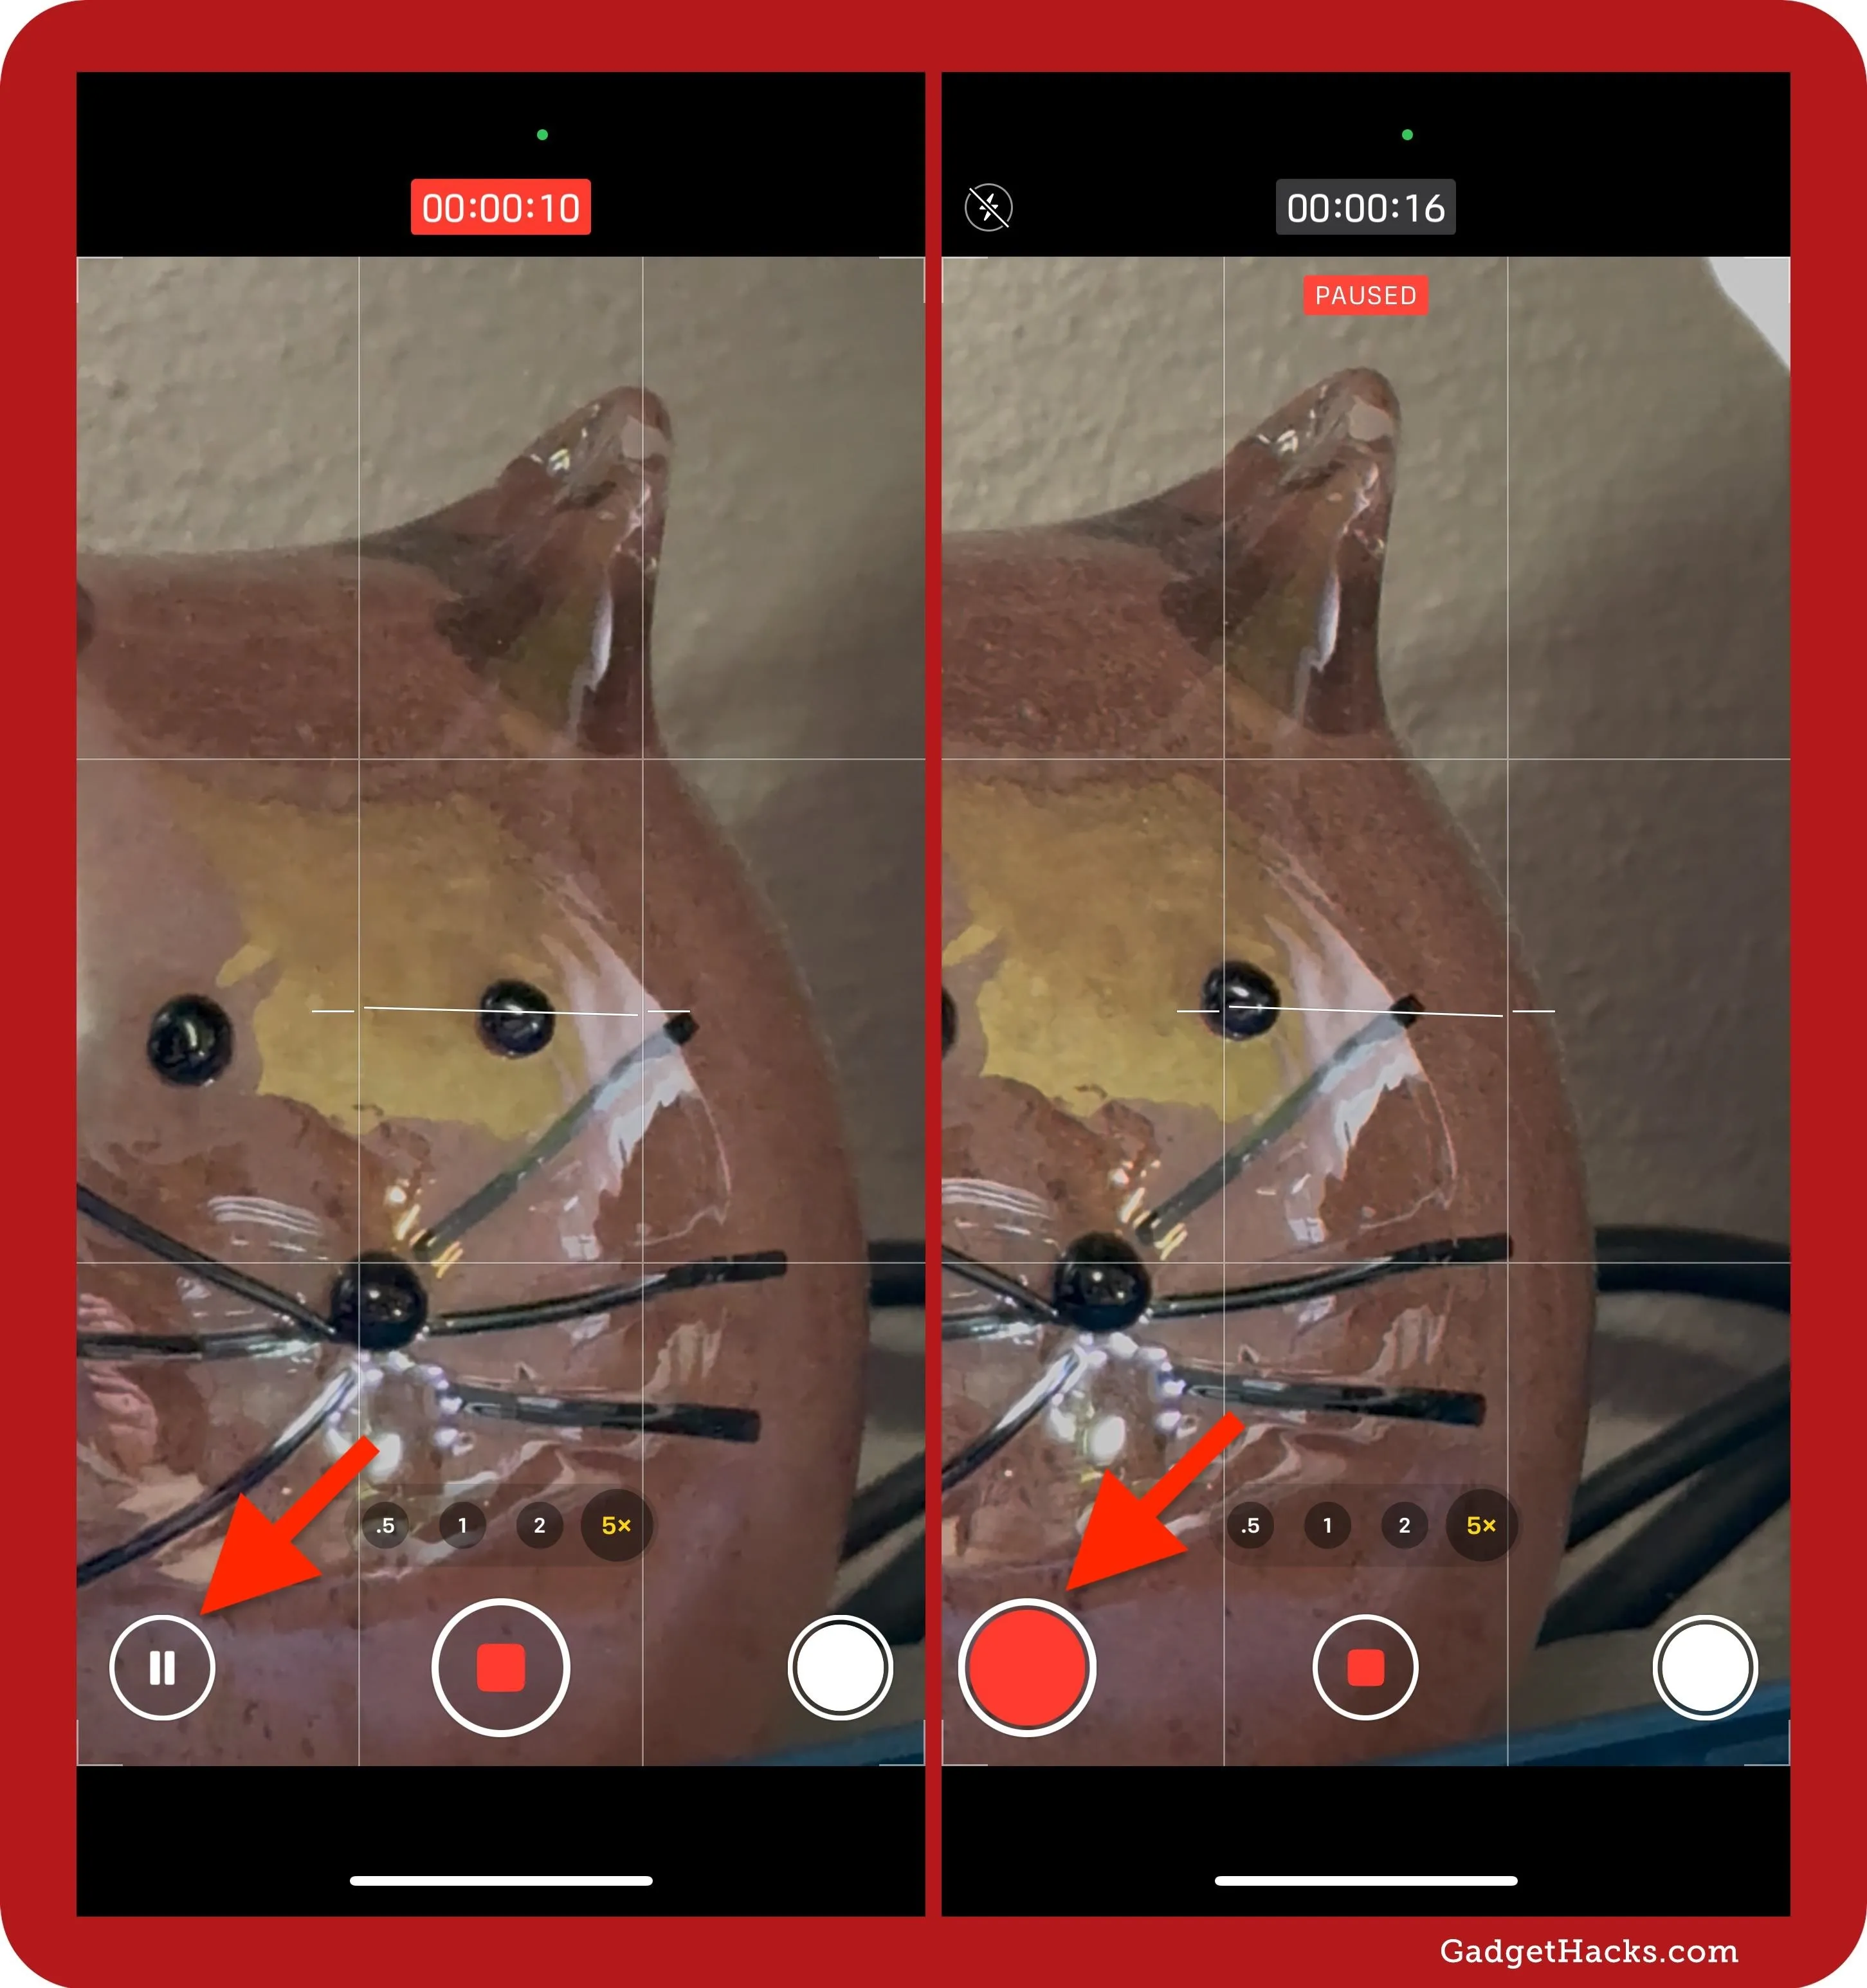
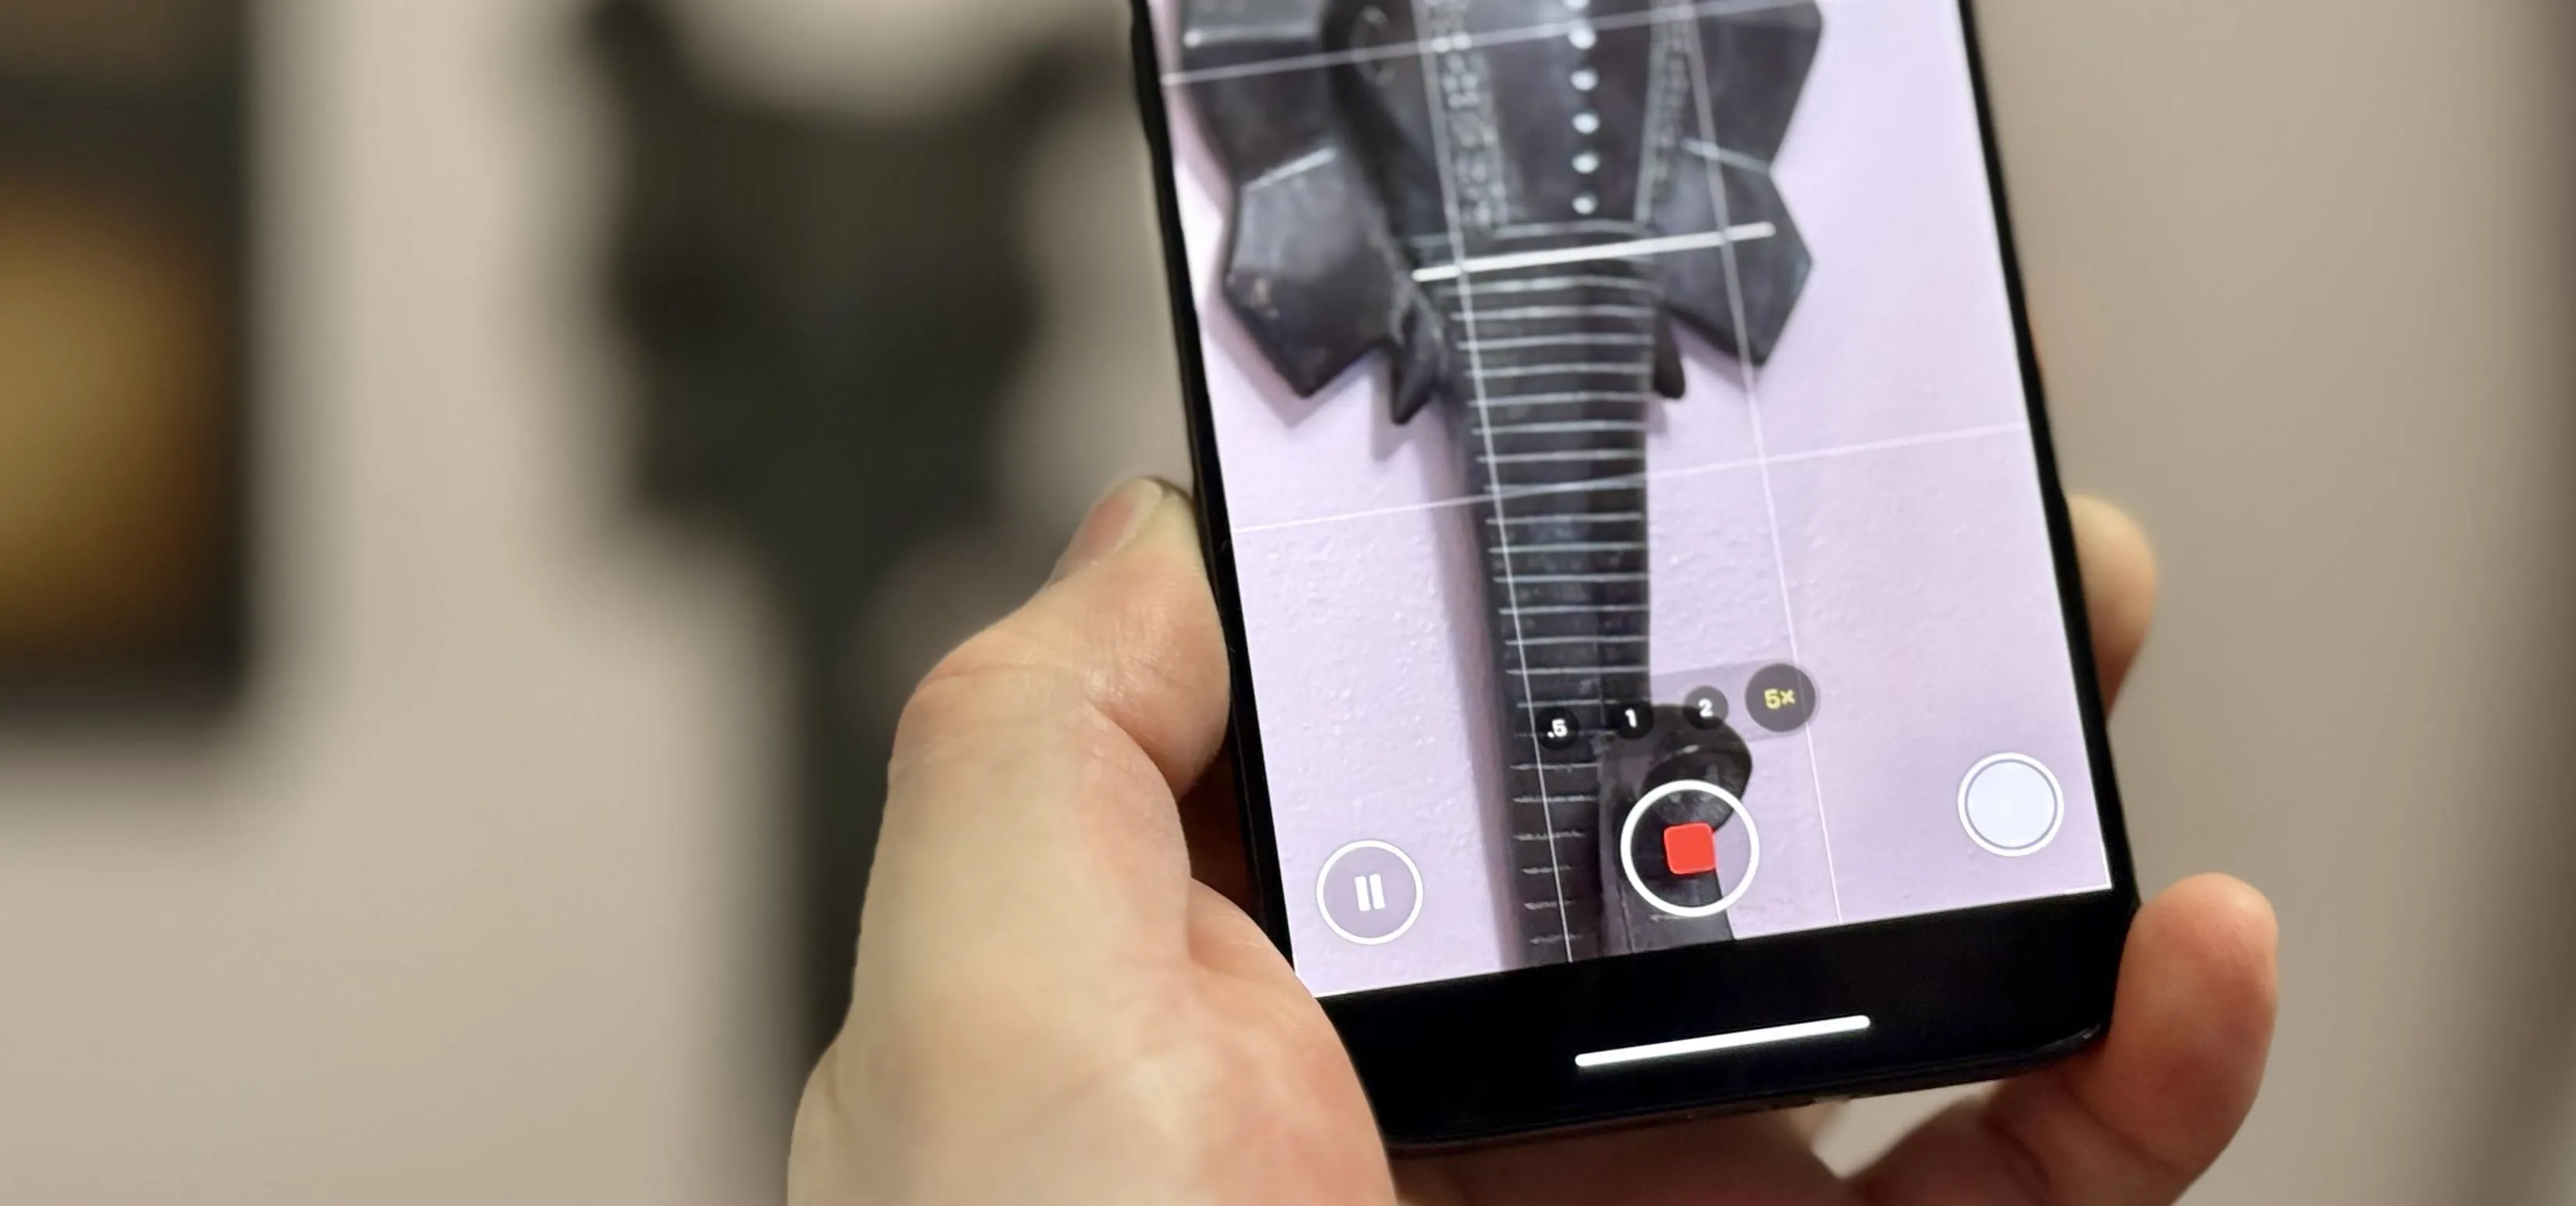
Finally! With iOS 18, you can now pause video recordings directly in your iPhone's Camera app. When using Video mode, a pause button will appear next to the shutter button after you initiate recording. This lets you take a break mid-shot and resume recording whenever you're ready.
It's a feature vloggers and content creators will love, which has already been perfected on platforms like TikTok, Instagram Reels, and Snapchat.
Pausing doesn't work in Camera when shooting cinematic, slow-motion, and time-lapse videos, but it will work in Video mode when Action mode is enabled. It also works in the Spatial video shooting mode on any iPhone 16 series model and, since iOS 18.1, the iPhone 15 Pro and 15 Pro Max.
11. Preserve Last-Used Controls
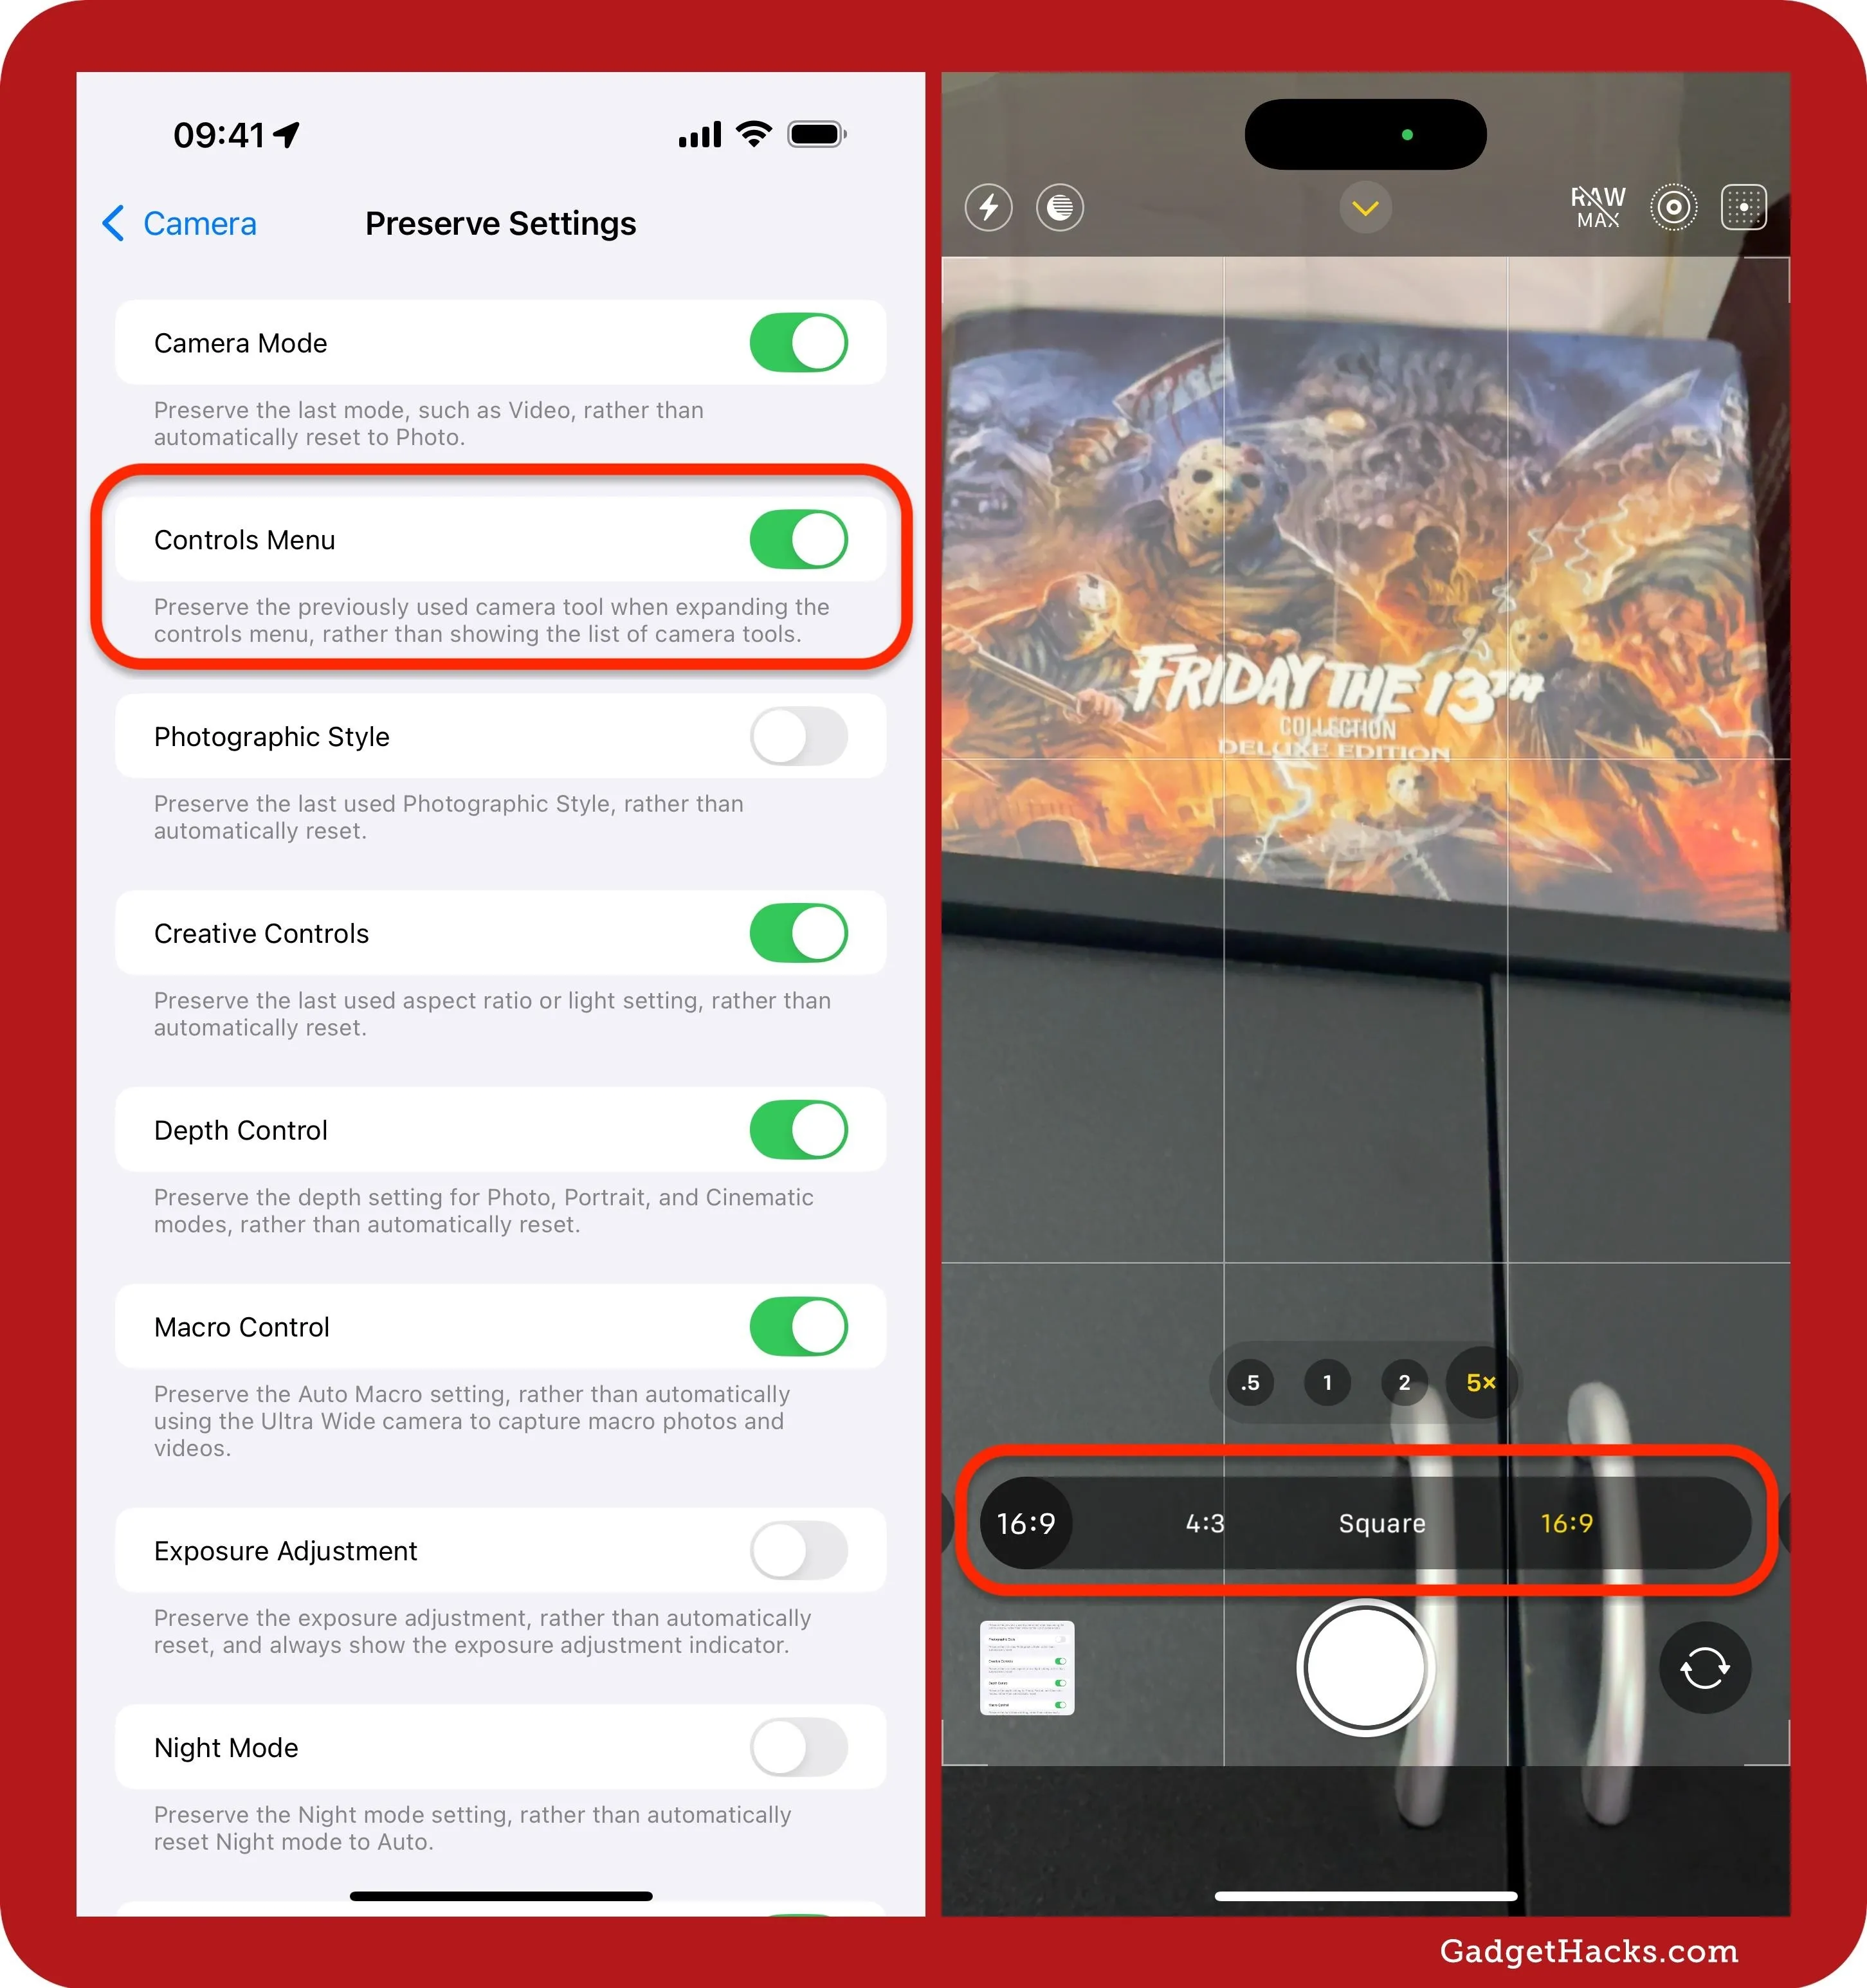
On iOS 18, there's a new option in Settings » Camera » Preserve Settings menu for "Controls Menu." You can unhide the Controls Menu in any shooting mode besides Pano; the tools available depend on the mode. To unhide the tools in Camera, swipe the screen toward your TrueDepth camera or tap the chevron near it.
When the Controls Menu's settings are preserved, the Controls Menu will open directly to the last tool used instead of the full list of tools. For example, if you last used Exposure in Video mode, you'll automatically see the Exposure slider the next time you unhide the Controls Menu in that shooting mode.
This is helpful if you frequently change settings per photo or video. In another example, if you last used the Gold preset for Photographic Styles and adjusted it to tone 95, color -80, and palette 20 in Photo mode, it will open right up to those preferences when you unhide Controls Menu in Photo mode.
Some tools depend on the environment, so Night mode won't reappear in bright conditions since it disappears entirely from the Controls Menu.
12. Preserve Photographic Styles
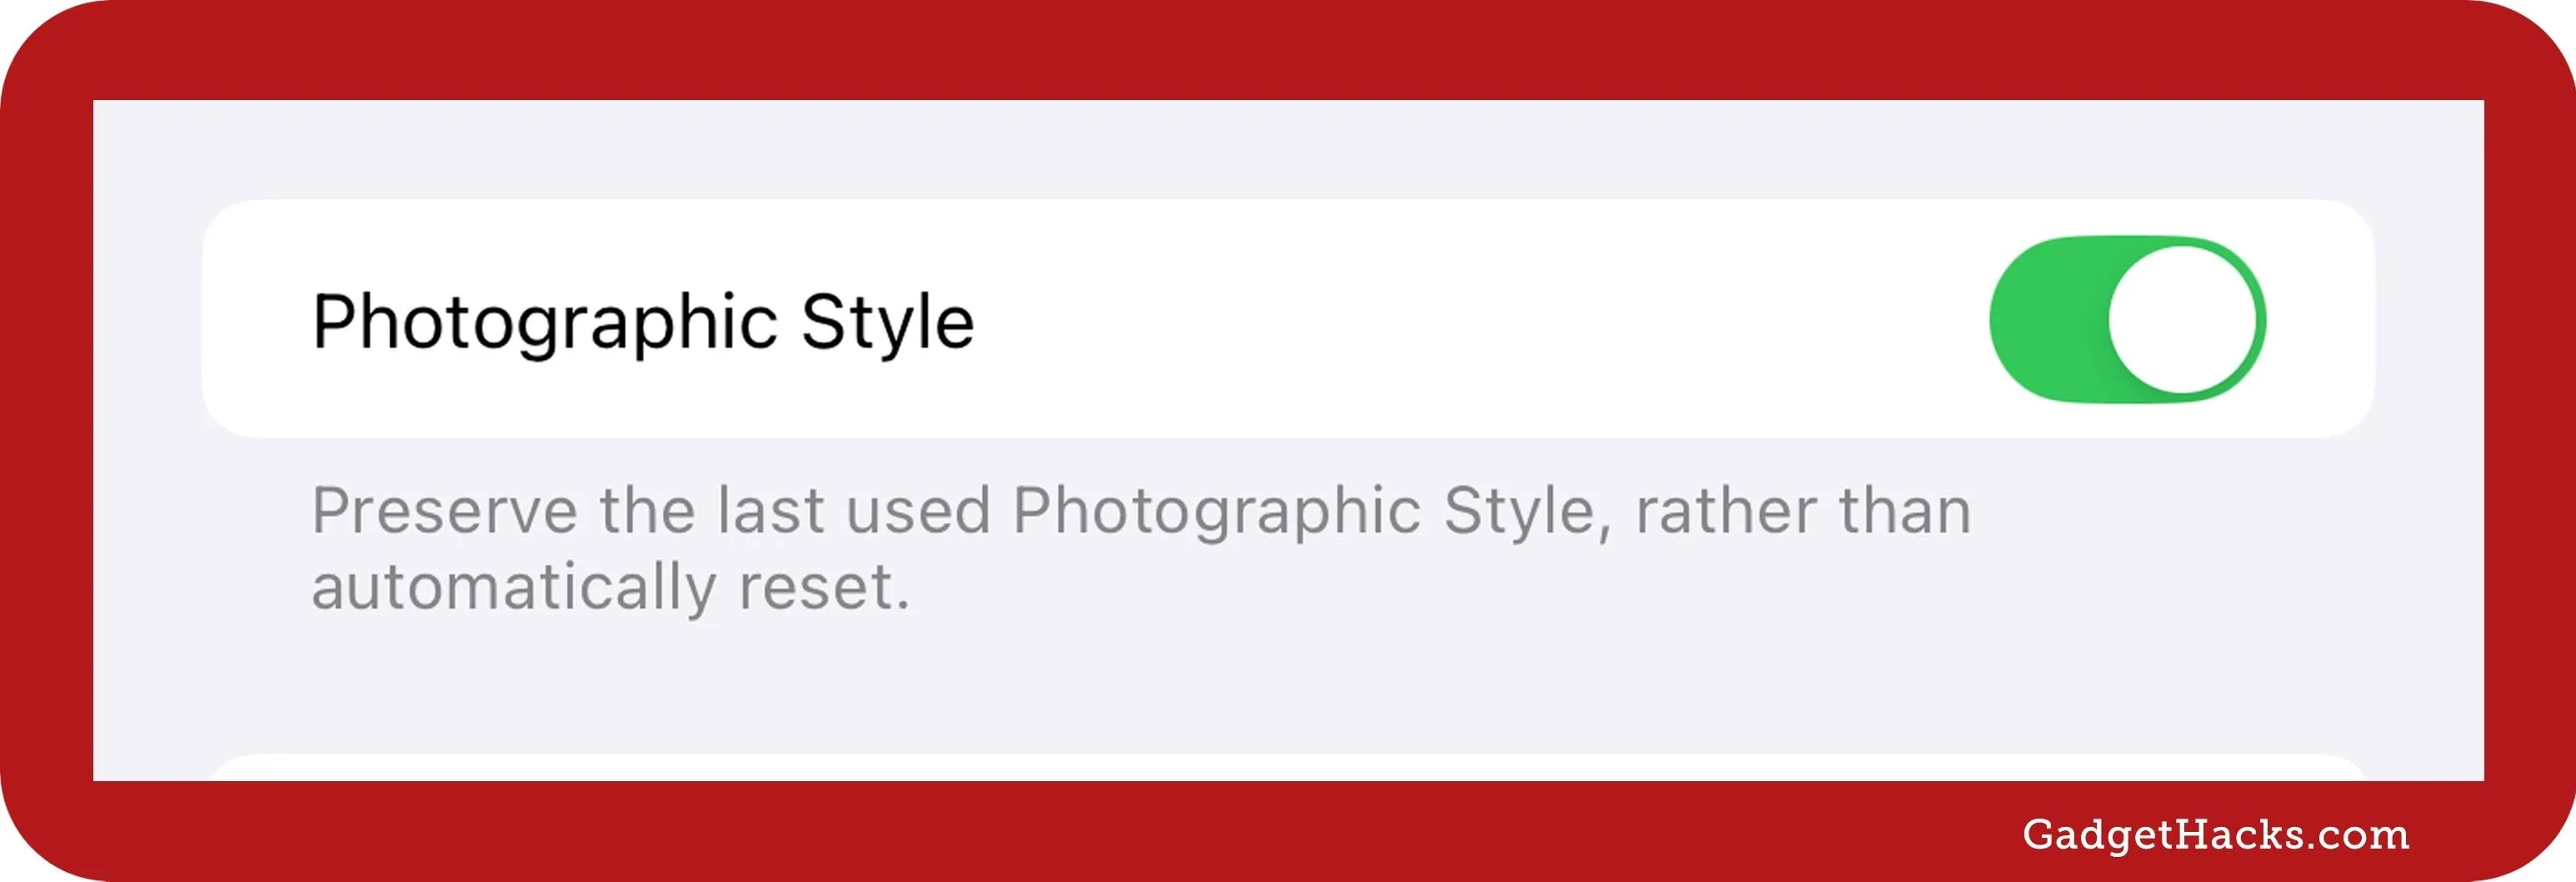
On the iPhone 16 series models, there's also a new "Photographic Style" option in the Settings » Camera » Preserve Settings menu. Turn the switch on to make Camera remember your last used Photographic Style preference instead of automatically resetting it to the default.
13. Move the Camera Shortcut on the Lock Screen
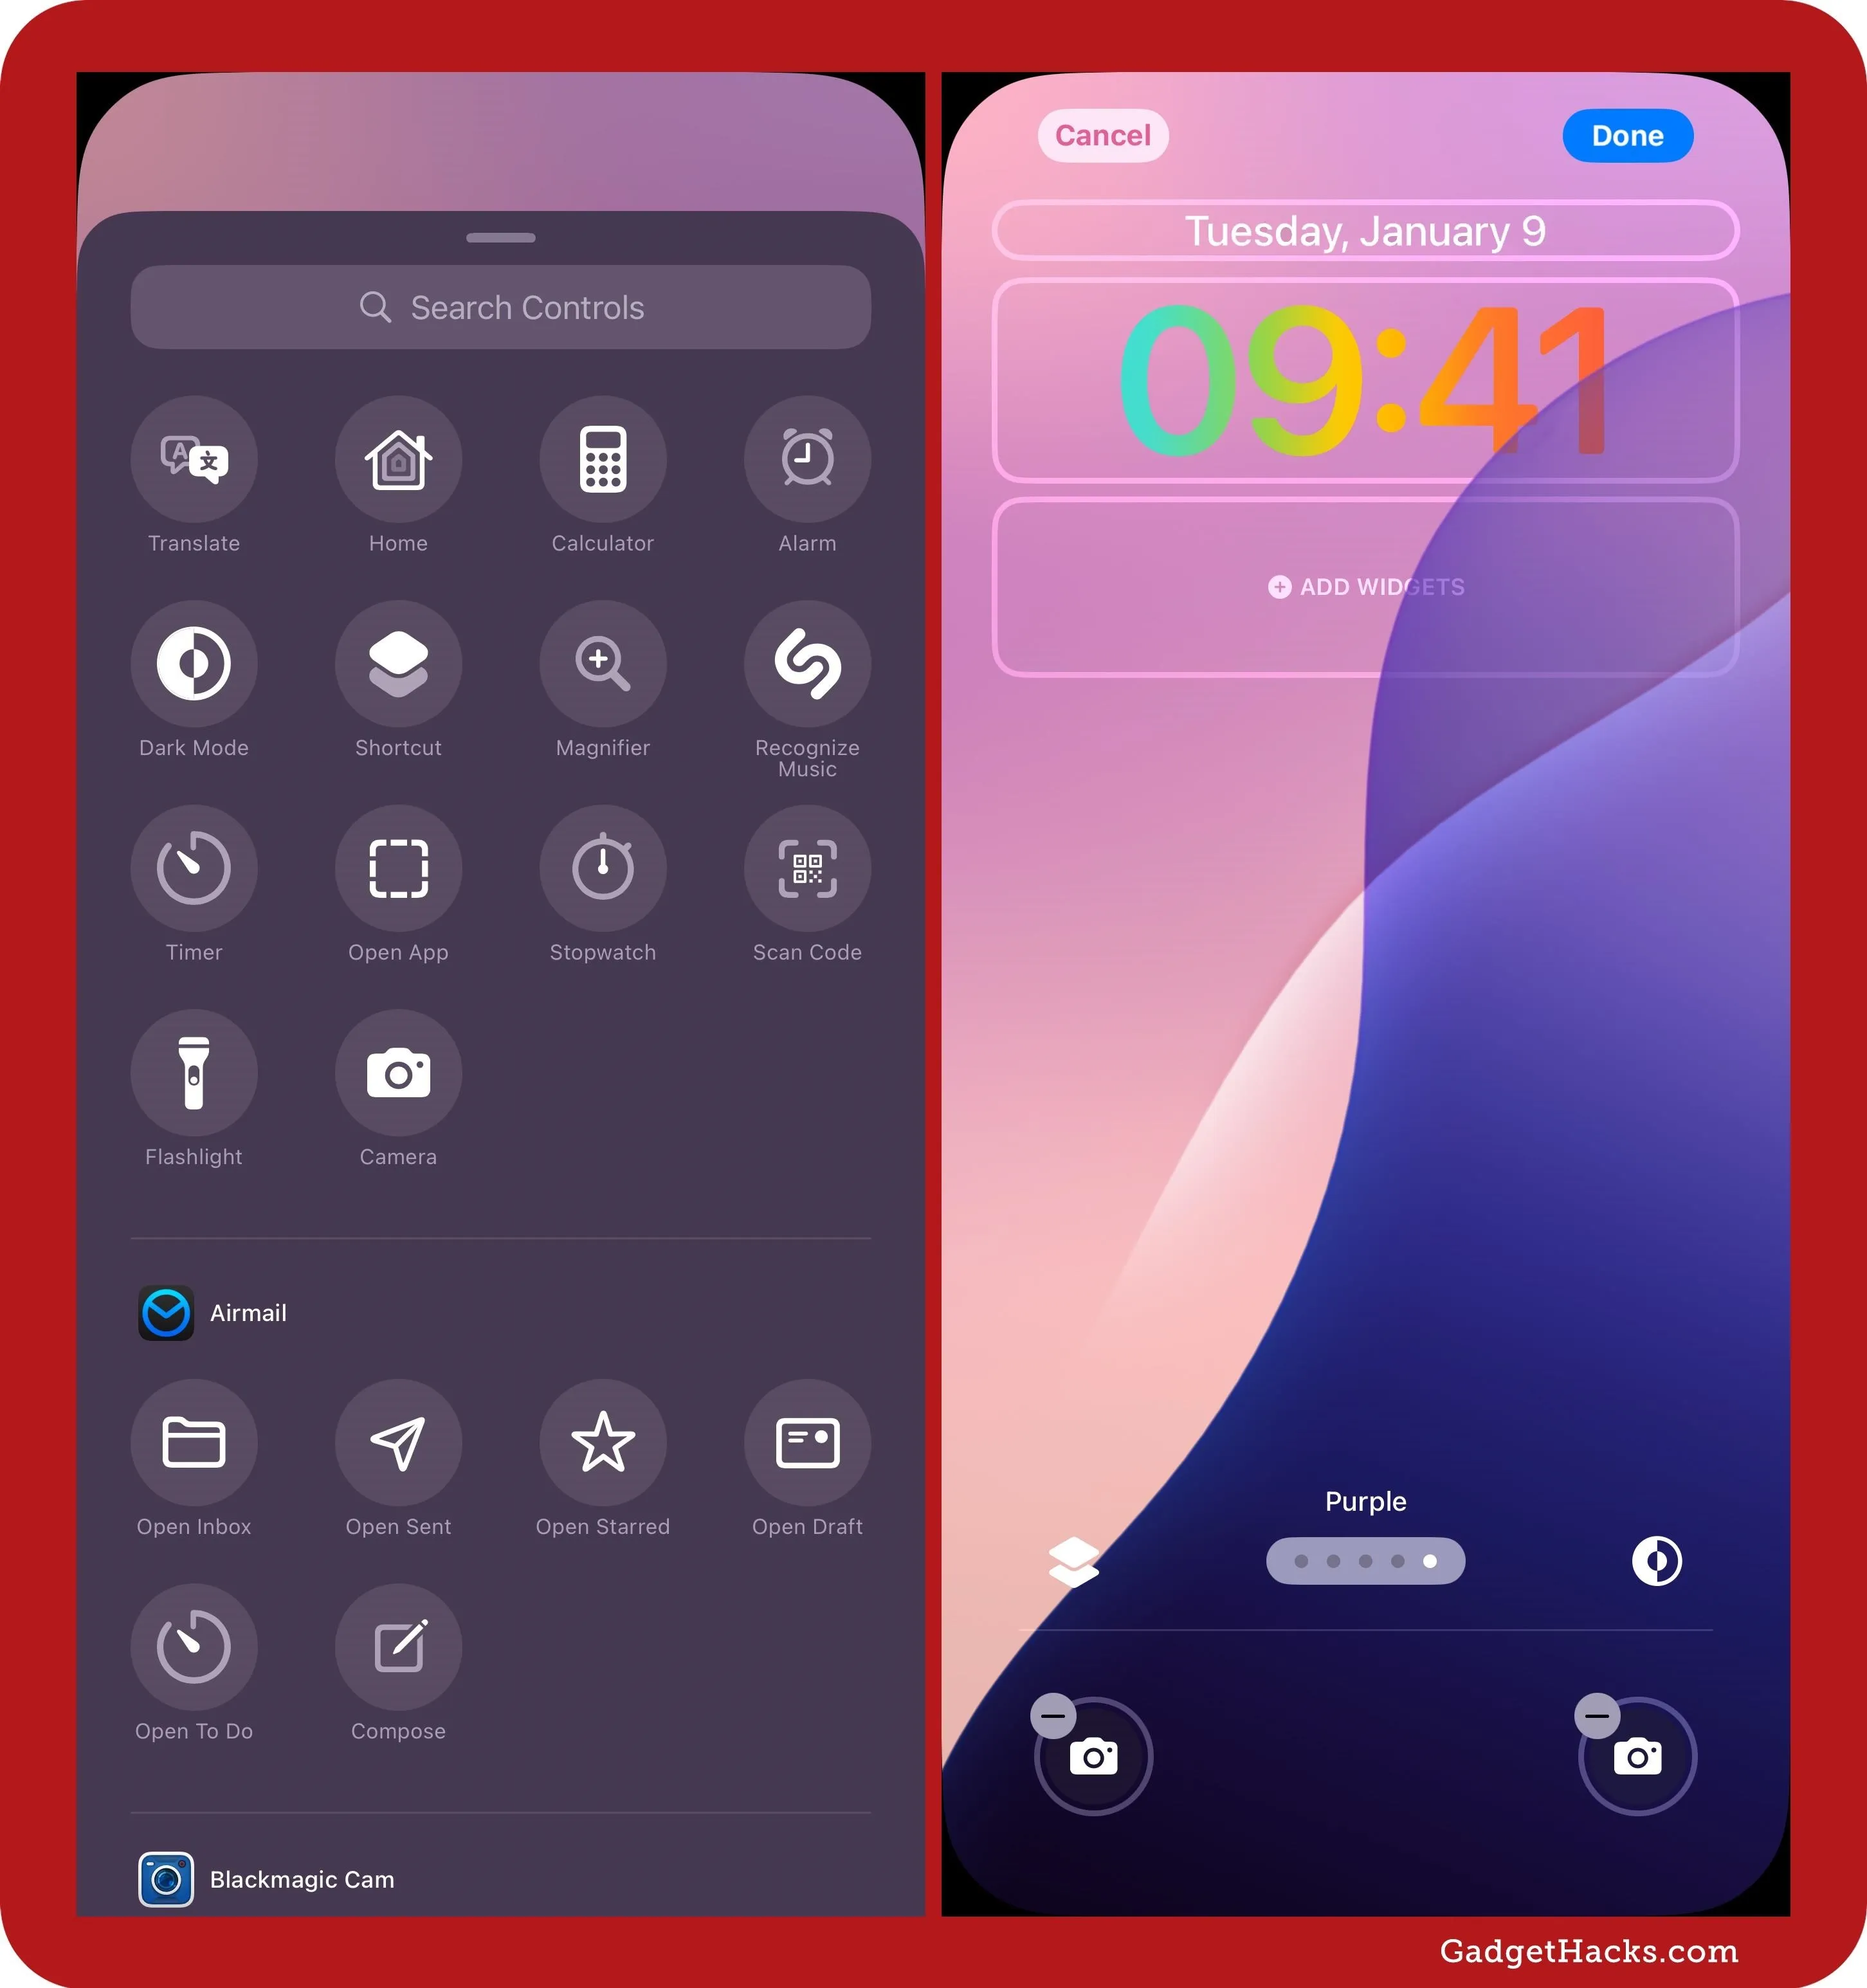
With iOS 18, you can replace the Flashlight and Camera controls on your iPhone's Lock Screen with controls for other apps and features. If you simply want to move the Camera control from the right to the left side, it's easy. But you can also get rid of it entirely and continue swiping left on the Lock Screen to open Camera.
- Full Guide: Swap the Flashlight and Camera Lock Screen Controls on Your iPhone to Open Apps, Toggle Settings, and More
Cover photo and screenshots by Gadget Hacks




Comments
Be the first, drop a comment!