What started as an accessibility setting for hearing aids turned out to be a super helpful tool for anyone with a good set of Bluetooth headphones. The problem is that most iPhone and iPad users still don't know about it. If you're one of them, you need to see what this underrated gem in iOS and iPadOS can offer you.
The feature is called Live Listen, and it's been around for Made for iPhone hearing aids since 2014. While it was and is beneficial for people with hearing impairments, Apple truly made it a killer feature when it made it compatible with AirPods and Beats wireless Bluetooth headphones.
The concept is simple: connect a compatible pair of Bluetooth headphones, turn on the feature, and point your iPhone or iPad's microphone at a voice or sound you're having trouble hearing. Instantly, things are much louder and clearer as the audio beams to your headphones within a comfortable volume range.
- Don't Miss: Automatically Bypass Human Verification Prompts on Your iPhone, iPad, or Mac to Experience Fewer CAPTCHAs
Reasons You Should Be Using Live Listen
To name just a few reasons why Live Listen is so useful, you can use it to:
- Hear a person talking better during a class, lecture, tour group, business meeting, or other assembly.
- Help identify unknown sounds, such as wildlife in your backyard.
- Troubleshoot noises in car engines, walls, and other areas.
- Understand everything your friends say at a packed bar or restaurant with a lot of ambient noise.
- Listen to your or somebody else's heartbeat.
- Find out if your friends are talking about you when you momentarily exit the room.
- Keep taps on your child by turning your iPhone or iPad into an impromptu baby monitor.
- Spy on pretty much any conversation nearby, though you'd want to hide your iPhone well because an unattended iPhone is just asking to get snatched.
Requirements for Live Listen
To ensure the Live Listen works smoothly, update your iPhone or iPad to iOS 17 or iPadOS 17 or later. However, Live Listen works on any iPhone or iPad running at least iOS 14.3 or iPadOS 14.3.
Also, you'll need a compatible pair of wireless headphones. When iOS 12 came out, some third-party wireless headphones worked with Live Listen, and we confirmed the feature worked with Bluetooth headphones from various manufacturers. However, the following AirPods and Beats models are the only wireless headphones officially compatible with Live Listen.
- Apple AirPods (1st generation)
- Apple AirPods (2nd generation)
- Apple AirPods (3rd generation)
- Apple AirPods Pro (1st generation)
- Apple AirPods Pro (2nd generation)
- Apple AirPods Max
- Beats Powerbeats Pro
- Beats Fits Pro
- Beats Studio Pro
Live Listen also supports optional external wired microphones, such as the directional RØDE VideoMic Me-C for USB-C iPhone and iPad models, which can provide higher quality audio. Or the Pixel Lavalier Microphone for Lightning models, which can help capture everything in one room. Or a unidirectional microphone with a lengthy wire to keep your iPhone or iPad closer to you while getting closer to the audio source.
Add Hearing to Control Center
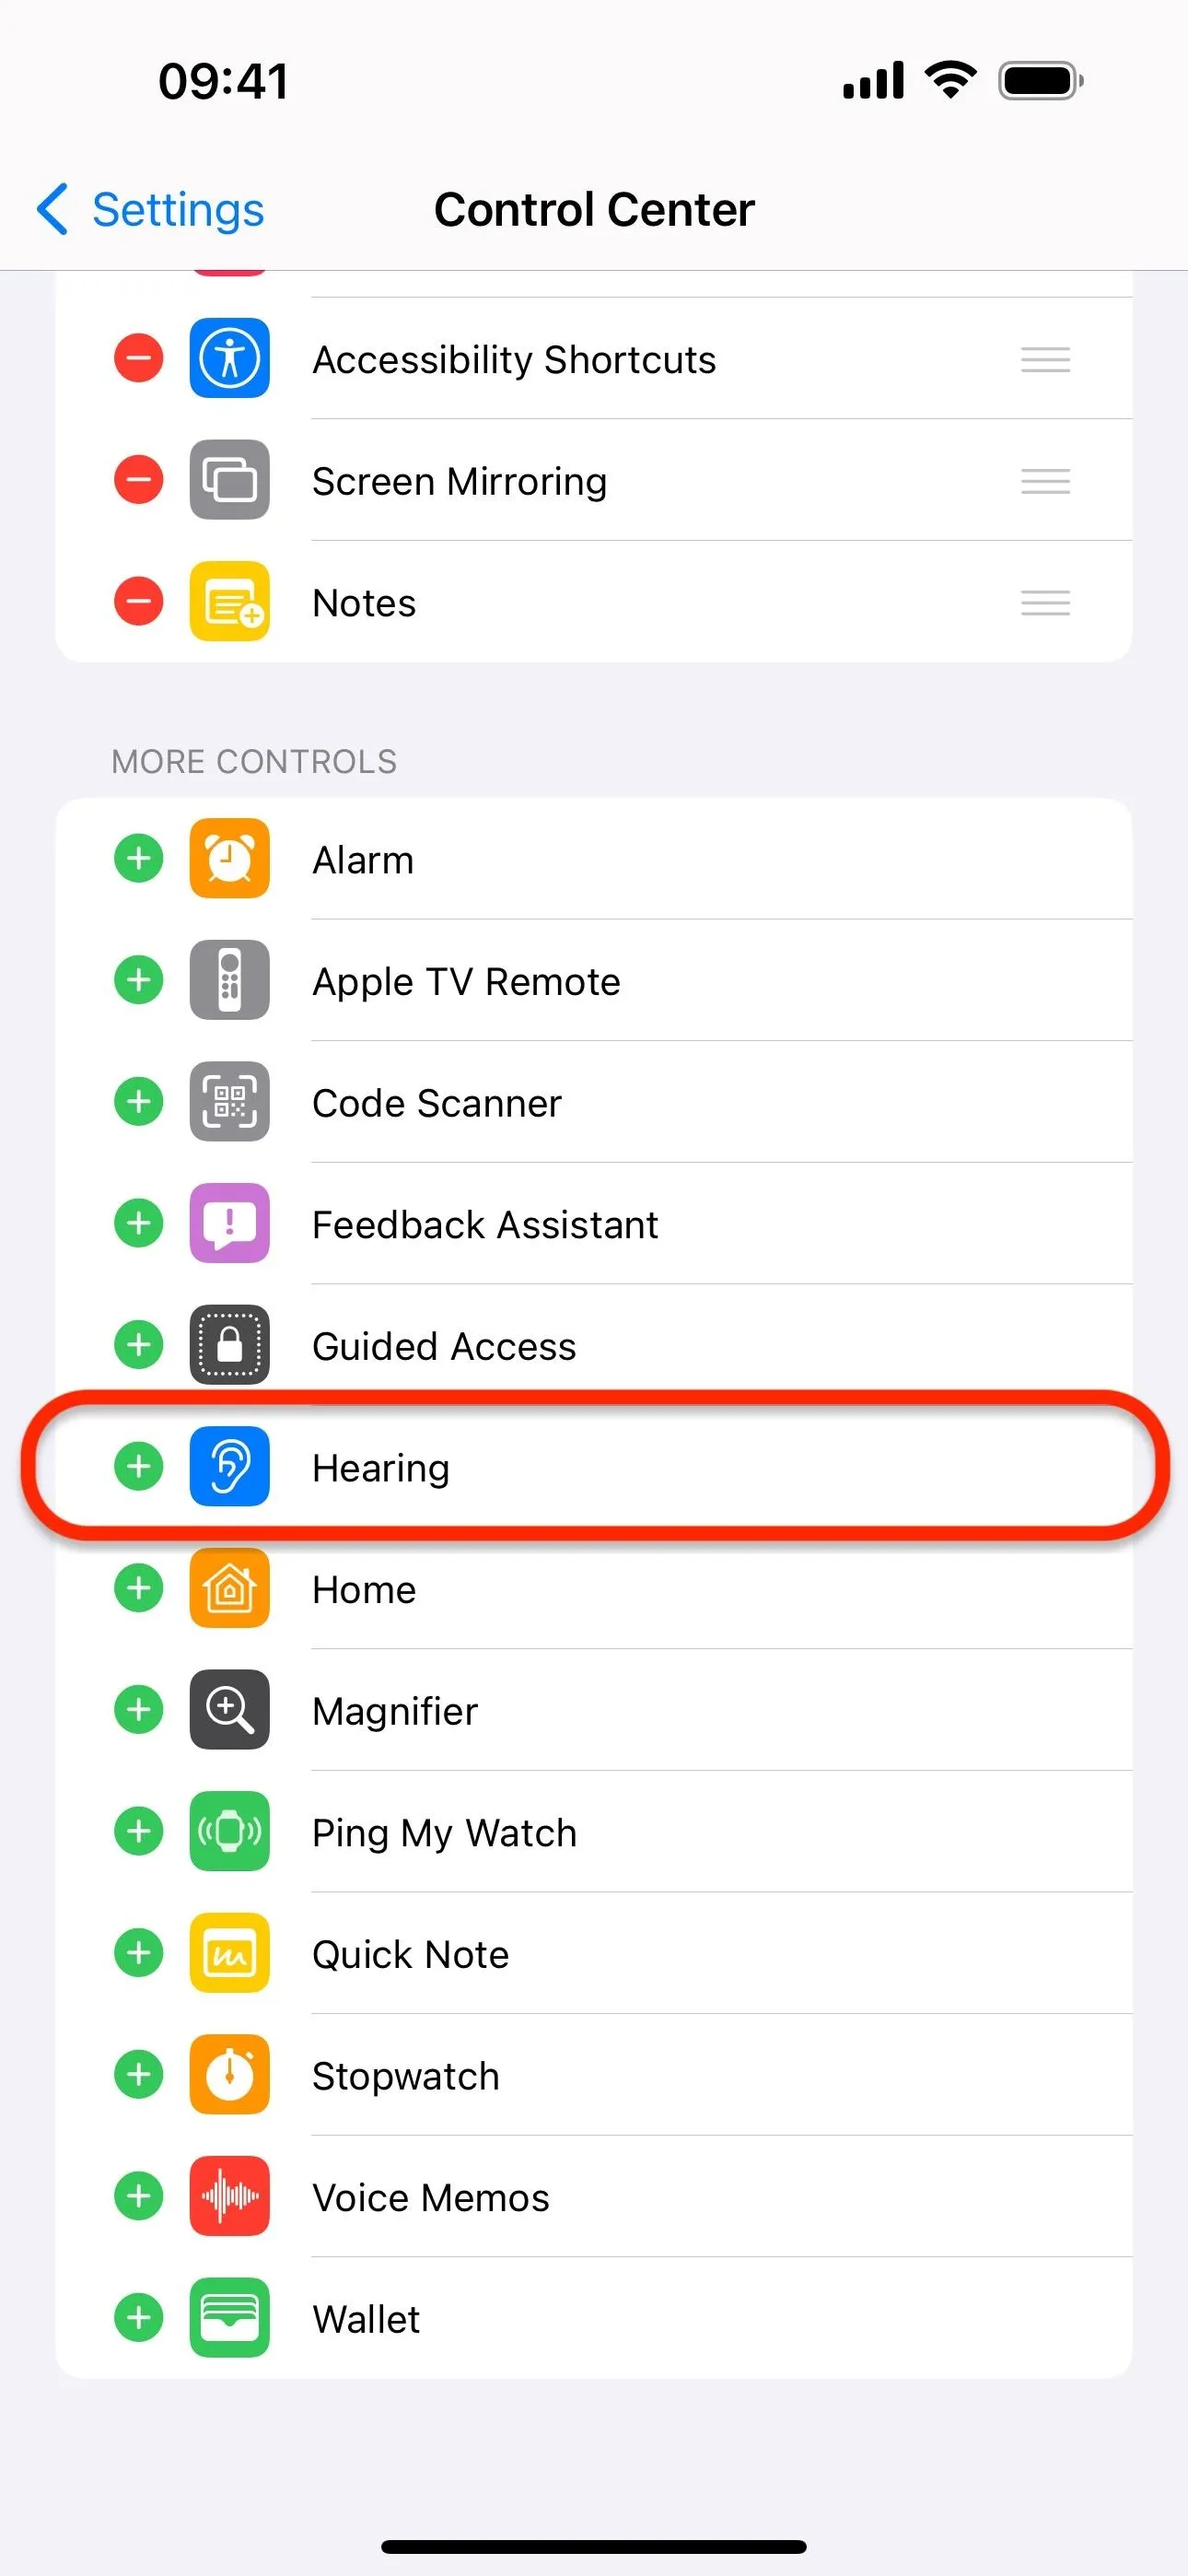
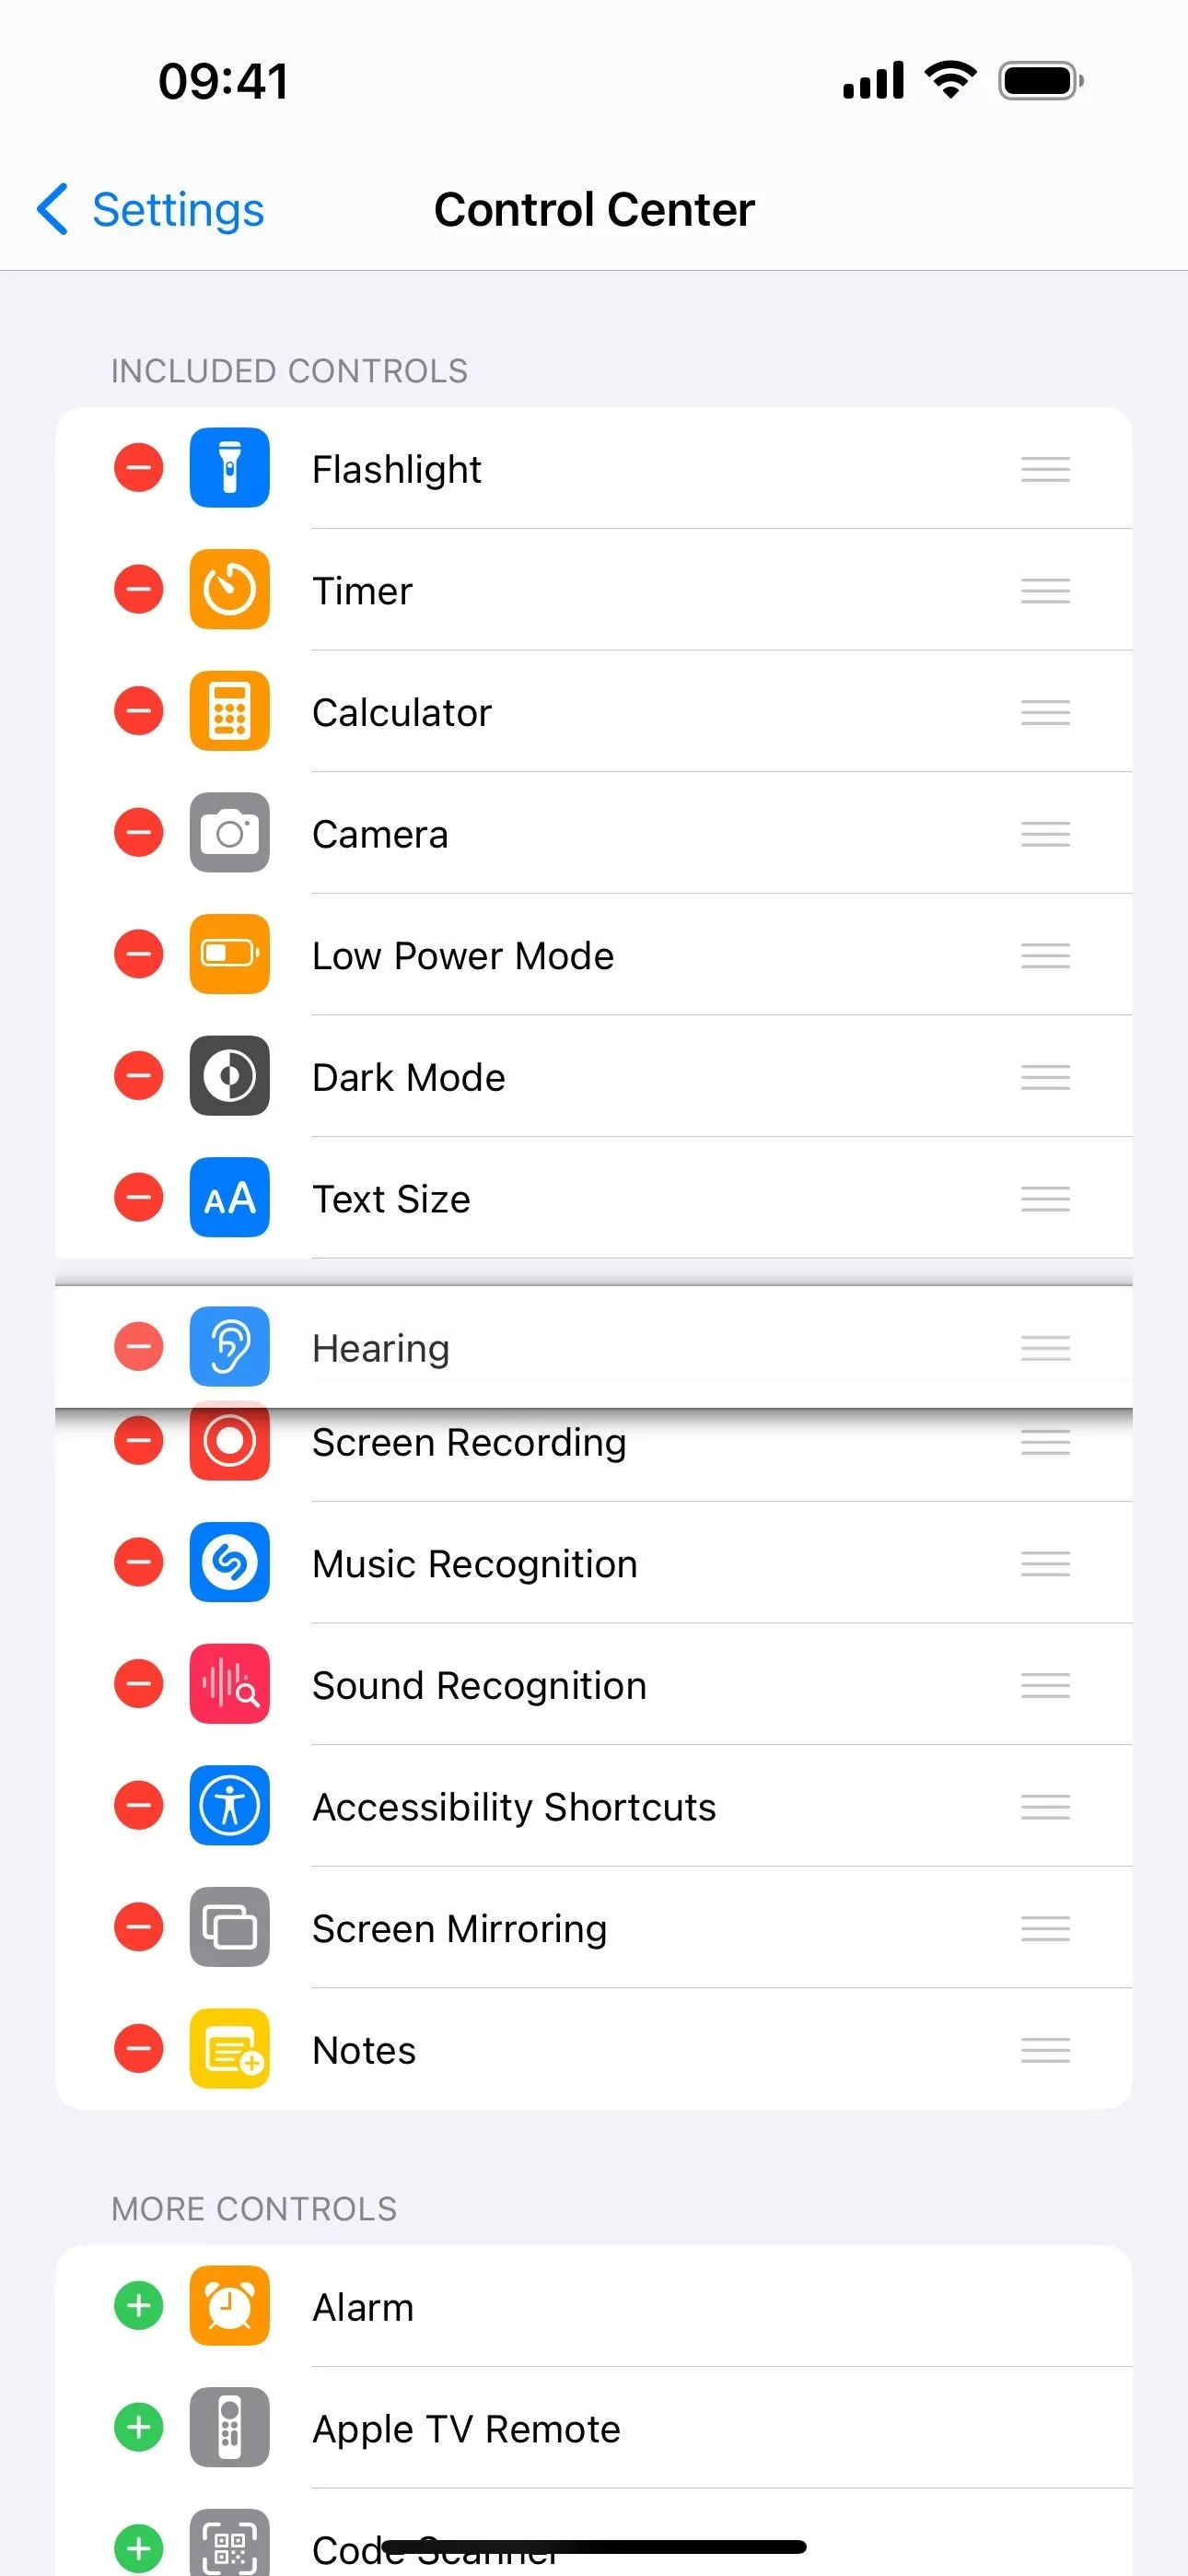
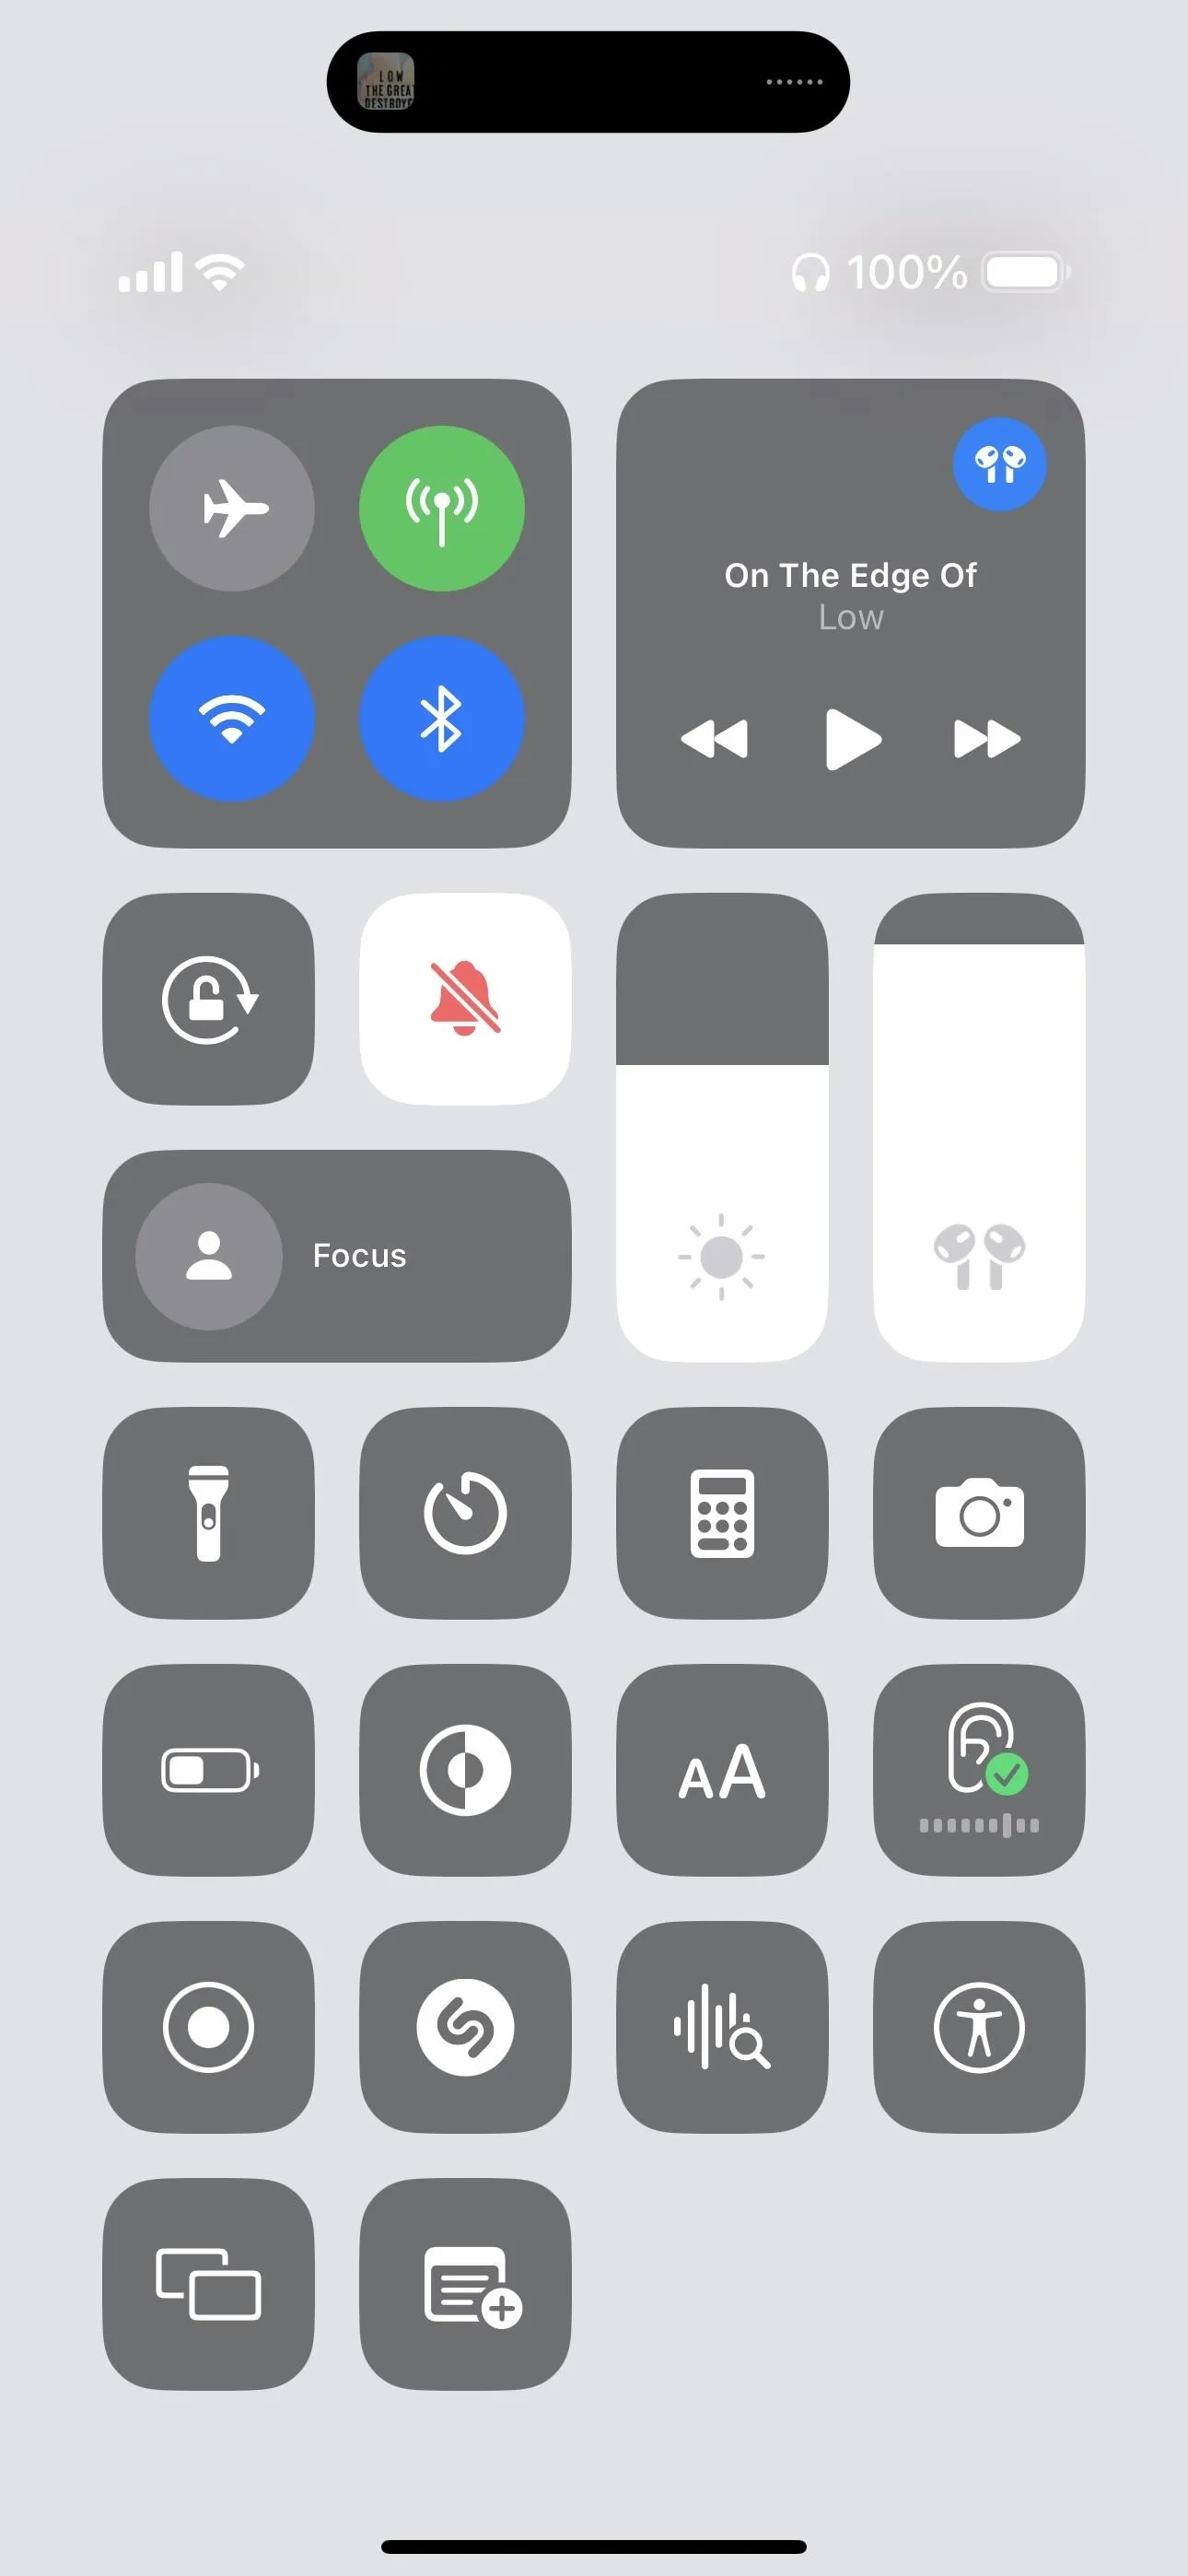
While built into the system, Live Listen isn't usable until you unlock its control. To add it to Control Center or verify that it's already there, open Settings and tap "Control Center." Under More Controls, find "Hearing" and tap its plus (+) icon to add it to Included Controls.
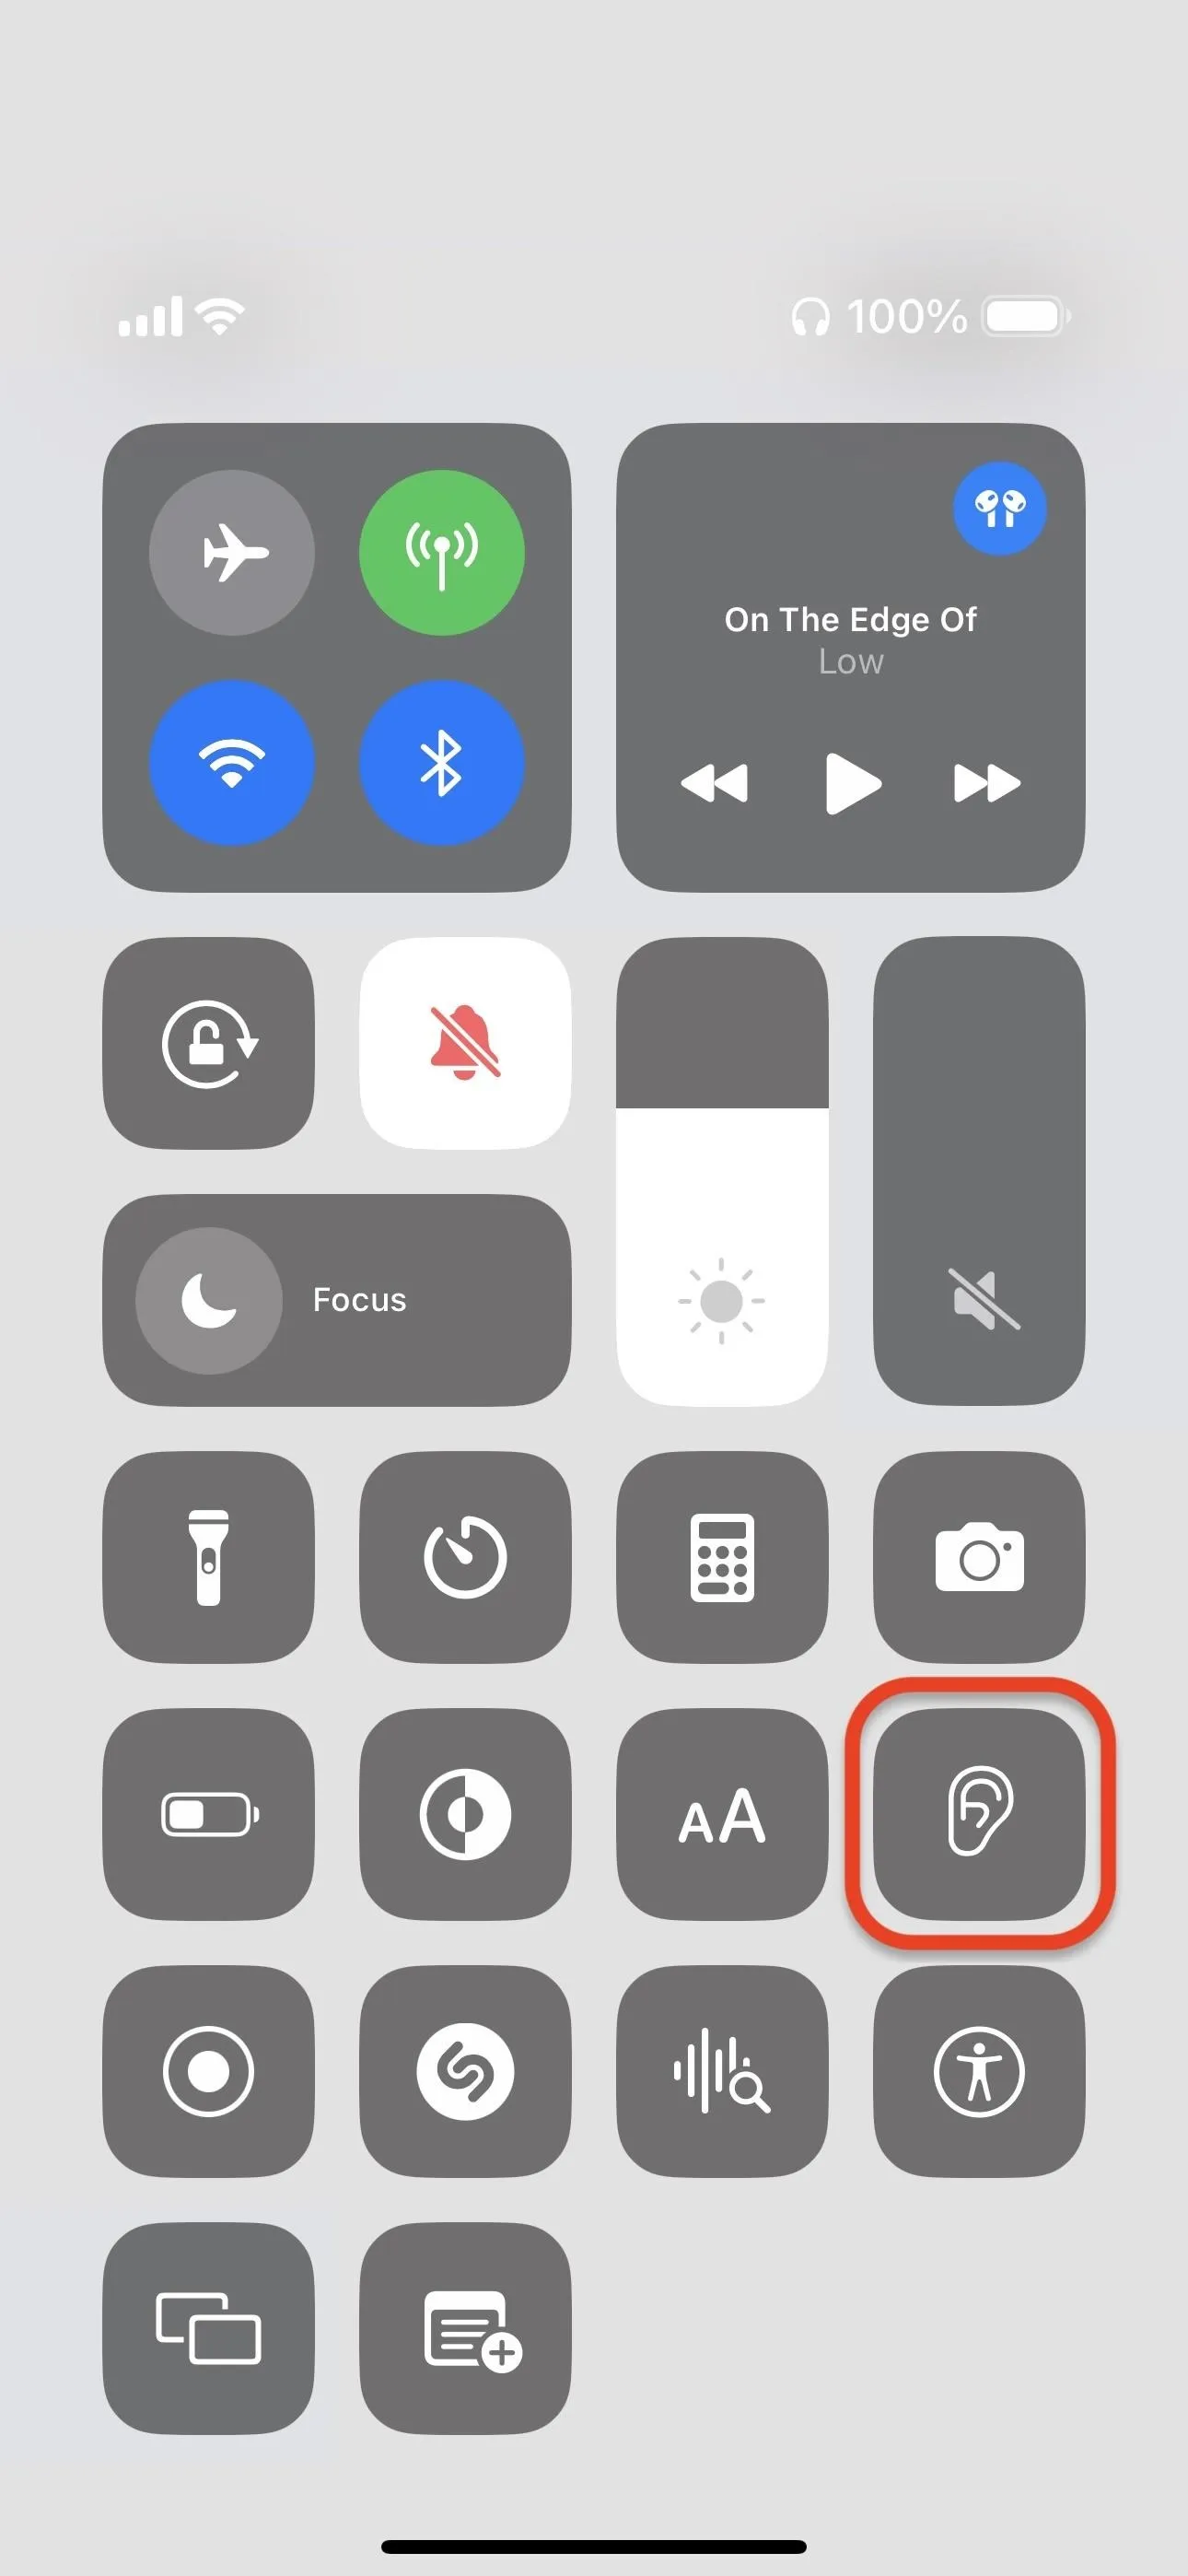
If you have many included controls, you can drag and drop each one by its three-lined icon to move its position in your Control Center. You can see the control's updated position by opening your Control Center, then rearrange things until the placement is to your liking. Exit the Settings app to save.


Connect Your Bluetooth Headphones
Before proceeding, ensure your Bluetooth headphones are connected to your iPhone or iPad. You can check this in various ways.
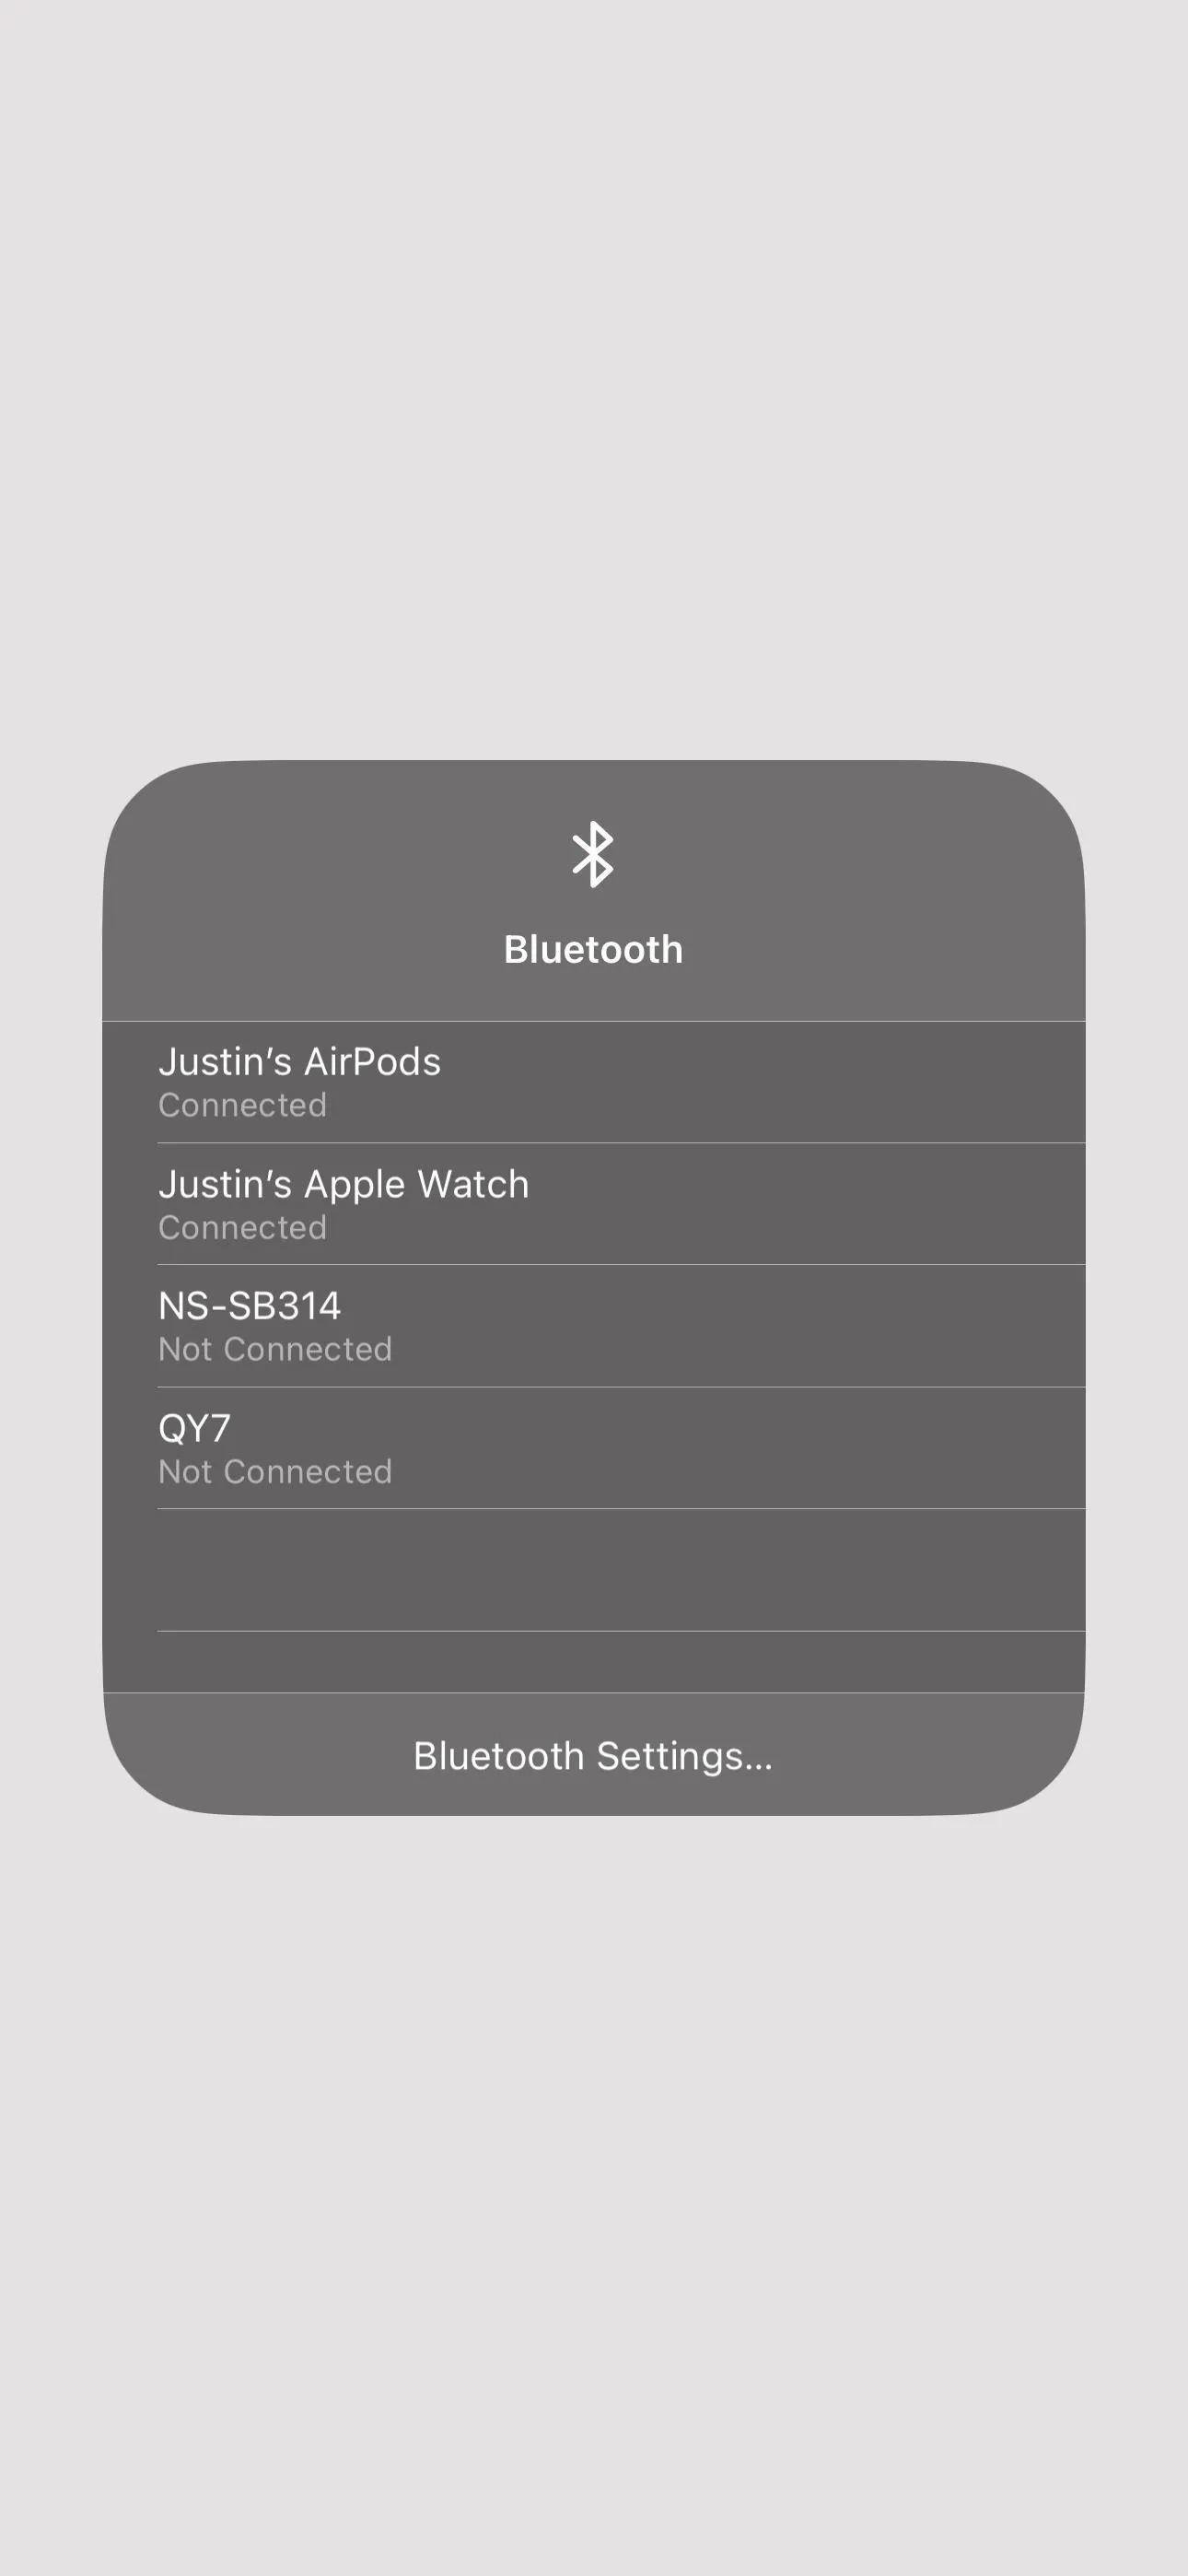
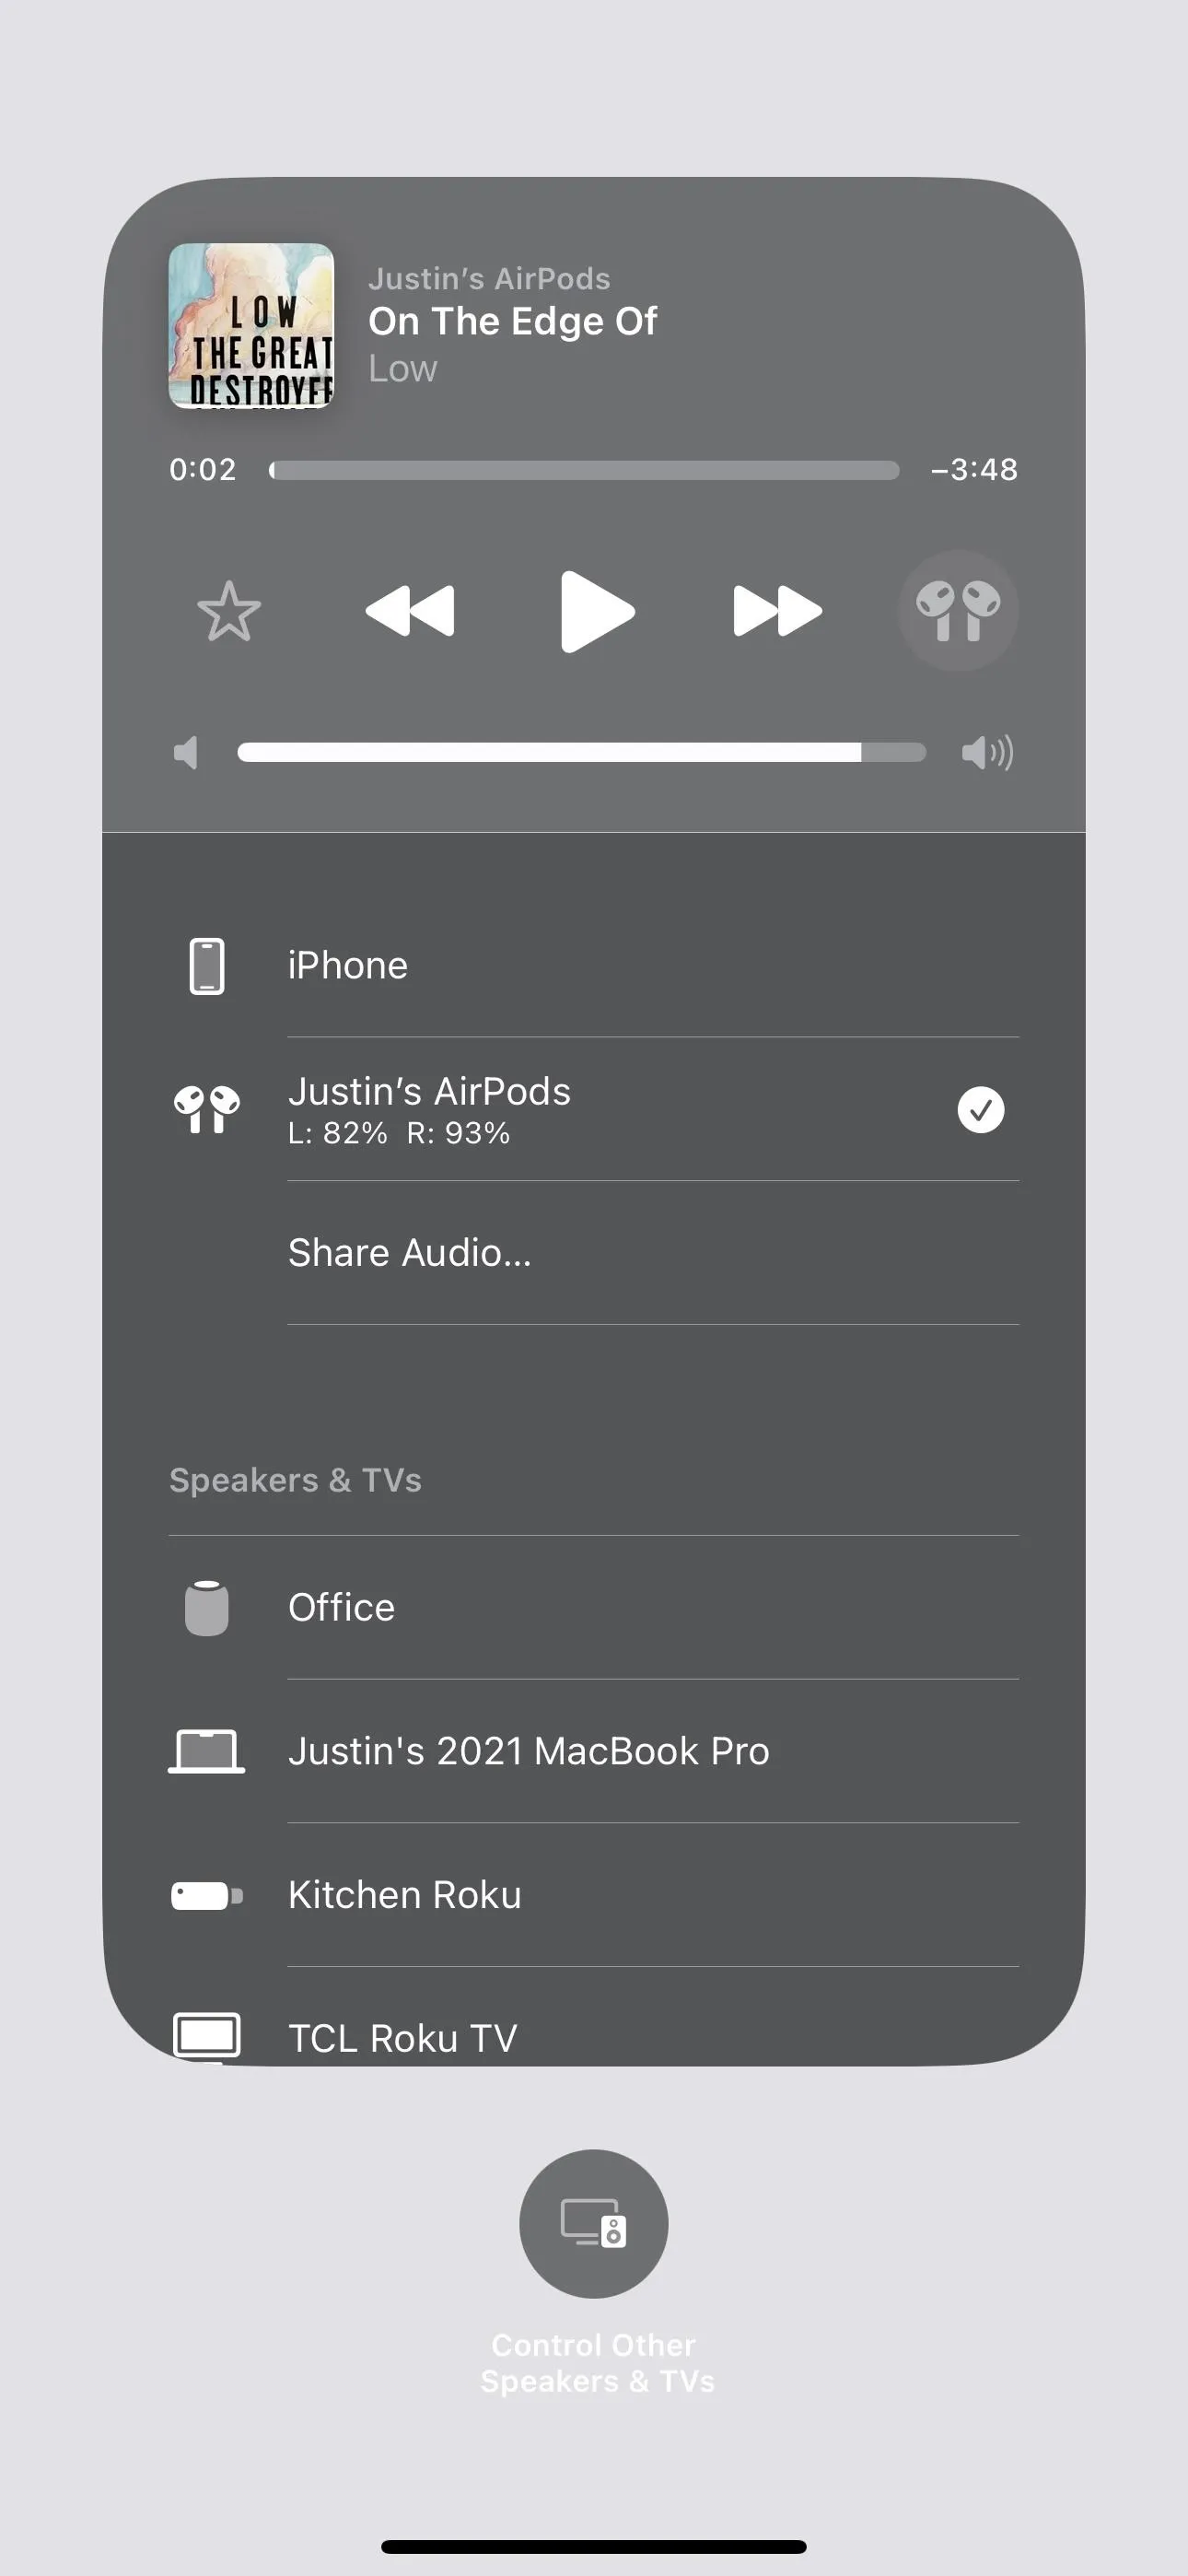
If your AirPods or Beats have already been paired with your iPhone or iPad, you can use the Bluetooth control in Control Center to connect to them. Just touch and hold the connectivity group, touch and hold the Bluetooth control, and choose your headphones from the list. If you're listening to music or other audio on the iPhone or iPad, you can also tap the AirPlay icon in the Now Playing control.
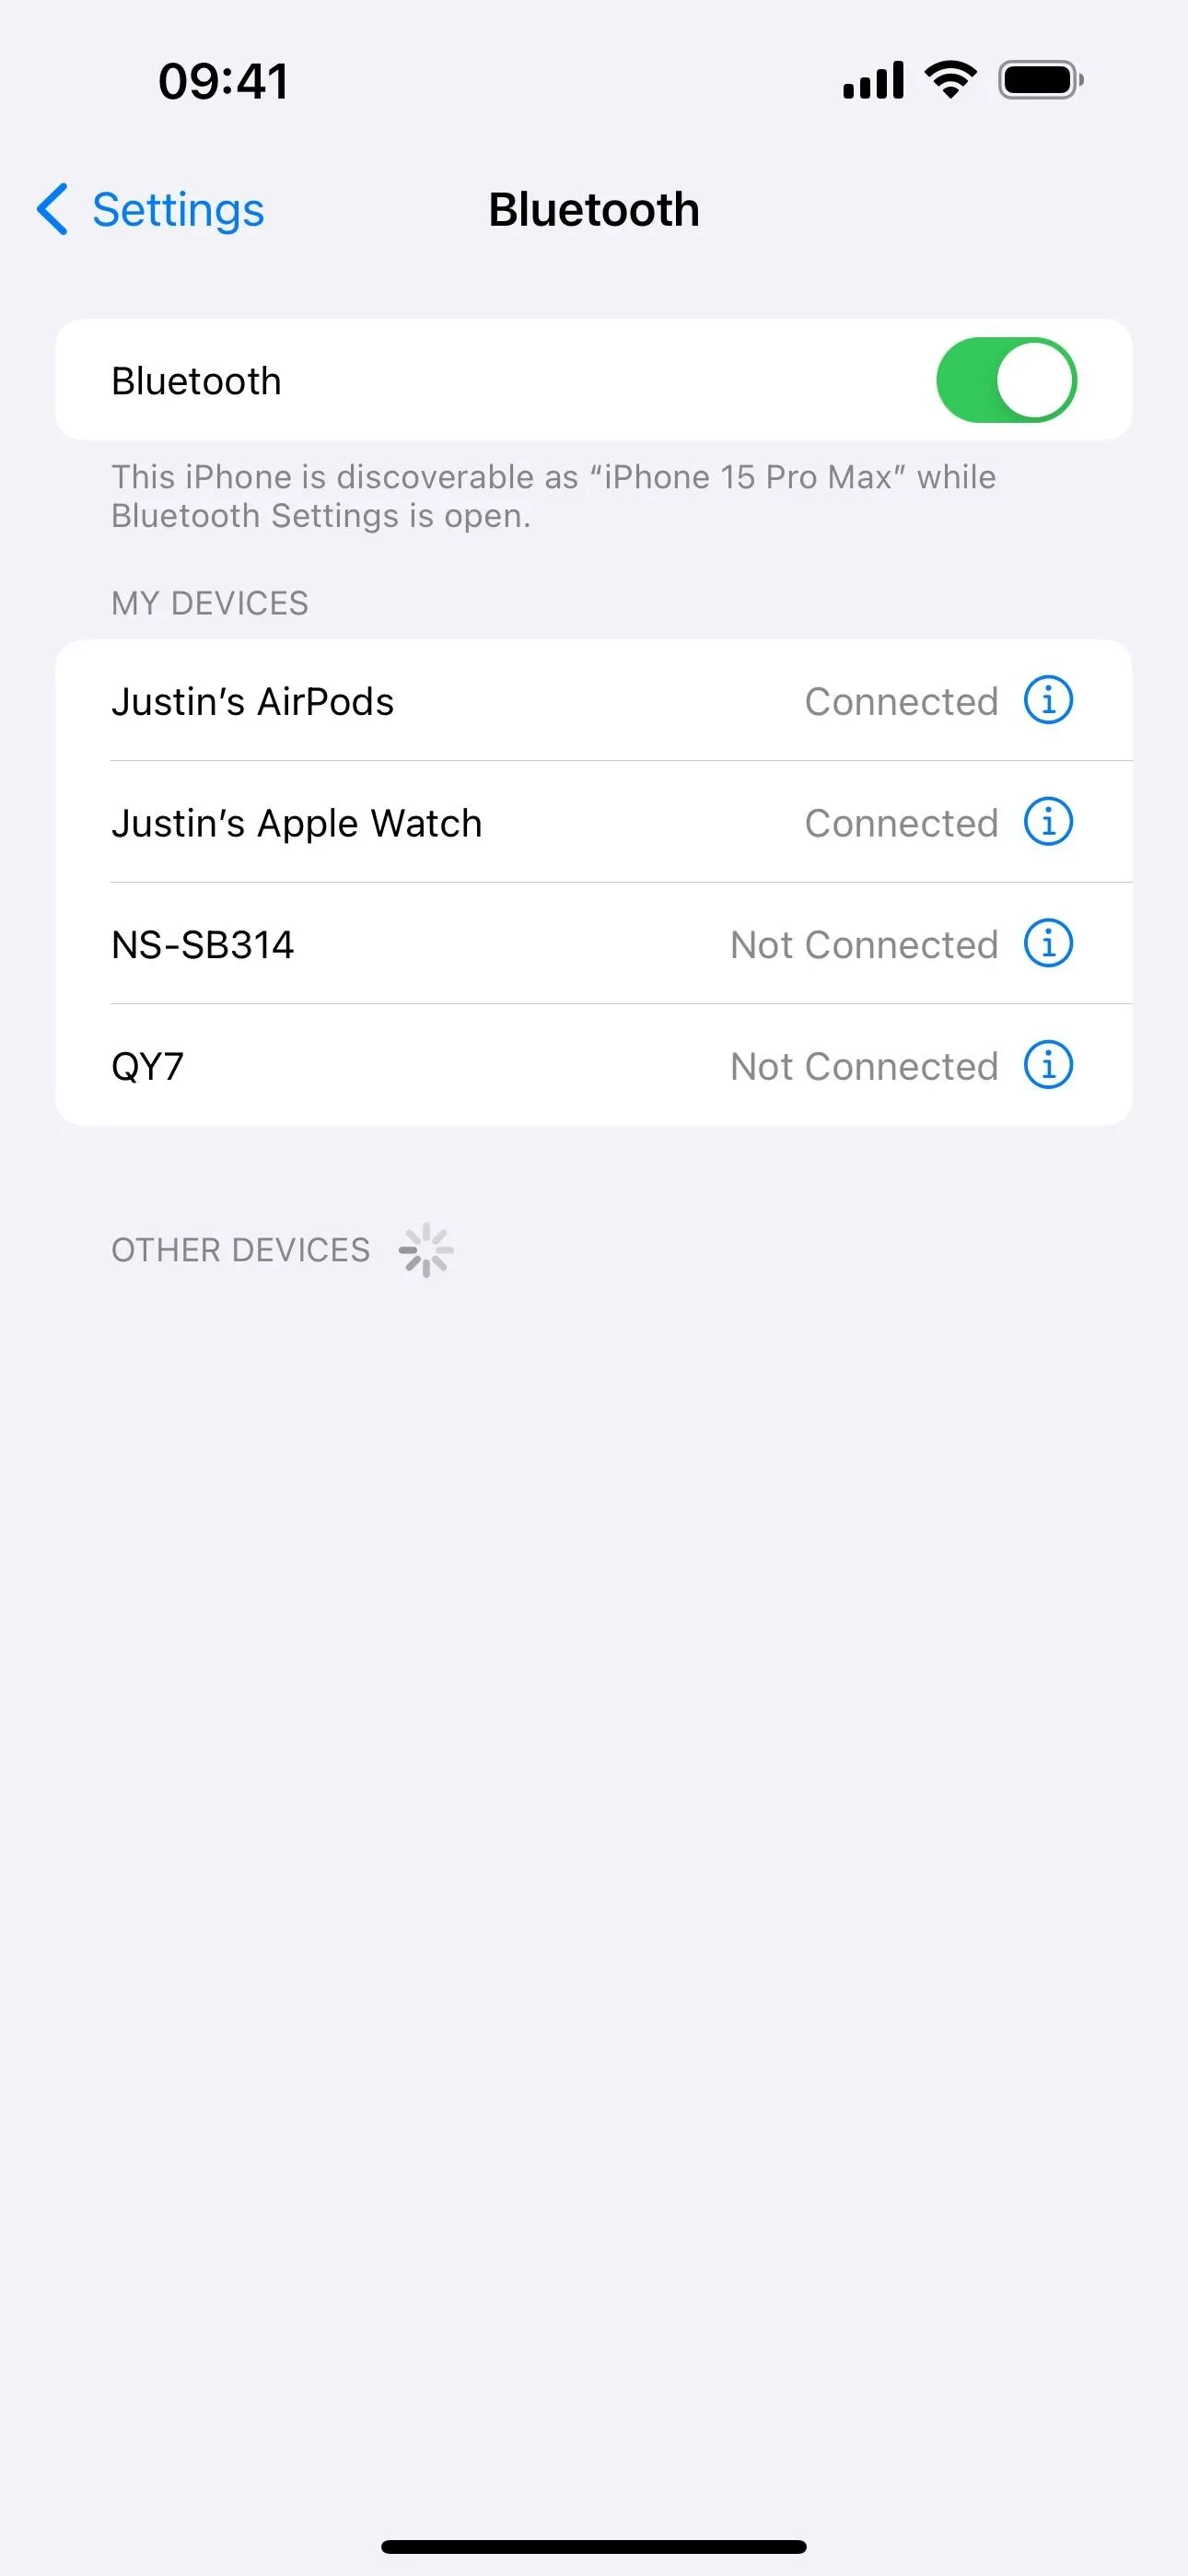
You can also navigate directly to Settings –> Bluetooth, tell Siri to "open Bluetooth settings," or tap "Bluetooth Settings" from the expanded Bluetooth control in Control Center to find and connect to your AirPods or Beats.


Activate Live Listen for Improved Hearing
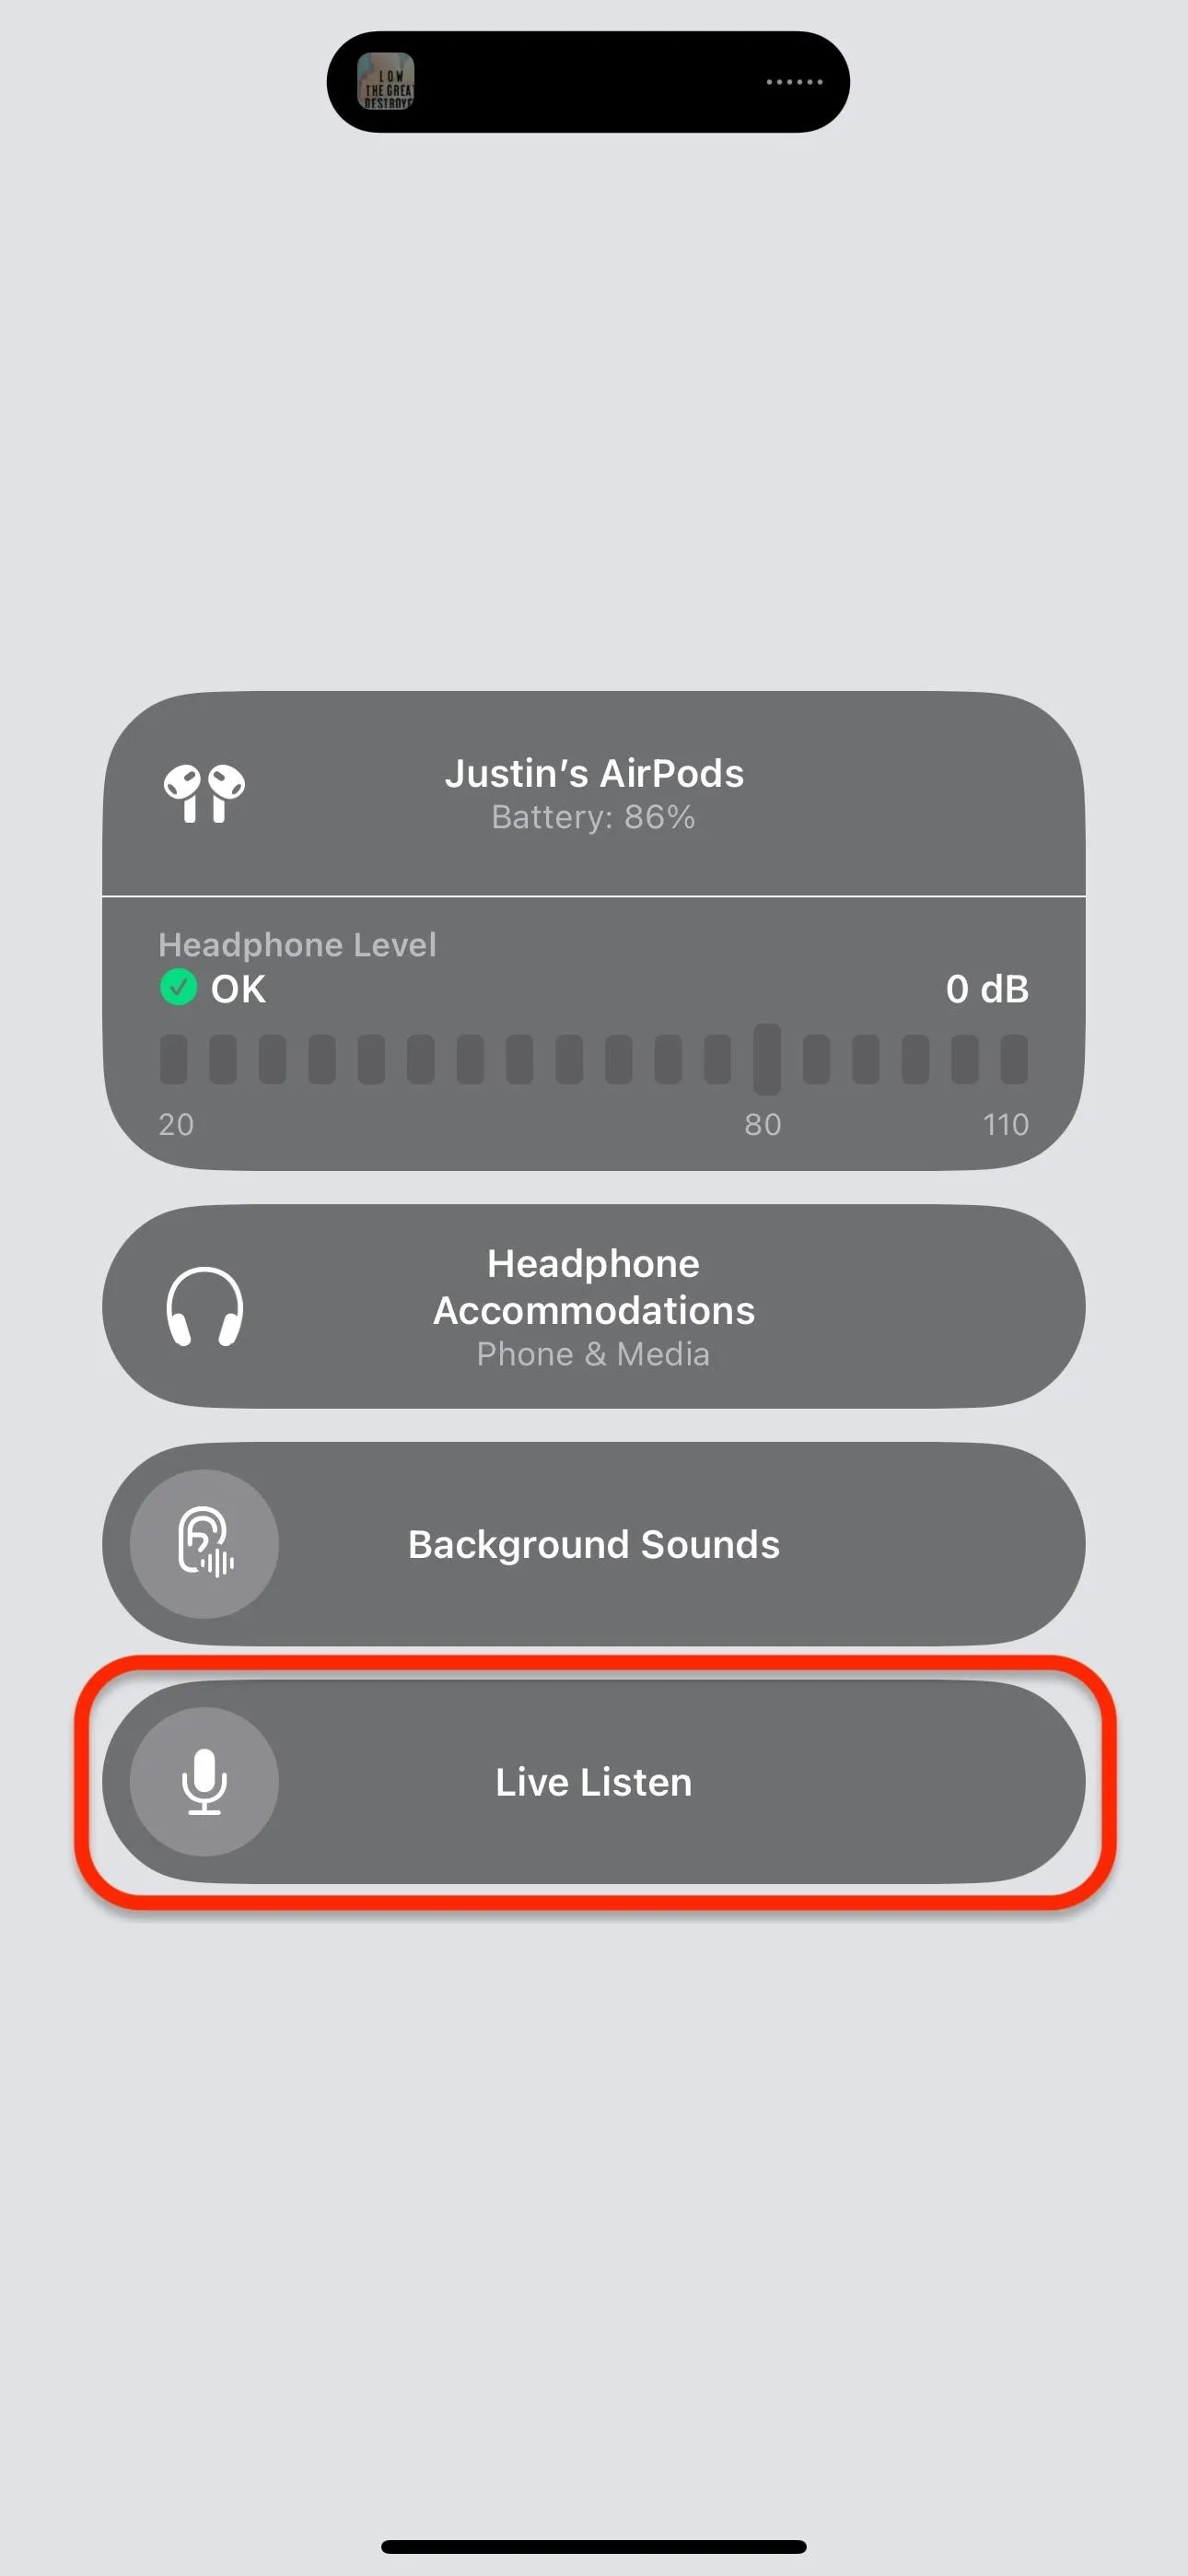
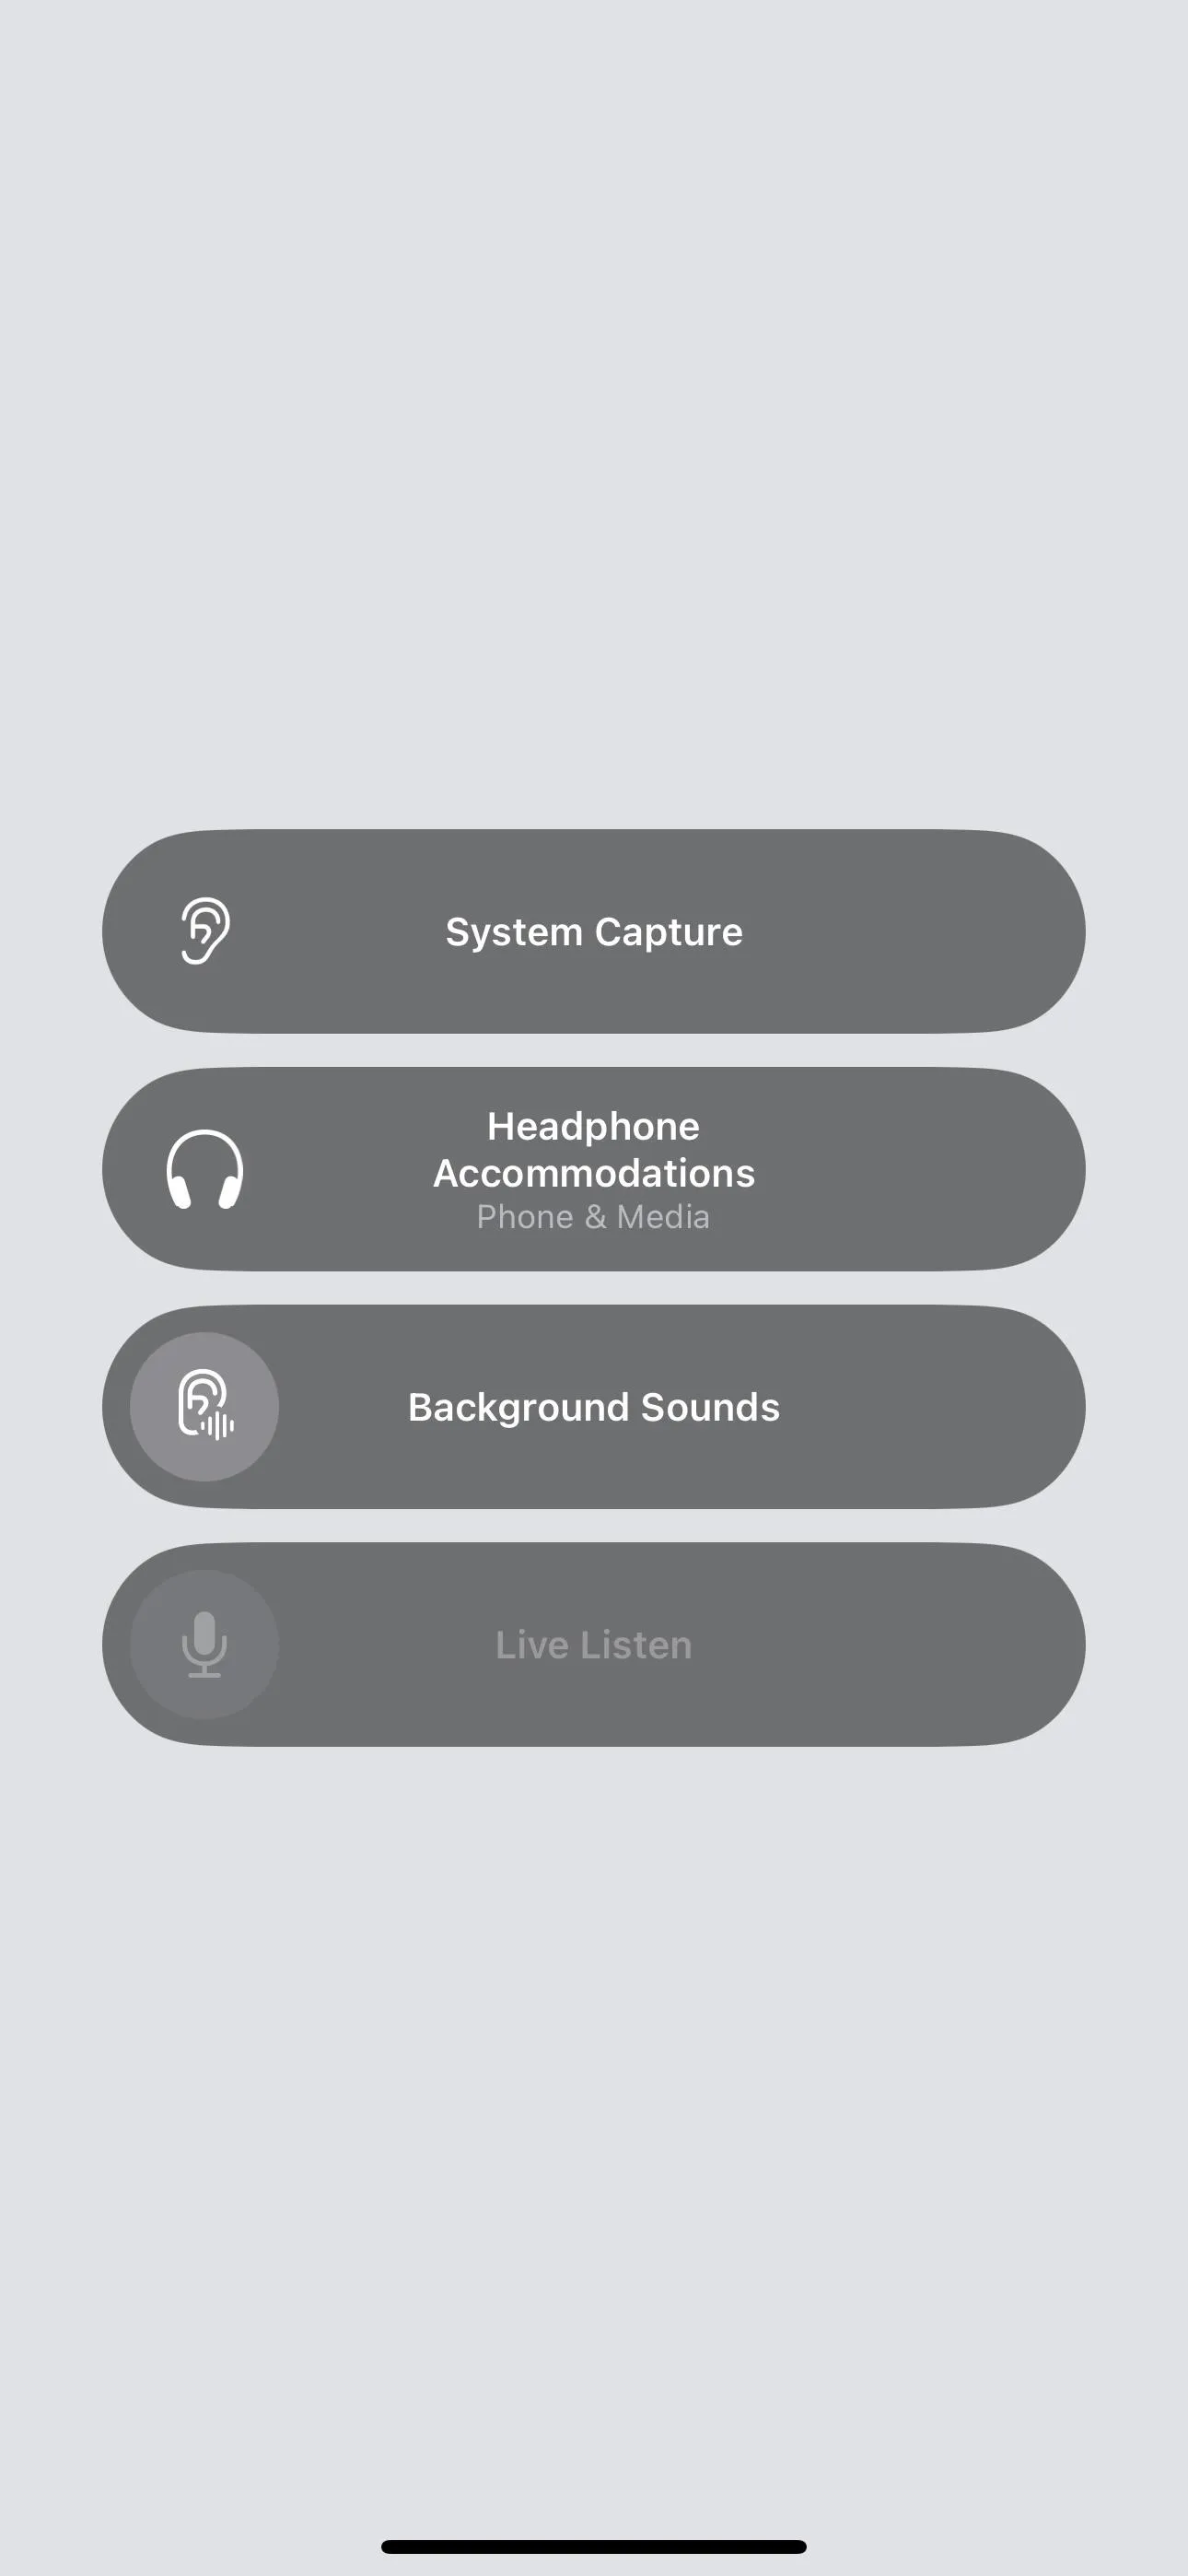
To activate Live Listen, open Control Center, tap the Hearing control, and hit "Live Listen." And that's all there is to it. You should immediately begin hearing audio captured by your iPhone or iPad's mic.
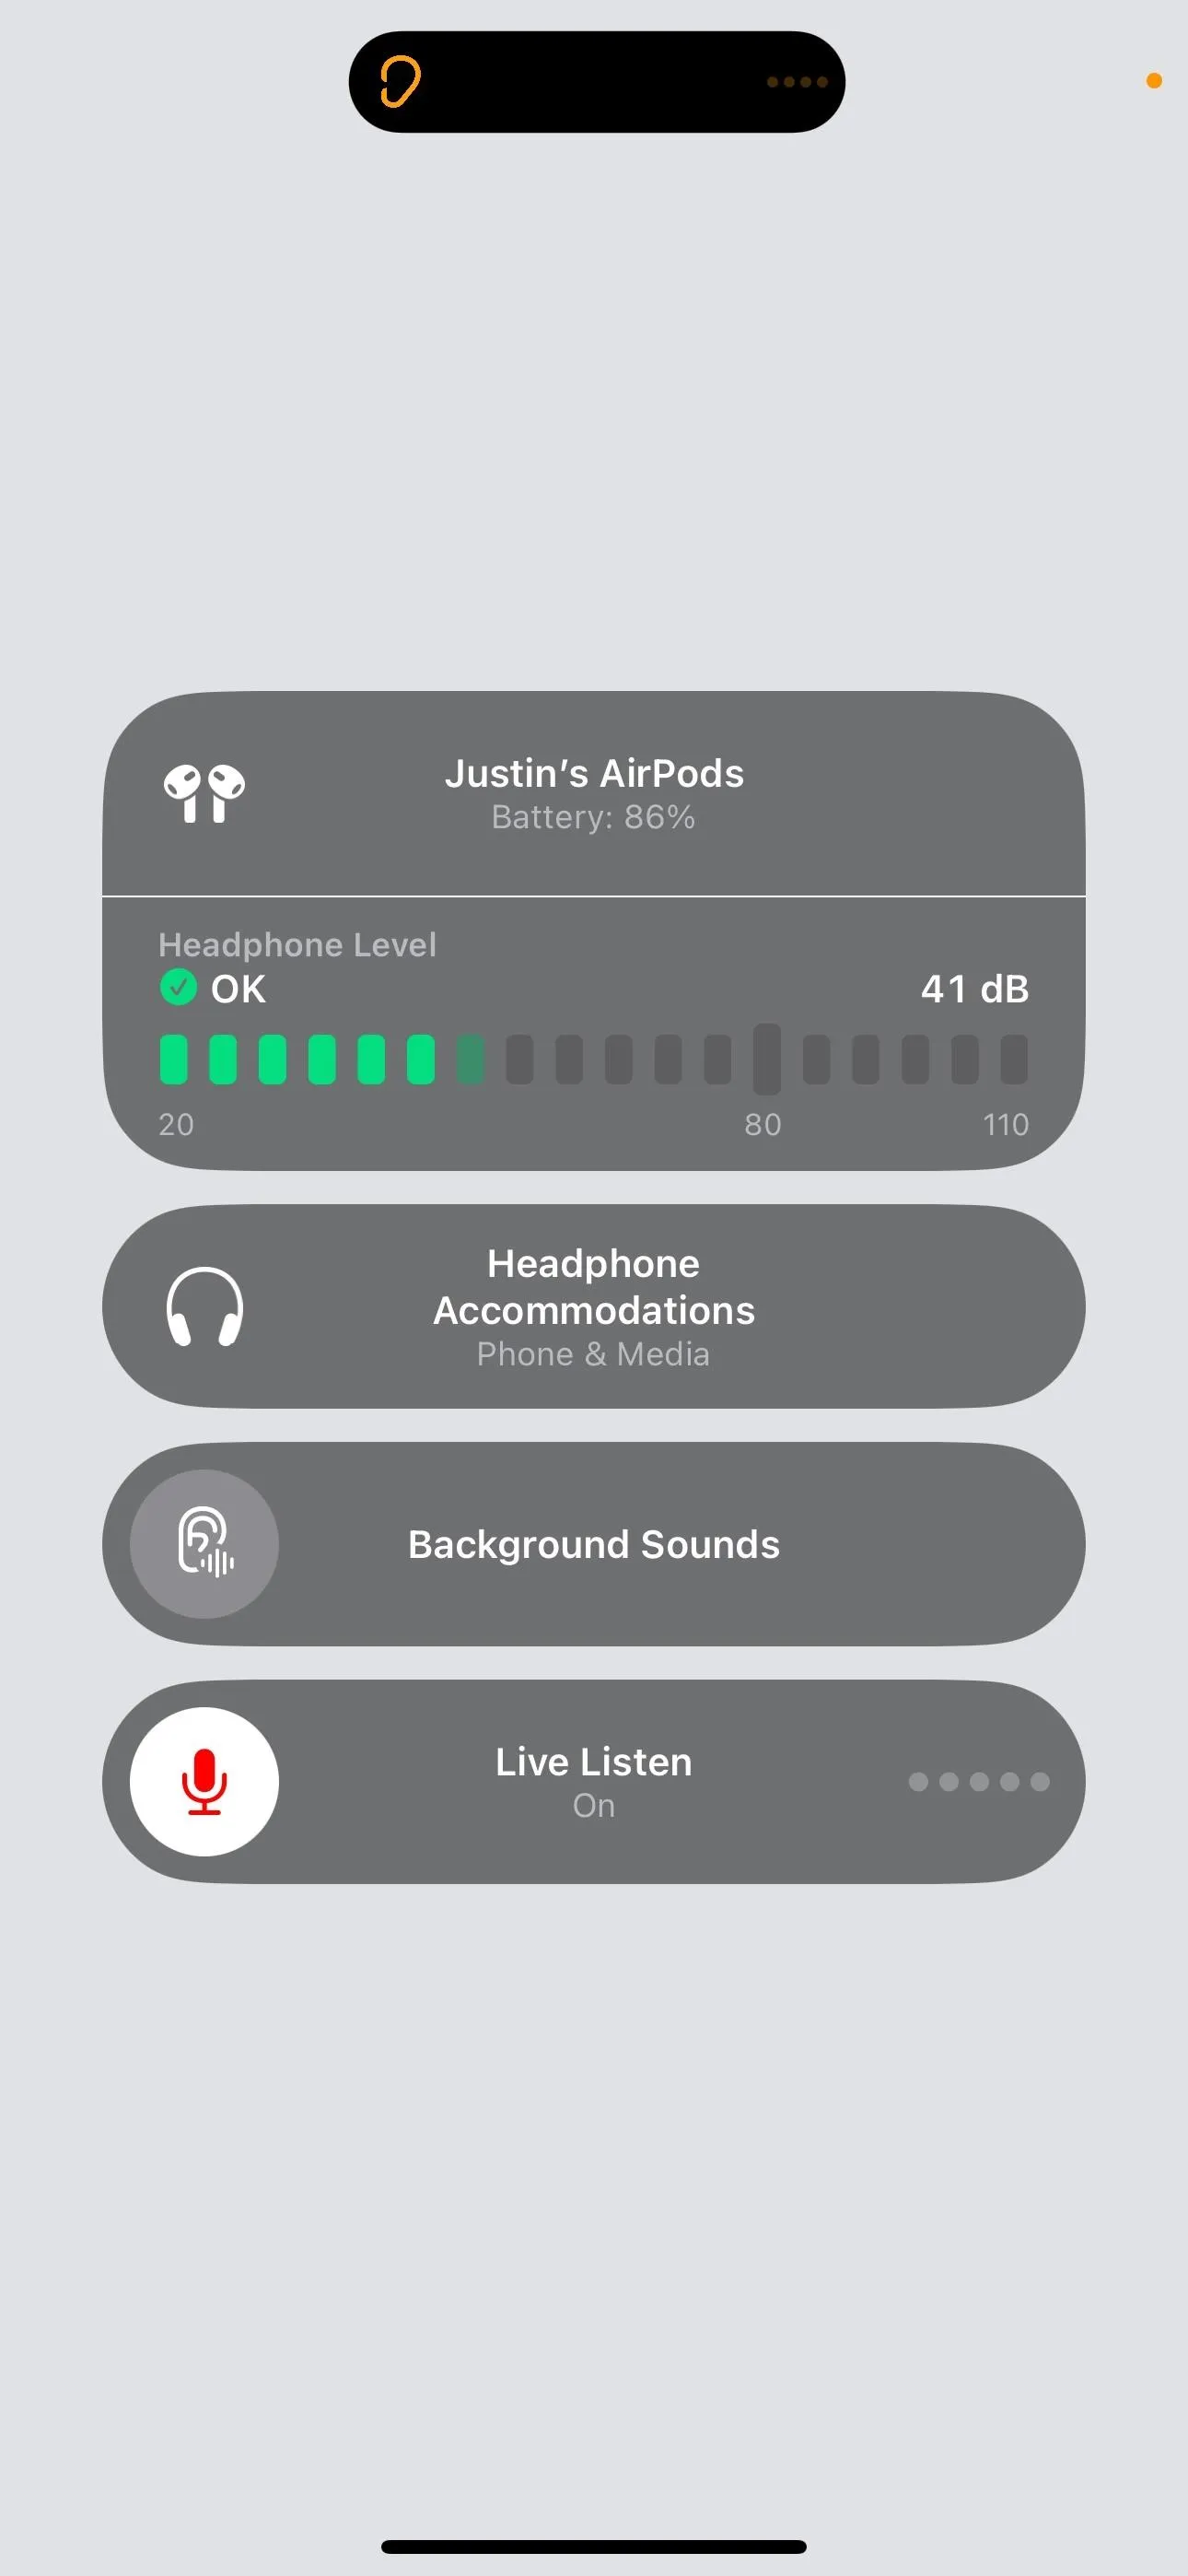
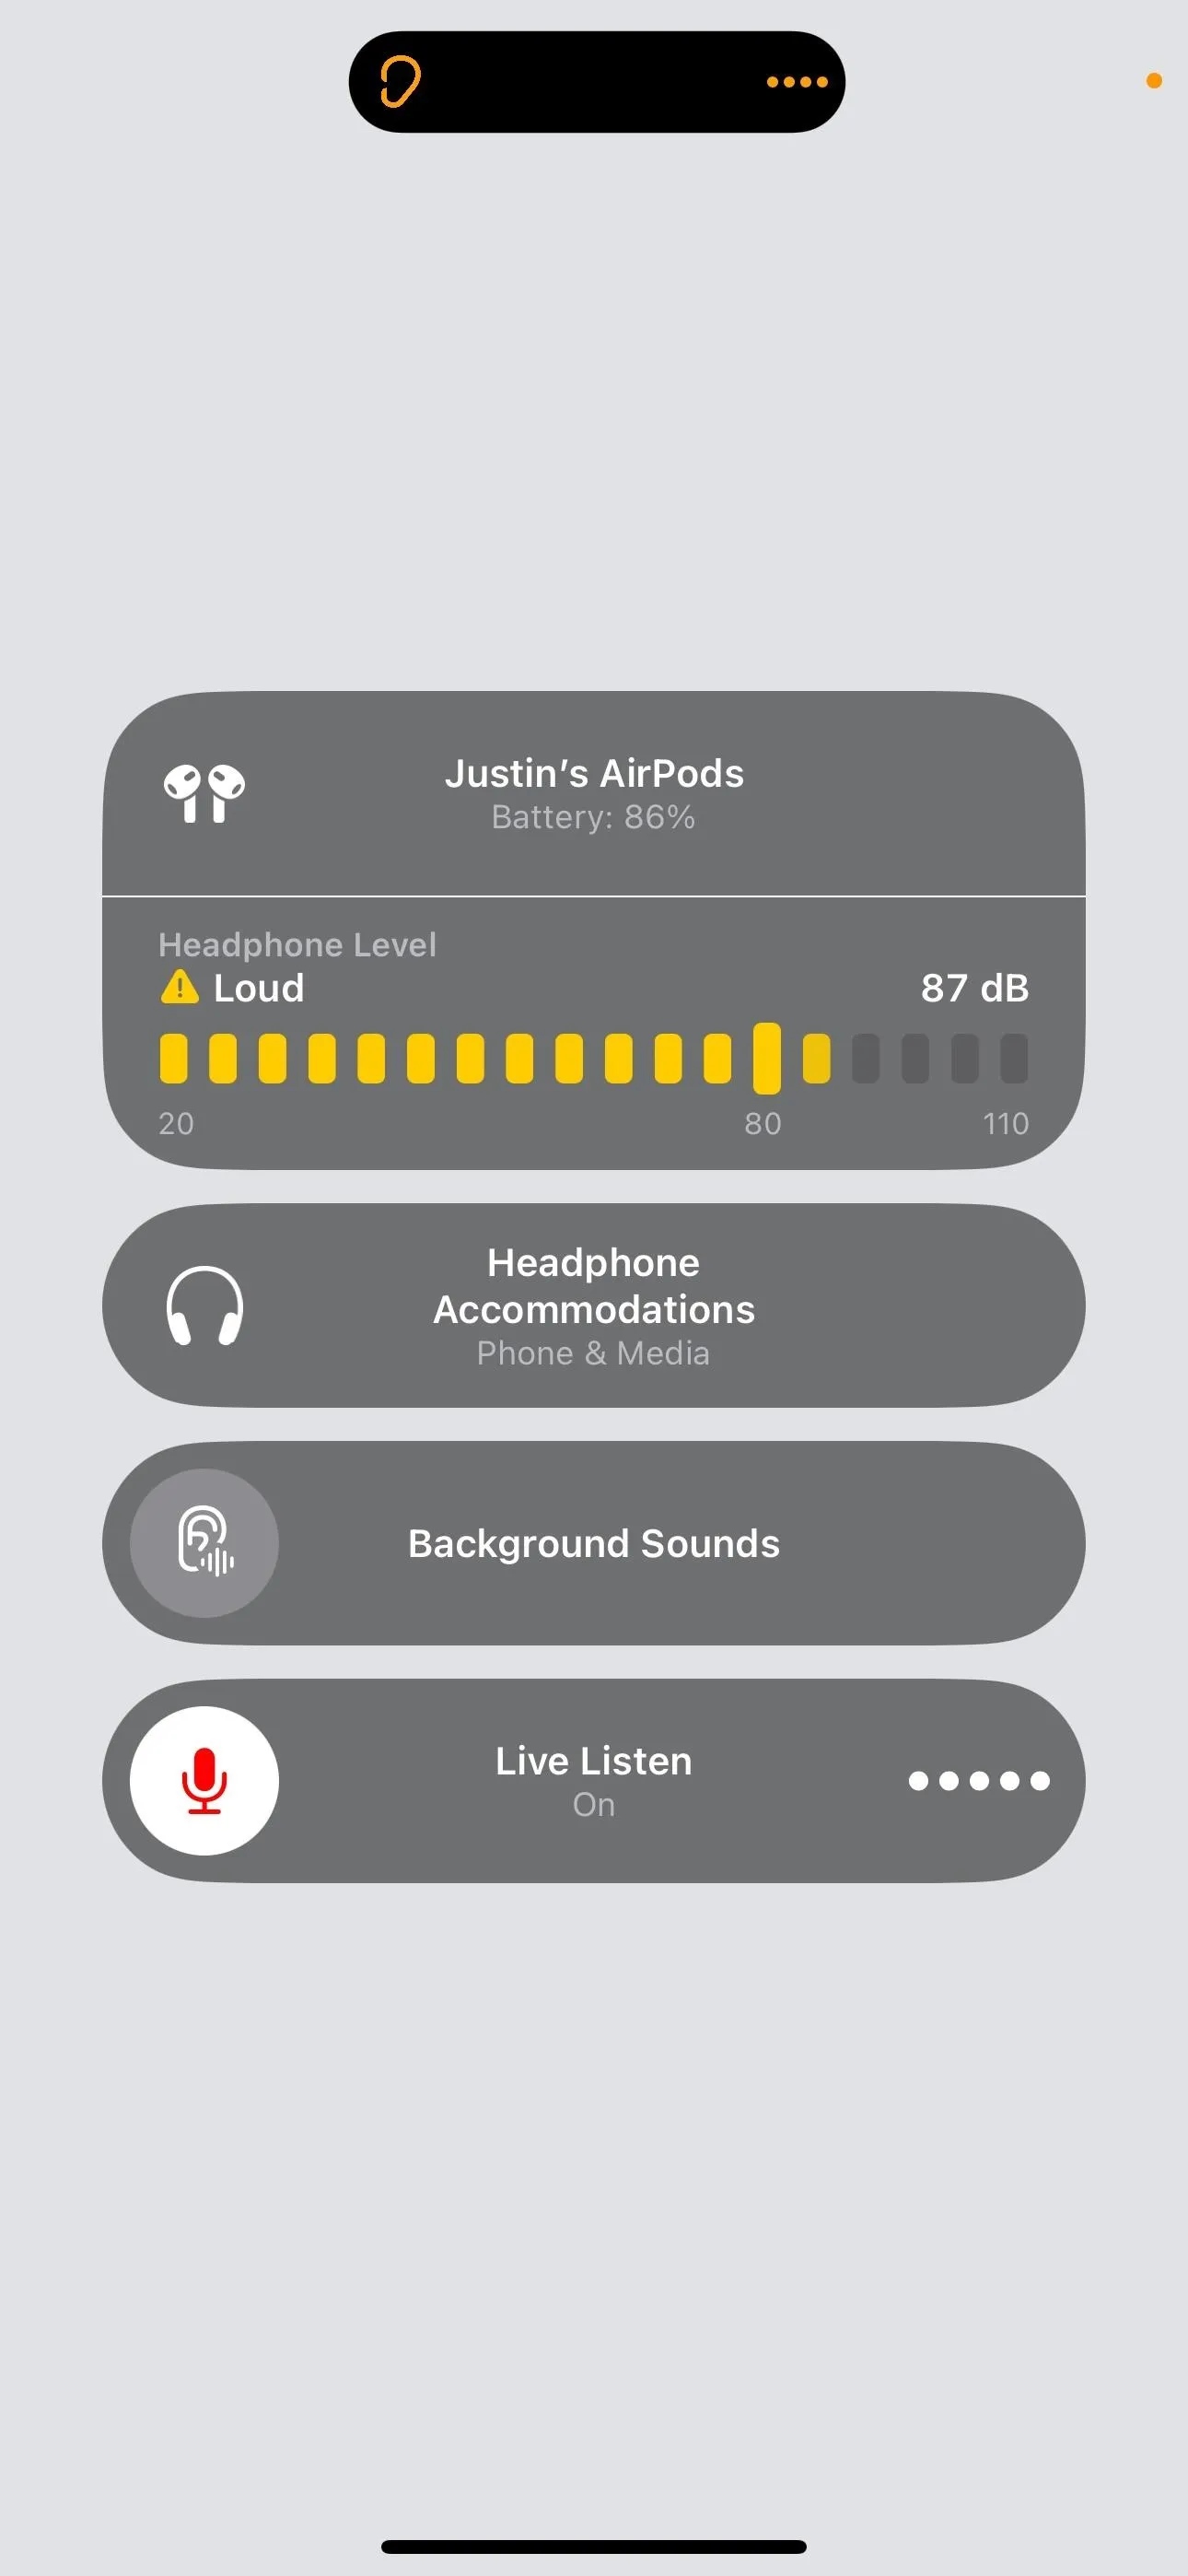
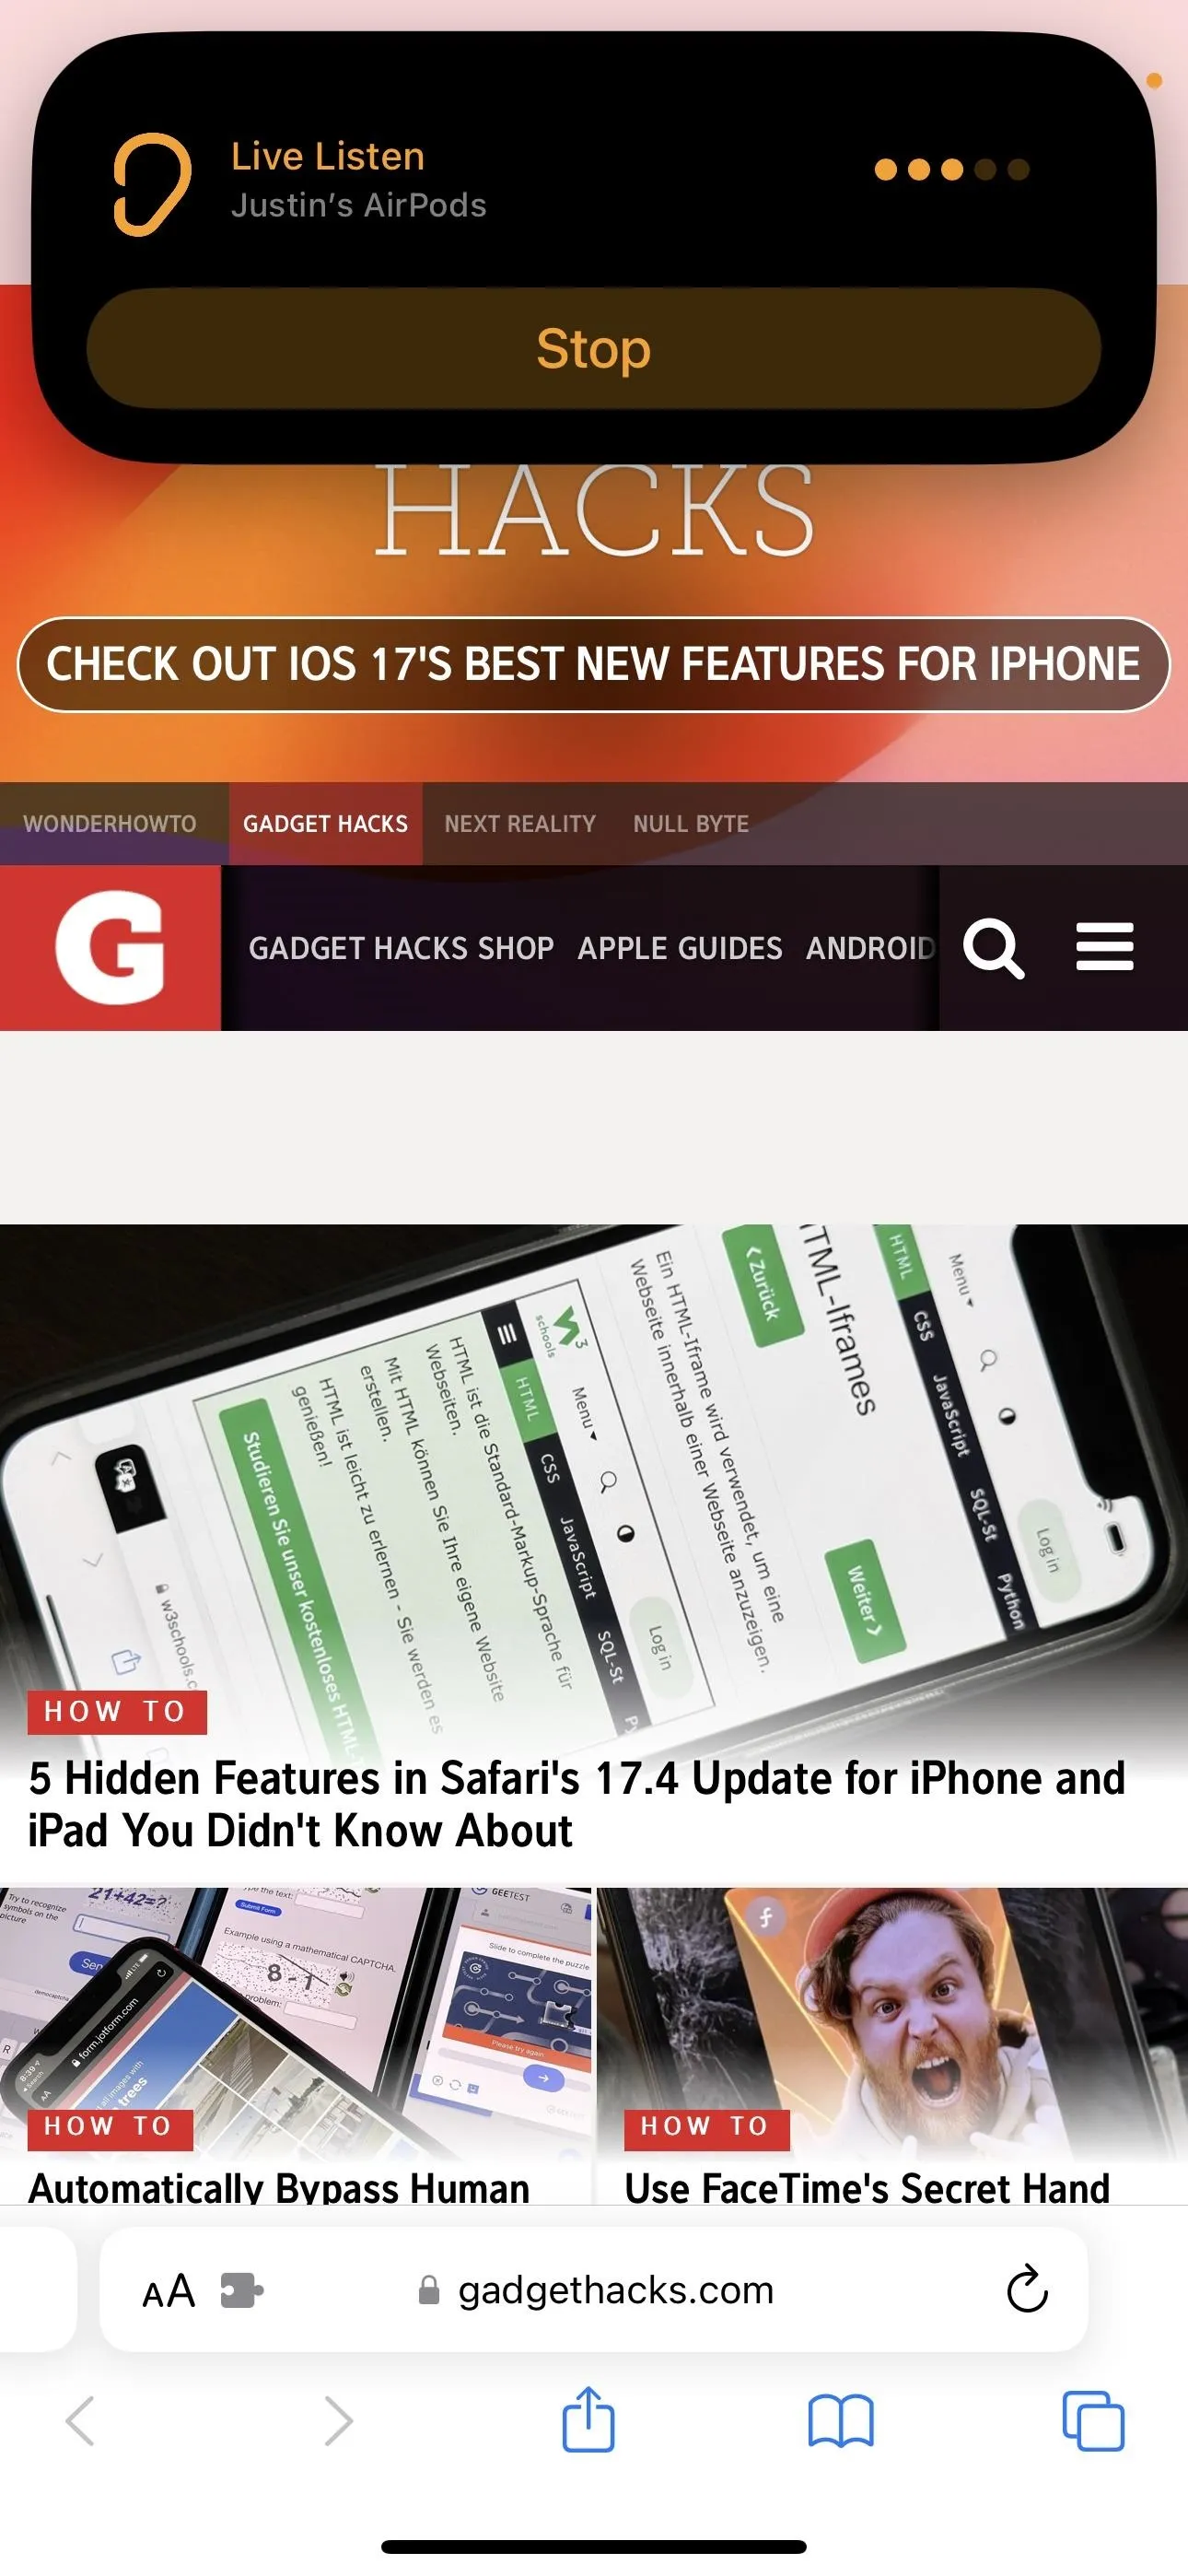
When enabled, the Live Listen button will show five dots that light up as the sounds around you get softer or louder. Plus, the Headphone Level meter on the Hearing screen for your AirPods or Beats, which measures sounds in decibels (dB) in real time, will show you exactly how noisy the world around you is. It will even tell you if it's too loud for safe hearing.


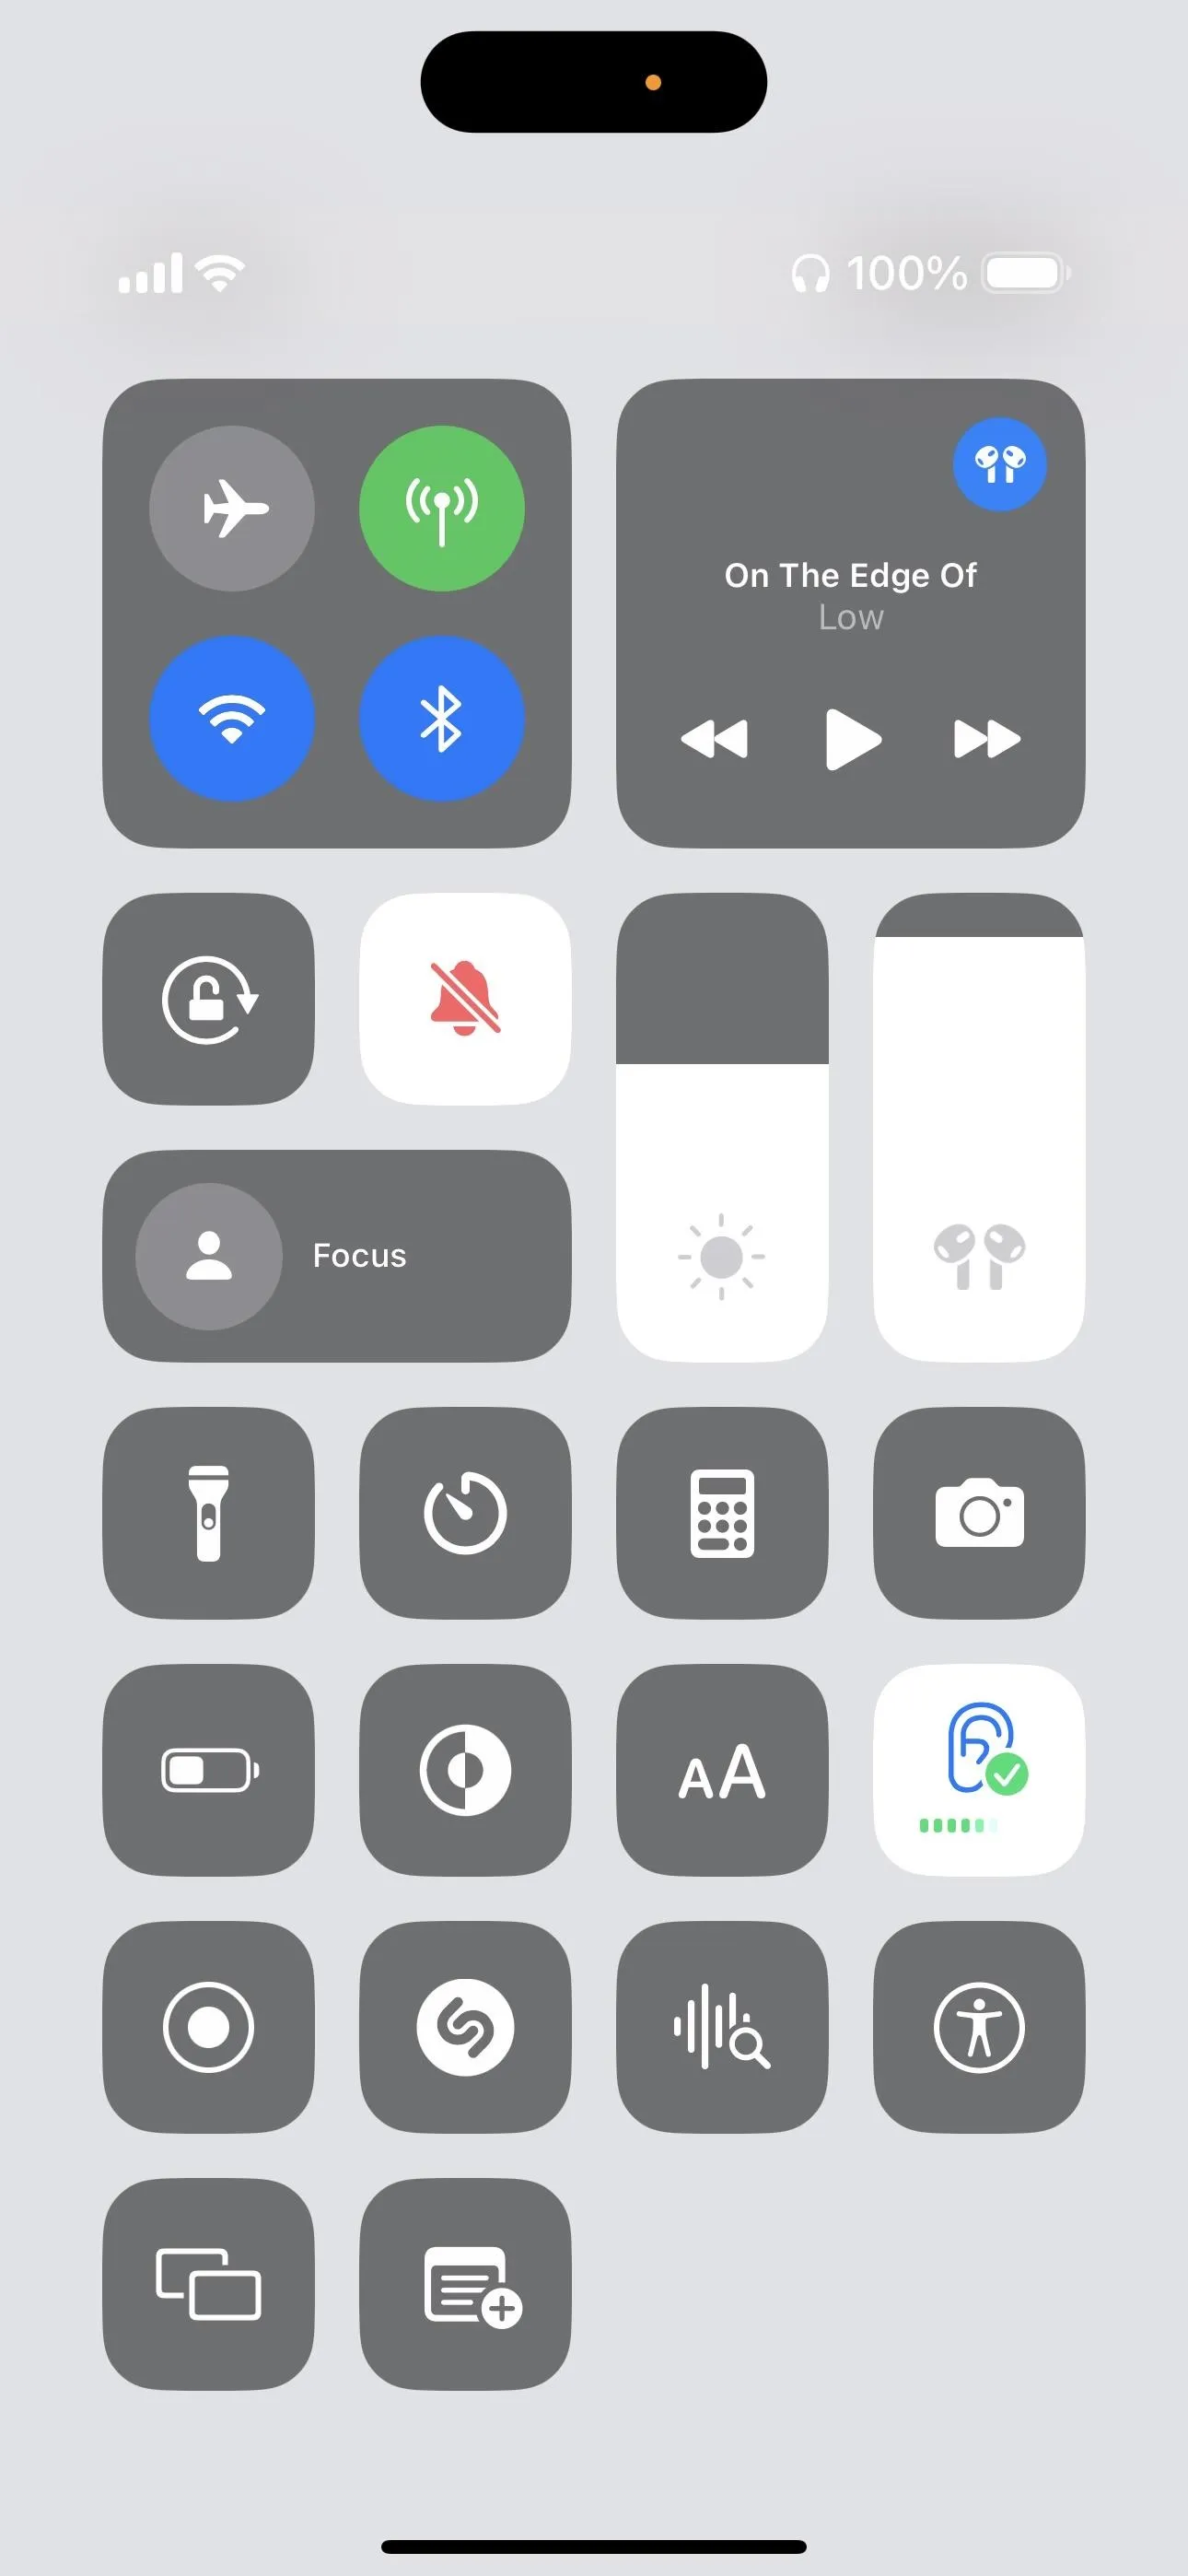
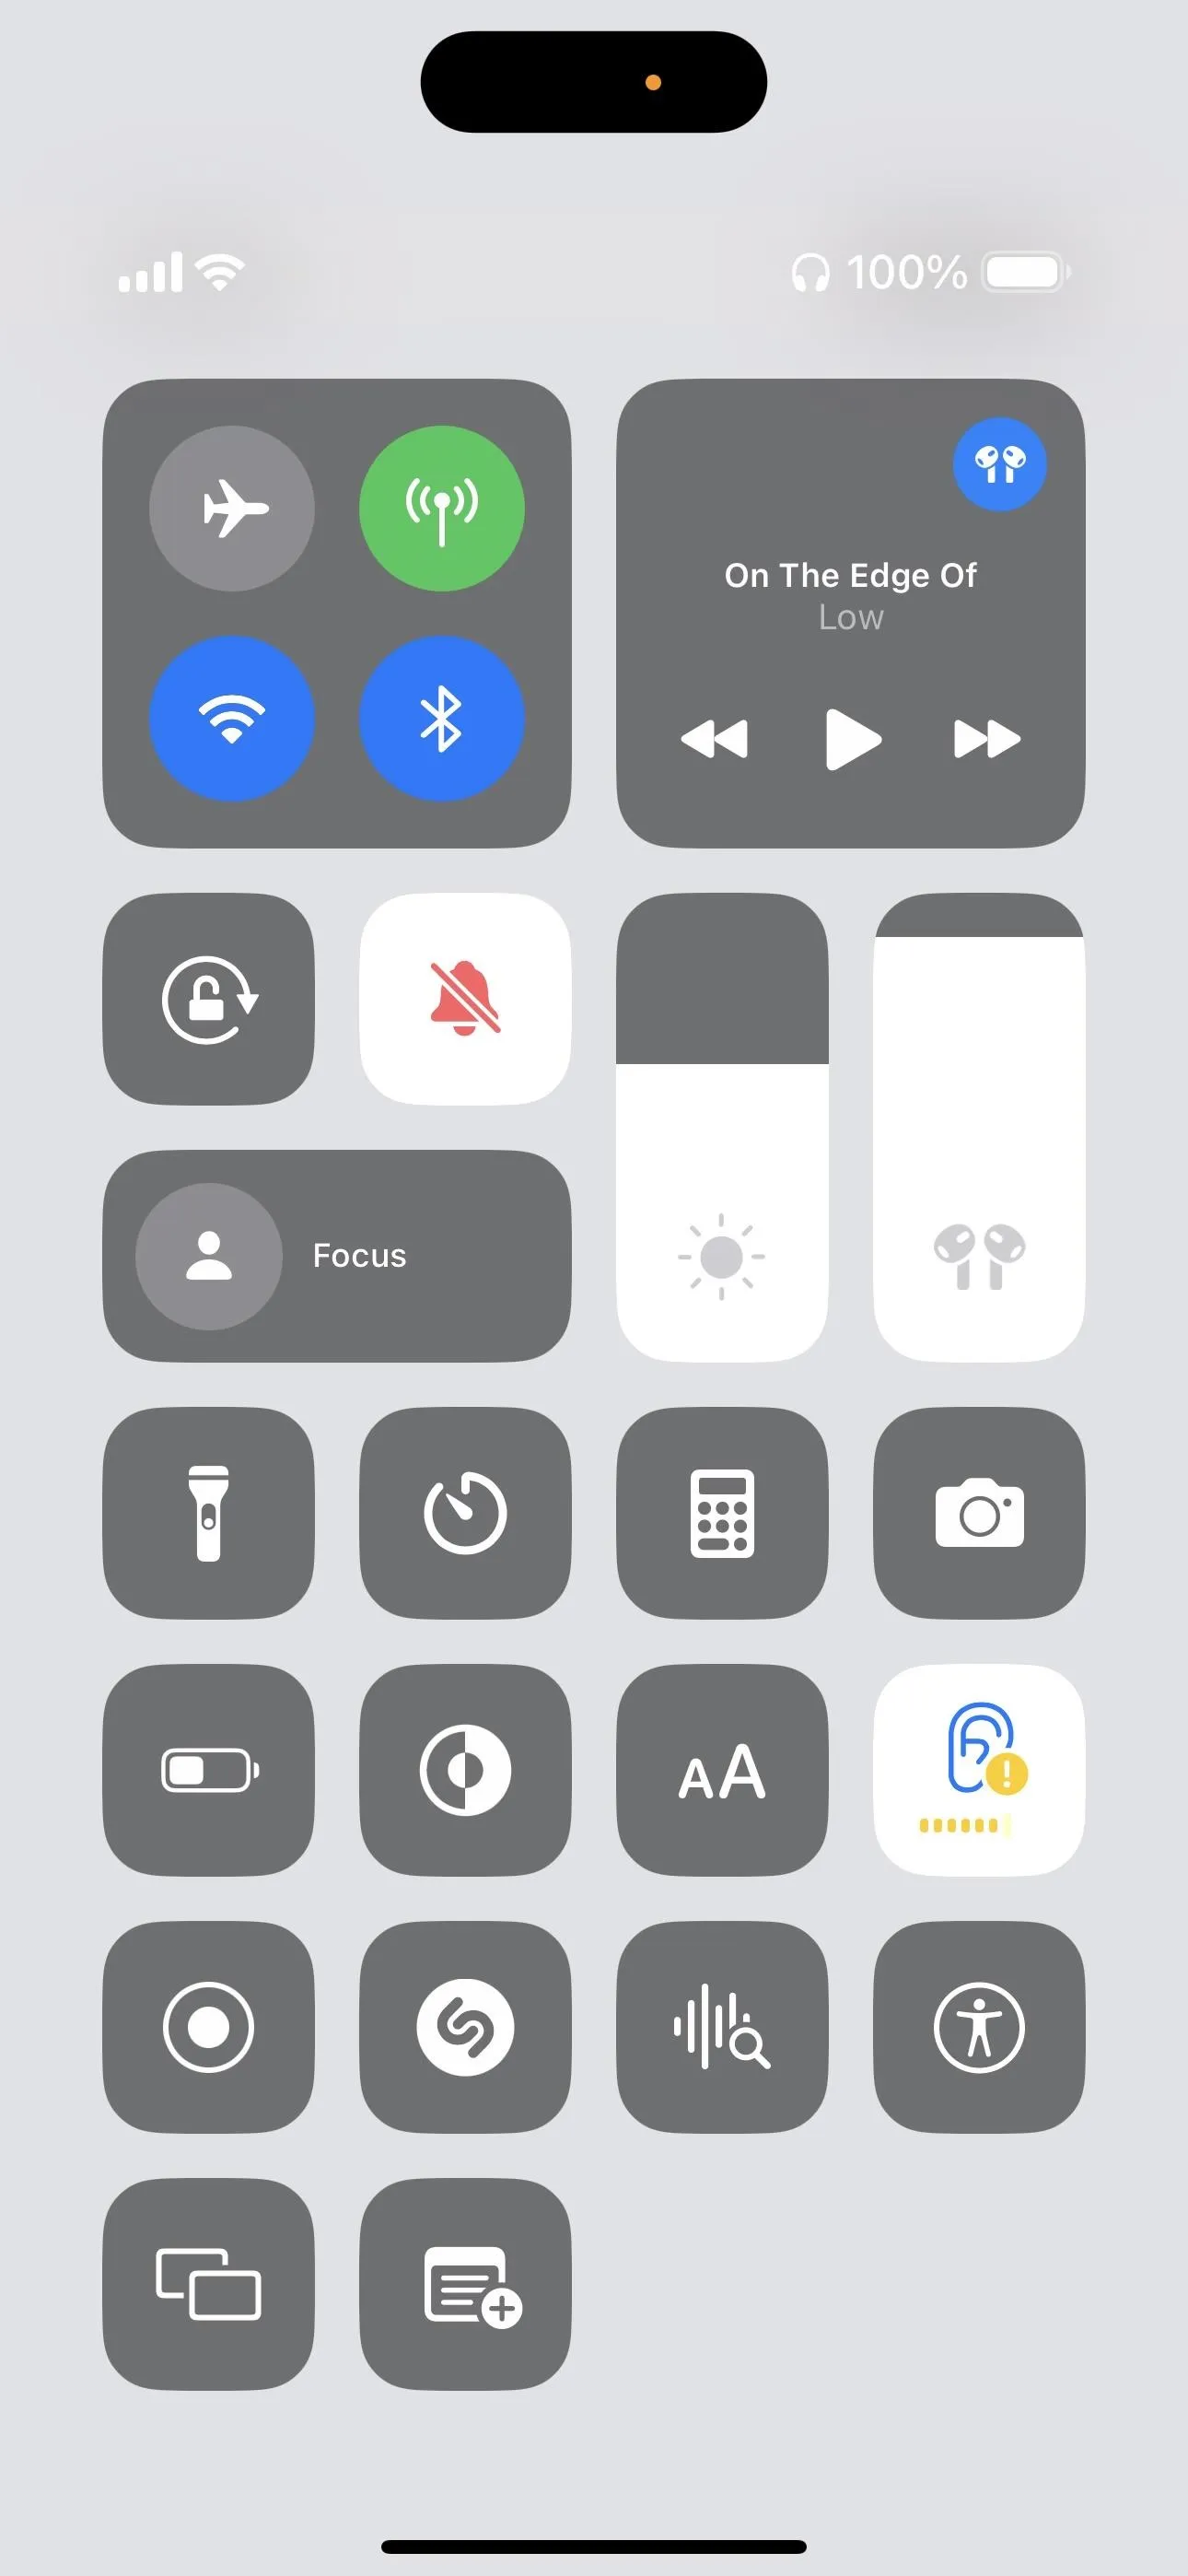
On the main Control Center screen, the Hearing control shows a green checkmark when your AirPods or Beats levels are within a safe dB range but will change to yellow if they become too loud. This also happens when listening to music or other audio, not just when using Live Listen.


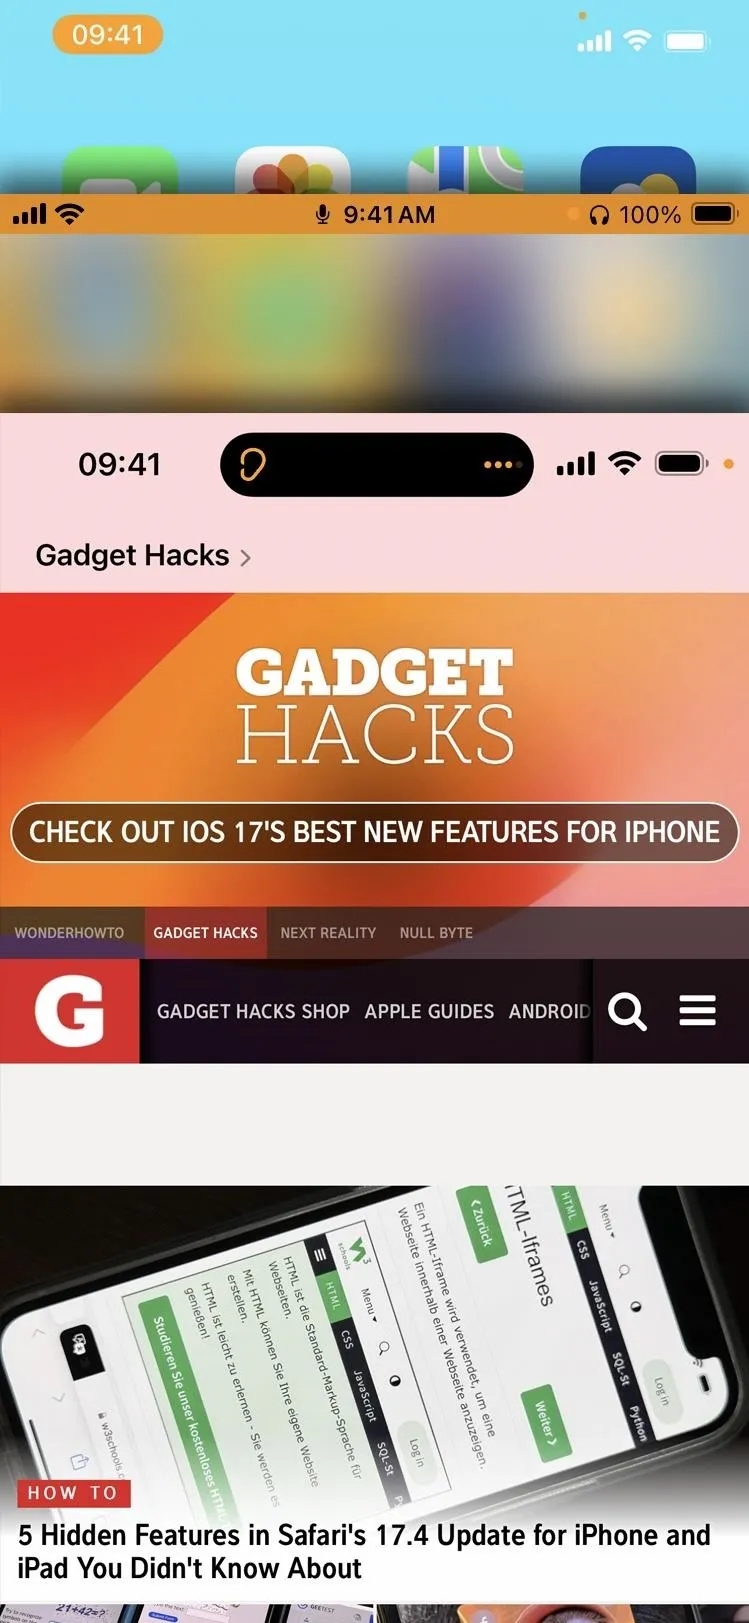
When the microphone is in use by Live Listen, you should see an orange dot in your iPhone or iPad's status bar.
The status bar also acts as a quick way to access Live Listen and turn it off, but its appearance will vary based on your device. For example, the entire status bar will be orange on an iPhone with a Home button, while the time will have an orange pill shape around it on older Face ID models. Tapping either will open the Hearing page in the Control Center.
If your iPhone supports Dynamic Island, it will show you the five dots that light up as the sounds around you get softer or louder, and you can tap it to access a quick "Stop" button.


It's important to note that Live Listen does not record anything, so there's no record of what you've heard when the feature was active. The audio is transmitted, and that's it. There are ways to record it, but then what's the point of using your headphones for improved live listening?
Troubleshooting
If the "Live Listen" button is grayed out, return to the main Control Center screen to double-check that your AirPods or Beats are connected to your iPhone or iPad. If the volume slider appears muted or doesn't show the headphones in use, try playing music or other media to wake them up.


Cover photo and screenshots by Justin Meyers/Gadget Hacks


Comments
Be the first, drop a comment!