Organizing contacts is a bitch, especially on the iPhone. Some contacts will have multiple entries, you can only delete contacts one by one, and certain types of contacts can't be deleted at all. If that isn't enough to make you pull your hair out, then I don't know what will.
Thankfully, there are many ways to clean up the messy contacts list on your iPhone and finally get organized. Below, I'll be covering easy ways to delete multiple iCloud contacts on your iPhone or from your computer at once, as well as simple methods for merging multiple contacts without any fuss.
How to Delete iCloud Contacts on Your iPhone
Before we get to merging contacts and dealing with Facebook ones, let's first go over how to delete all of the unwanted contacts on your iPhone. There are four different ways of doing so: deleting them one by one on your iPhone, deleting them en masse through iCloud on your computer's web browser, deleting multiple entries at once using the Contacts app on your Mac, and deleting them in bulk using a third-party app on your iPhone.
Method #1: Delete Single Contacts on Your iPhone
Apple has a way to delete contacts natively on the iPhone, but it's a major pain in the ass—and you have to do them one by one. Note that you have to have Contacts toggled in Settings -> iCloud in order to sync to iCloud and other devices.
- Go to the Contacts app.
- Select the contact you want to delete.
- Tap on Edit.
- Scroll down and tap on Delete Contact.
- Select Delete Contact again to confirm.
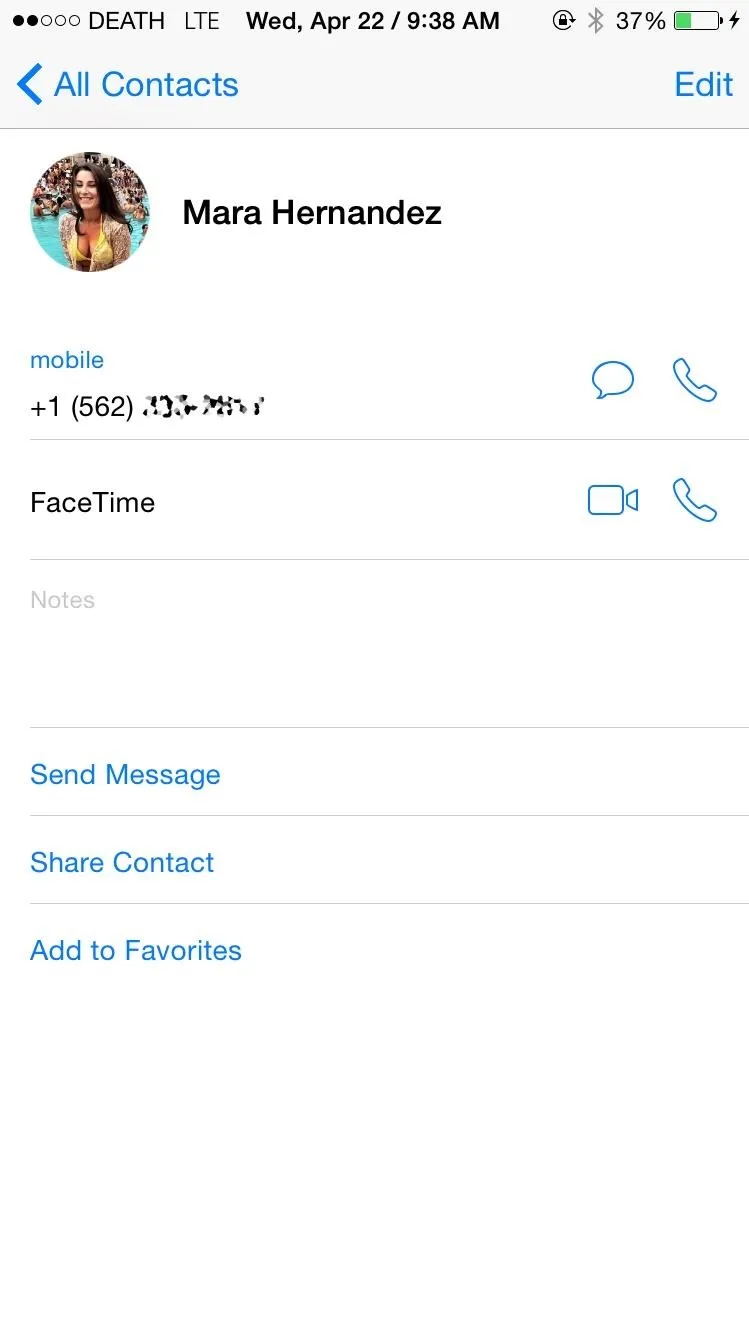
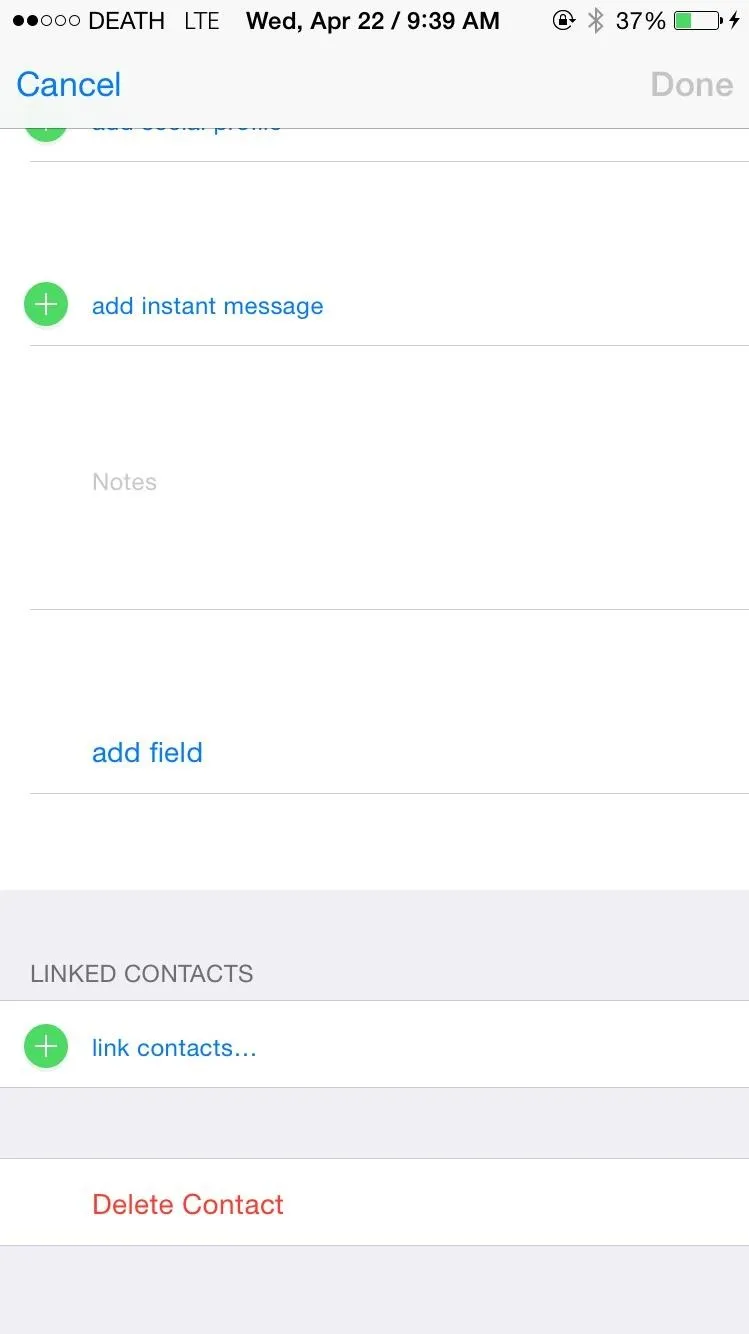


If you're trying to more than just a handful of contacts, this method will be a headache and take way longer than it should. Skip to the second method below to learn how to delete multiple contacts at once on your computer.
Method #2: Delete Multiple Contacts from iCloud
Not sure why they haven't implemented this feature directly on the iPhone, but Apple has a way to delete multiple contacts at once through any web browser on your computer (Windows or Mac).
- Sign into iCloud.com using your Apple ID.
- Go to the Contacts app.
- Hold down on Command (Mac) or Ctrl (Windows) and select (left-click) all of the contacts you want to get rid of.
- When ready, either hit the Delete key on your keyboard, or click on the gear icon at the bottom left and select Delete from the menu.
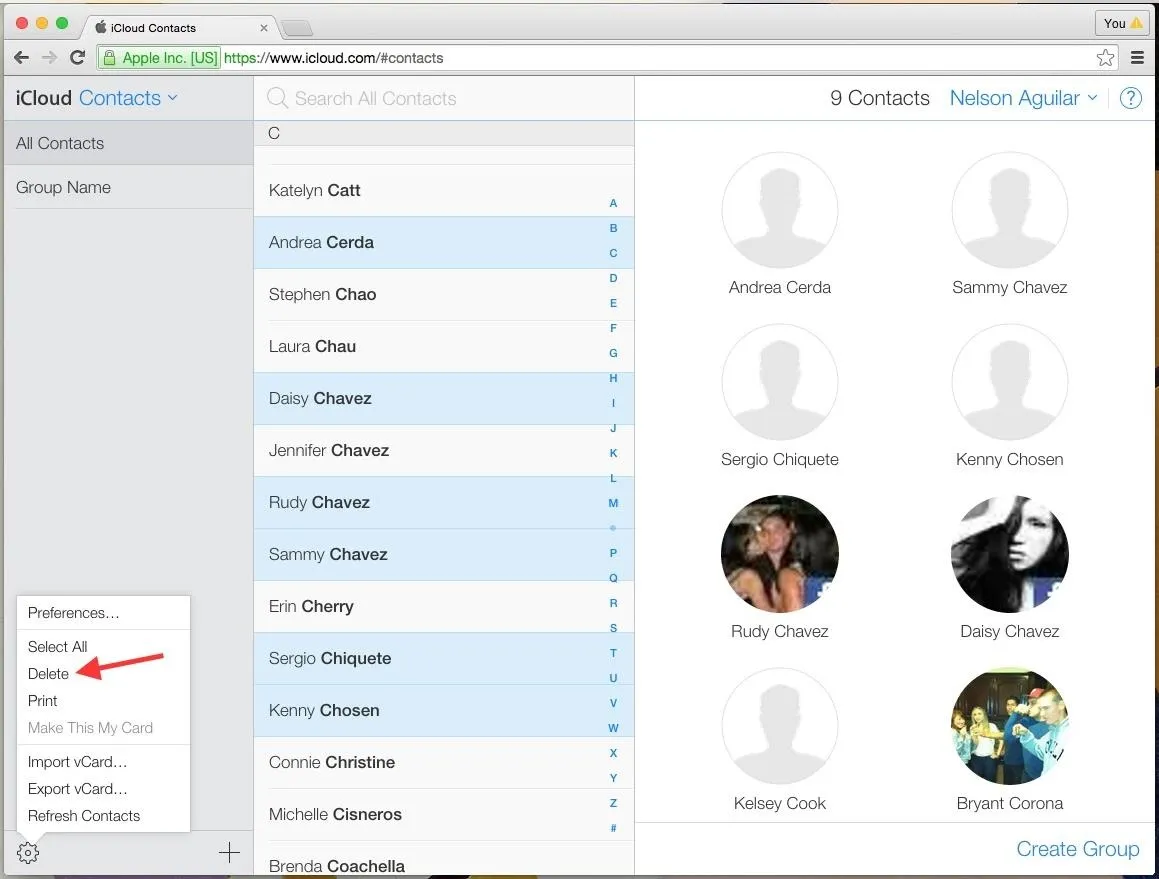
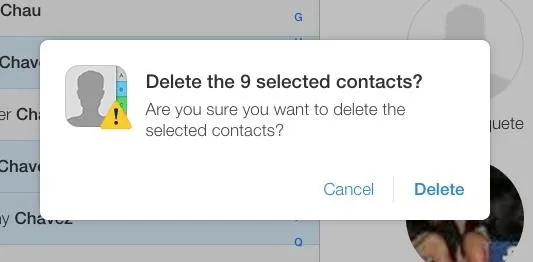
- You will then be asked if you're sure you want to delete the selected contacts. Click on Delete and they'll be removed.
Method #3: Delete Multiple Contacts in the Contacts Mac App
Using your Mac computer, you can also use the Contacts app to delete multiple contacts at once. Note that you must have iCloud set up to sync Contacts on your computer, which can be done in the iCloud section of System Preferences.
- Open the Contacts app.
- Hold down on the Command key and select (left-click) all of the contacts you want to get rid of.
- When ready, either hit the Delete key on your keyboard, or right-click on any of the highlighted contacts and select Delete Cards from the menu.
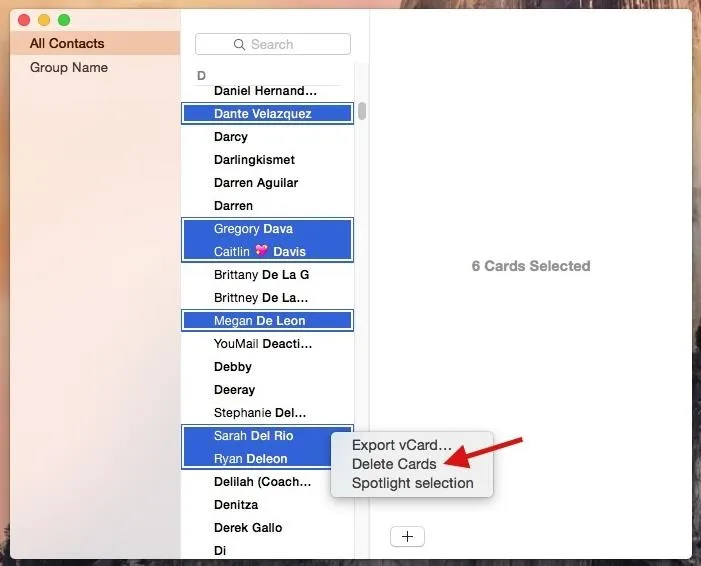
- Click Delete on the popup to confirm.
While the contacts disappear instantaneously from the Contacts app on the Mac, it will take several minutes for them to be deleted from your iPhone.
Method #4: Delete Multiple Contacts on Your iPhone
If you don't want to use your computer, there is a way to delete multiple contacts directly from your iOS device, but it requires a third-party app called Cleanup Duplicate Contacts by Business Contacts Solutions.
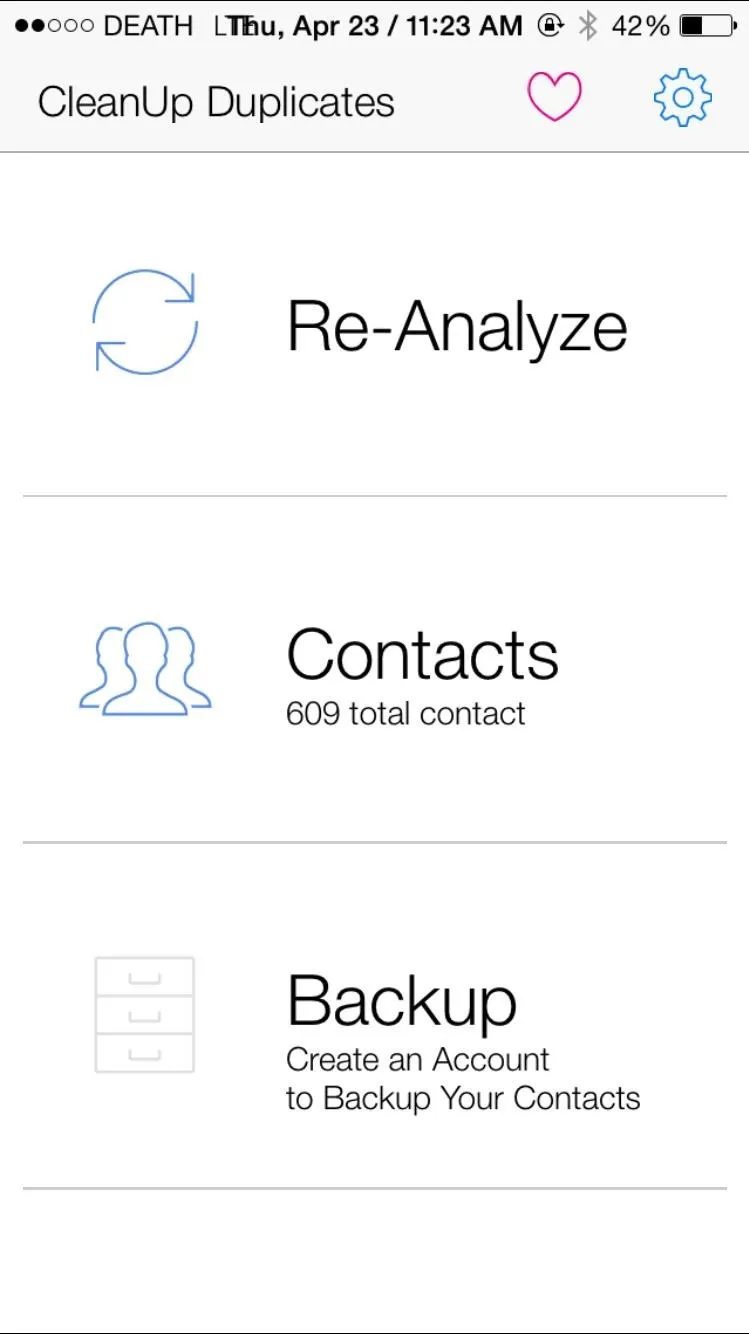
- Open the Cleanup Duplicate Contacts app.
- Go to Contacts to view your entire list.
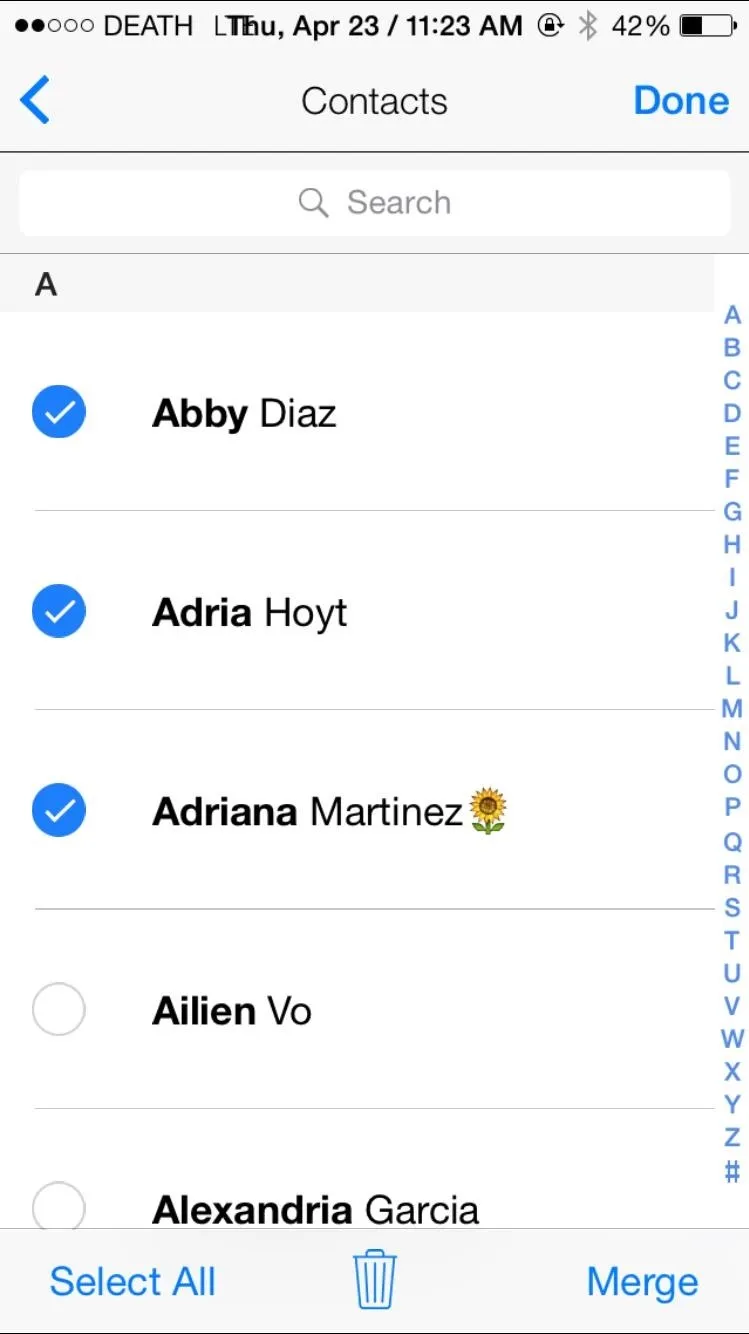
- Select a contact by tapping on the pencil icon in the top right.
- Tap to select the contacts you want to delete.
- Hit the trash can button located at the bottom.


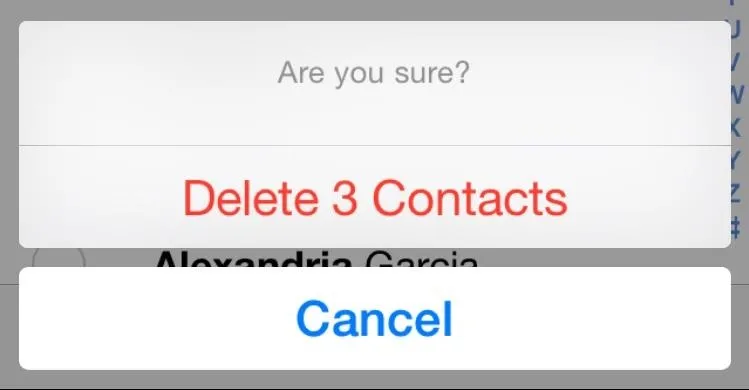
- Confirm by tapping Delete # Contacts on the popup.
How to Delete Facebook Contacts on Your iPhone
If you've signed into the Facebook app on your iPhone, you more than likely have Facebook contacts in your Contacts app. On a contact's info page, you can tell they are from Facebook by the small Facebook icon in the bottom left of the contact's photo.
Infuriatingly enough, you can't delete Facebook contacts from the native Contact app. If you go to a Facebook contact, tap Edit, and scroll down, you won't find the option to delete the contact.
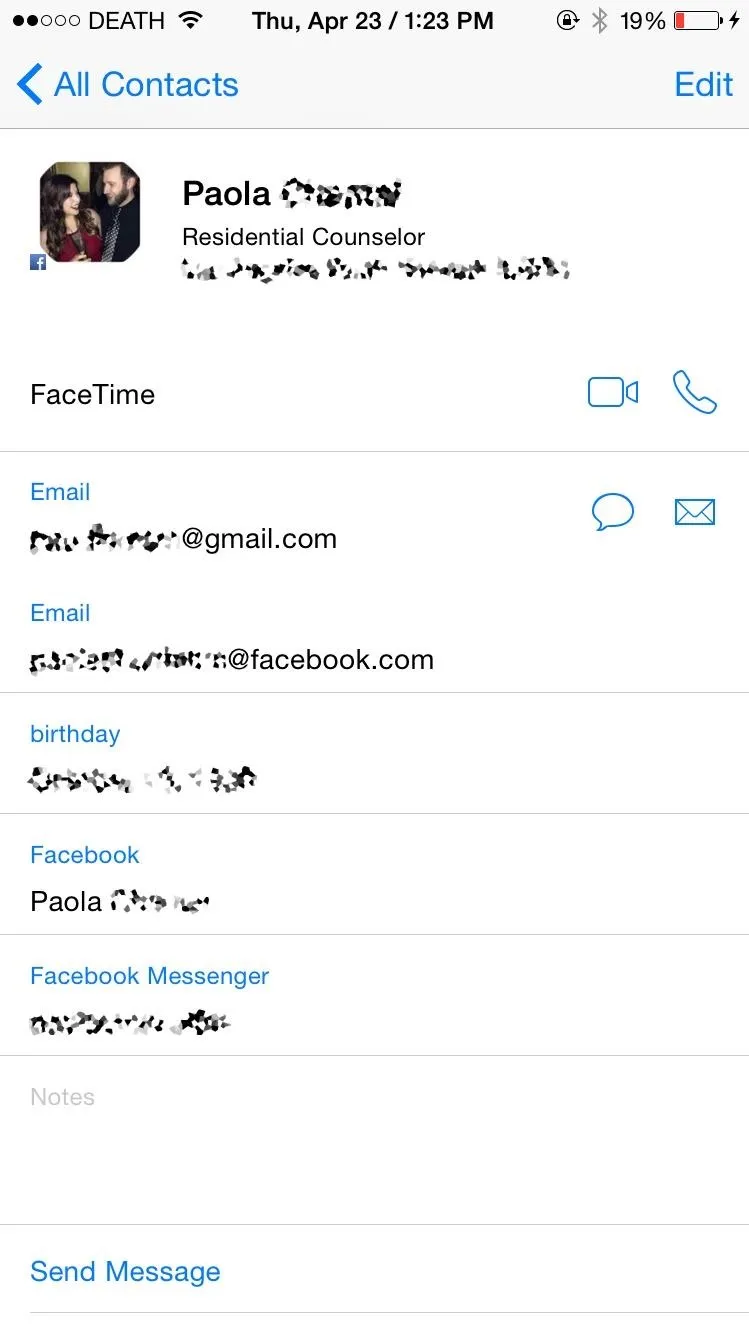
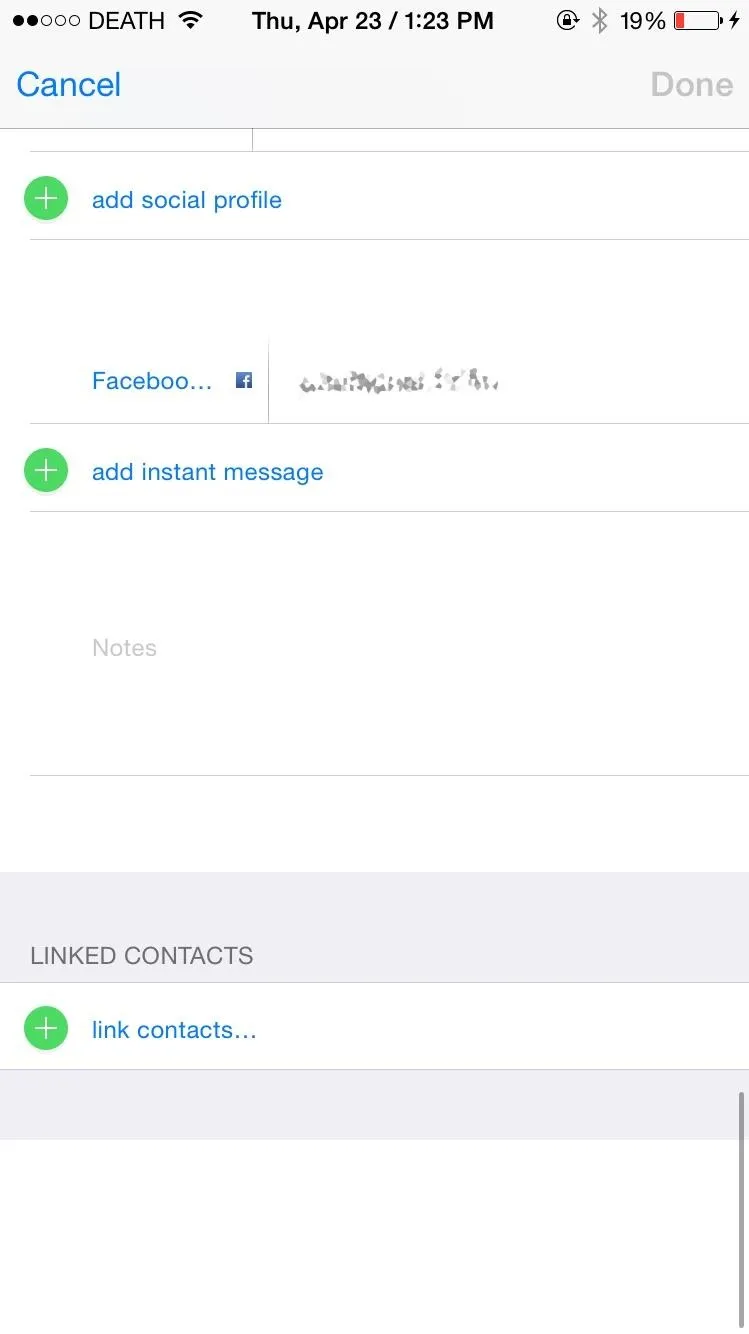


While you can't delete Facebook contacts individually, you can hid all of your Facebook contacts from the Contacts app. There are two ways to do this.
Method #1: Hide Facebook Contacts in the Contacts App
This option will remove them from the main view, but will give you easy access to them should you need it. This method will also work for hiding other contacts groups, such as Gmail, Yahoo, and individual contacts folders for iCloud.
- Open the Contacts app.
- Select the Groups option in the top left.
- Uncheck the All Facebook option.
- Tap on Done.
Method #2: Prevent Facebook Access to the Contacts App
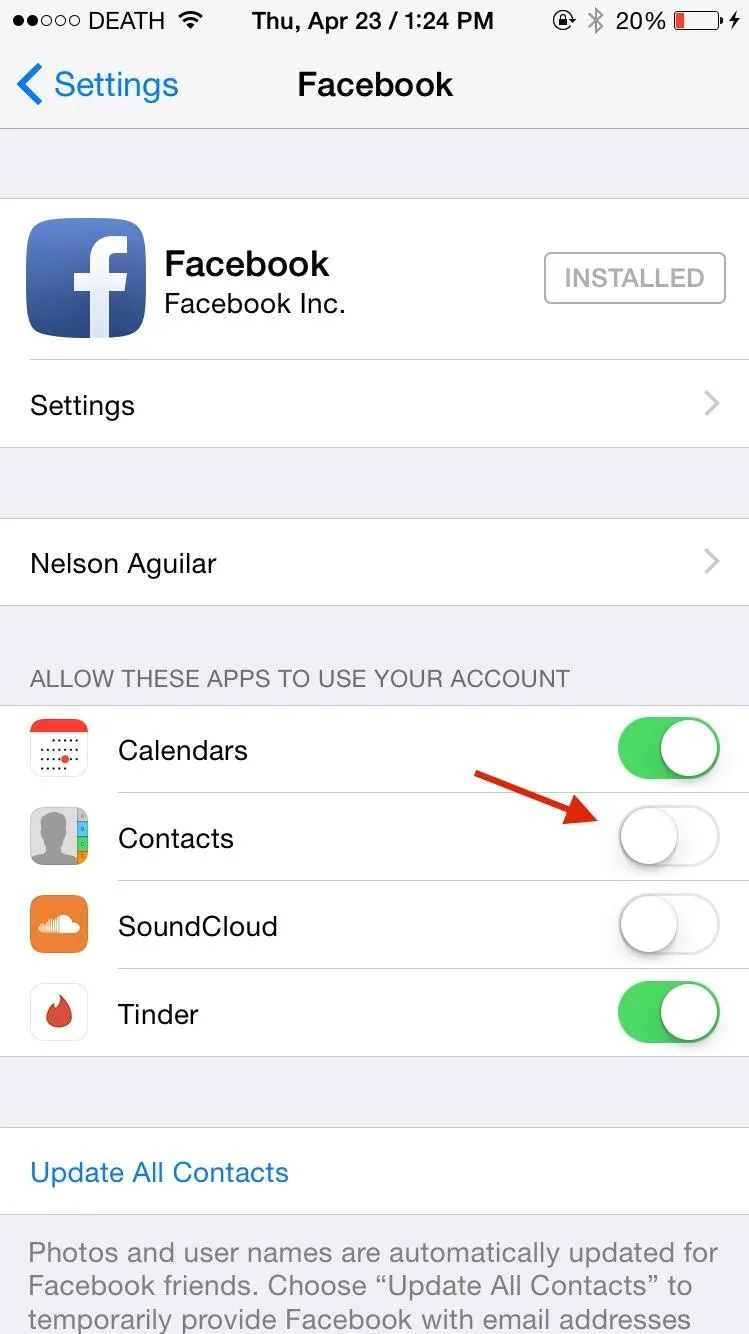
If you know you never want to see your Facebook contacts in the Contacts app, you can disable Facebook access to it.
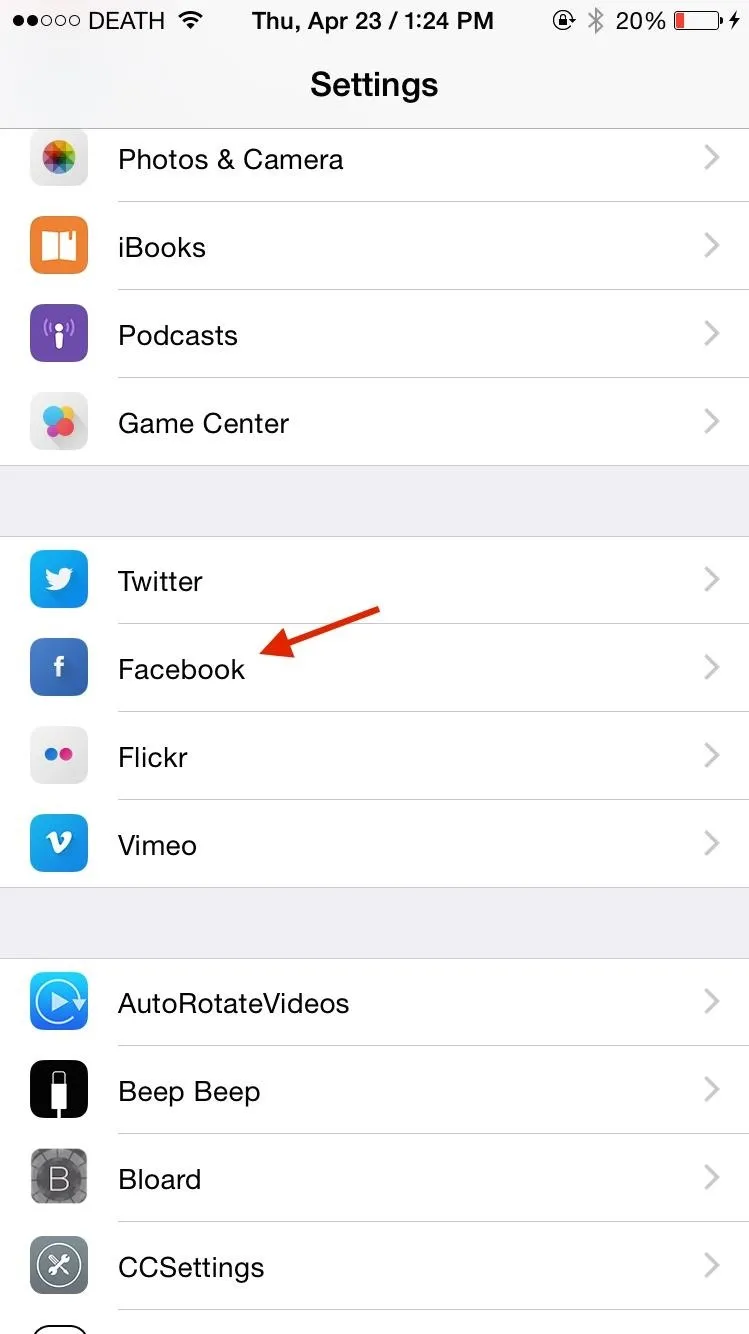
- Open the Settings app.
- Tap on Facebook.
- Toggle off Contacts.


How to Merge Contacts on Your iPhone
Sometimes we add new entries for an existing contact, whether it's because they got a new number, we forgot we already had the contact saved, or because a new entry was added when you merged your contacts with another contact list, like Gmail or Yahoo.
Whatever the reason, you've probably got multiple contacts of the same person that don't need to be on your iPhone. Let's merge those contacts with the methods below.
Method #1: Manually Merge Contacts on Your iPhone
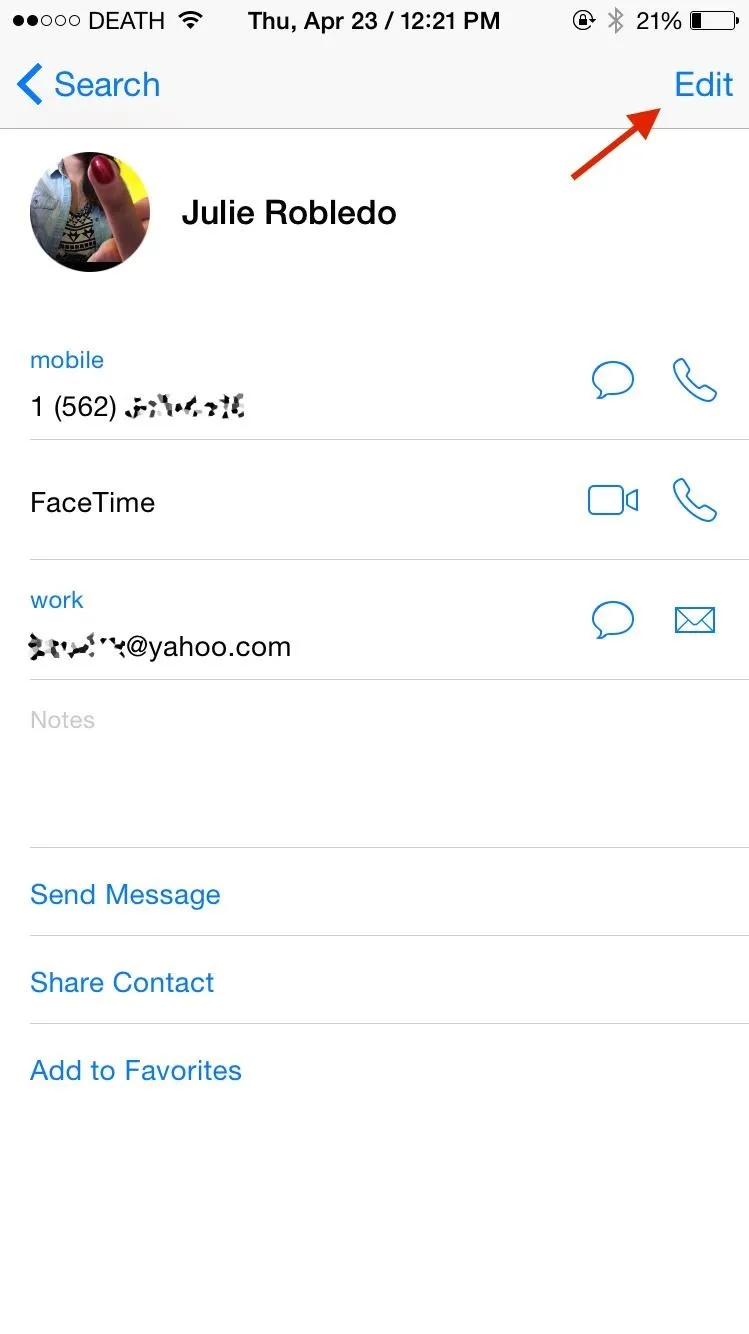
Just like deleting a contact, Apple has a second-rate way of merging contacts natively on your iPhone. I'll be merging the two contacts below, which have different contact information, but are the same person.
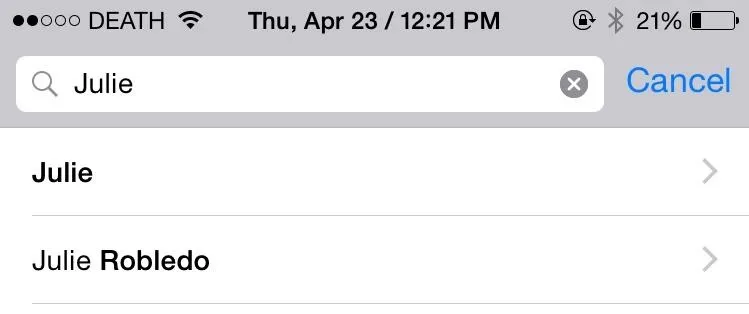
- Open the Contacts app.
- Select the contact that you want to be the main one of the two.
- Tap on Edit.
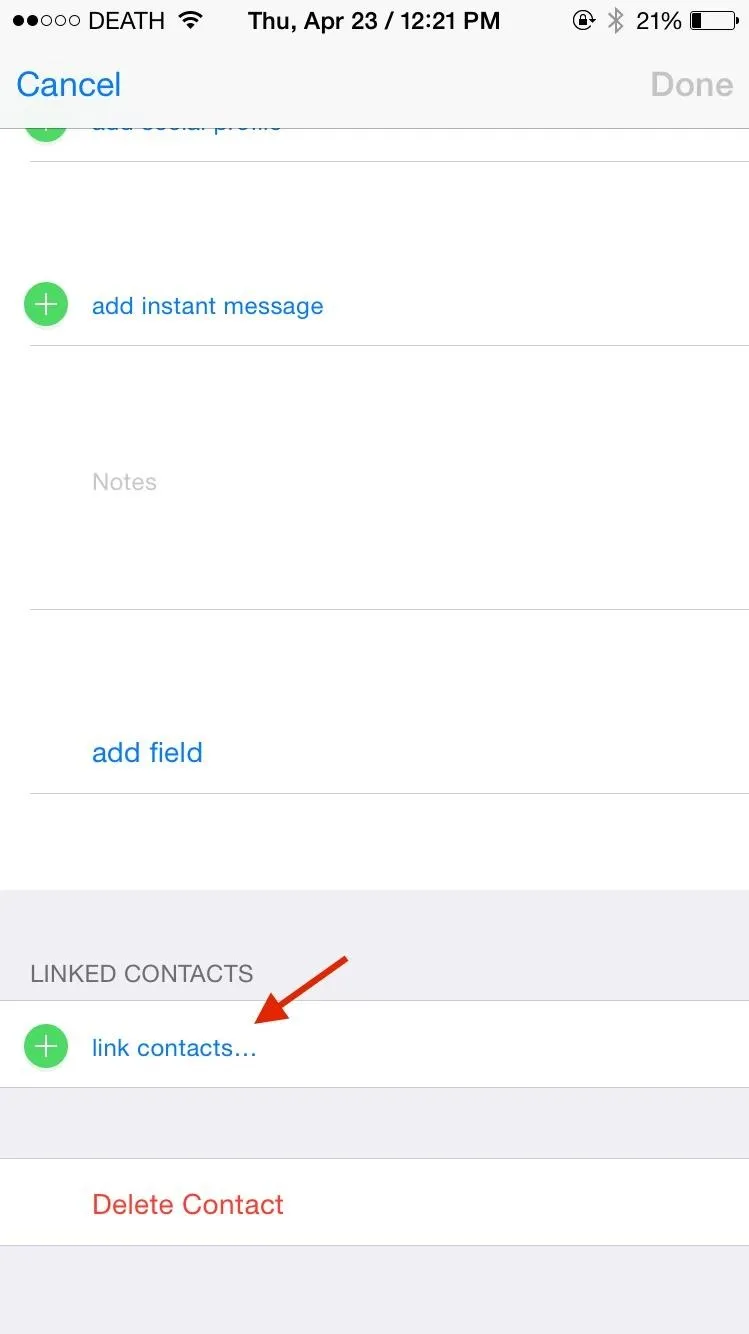
- Scroll down and tap on "link contacts…."


- Select the contact that you want to merge with it.
- Tap on Link in the top right.
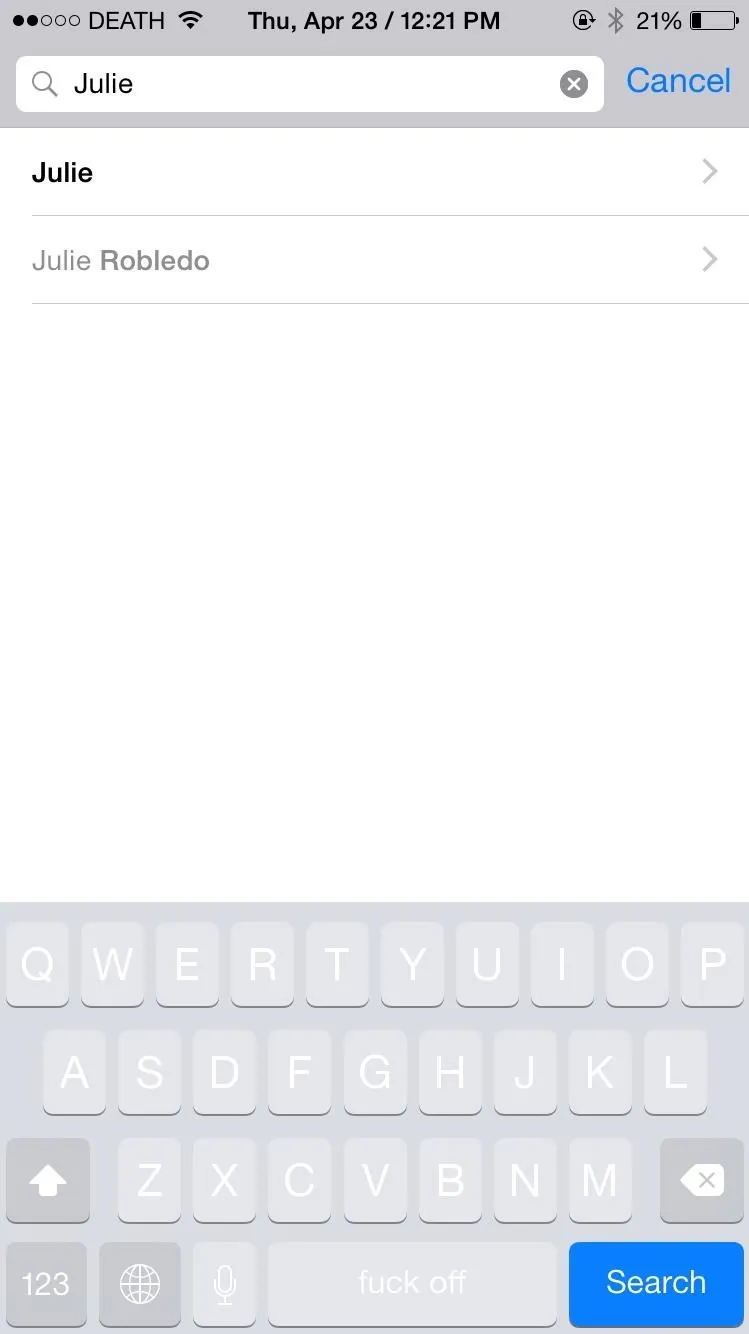



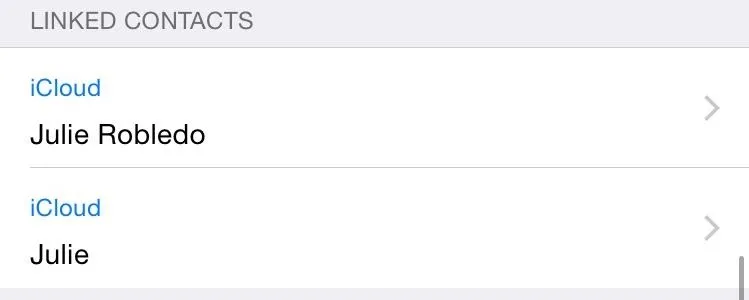
The second contact you linked will now be gone and merged with the first contact. Inside of the main contact, the two contacts will appear underneath the Linked Contacts section.
Method #2: Automatically Merge Contacts on Your iPhone
Cleanup Duplicate Contacts, the app I used earlier in this guide to delete multiple contactse at once, can also be used to automatically merge contacts.
- Open the Cleanup Duplicate Contacts app.
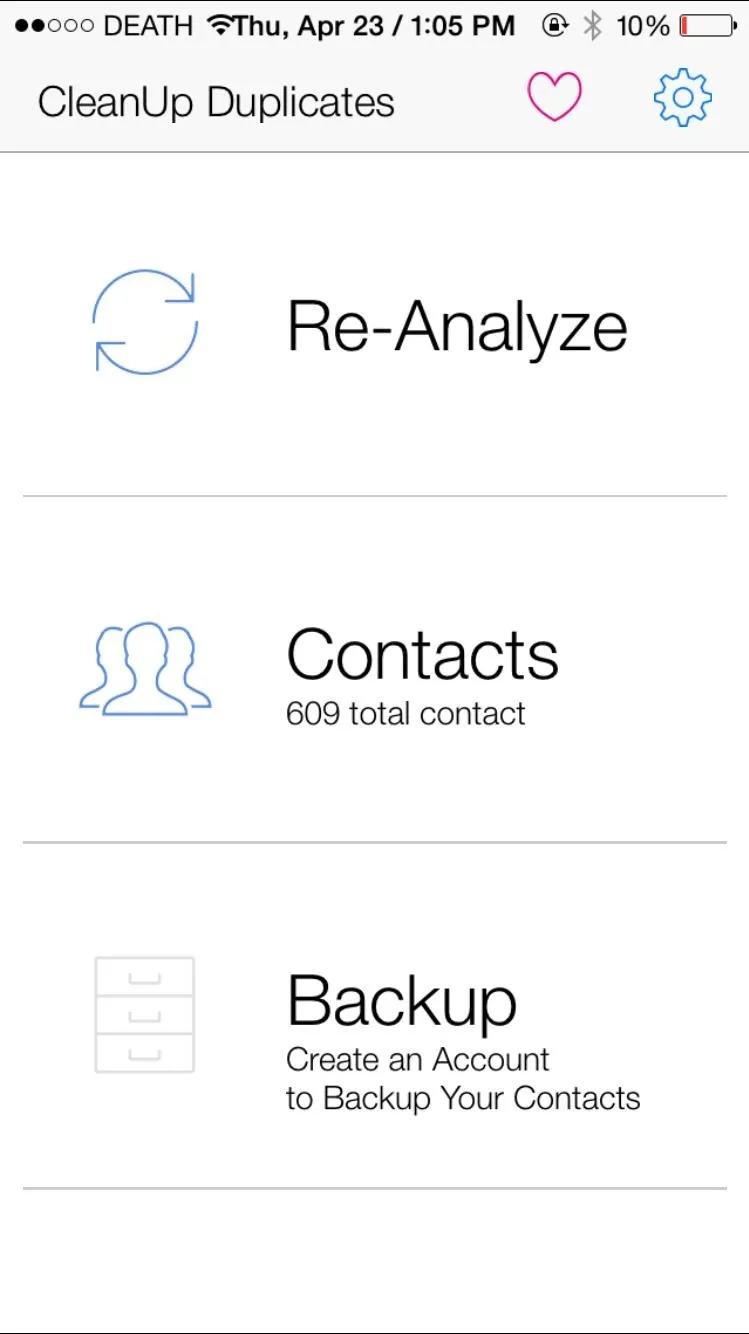
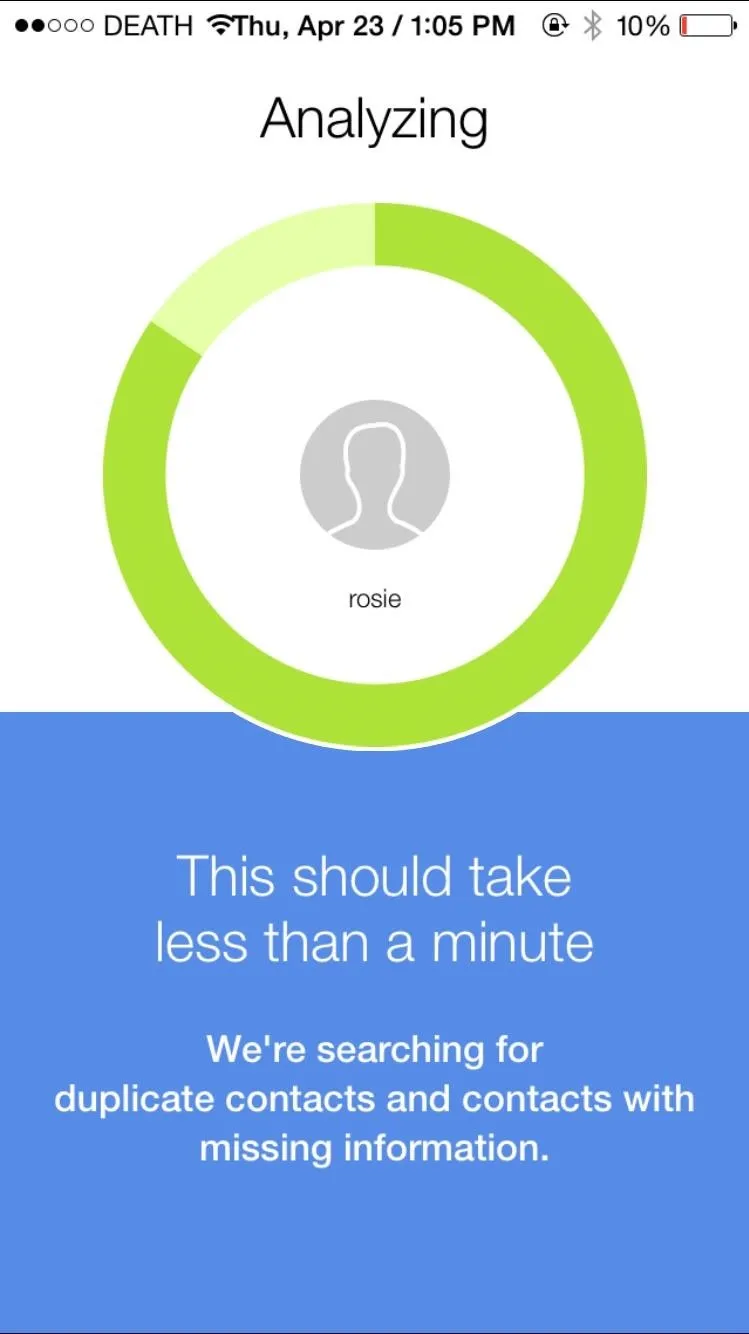
- Tap on Analyze to find all of your contacts. (It says Re-Analyze for me because I've already done it once.)


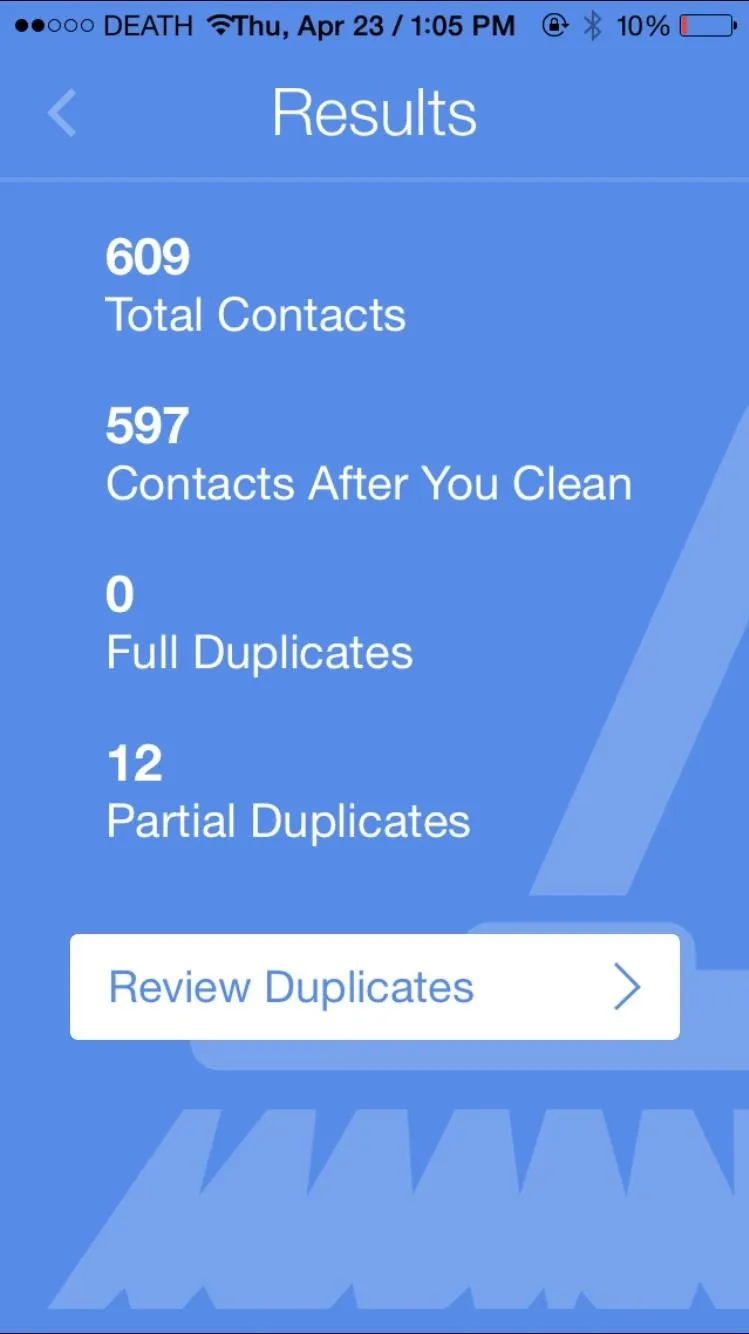
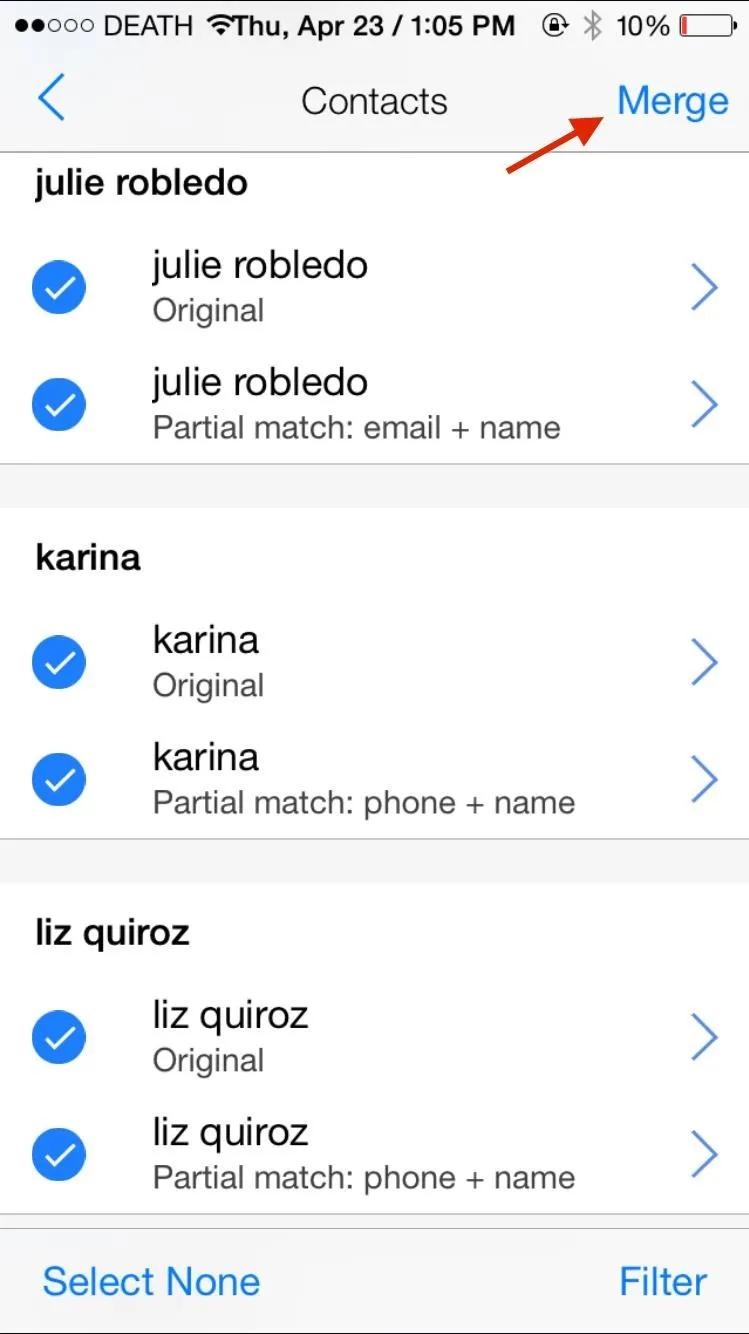
- Results will appear, showing the amount of total contacts, as well as any full duplicates (identical information) and partial duplicates (some information shared).
- Select Review Duplicates to see contact names and why they match (shared email address, number, home address, first name, etc.).
- Uncheck any that you do not want to merge.
- Select the Merge option the top right.


Method #3: Automatically Merge Contacts from Your Mac
Finally, we've got Scrubly, an application that allows you to perform a deep cleanse on your contacts to automatically merge contacts. Note that this app is free for up to 250 contacts; if you have more than that, you'll need to pay $20.
- Go to the Scrubly site and click on the Try It Free button.
- Create a Scrubly account.
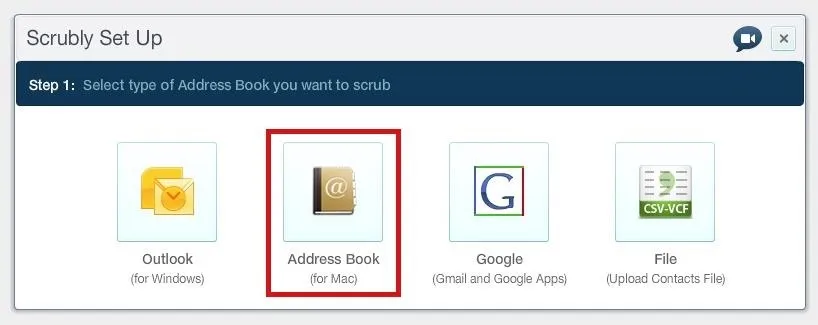
- Select the Address Book (for Mac) option.
- Give it a name and download the Mac client to your computer.
- Grant access to your contacts; your contacts will upload to your Scrubly account.
- You'll then be redirected back to the online client of Scrubly to choose between an Express Scrub and Deep Scrub. If you choose Express Scrub, it only takes a few seconds and combines only a few contacts. If you choose Deep Scrub, it will take longer and requires your involvement, but merges more contacts together. I'll be going over Deep Scrub below.

- After selecting Deep Scrub, choose options such as scrubbing for contacts with company names, contacts with phonetic name matches (John and Jon), contacts with matching addresses, and more.
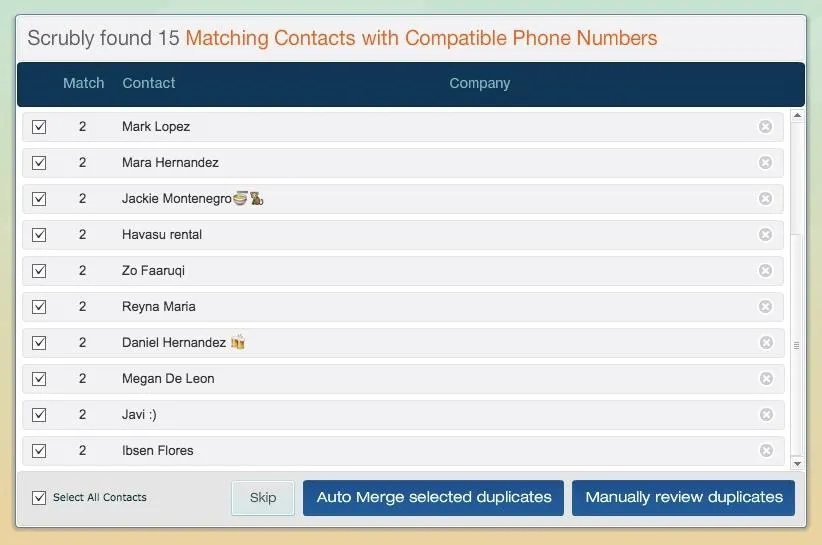
- Deselect any contacts you don't want to merge, then select Auto Merge selected contacts. You can also choose Manually review duplicates if you're not sure.
- Optional: You can connect your Facebook and Twitter accounts and have information added to your existing contacts, such as birthdays, locations, employment, and more.
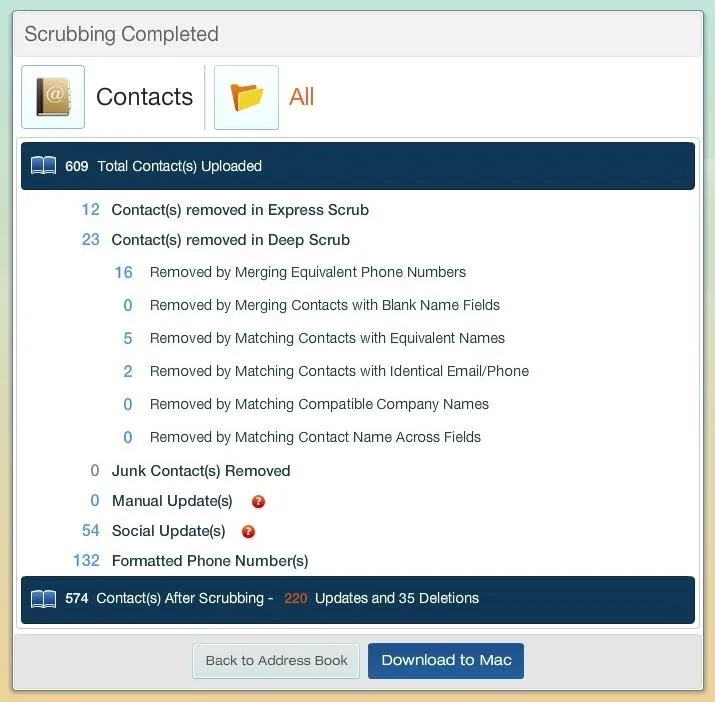
- When the cleanse is finished, you'll be able to see how many contacts were updated, merged, and deleted.
- Download your new contact list to your computer and the Mac client will then ask if you want to replace your existing contacts with your new clean one.
- Hit Apply and your contact list will update on your computer, as well as on your iPhone after a few minutes.
Enjoy Your Organized iPhone Contacts
Now your iPhone should have a list of completely organized contacts, with all the ones you wanted gone deleted and all the multiple entries merged into one. Are there any other apps out there that you use to solve the issue of messy contacts? Let us know in the comments below!
Follow Apple Hacks on Facebook and Twitter, or Gadget Hacks over on Facebook, Google+, and Twitter, for more Apple news, apps, and tips.


Comments
Be the first, drop a comment!