You hand your iPhone to a friend to show them a picture. What happens? They swipe. Left, right, it doesn't matter. You don't remember what lies in either direction of the photo in question, and you don't want anything compromising exposed to the unassuming viewer. Luckily, Apple includes a safety net in iOS to prevent this scenario from ever happening, so long as you set it up ahead of time.
The setting is called "Guided Access," and offers users a surprising level of control over iOS and their iPhone. With this Accessibility setting, you can choose whether or not the Sleep/Wake button, Volume buttons, iOS motions, keyboards, or touch response functions in a given app. While all of these options have their place one way or another, the latter is what enables you to block users from moving away from the one photo in question.
Enable Guided Access
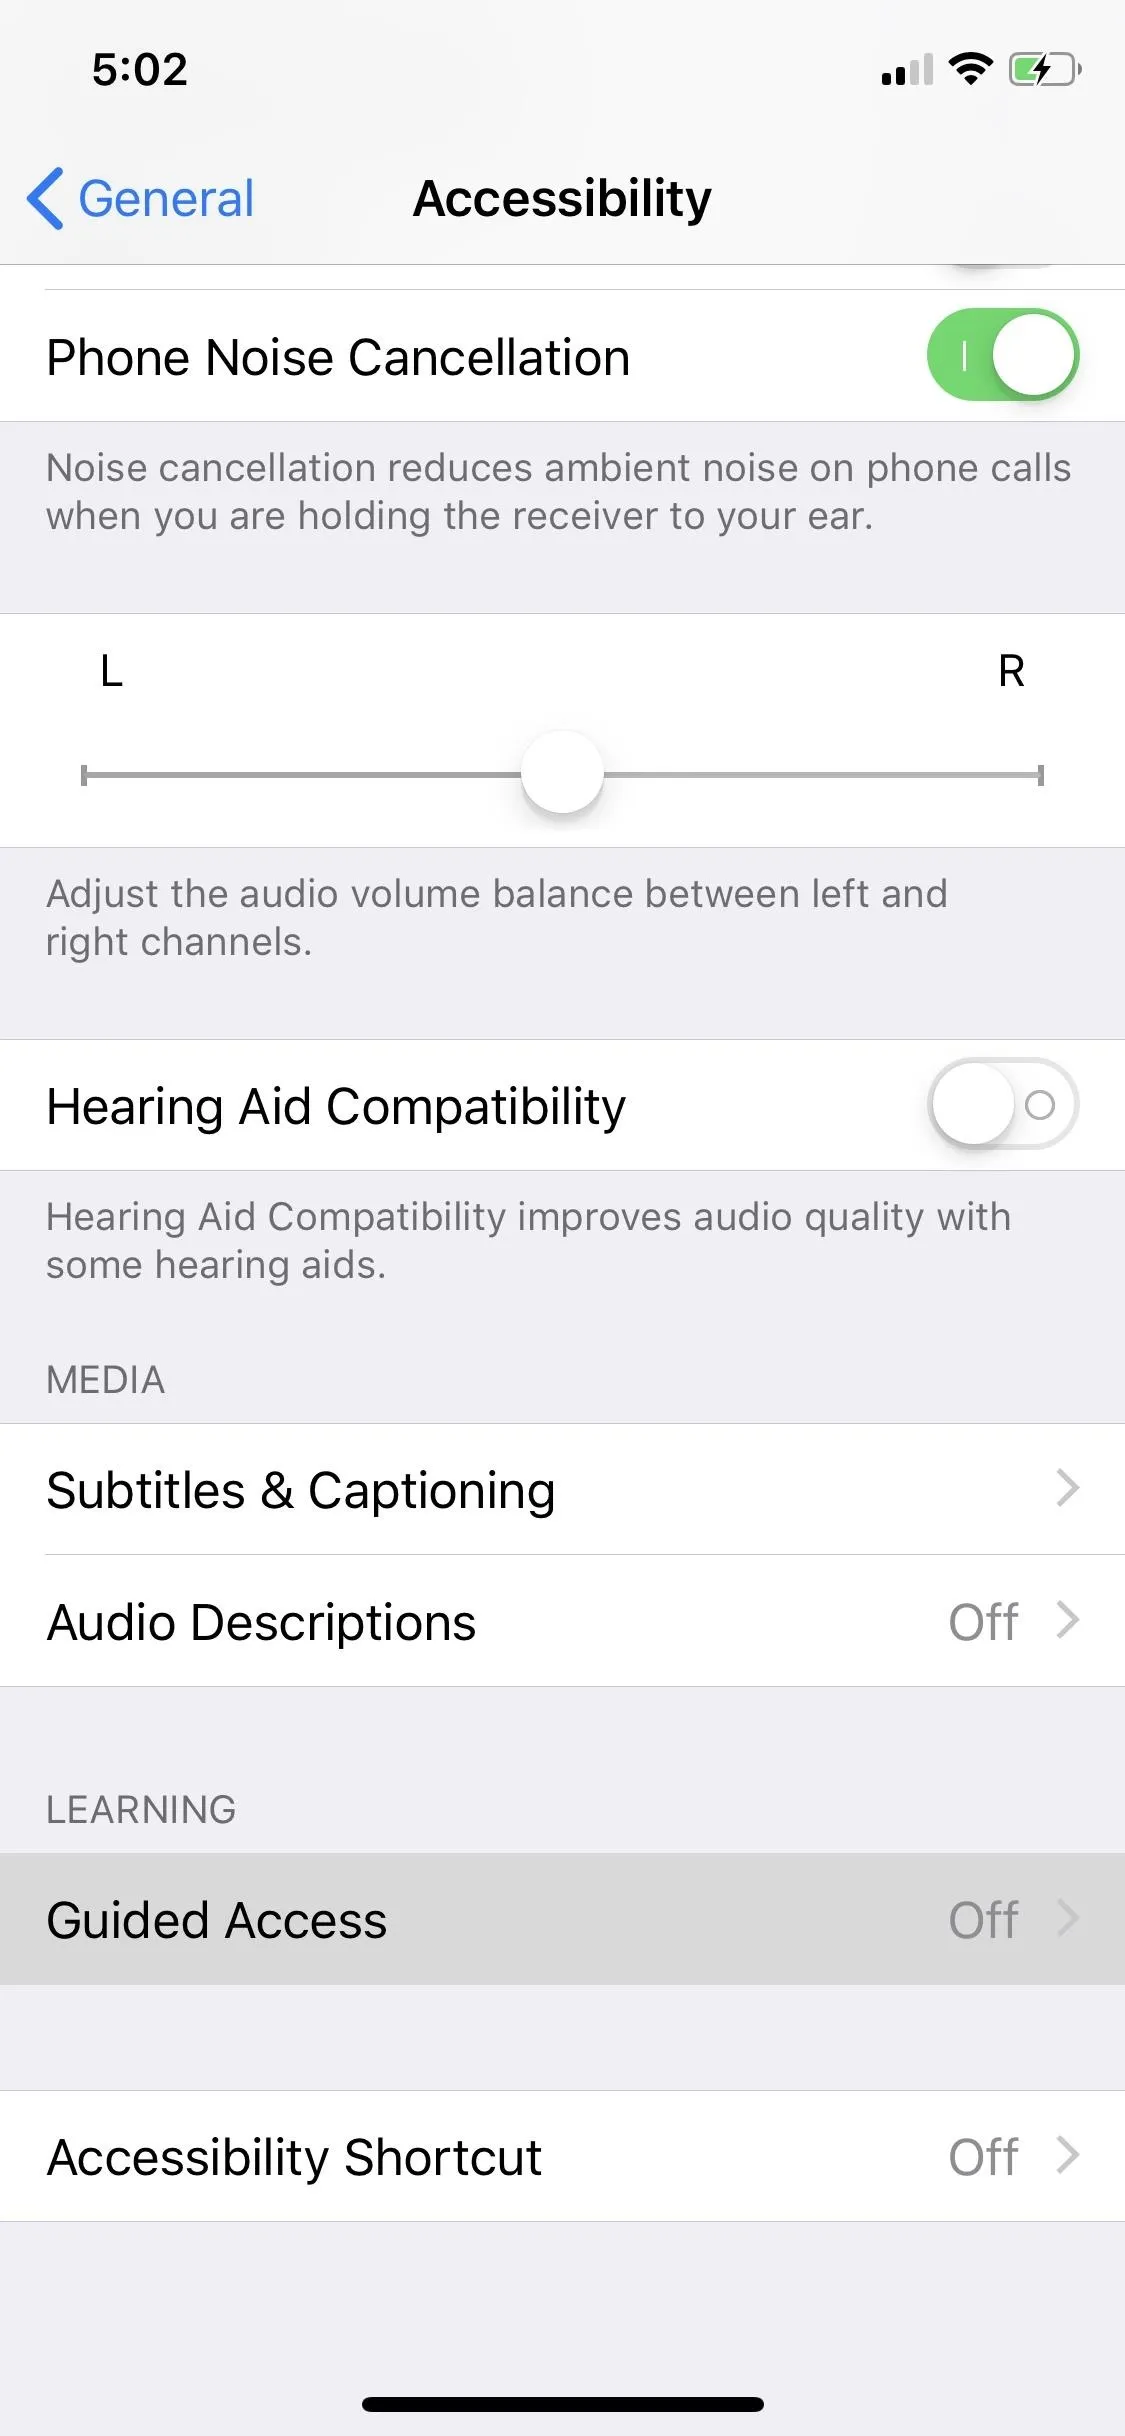
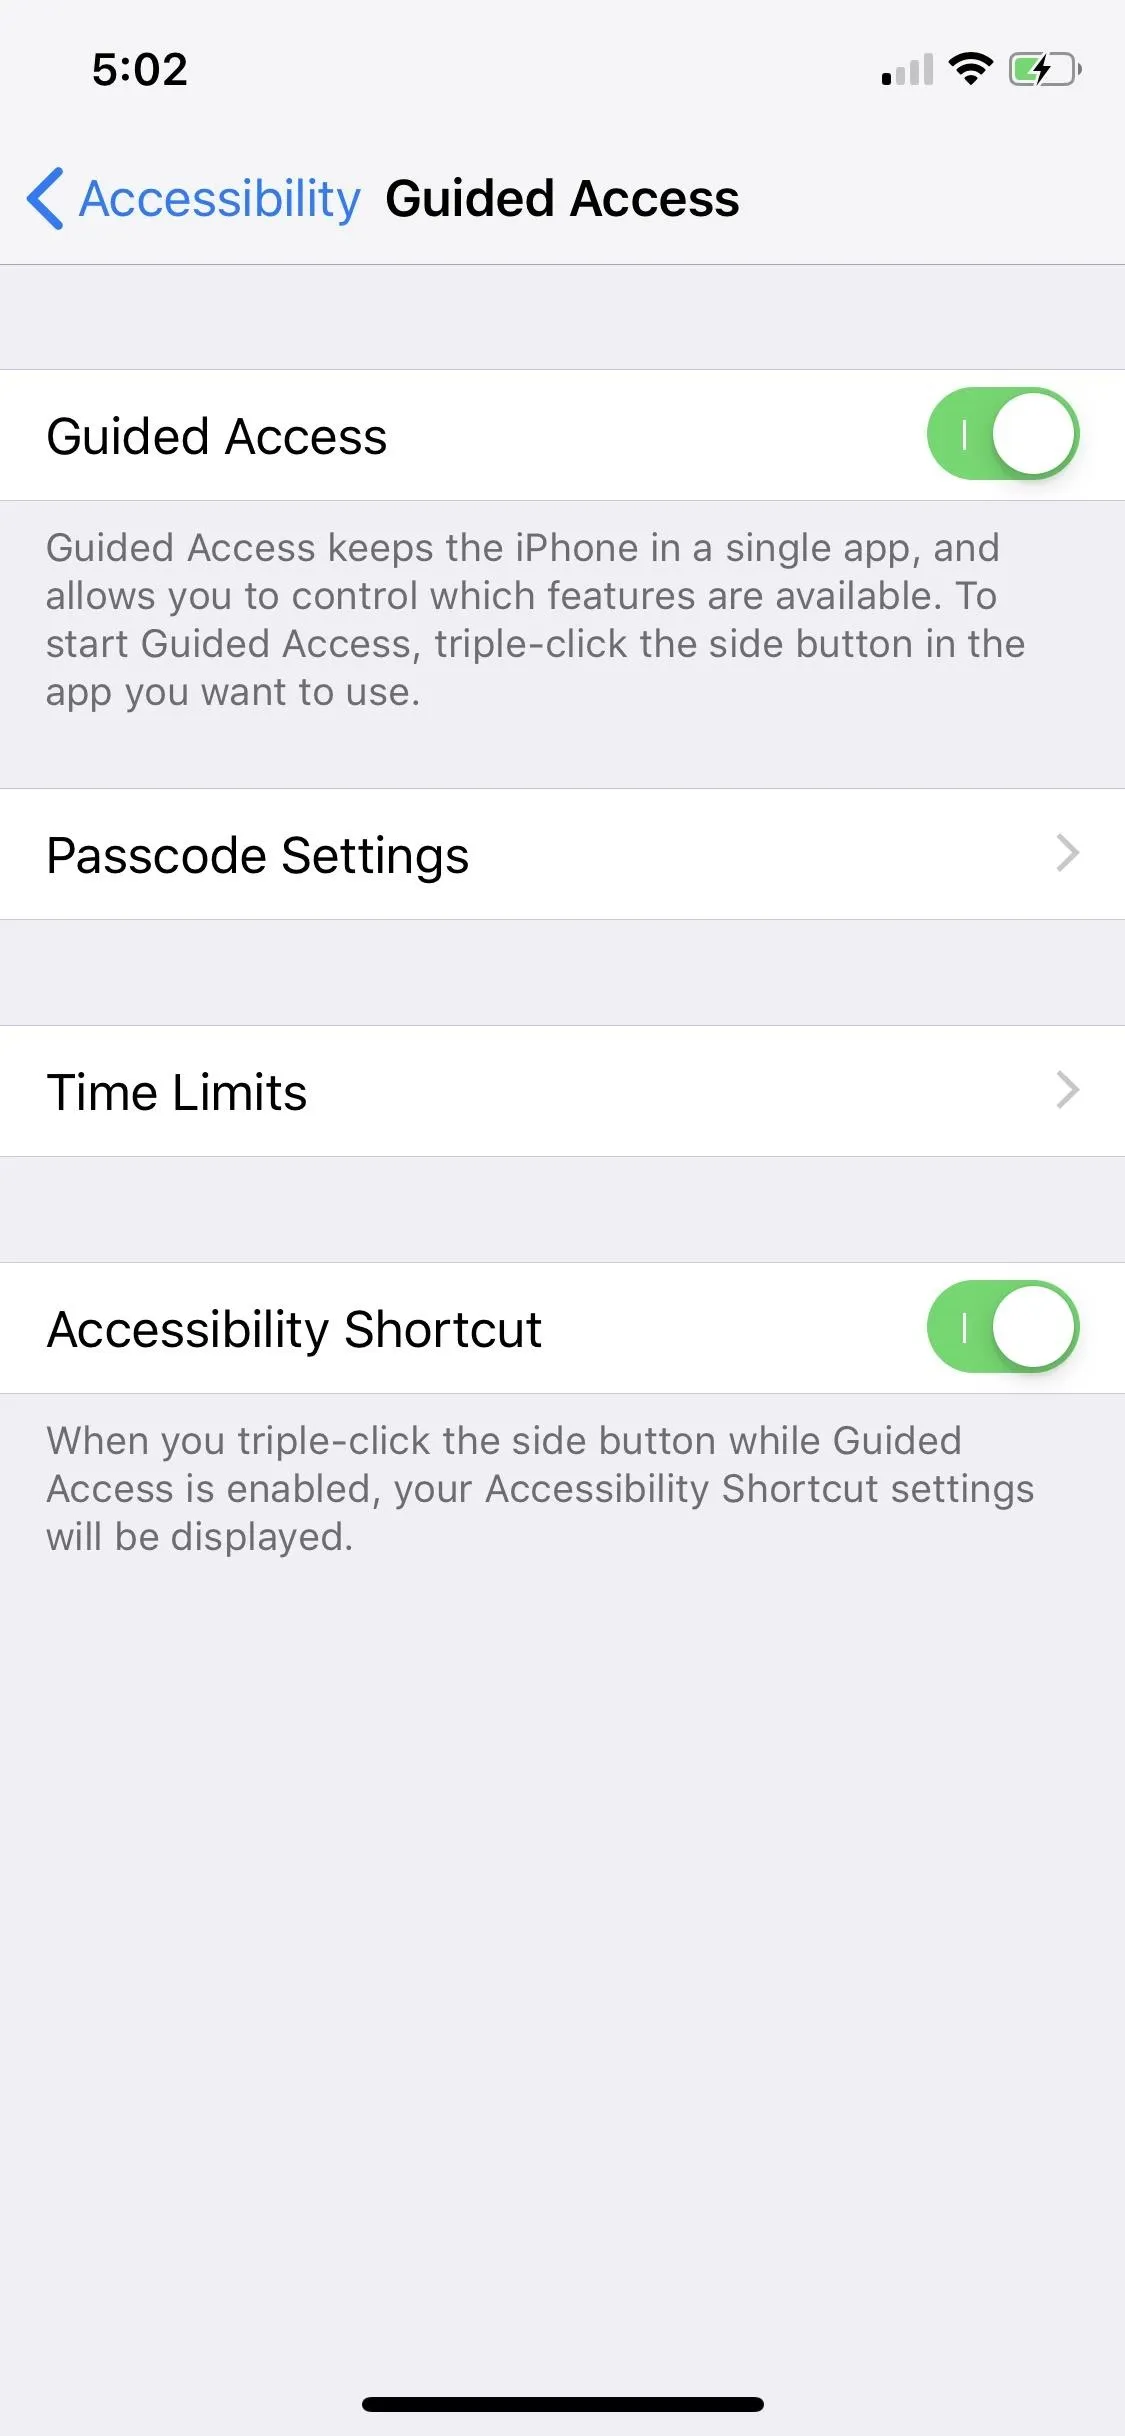
Go to "Settings" -> "General" -> "Accessibility" and scroll down until you find "Guided Access." In the Guided Access settings, enable the "Guided Access" toggle. This setting will allow you to control which features are available in a single application, like the Camera Roll.
You can move on to Step 2 from here, however, there are additional settings you can configure before you try out Guided Access. While iOS will make you set up a Guided Access passcode the first time you use it, you can choose a passcode ahead of time by tapping "Passcode Settings," then "Set Guided Access Passcode." Enter a passcode, then enter it again to confirm. You can also use Face ID or Touch ID with Guided Access by enabling the "Face ID" or "Touch ID" slider.
If you have other Accessibility Shortcuts enabled, like Smart Invert Colors, you can toggle on "Accessibility Shortcut" at the bottom of this page. That way, you can still access them while Guided Access is enabled.



Configure Guided Access
Now that Guided Access is easily accessible, head over to your Camera Roll and find a picture you want to show someone. Triple-click the Home button or Side button and wait for the Guided Access window to pop up.
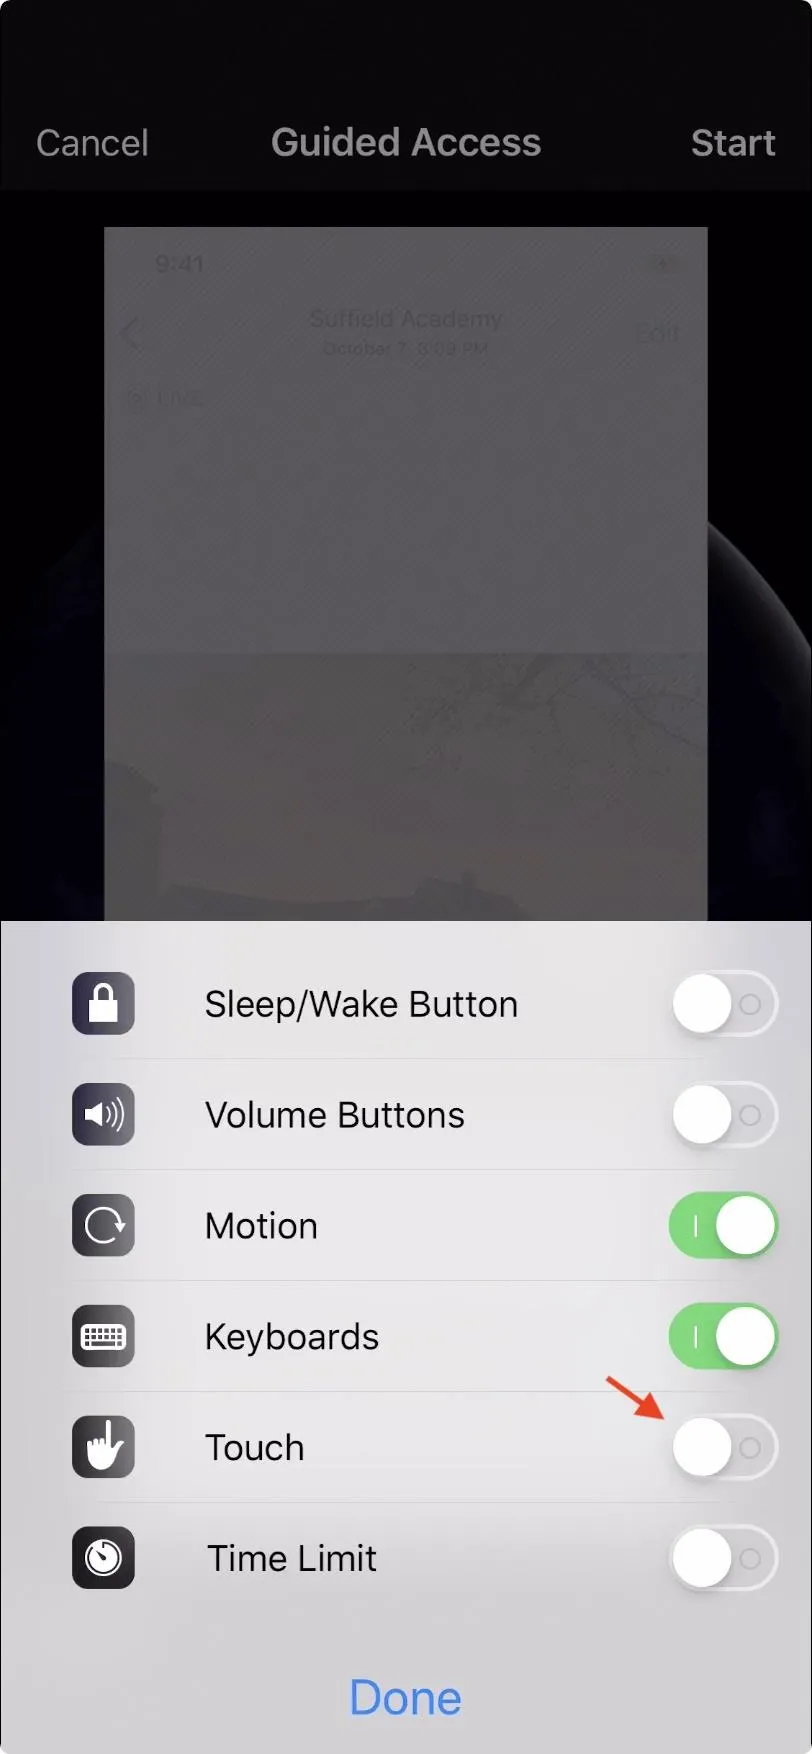
At the bottom-right of the Guided Access window, select "Options." Switch the "Touch" setting off in order to disable any sort of screen touches or swipes. Select "Done" and tap "Start" at the top-right corner.



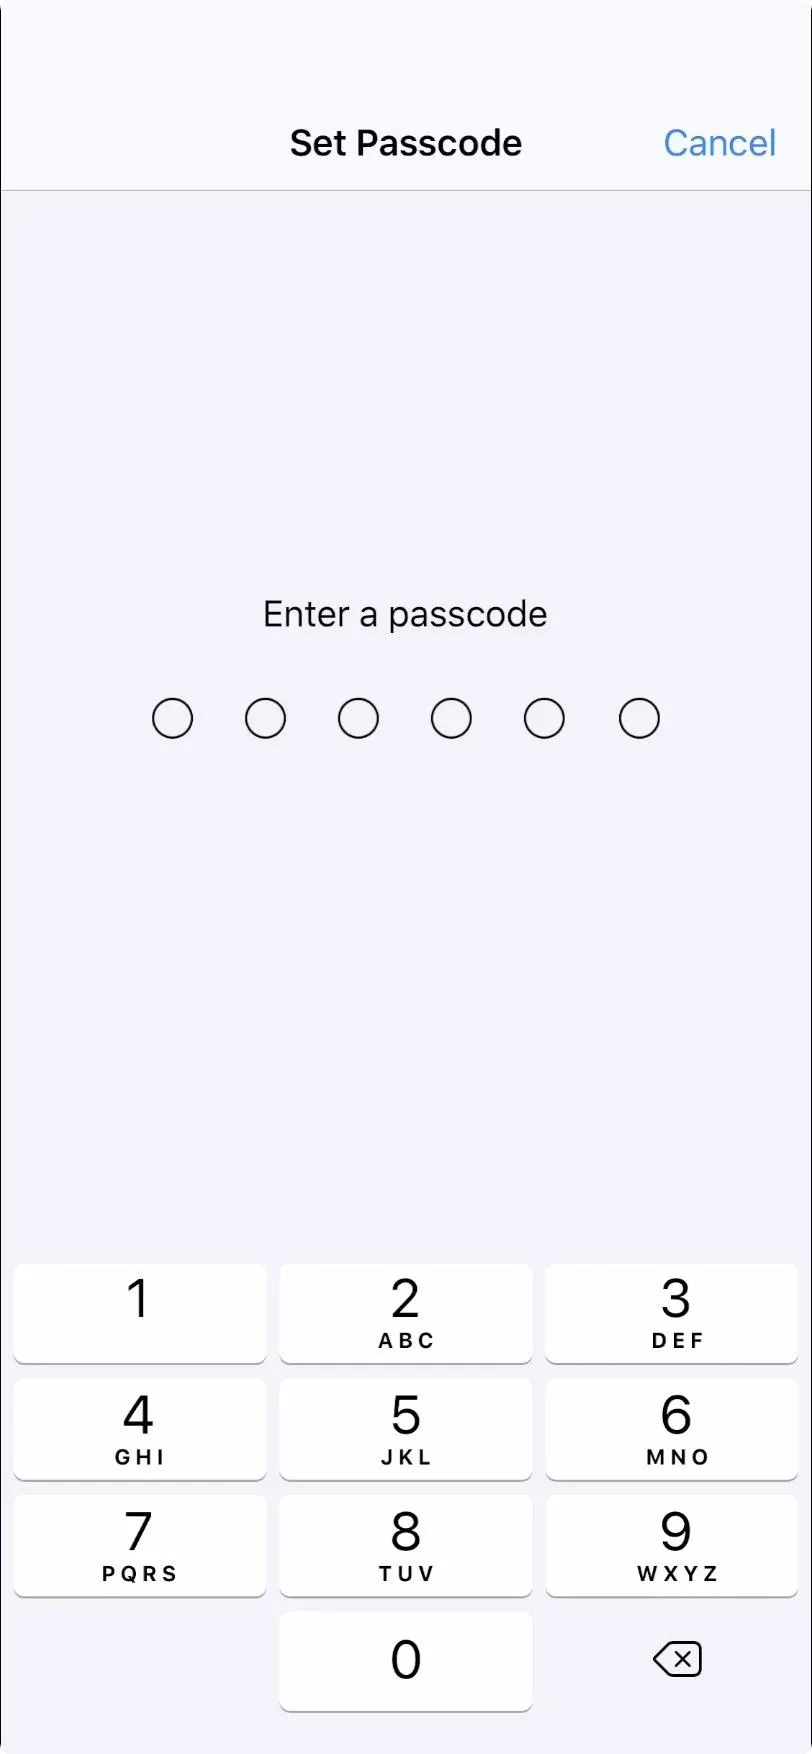
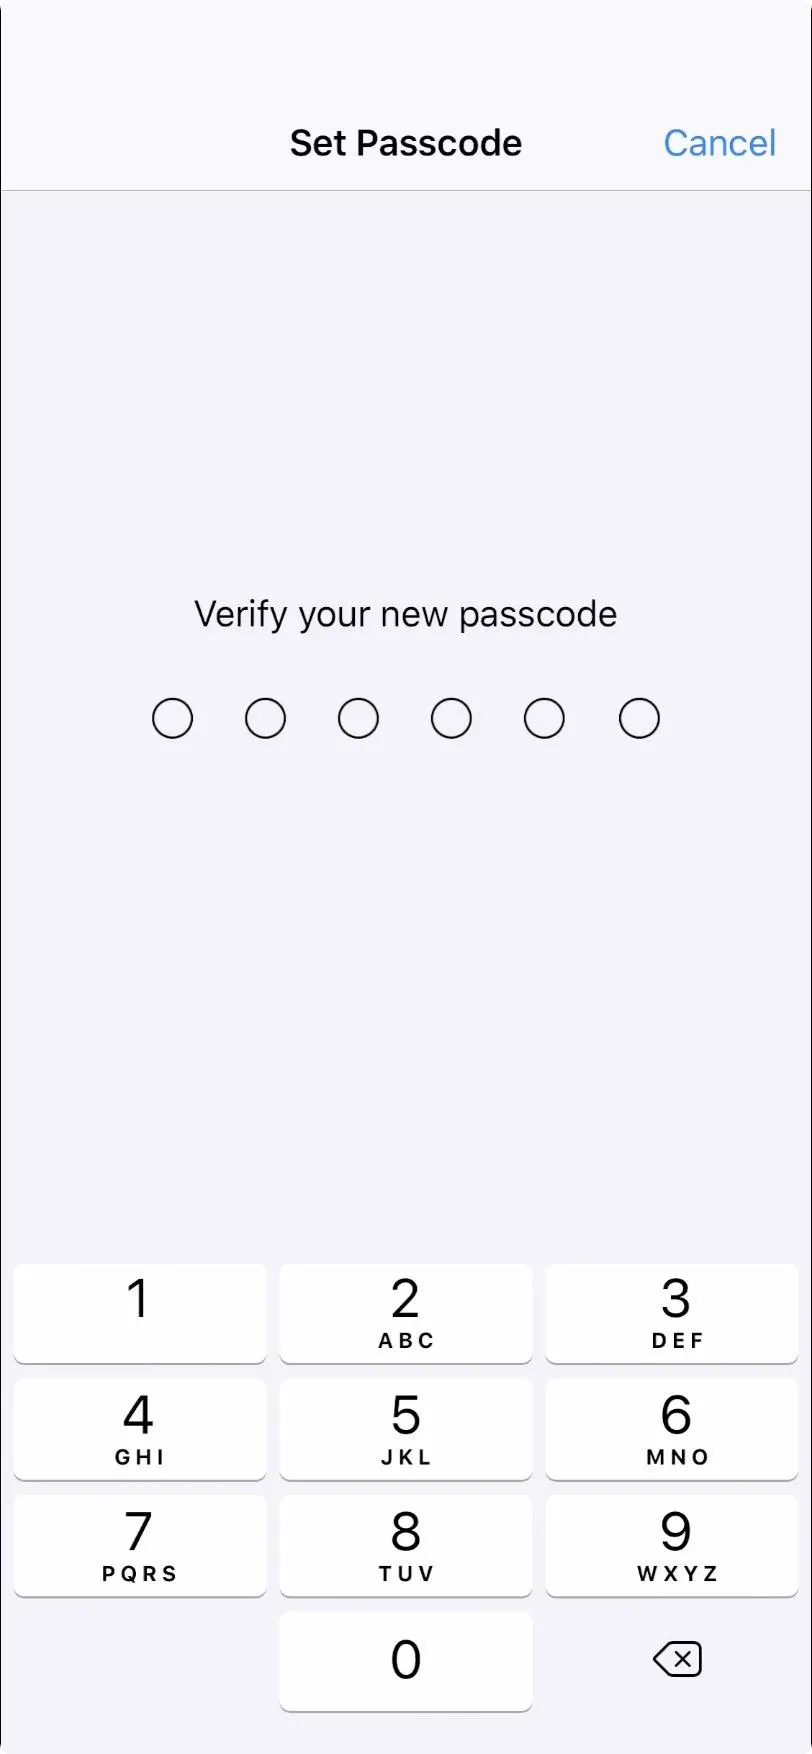
Now you'll need to enter a passcode, which you'll use later to disable Guided Access. If you already set up your passcode in Step 1, you won't see this option here. Enter your passcode twice and a short-lived message will then appear saying "Guided Access Started / Triple-click the side button to exit."
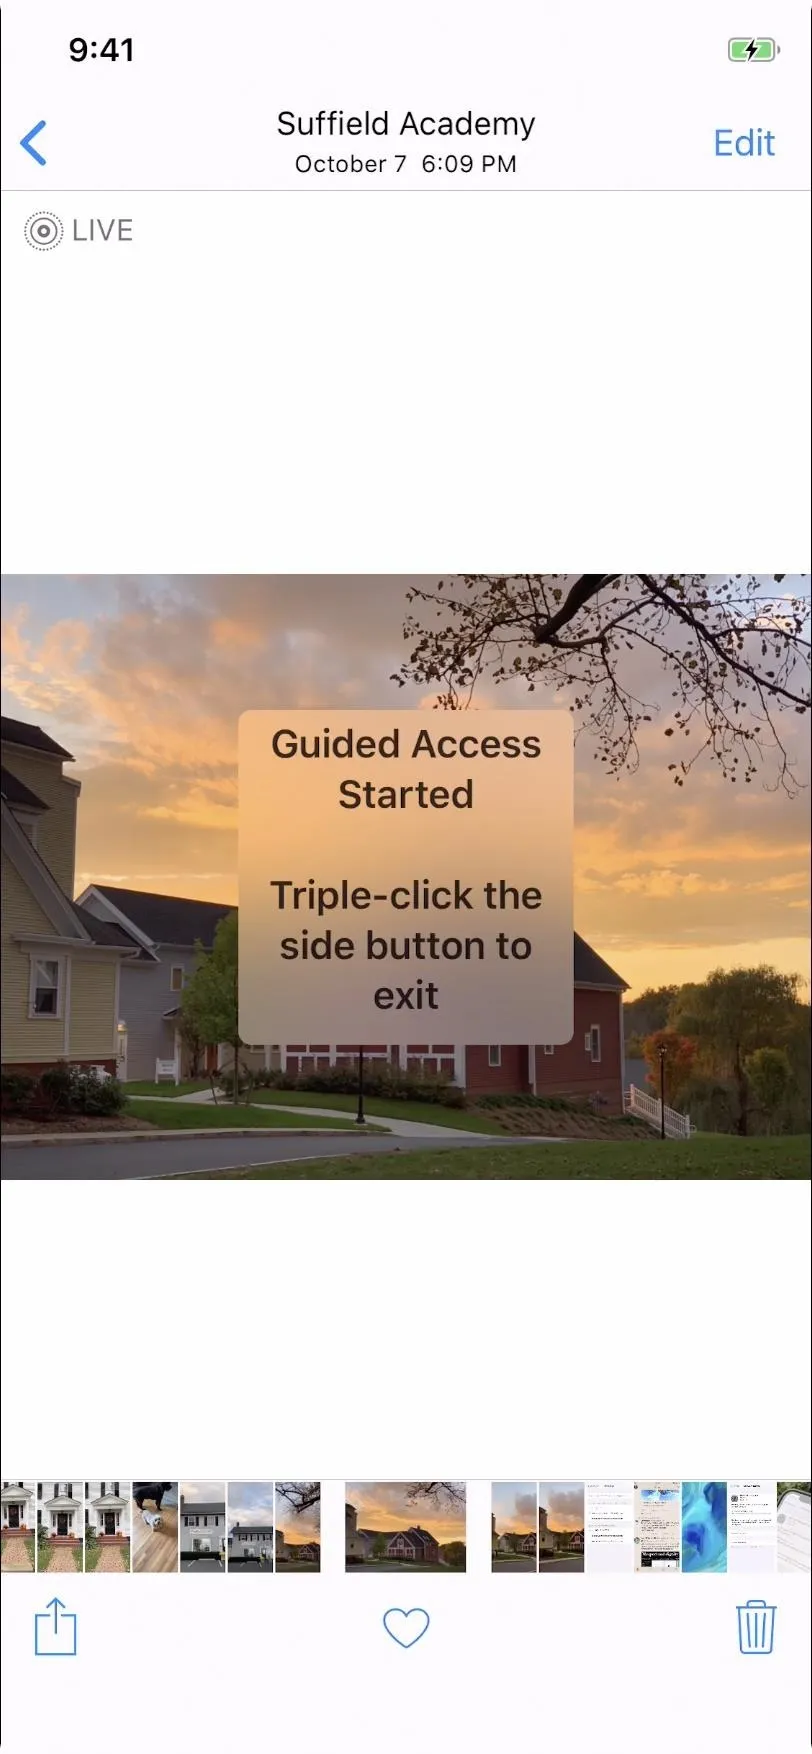


Now hand your phone over to your friend or family member and watch them try and swipe left or right to no avail.
Disable Guided Access
Once you have your phone back comfortably in your hands, it's time to disable Guided Access. Once again, triple-click the Side button or Home button, which will bring up the "Enter Passcode" screen. Enter the passcode you used earlier, which will then take you to the Guided Access window once again.
Tap "End" at the top-left corner and a "Guided Access Ended" window will pop up, indicating that the feature is now disabled.
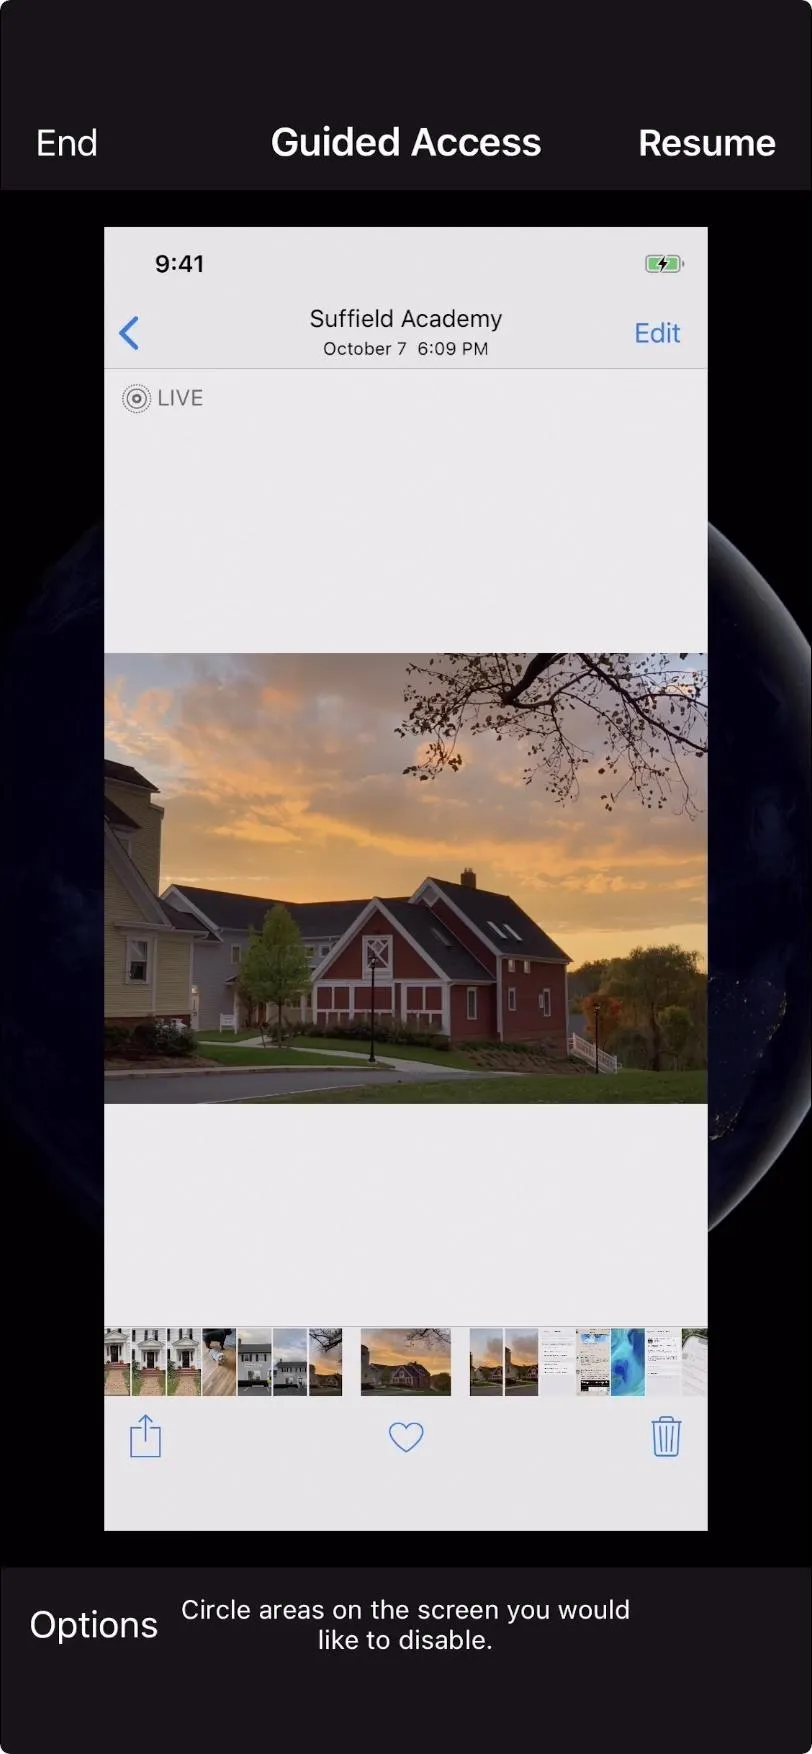



If you want to quickly disable Guided Access, with no option screen, make sure "Touch ID" or "Face ID" is enabled (Step 1). Then, click the Home button once with a Touch ID-enabled finger, or double-click the Side button to instantly end Guided Access.
Hopefully, this will dissuade your friends and family from trying to look through your photos when handing over your phone. Eventually, you might not even need to enable this feature, conditioning everyone to not be so freaking nosy.
If only.


Comments
Be the first, drop a comment!