Certain contacts on my iPhone have special ringtones so that I know exactly who's calling or texting without looking at my screen (like Adele's "Hello" for all my exes). But when my phone is silenced and tucked away in my pocket, these contact-specific ringtones can't really help me out. Luckily, there's something else that can—custom vibration patterns.
Contact-specific vibration patterns are a great alternative—or companion—to contact-specific ringtones, and they're pretty easy to set up. Watch the video below to see how it's done, or jump below for the written guide.
- Don't Miss: The Guide to Deleting, Merging, & Hiding Contacts
- Don't Miss: How to Hide Apps & Folders Without Jailbreaking
Creating a Vibration Pattern
To create a custom vibration pattern, just go to the Vibration settings on your iPhone. If you don't want to create a custom one, there are a few default Apple vibration patterns you can choose from.
- Settings -> Sounds -> Ringtone -> Vibration -> Create New Vibration
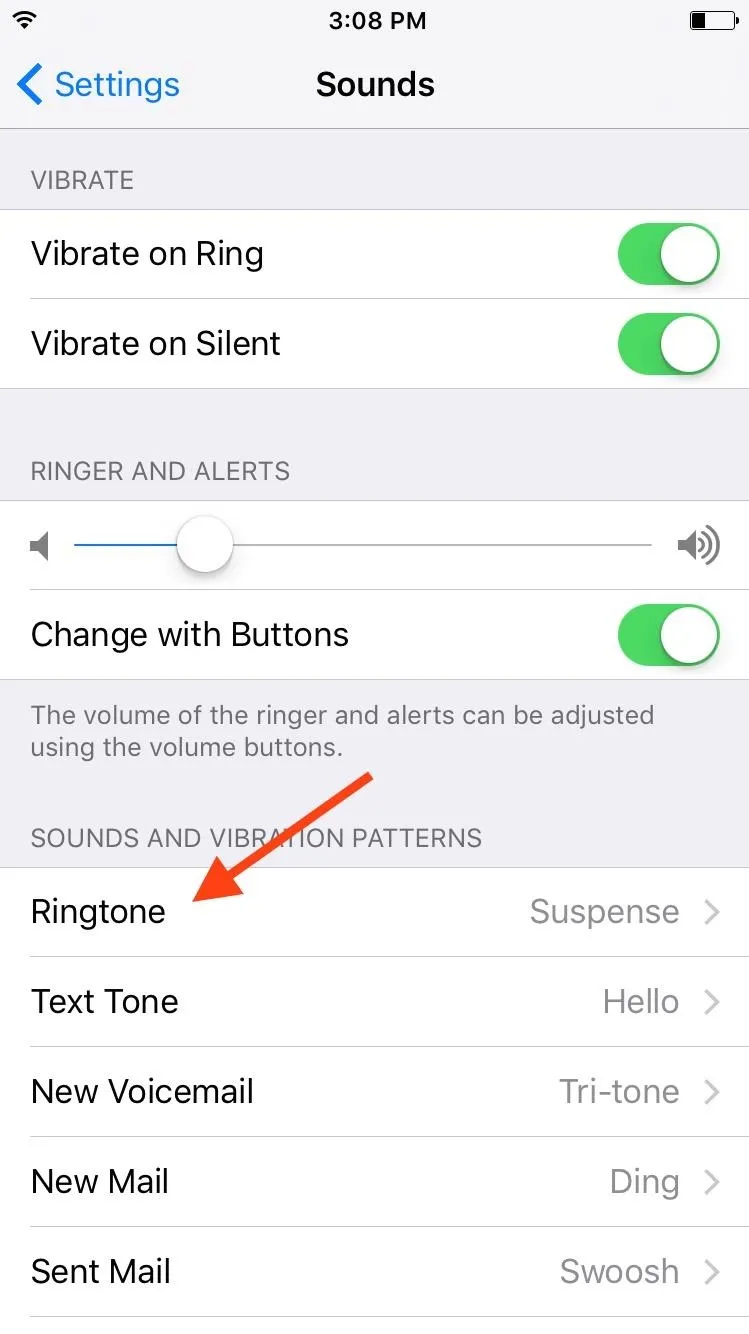
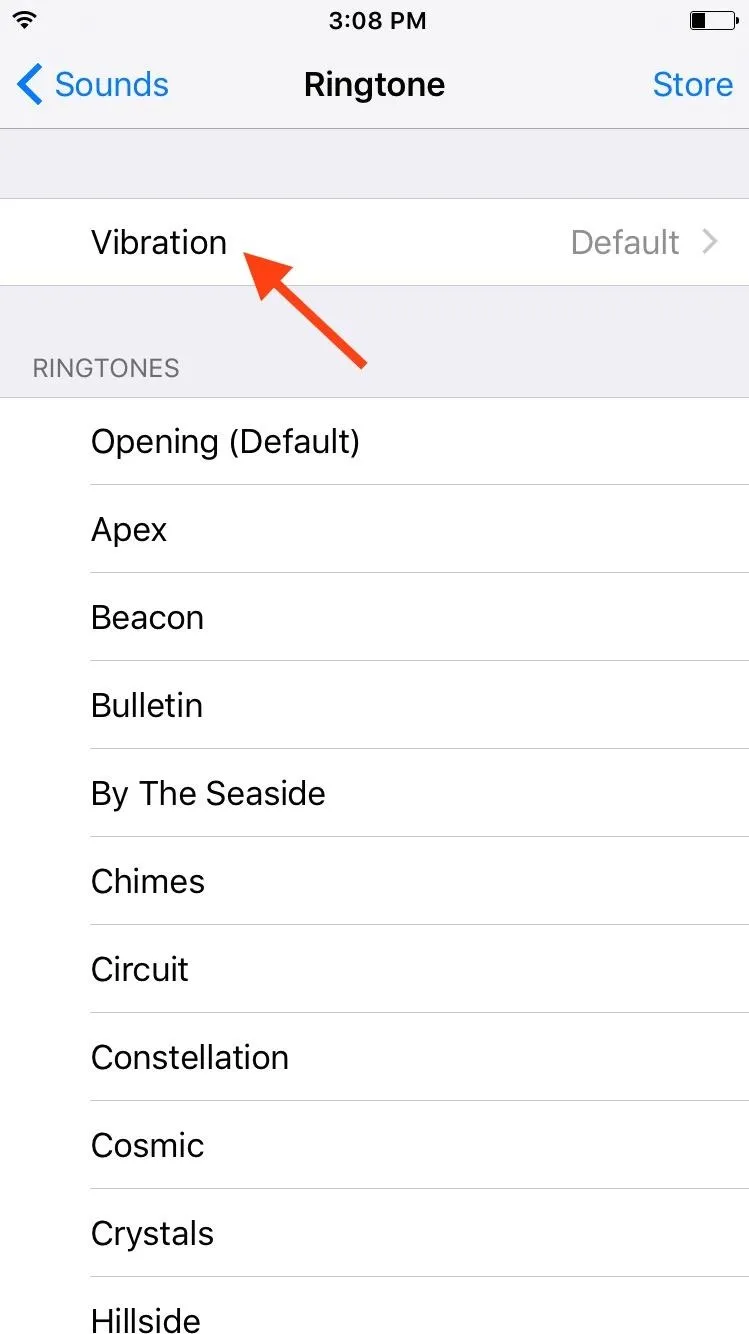
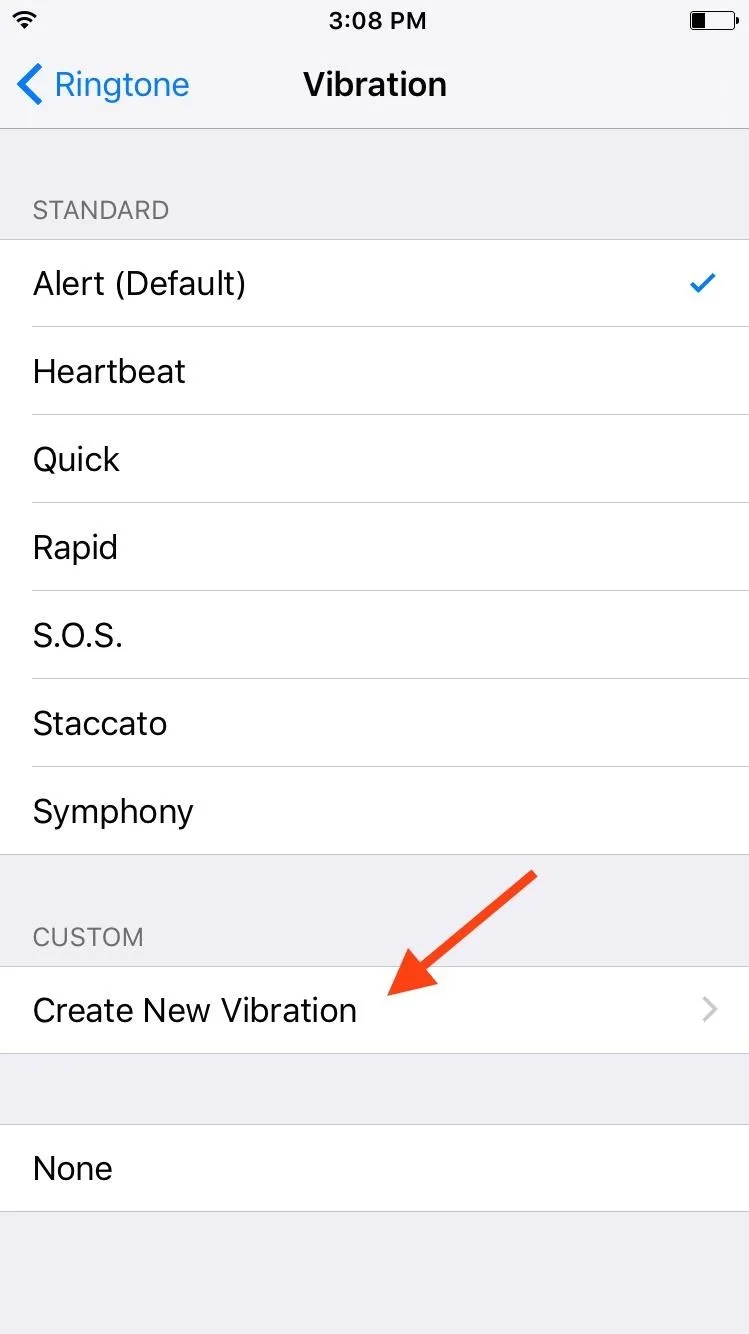


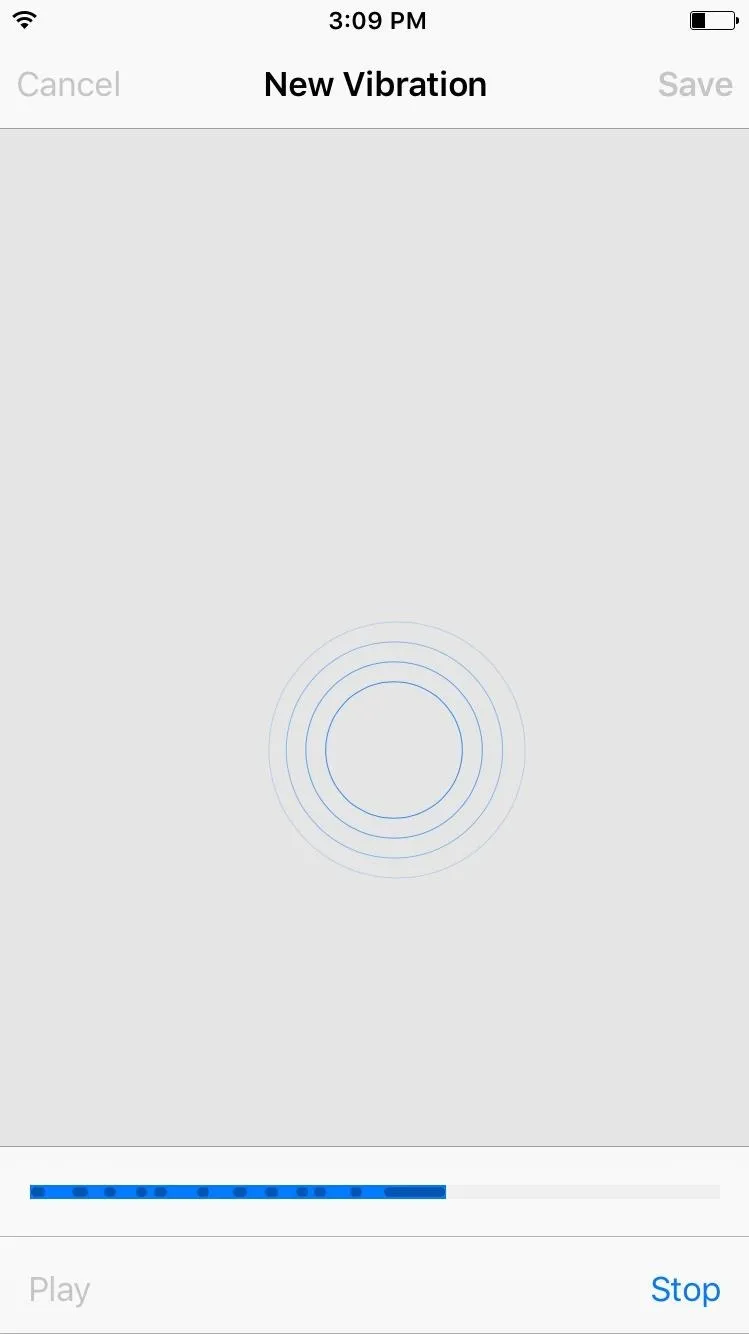
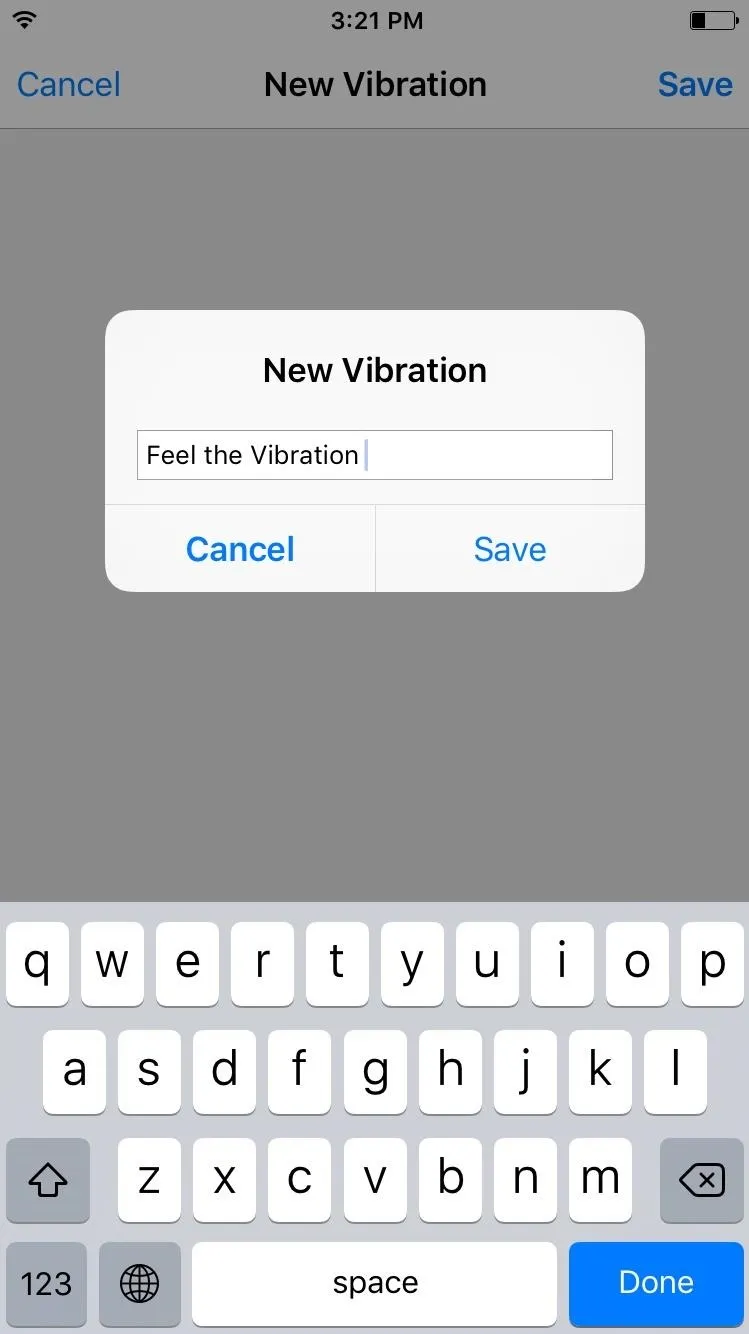
Now all you have to do is tap to create a unique pattern. The bar at the bottom of the screen will display how much time you have left. As soon as you're done, name it, then save it.


Assigning the Vibration Pattern
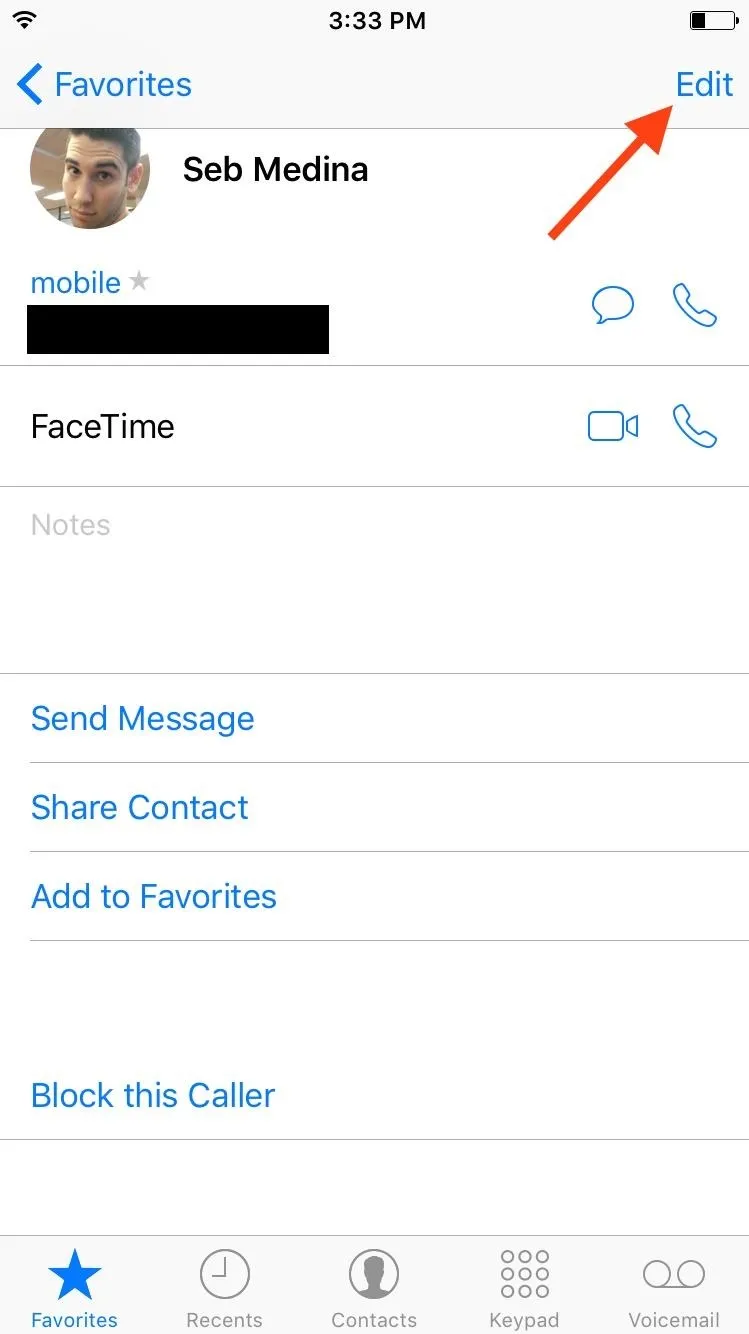
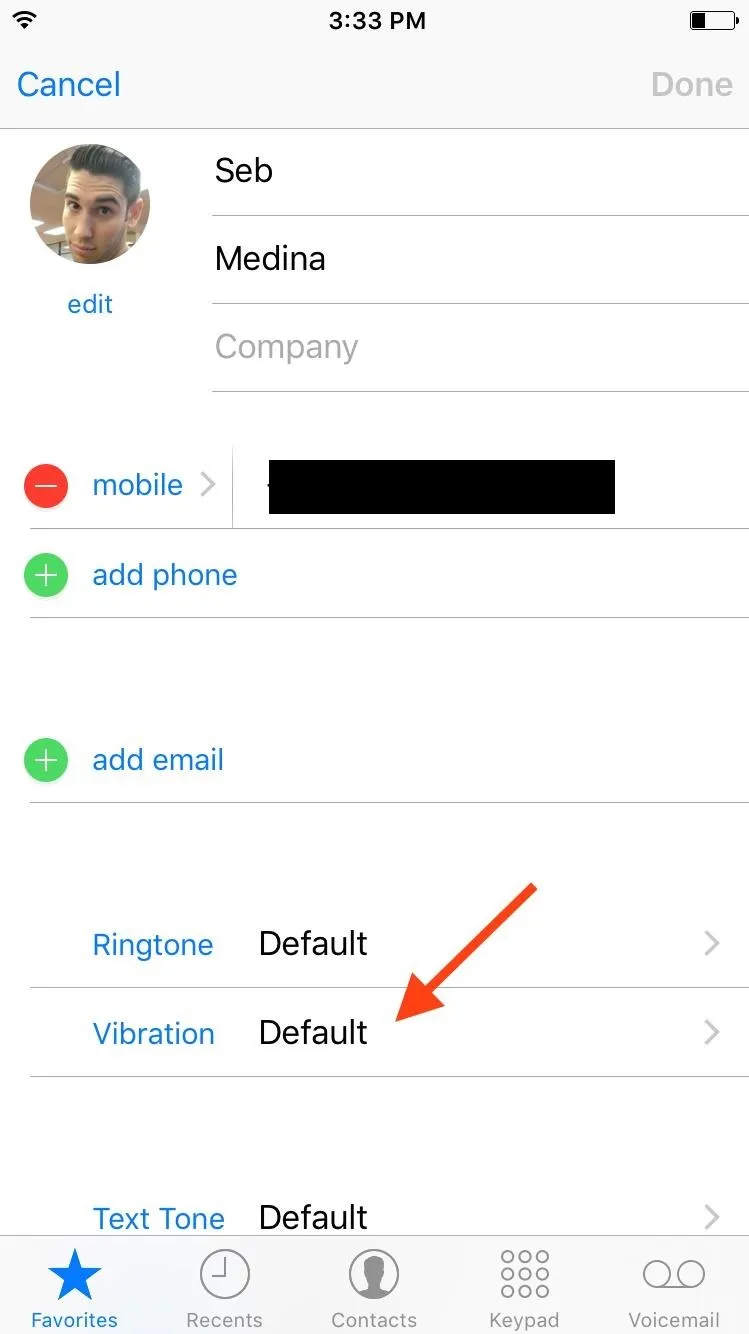
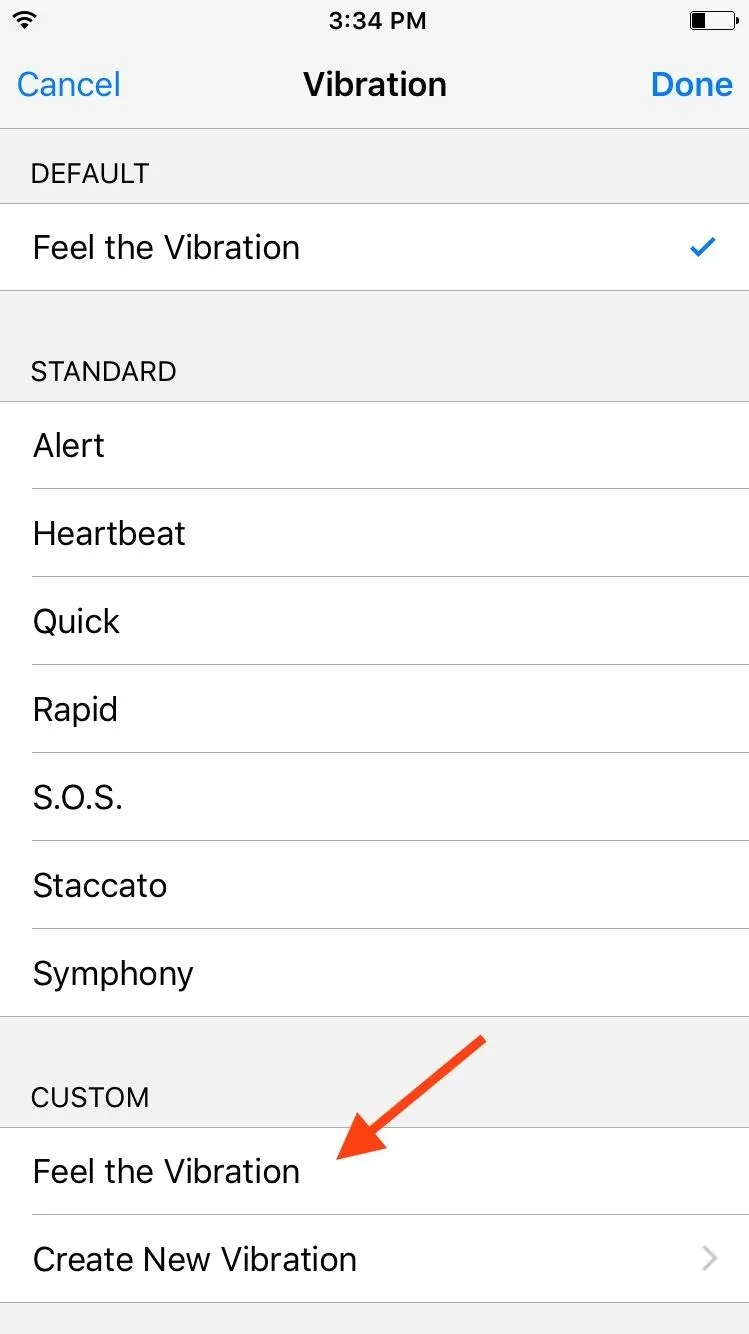
Go to your Contacts app (or the Contacts tab in the Phone app), find the contact you want to assign the custom vibration pattern to, then choose Edit in the top right. Tap on Vibration: Default, then choose the new pattern you created. It's that simple.


With a unique pattern for each contact, you can feel who's calling or texting you without ever looking at your iPhone. It's a simple trick, but useful for those who don't like ringtones or frequently have their iPhone on silent.
Follow Apple Hacks over on Facebook and Twitter, or Gadget Hacks over on Facebook, Google+, and Twitter, for more Apple fun.


Comments
Be the first, drop a comment!