


Restoring your iPhone from a previous backup is still a simple process using your Mac, but the way it works has changed since Apple killed off iTunes with the macOS Catalina update. Now you must use Finder to both back up and restore your iPhone, which can take a little getting used to.
If you use a Windows PC, you still would use iTunes to sync and back up your iPhone, but not in macOS Catalina 10.15 and higher, including macOS Big Sur 11. As long as you've backed up your device using Finder or iTunes in macOS Mojave and older, you can restore your iPhone with just a few clicks. We'll also show you how to turn off Find My iPhone (which is necessary to restore your iPhone) and restore your iPhone to factory settings.
- Don't Miss: 200+ Exciting New iOS 13 Features for iPhone
Back Up Your iPhone (Before It's Too Late)
Before you can restore your iPhone using a backup, you must first back up your device to your computer. You can check out our other guide which shows you how to back up your iPhone, encrypt and password-protect your backups, delete old backups, and archive them, all using Finder.
If you don't care about restoring a backup and just want a go back to factory settings, with your data wiped, skip to Method 2 under Step 3.
Disable Find My iPhone on Your iPhone
Also, you must disable Find My iPhone on your iPhone. If you try restoring from a previous backup without turning the feature off, Finder won't let you restore your device and will tell you to turn it off. You can do it right when Finder reminds you, or you can knock it out beforehand.
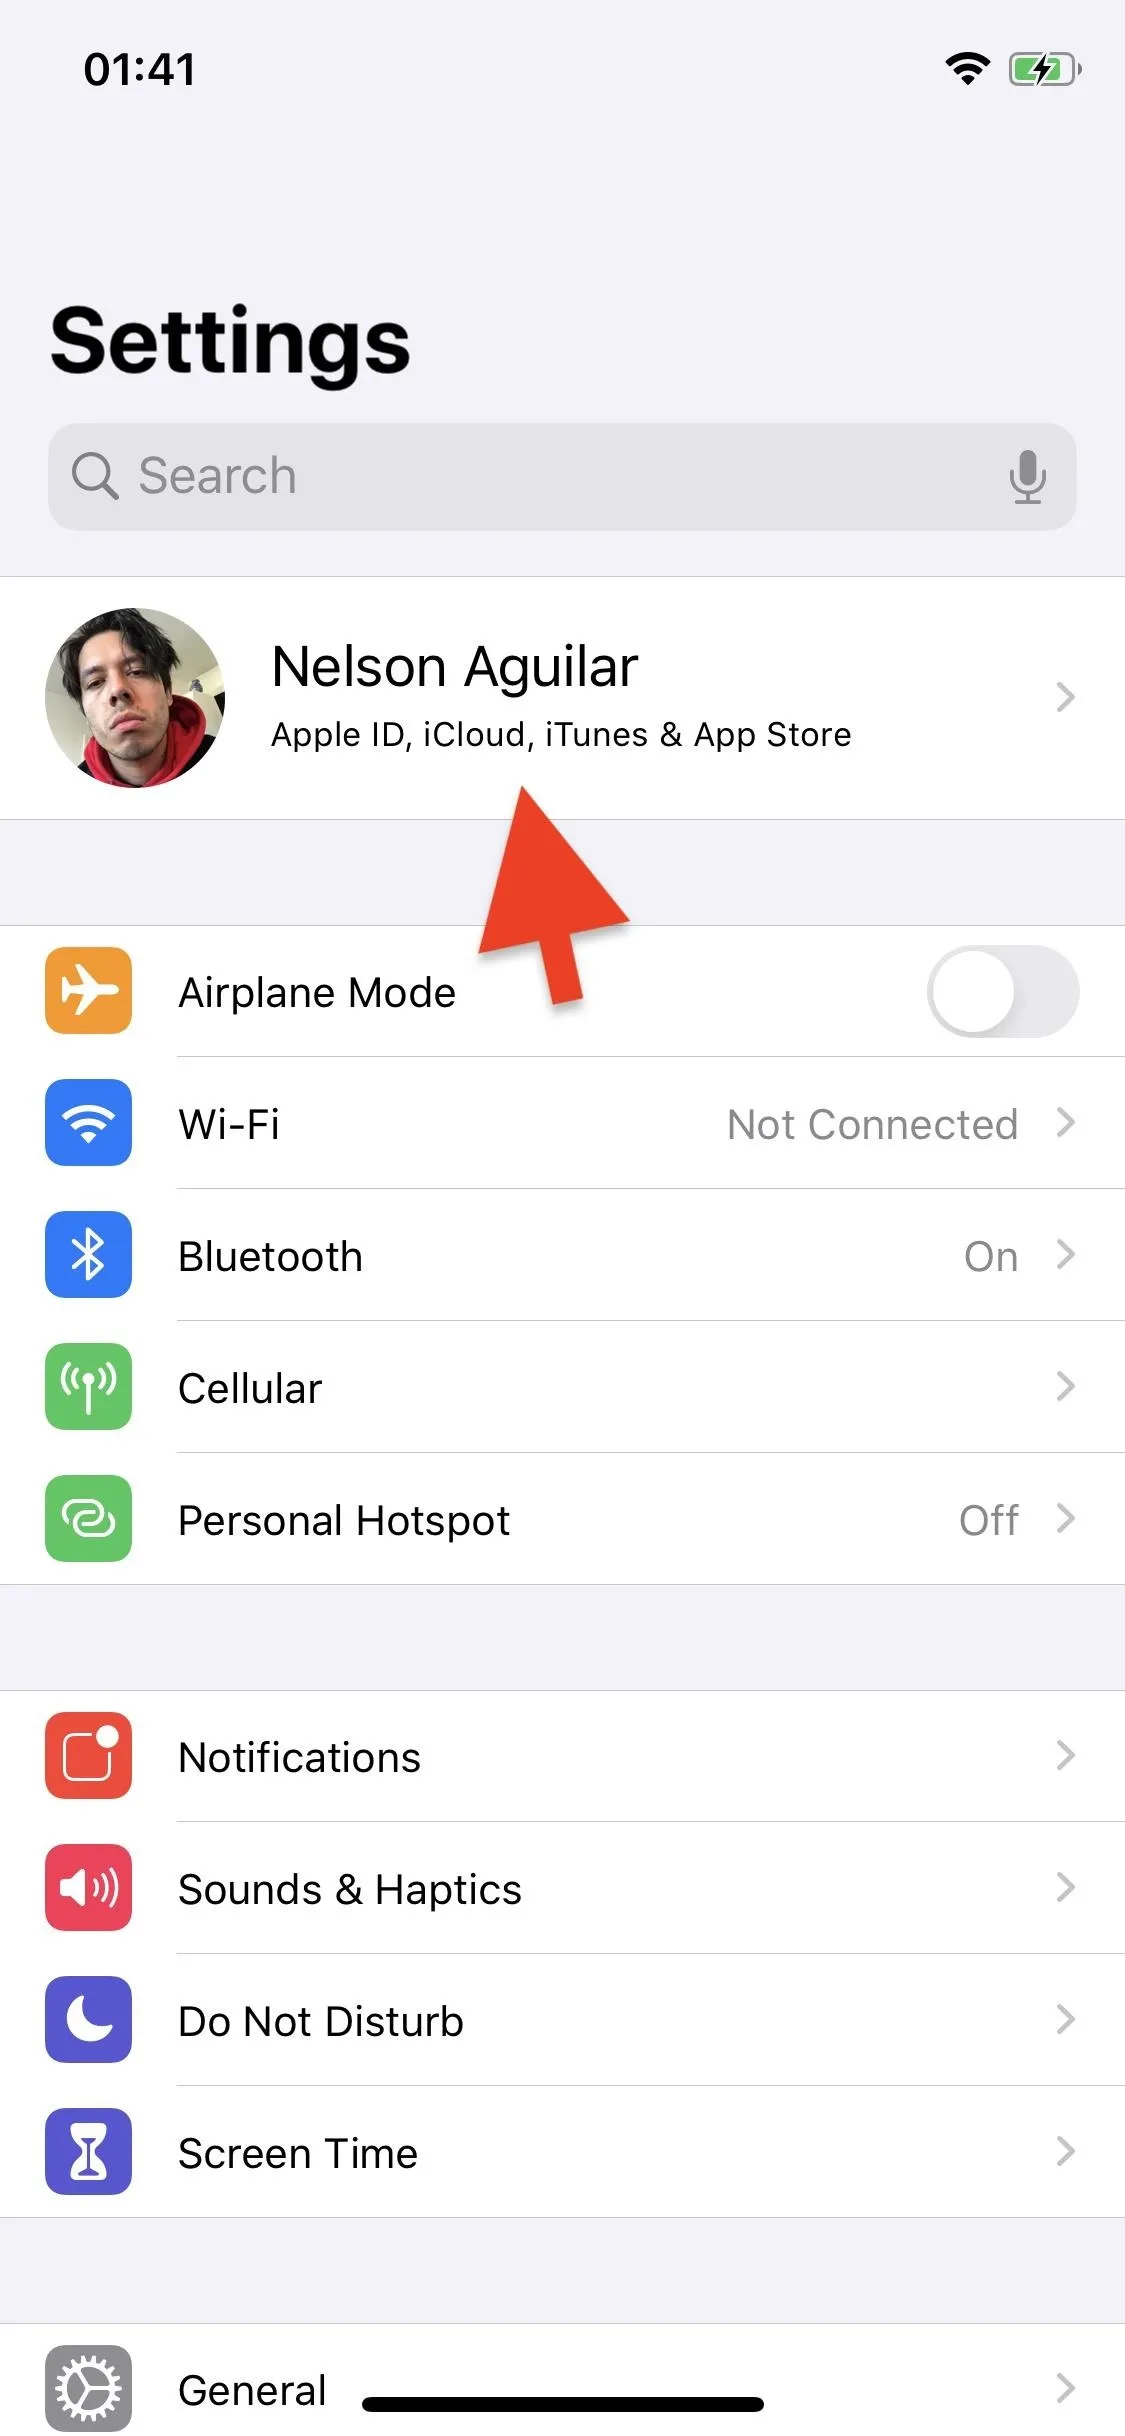
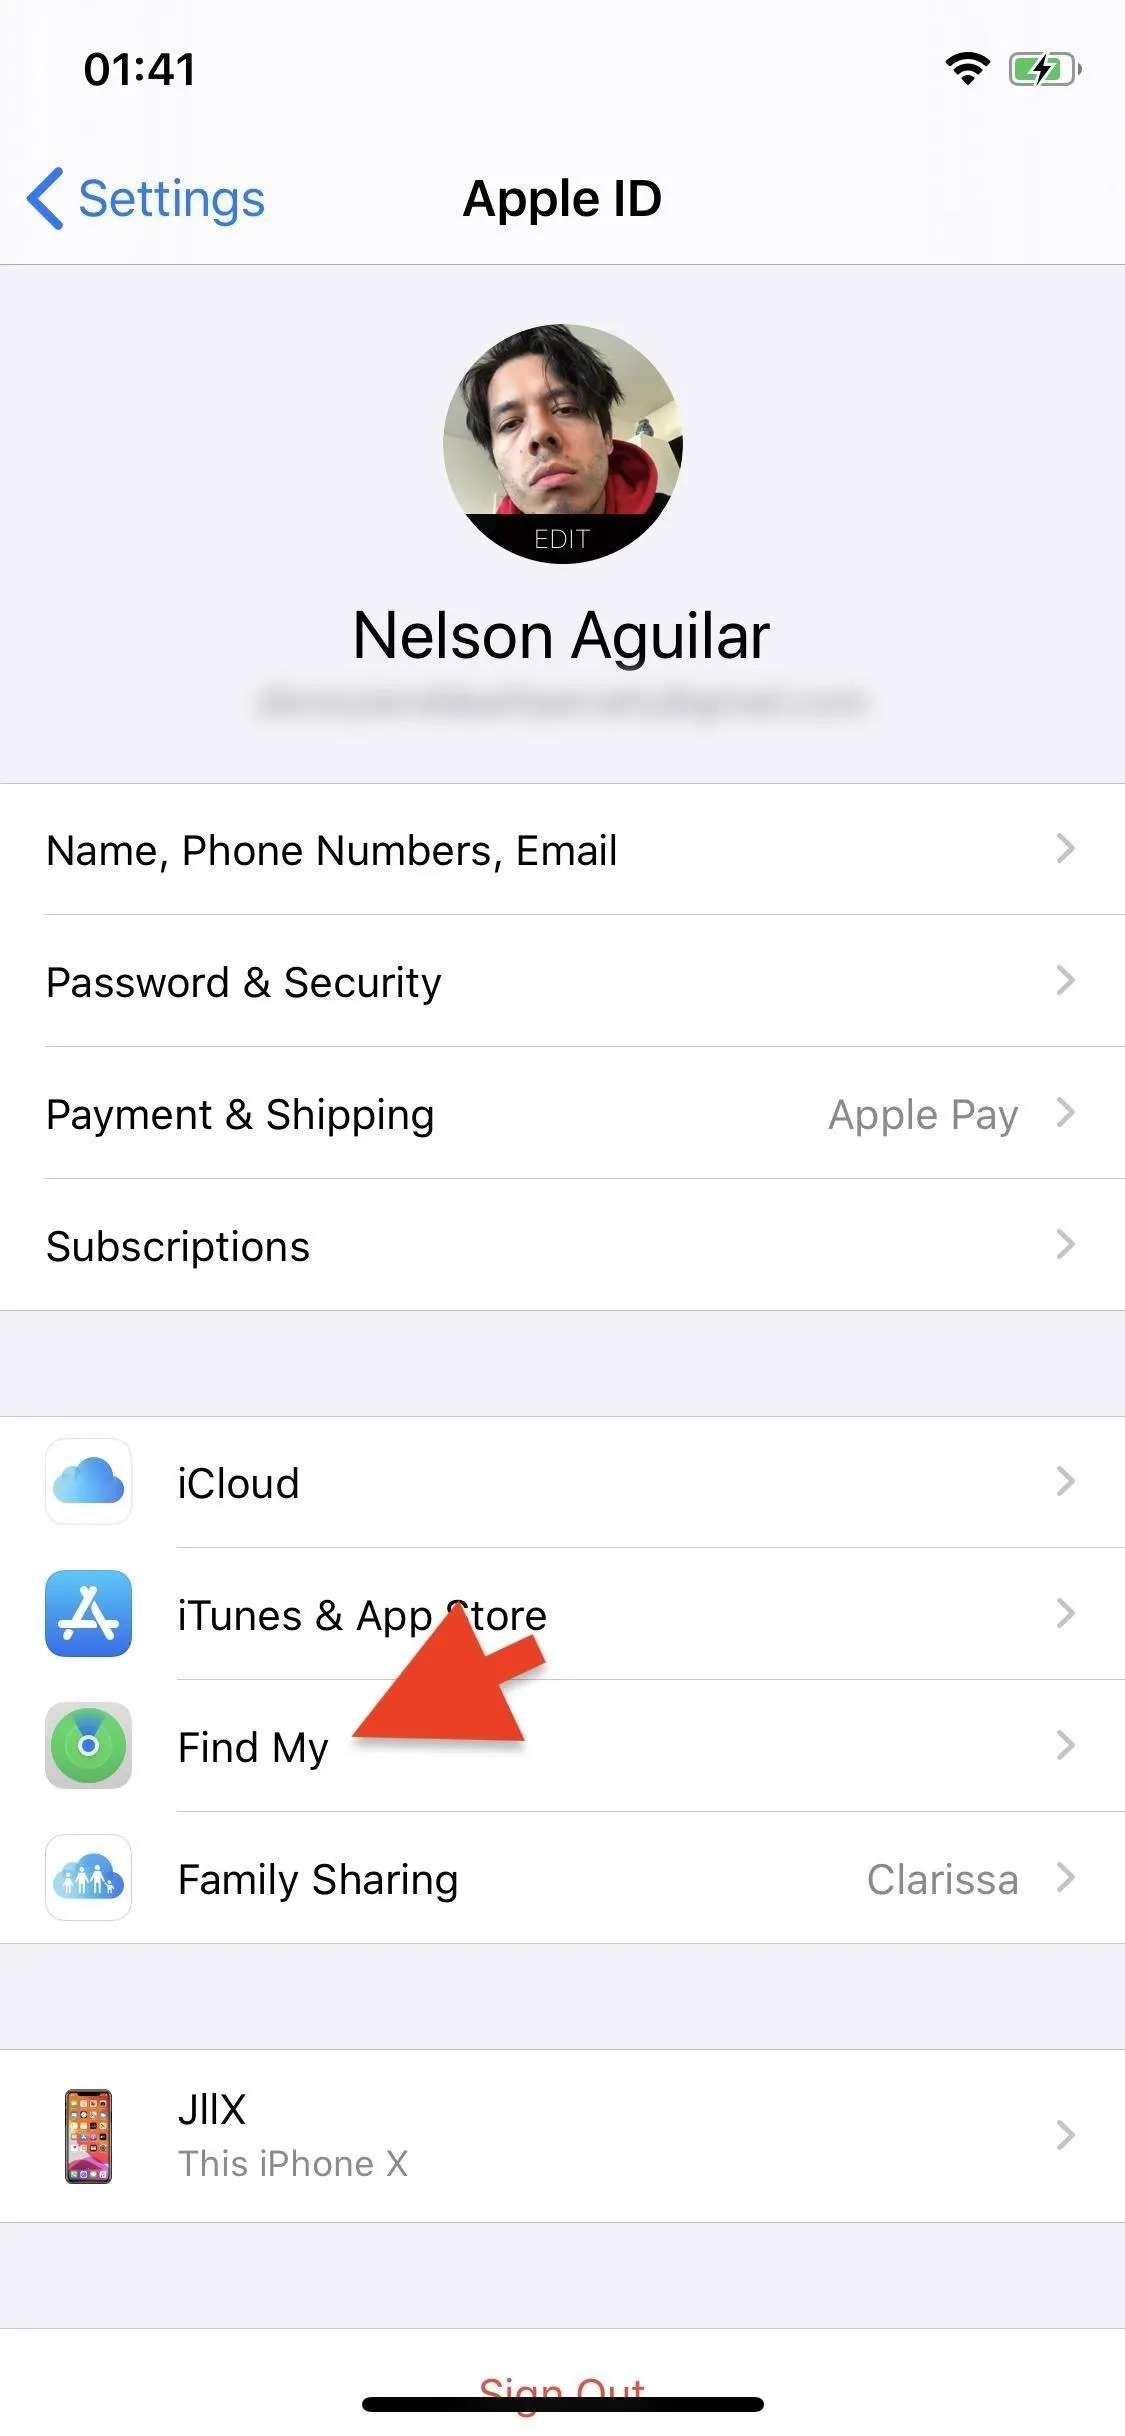
To do so, go into the Settings app on your iPhone and tap on your name at the top. Next, go into "Find My" and tap on the "Find My iPhone" option.
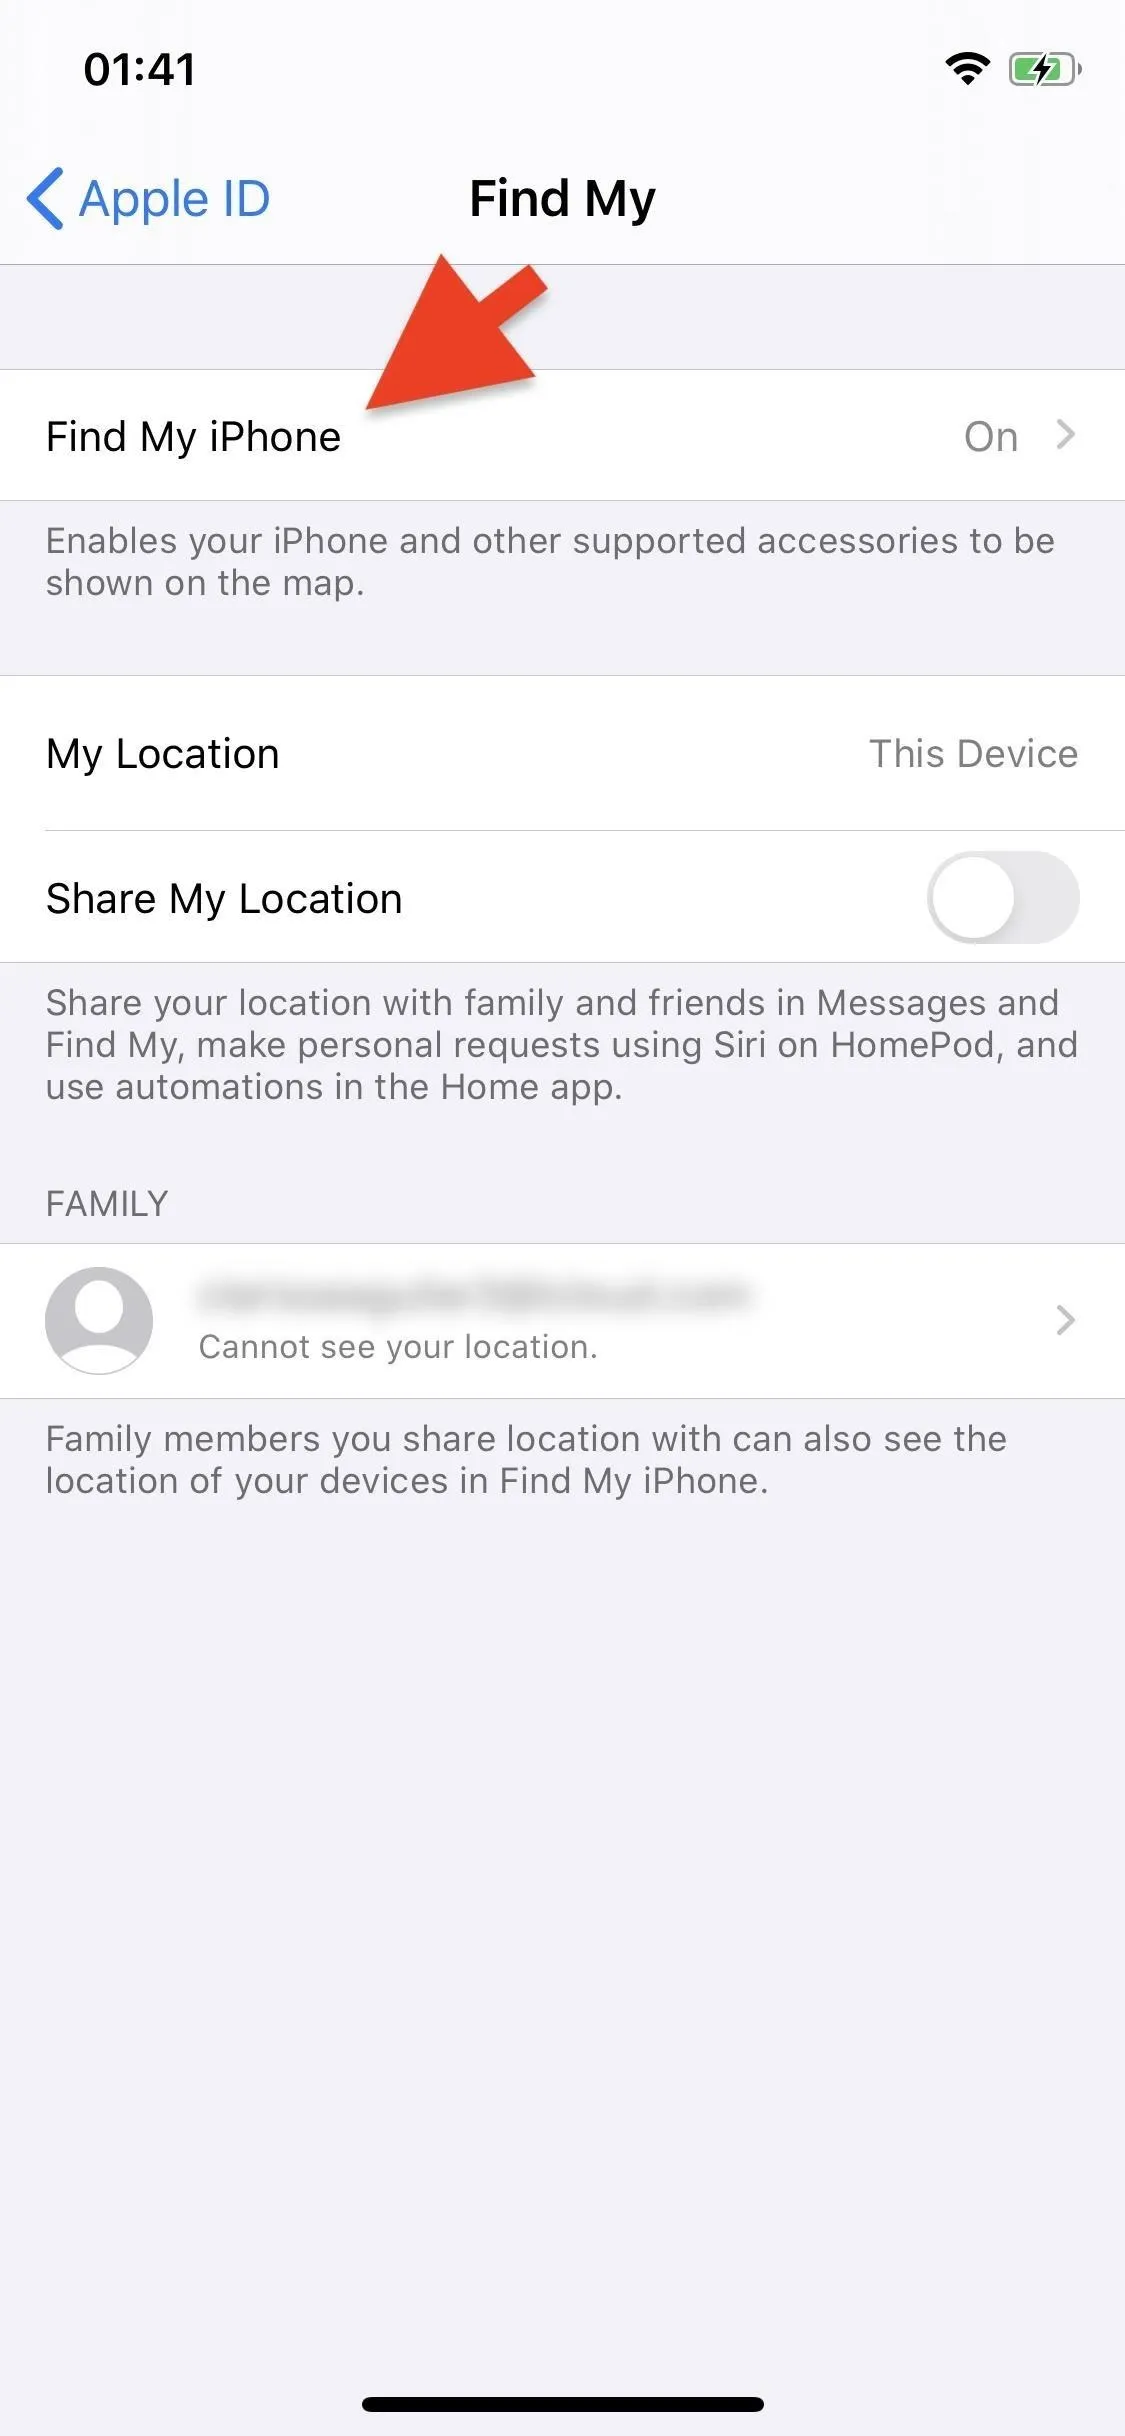
Toggle off "Find My iPhone" and enter your Apple ID password when prompted. Finally, tap on "Turn Off," and Find My iPhone will be disabled.


Restore Your iPhone
Now that Find My iPhone is disabled, you can restore your iPhone from either a previous backup or to the factory default.
Restore from a Backup
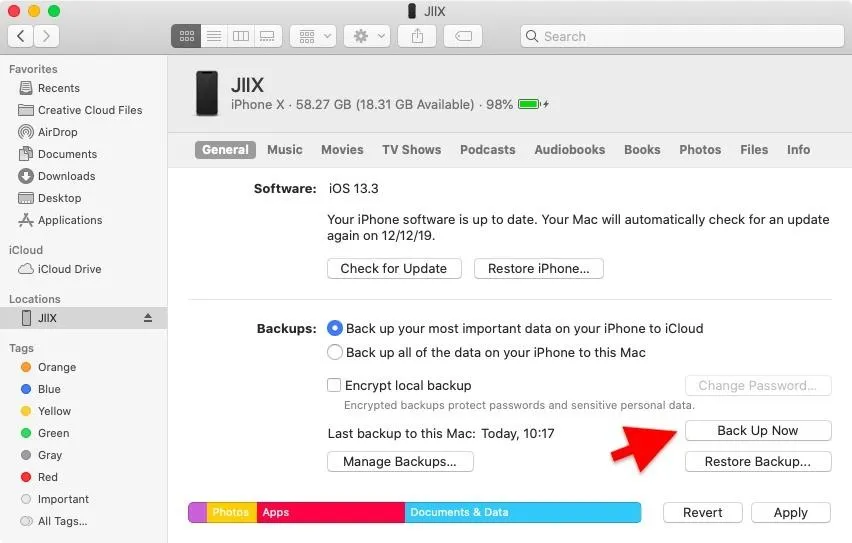
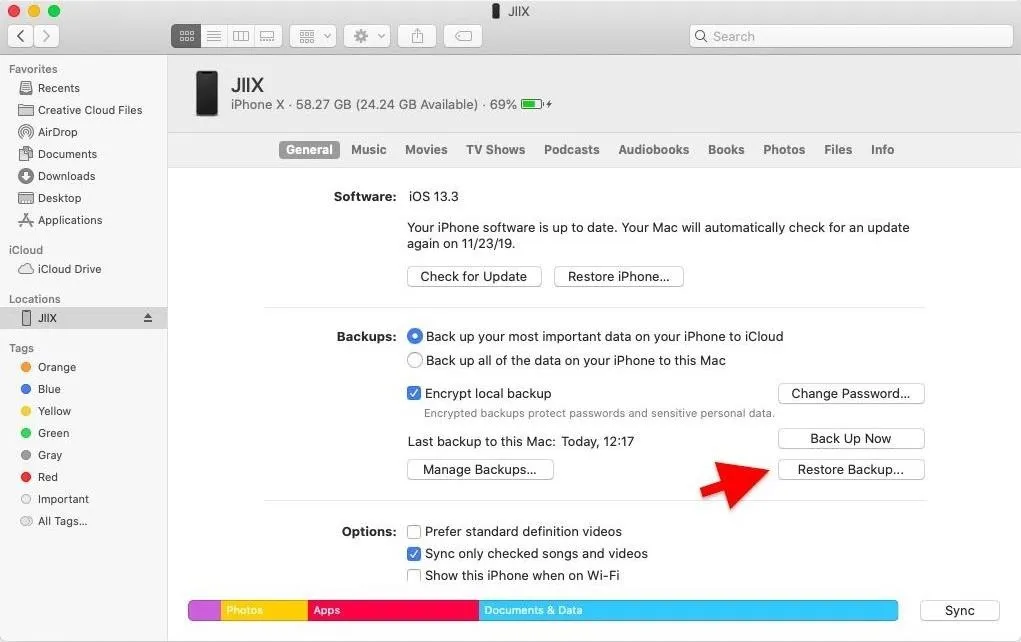
To restore your iPhone from a previous backup, connect your device to your computer using a Lightning to USB or Lightning to USB-C cable and open any Finder window. On the left side, click on your device when it appears under Locations. In your device's Summary screen, click on "Restore Backup."
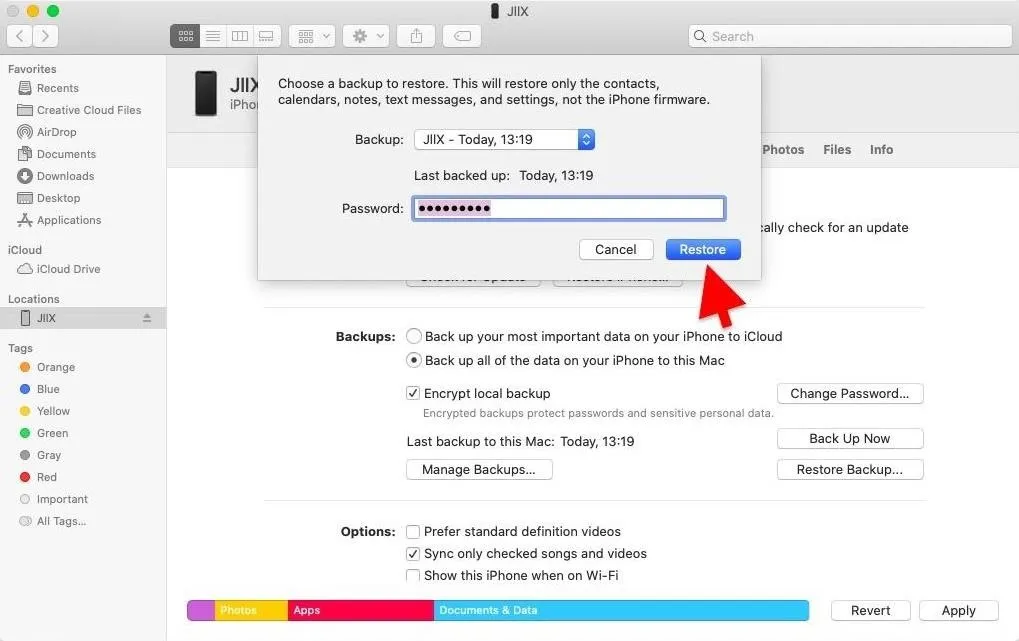
Choose your backup from the options that appear. Look at the time and date of each backup and select either the most recent or most relevant one. You may see three different types of backups in your options, including:
- iCloud: Your most recent backup saved to your iCloud.
- Local: Your most recent backup saved to your computer.
- Archived: An older backup that can't be overwritten.
If it's an iCloud, local, or archived backup, simply click on "Restore" to begin the process. However, if it's a local (archived or not) backup and it's encrypted, you must first enter your encryption password before hitting "Restore."
Your iPhone will restart and take a few minutes to restore. Don't disconnect your device until the iPhone is synced with your computer, which you can see from the circling arrows next to your device name in Finder. Disconnect once the syncing finishes.
Restore to Default Configuration
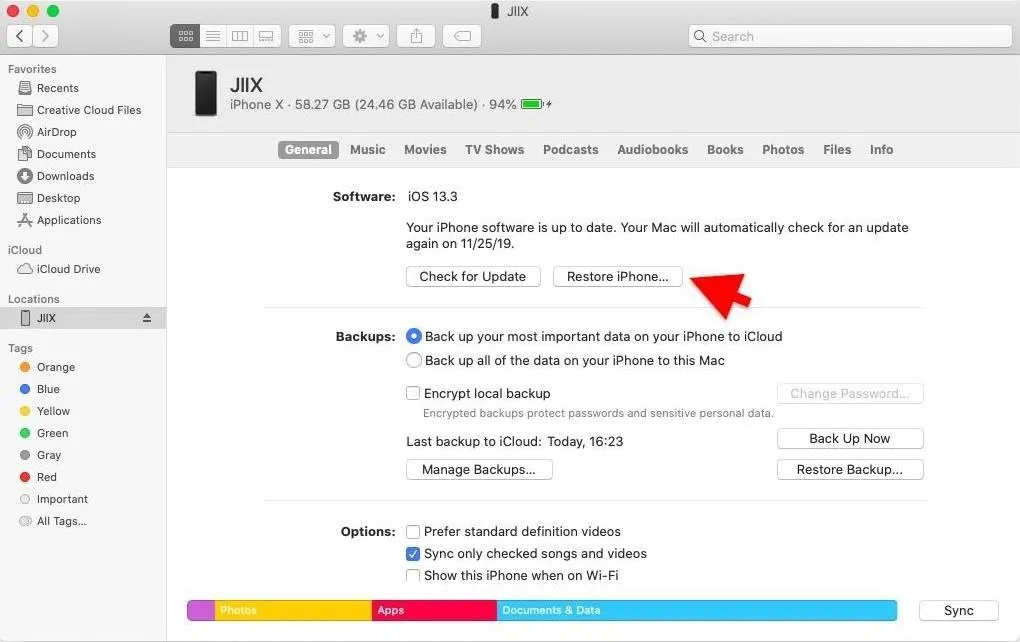
Using an iCloud or local backup isn't the only way to restore your iPhone. You can also choose to restore your iPhone to factory settings from Finder. Select the "Restore iPhone" option, click on "Restore" again when prompted, and your iPhone will restore to the latest stable iOS software version.
Note: If you're running public or developer beta software, your iPhone will restore to the latest public software, so be mindful.
After your iPhone restores to factory settings, it will restart. You can now set up your iPhone as new.
Cover photo and screenshots by Nelson Aguilar/Gadget Hacks


Comments
Be the first, drop a comment!