If you've accidentally turned on "Read Receipts" for all of your iMessages, there's an easy way to disable it so that no one knows when you're actually reading their incoming messages. You could also pick and choose which conversations can see that you've read their messages if you don't want to kill the feature entirely.
Read Receipts has been a feature for iPad, iPhone, and iPod touch ever since iOS 5 when the iMessage platform was first introduced. It has always been an opt-in setting, so you never really had to worry about people being notified that you've read their iMessages. However, it's very easy to enable this setting and forget it.
If you have not already opted into Read Receipts, Apple will give you prompts occasionally to turn it on. It's very easy to tap "Allow" on this if you're in a hurry, without thinking twice about what it means.
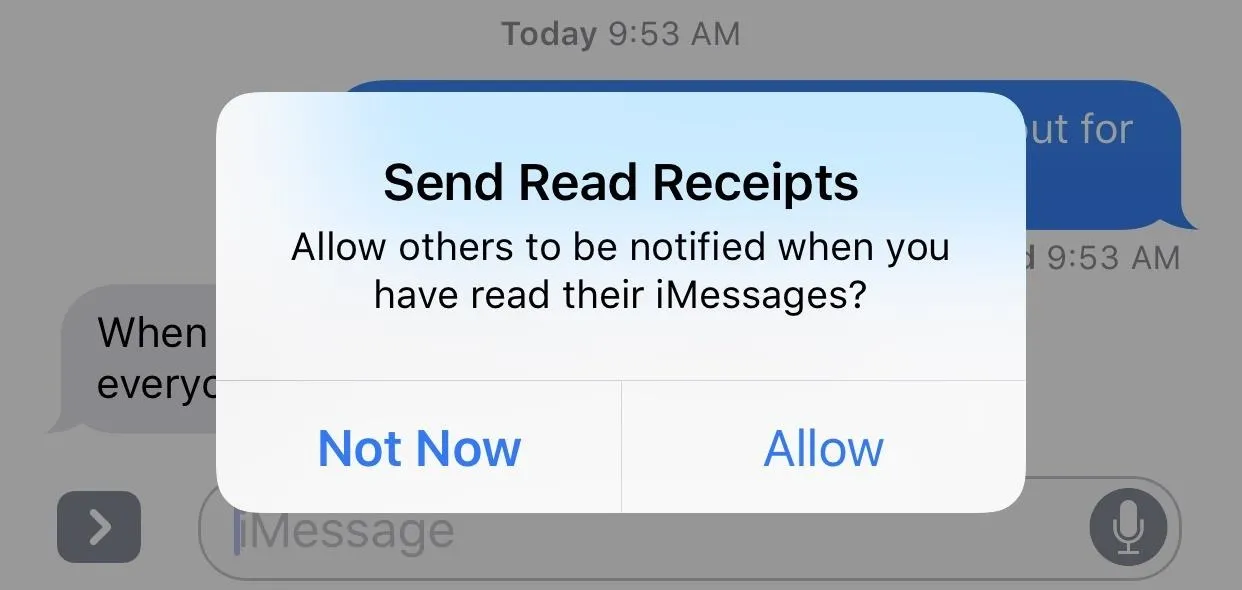
With it on, every time you read somebody's iMessage in the Messages app, they will receive a "Read" notification underneath what they sent you on their end. Also, while they won't get a "Read" stamp when you read their iMessage on a lock screen preview or in your Notifications View (Recent Notifications in iOS 11), if you use 3D Touch to expand the messages, they will know that you've read it.
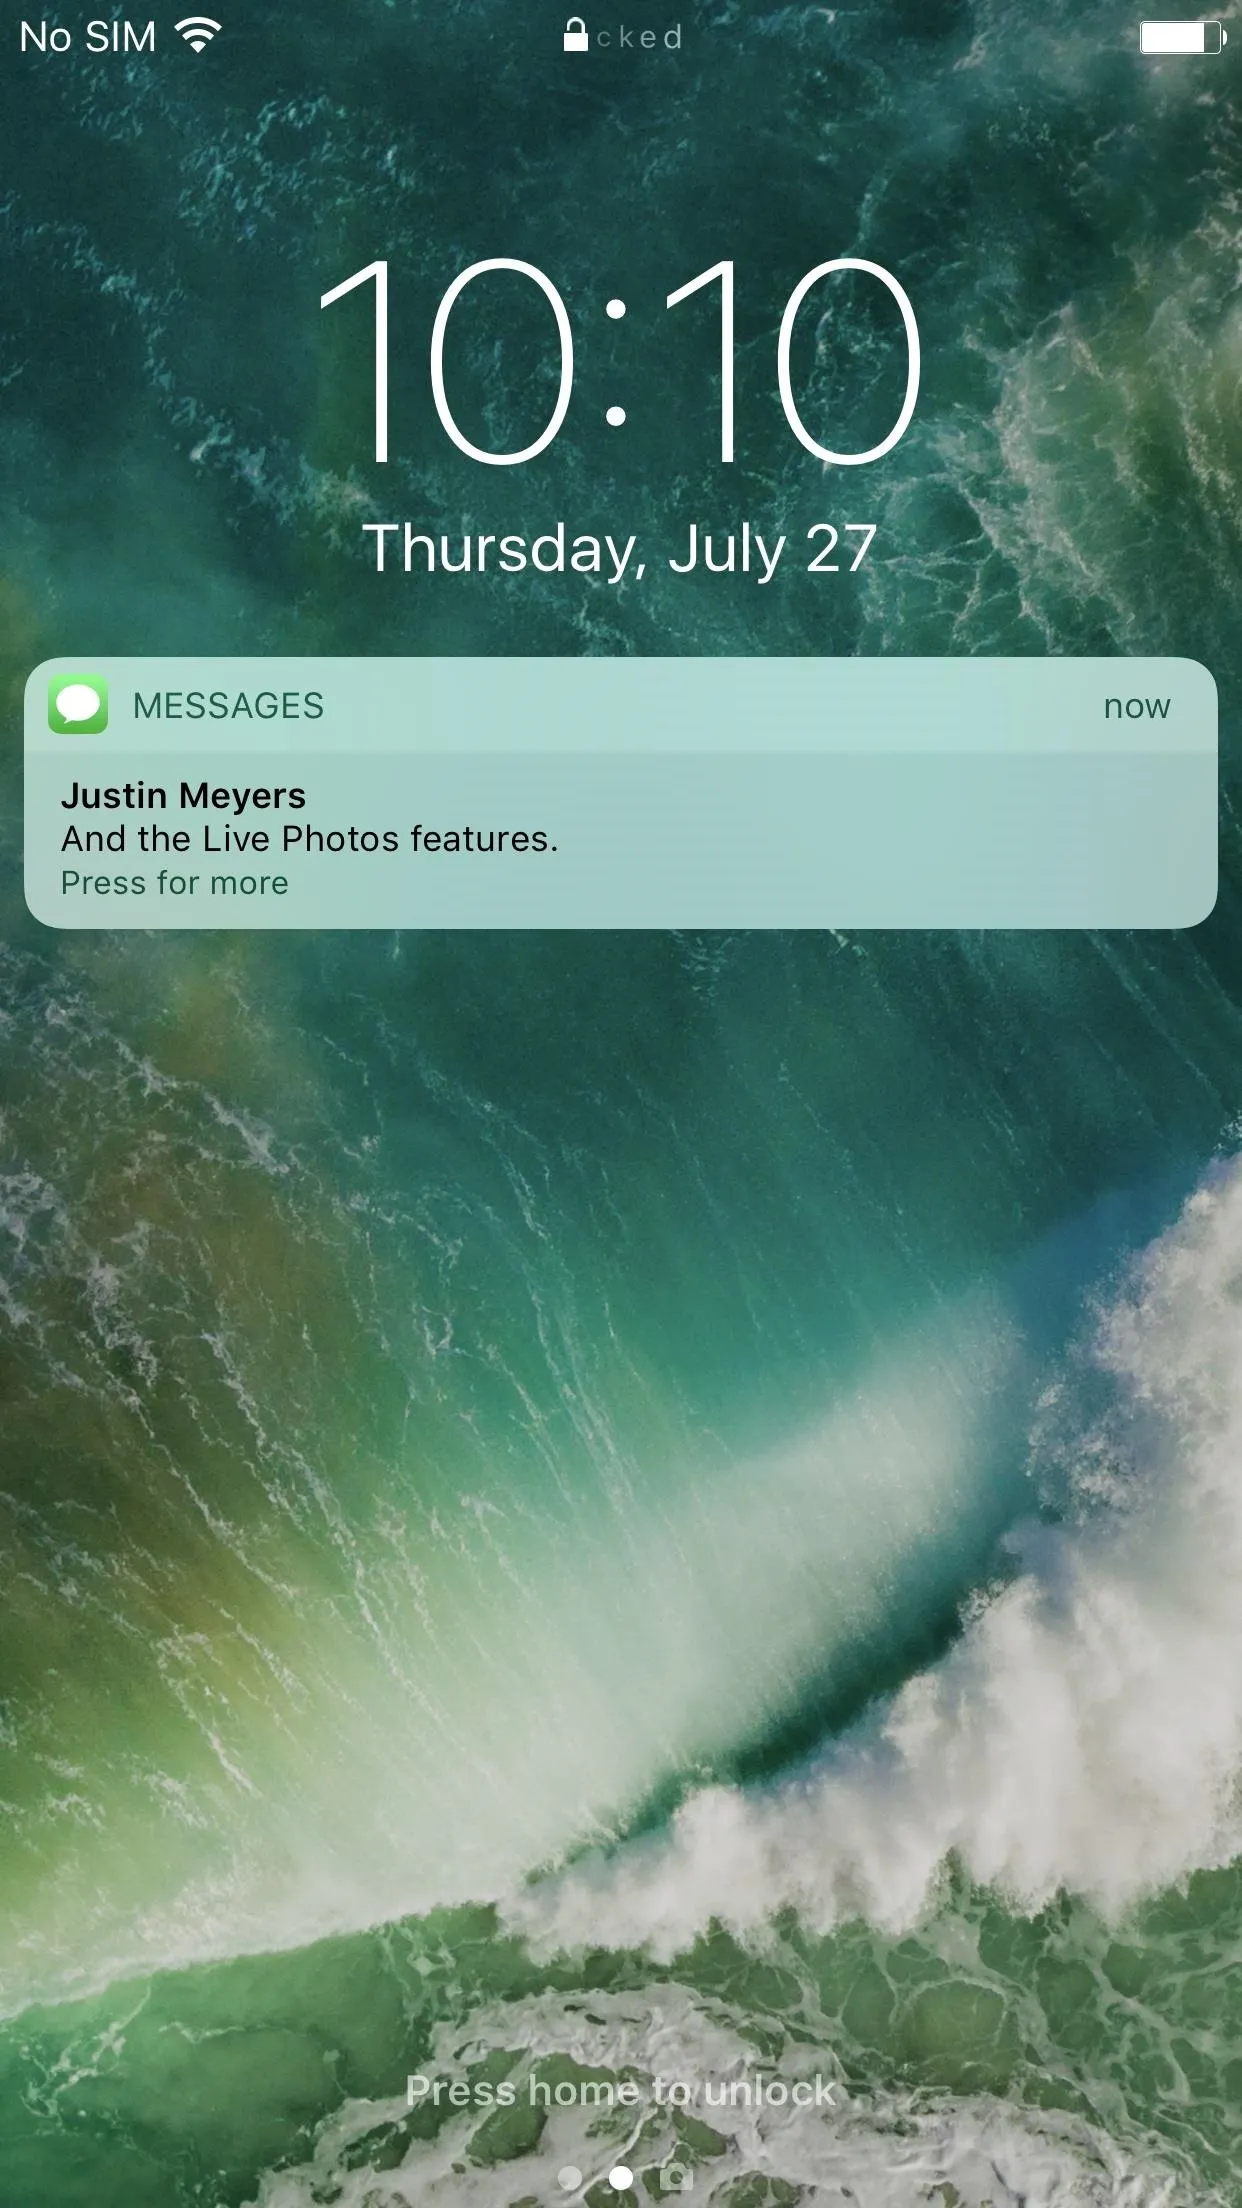
Opening an iMessage using 3D Touch on your lock screen (left, middle) will show as "Read" in their Messages app (right).
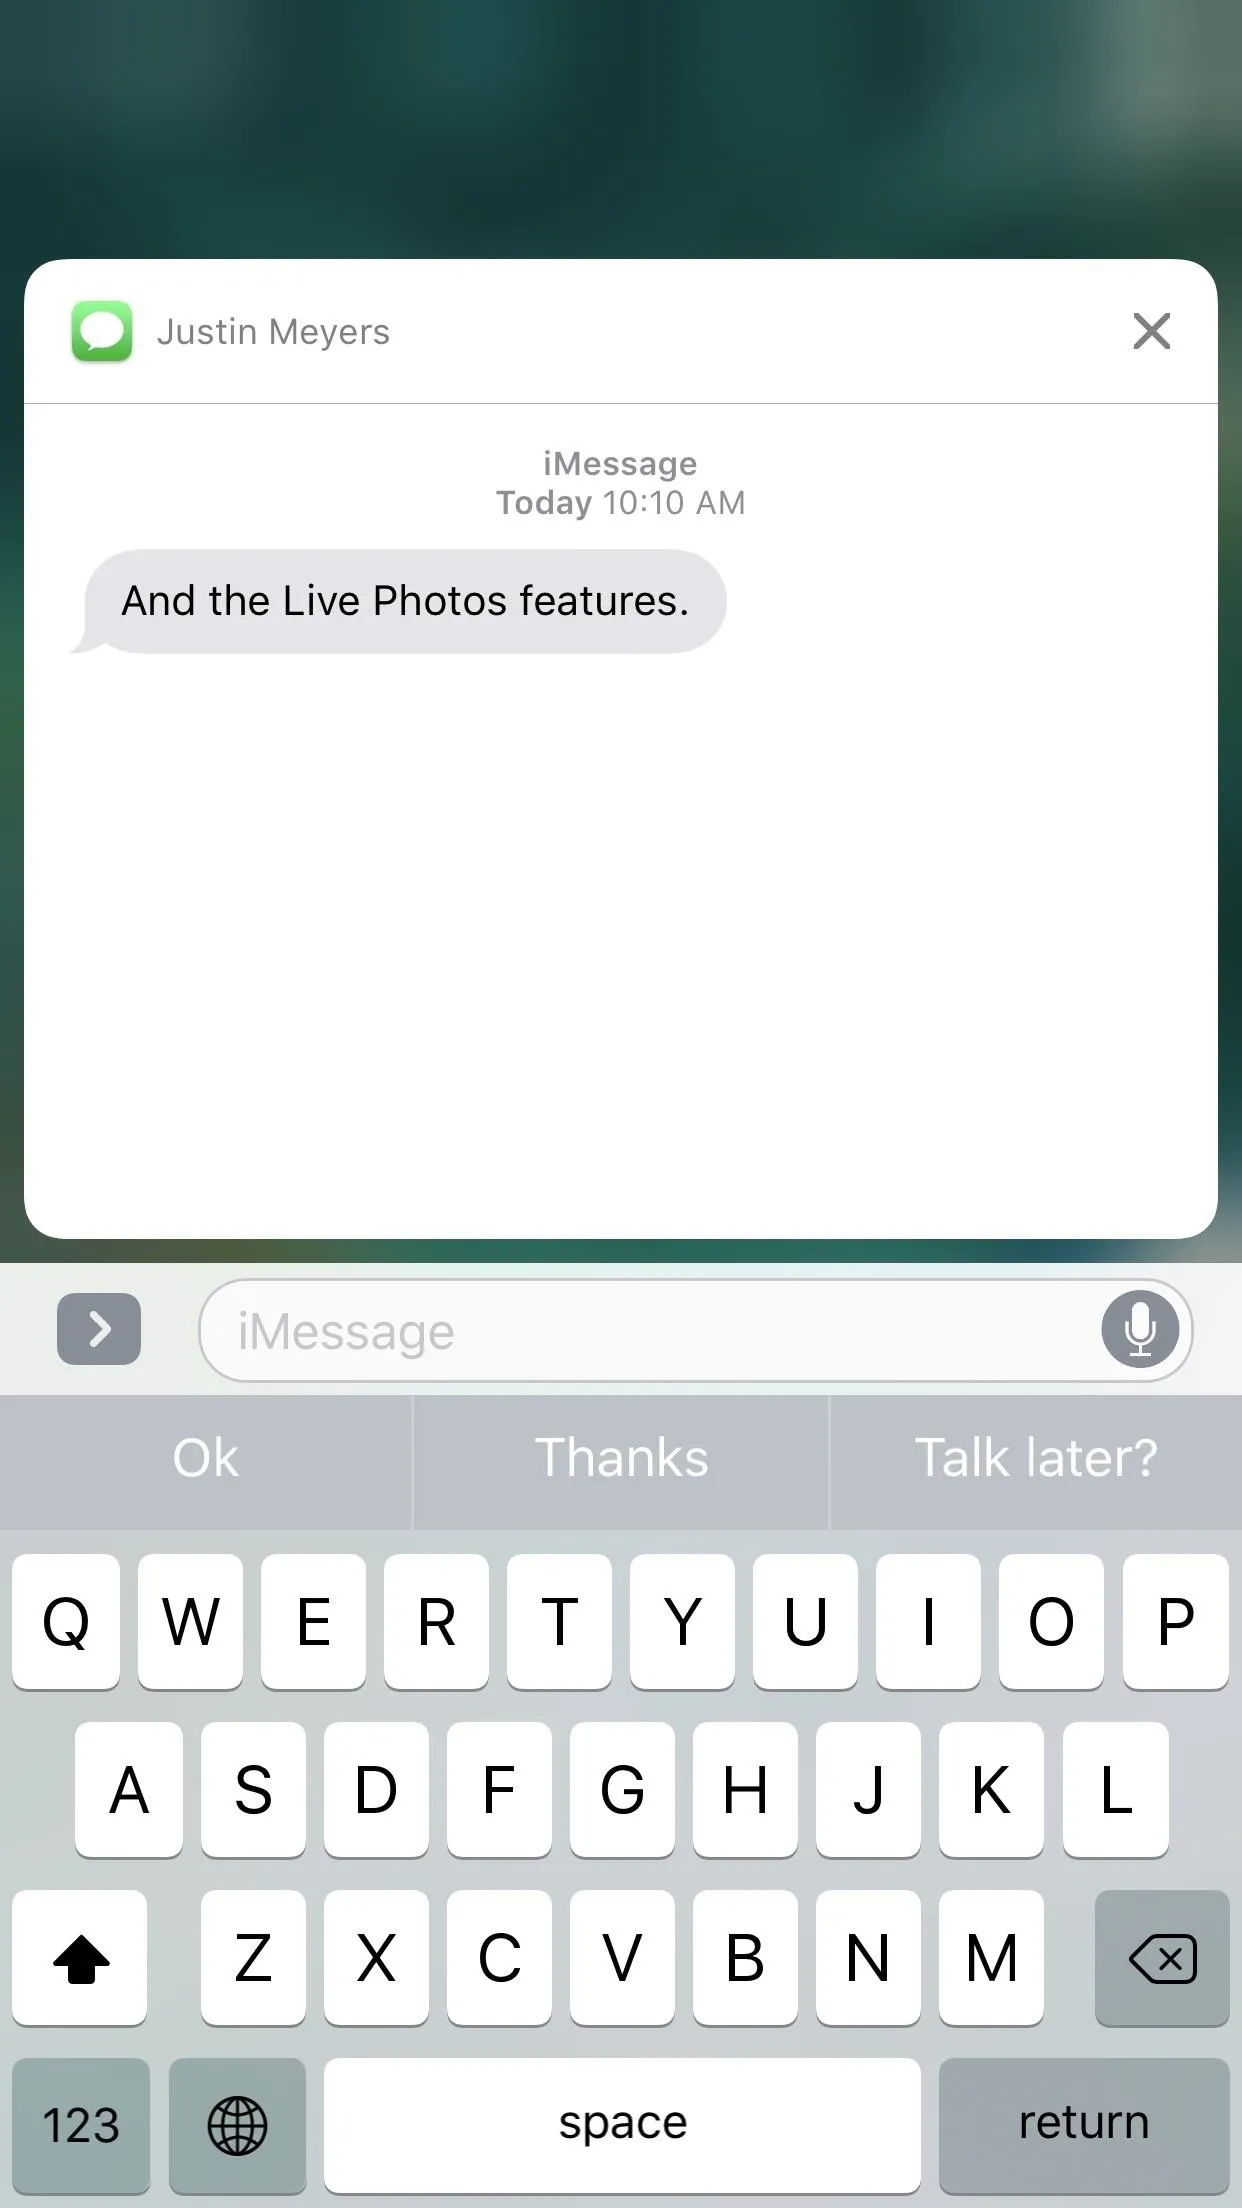
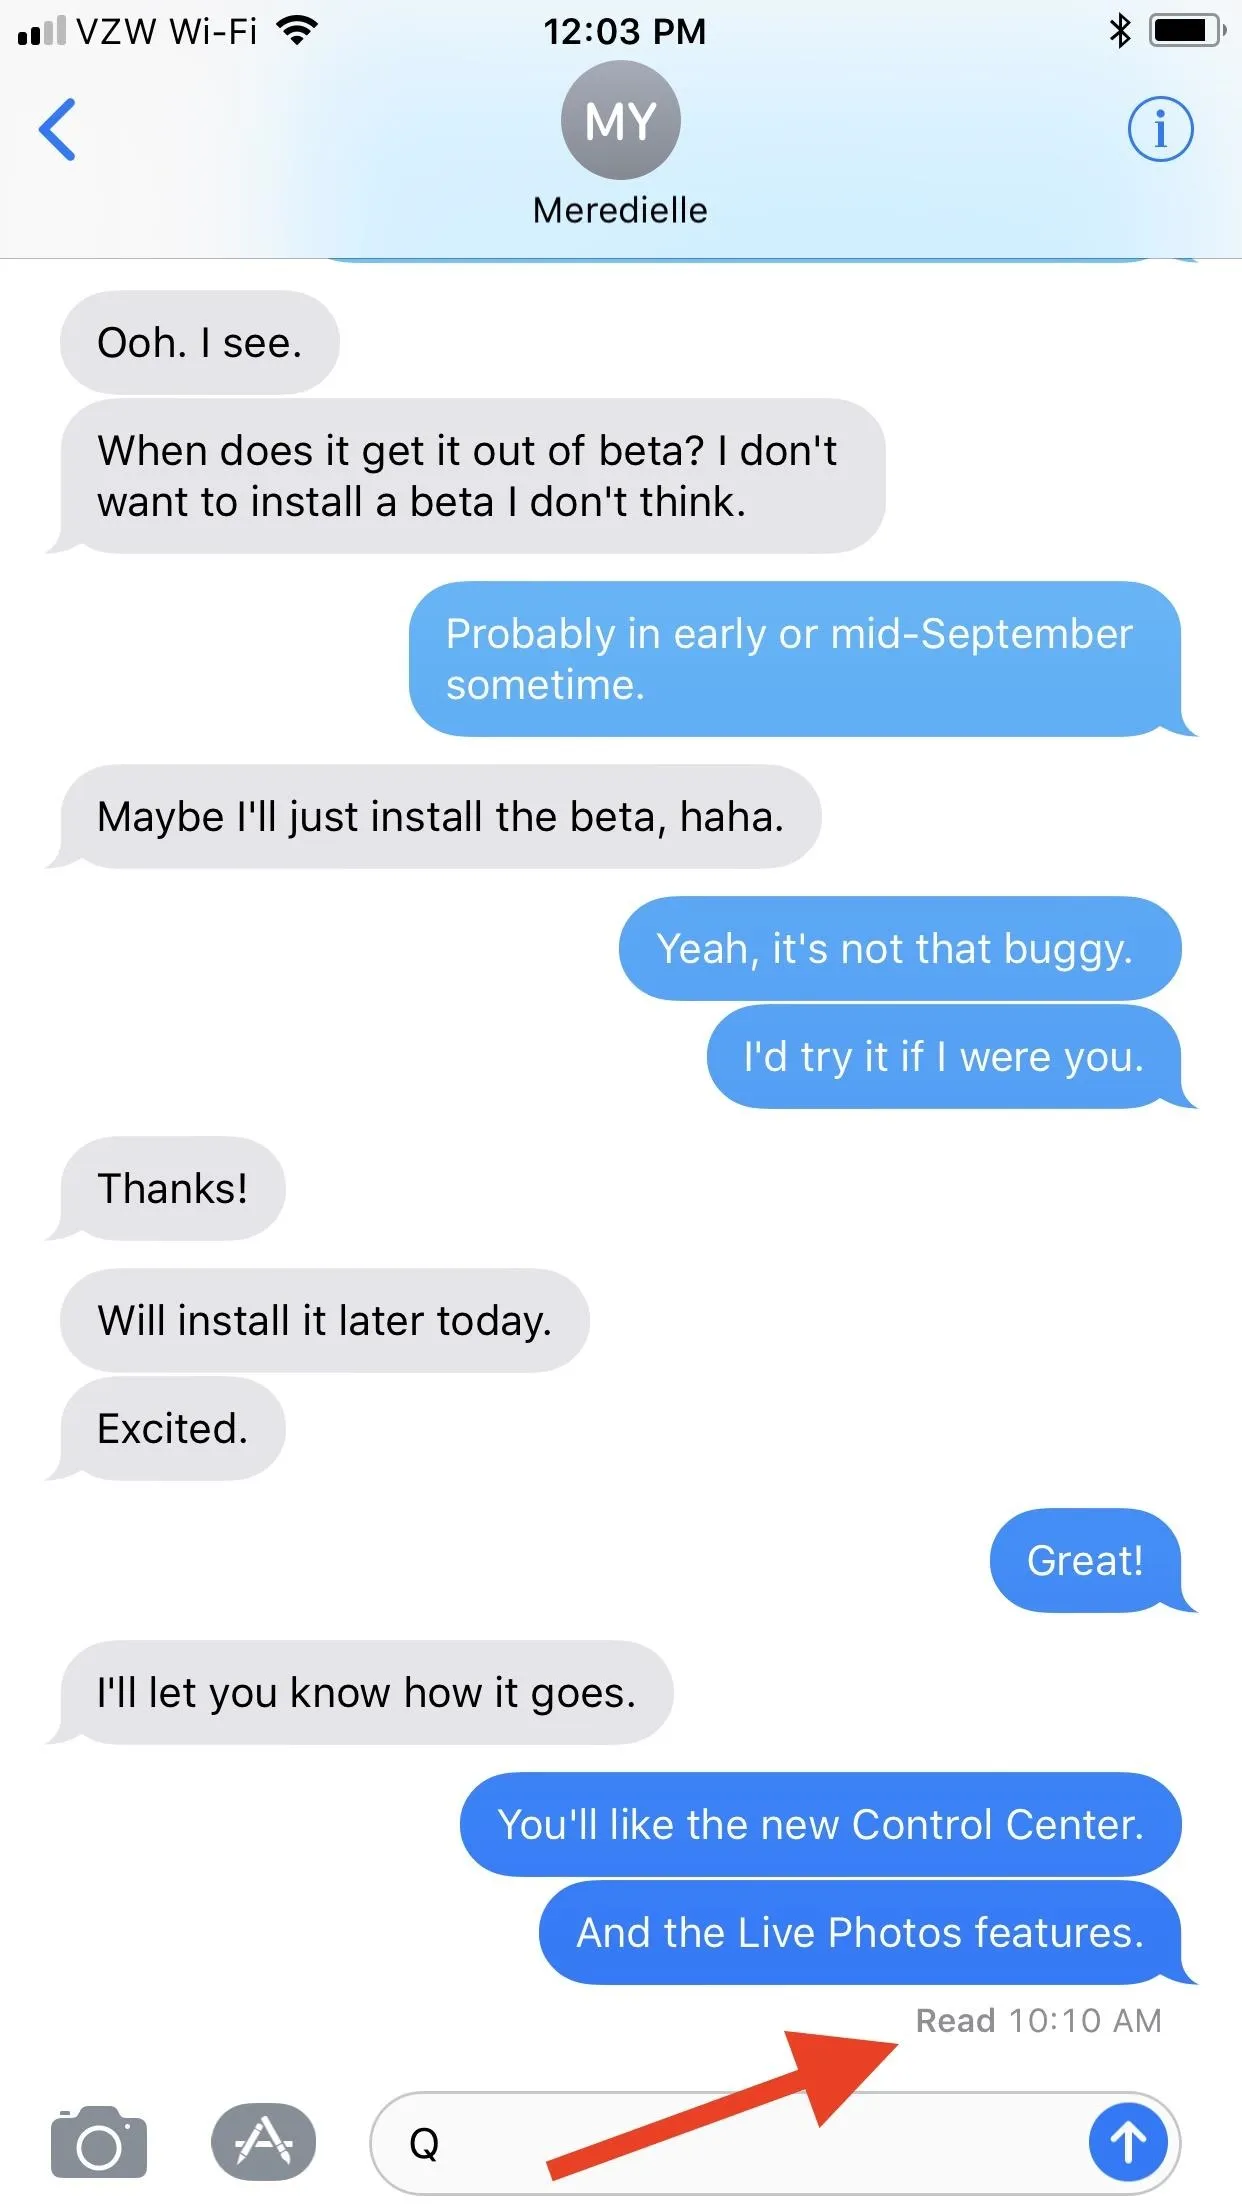

Opening an iMessage using 3D Touch on your lock screen (left, middle) will show as "Read" in their Messages app (right).


Truthfully, when you think about it more in depth, Read Receipts aren't all that bad. Carrie Dennis of Thrillist is actually a strong supporter of Read Receipts because she believes they keep you honest and accountable. They also can cut down on all that time you spend overthinking your responses and reassure the recipient that you're not totally ignoring them. Still, for most of us, privacy will reign supreme and we'll want to opt out of this feature asap.
How to Opt In/Out of Read Receipts for All iMessages
Enabling or disabling this option is easy. Just go to "Messages" in your Settings app, then toggle on or off "Send Read Receipts." If you don't see this option, it's probably because you don't even have "iMessage" turned on at the top of this page and are strictly messaging with SMS instead, which is not supported. In that case, you have nothing to worry about (except the fact that you're not using iMessage!).
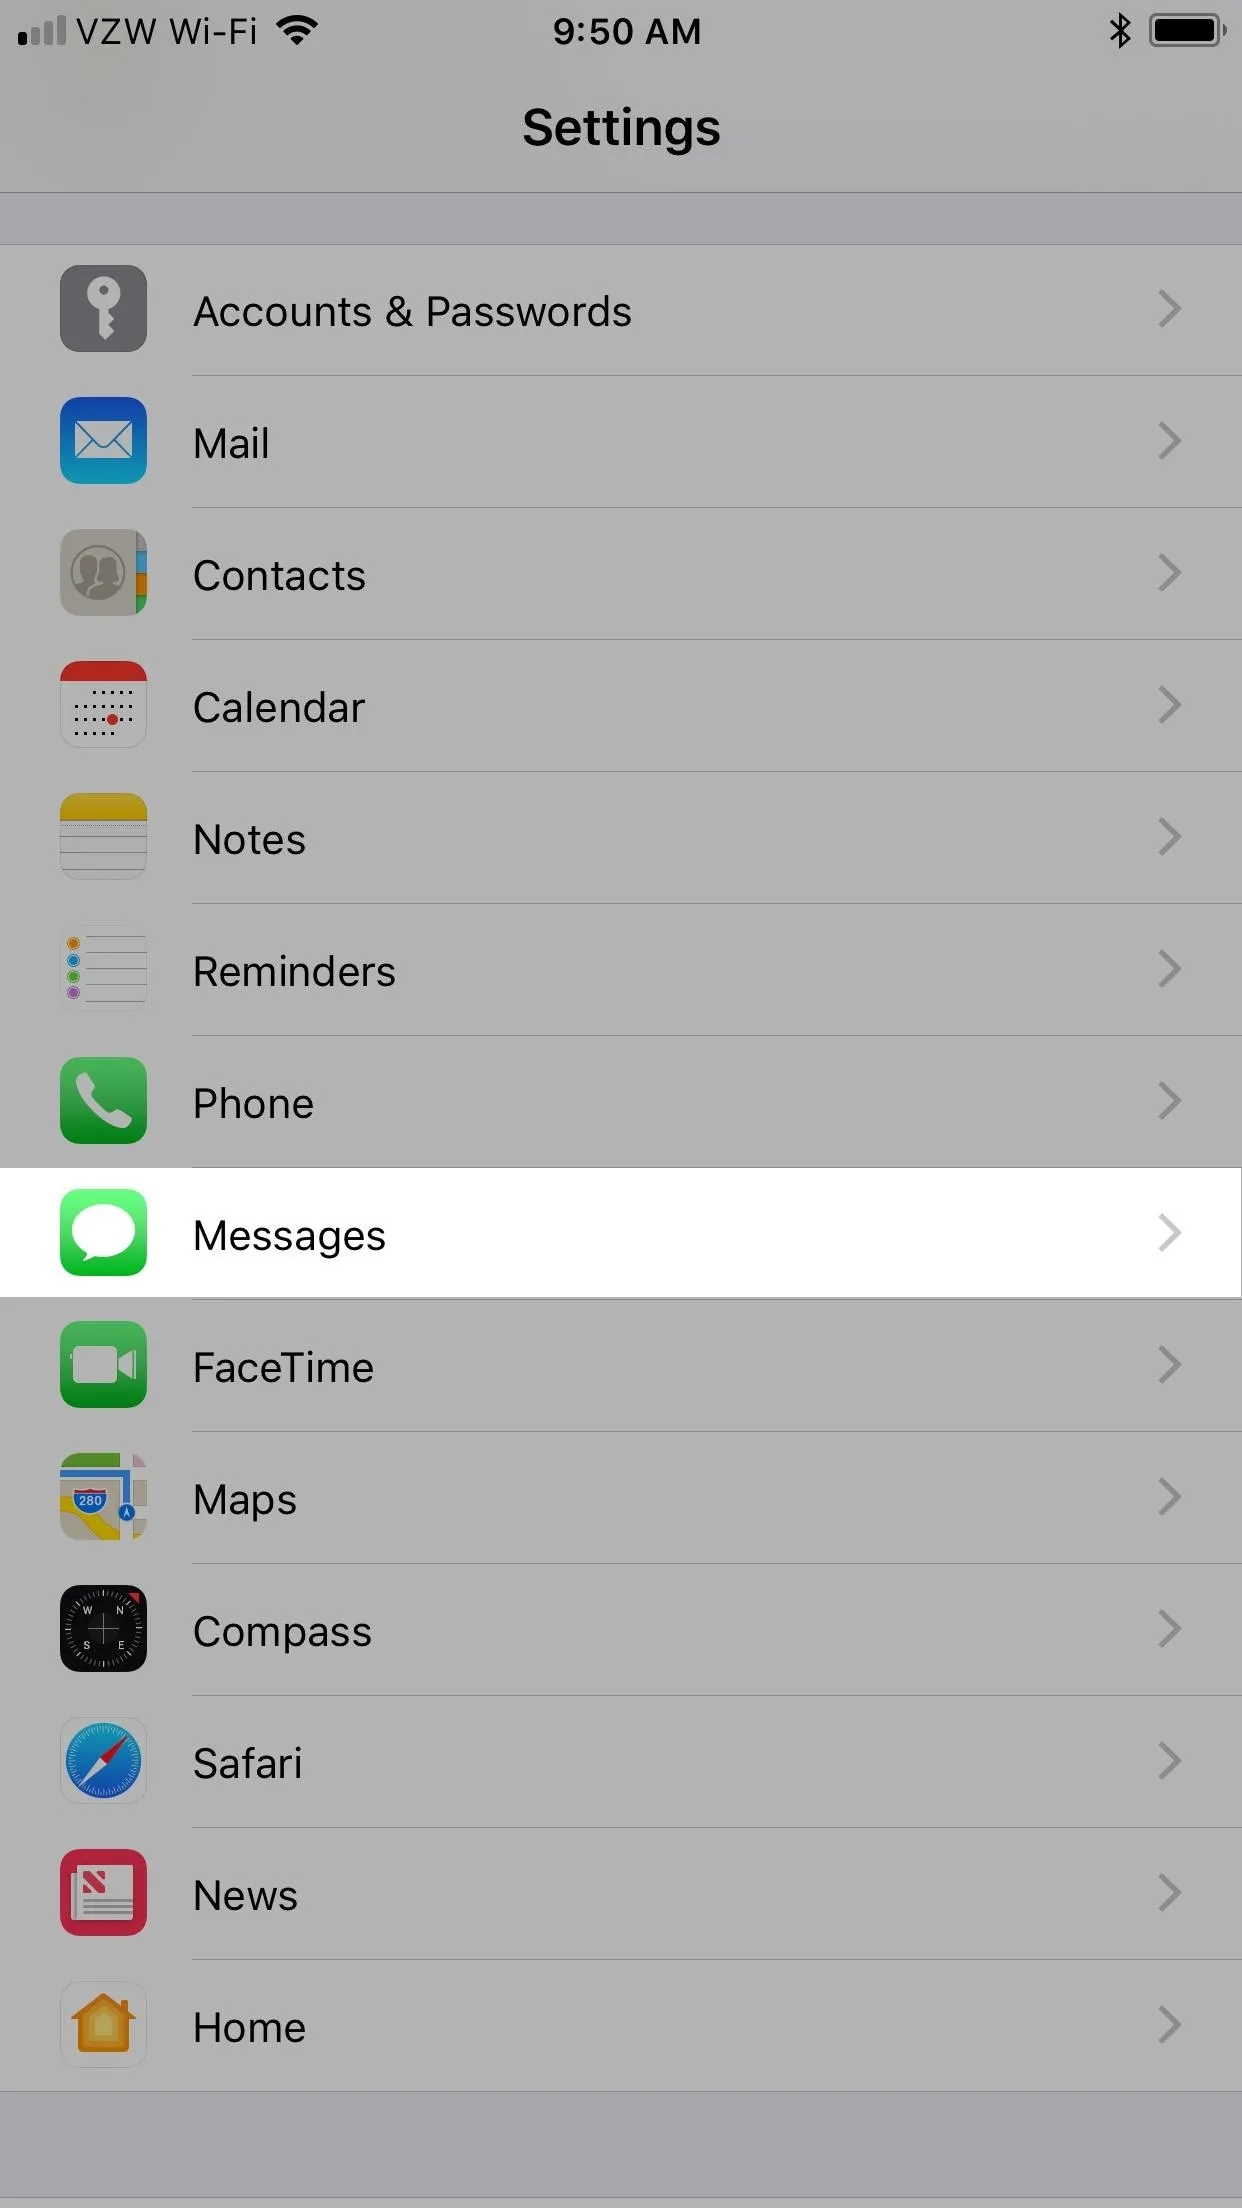
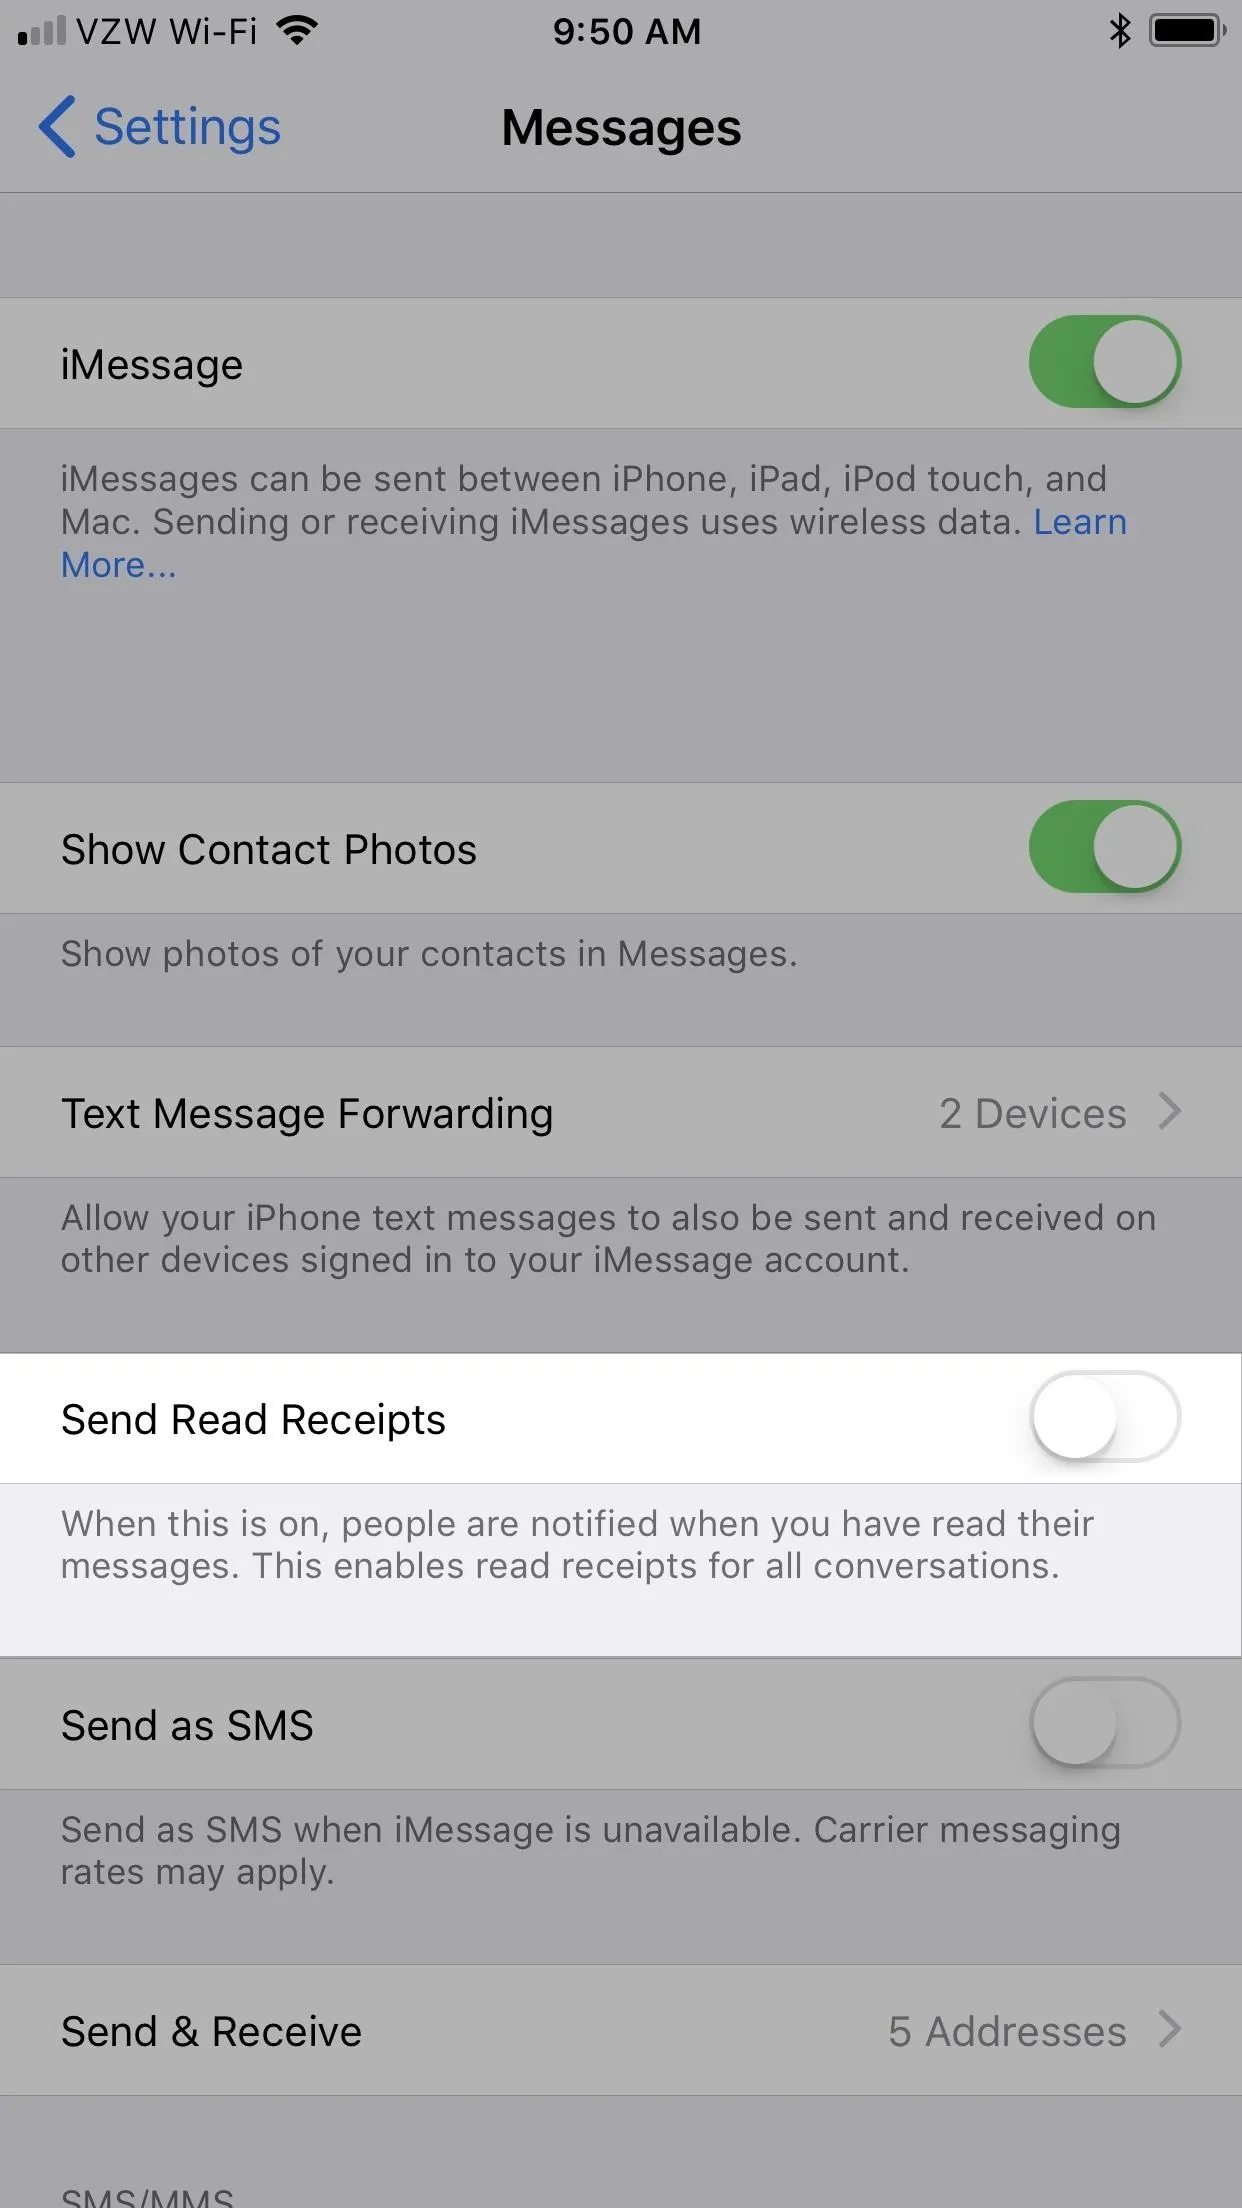


How to Enable/Disable Read Receipts Individually
Turning Read Receipts on or off completely has worked the same ever since iOS 5, but iOS 10 brought a new option that lets you turn Read Receipts on or off on a case-by-case basis. This way, you can turn it off across the board but go back and select people that you actually want to see that you've read their messages. Or, you can turn it on for everyone and disable it for individual contacts.
To do this, in the Messages app, select a conversation thread, then tap on the "i" (info) button in the top right. Next, toggle on "Send Read Receipts" and hit "Done."
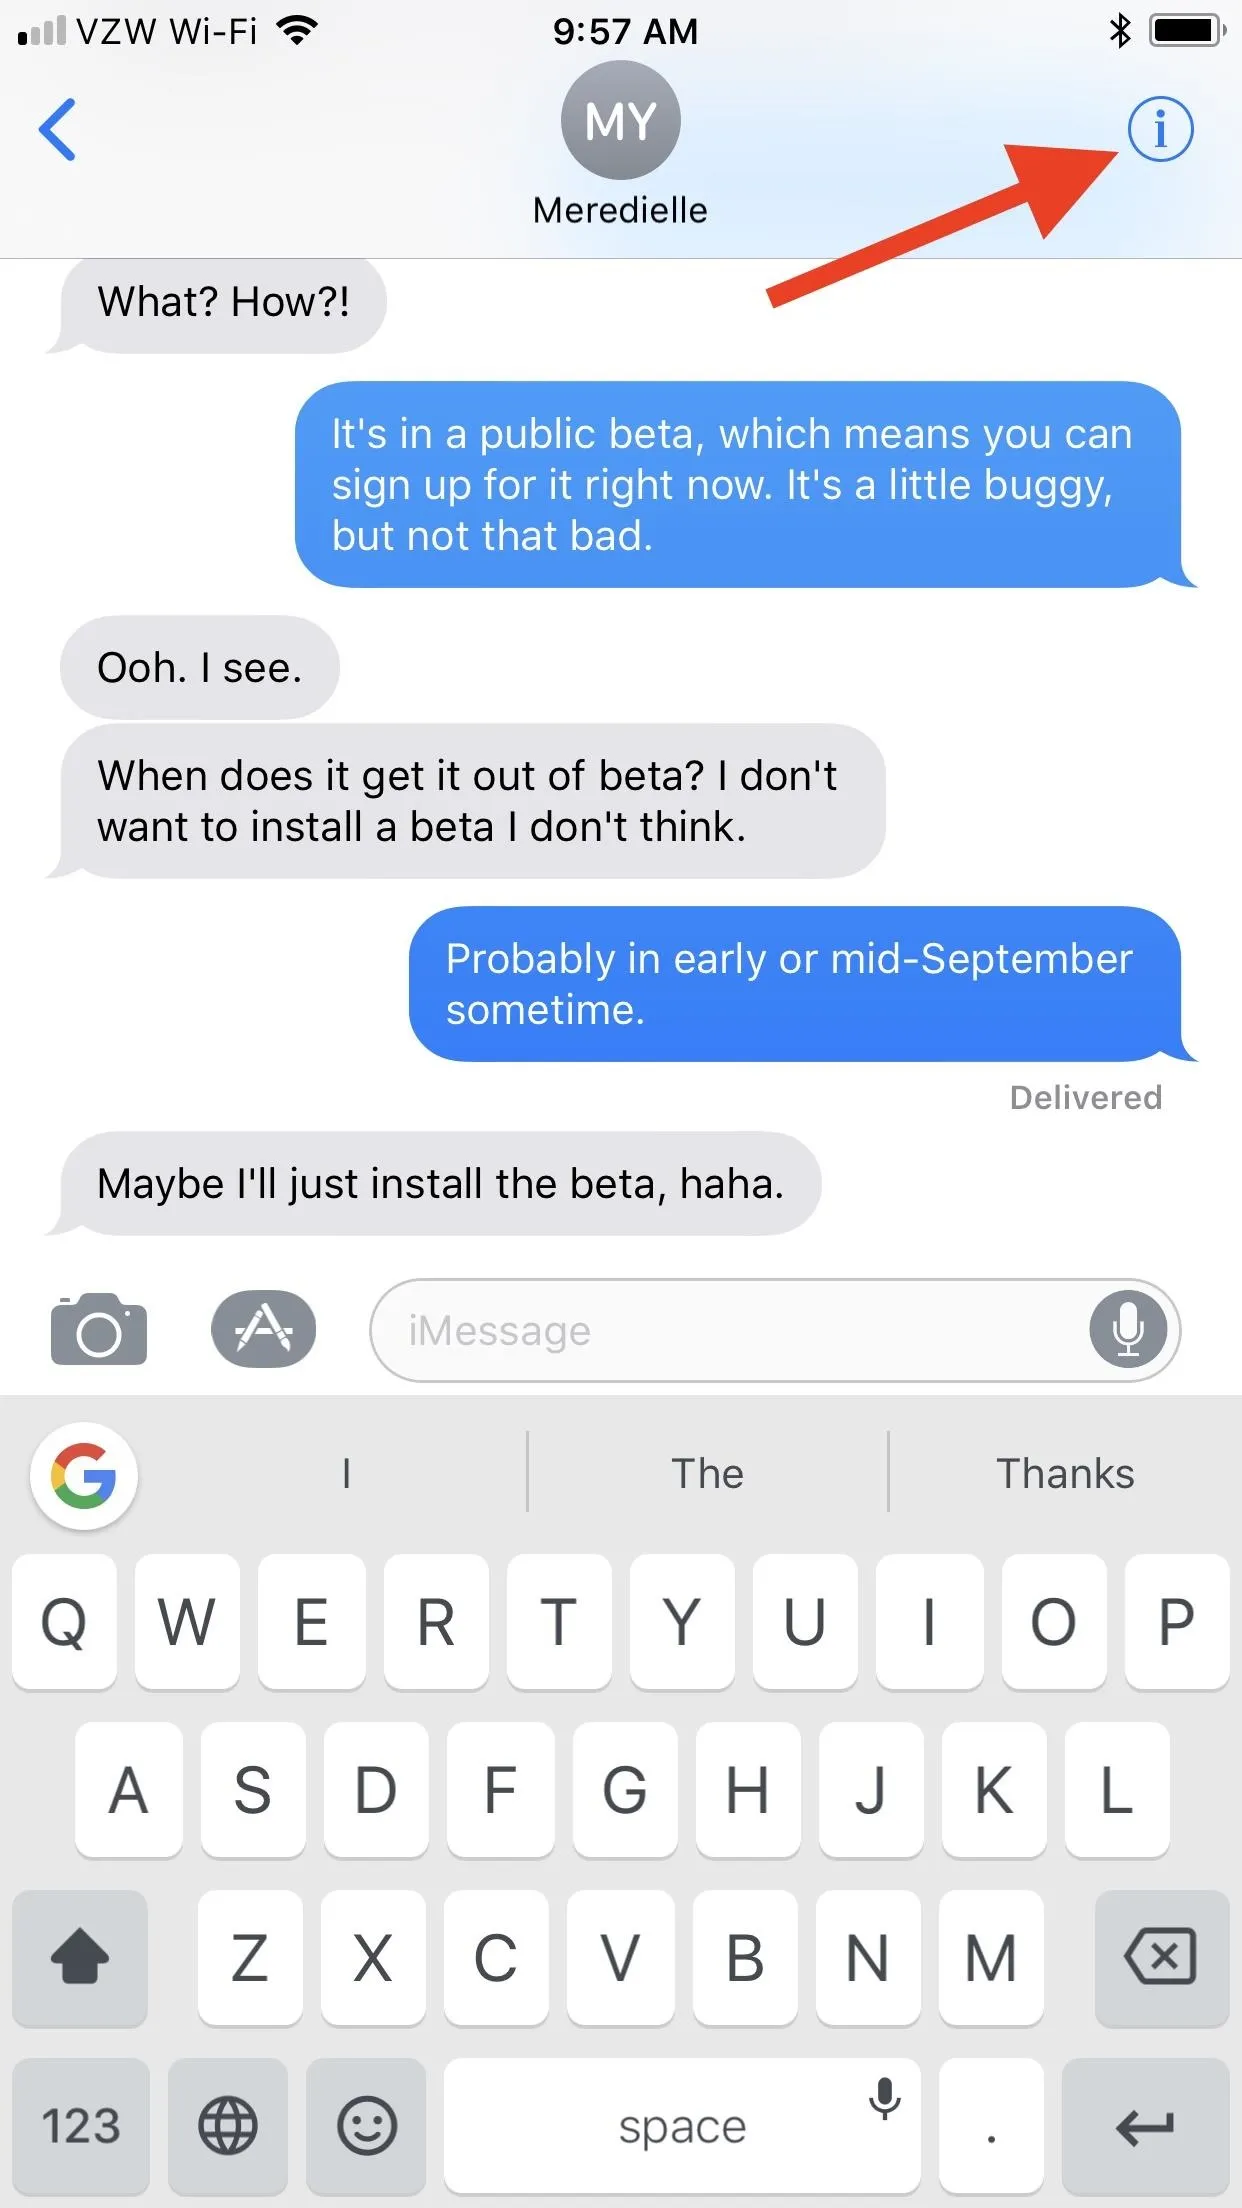
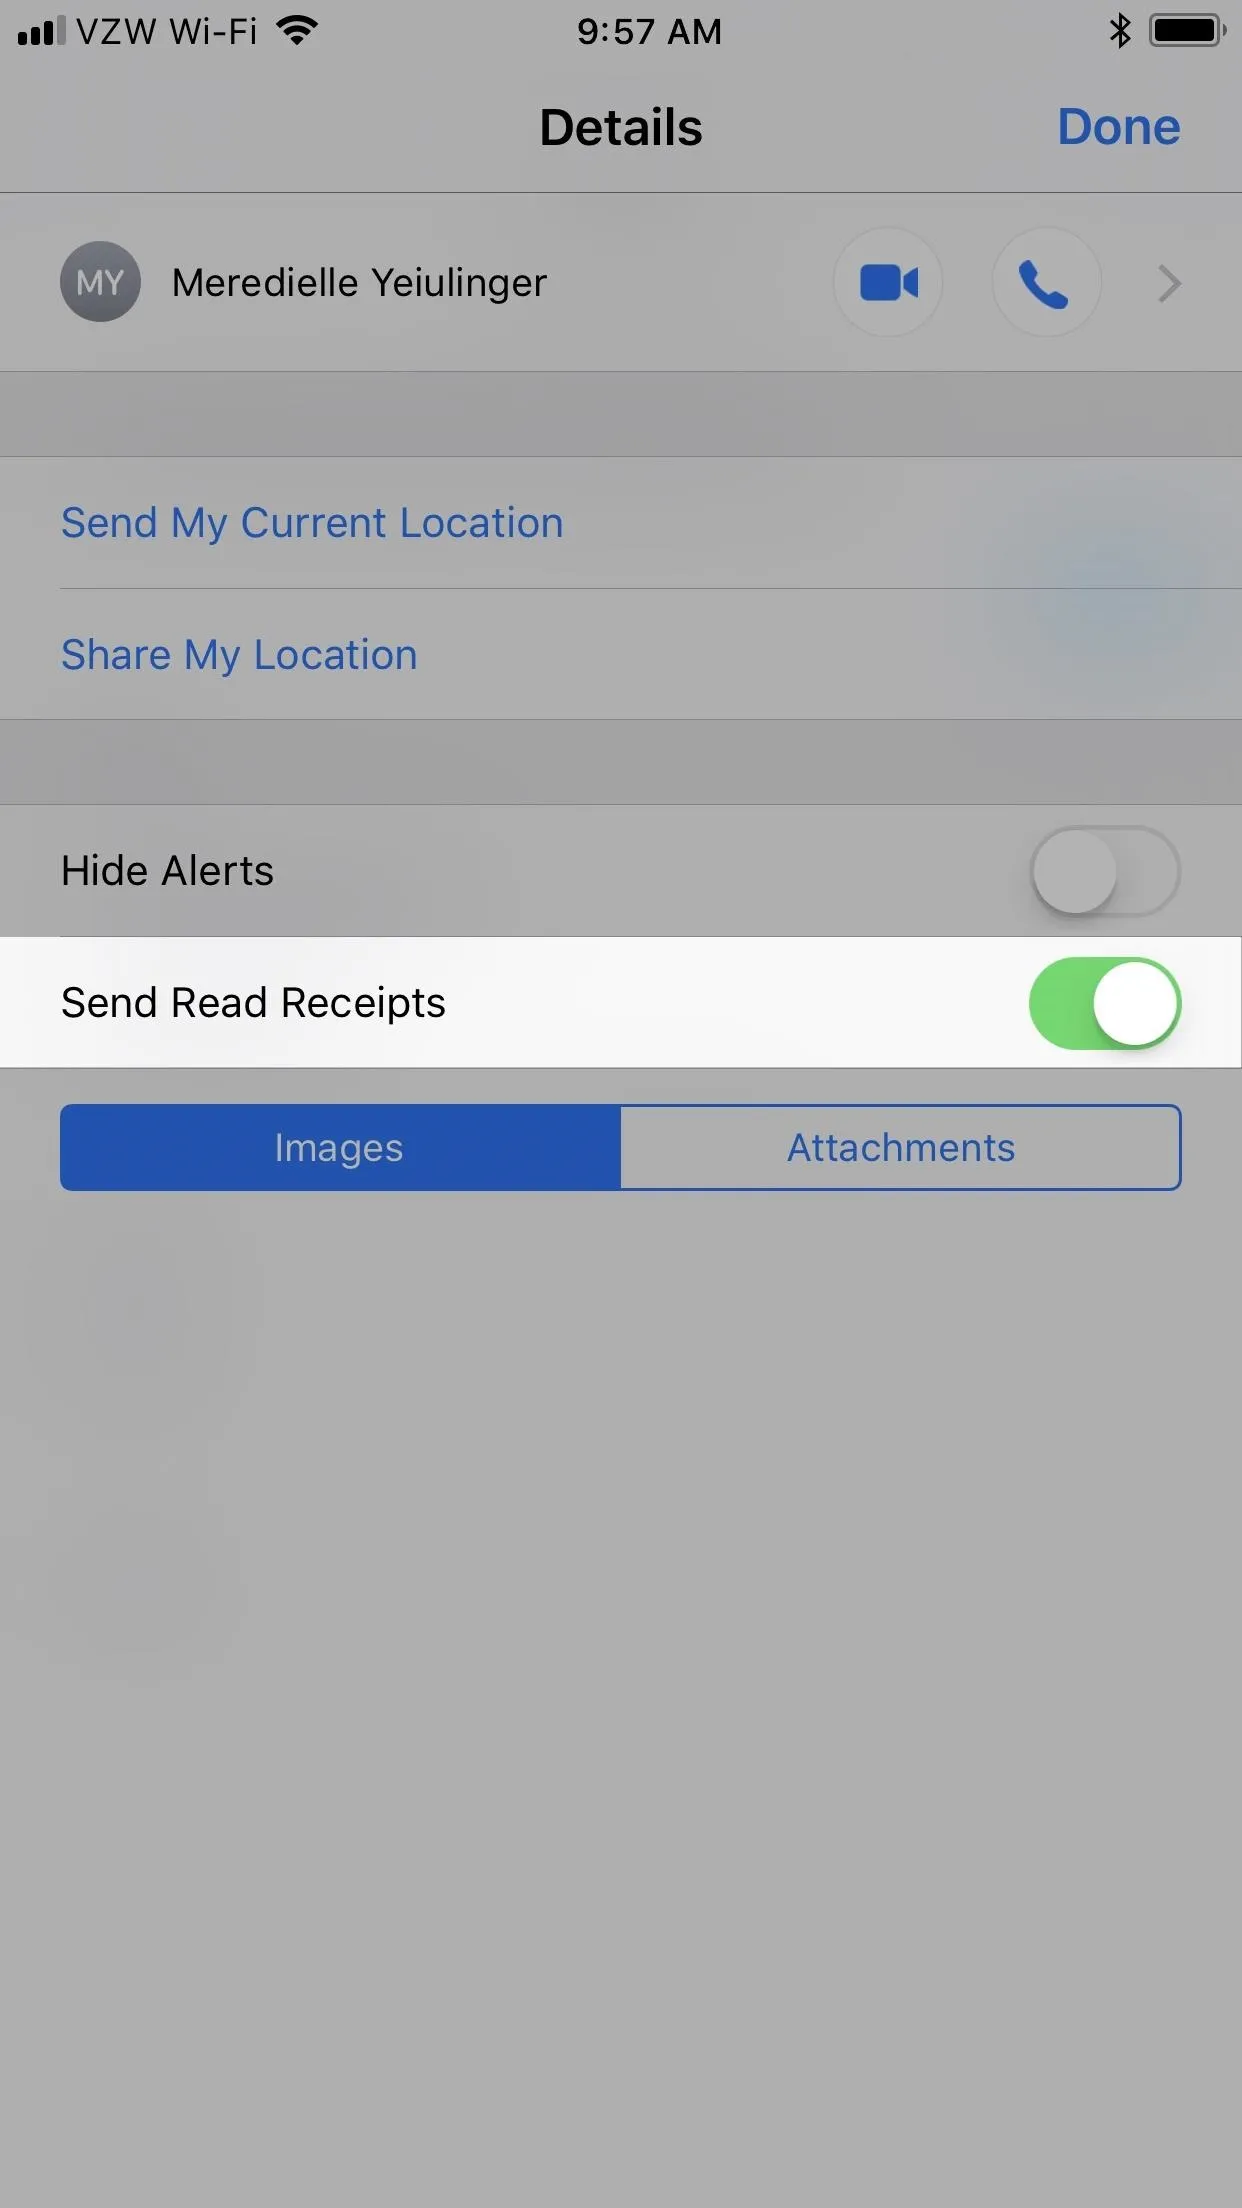


If you don't see this option, it's either because it's an SMS thread, not an iMessage thread, or because it's a group chat, which also doesn't support Read Receipts.
Note that if you turn on Read Receipts for individual contacts, then go into your main Messages settings and toggle "Send Read Receipts" on for everybody, then decide to turn it off again, Messages won't remember your individual contact settings, so you'll have to redo them all. Likewise, if you've turned off individual contacts when the main setting is on, then go back and turn off Read Receipts for everyone and turn it back on, it won't remember individuals you wanted it off for.
- Follow Gadget Hacks on Facebook, Twitter, Google+, YouTube, and Instagram
- Follow WonderHowTo on Facebook, Twitter, Pinterest, and Google+
Cover photo and screenshots by Justin Meyers/Gadget Hacks


Comments
Be the first, drop a comment!