Thanks to Apple's ARKit 2.0 augmented reality framework in iOS 12, we now have a "Measure" app built right into our iPhones that can measure real-world objects. No more physical tape measure or ruler. No more guessing. Just whip out your iPhone, open the app, put your camera, and get measurements. Before you do, however, there are a few things you'll want to know.
While similarapps have existed for some time, Apple's is the default choice now, at least, when first using AR to measure real-life 3D objects. You may eventually move onto more advanced tools, but Apple's stock measuring app isn't going to be any less accurate than third-party ones, so keep that in mind.
- Don't Miss: 10 New AR Features in iOS 12 for iPhone & iPad
To use Measure, you need to have iOS 12 installed, but you can use almost any iPhone that supports iOS 12, not just the newer iPhone X, XS, XS Max, or XR models. However, the iPhone 5S, 6, and 6 Plus are the only models not supported. Measure is preinstalled on all but those devices, but you can install it from the App Store if you've deleted it for some reason or another.
Set Your Preferred Units
Before going any further, you'll want to make sure the app displays measurements how you'd like. There are two systems available for units, imperial (inch, foot, yard, etc.) and metric (millimeter, centimeter, etc.). By default, in the US, it's set to imperial, but you can go to "Measure" in the Settings app to change it if you'd like.
Get Automatic Dimensions
First, open up Measure either from the home screen, with Siri, or from the Search pane. Your iPhone may ask you to move your iPhone around a bit, from side to side and up and down; This is the app calibrating itself to your physical surroundings so that it can make more accurate measurements.
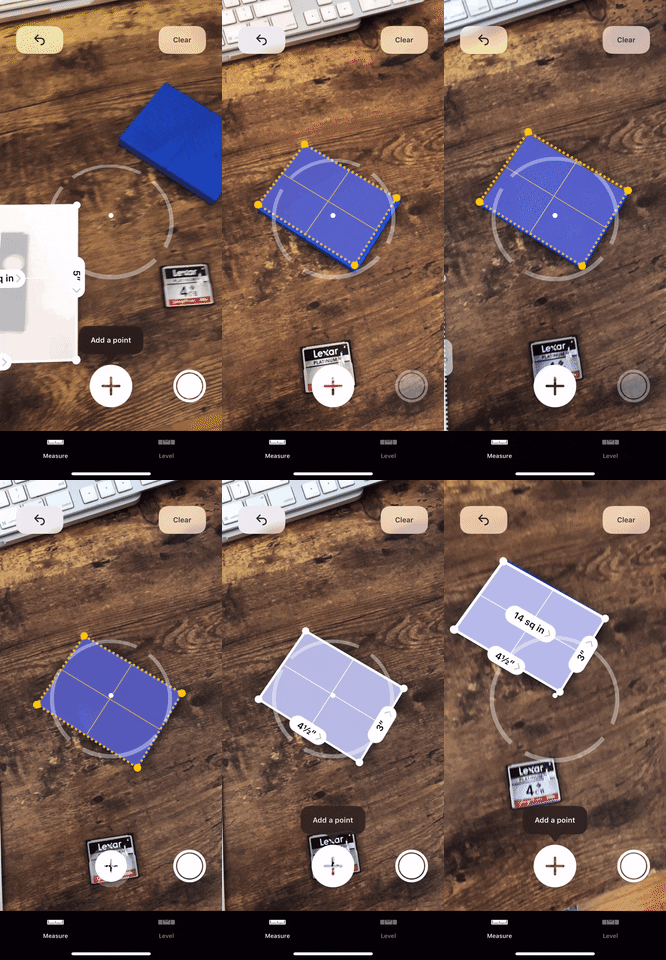
Once the calibration is completed, a white circular cursor will appear at the center of your screen. Point it at the item you want to measure; it's that easy. If it's a square or rectangle, a yellow box should appear over it — tap it or the big plug (+) sign to have it spit out rough dimensions.
Right now, these types of shapes are the only ones the Measure app can detect and spit out dimensions for. Circles won't work, and you won't be able to get quick dimensions for a 3D object, i.e., width, length, and height.
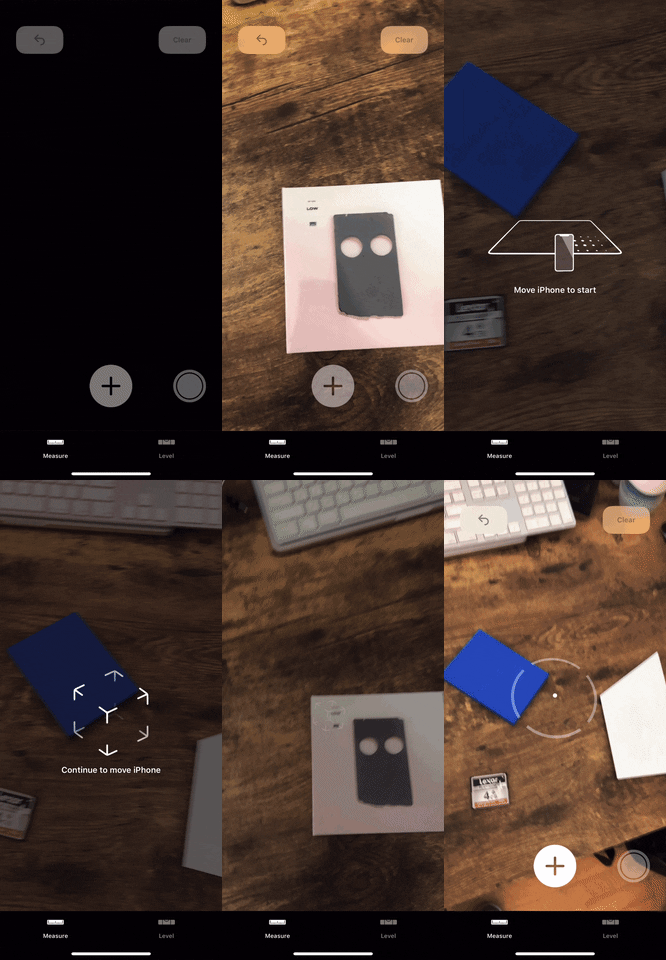
Calibrate first, then measure your object.
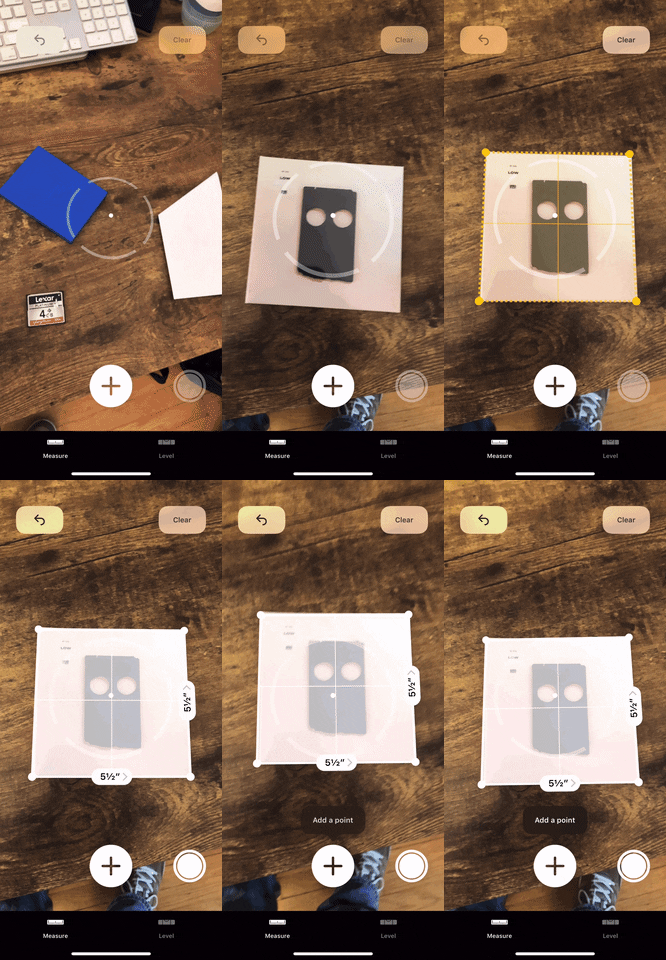

Calibrate first, then measure your object.

View Measurement Details
After you have measured a square or rectangular object, you can immediately see the area in the middle (you may have to move around slightly to get it to appear). If you tap that measurement, you'll be greeted with a popup displaying more information, as well as a quick conversion to the other units so that you can see imperial and metric at the same time. Aside from length x width and area, you'll also see the diagonal measurements.
If you want to see a quick conversion of one side of the object, you can tap that measurement to see its imperial or metric equivalent. Either way you view the data, you can tap "Copy" to add it to your clipboard. When you paste it wherever, the information will show as your default unit system, either as area (dimensions, diagonal) or just the single measurement.
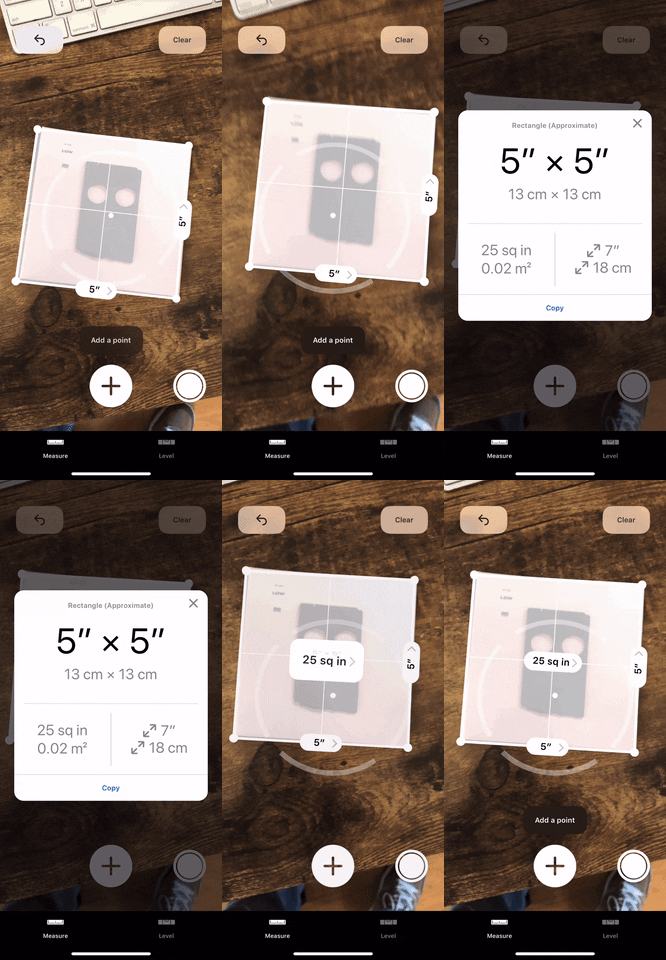
Copied/pasted, these would show up as 25 sq in (5" x 5", 7" Diagonal) and 2", respectively.
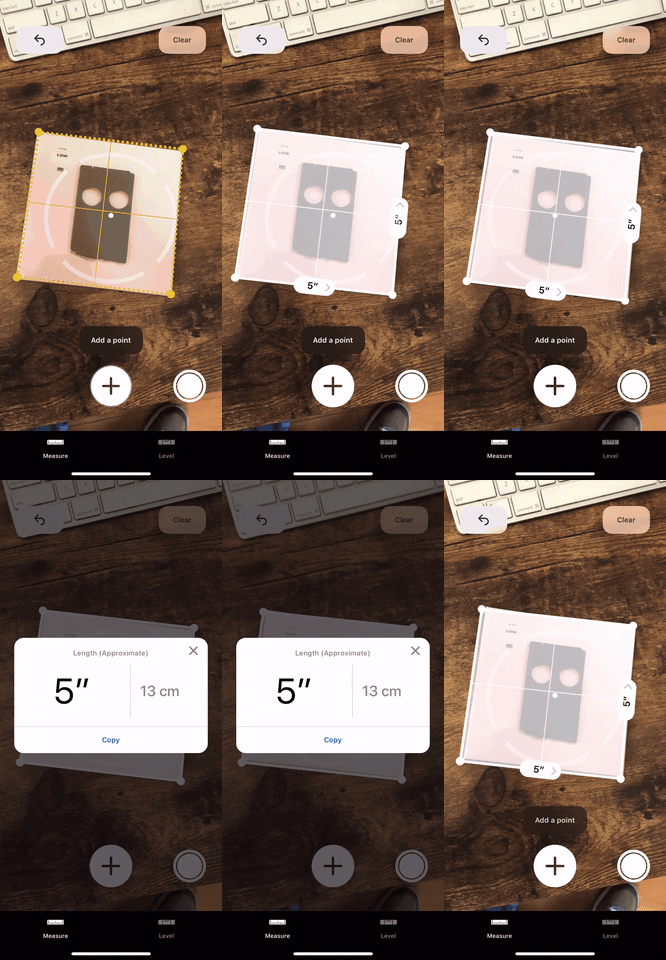

Copied/pasted, these would show up as 25 sq in (5" x 5", 7" Diagonal) and 2", respectively.

Manually Measure & Screenshot
If it's not a square or rectangle, or if it can't automatically give you details, you can manually measure objects instead. Point the cursor at something, tap the plus (+) icon to create a point, and then tap it again when you've drawn the line. The length will automatically appear.
When measuring a polygon, tap the same dot you just ended on again to start a new line without erasing your previous line, that way you see all side measurements at the same time. Tap again to end the line and get the second measurement, then tap in the same spot to start the third one, and so on and so on.
The "Copy" button won't appear for all measurements, so if you want to remember the details in these cases, you can tap the shutter button to take a screenshot. To add a note to the screenshot, tap its thumbnail when it appears. Whether you dismiss the thumbnail or edit it and save, the screenshot will be located in your "Screenshots" and "Camera Roll" albums in Photos.
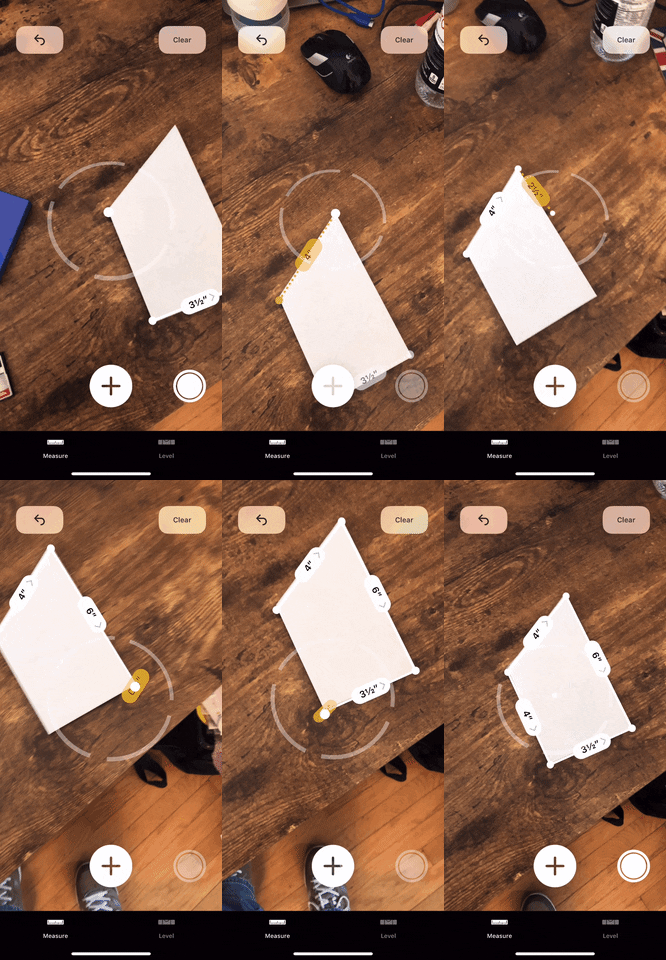
Manually do the work (left) and take a screenshot to save it after (right).
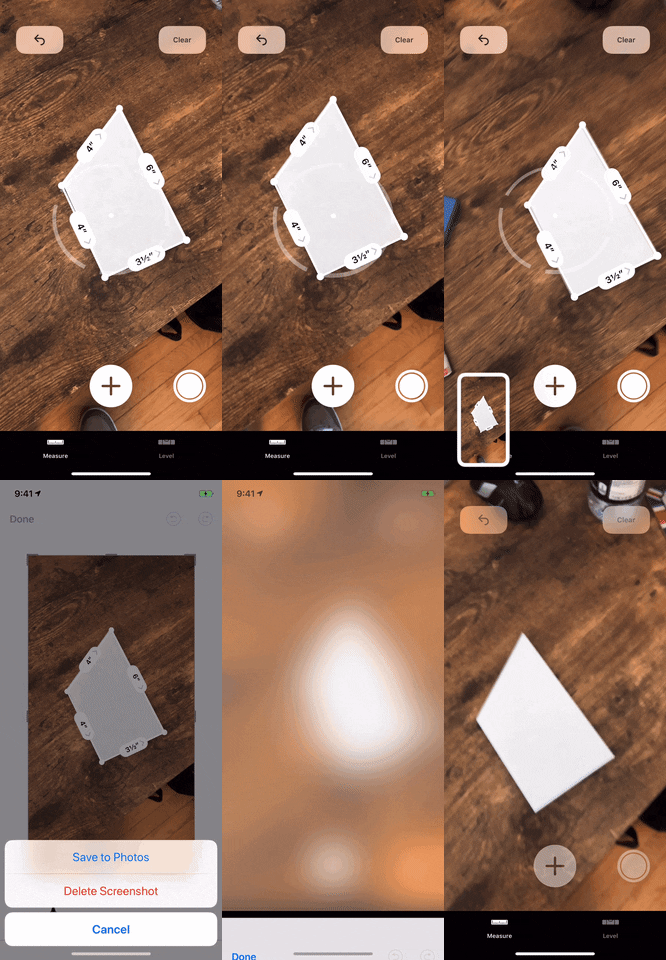

Manually do the work (left) and take a screenshot to save it after (right).

The Accuracy of Measurements
Overall, it does need some work in the accuracy department, especially since AR points have a tendency to drift in space, and no matter how hard you try to calibrate it correctly, it'll still probably be slightly off. My advice: Use these AR measurements for approximations, not accurate numbers.
In the Low album that was tested out above, it clearly shows 5 x 5 inches for 25 square inches. In real life, it was 5.38 x 5.31 inches for 28.57 square inches. The trapezoid above states 4 x 6 x 3.5 x 4 inches, when it real life it was 4.25 x 6.5 x 4.63 x 4.25 inches.
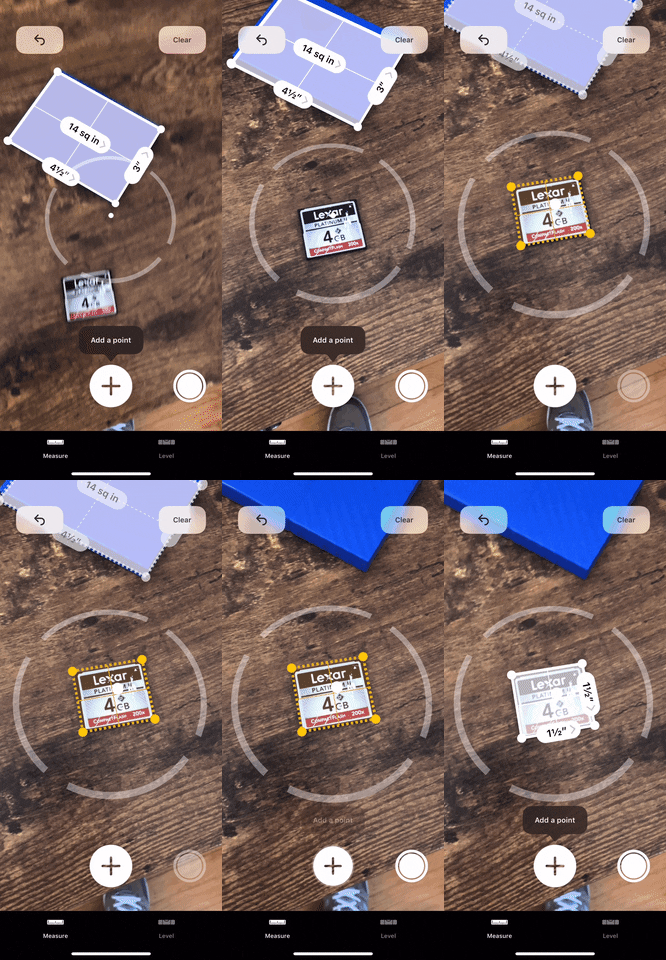
Below, you can see a WD My Passport portable hard drive, which shows 4.5 x 3 inches for 14 (really 13.5) square inches. In real life, it's 4.31 x 3.19 inches for 13.75 square inches. The Lexar CompactFlash card is recorded as 1.5 x 1.5 inches, whereas it's really 1.69 x 1.44 inches.


Level Has a New Home
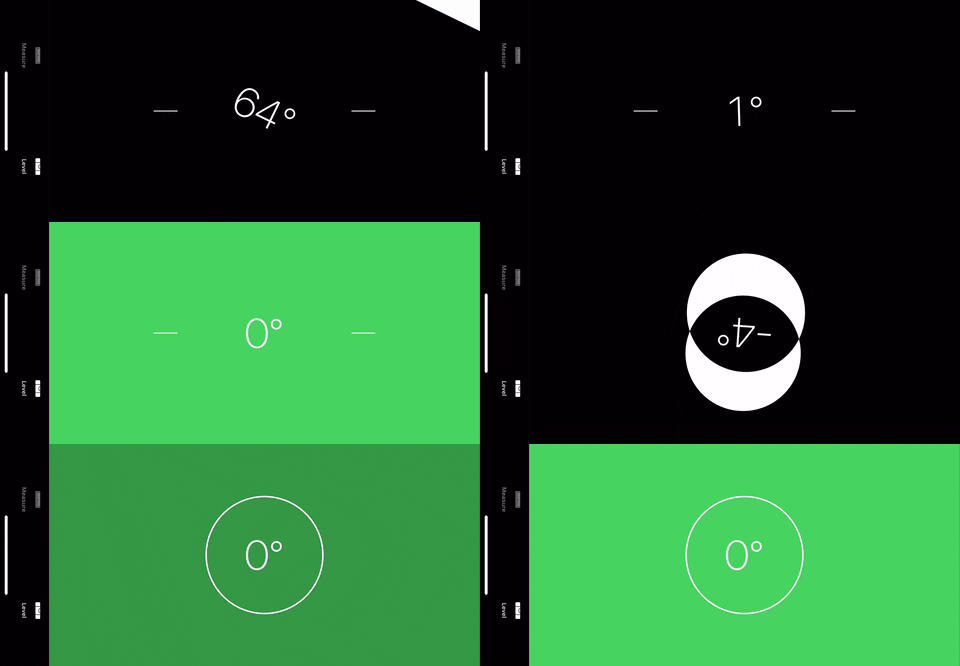
If you use the "Level" tool a lot in the Compass app before, you'll probably notice it's gone now. That's because it has moved to the Measure app, which makes sense considering it's more closely related to measurements than directions.
From inside Measure, tap "Level" in the bottom-right corner to begin using the tool. Your iPhone will be able to tell if you're using your phone horizontally or vertically, flat on a table, or held upright. When it's at zero degrees, your iPhone will turn green, indicating it's straight or level.
Cover photo and GIFs by Justin Meyers/Gadget Hacks


Comments
Be the first, drop a comment!