Navigating and editing text is an essential part of any operating system, and with iOS 13, Apple has made some significant changes. Some things remain the same when working with text, but there are many updates to moving the cursor, scrolling, and selecting, cutting, copying, pasting, undoing, and redoing text.
Apple streamlined the text editing system to make it easier and quicker to use on an iPhone. So the changes to editing text in iOS 13 go relatively deep. Apple even ditched the magnifying glass that'd appear when moving the cursor, something that has been around since the very first iPhone.
Text selection is also faster, allowing you to highlight text with either a swipe or a few taps, in addition to the drag handles that previous versions of iOS relied on. Also, while not explicitly geared toward text, the scroll bar is now draggable. So you can quickly move to any point in a document in one step instead of having to swipe over and over.
- Don't Miss: 200+ Exciting New iOS 13 Features for iPhone
While some of the things below also apply to selectable, non-editable text, there will be some differences. We're just focusing on the editing side of things. If you're only interested in certain aspects, you can jump to a section: Moving the Cursor | Selecting & Moving Text | Editing Text | Scrolling Through Documents.
Moving the Cursor
Before iOS 13, moving the cursor could be done in a few different ways. All of the following ways worked in iOS 12, and some of them still work in iOS 13 (which will be noted).
- Tap: The cursor can be moved to the beginning or end of a word, number, emoticon, emoji, and so on, depending on where you tap on the word. It allows you to jump around a text field quickly, and it's sticking around in iOS 13, though, with a minor change as you'll see.
- Tap-and-hold: In editable text, the tap-and-hold action brings up a magnified view of what's under your finger to allow you to place the cursor where you want it precisely. Though precise, it's a bit slow, requiring a tap-and-hold every time you want to drag the cursor somewhere else. It's been around since the first iPhone, but it's not found in iOS 13.
- Press-and-slide on the keyboard: Introduced in iOS 9 with the addition of 3D Touch, a firm press on the keyboard turns it into a trackpad that can be used to move the cursor around. On iPhones without 3D Touch, iOS 12 added long-pressing the space bar to the same effect. Additionally, iPads can access the trackpad by using either the long-press on the space bar or by dragging with two fingers. All of these methods are still available in iOS 13.
- External keyboards: If using a hardware keyboard, the cursor can be moved by using the arrow keys. And there are different ways to move the cursor by using the arrow keys in combination with the modifier keys. All of that works as expected in iOS 13.
The most significant change to cursor movement comes with the removal of the tap-and-hold method to bring up the magnifying glass. In iOS 13, the cursor becomes draggable. Now, rather than tapping, holding, and waiting for the magnifying glass to show up, you can just grab the cursor and move it right where you want it. After grabbing the cursor, it will hover right above your finger, so you can still see and drop it precisely where you want to.
It's easily the most disruptive change in iOS 13 and will require some users to change a habit that's been built up for the past decade. Once your muscle memory switches to the new system, however, moving around the text cursor should become quicker since there's no waiting on the magnifying glass.
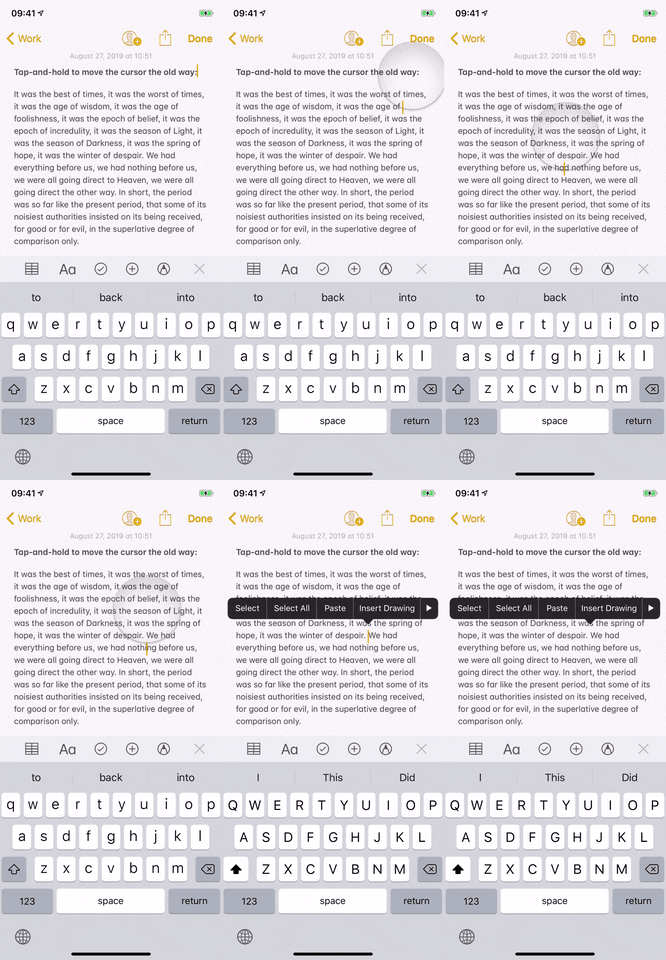
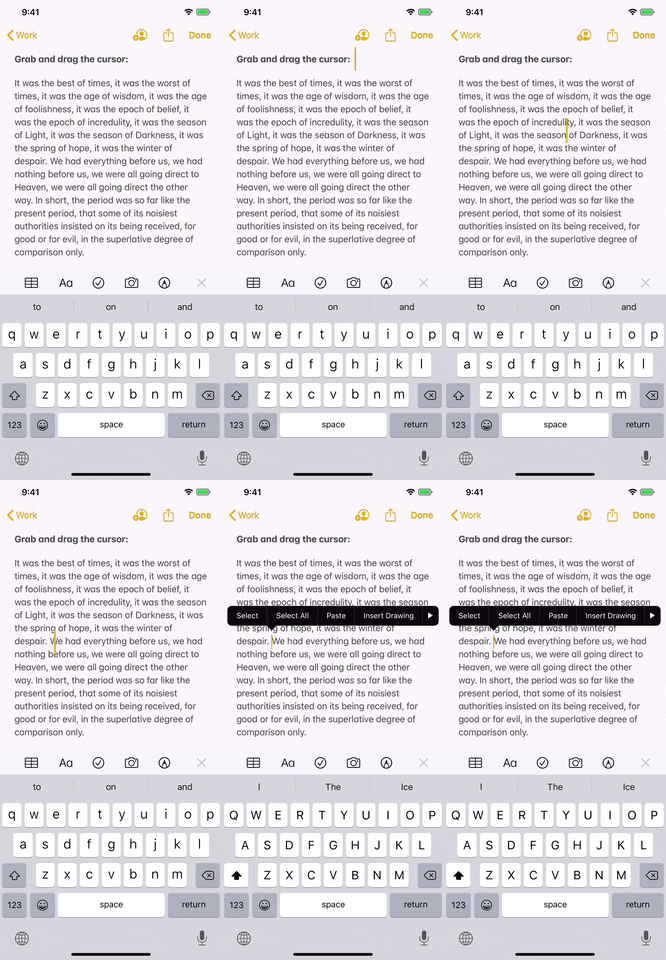
Moving the cursor in iOS 12 (left) and iOS 13 (right).


Moving the cursor in iOS 12 (left) and iOS 13 (right).
The tap method also received a small tweak in iOS 13. In prior versions, after tapping a word to move the cursor, a second tap will only open the edit menu. Plus, if you tap to put the cursor inside of a word after the first tap, it would only move the cursor to the beginning or end, not in the middle anywhere.
In iOS 13, if you tap to go to a word, then tap in the same spot, the edit menu will appear. And if you tap that word the second time in the middle somewhere, it'll act like in iOS 12 where the cursor jumps to the beginning or end of the word. However, long-press that second time and the cursor will move to the place within the word that you touched. In some cases, the menu may appear, other times not.
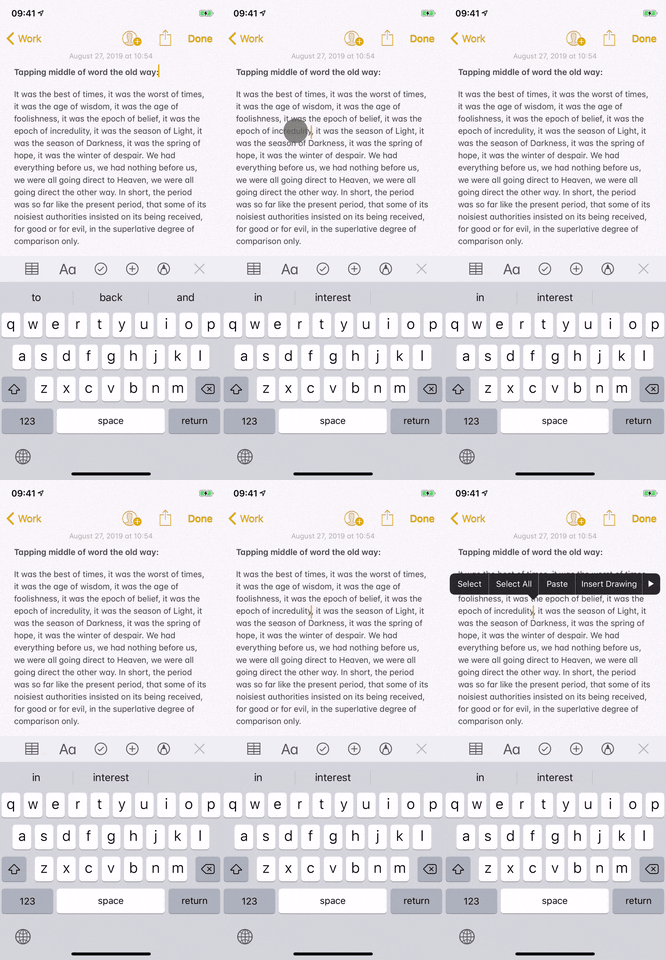
Trying to tap in the middle of a word on iOS 12 (left) and iOS 13 (right).
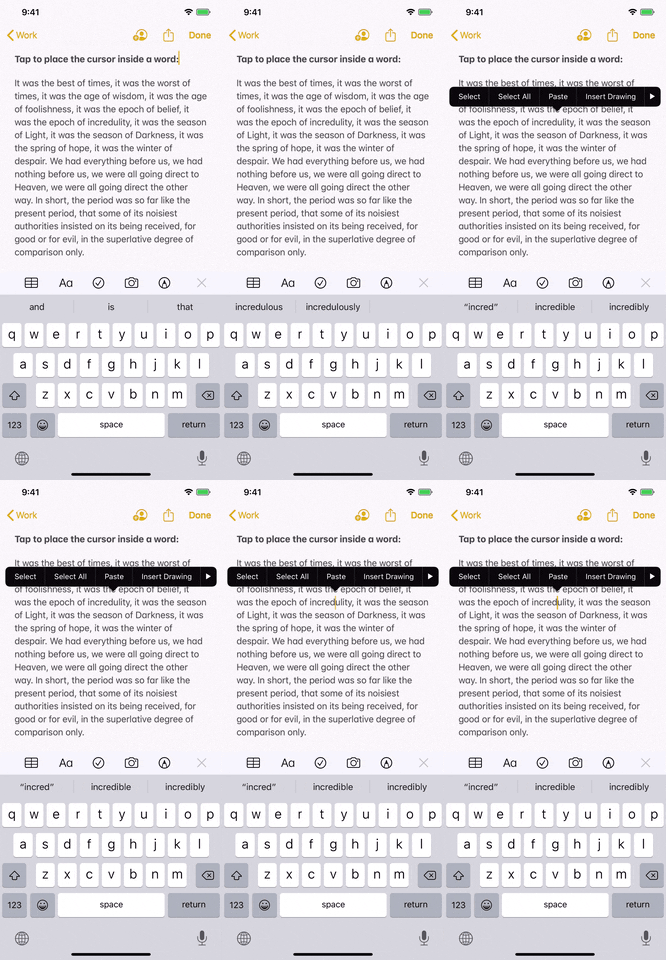

Trying to tap in the middle of a word on iOS 12 (left) and iOS 13 (right).

Selecting & Moving Text
Prior to iOS 13, selecting text could be done in a few different ways. Some of those ways continue to work in Apple's latest operating system for the iPhone.
- Double-tap: Tap twice on a word, number, etc. to select it and open up the contextual edit menu with options to Cut, Copy, Paste, BIU, Look Up, Speak, Share, Indent Right/Left, and Spell. You can drag the ends to expand the selection. The gesture still works in iOS 13 but there are also similar options that do more (see below).
- Long-press a word: If you long-press (but not too hard) the word, number, etc., it will be highlighted and the contextual edit menu appears. In it, you can Cut, Copy, Paste, BIU, Look Up, Speak, Share, Indent Right/Left, and Spell. You can drag the ends to expand the selection. On non-3D Touch devices, long-pressing brings up the cursor magnifier instead. It's all there in iOS 13 except for the cursor magnifier, and you may see some small changes in the edit menu.
- Long-press a word and slide: On 3D Touch devices, when you long-press a set of characters to highlight it, without releasing your finger from the screen, you can drag to select more text. All of the edit menu options for the long-press show up except Speak. In iOS 13, it works the same, though, you have to wait for haptic feedback.
- Tap the cursor: When you tap the cursor in its place, the contextual edit menu appears with options to Select, Select All, Paste, Insert Drawing, BIU, Indent Right/Left, and Speak Sentence. You can drag the ends to expand the selection. All of it works in iOS 13.
- Move the cursor: Just like with tapping the cursor itself, after moving the cursor with the tap-and-hold action, you'll see all the same options. While tap-and-hold doesn't work in iOS 13 for moving the cursor, dragging the cursor has the same effect.
- Hard-press a word: On 3D Touch devices, when you hard-press a word, number, etc., it jumps into a floating bubble that you can place anywhere else in the text. It's basically a shortcut for moving a single set of characters. Unfortunately, it no longer works in iOS 13.
- External keyboards: Holding down the Shift key and using the arrow keys and modifiers to move the cursor will highlight the text and show the contextual edit menu where appropriate.
In iOS 13, the double-tap method has been updated to include triple and quadruple taps. So you can do more with multiple taps than just select a word. Tapping to highlight now includes the following options:
- Tap twice to highlight a single word.
- Tap three times to highlight a single sentence.
- Tap four times to highlight an entire paragraph.
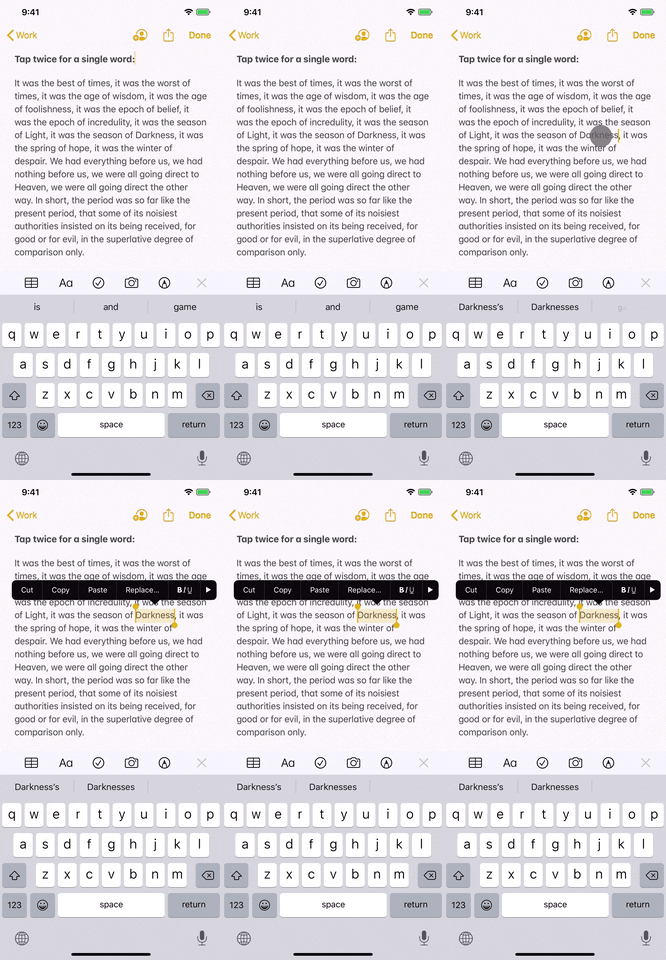
From left to right: Tapping twice, three times, and four times in iOS 13.
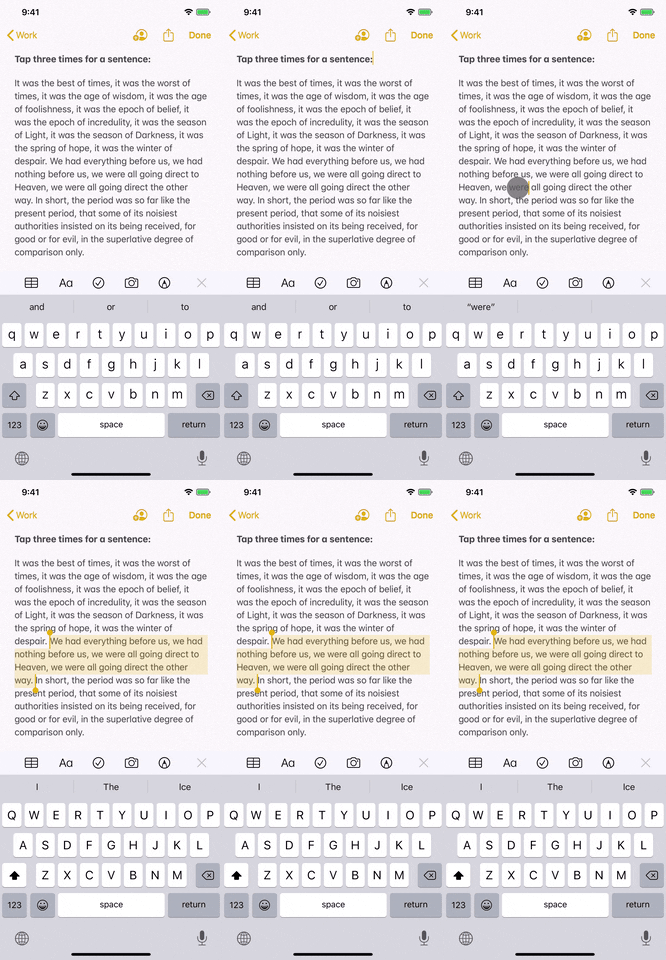
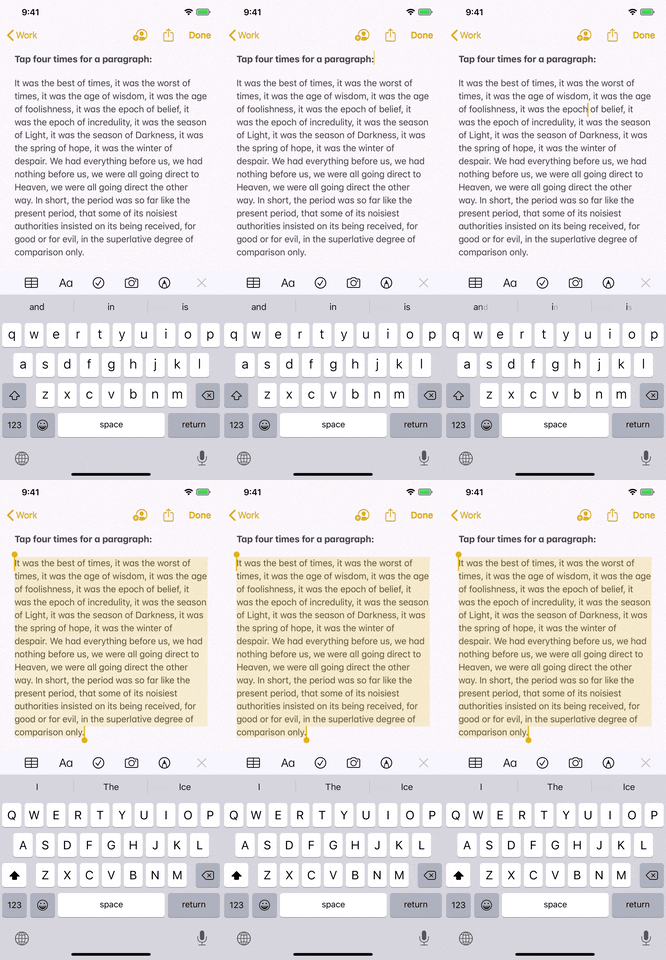

From left to right: Tapping twice, three times, and four times in iOS 13.


As mentioned above, the "long-press a word and slide" action works similarly, but you must wait for haptic feedback to know that it's ready to select more text. If you select a word without getting the haptic feedback, you'll just drag the whole selector box over to another word or set of characters.
Additionally, the "Indent Right" and "Indent Left" edit menu options are now labeled as "Indentation." When you tap that, you get options to "Increase" and "Decrease" the indent.
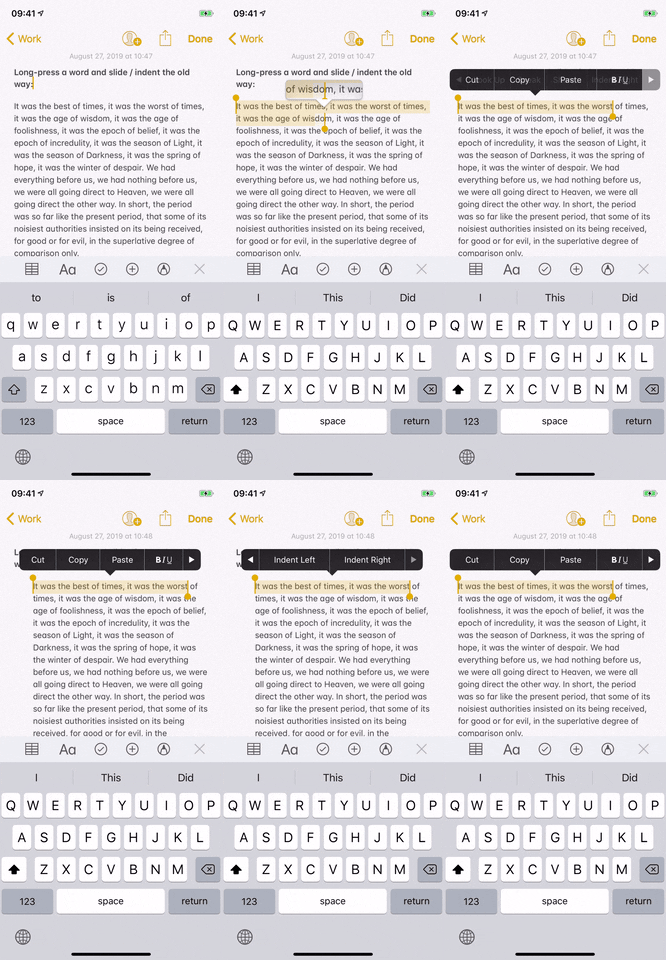
Slide to select and indenting on iOS 12 (left) and iOS 13 (right).
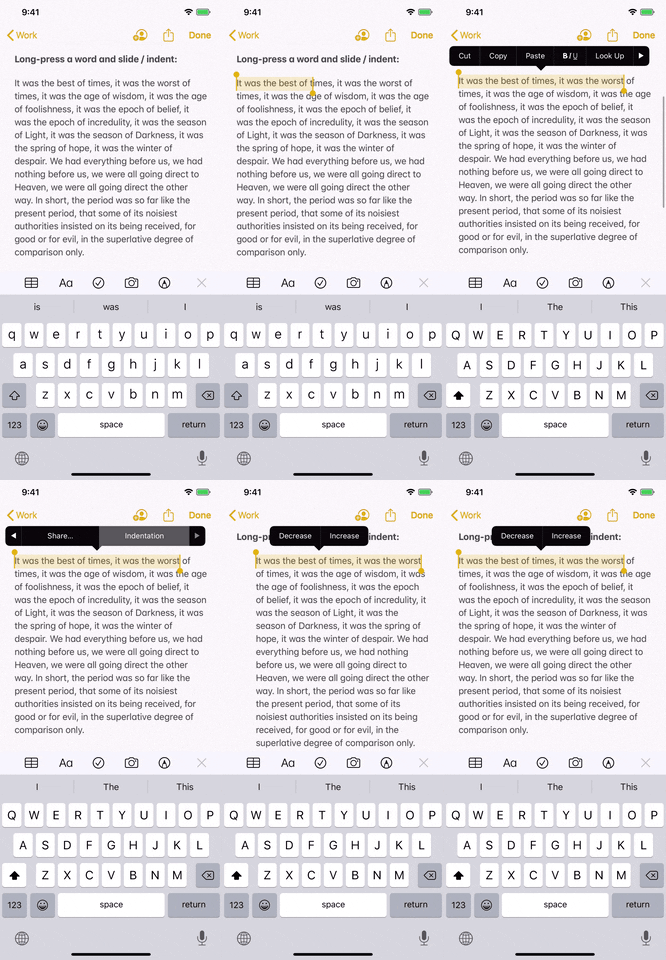

Slide to select and indenting on iOS 12 (left) and iOS 13 (right).

Also worth mentioning, whenever you tap on a word, then tap in the middle of it somewhere, the cursor will jump there, and the edit menu will appear with options to Select, Select All, Paste, Insert Drawing, BIU, and Indentation.
Editing Text
In previous versions of iOS, getting to the Cut, Copy, and Paste commands is primarily done using the contextual edit menu that appears when text or numbers are selected, as seen above. It's not the fastest way, but it's better than the options for Undo and Redo. Introduced almost a decade ago, the "Shake to Undo" and "Redo" feature may be responsible for its fair share of broken iPhone screens.
To get around those downfalls, some apps added buttons to their UI for oft-used features, and Apple even added them to the top of the onscreen keyboard on the iPad. However, both have shortcomings in that they aren't available across iOS and are usually only shown when editing text.
In iOS 13, Apple has added some new three-finger gestures to make accessing these commands much faster across all of the system. Much like keyboard shortcuts, learning these gestures will make manipulating text much quicker and fluid. To get started, select some text, then do the following:
- Pinch with three fingers to copy.
- Pinch with three fingers twice in succession to cut.
- Do a three-finger spread to paste.
- Swipe to the left with three fingers to undo.
- Swipe to the right with three fingers to redo.
- Tap with three fingers to open the menu.
When you perform each gesture, a small bubble will appear at the top of the screen showing which command was executed. These gestures tend to work better on larger iPhone models. If you're on an iPhone with a smaller screen (the iPhone SE, in particular), you can also do a three-finger tap to open a menu at the top of the screen with all five commands available. But you can also use that option if the swipe gestures are too hard to remember.
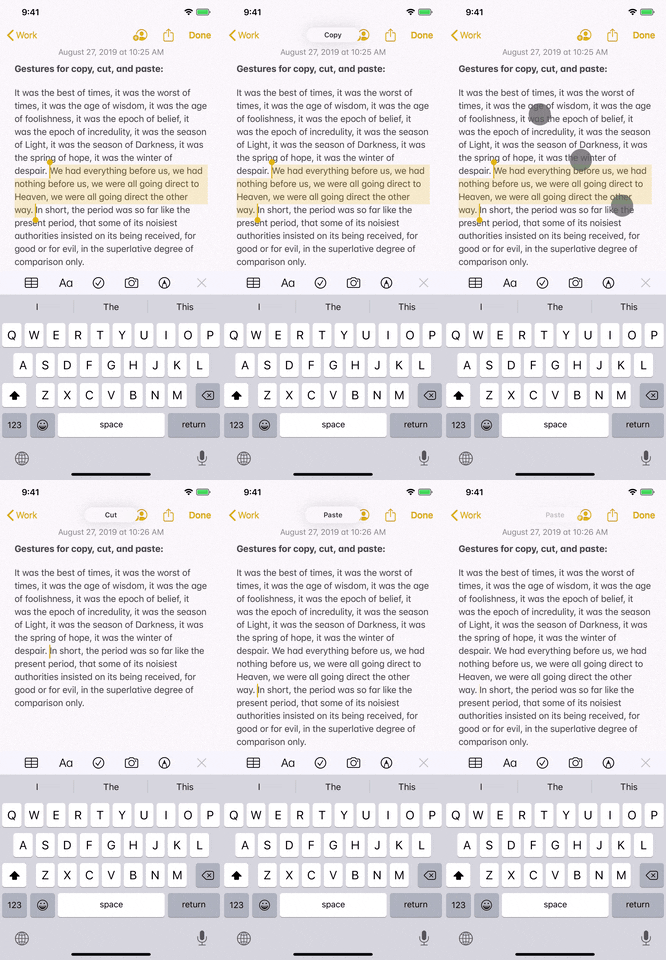
New copy, cut, and paste gestures (left); Undo, redo, menu (right).
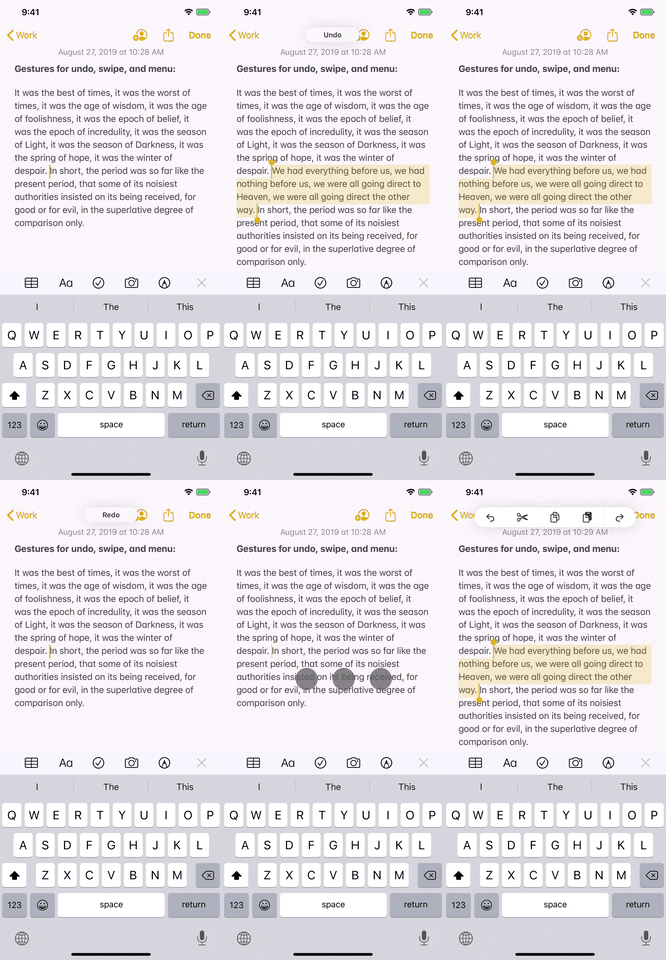

New copy, cut, and paste gestures (left); Undo, redo, menu (right).

Scrolling Through Documents
The iPhone has always done a great job providing a fast and smooth scrolling experience. Flicking a webpage then watching it scroll and slowly come to a stop was one of those "wow" moments back when the iPhone first came out. The experience has aged well for the most part, but it can be a little frustrating when scrolling through long documents.
For iOS 12 and under, you can get back to the top by tapping the status bar, but getting to a specific point is often an exercise in frustration. Usually, you would start to flick over and over, only to scroll past where you wanted to go since things are moving so fast.
In iOS 13, Apple has finally added the ability to grab and move the scroll bar. To do it, scroll a bit to show the scroll bar on the right side of the screen, then long press on it. You'll feel a haptic tap and the scroll bar will get thicker. Now, just move it up and down the side of the screen to scroll to any point. No more flicking!
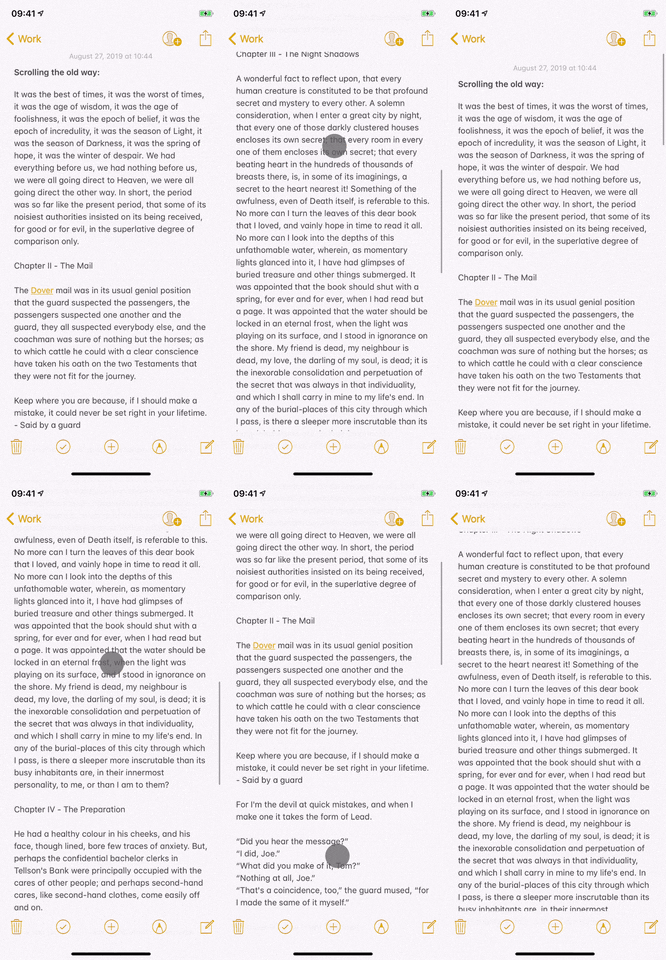
Scrolling in iOS 12 (left) vs. iOS 13 (right).


Scrolling in iOS 12 (left) vs. iOS 13 (right).

Working with editable text documents in iOS 13 is going to take some getting used to for people who have been using iOS for several years. While many of the old ways of doing things are sticking around, functions like moving the cursor are changing concepts that have been there since the iPhone was first unveiled.
Ultimately, learning the new methods to work with text can make using iOS faster and more fluid, and it can possibly save you from an expensive "Shake to Undo" screen repair.
Cover photo by Mike Goril/Gadget Hacks; GIFs by Justin Meyers/Gadget Hacks




Comments
Be the first, drop a comment!