In the latest software updates for iPhone and iPad, there's an even easier way to view all your saved Wi-Fi networks and credentials and share them with family, friends, and others who need access.
For a while now, whenever your Wi-Fi-connected iPhone or iPad gets close to another Apple device not on any Wi-Fi network, you may see a prompt appear to share the password. It's a quick and easy way to help others connect to the same Wi-Fi hotspot, but it only works between Apple devices.
When iOS 16 and iPadOS 16.1 came out, Apple gave us a convenient way to see stored wireless networks. Go to Settings » Wi-Fi, hit the info (i) button for the connected network., then tap the obfuscated password to reveal it in plain text. To see other saved networks, tap "Edit" from the list of nearby networks. This is an easy way to view and copy your saved Wi-Fi passwords in plain text, but it's not a great way to share Wi-Fi login credentials with others.
With the iOS 18 and iPadOS 18 software updates, released Sept. 16, a new Passwords app houses all the saved credentials, security recommendations, password groups, codes, and recently deleted credentials previously found in Settings » Passwords. It also lists all your saved known and managed wireless access points. It's the same list you can still access via Settings » Wi-Fi, only sharing credentials is much easier with quick copy/paste options, share sheet support, and even QR codes.
Things You Should Know
- The Passwords app works on iOS 18 and iPadOS 18, as well as on macOS Sequoia 15.
- Wi-Fi network credentials are stored on iCloud Keychain.
- To ensure your device is saving Wi-Fi network credentials to iCloud Keychain, go to Settings » iCloud » Saved to iCloud » Passwords and Keychain, and toggle on "Sync this iPhone" or "Sync this iPad" if it's not already enabled.
- You can find saved Wi-Fi network credentials in Settings » Wi-Fi on iOS, iPadOS, and macOS, which are the same networks stored on iCloud Keychain, but you can only view and copy passwords, not easily share them.
- Macs running older software can use Keychain Access to find saved Wi-Fi network credentials, but it's still not easy to share them.
Step 1: Open the New Passwords App
You'll need to use Face ID, Touch ID, or your passcode to access the app's contents, just like before in the Passwords menu item in Settings. With iOS 18's new app lock feature, you can also require Face ID, Touch ID, or your passcode to even open the app, but it's redundant since you already need to authenticate yourself after the app opens, so you'd have to authenticate yourself twice in a row.
If it's your first time opening Passwords:
- Welcome to the Passwords App explains why the app is helpful. Tap "Continue."
- Password App Notifications says, "If you allow notifications, Passwords will notify you when passwords are saved, when changes are made to shared groups, and if any of your passwords are compromised in a data leak." Tap "Continue," then hit "Allow" or "Don't Allow" on the permissions prompt.
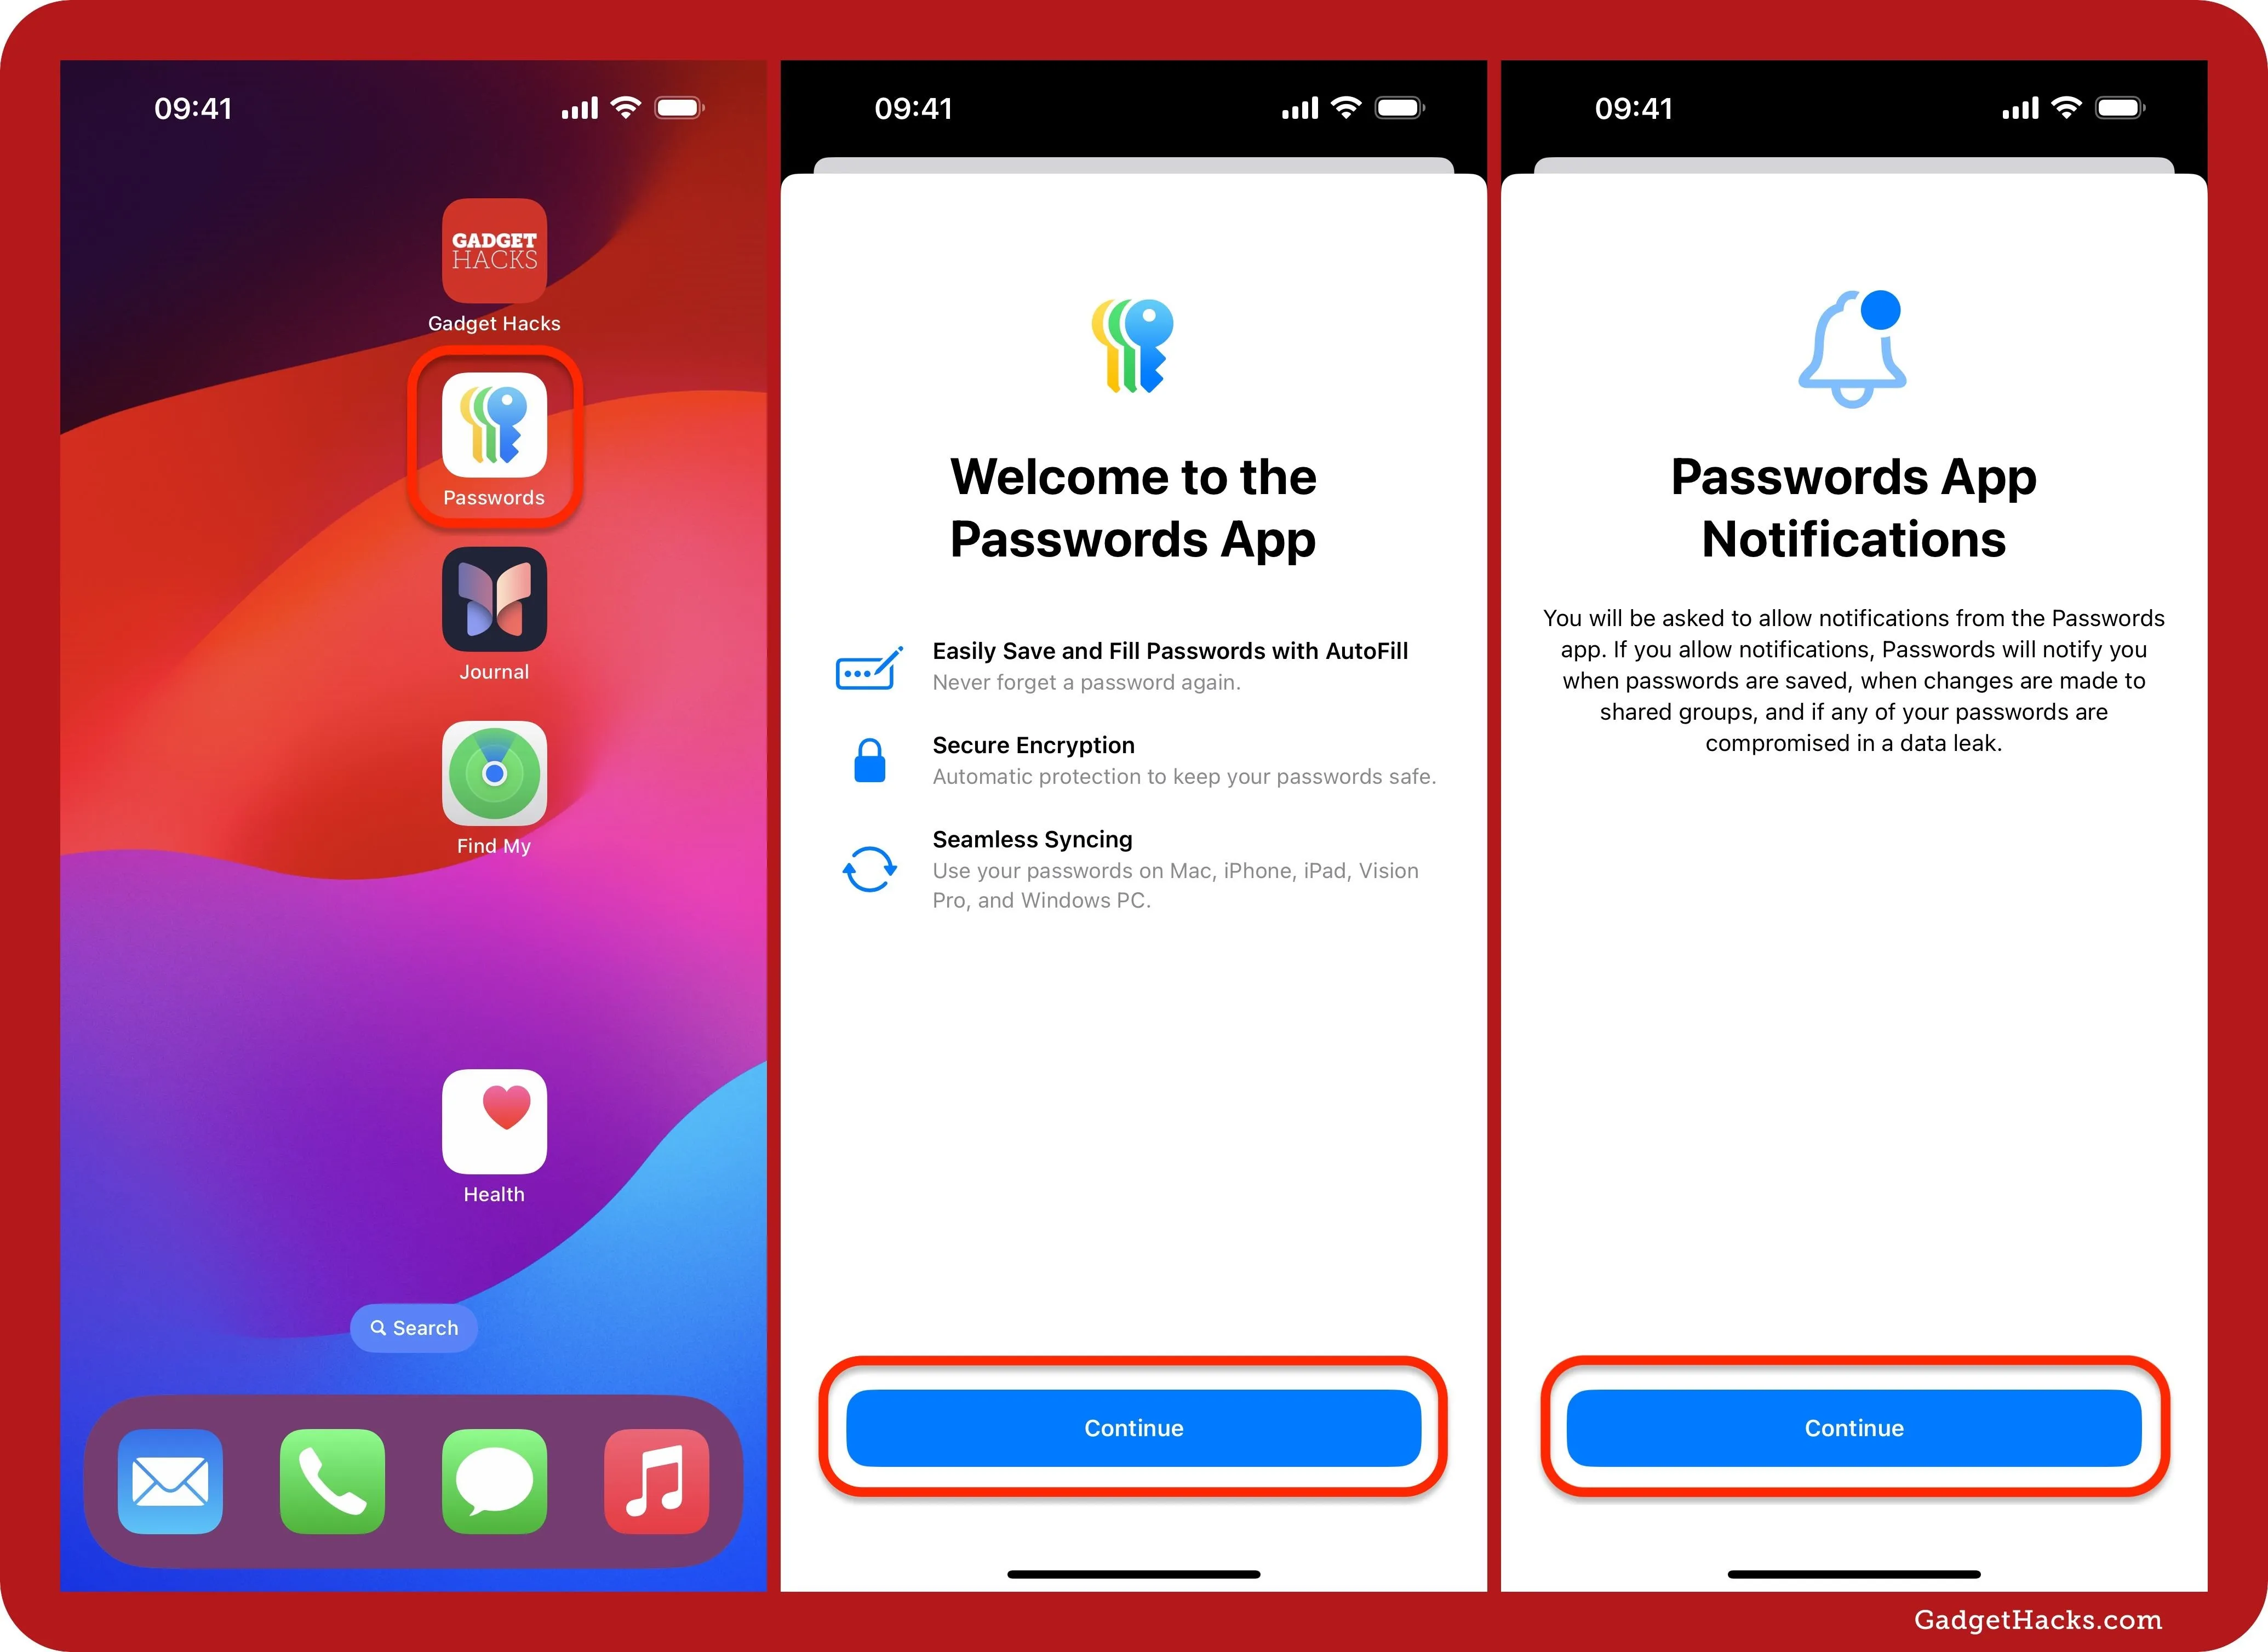
Step 2: View All Your Saved Wi-Fi Networks
Like the old Passwords menu in Settings, you can browse all your saved website and app credentials, security recommendations, password groups, codes, and recently deleted credentials. However, you can also now easily find all your passkeys and, more importantly, saved Wi-Fi log-in details.
Open the "Wi-Fi" view to see a list of all your saved networks.
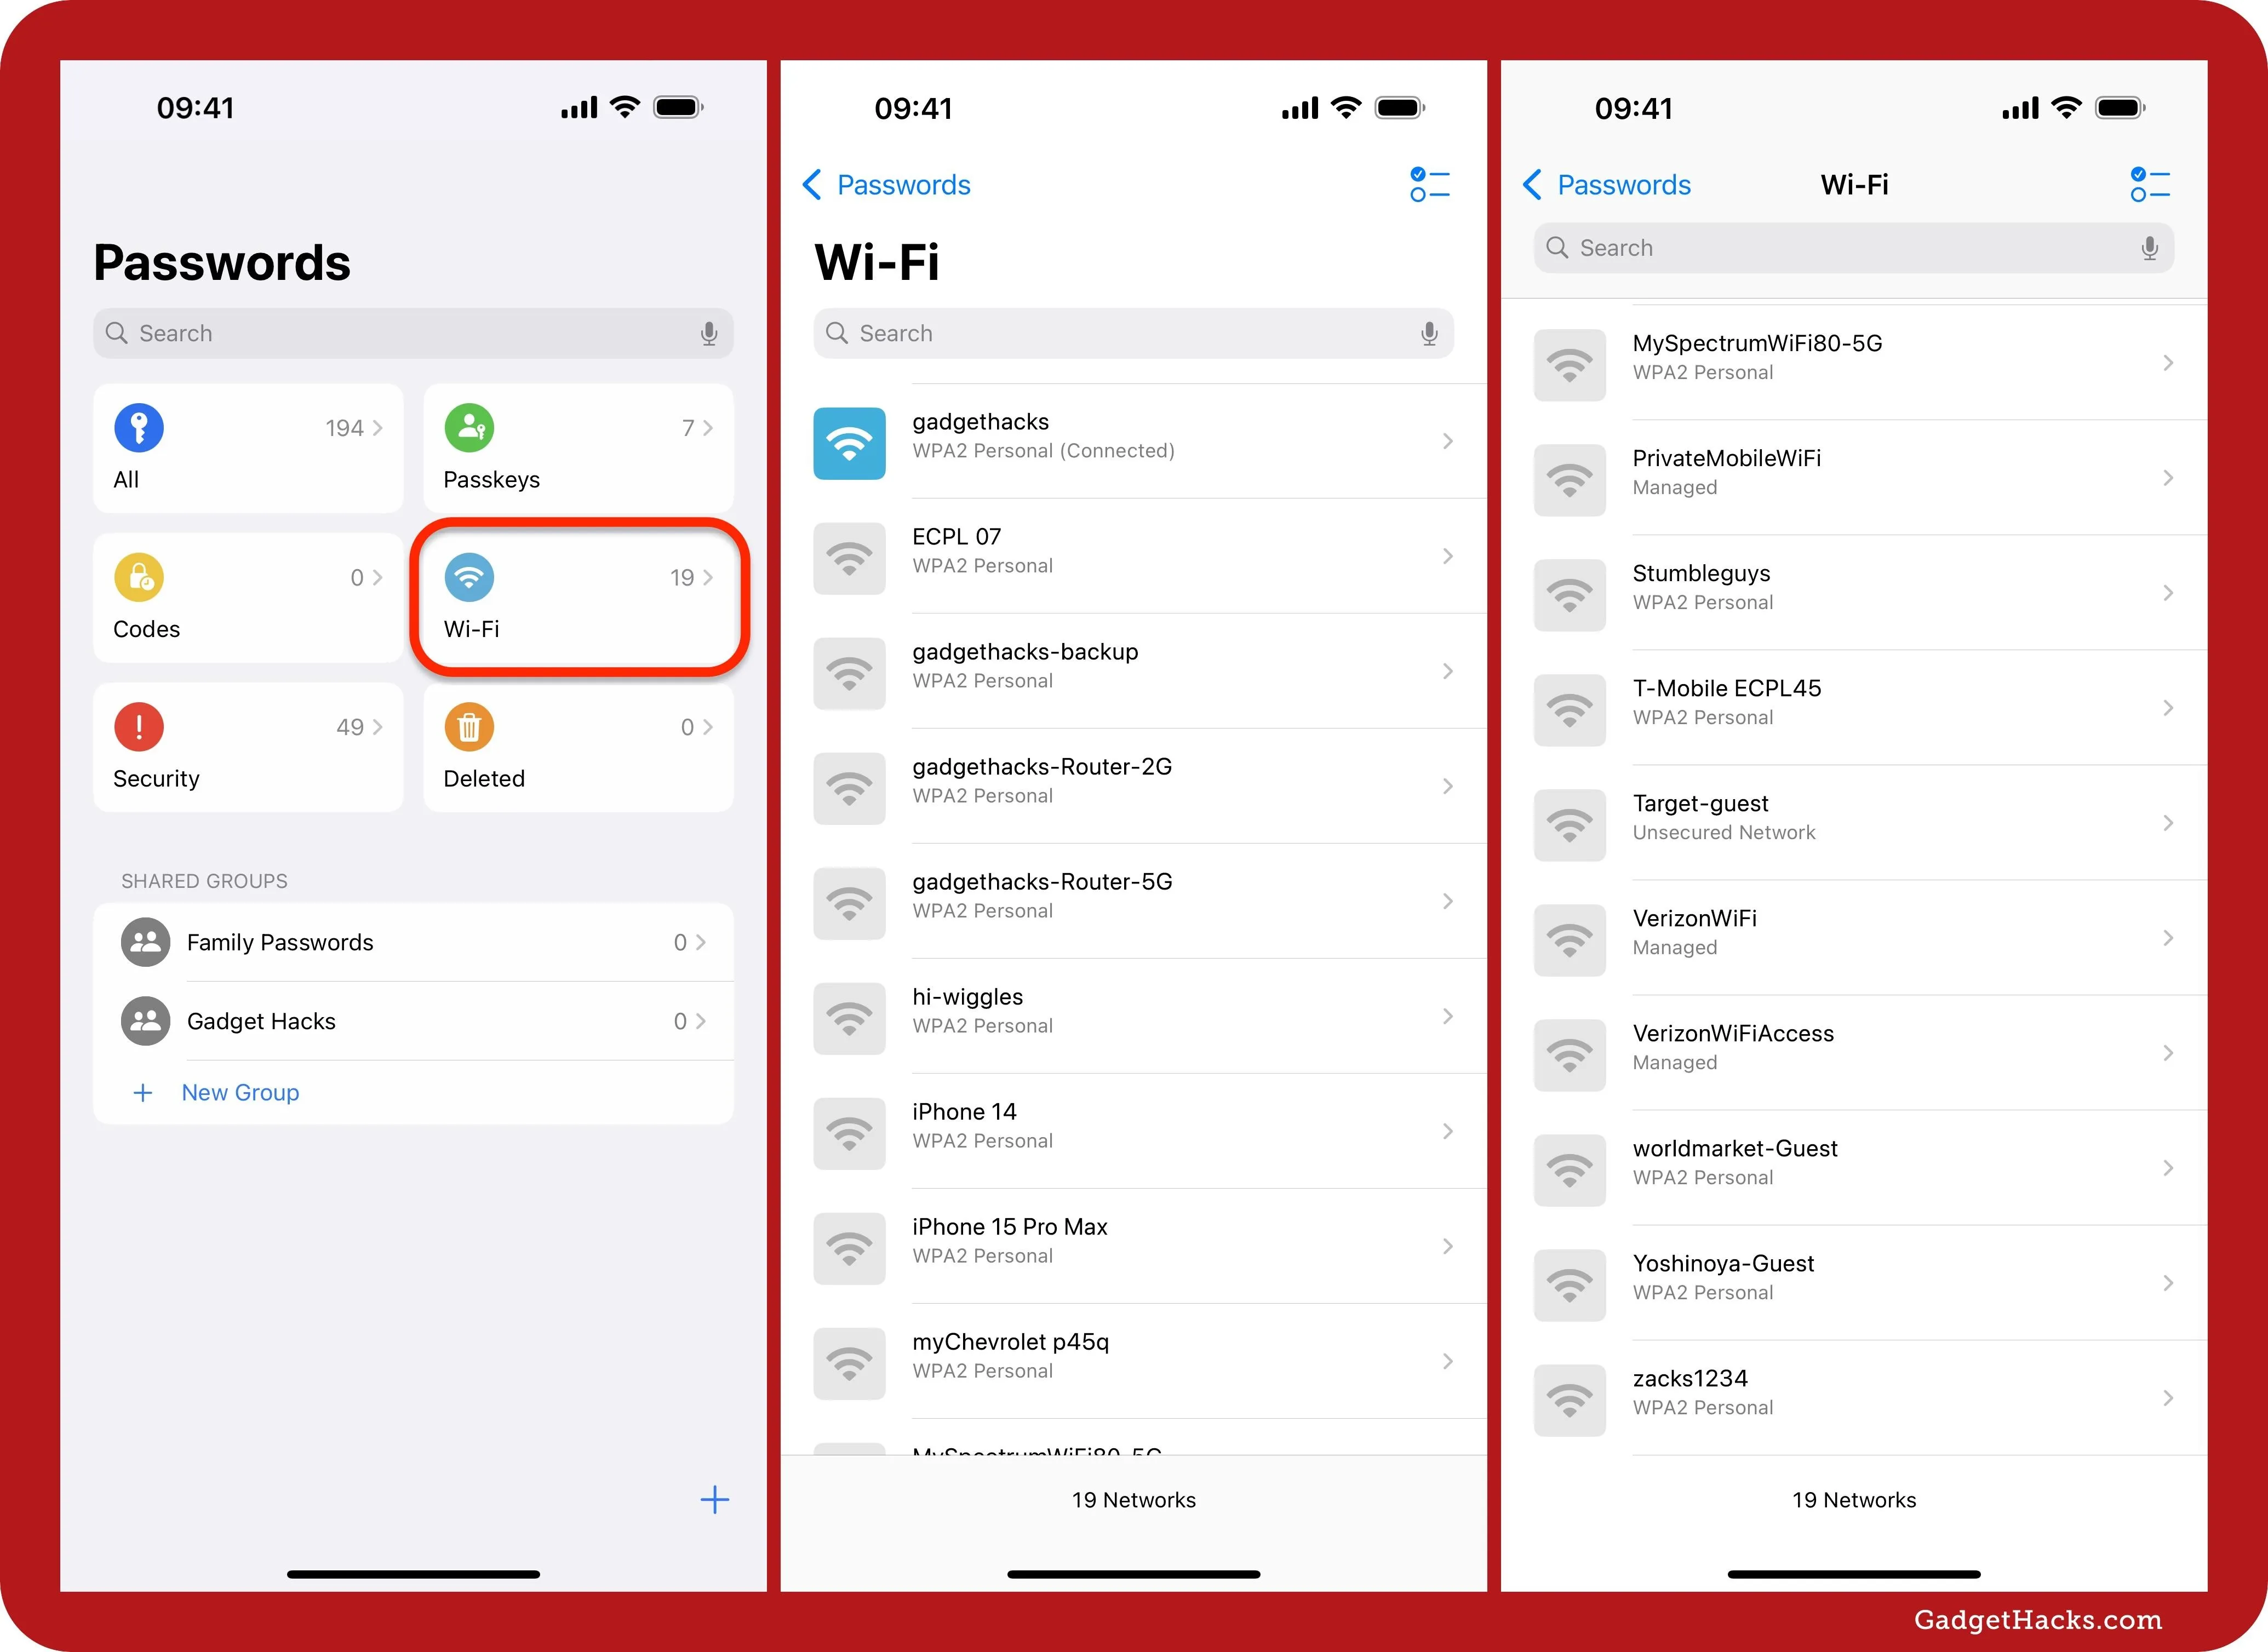
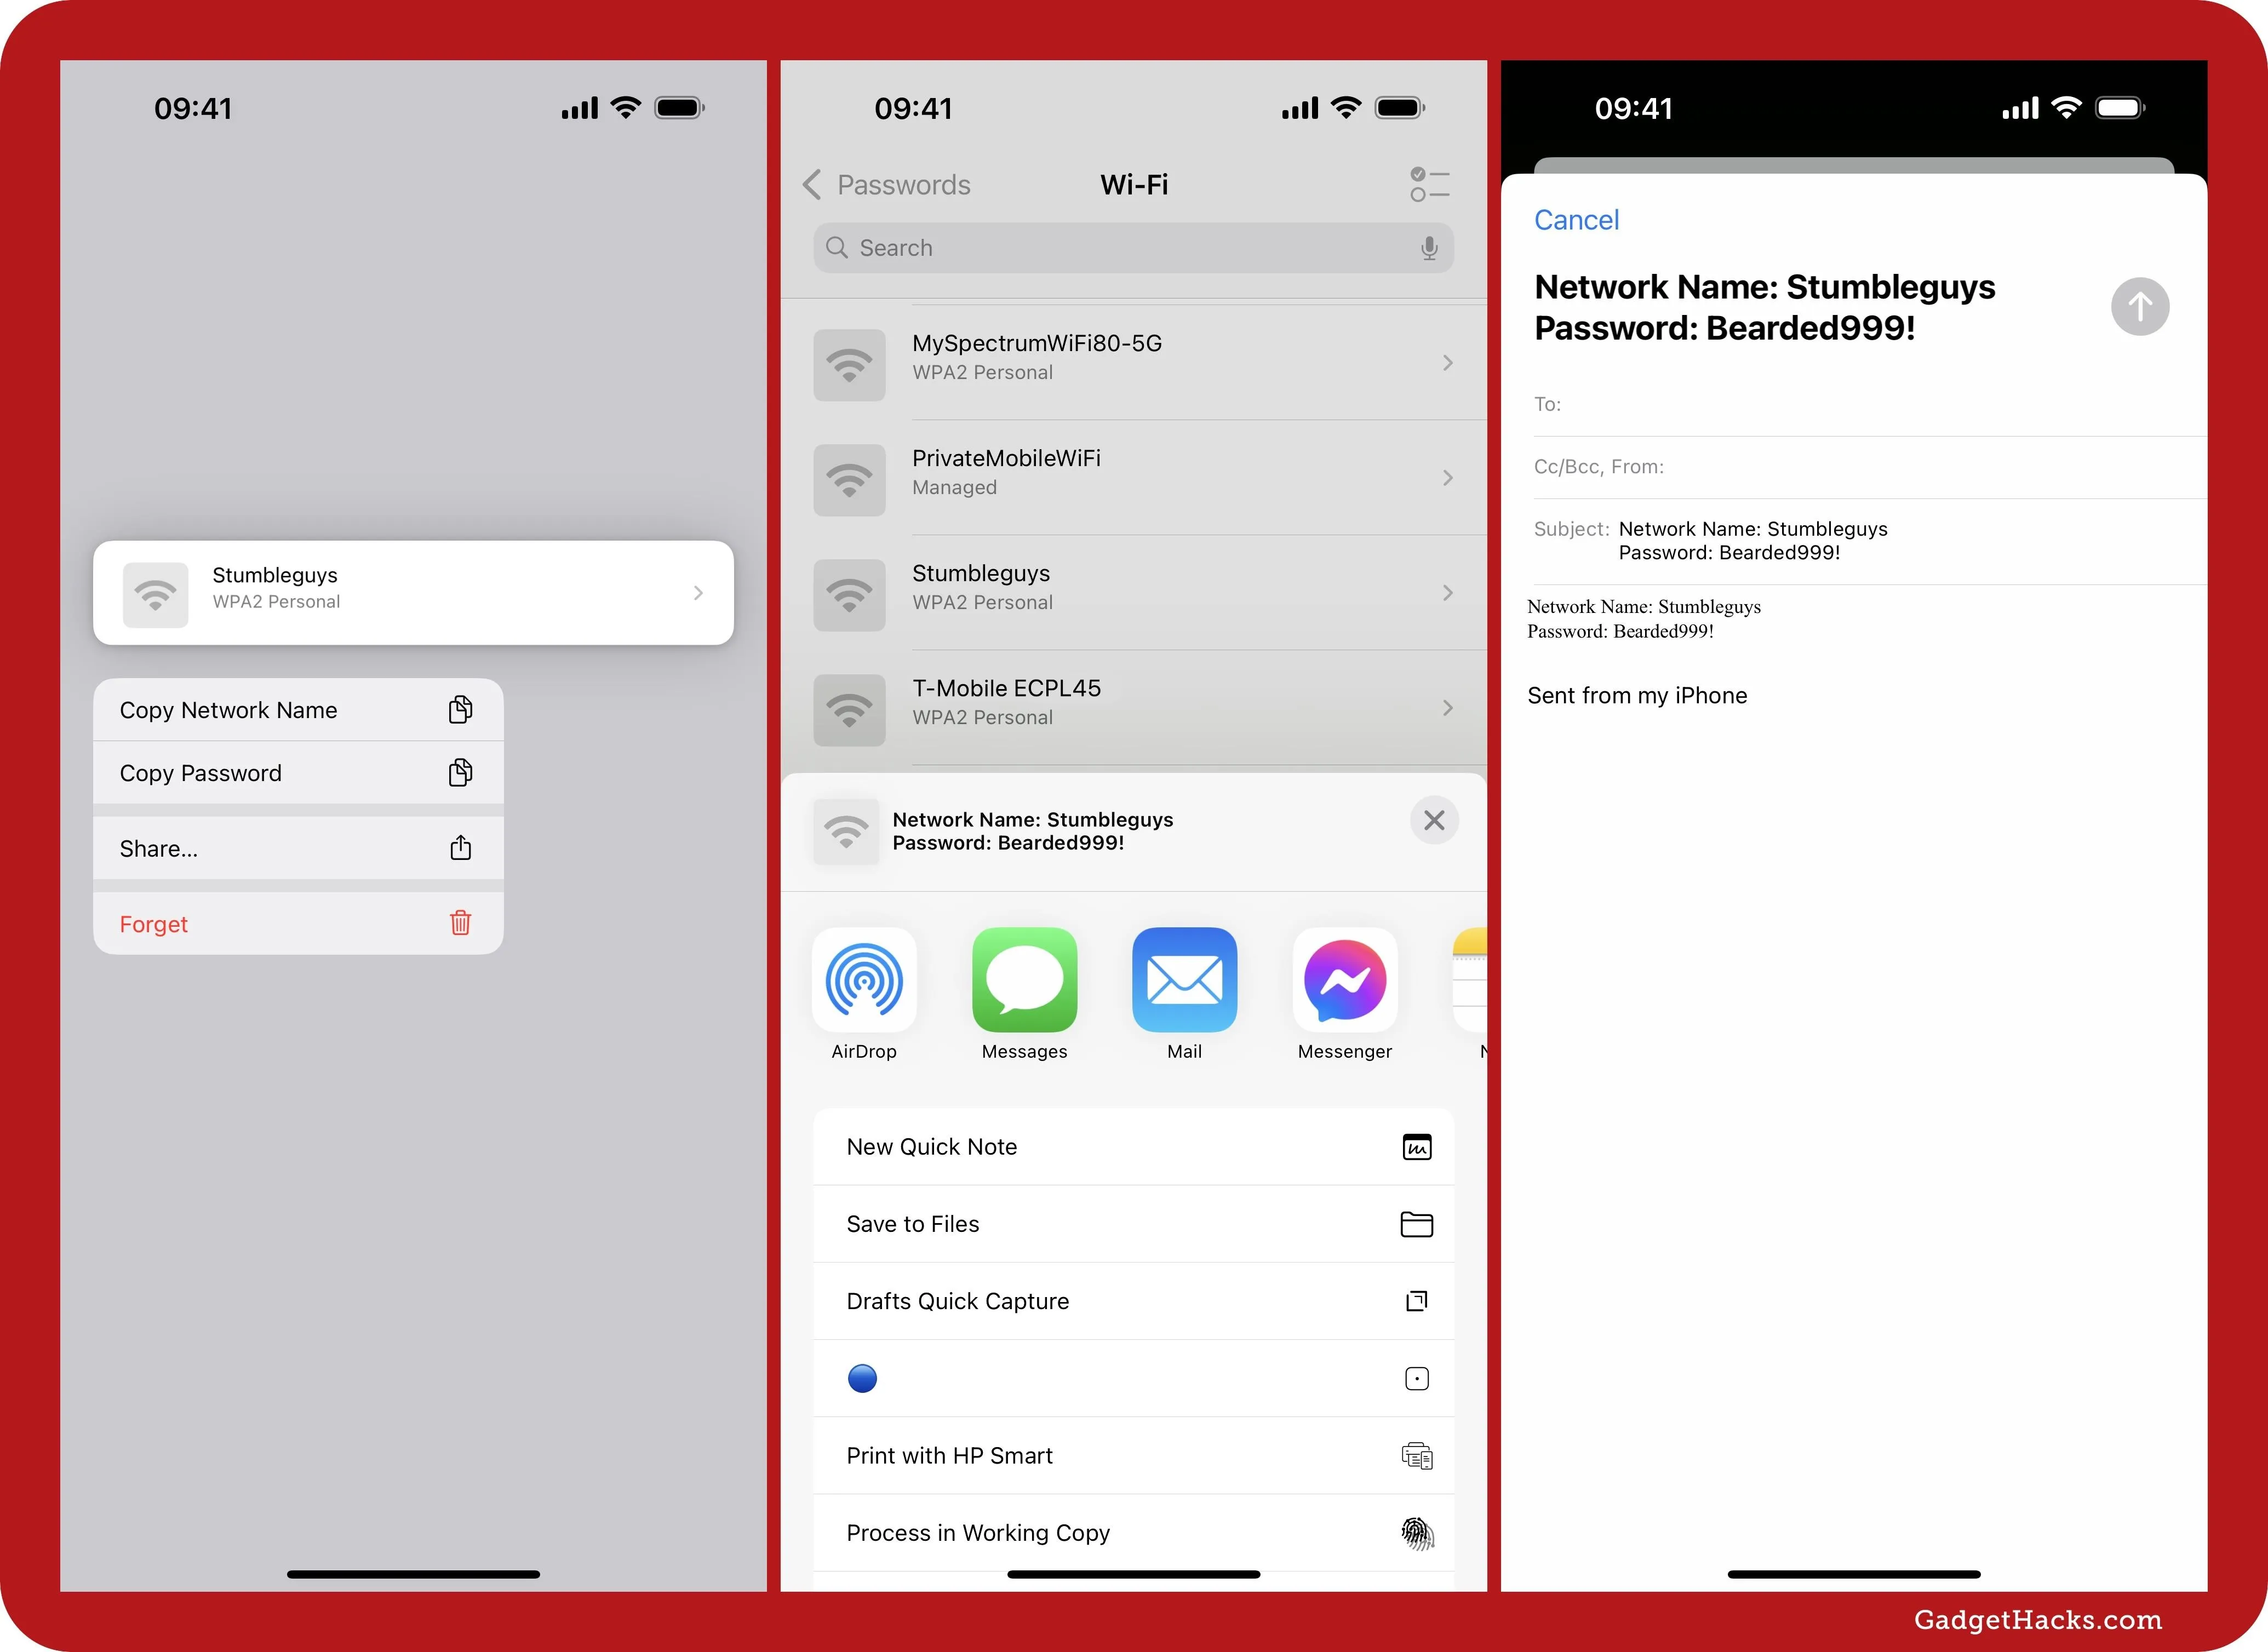
Step 3: Copy/Share Credentials from the List View
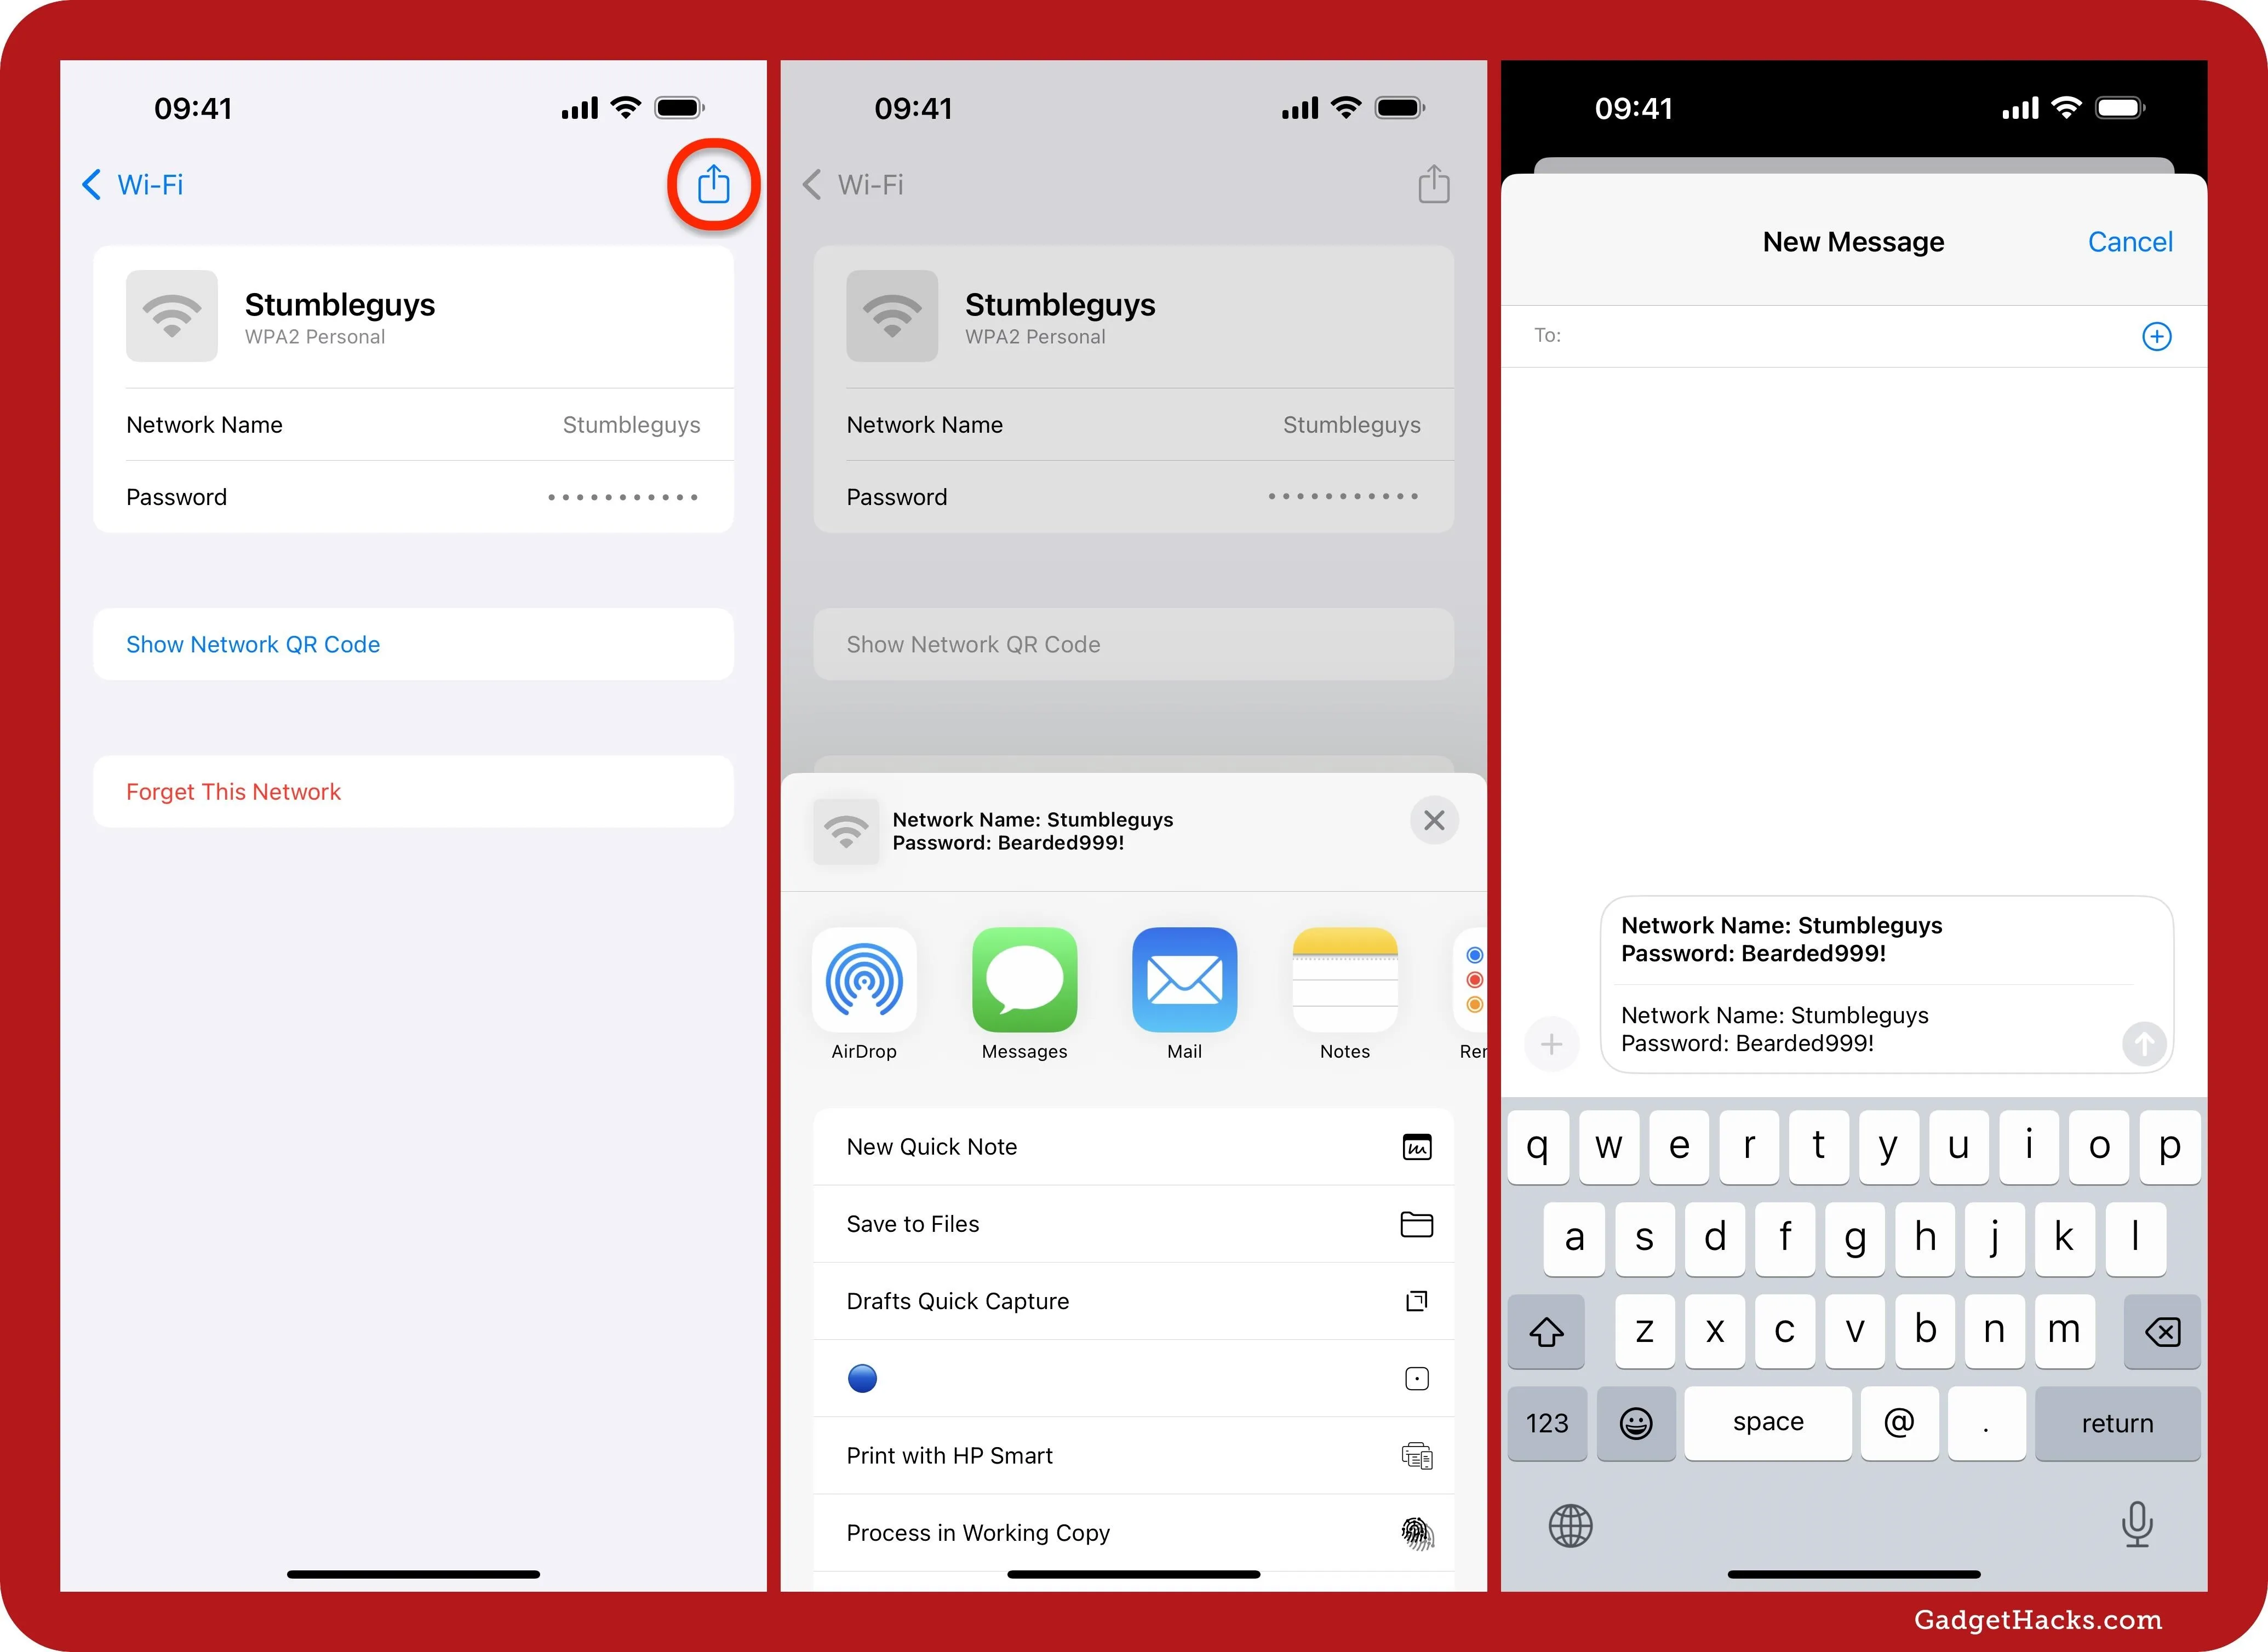
You can tap and hold (or long-press) any network in the list to bring up the quick actions for sharing. You can copy the password to your clipboard, copy the network name, or open up your share sheet and share your network name and password together via Messages, Mail, or another option.
Step 4: Copy/Share Credentials from a Network's Details
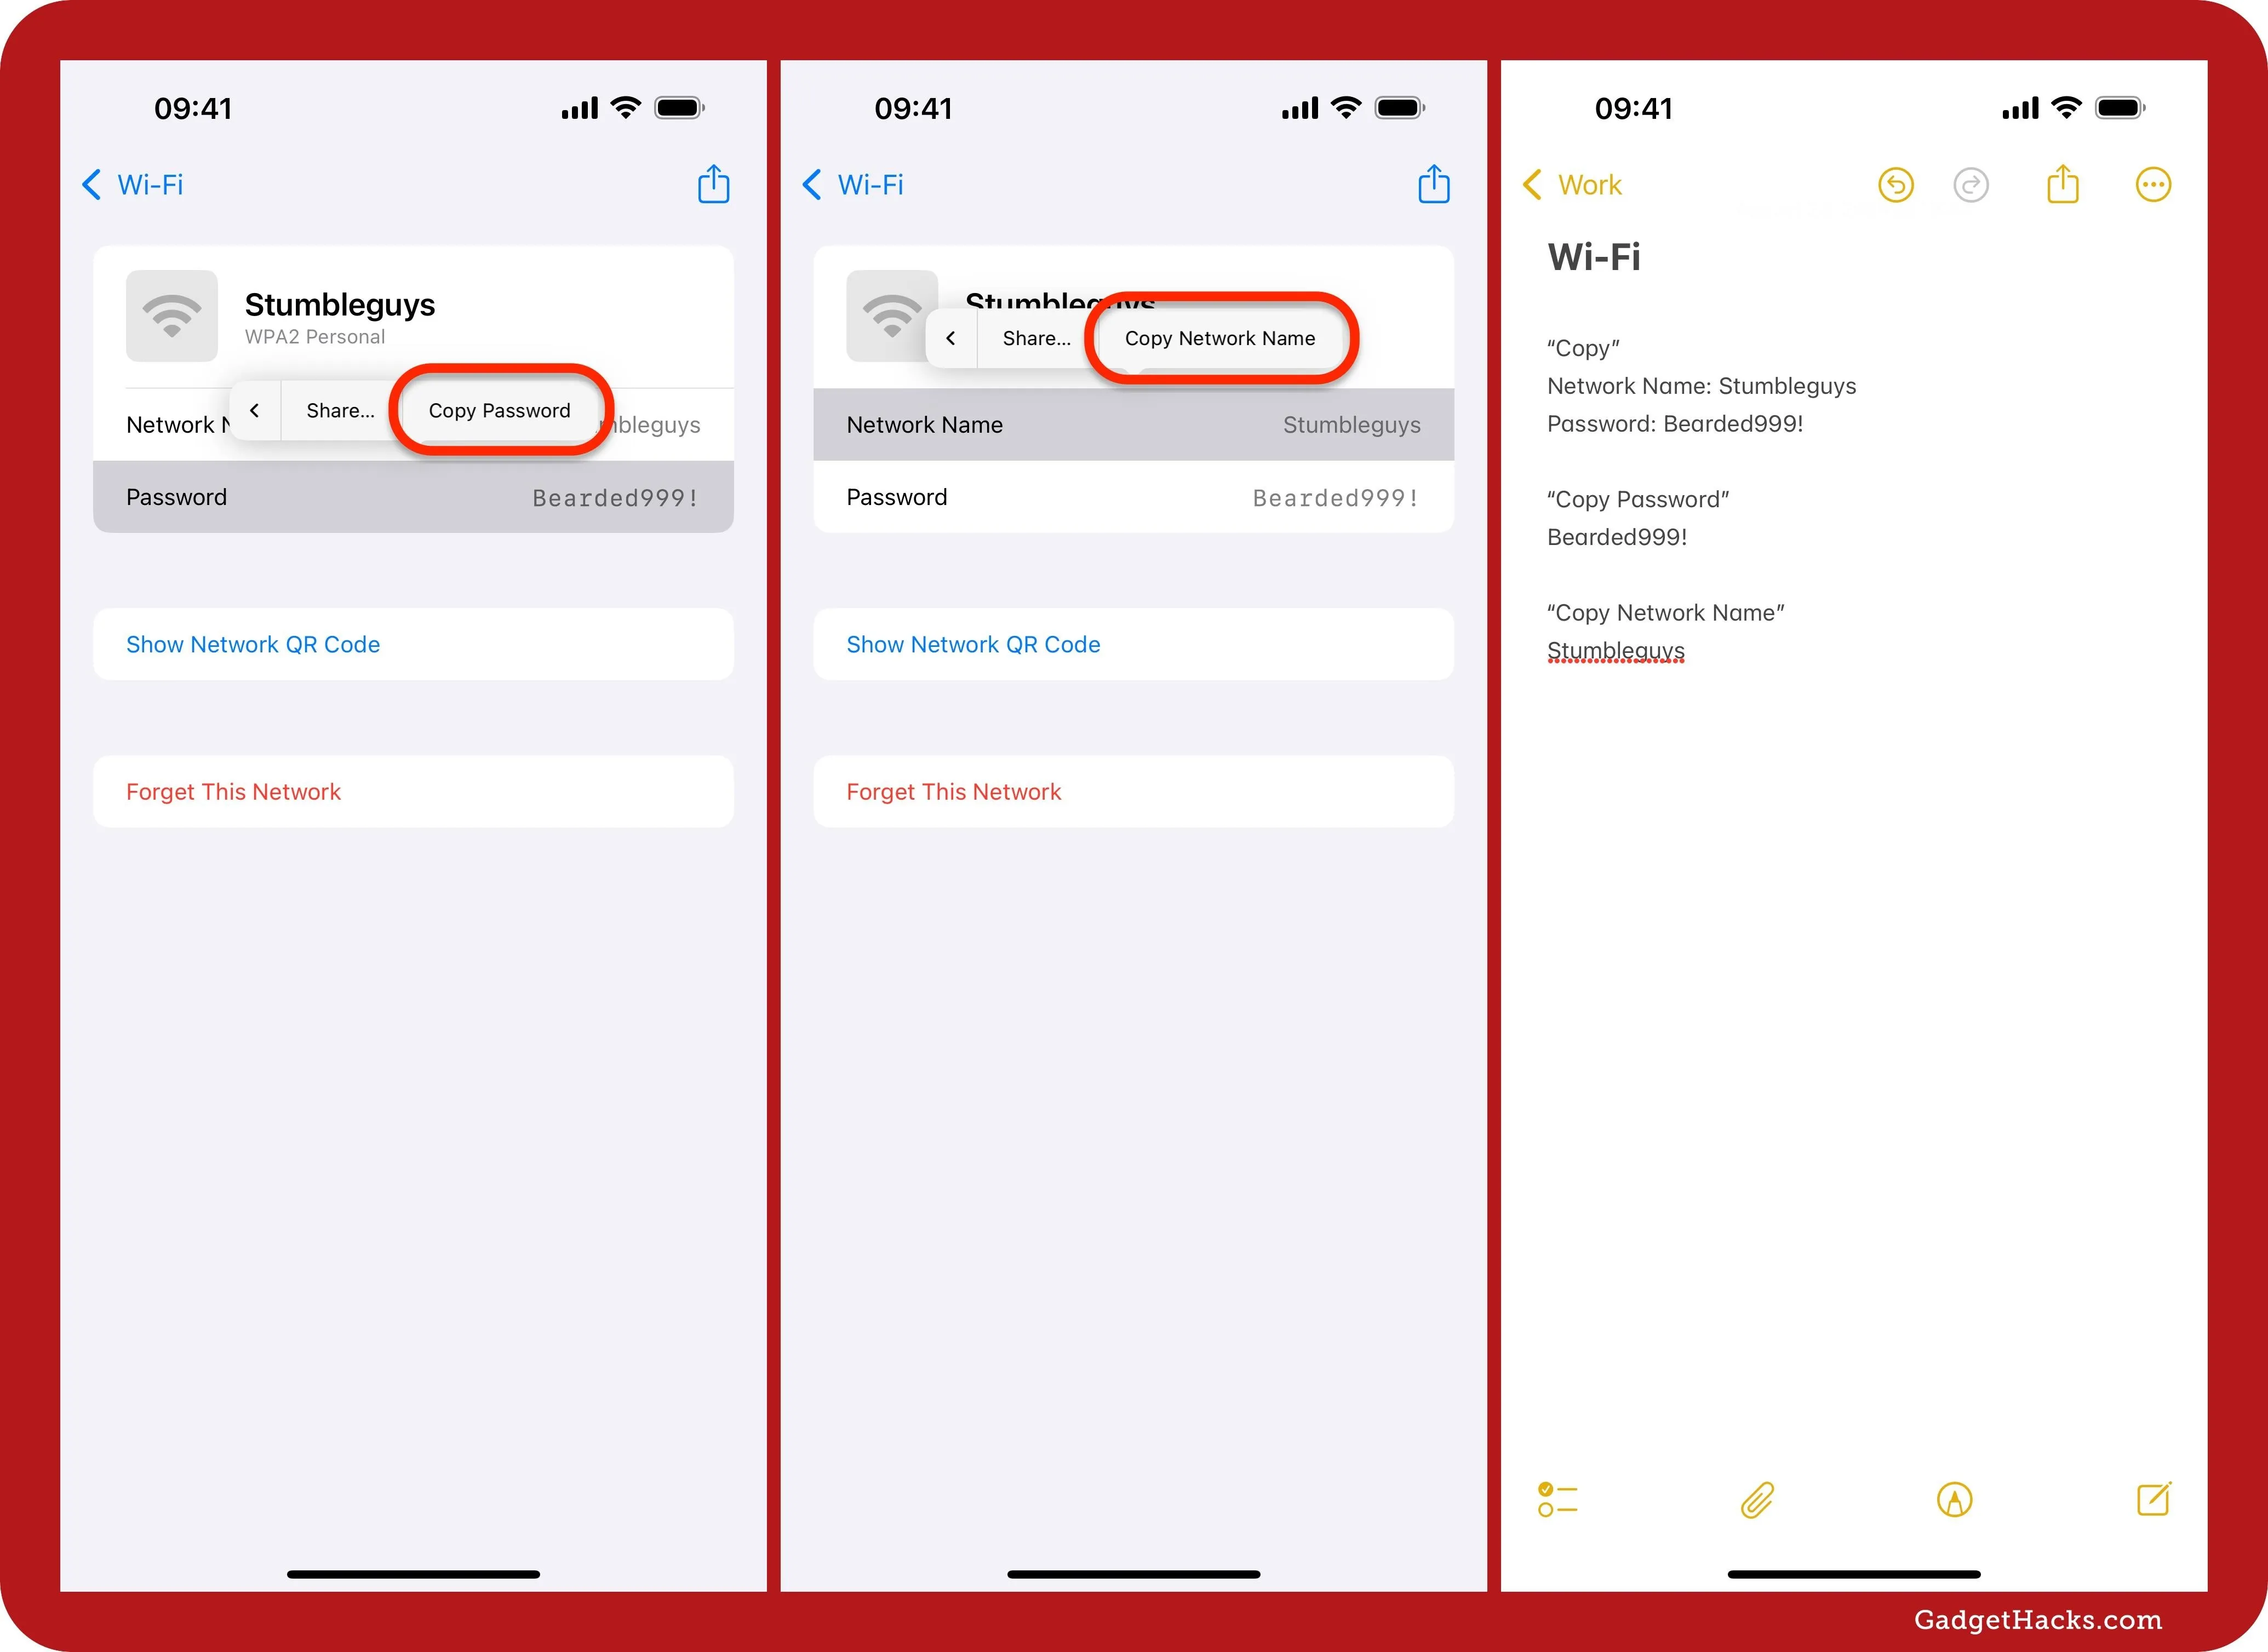
Tap a network's name from the list to see the network's name and obfuscated password. Tap the password to reveal it in plain text while also bringing up the context menu. Select "Copy" from that menu, and it will copy both your network name and password.
The same applies to the network name — tap it to open the context menu, where you can select "Copy" to copy both the network name and password.
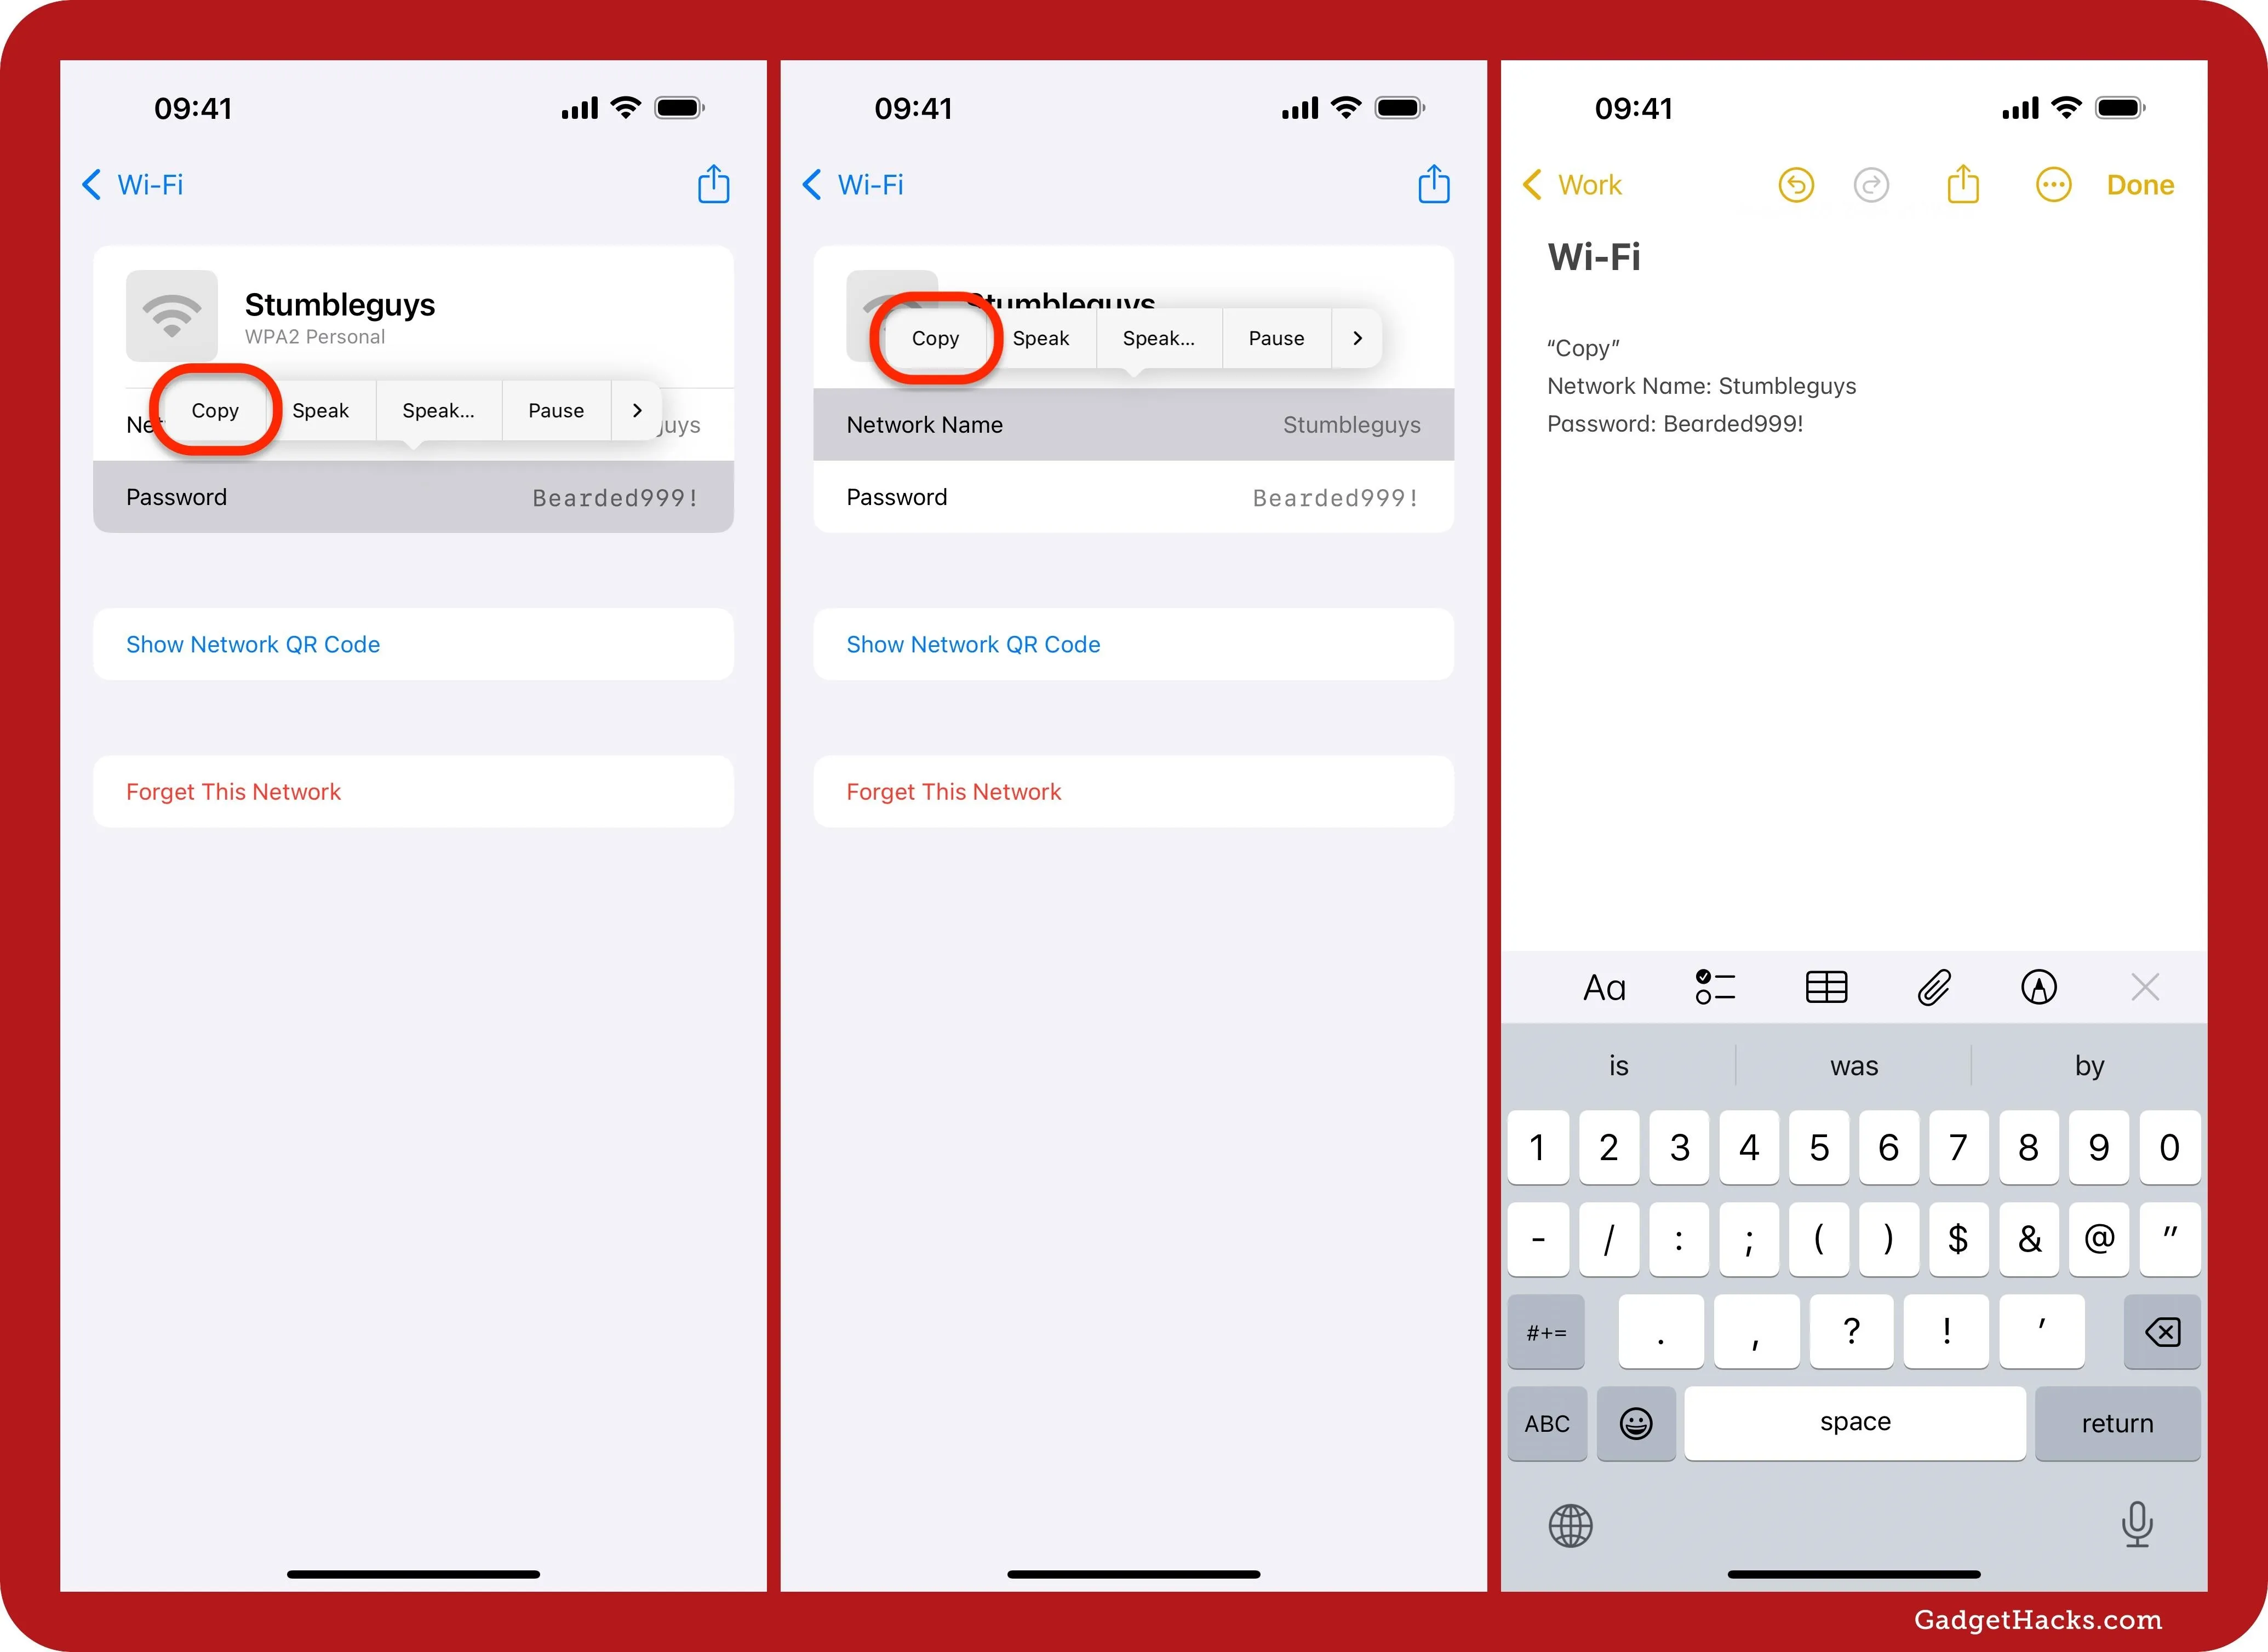
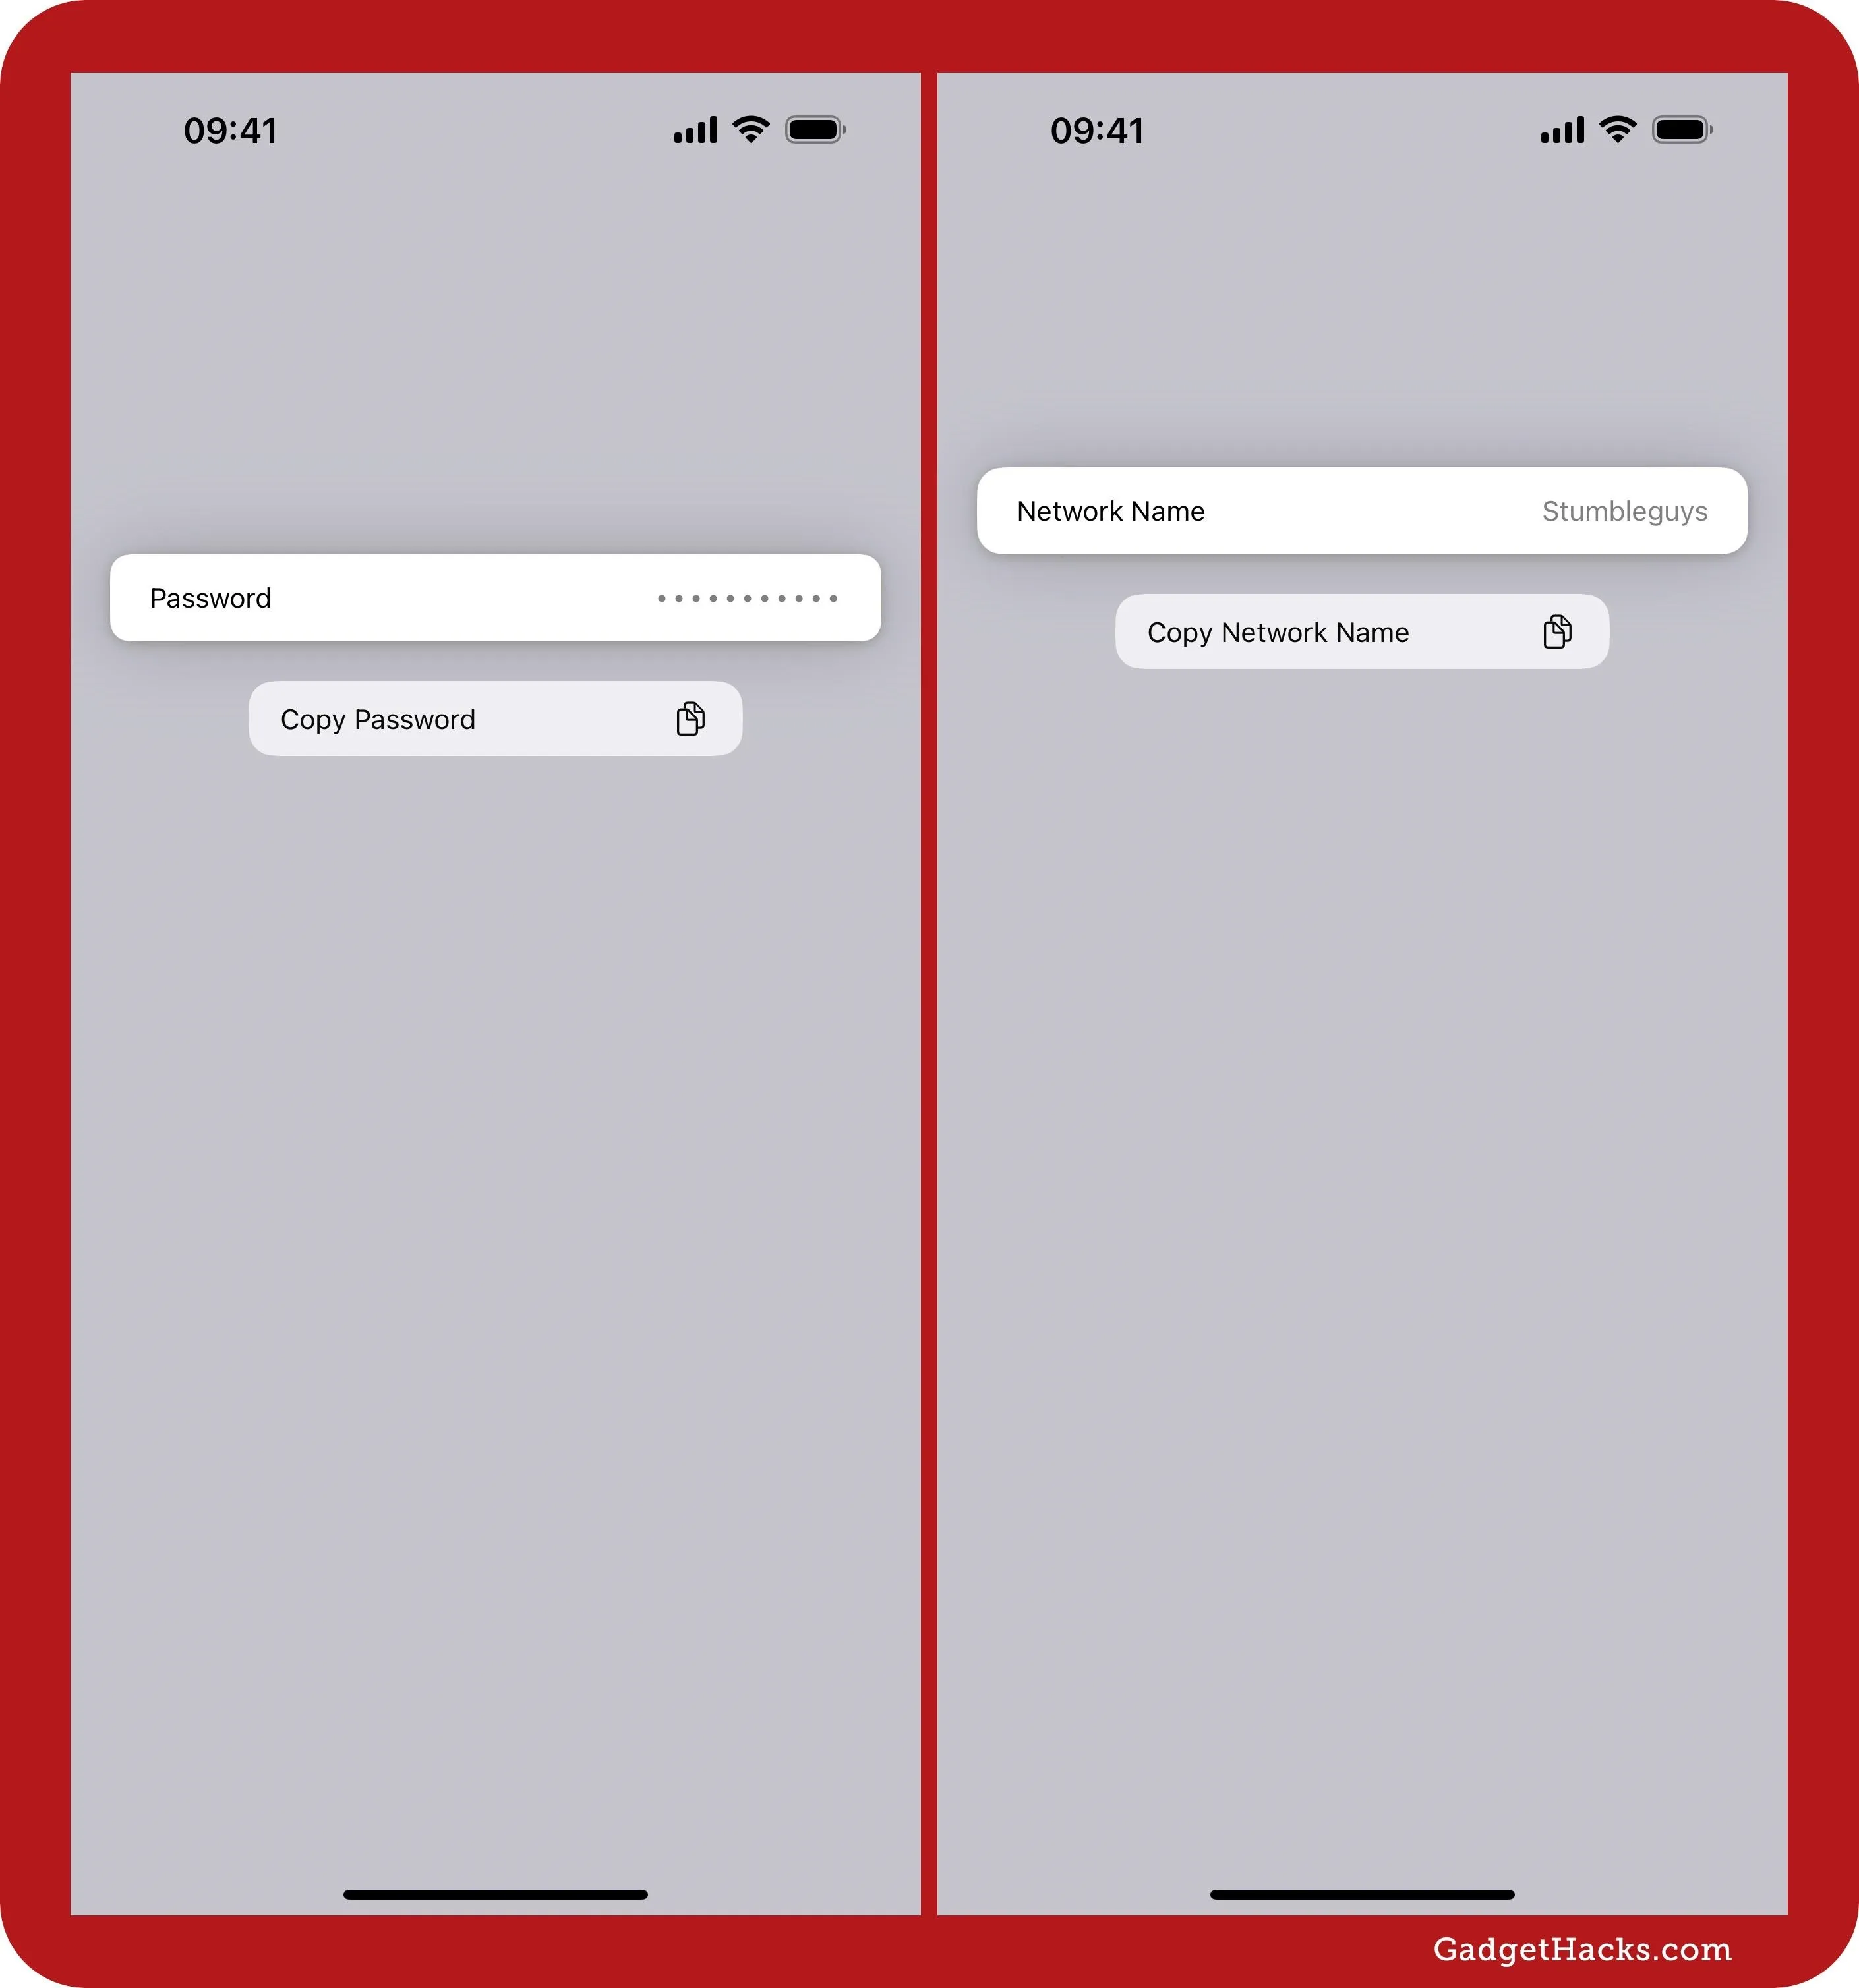
If you only want to copy the password or network name, tap either to open the context menu, then select the "Copy Password" or "Copy Network Name" option (you may need to swipe to find it).
You can also tap and hold (or long-press) the password or network name field to find the "Copy Password" or "Copy Network Name" option.
You can tap the share button on the network's details to open the share sheet and select a sharing method like Messages, Mail, etc.
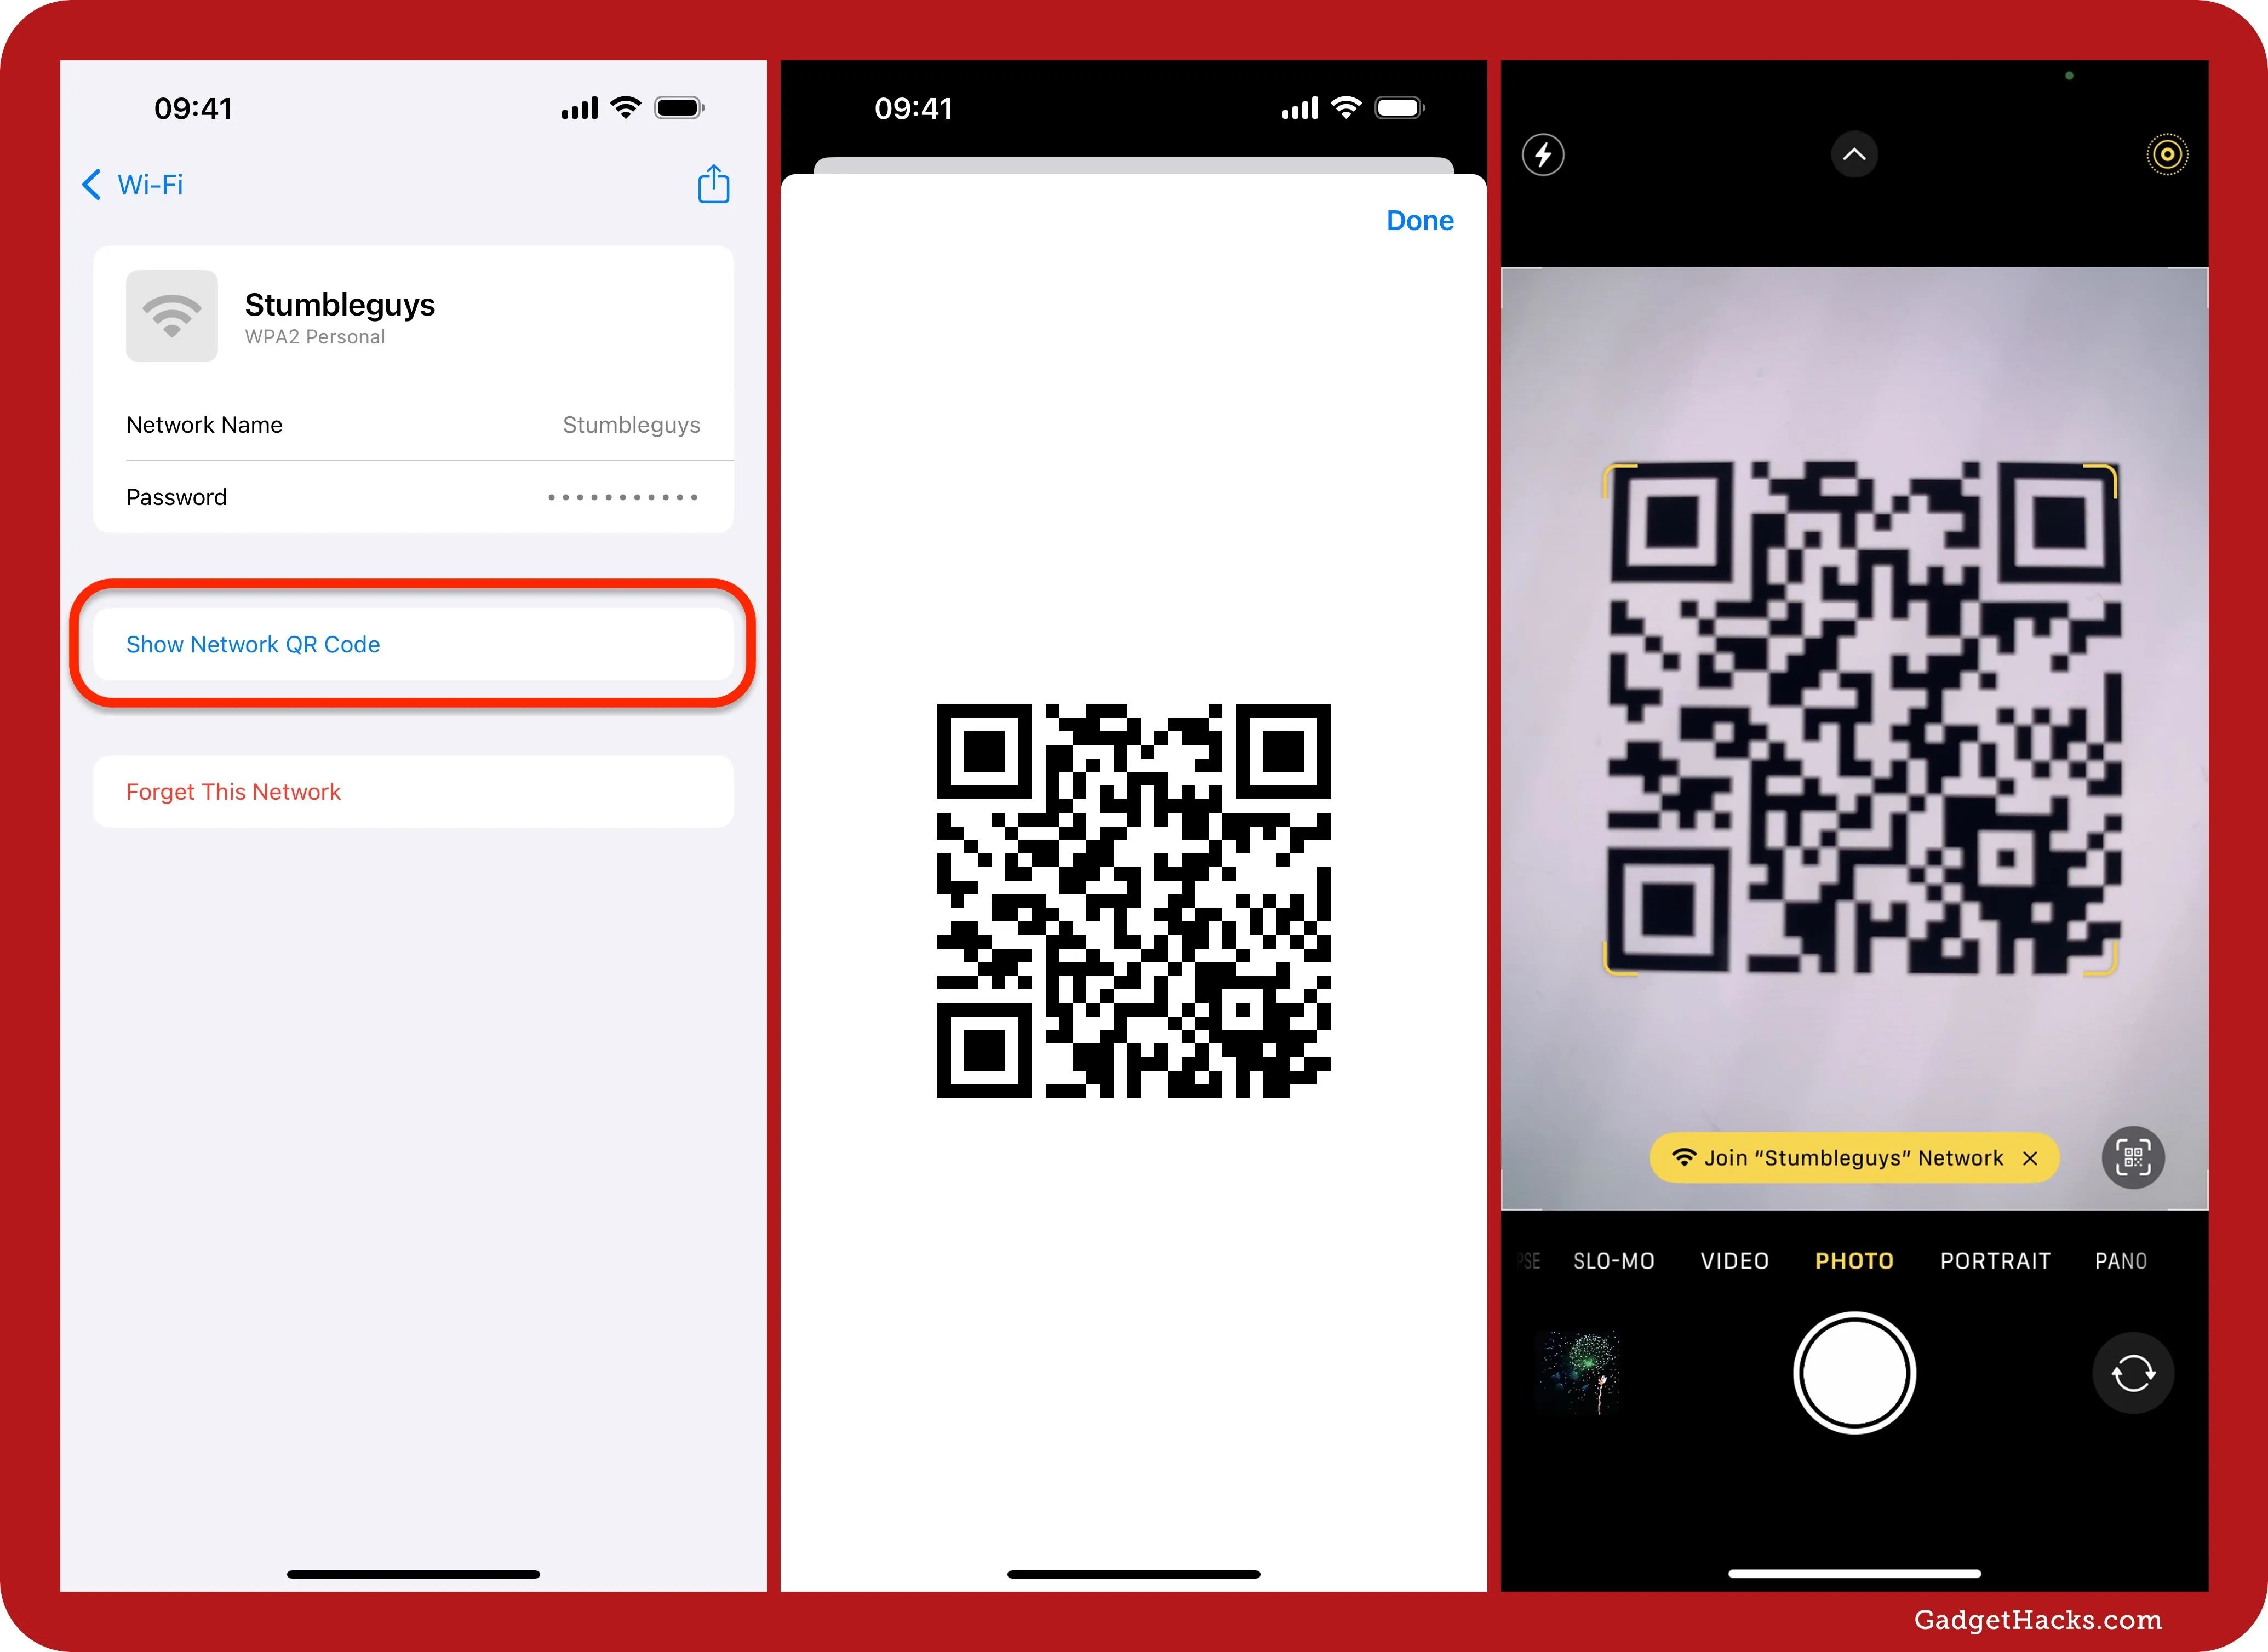
Step 5: Show/Scan the Network's QR Code
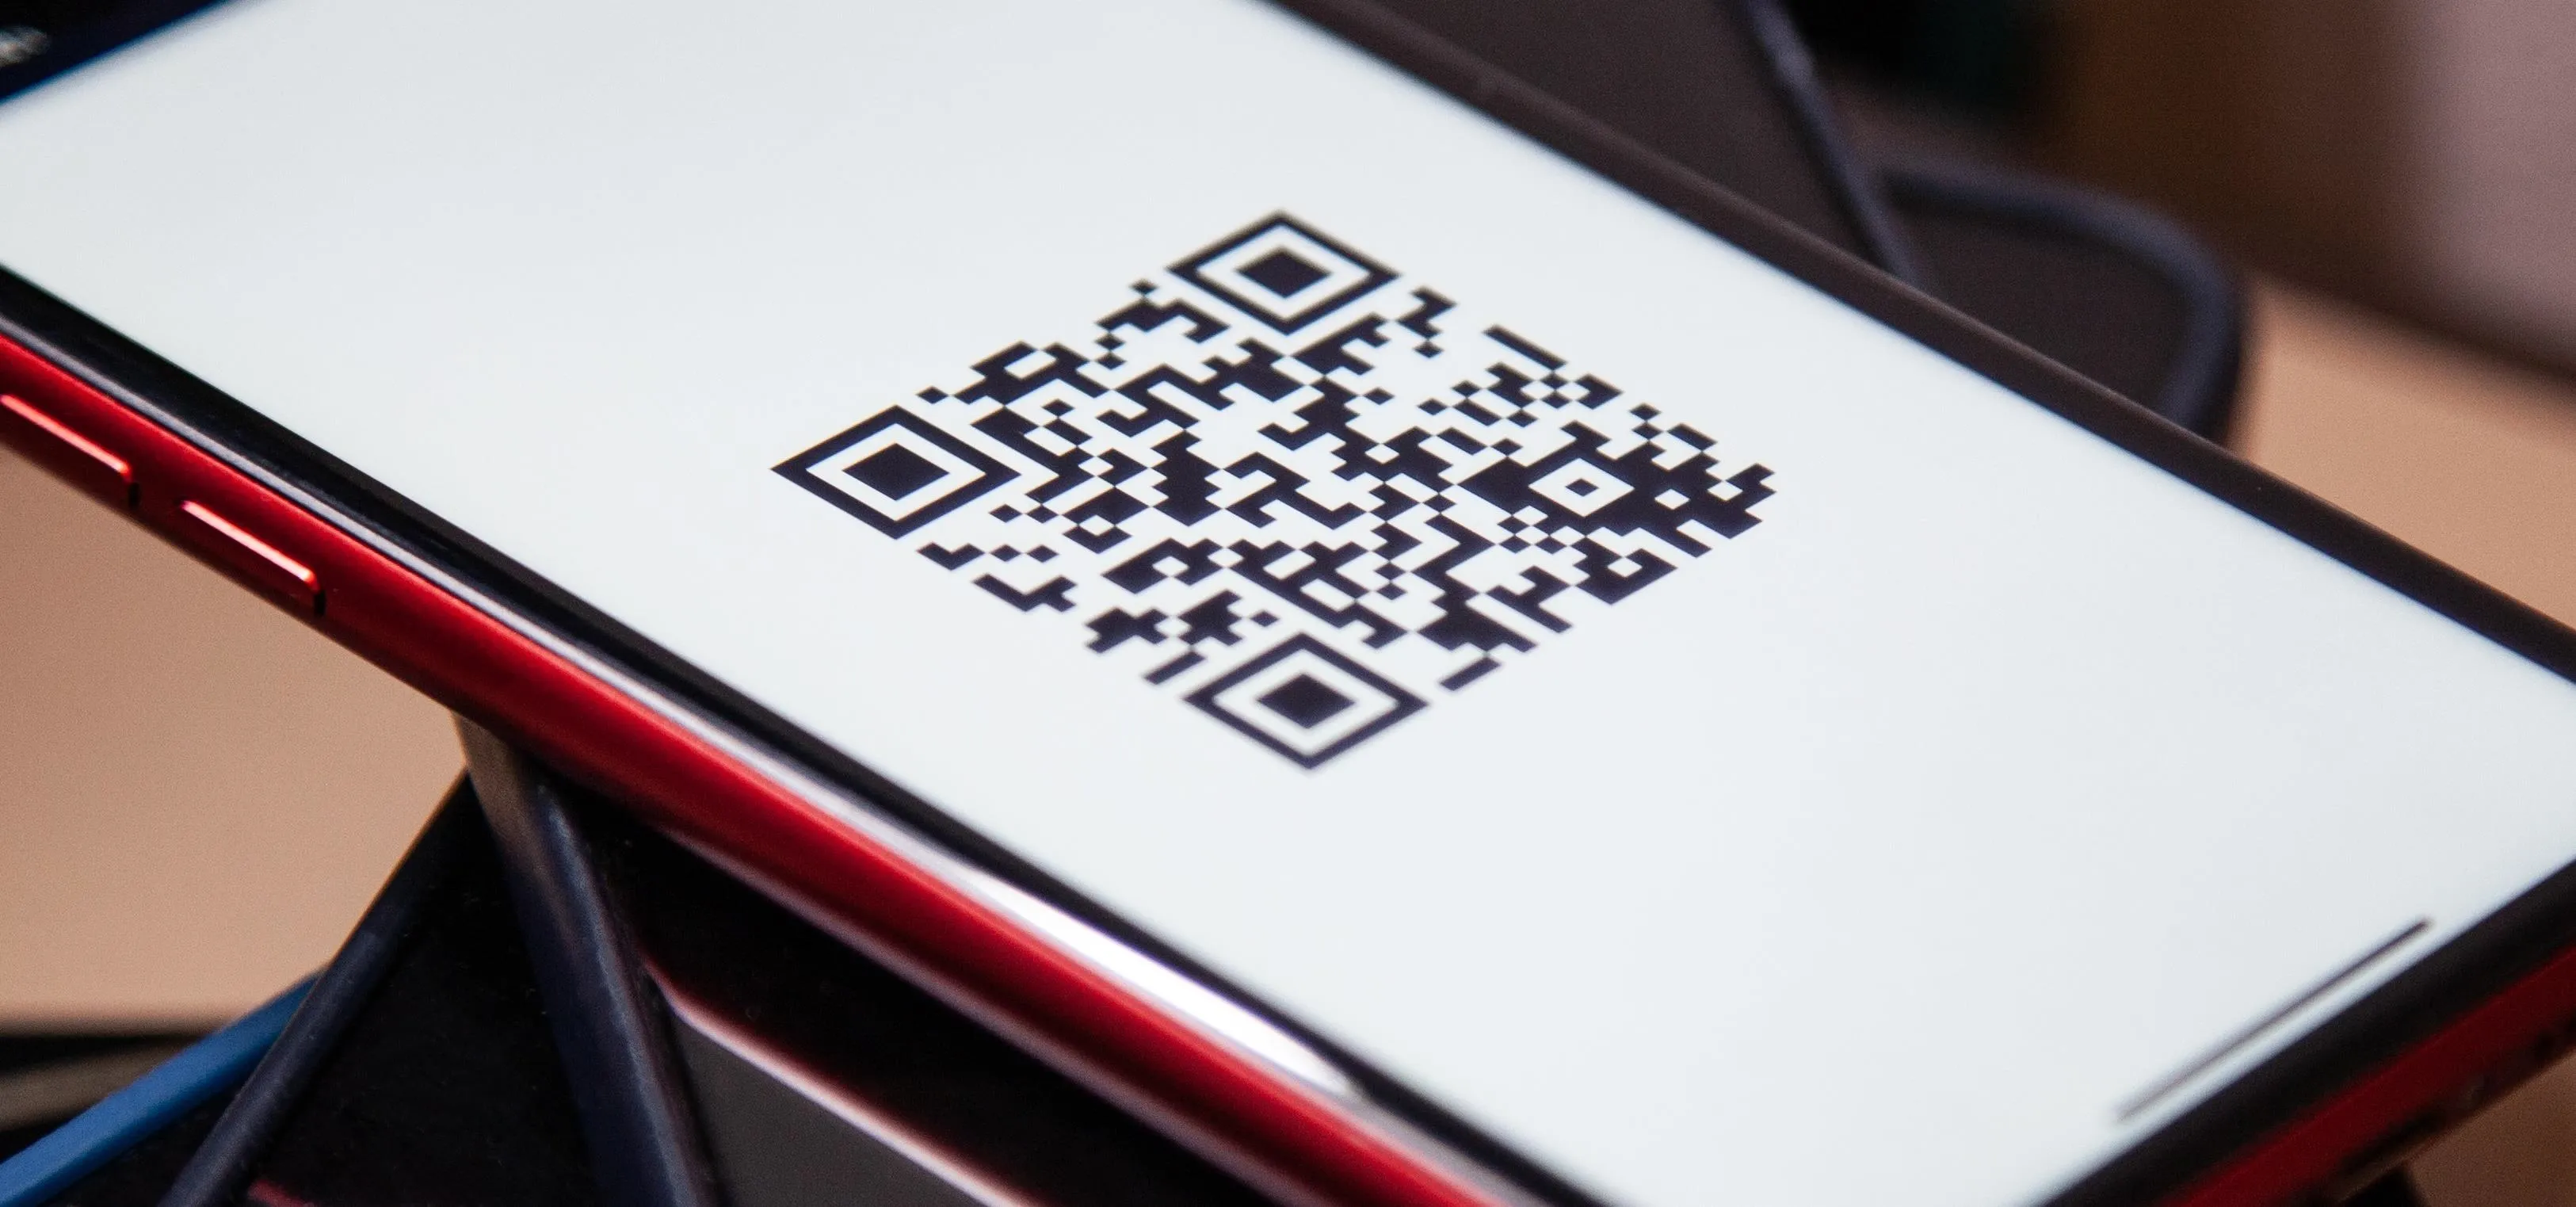
From a network's details, you can also tap the "Show Network QR Code" button to show a QR code, which someone nearby can scan with their camera to join the Wi-Fi network automatically.
Step 6: Removed Saved Wi-Fi Networks
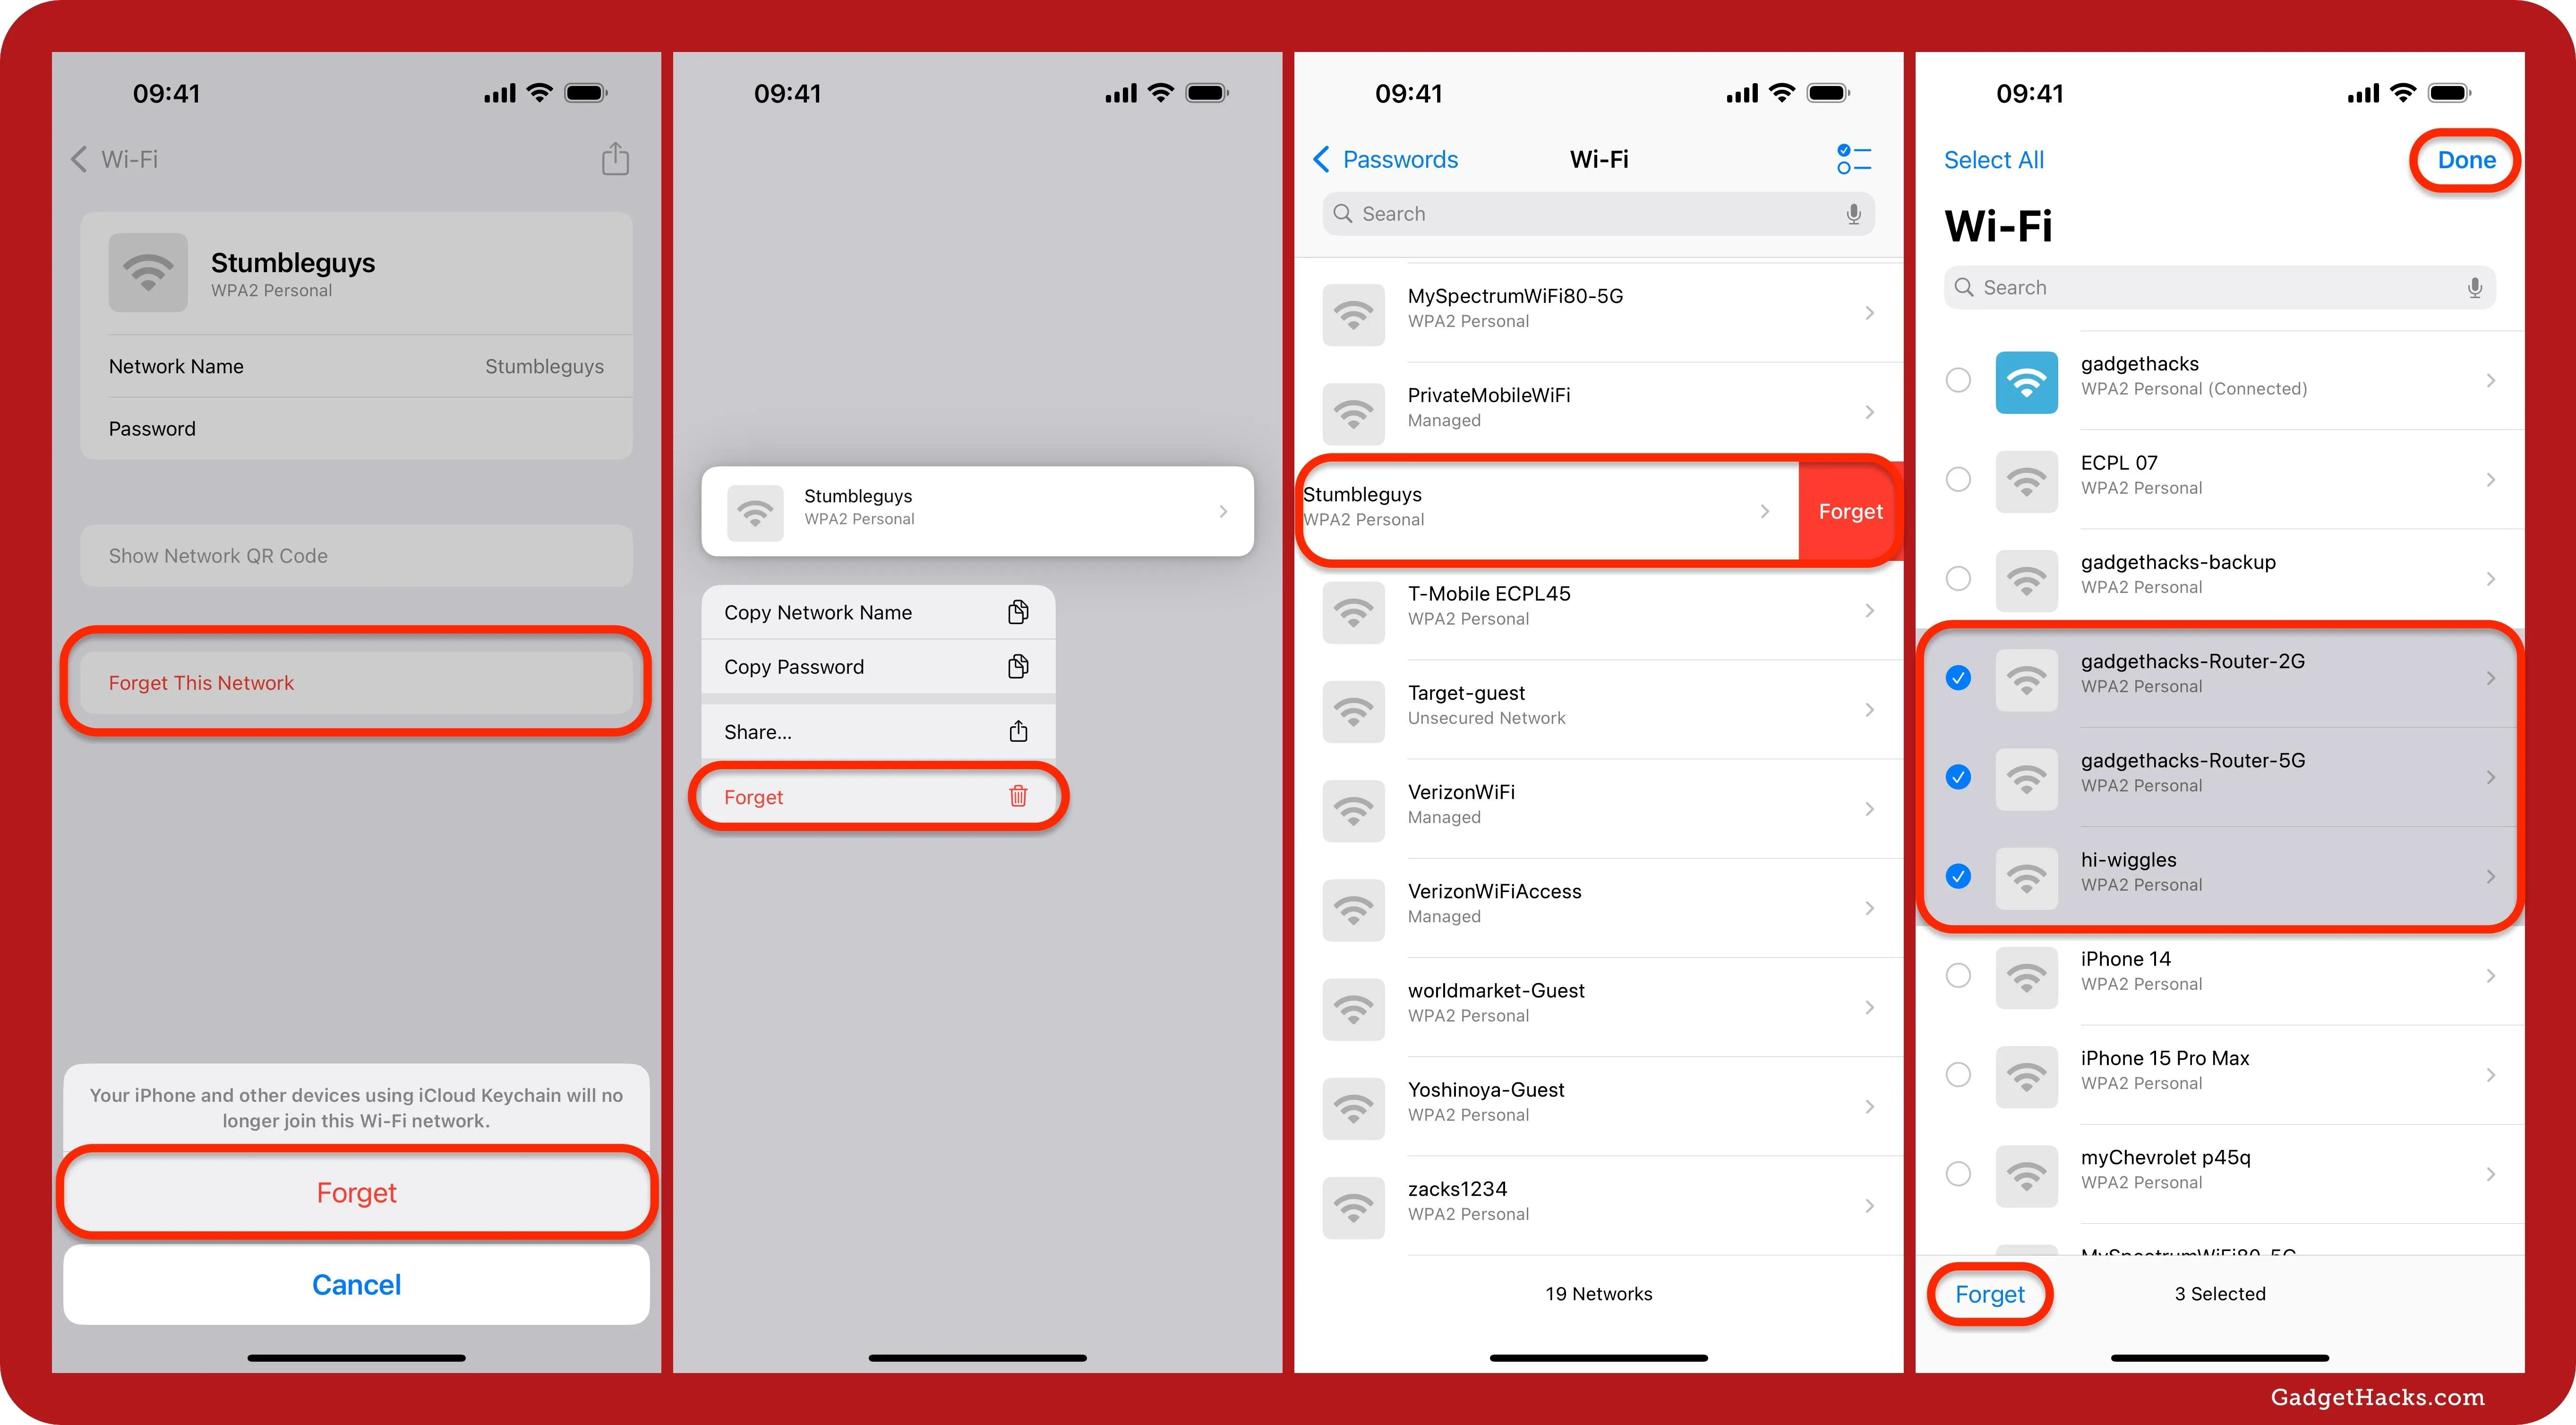
As you already could from the Settings » Wi-Fi menu, you can also forget, i.e., delete, any saved known wireless access points from within the Passwords app. Doing so will remove the saved network details on your current device and any other devices using iCloud Keychain since Wi-Fi credentials sync via iCloud.
- From a network's details, tap "Forget This Network."
- From the list view, tap and hold (or long-press) the network, then tap "Forget" from the quick actions.
- From the list view, swipe left on the network, then tap the "Forget" button that appears.
- From the list view, tap the Select button (the checklist-looking icon), select one or more networks or choose "Select All," and tap "Forget."
After doing any of the above, confirm with "Forget."
Cover photo and screenshots by Justin Meyers/Gadget Hacks




Comments
Be the first, drop a comment!