


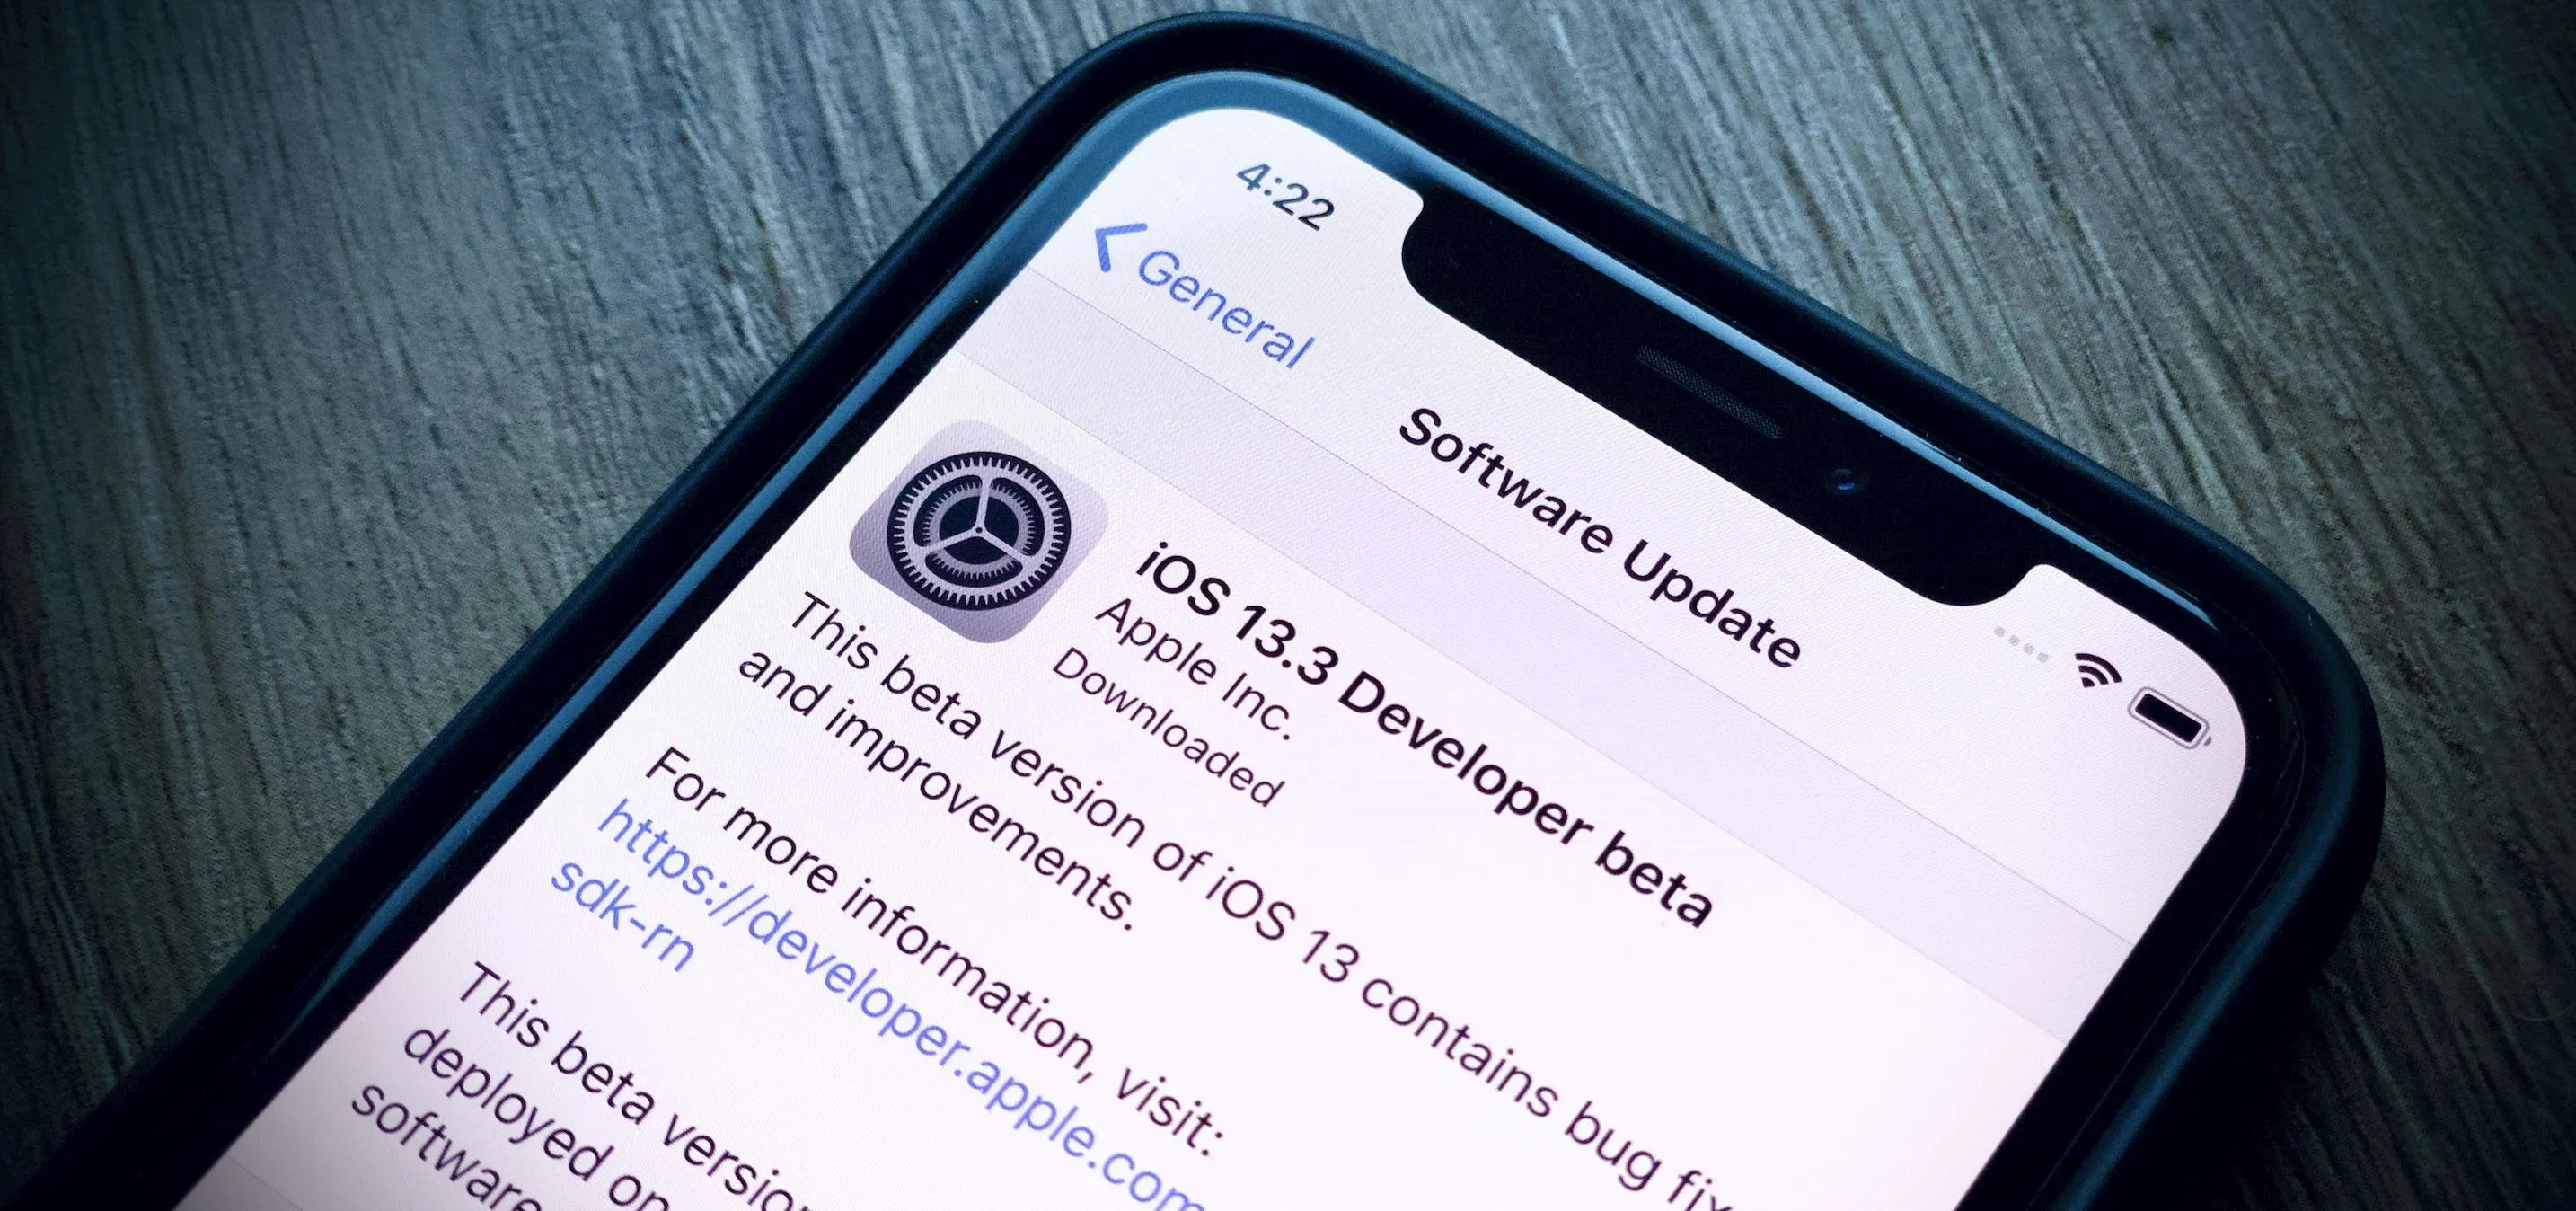
Apple's already gone through iOS 13.0, 13.1, 13.2, 13.3, 13.4, and 13.5 betas, and now it's time for iOS 13.6. If you want to try out new features on your iPhone before the masses, install either the developer or public beta.
The iOS 13.6 beta first appeared as an iOS 13.5.5 developer and public beta on June 1. It was renamed to iOS 13.6 when the second betas came out on June 9.
Apple invites beta testers to download and use pre-release iOS versions ahead of time, to find any bugs or issues that may be present. It's a win-win — Apple gets a large safety net to catch these problems, while the public has its chance to try out new features before an official release.
We strongly recommend you complete an archived backup of your iPhone before jumping on the beta. Beta programs, by nature, are unstable. Should something go wrong, you could lose every byte of data on your iOS device.
Jump to a section:Compatible Devices | Archive a Backup | Install Public Beta Profile for OTA Updates | Install Dev Beta Profile for OTA Updates | Install Dev Beta via Restore Image on Mojave | Install Dev Beta via Restore Image on Catalina
Compatible Devices
While iOS 13 is undoubtedly an exciting step for Apple devices, it comes with some sad goodbyes. The iPhone 5s, 6, 6 Plus, iPad Air, mini 2, and mini 3 will remain on iOS 12 for the rest of their life cycles (currently iOS 12.4.7). It was a good run and, for many of those devices, a record-breaking run at that.
However, iOS 13 splits iPad off into its own OS, called iPadOS 13, and supported devices for iPadOS 13 include all iPad Pro models, iPad mini 4 and 5th generation, iPad Air 2 and 3rd generation, and iPad 5th and 6th generation. As for iOS 13, the iPod touch 7th generation can use it, as well as all of the following iPhone models:
- iPhone 6s
- iPhone 6s Plus
- iPhone SE
- iPhone 7
- iPhone 7 Plus
- iPhone 8
- iPhone 8 Plus
- iPhone X
- iPhone Xs
- iPhone Xs Max
- iPhone XR
- iPhone 11
- iPhone 11 Pro
- iPhone 11 Pro Max
- iPhone SE (2nd generation)
These instructions assume that you're updating your iPhone to iOS 13.6, but consider each step the same whether updating an iPad or iPod touch as well.
Archive an iOS Backup
It can be tempting to jump right into beta testing, but if something goes wrong while beta testing iOS 13.6, and you want to head back to 13.4.1, you will lose all of your data without a proper backup. Even if you let iCloud automatically back up your device, it will only have a backup for the iOS 13.6 beta. Reverting a previous version of iOS, therefore, will result in the total annihilation of any data tied to that backup on your iPhone.
Without a proper backup, the only thing left to do to make sure your data is safe is to remove the beta profile from your iPhone, restart the device, then sit back and wait until the next stable release comes out and update to that. But if you don't think you'll want to wait that long, be prepared with an archived backup instead.
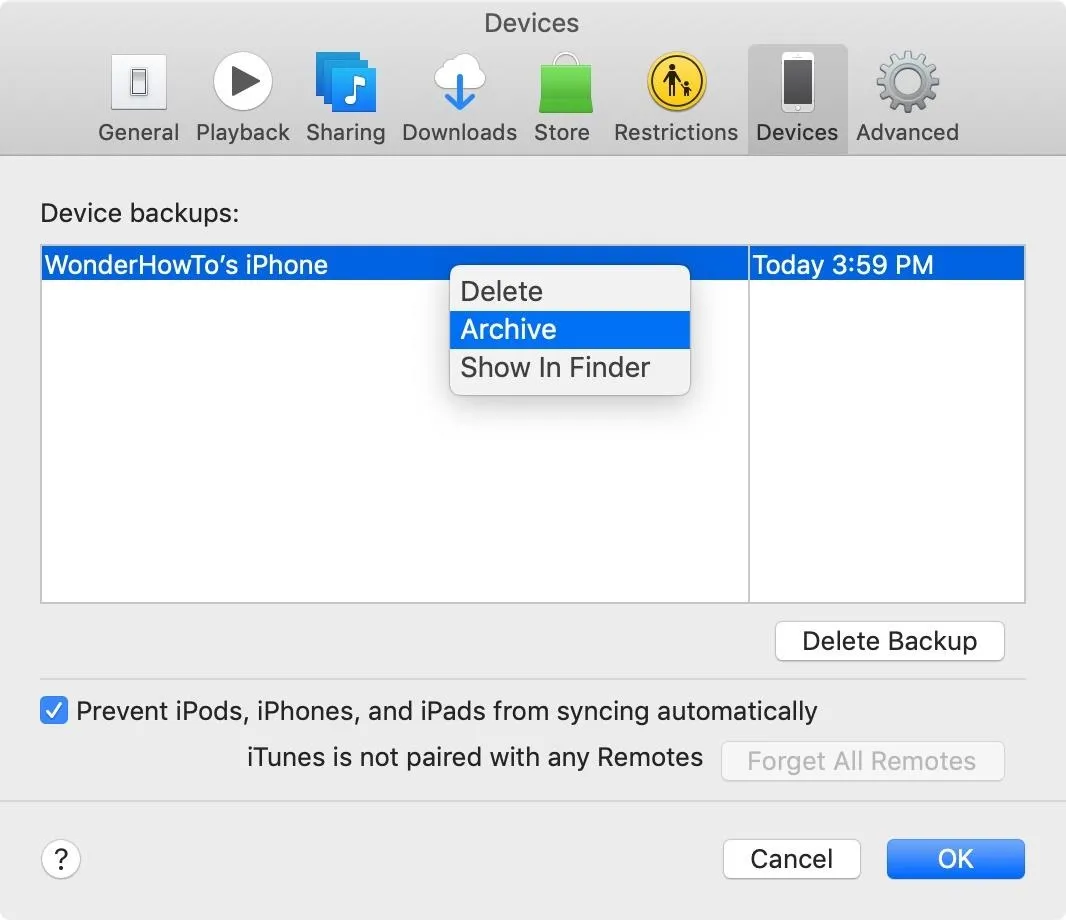
You can choose to back up your iPhone running a public version of iOS with either iCloud or iTunes. We suggest you use iTunes in macOS Mojave or Finder in macOS Catalina so you can archive the backup. Archiving prevents macOS from overwriting your backup the next time you sync your iPhone.
In Mojave, after completing a backup with iTunes, select "iTunes" in the menu bar, then "Preferences," then the "Devices" tab. Find your backup from the list, then right-click on it. Select "Archive" to do just that. Now, whenever your iPhone that's running iOS 13.0 to 13.4.1 backs up, iTunes saves it as a separate file. Your archived backup will remain as it was the day you backed it up, ready to download to your iPhone should you need it.
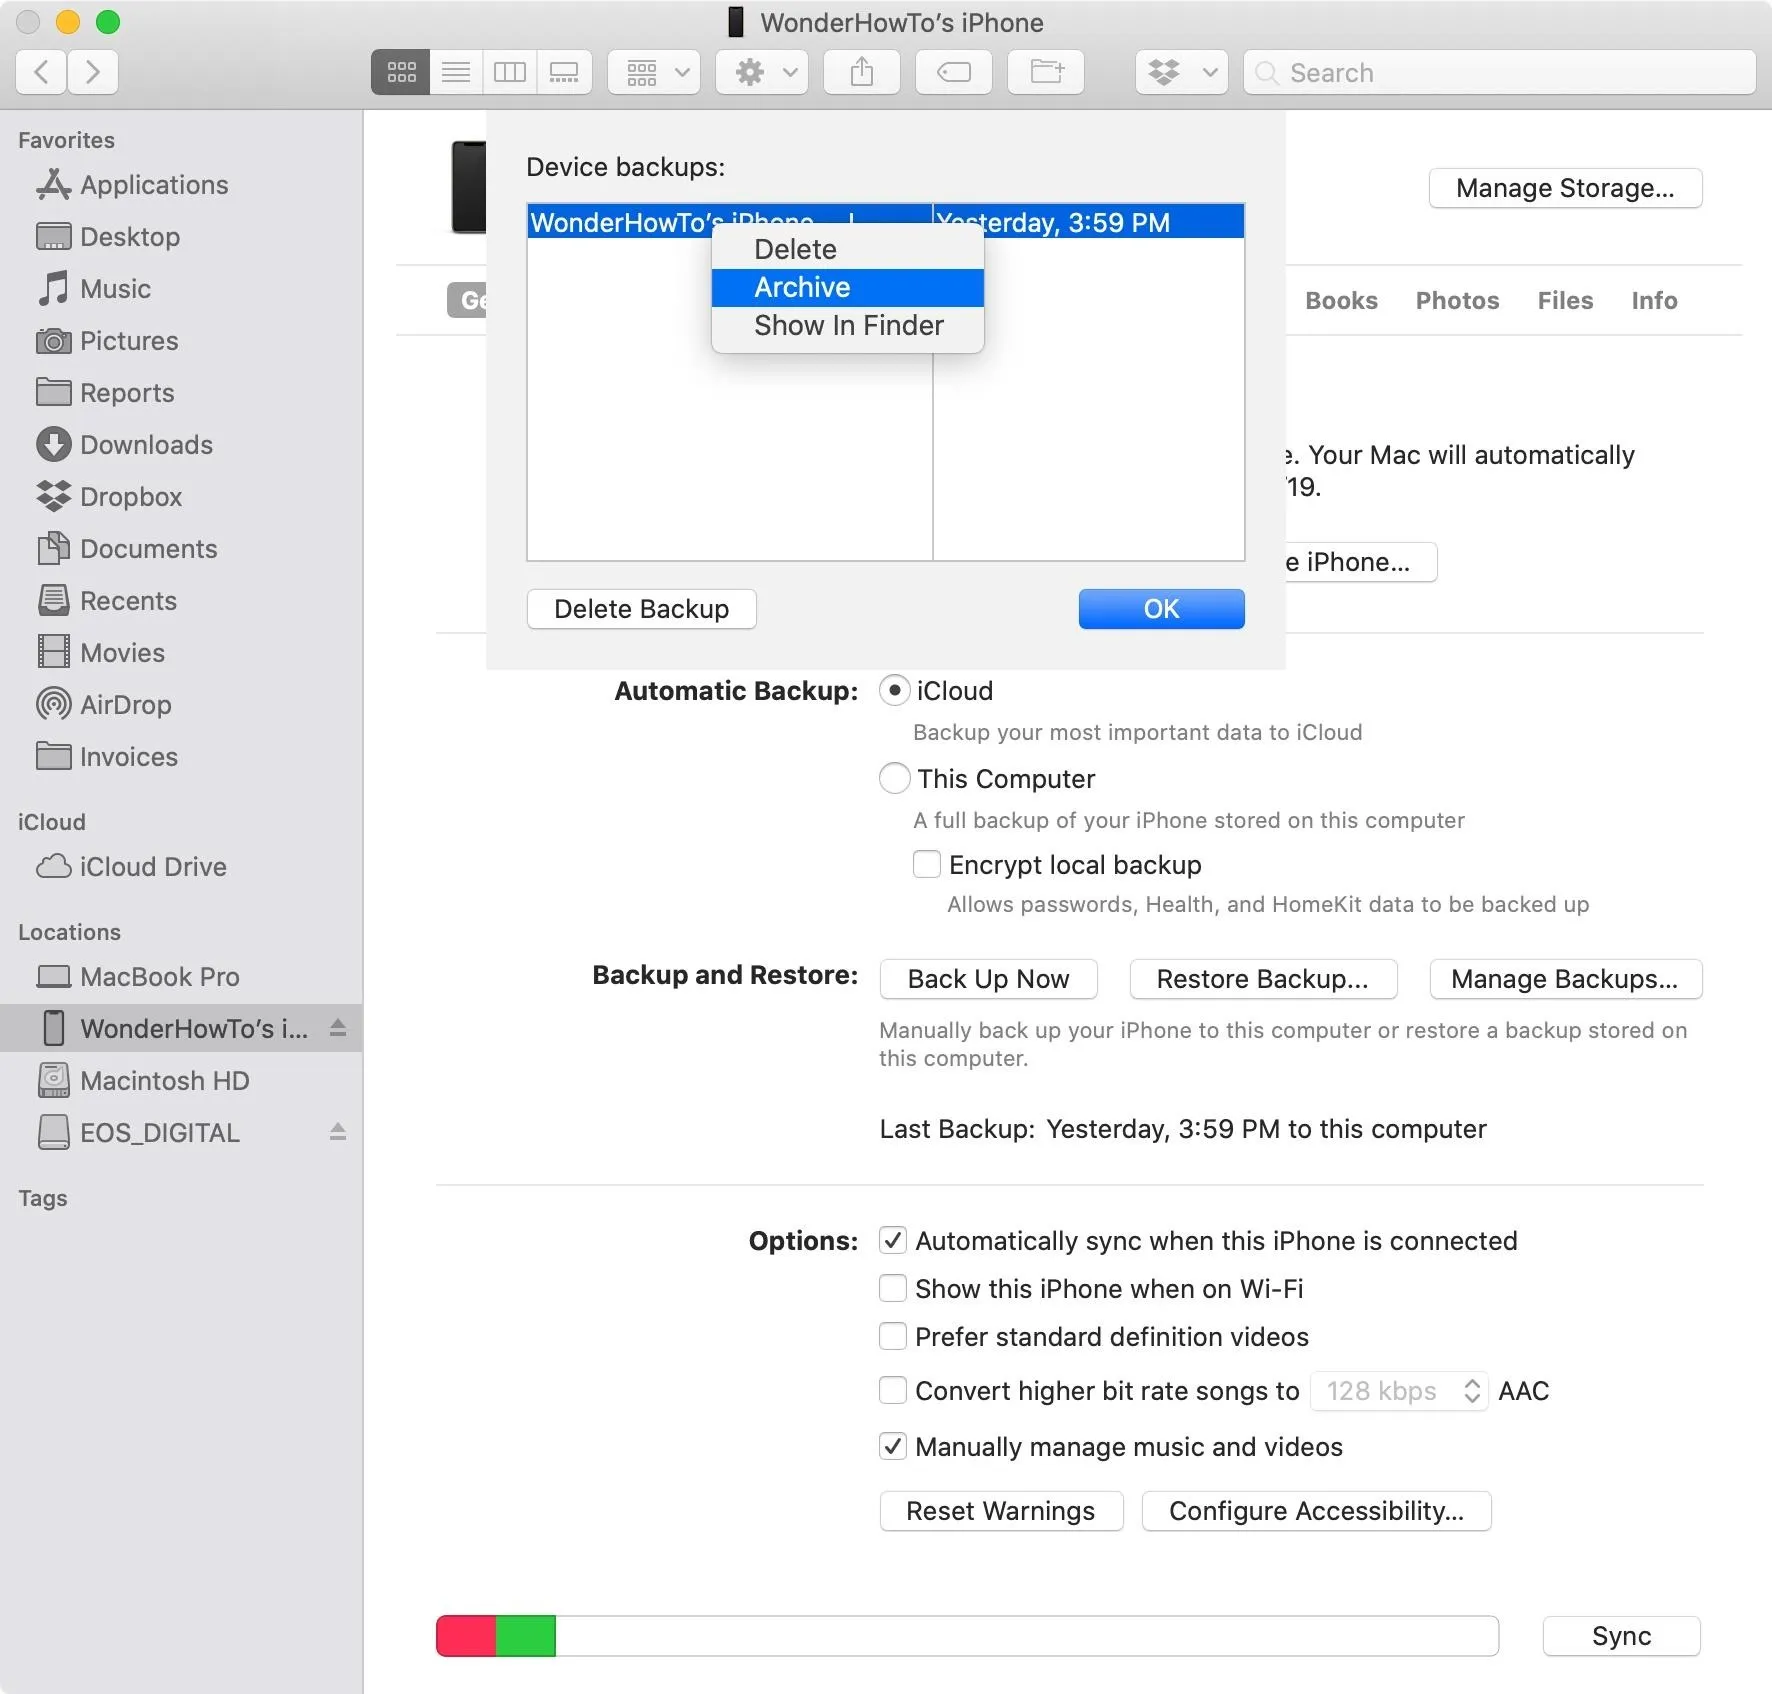
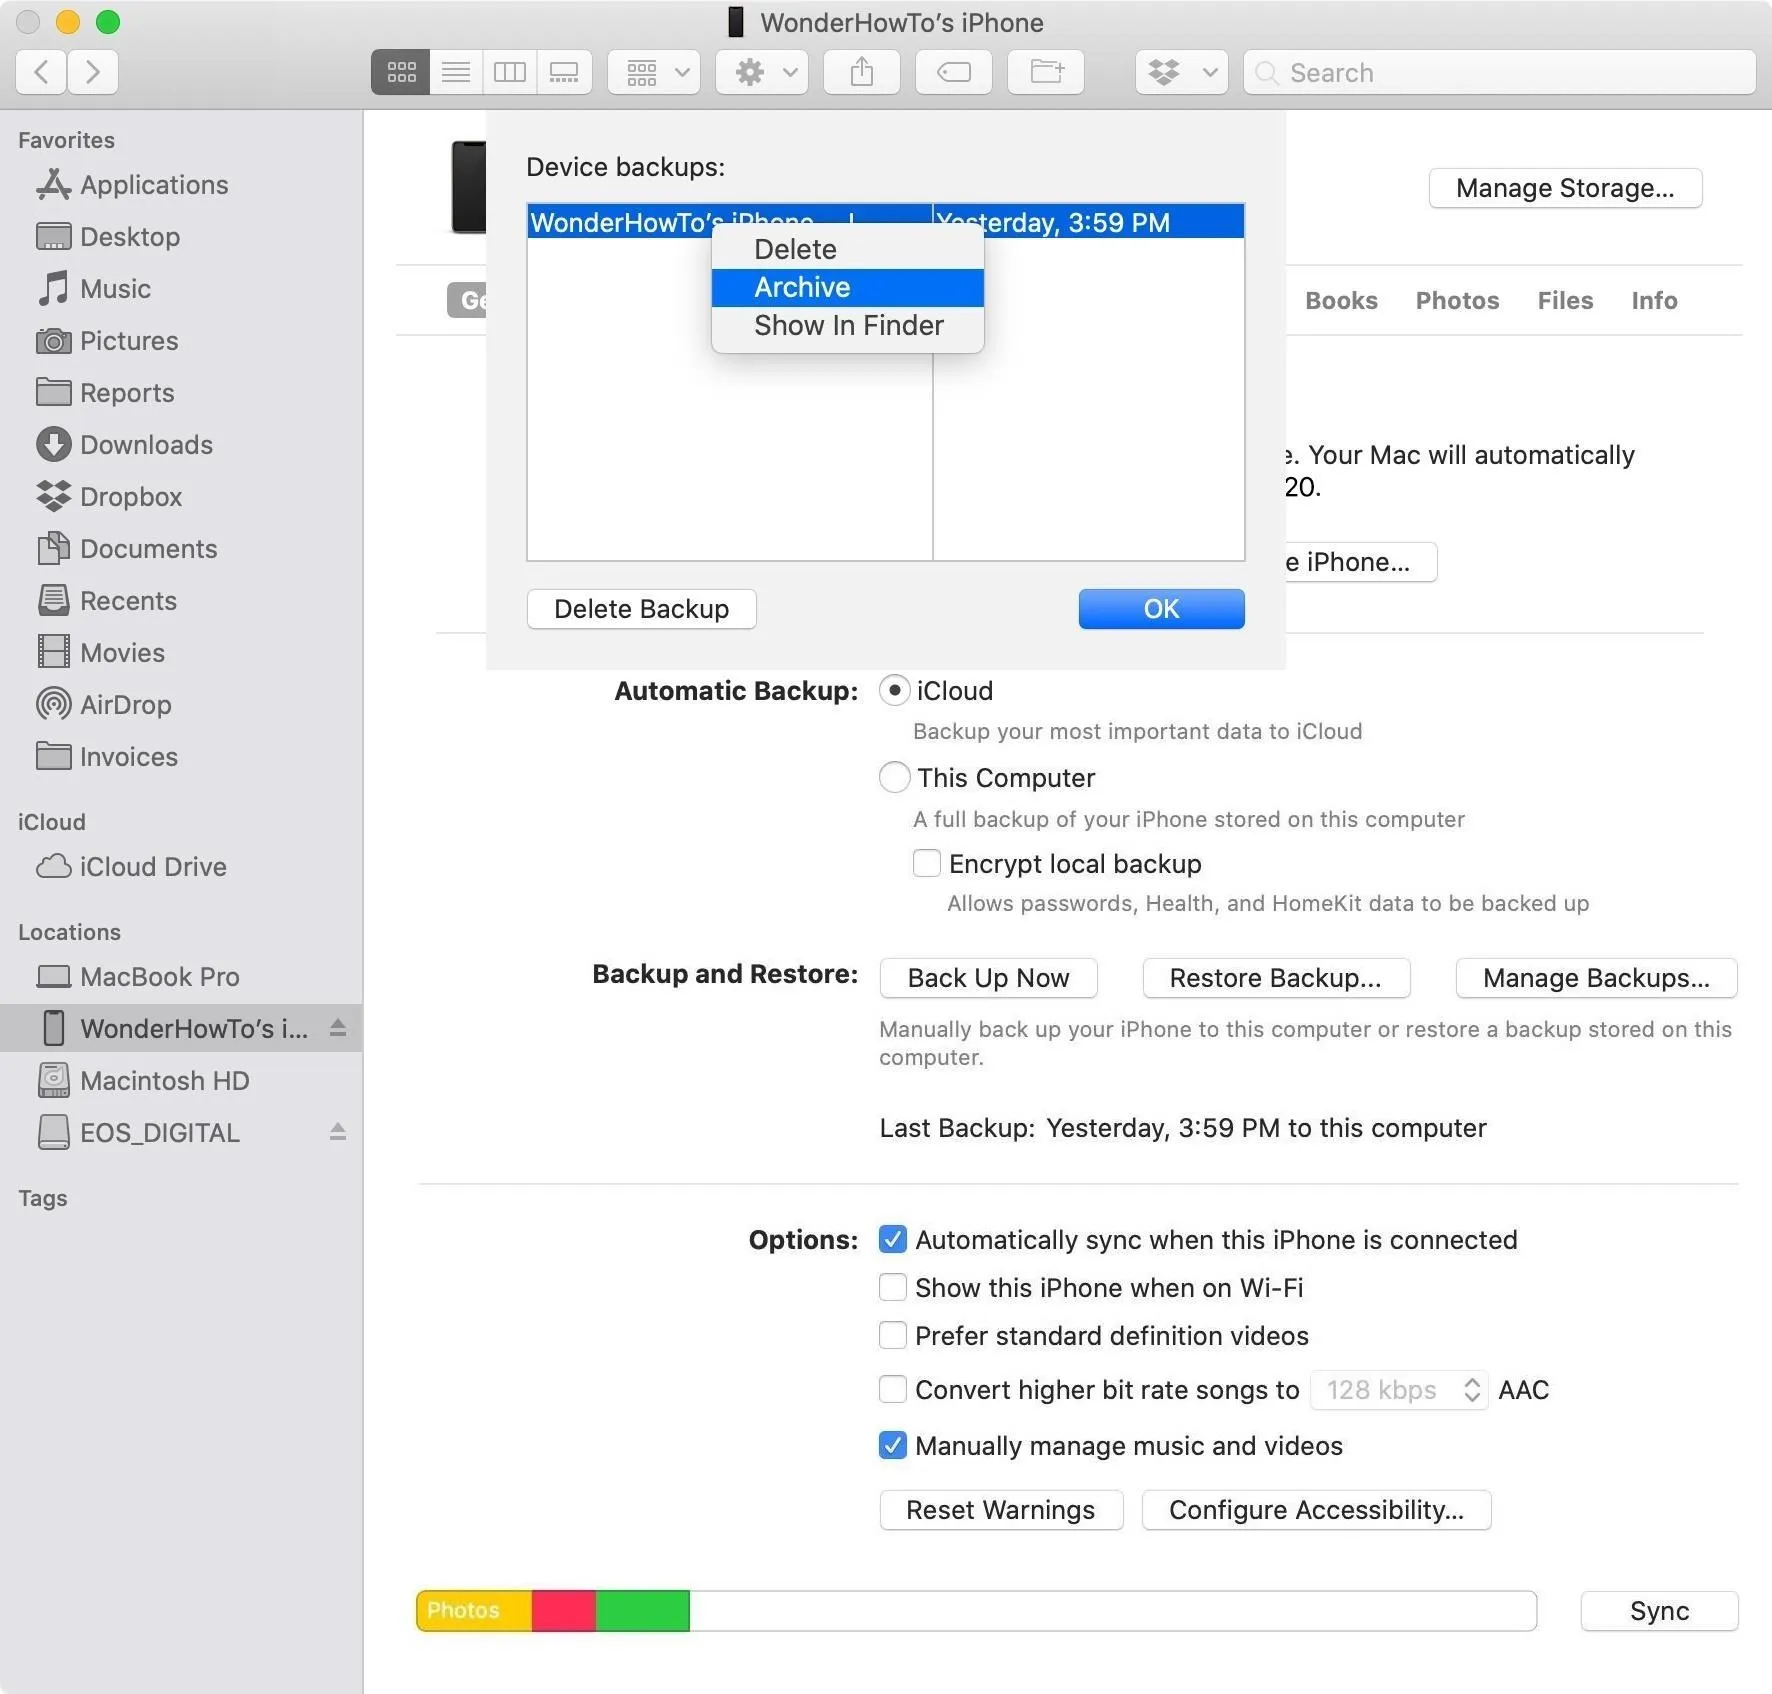
In Catalina, the process is similar, but you open up Finder and select your iPhone from the sidebar. Then, instead of going in any preferences menu, click the "Manage Backups" button. Next, right-click your last backup and hit "Archive." Make sure to use the encrypted backup option if you want to carry on Health and Activity data.
You should note that this method only works while Apple still signs iOS 13.4.1 (it has already stopped signing 13.4). Once Apple decides to stop supporting a version, your archived backup may not work anymore. The only way around this certainty is to back up your SHSH2 blobs. Backing up your iPhone this way is a bit more complicated, but it ensures your archived backup can withstand the sands of time. This is a common method for jailbreakers to use.
Install the iOS 13.6 Public Beta (OTA)
If you're coming from the iOS 12 public beta, make sure to remove your iOS 12 public beta profile before continuing. Go to Settings –> General –> Profile –> iOS 12 Beta Software Profile –> Remove Profile, then enter your passcode and confirm with "Remove." If you were already running the iOS 13.0, 13.1, 13.2, 13.3, or 13.4 public beta and still have the profile installed, skip to number 14 below in the list.
- Archive your backup via iTunes or Finder, if you haven't done so already.
- On your iPhone, head to beta.apple.com.
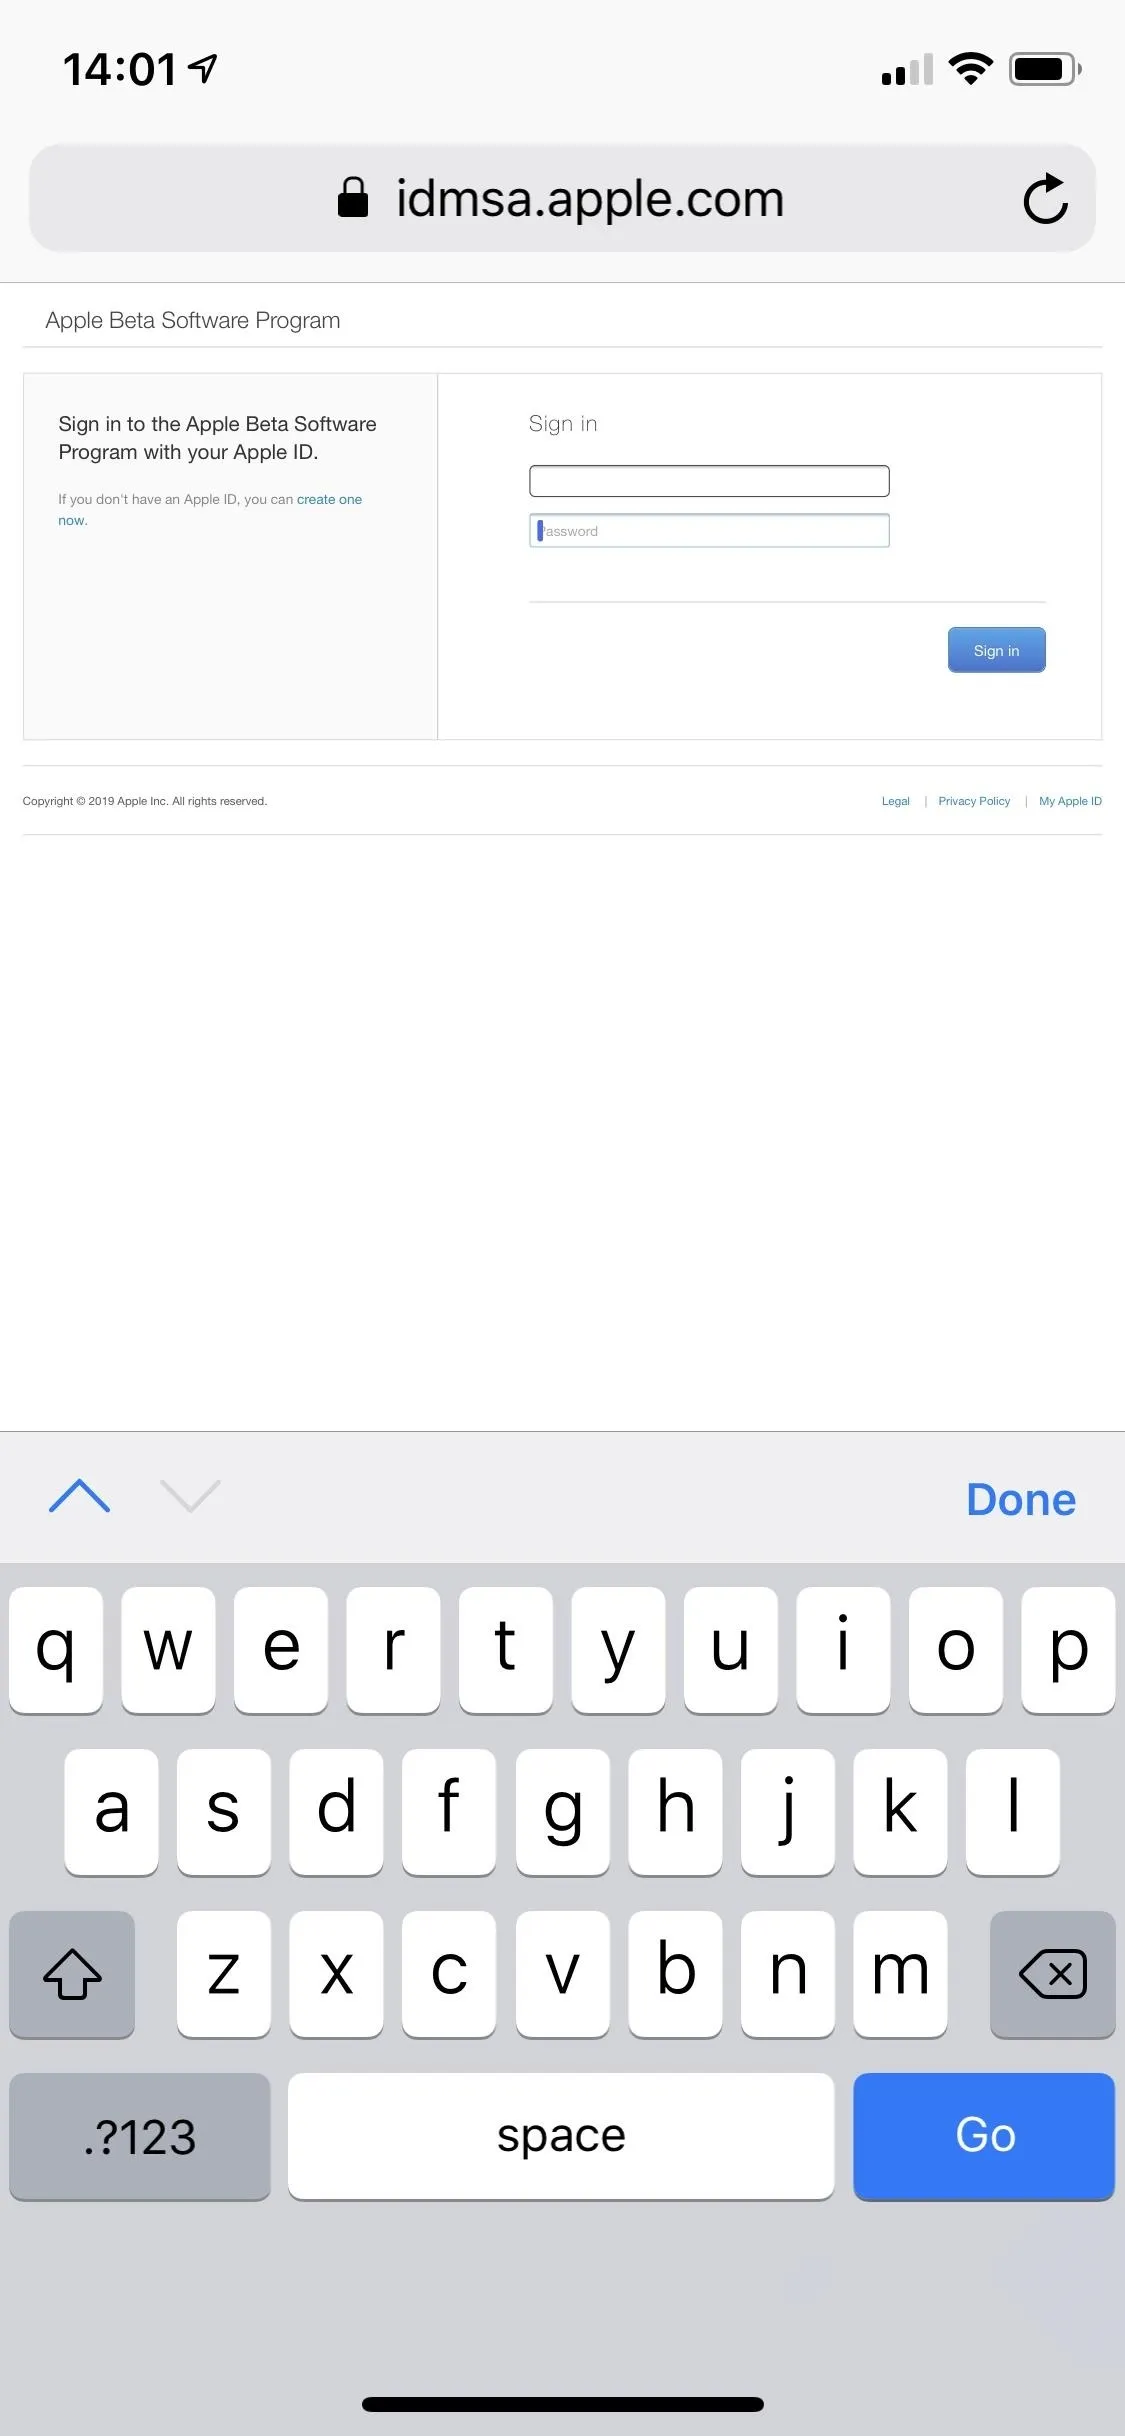
- Tap the "Sign Up" or "Sign In" option.
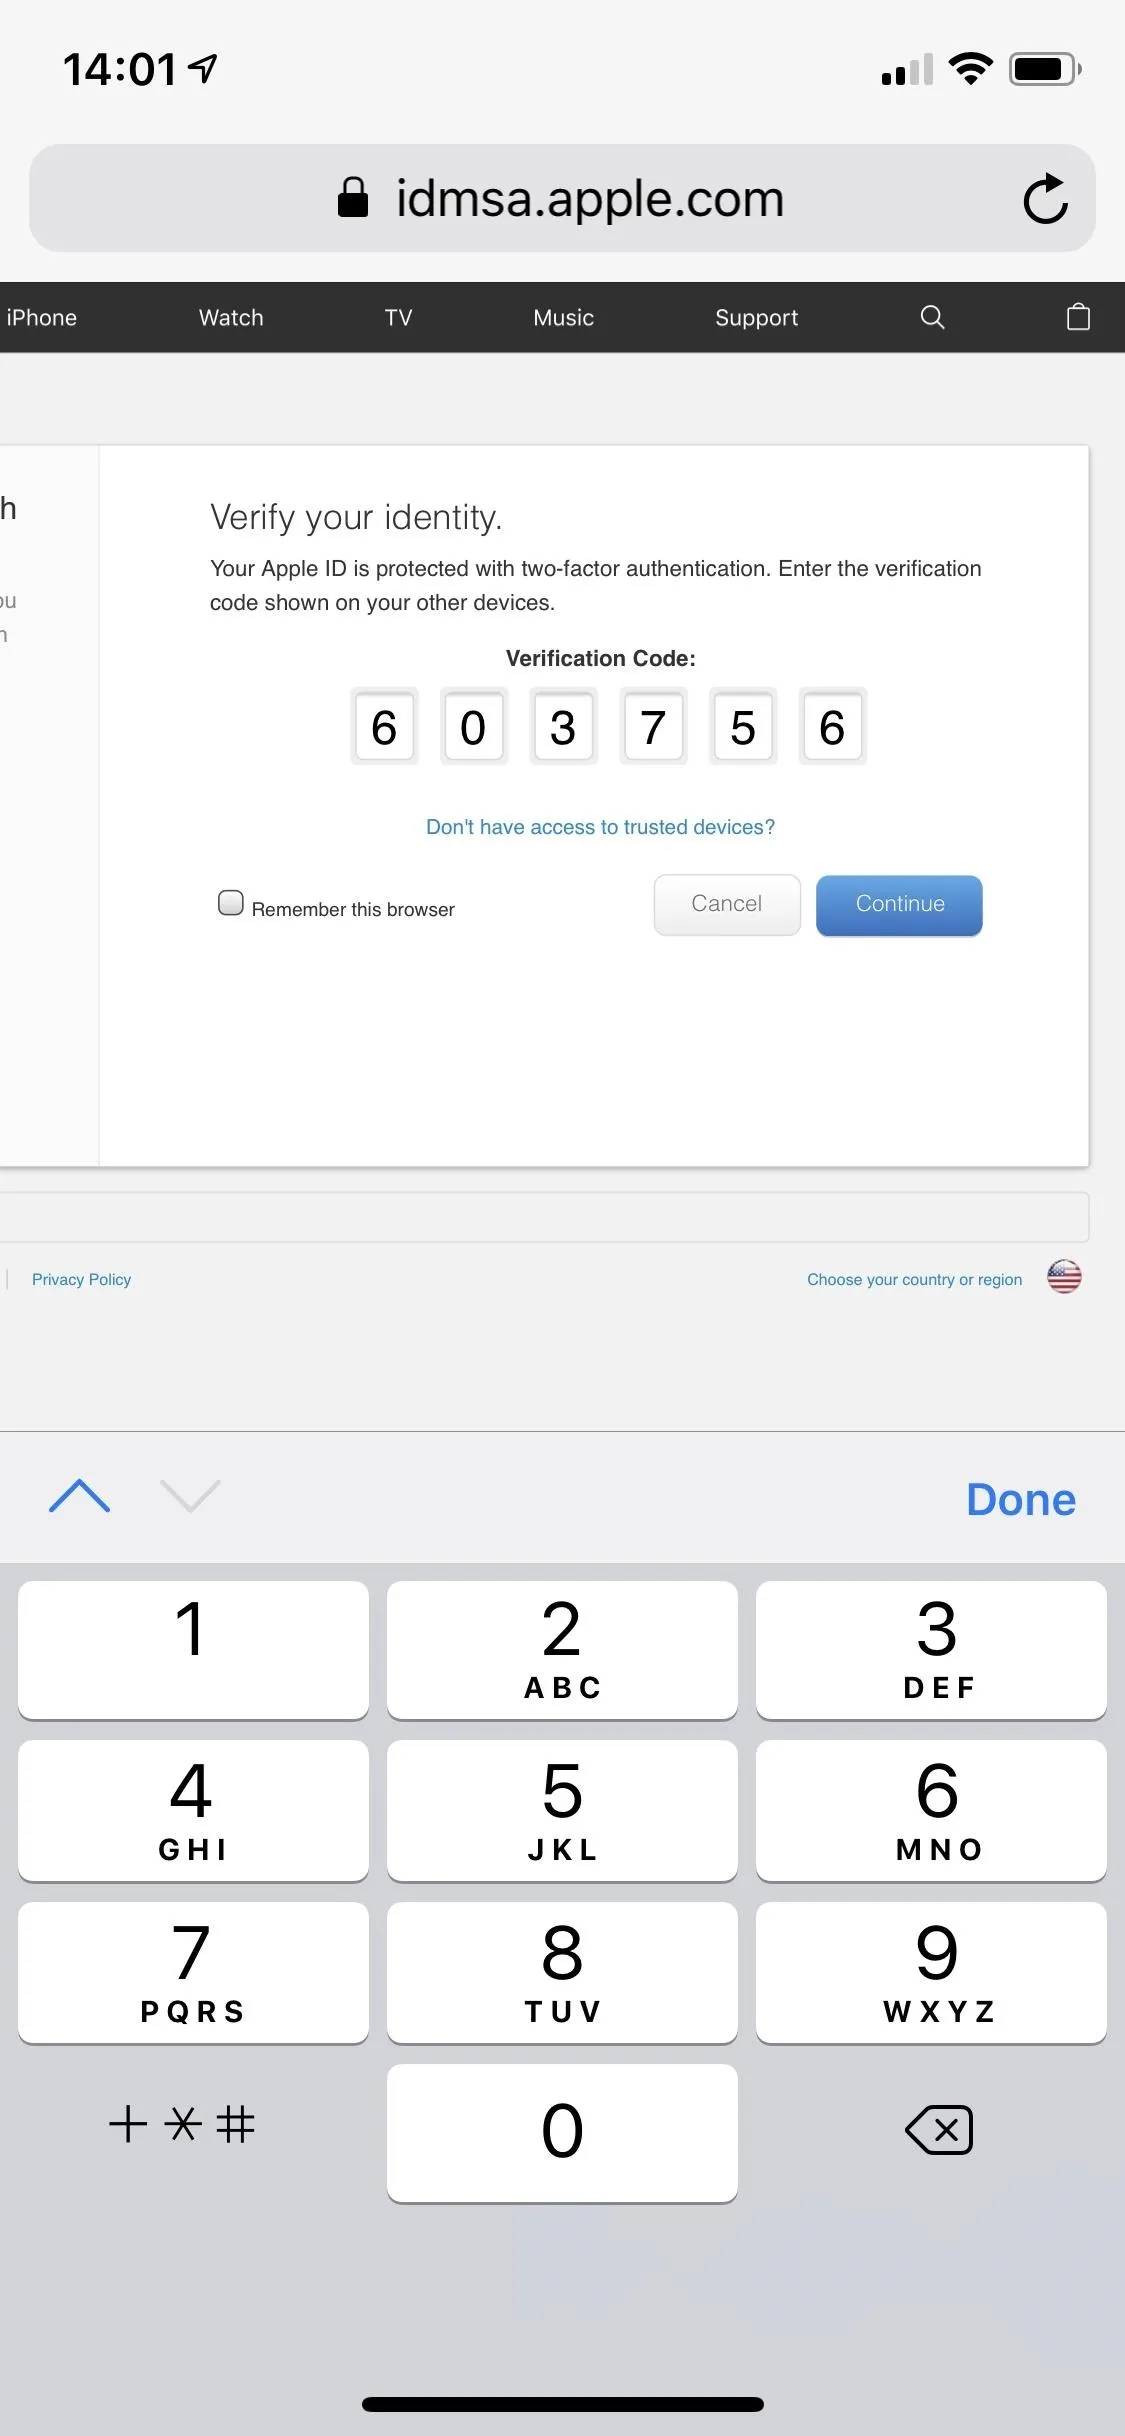
- Enter your Apple ID and password to log in, then follow the prompts if you have 2FA enabled.
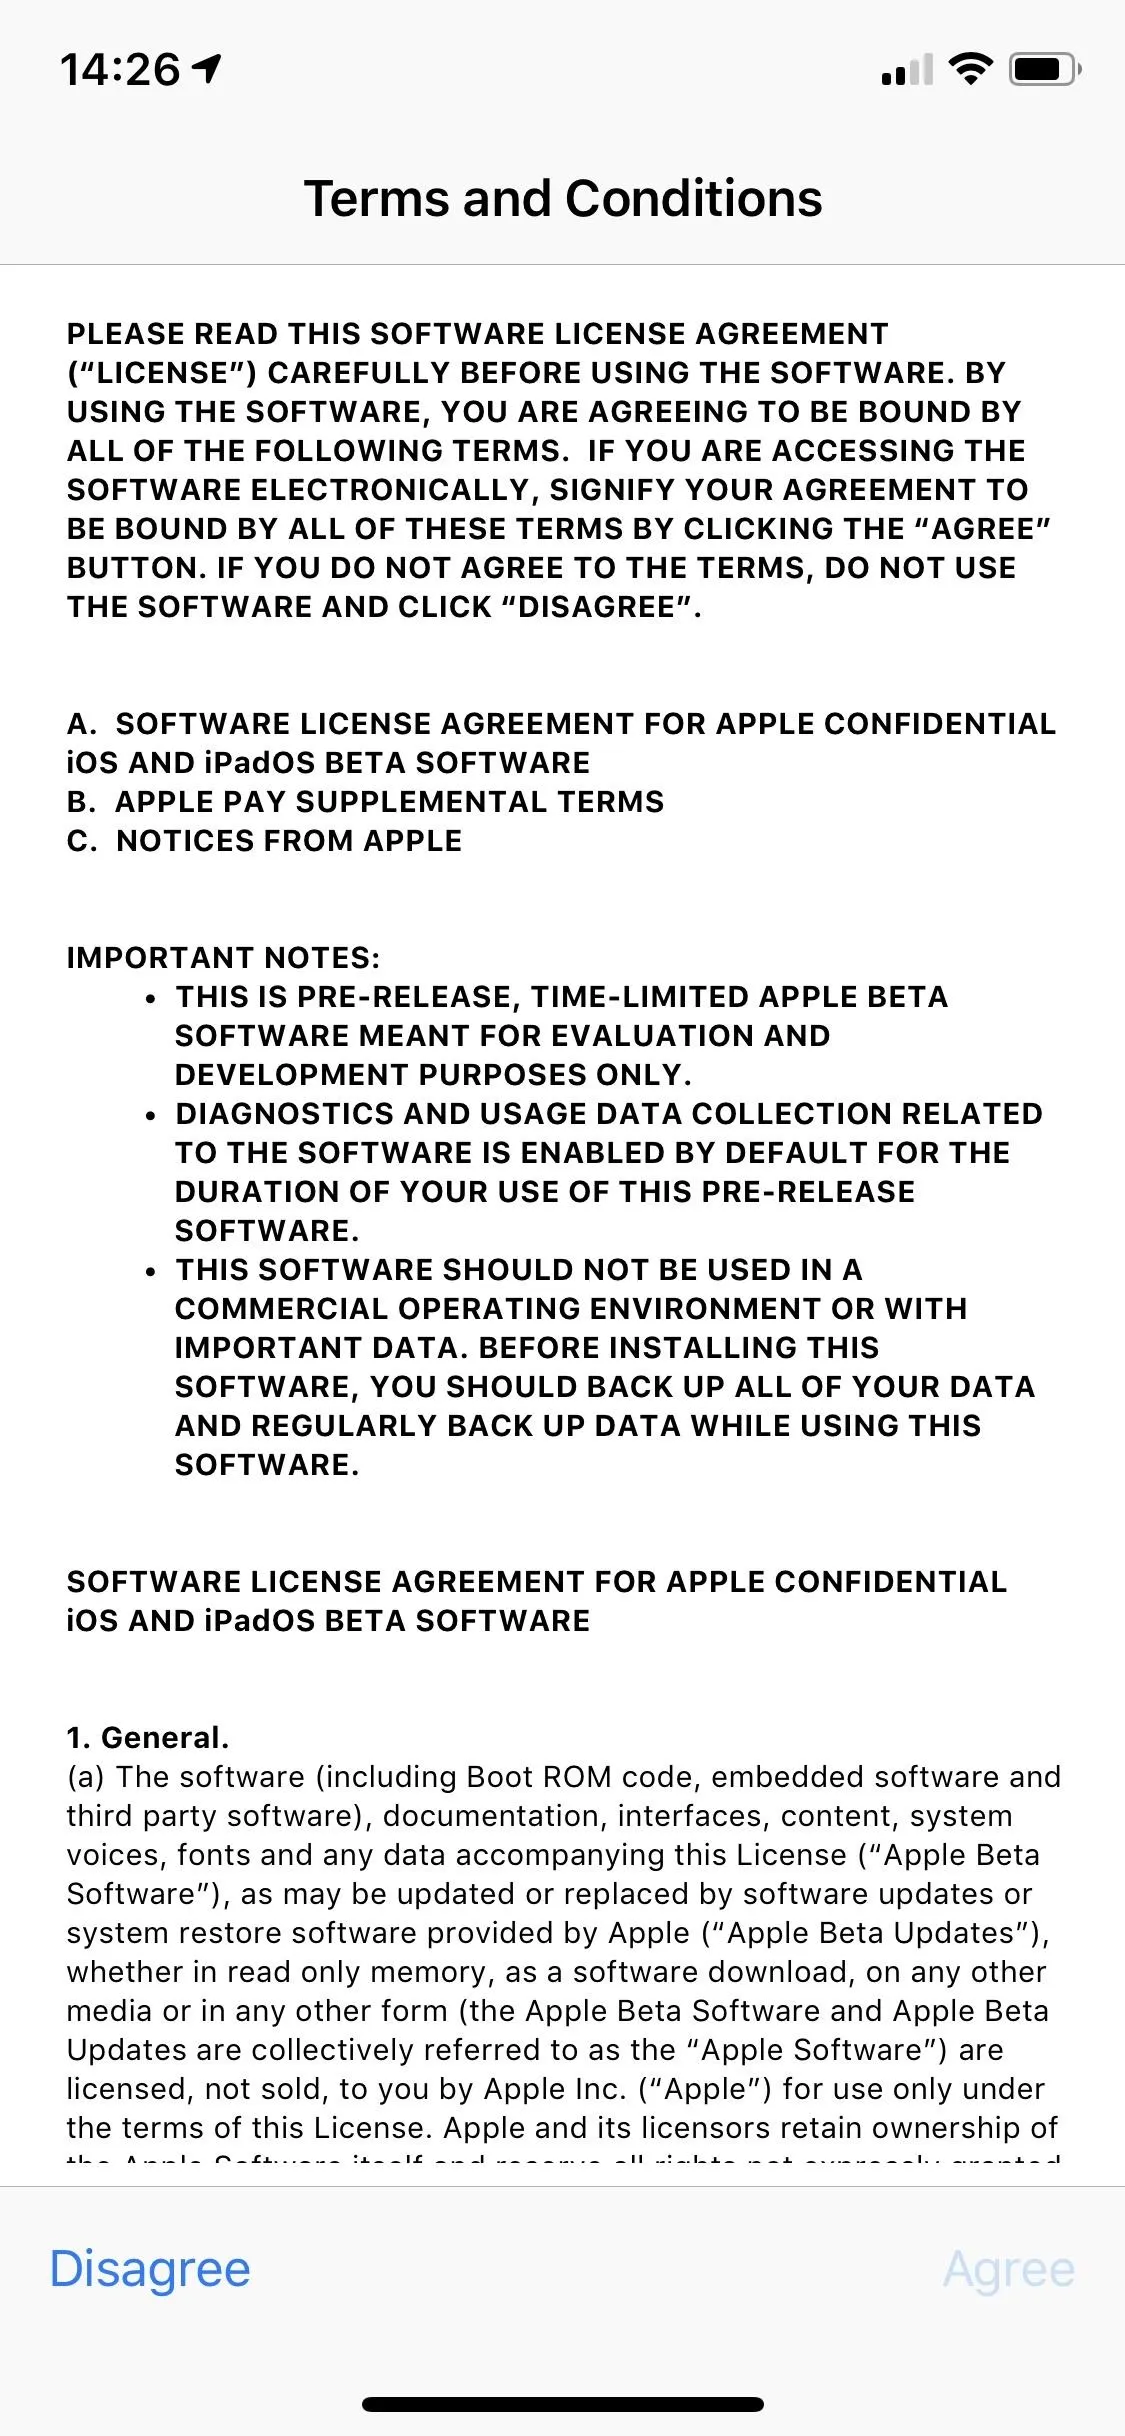
- Read and accept the Apple Beta Software Agreement, if any shows up.
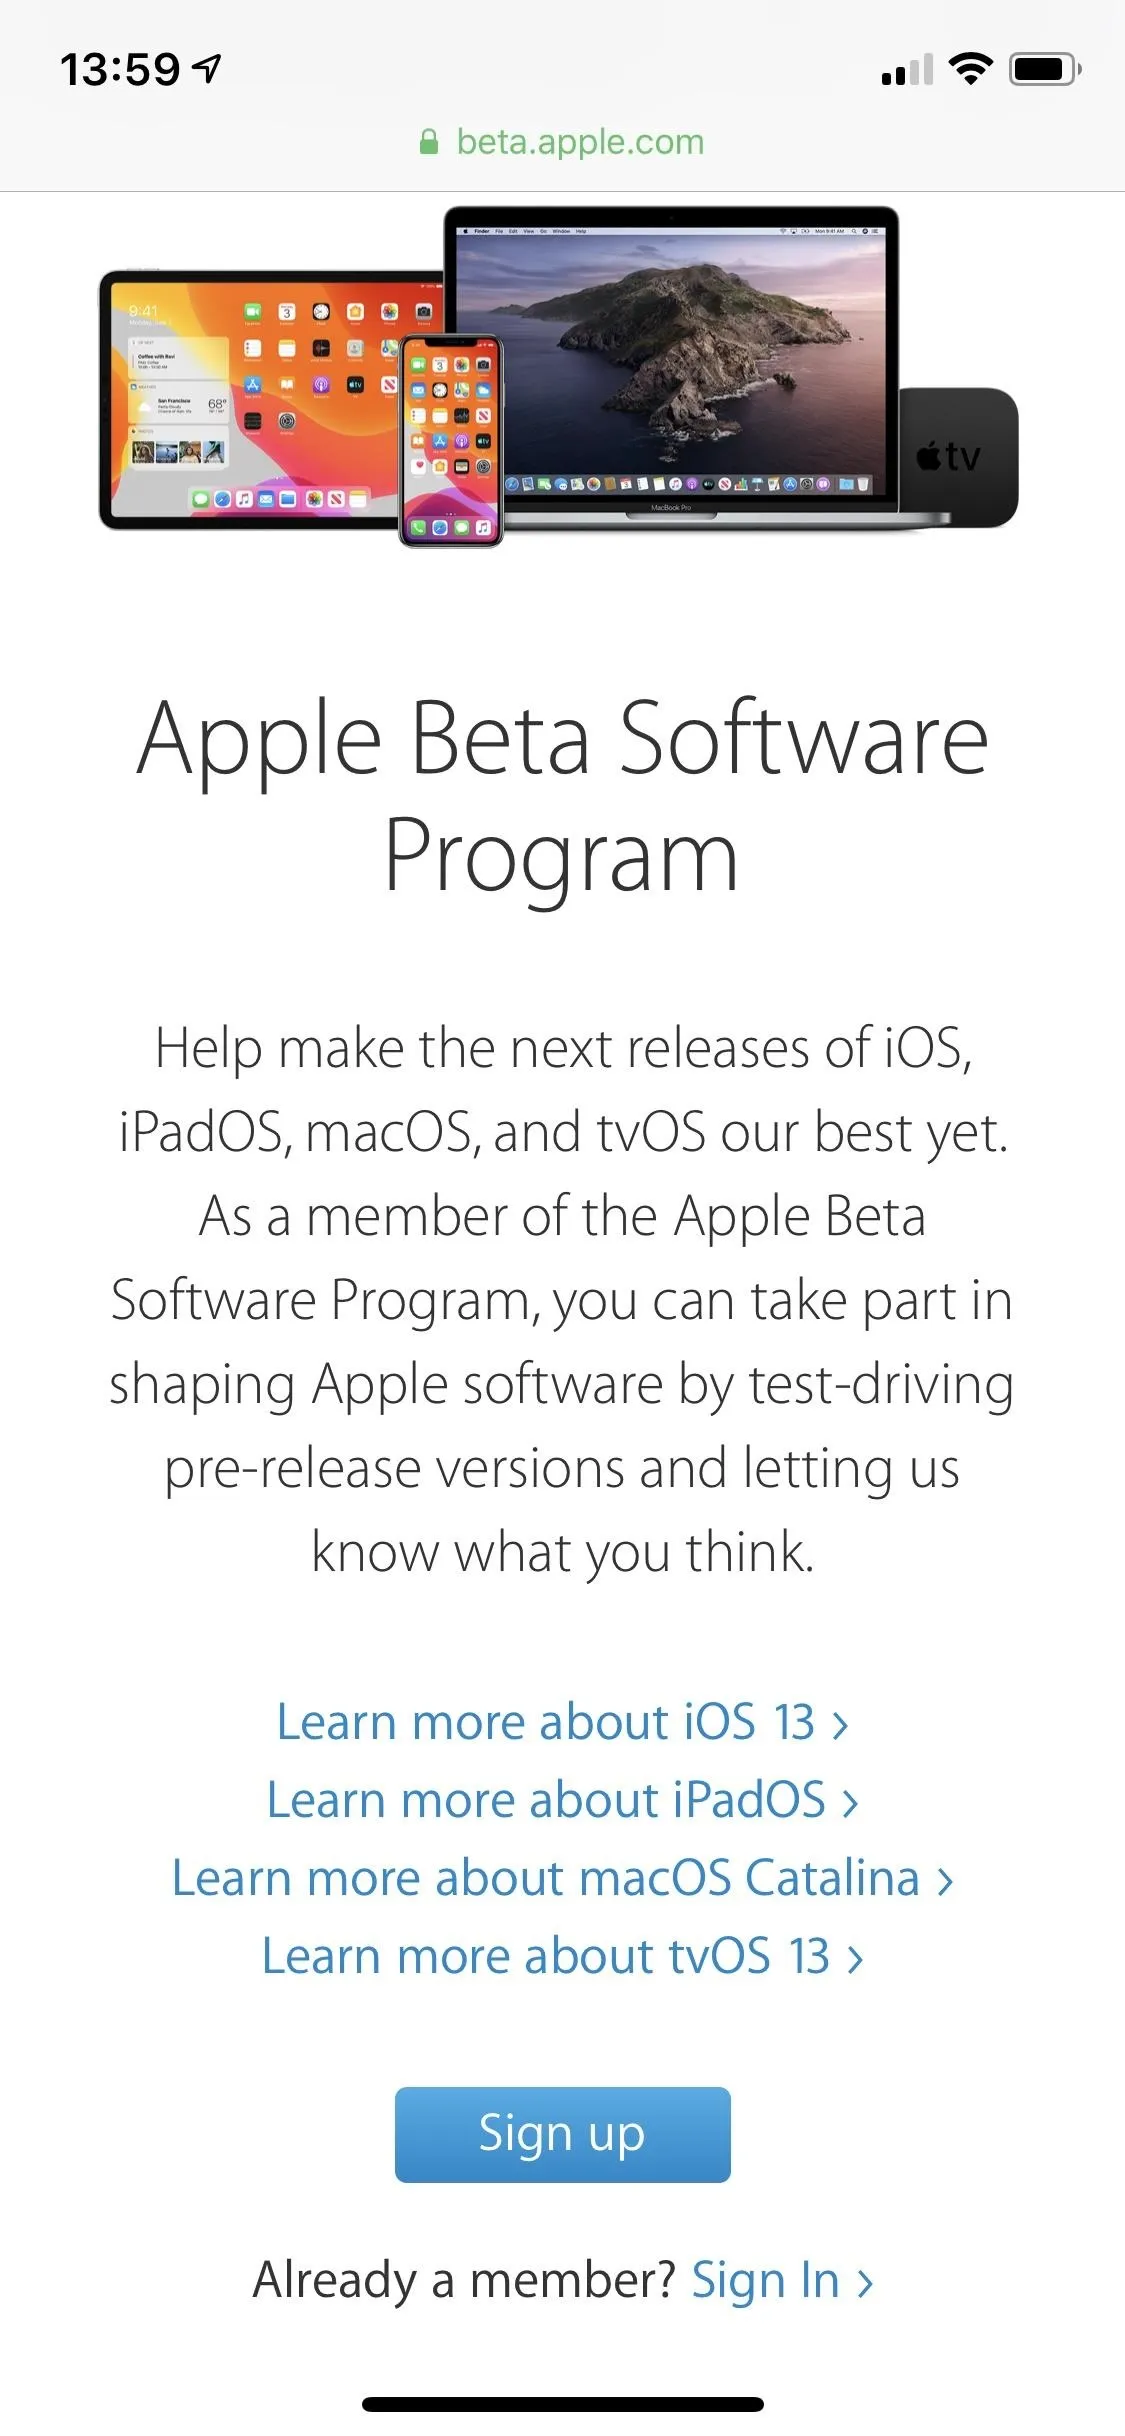
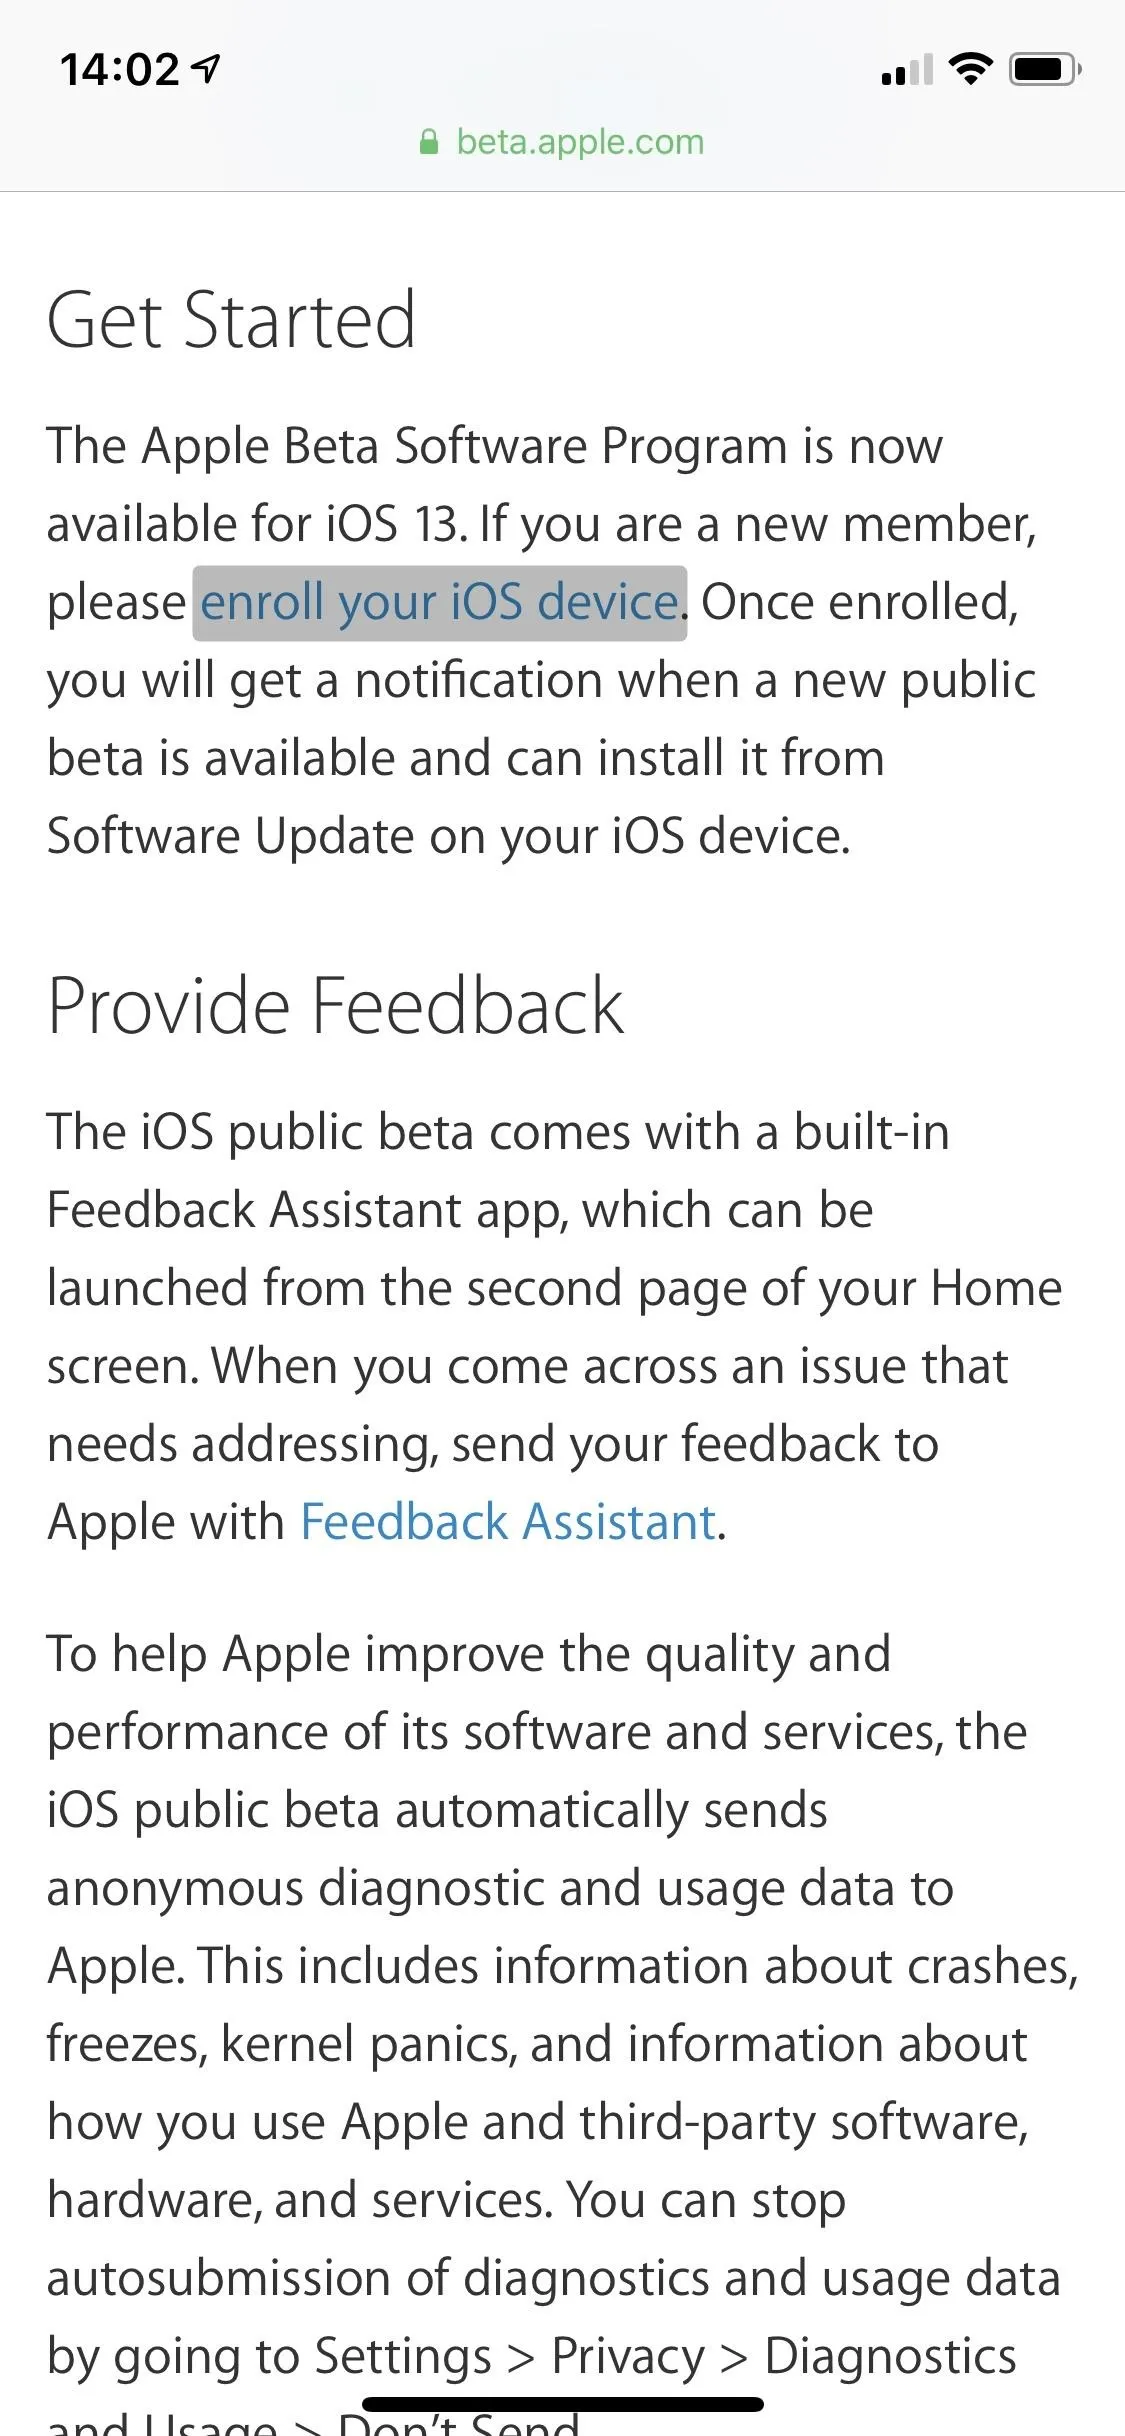
- Head to beta.apple.com/profile to enroll your iPhone in the beta program or tap on the "enroll your iOS device" link after signing in.
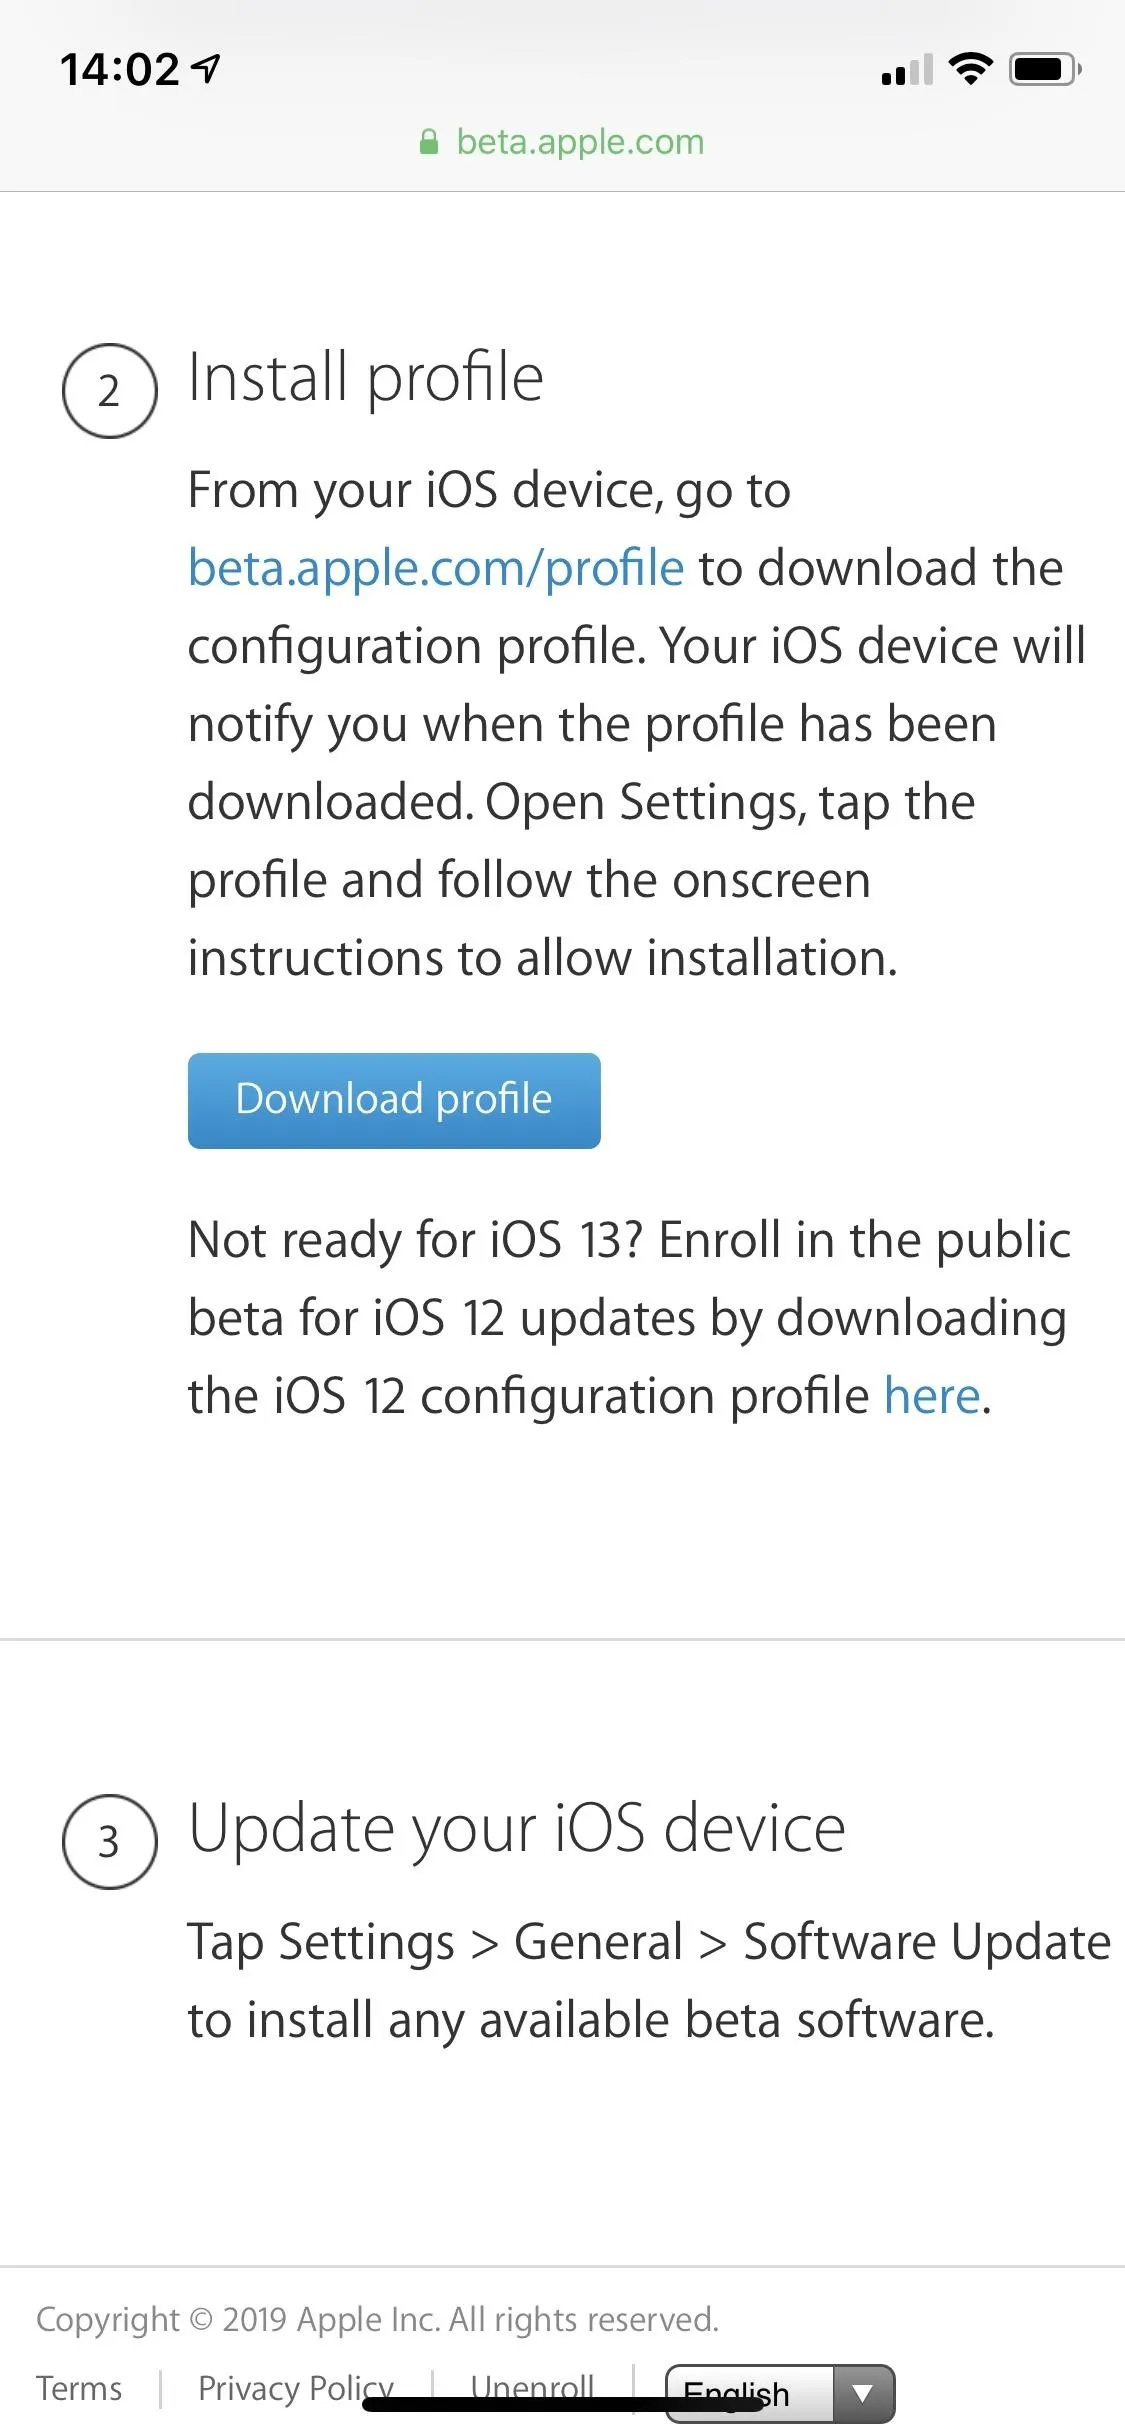
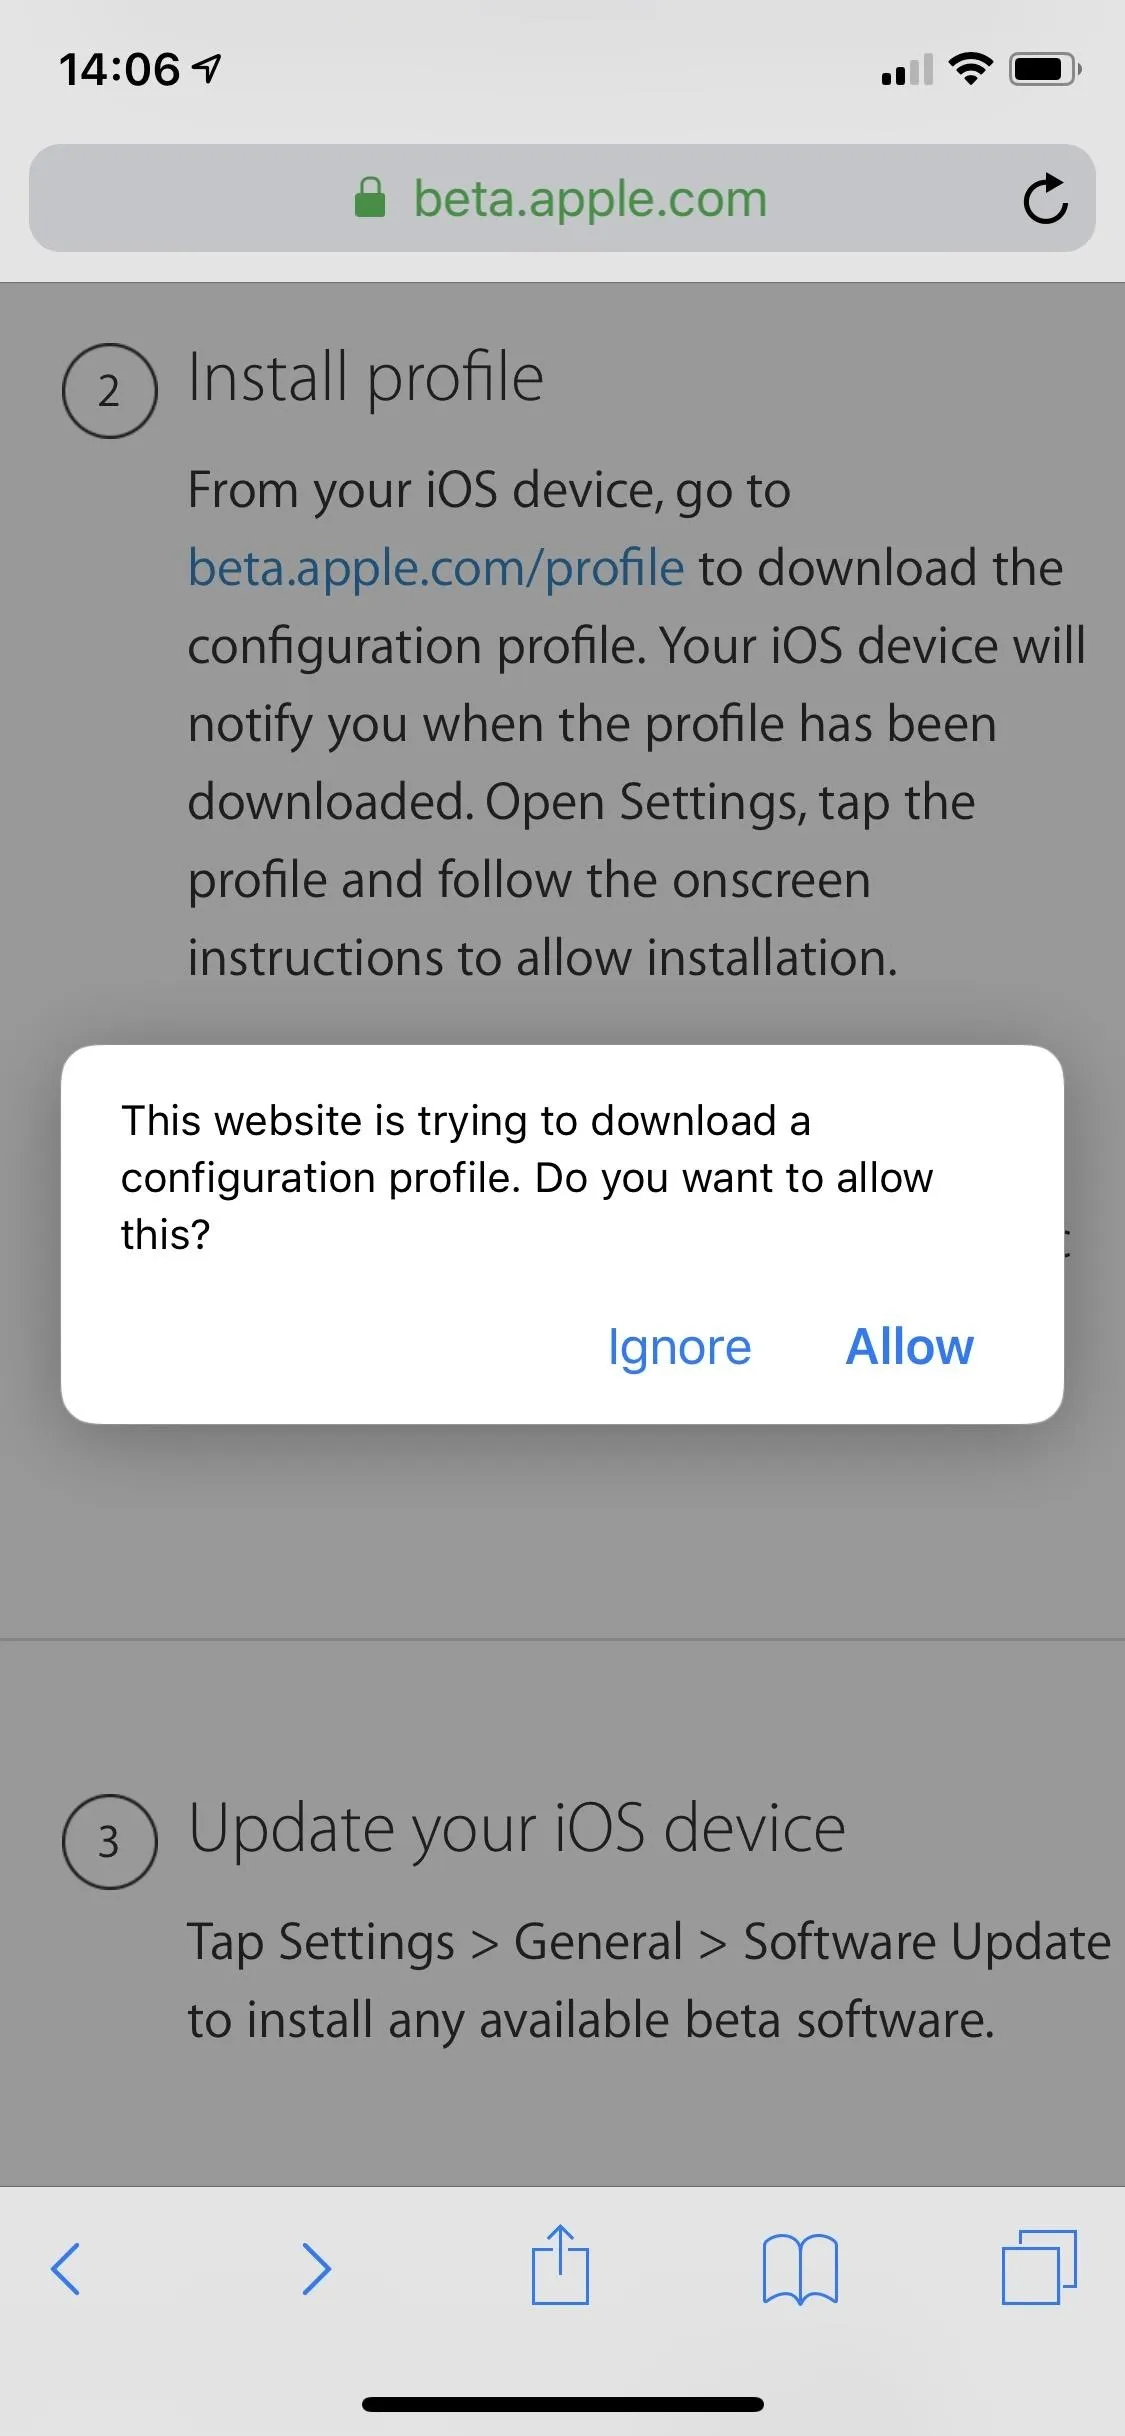
- Tap the "Download profile" link halfway down this page.
- Tap "Allow" on the pop-up to view the configuration profile, and it will tell you after that it has been downloaded.
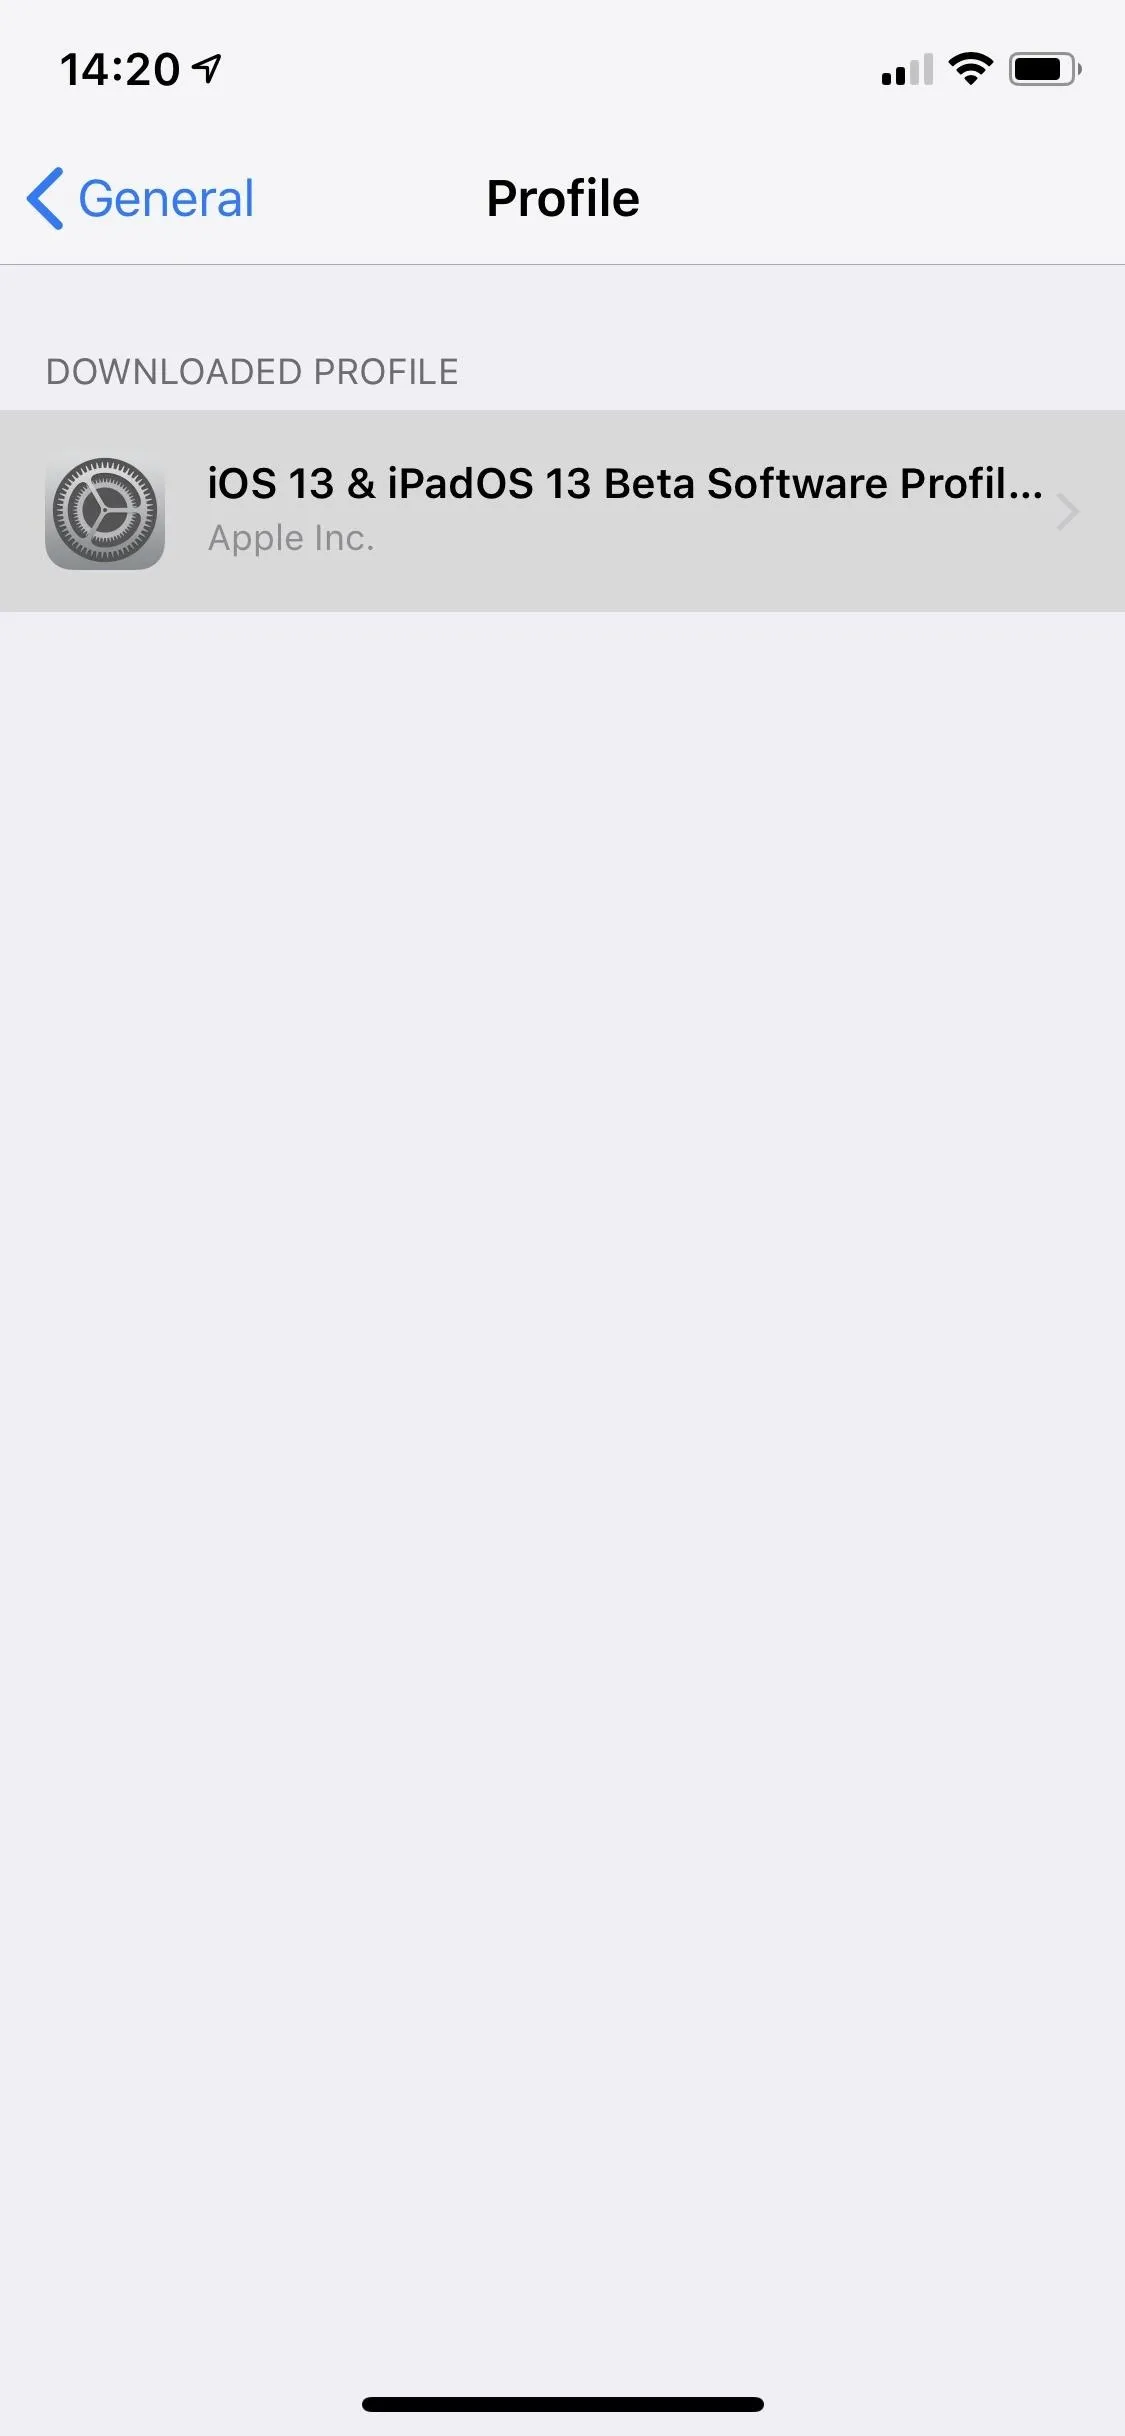
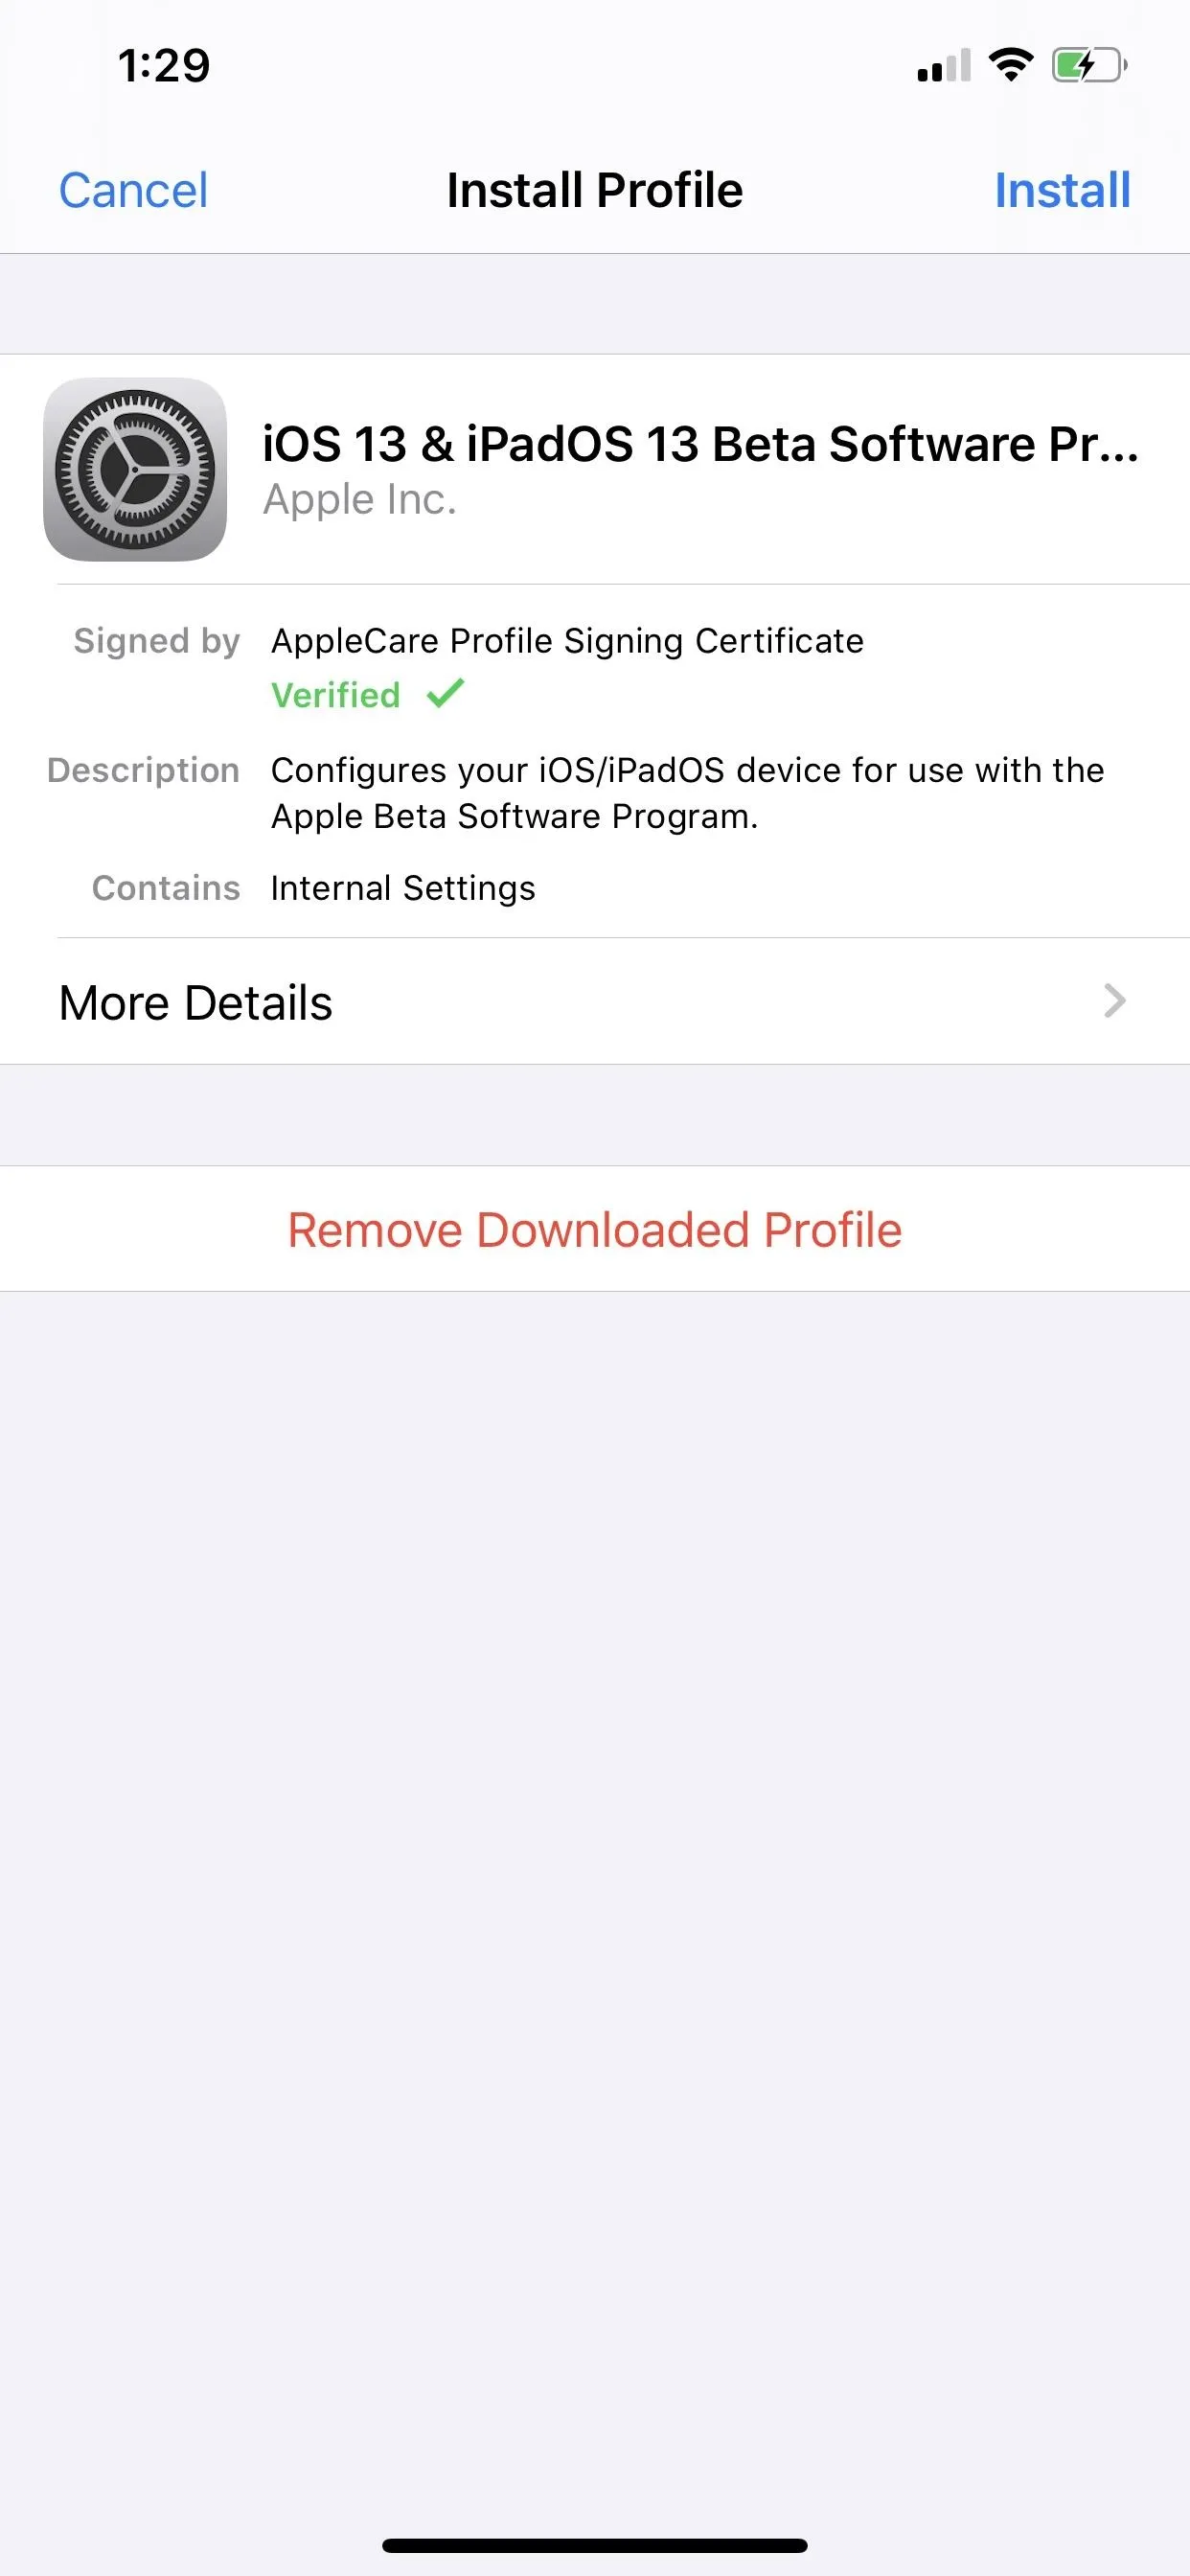
- Go to Settings –> General –> Profile –> iOS 13 & iPadOS 13 Beta Software Profile. Alternatively, if on a newer version of iOS, you'll see a "Profile Downloaded" link at the top of the Settings app's main page — tap that.
- Select "Install" in the top right of the profile's details page.
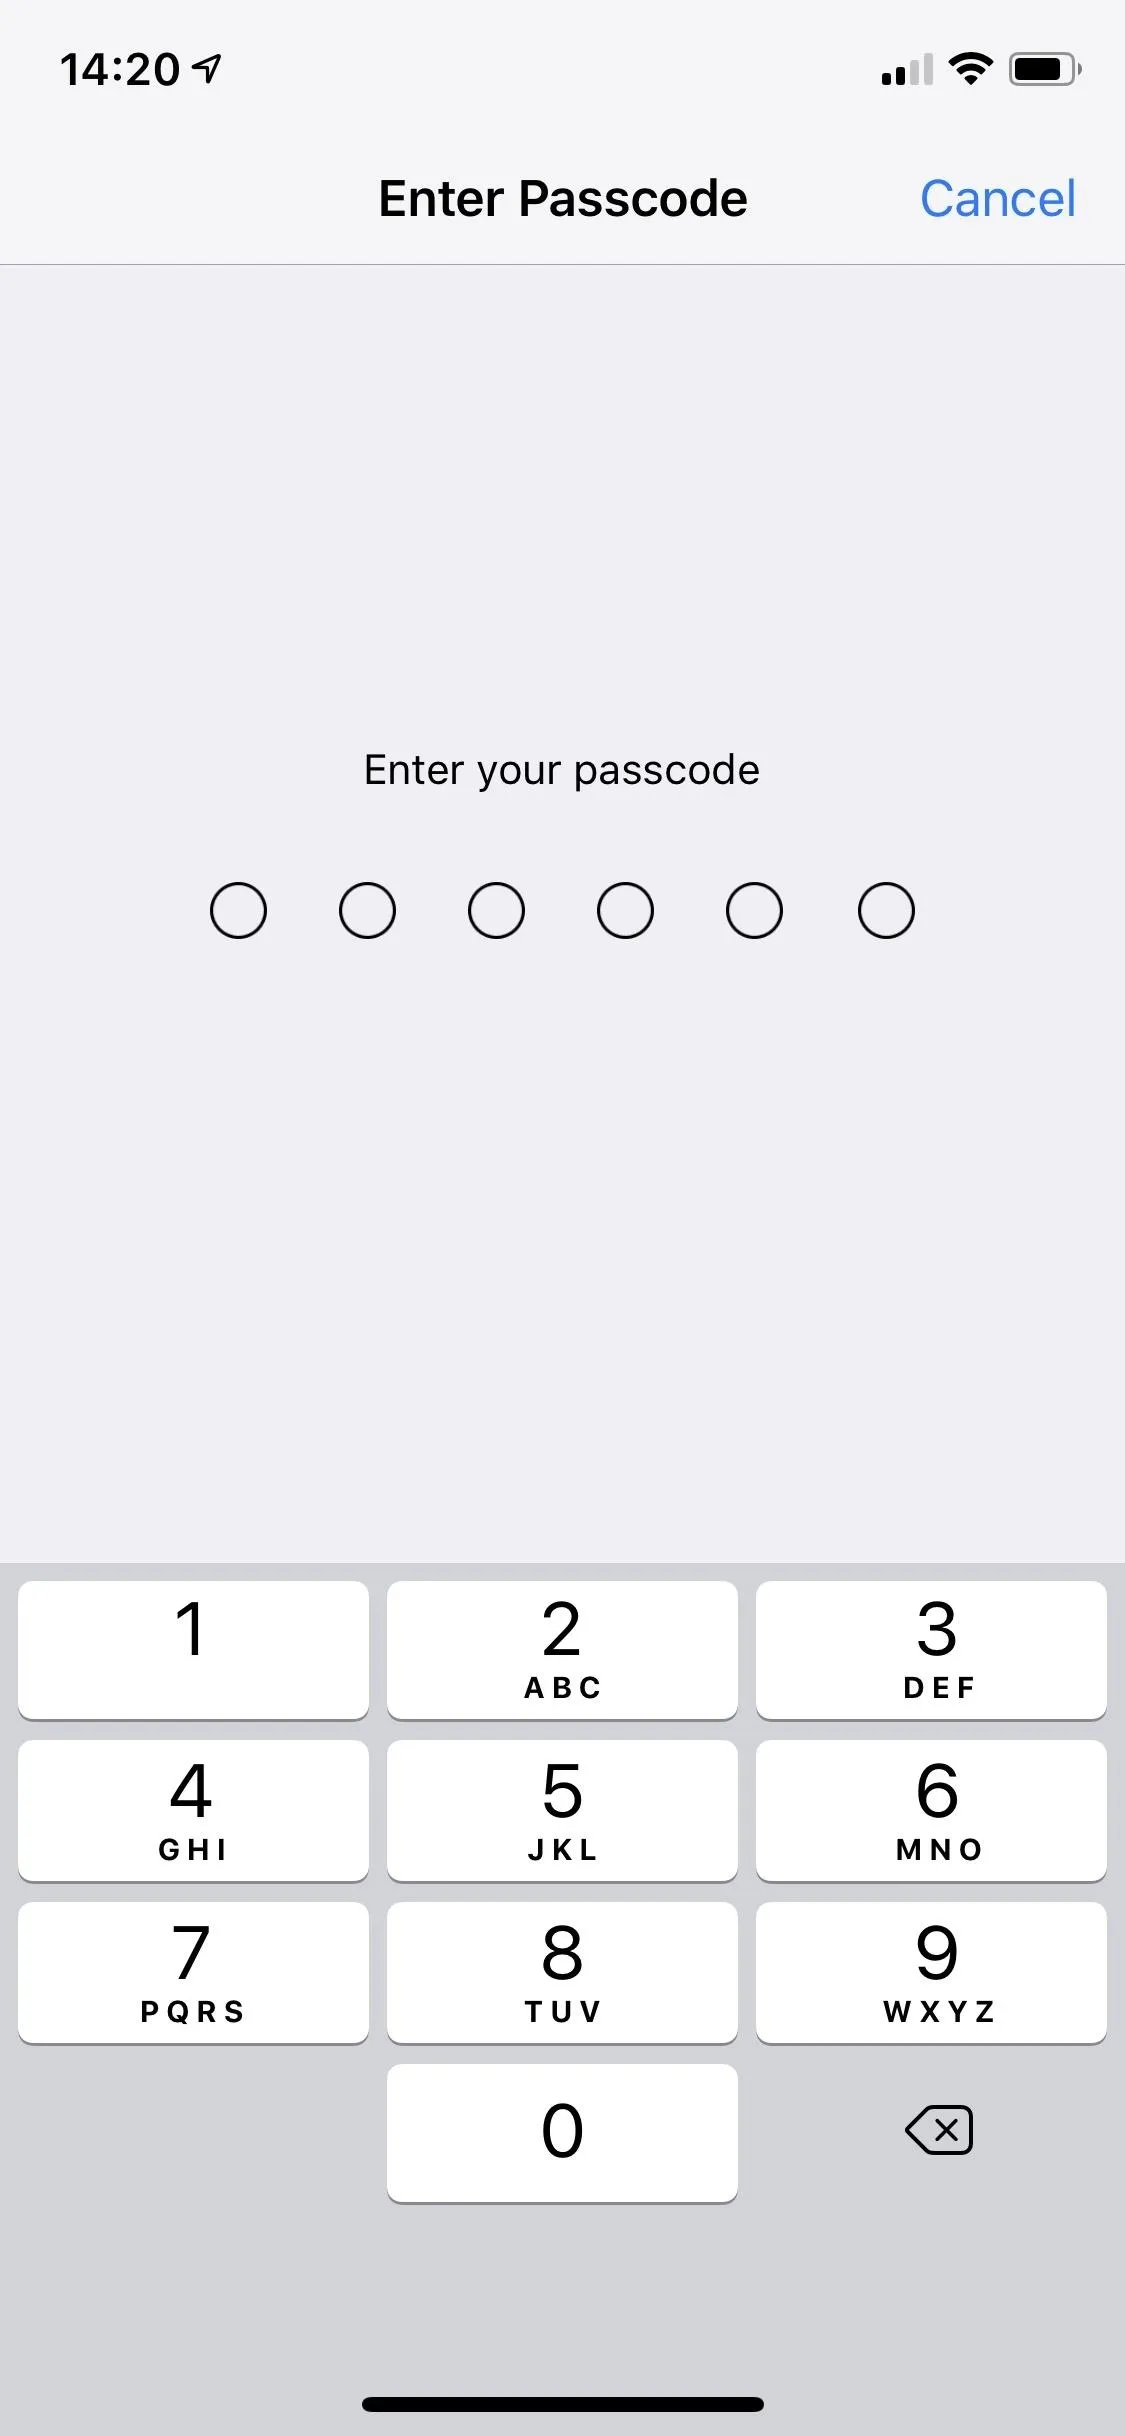
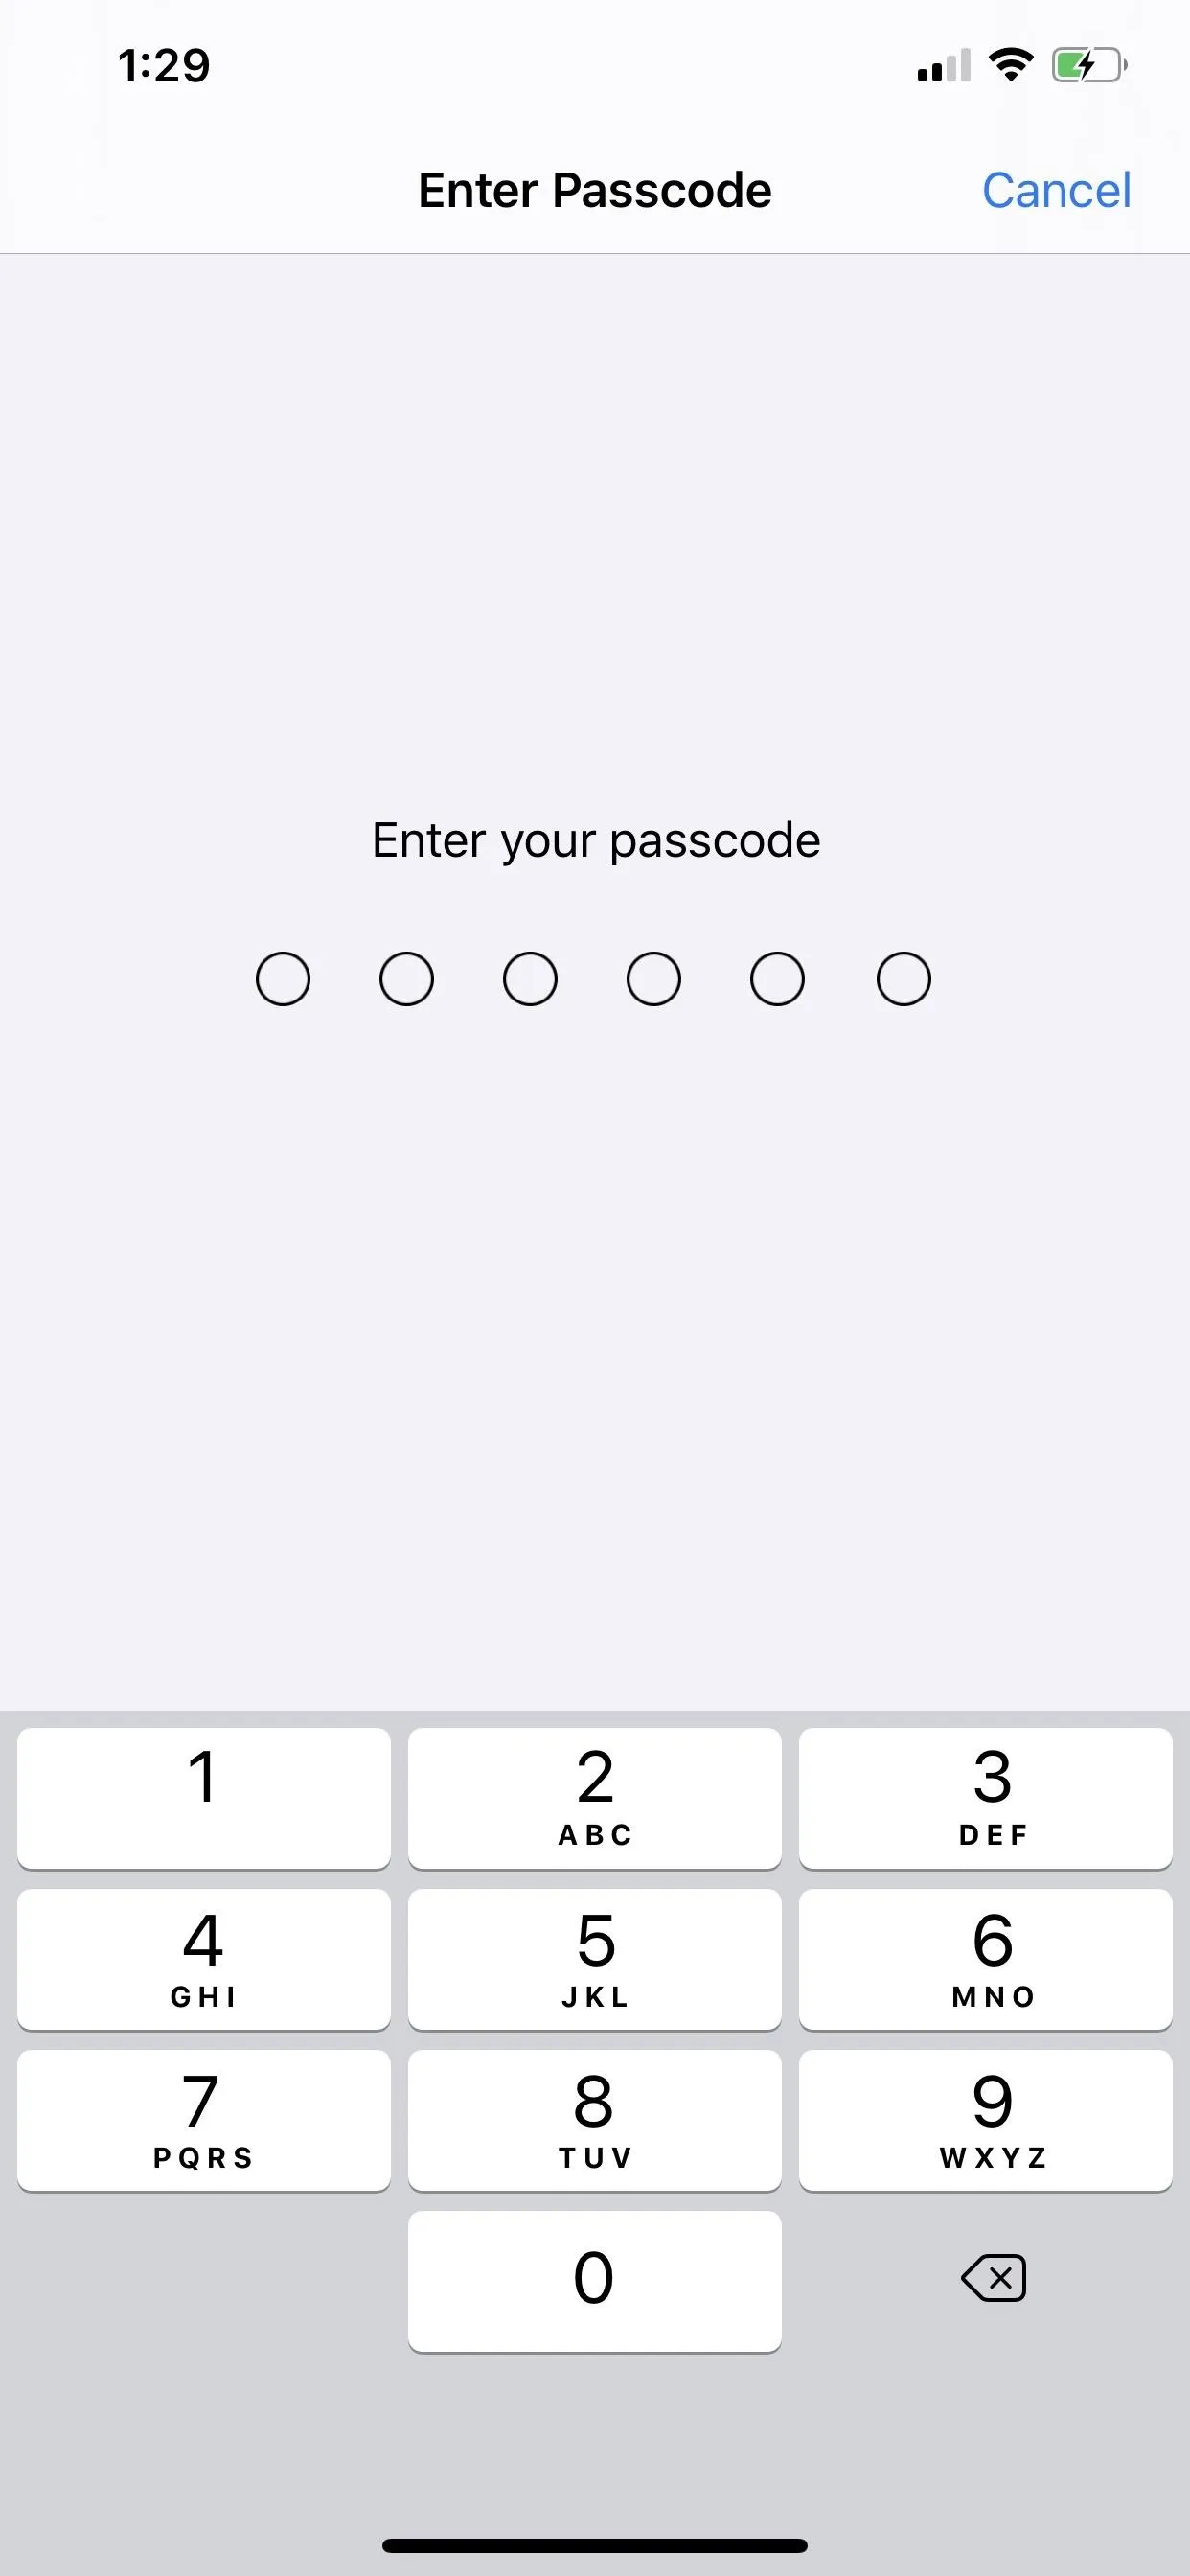
- Enter your iPhone's passcode in to confirm.
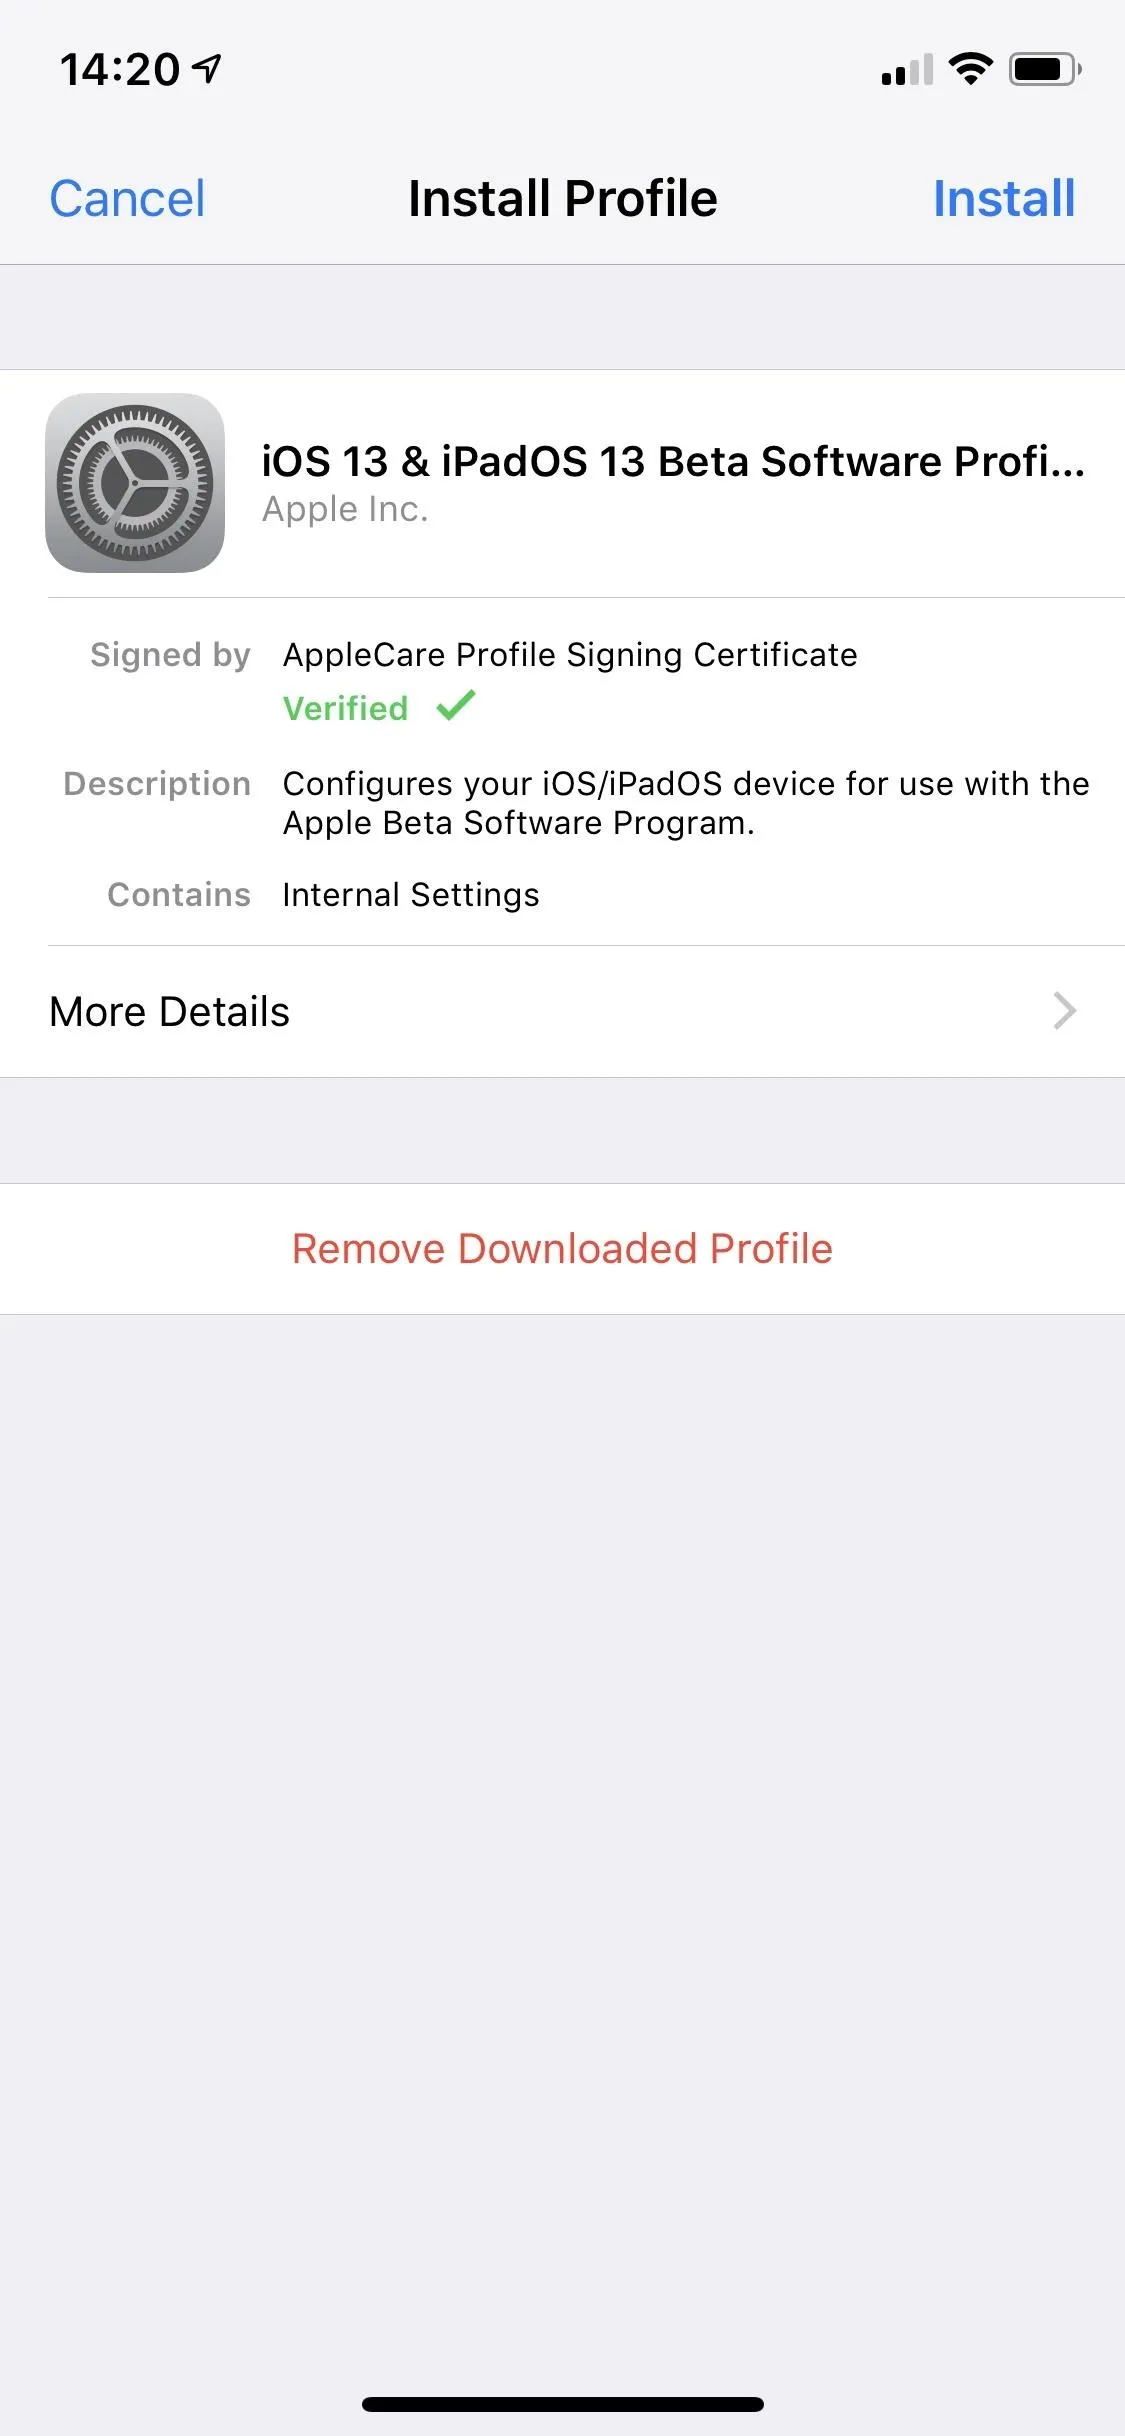
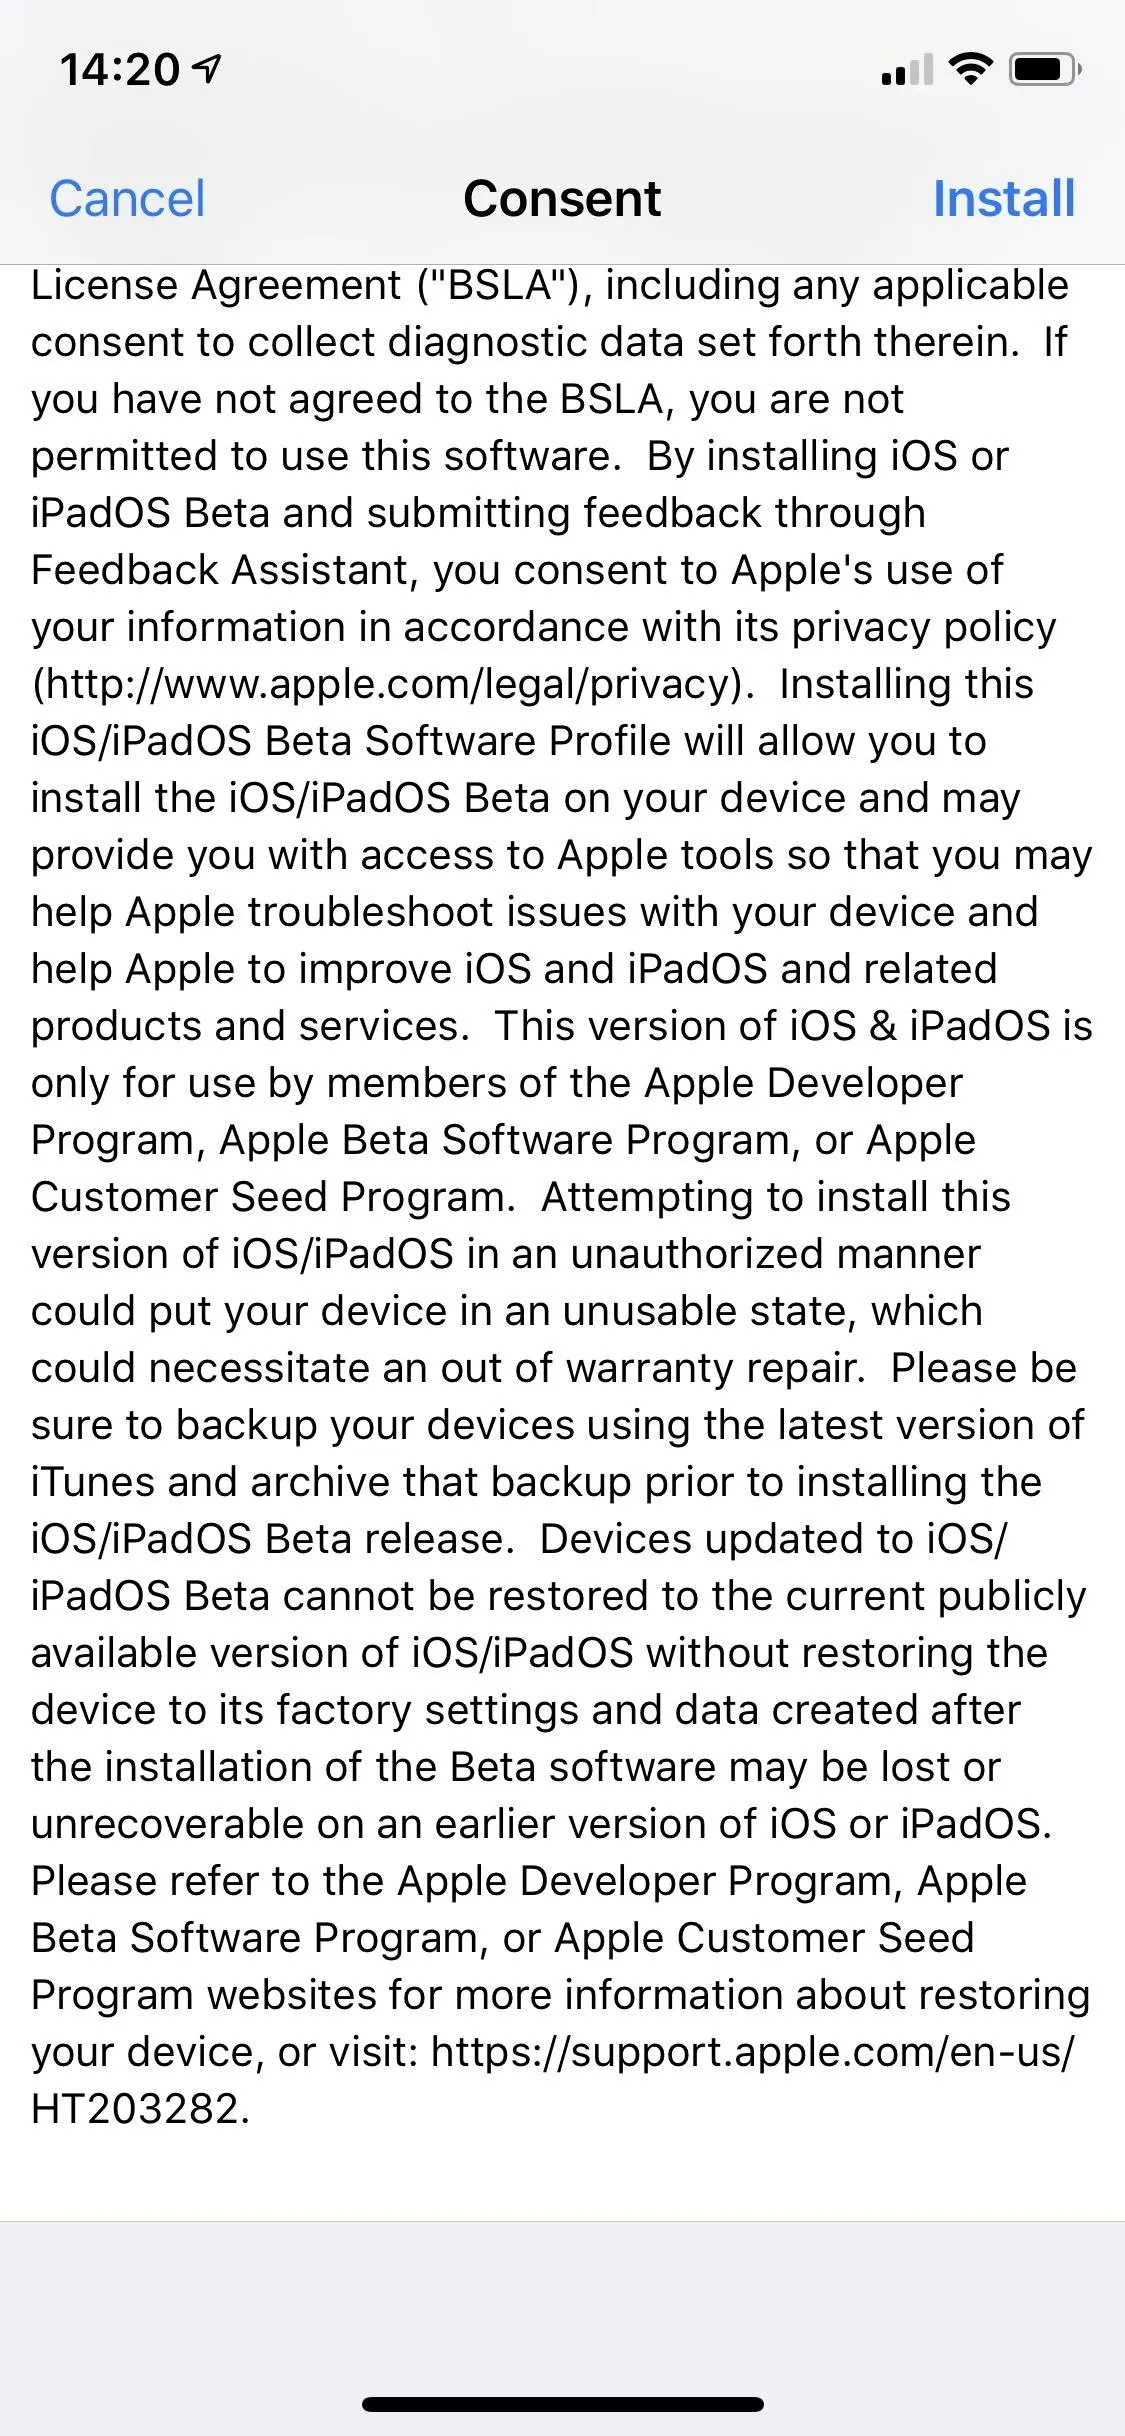
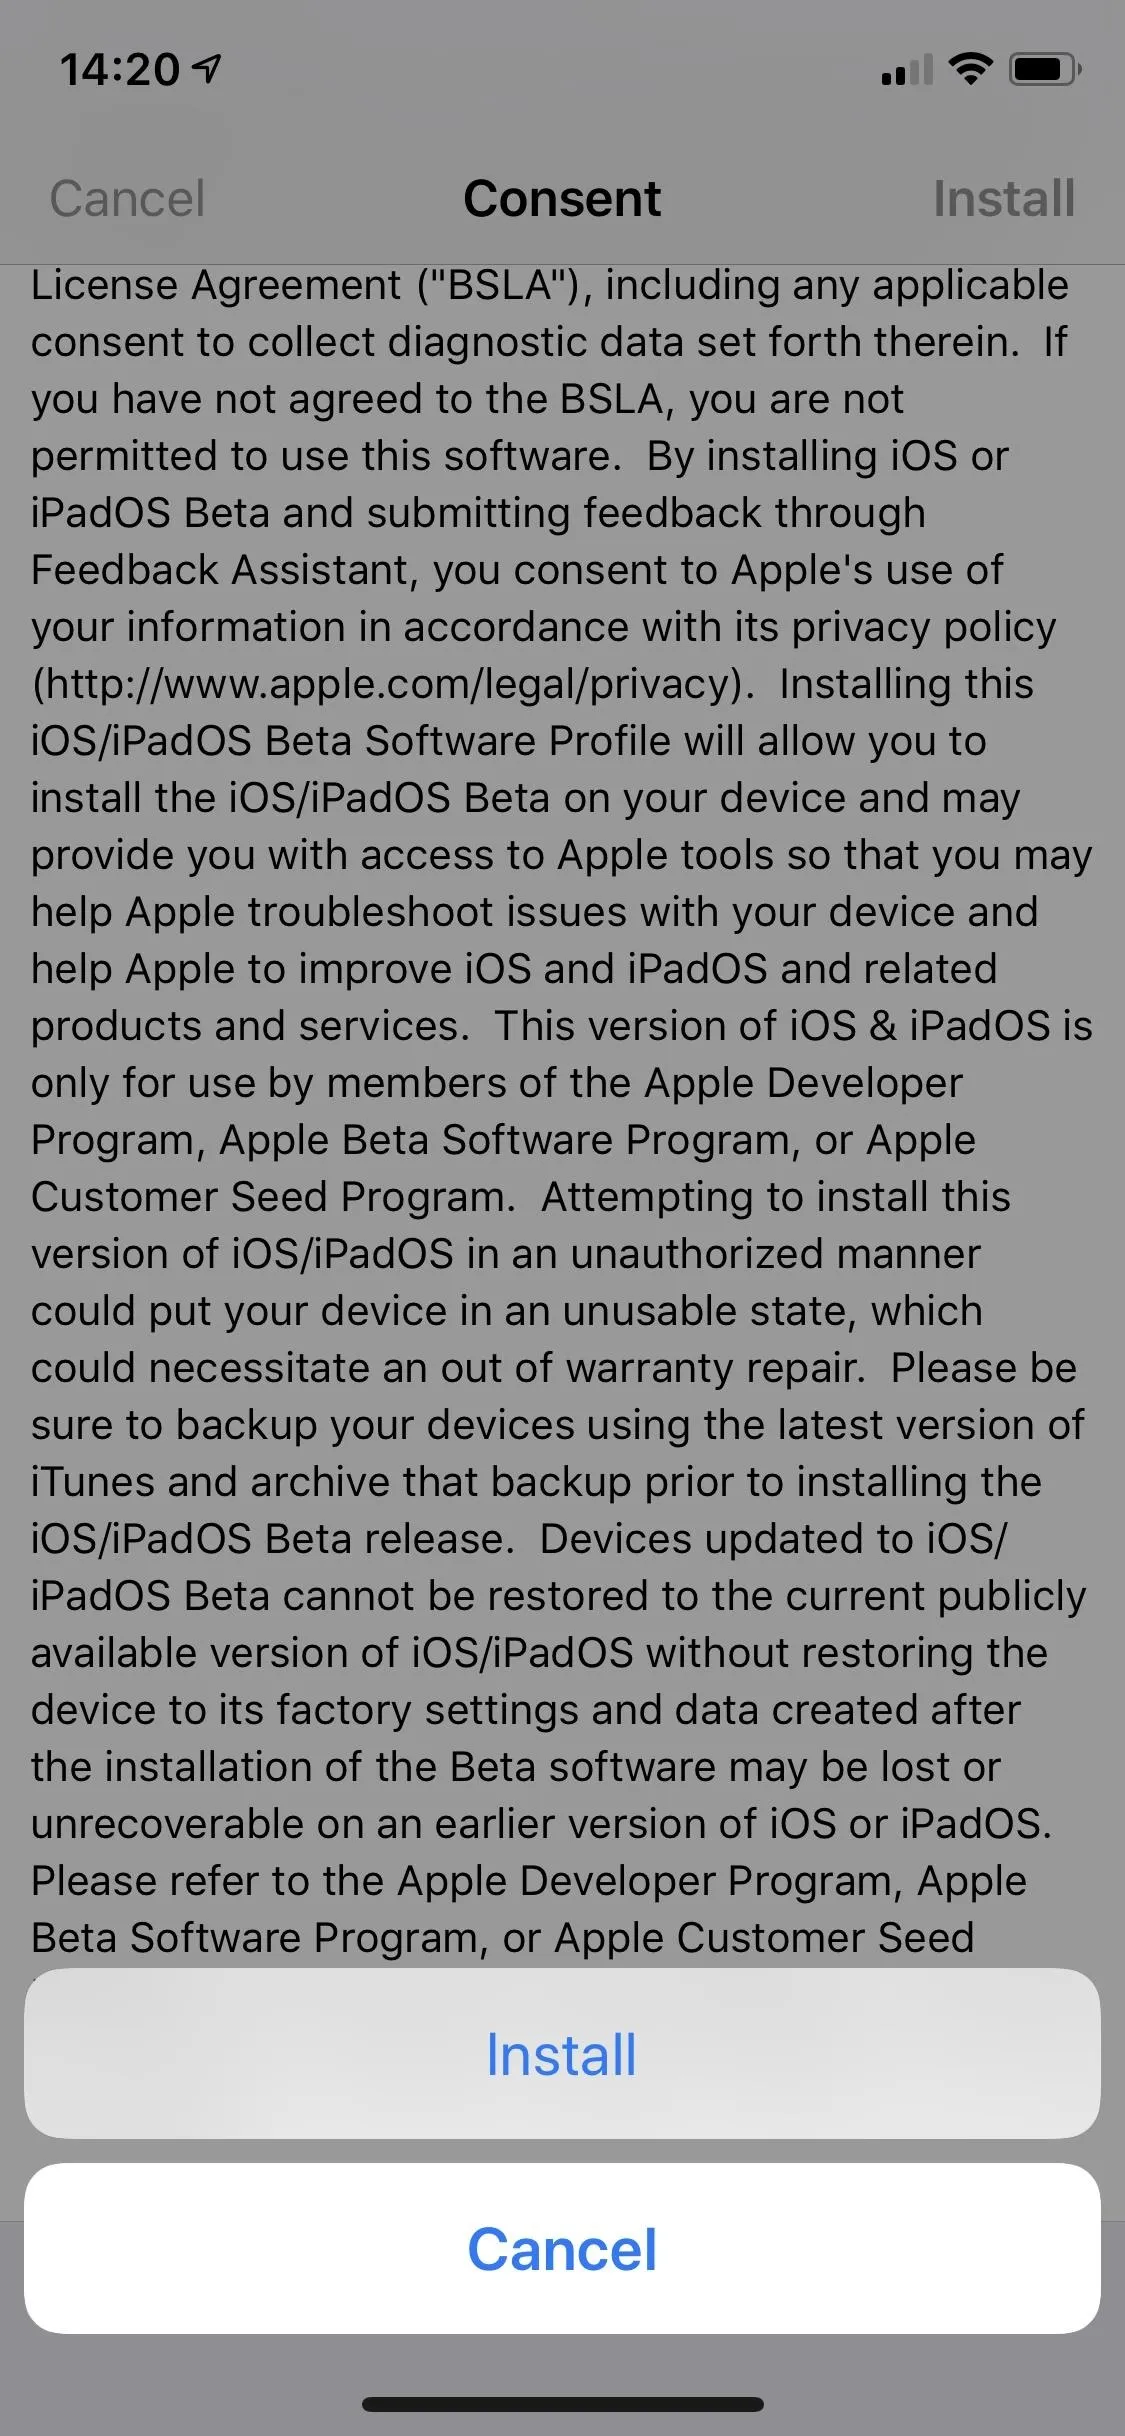
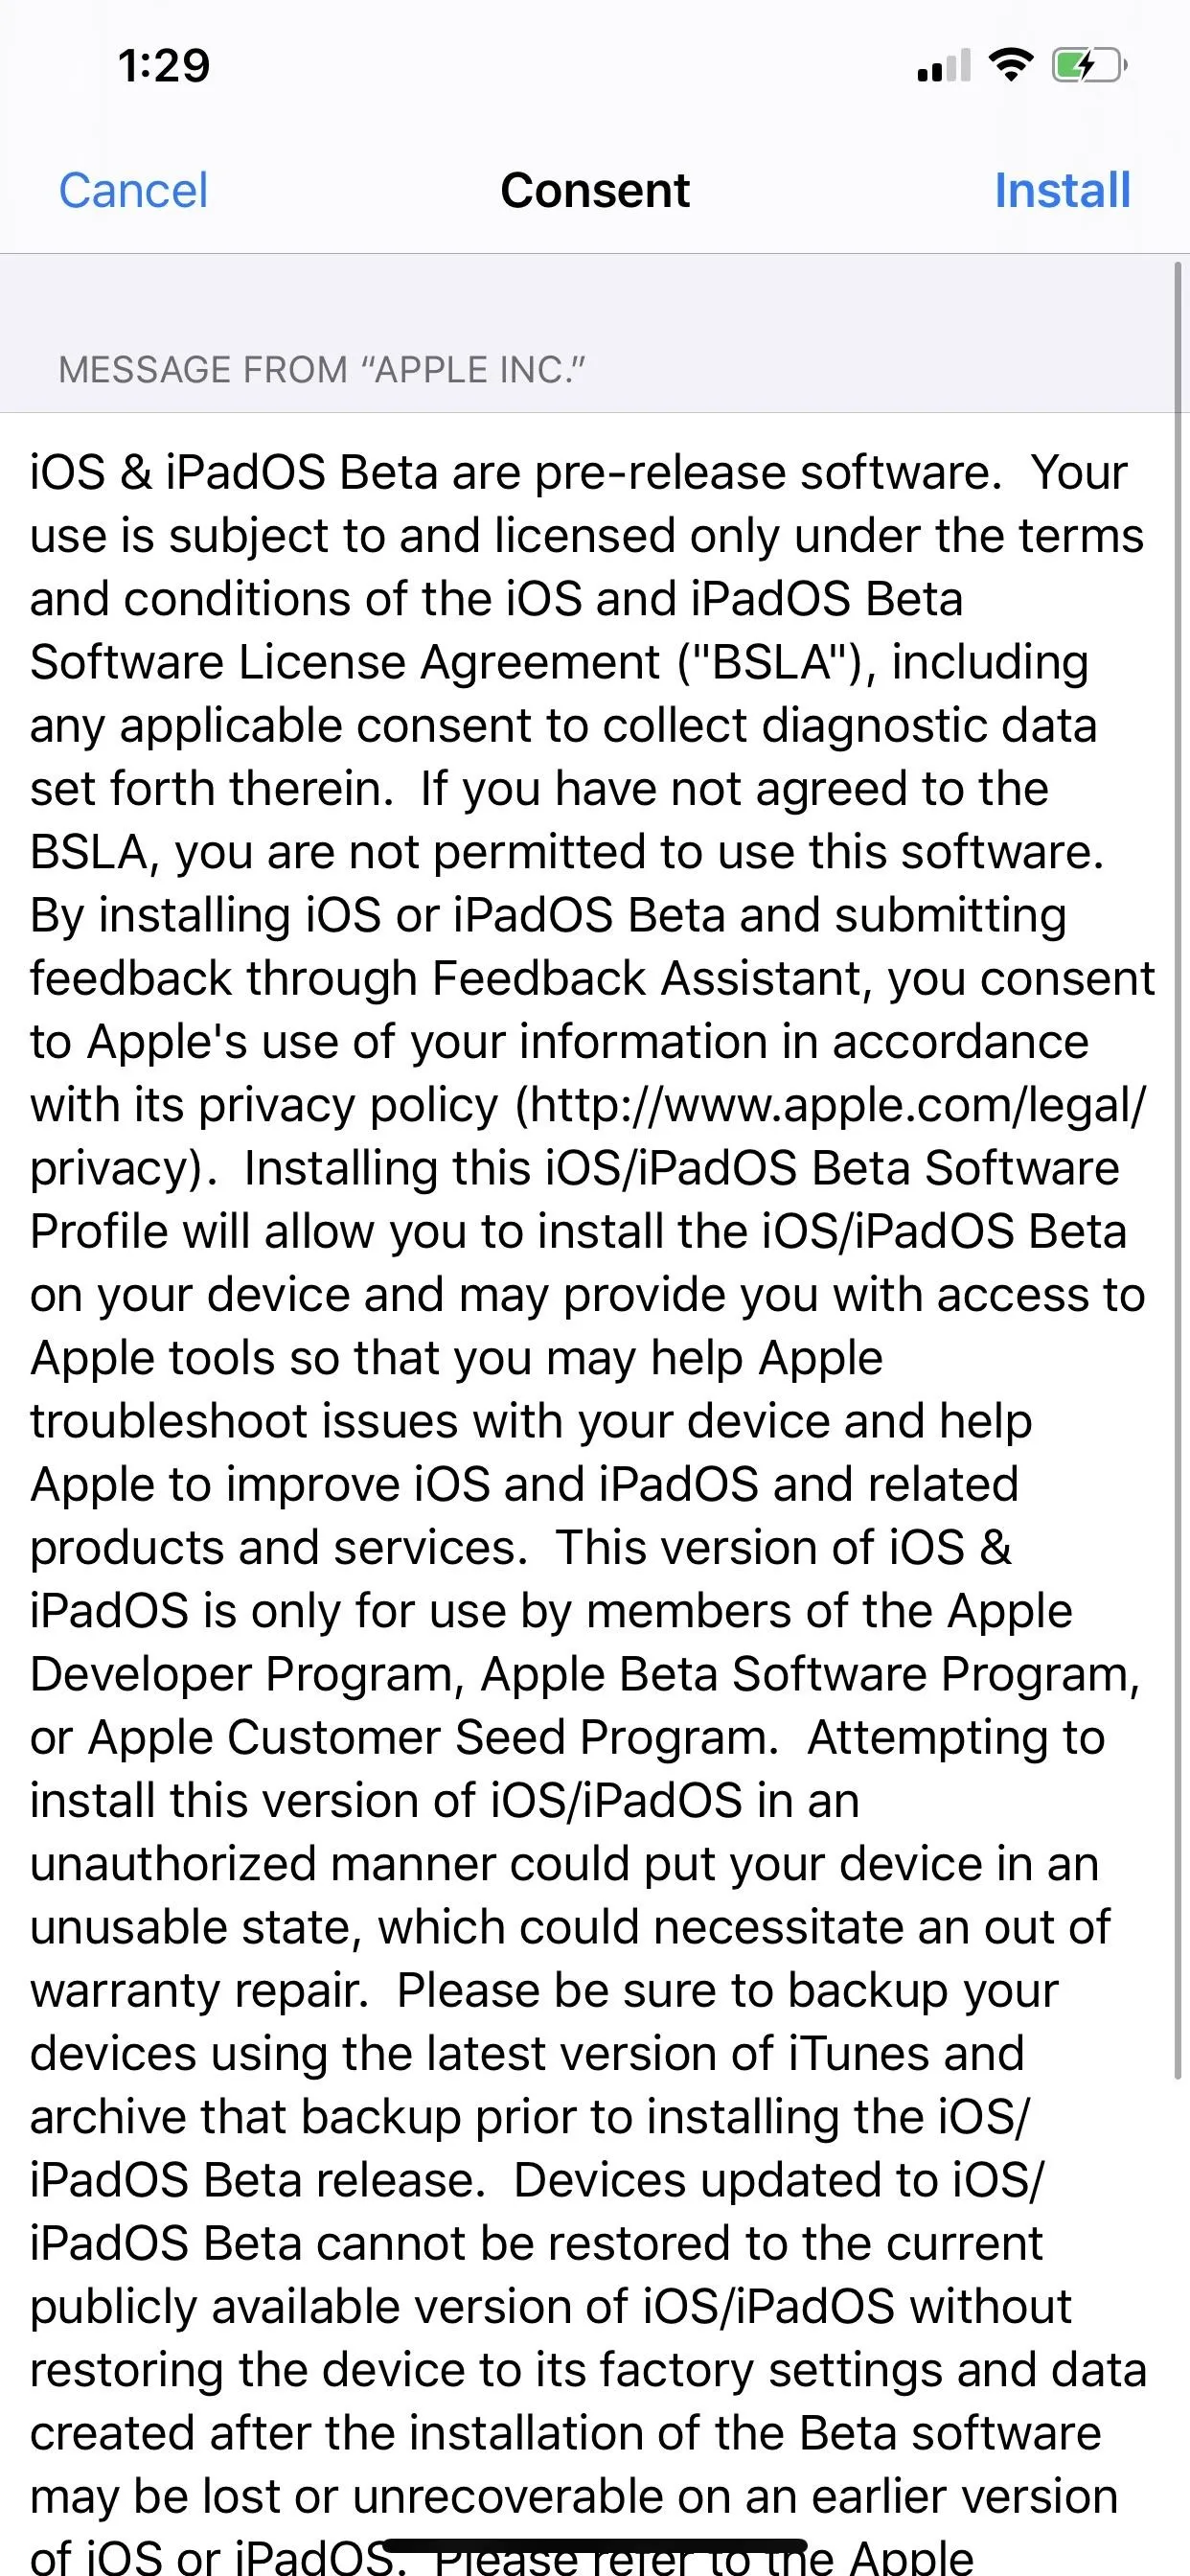
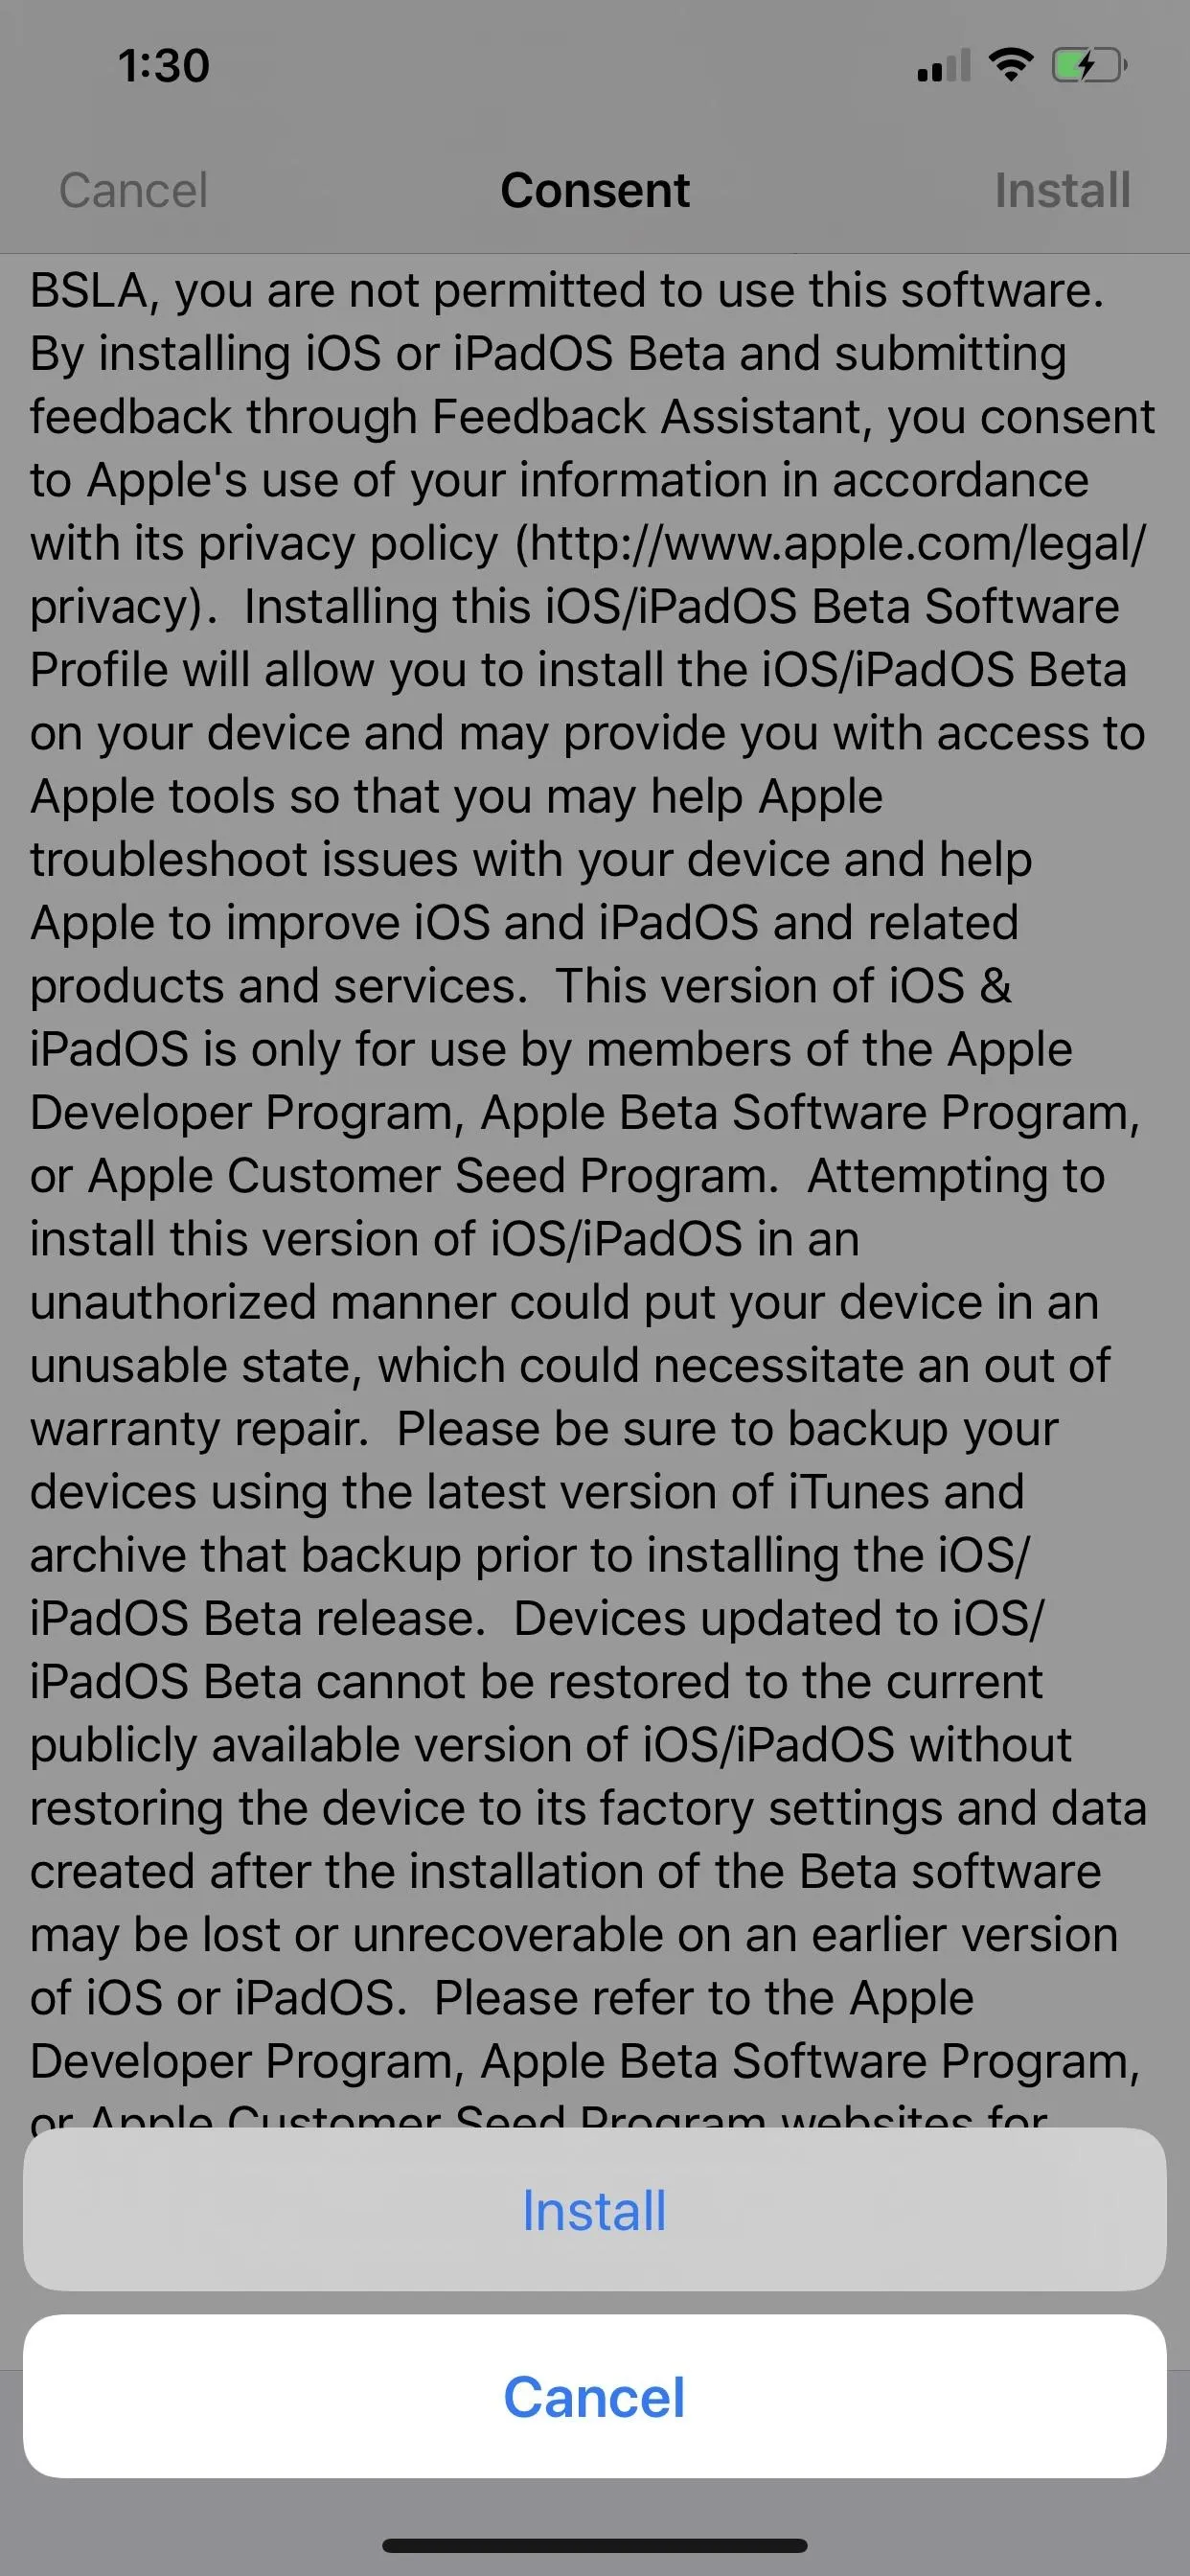
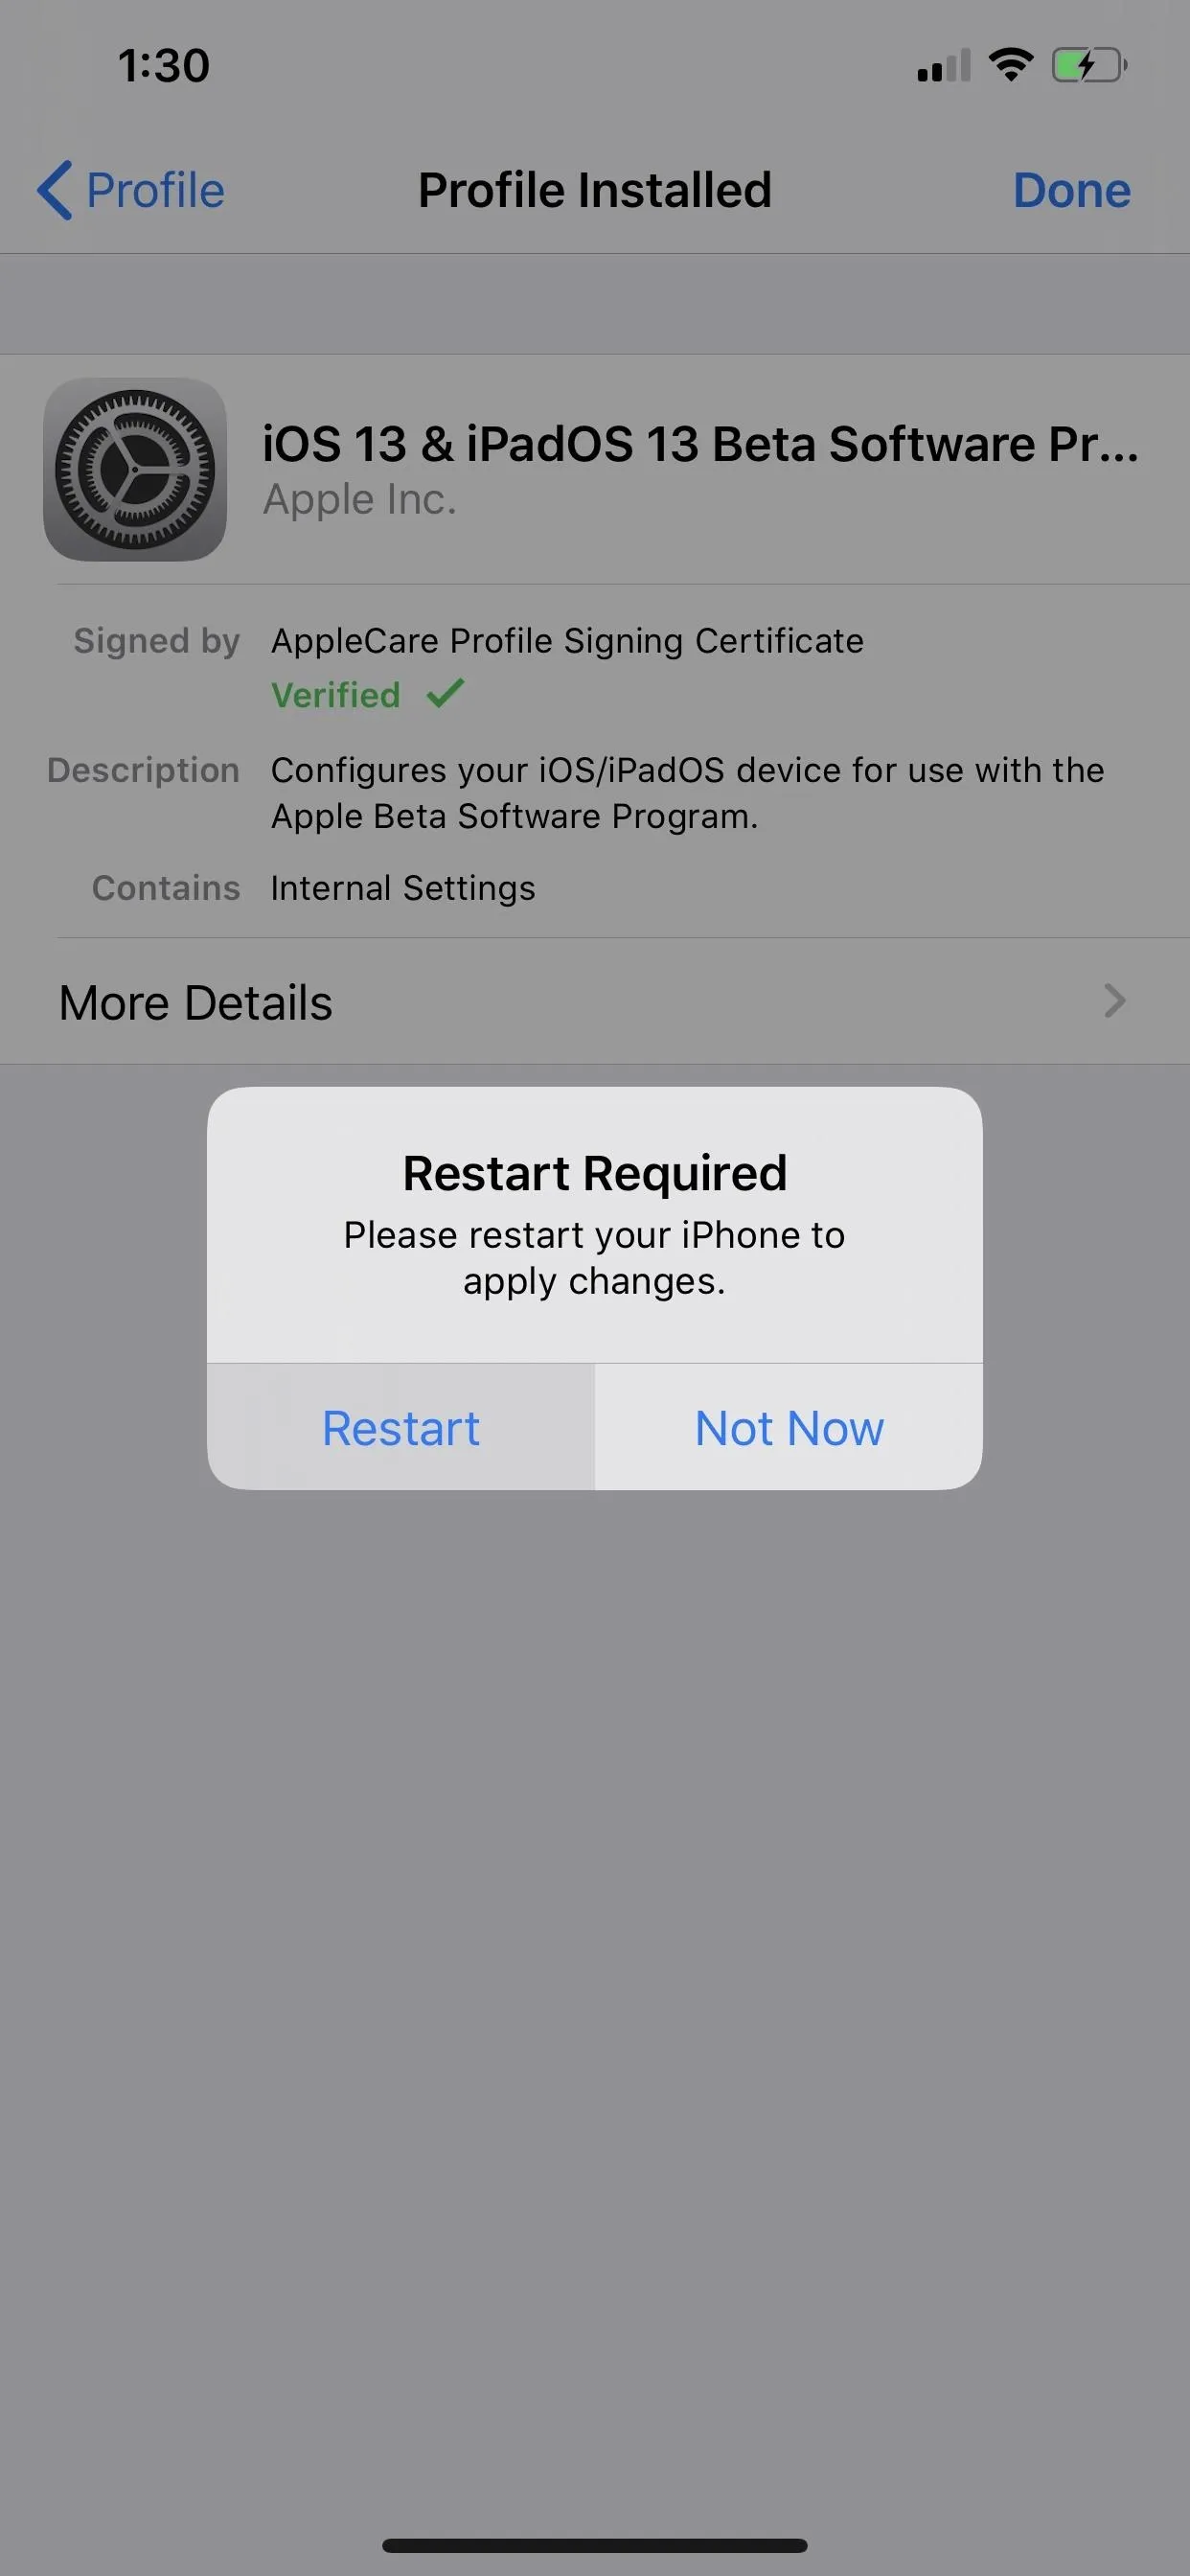
- Read the Consent form, then tap "Install" in the top right, followed by "Install" in the action sheet to confirm.
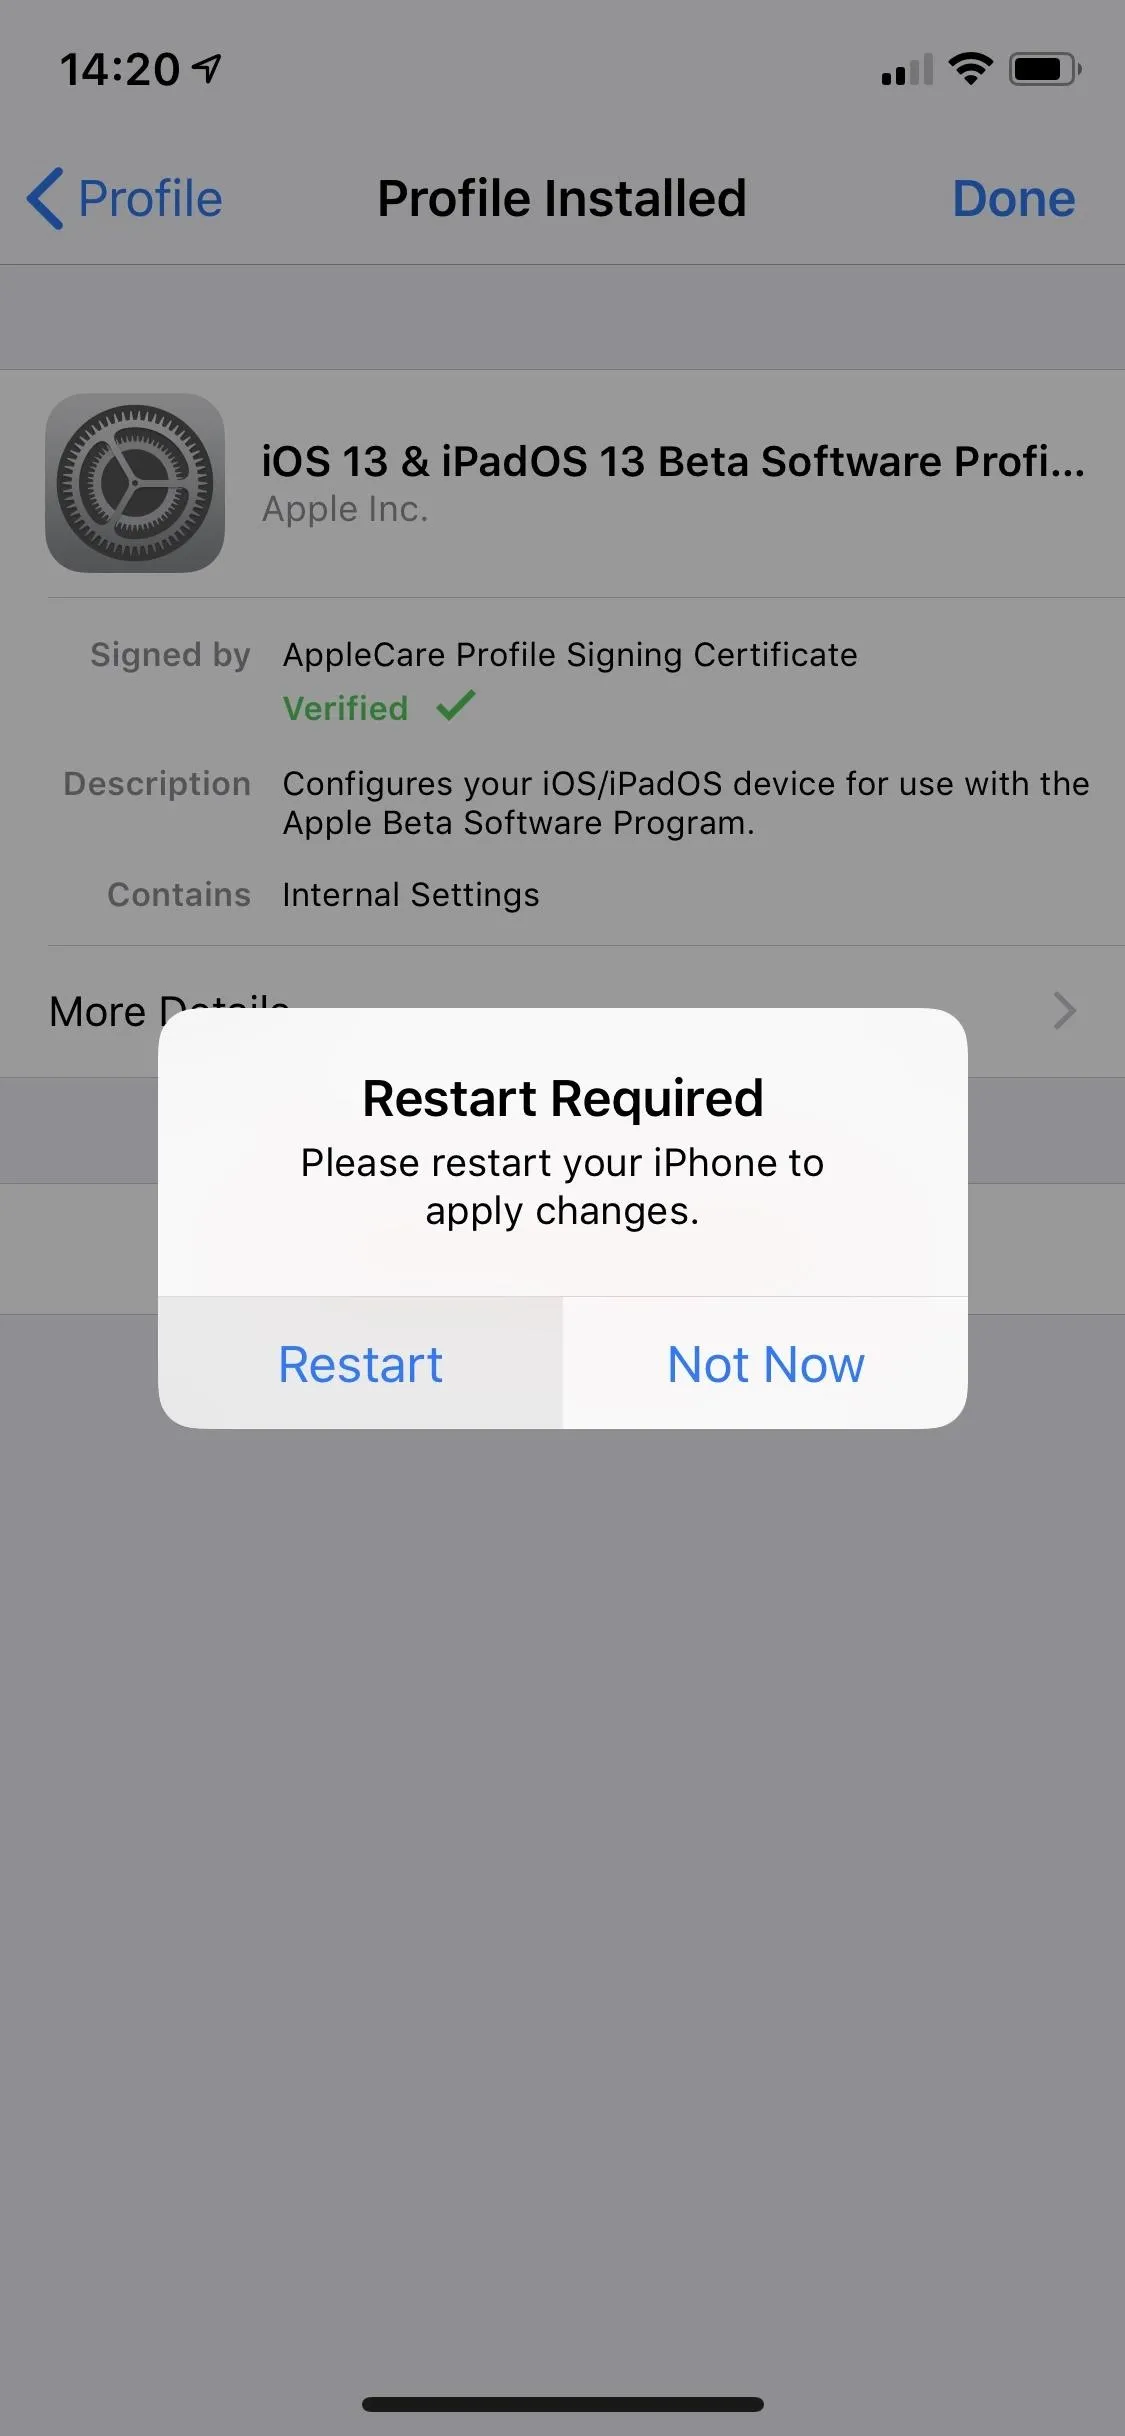
- A prompt may appear asking you to restart to apply the changes. Tap "Restart" if you see it. If you don't see it, you're good to go.
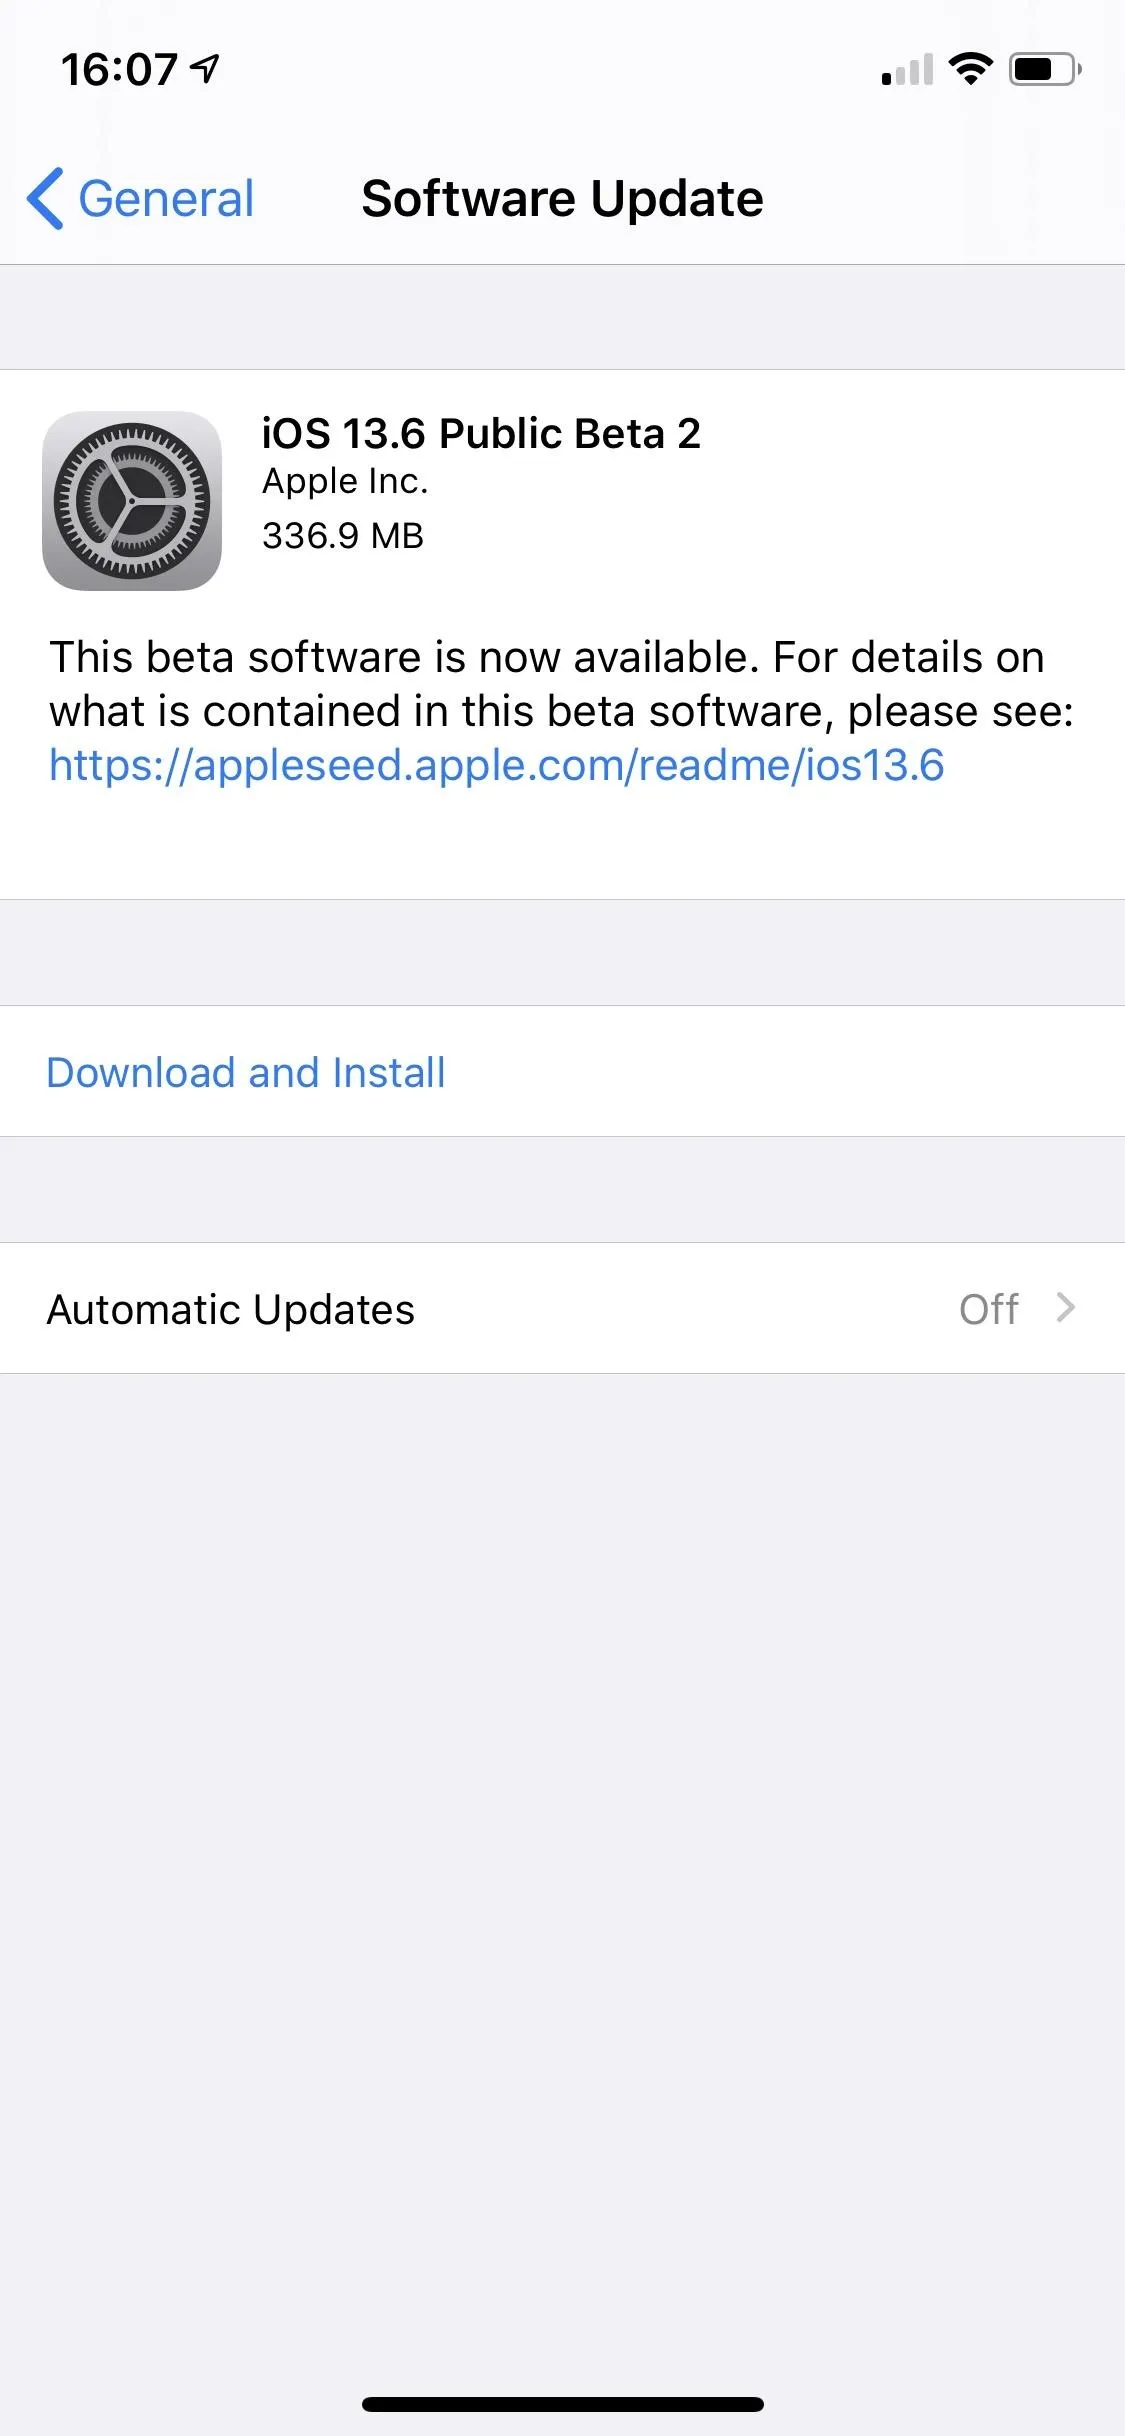
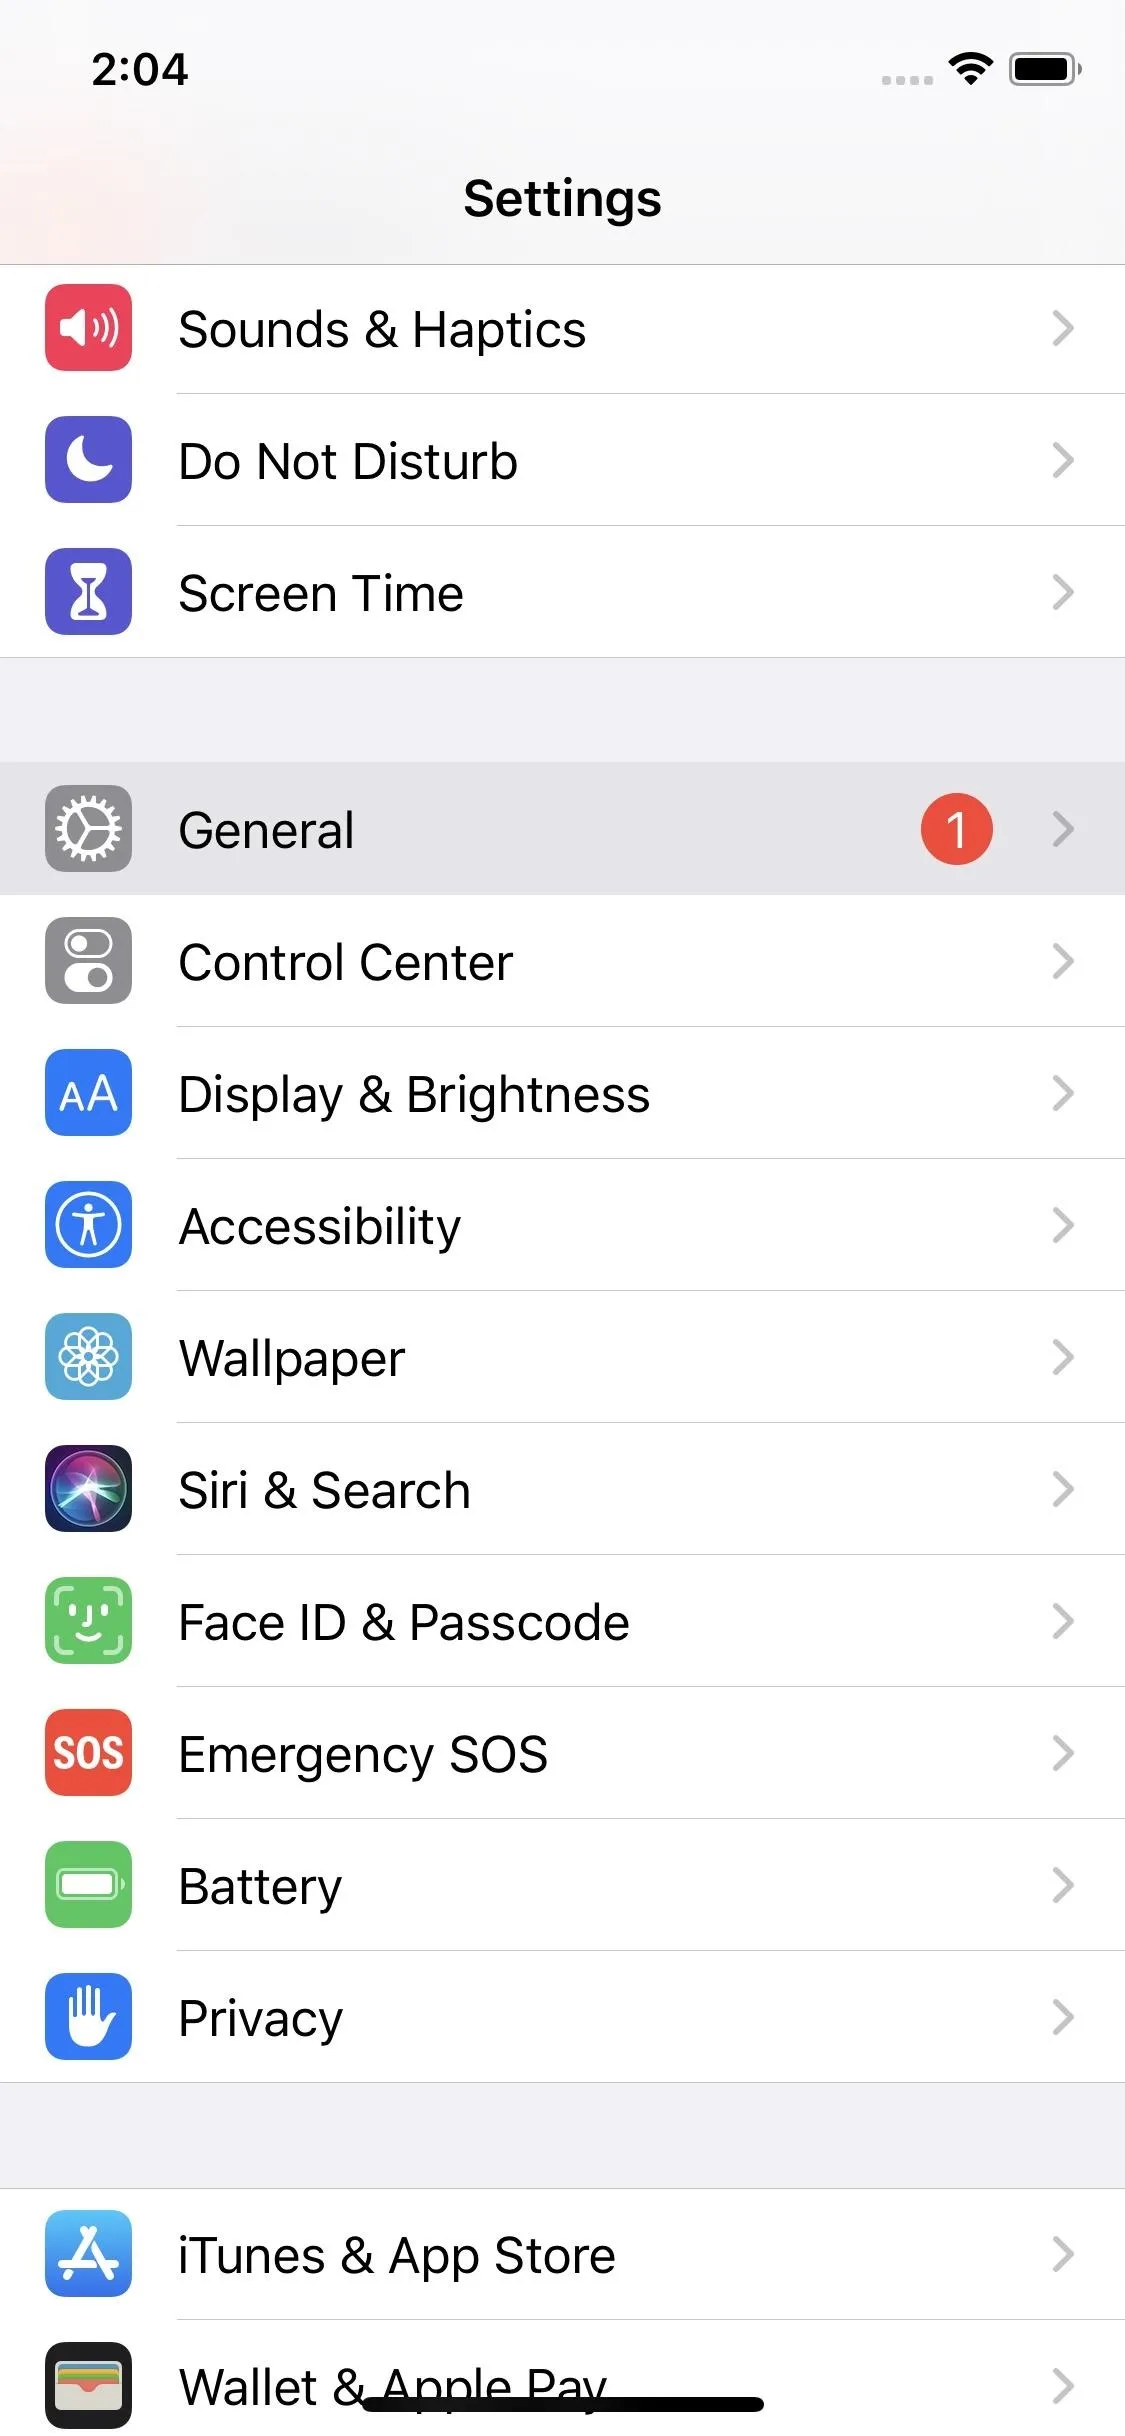
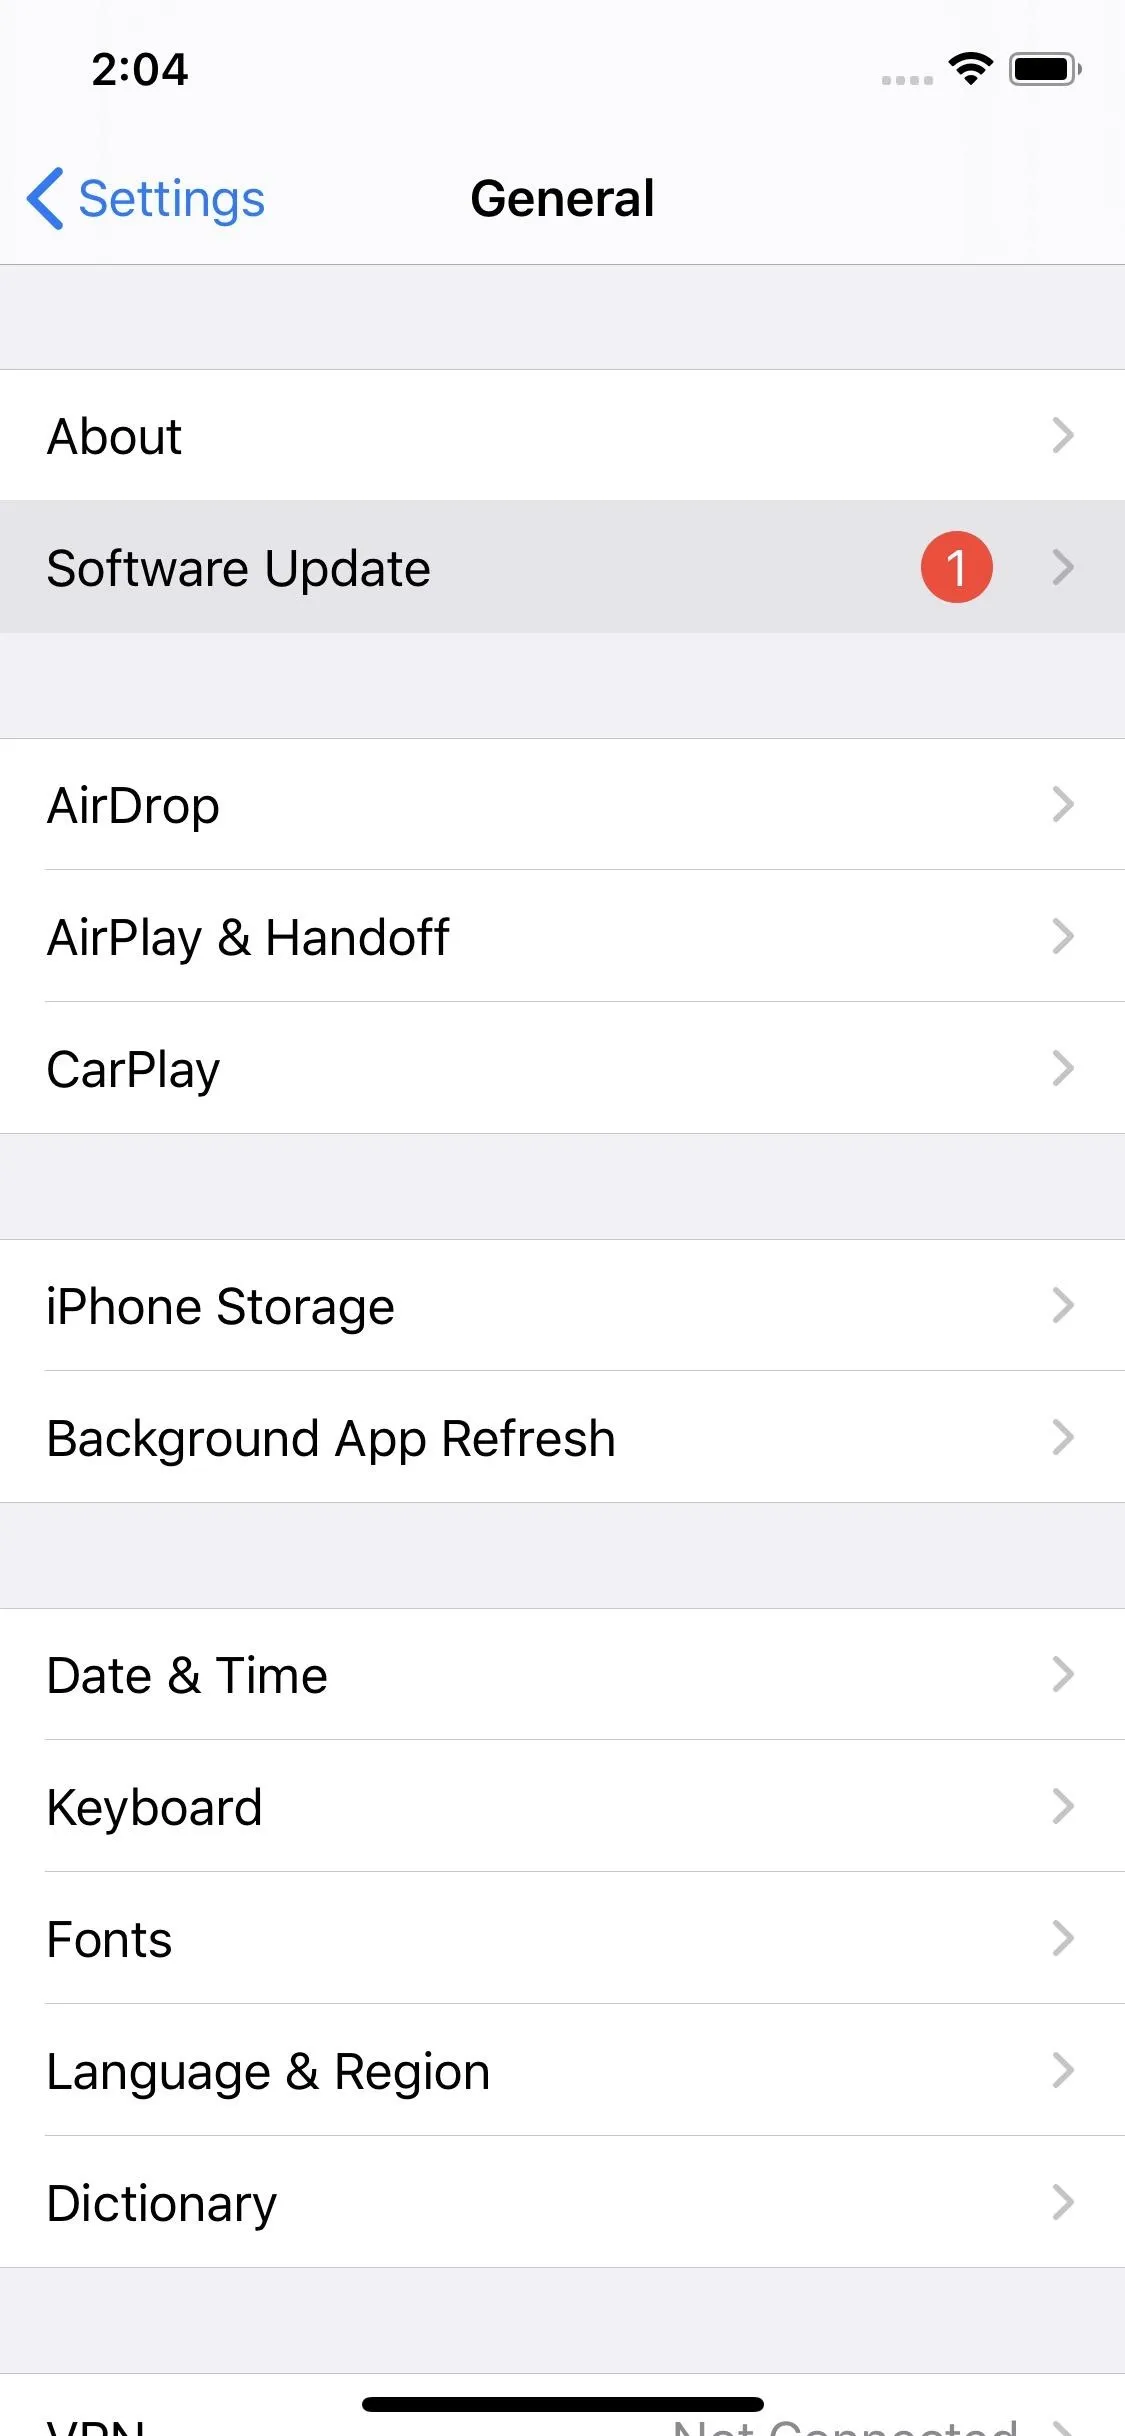
- Once powered on, head to Settings –> General –> Software Update.
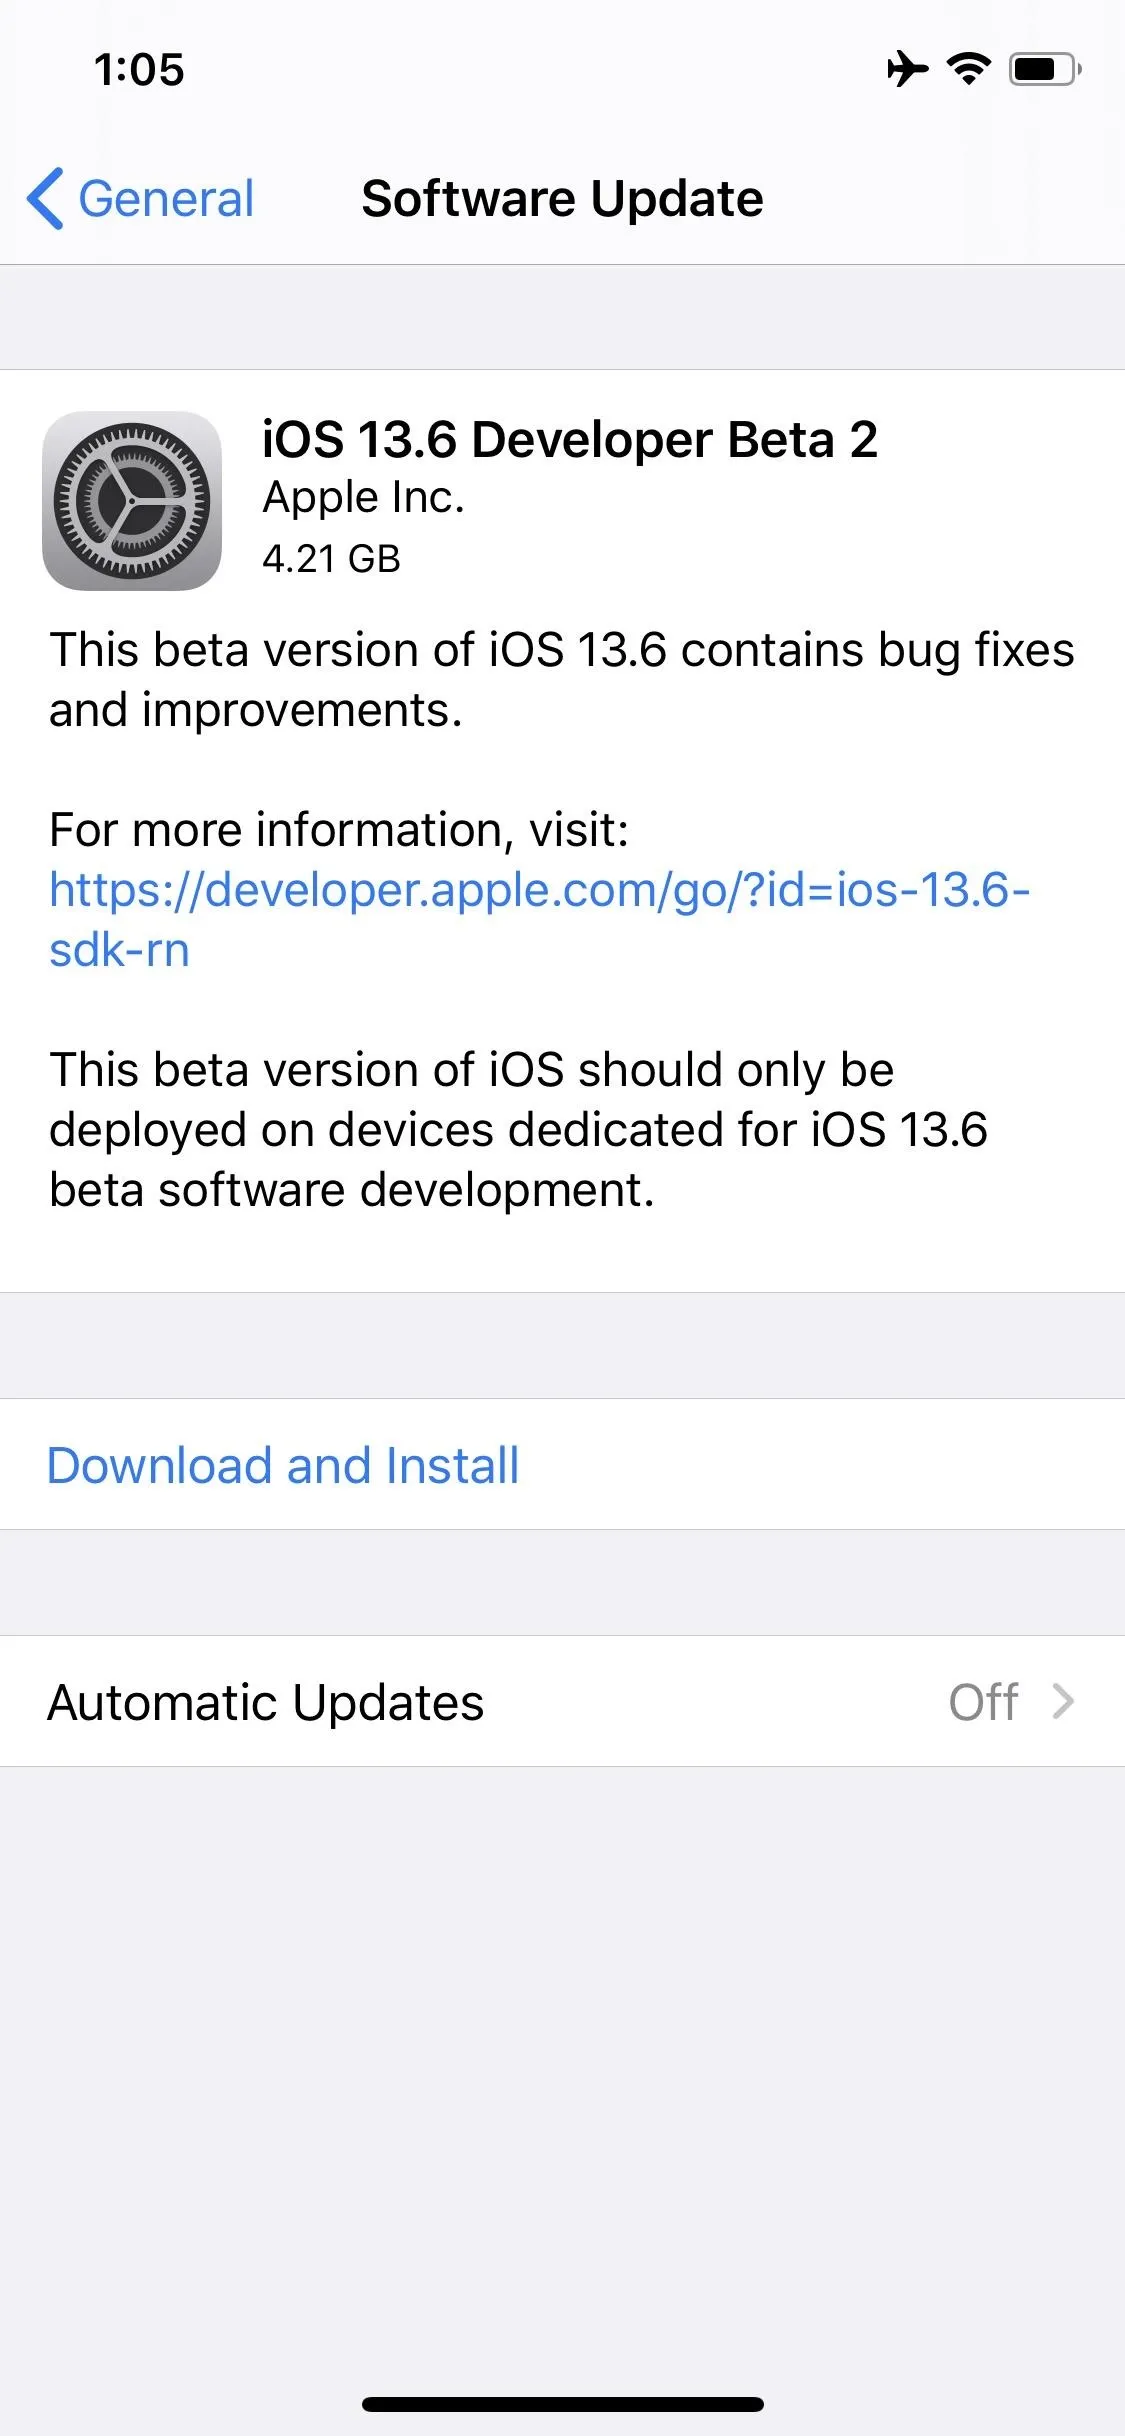
- Select "Download and Install," and enter your passcode to confirm.
- If the Terms & Conditions screen appears, tap "Agree," then finish installing the iOS 13.6 beta like you would any other iOS update.

Install iOS 13.6 Developer Beta 1 & Higher (OTA)
The iOS 13.6 developer beta has a configuration profile that makes installing it and future betas super easy. We recommend you use this method, but the Mojave and Catalina install methods are still listed below in case you want to update with a restore image instead of an OTA (over-the-air) update.
Note: You don't need to register your device's UDID with your Apple Developer account. That's only needed when building apps that need testing.
- Archive your backup via iTunes or Finder, if you haven't done so already.
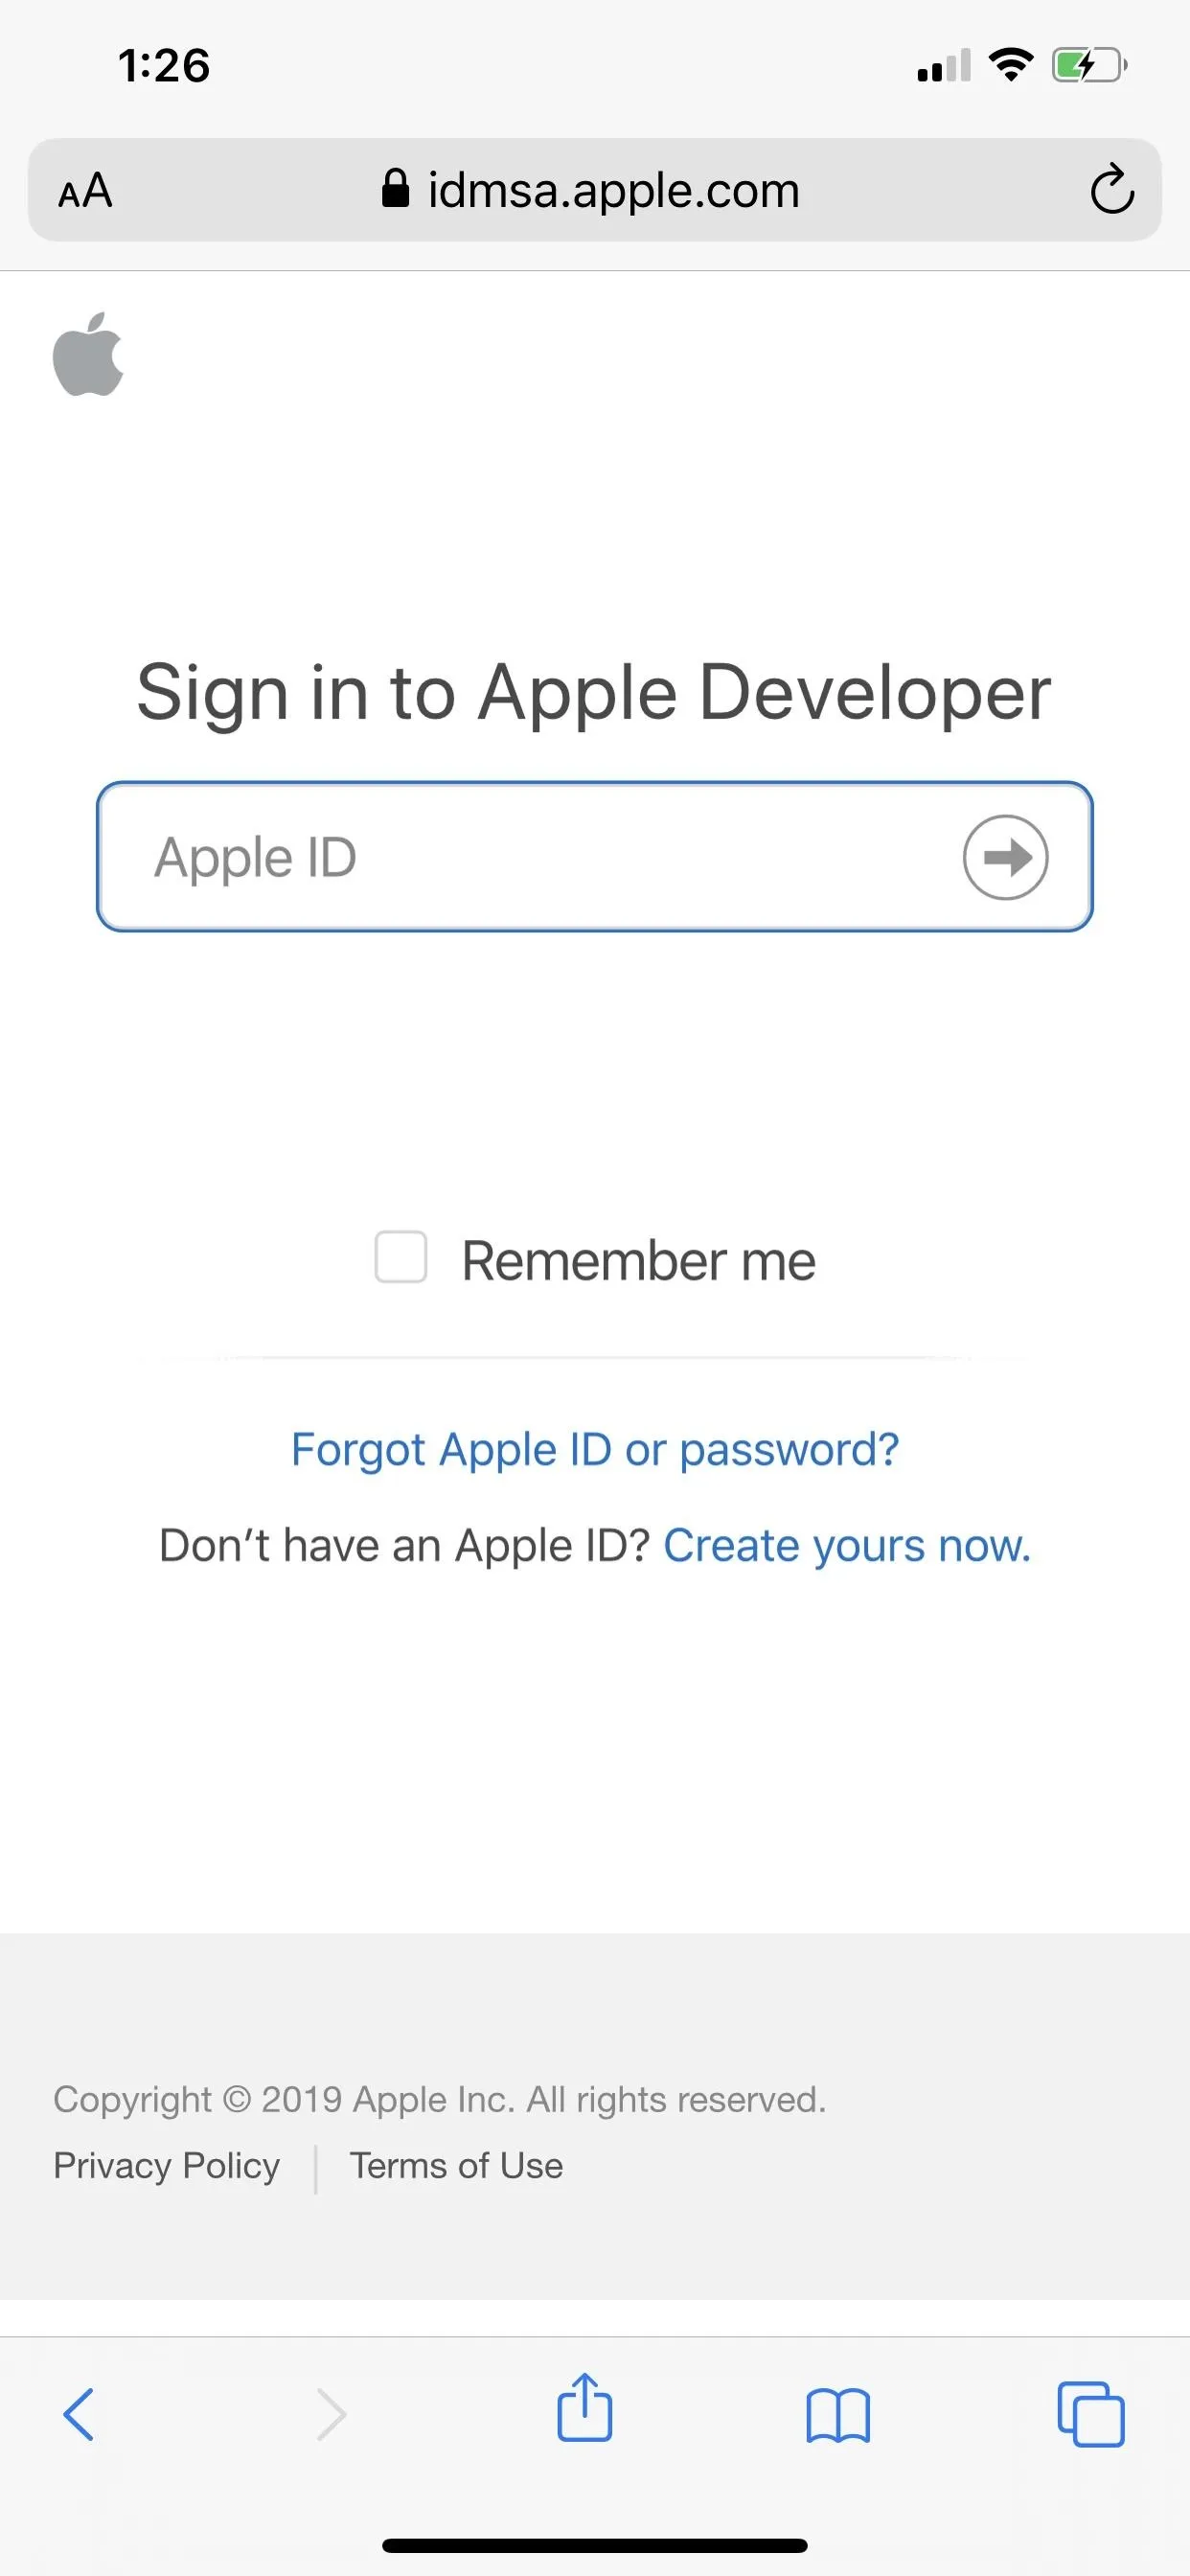
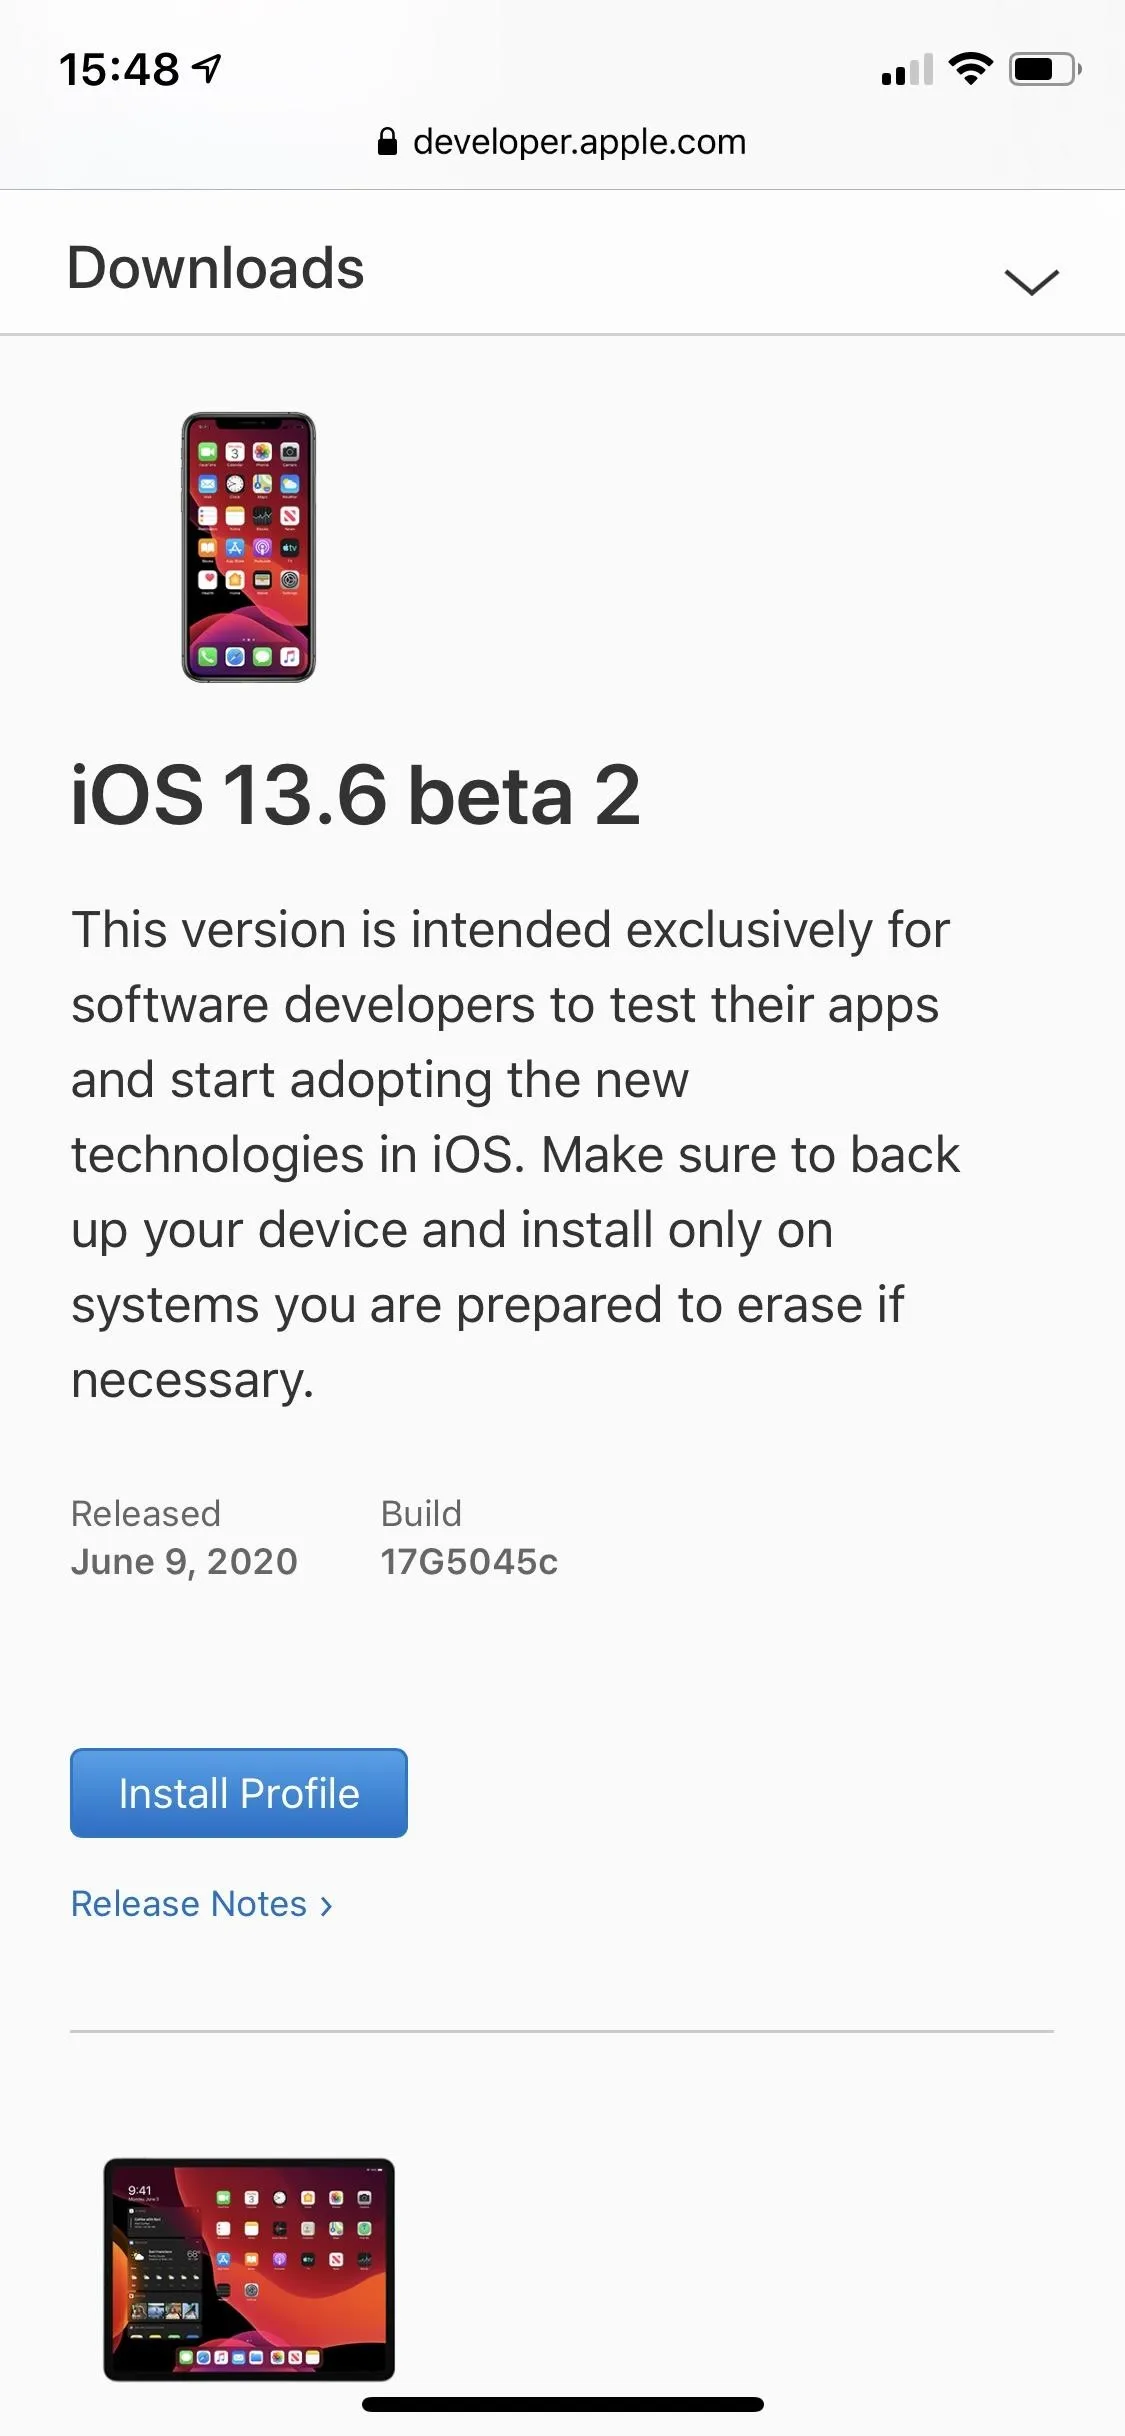
- On your iPhone, head to developer.apple.com/download.
- Enter your Apple ID and password to log in if not already signed in. If already signed in, skip to step 6 on this list.
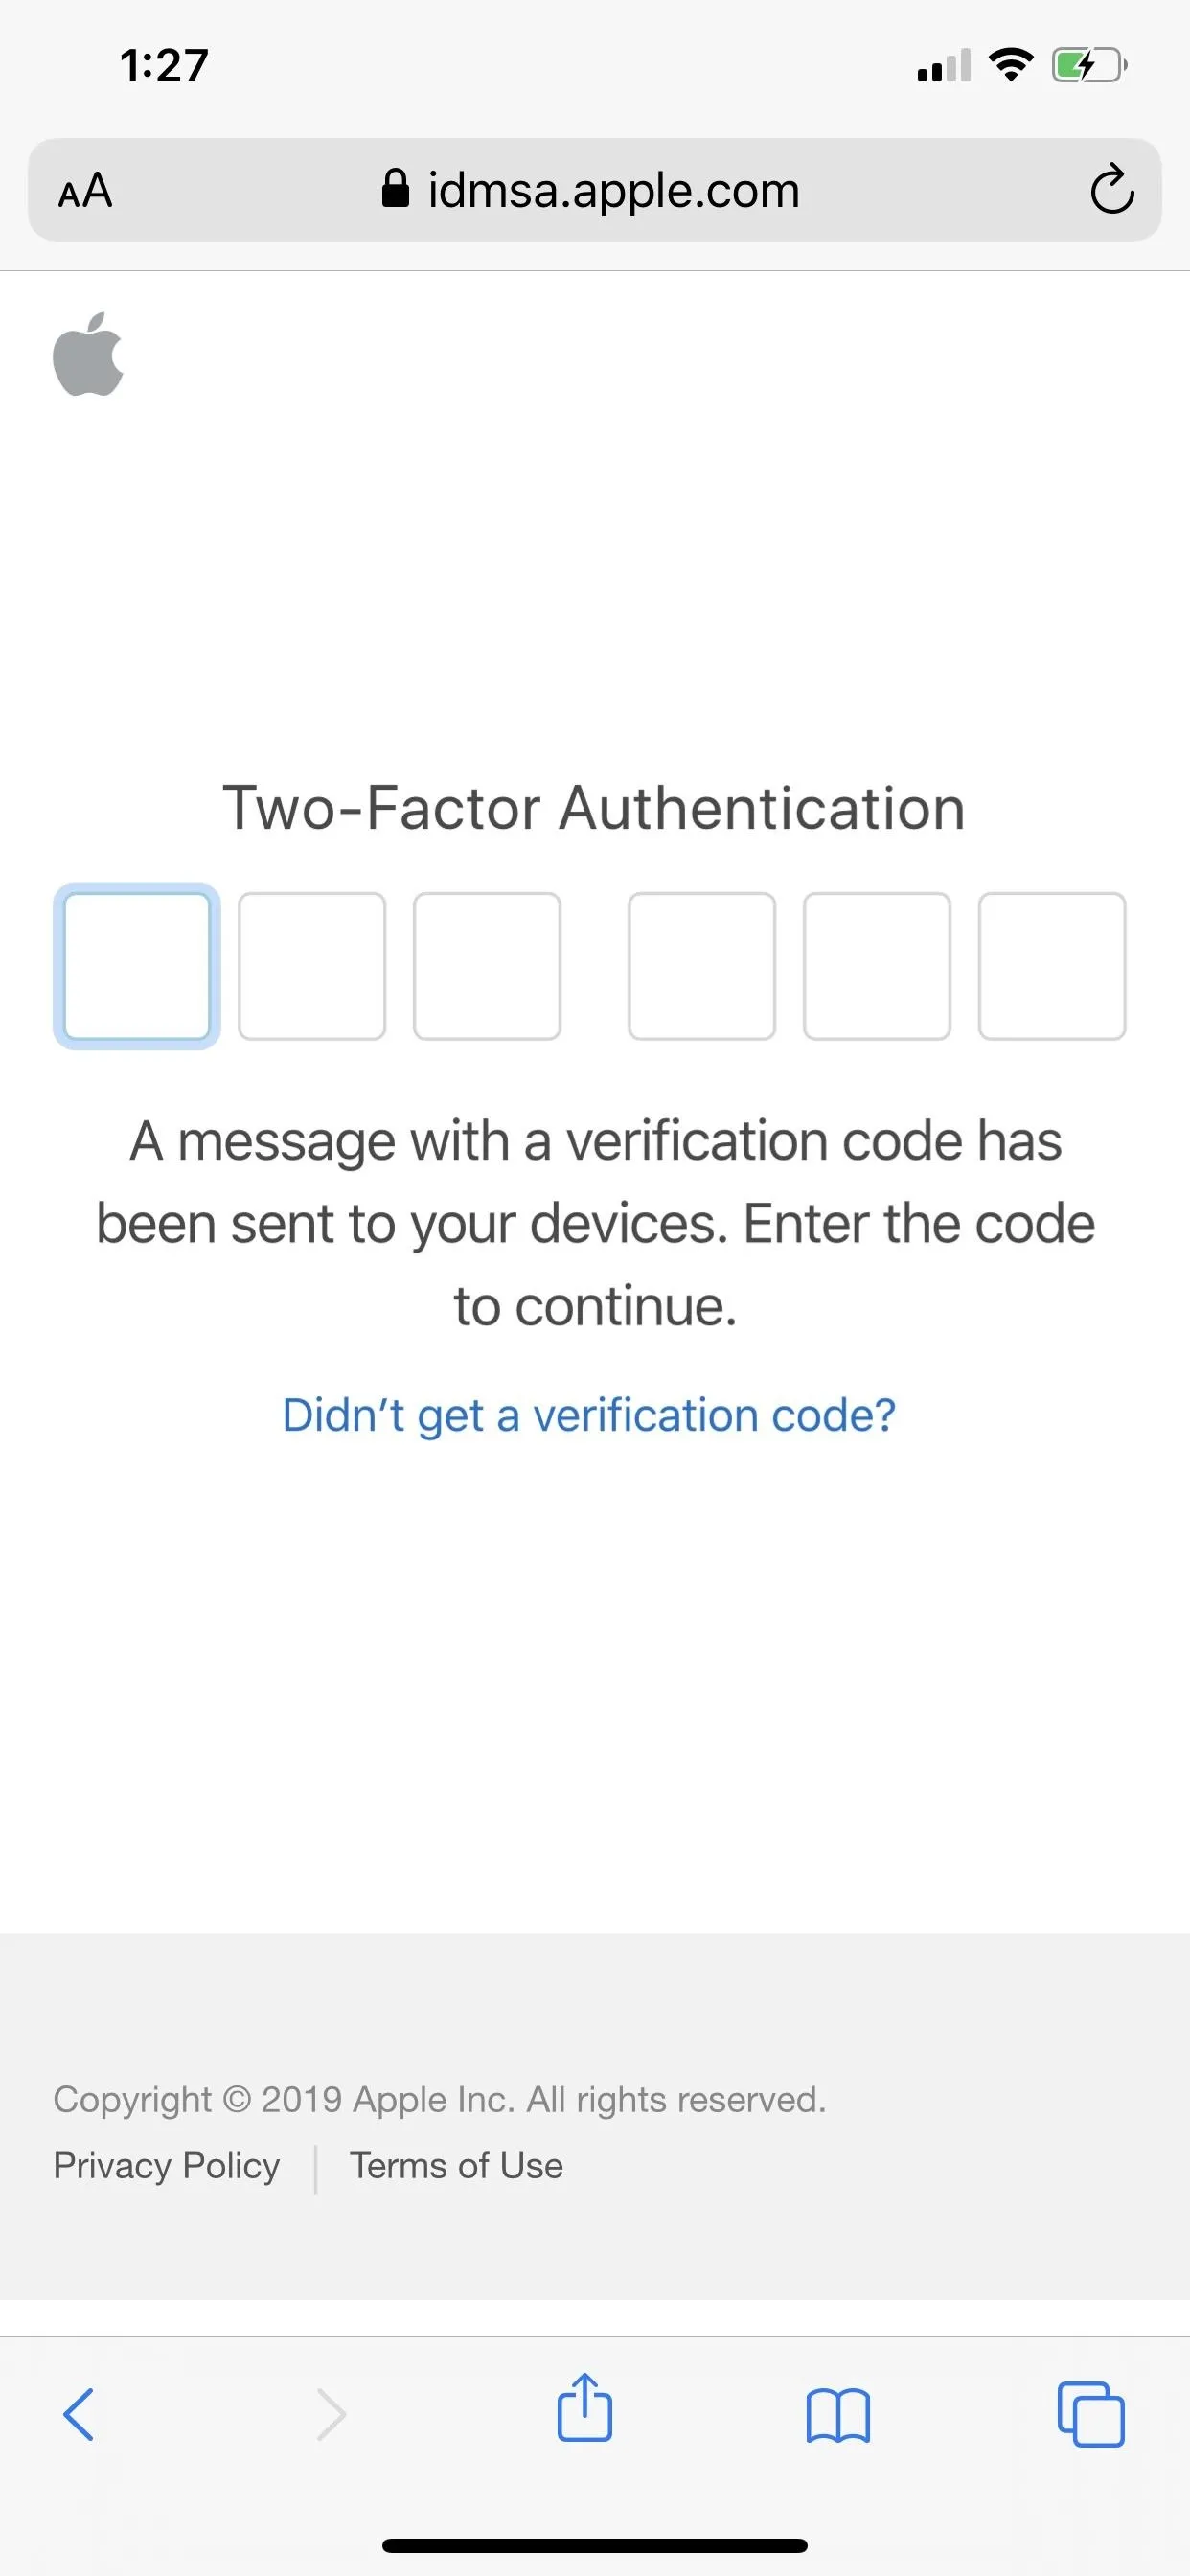
- Enter the two-factor authentication code from another device if you have 2FA setup.
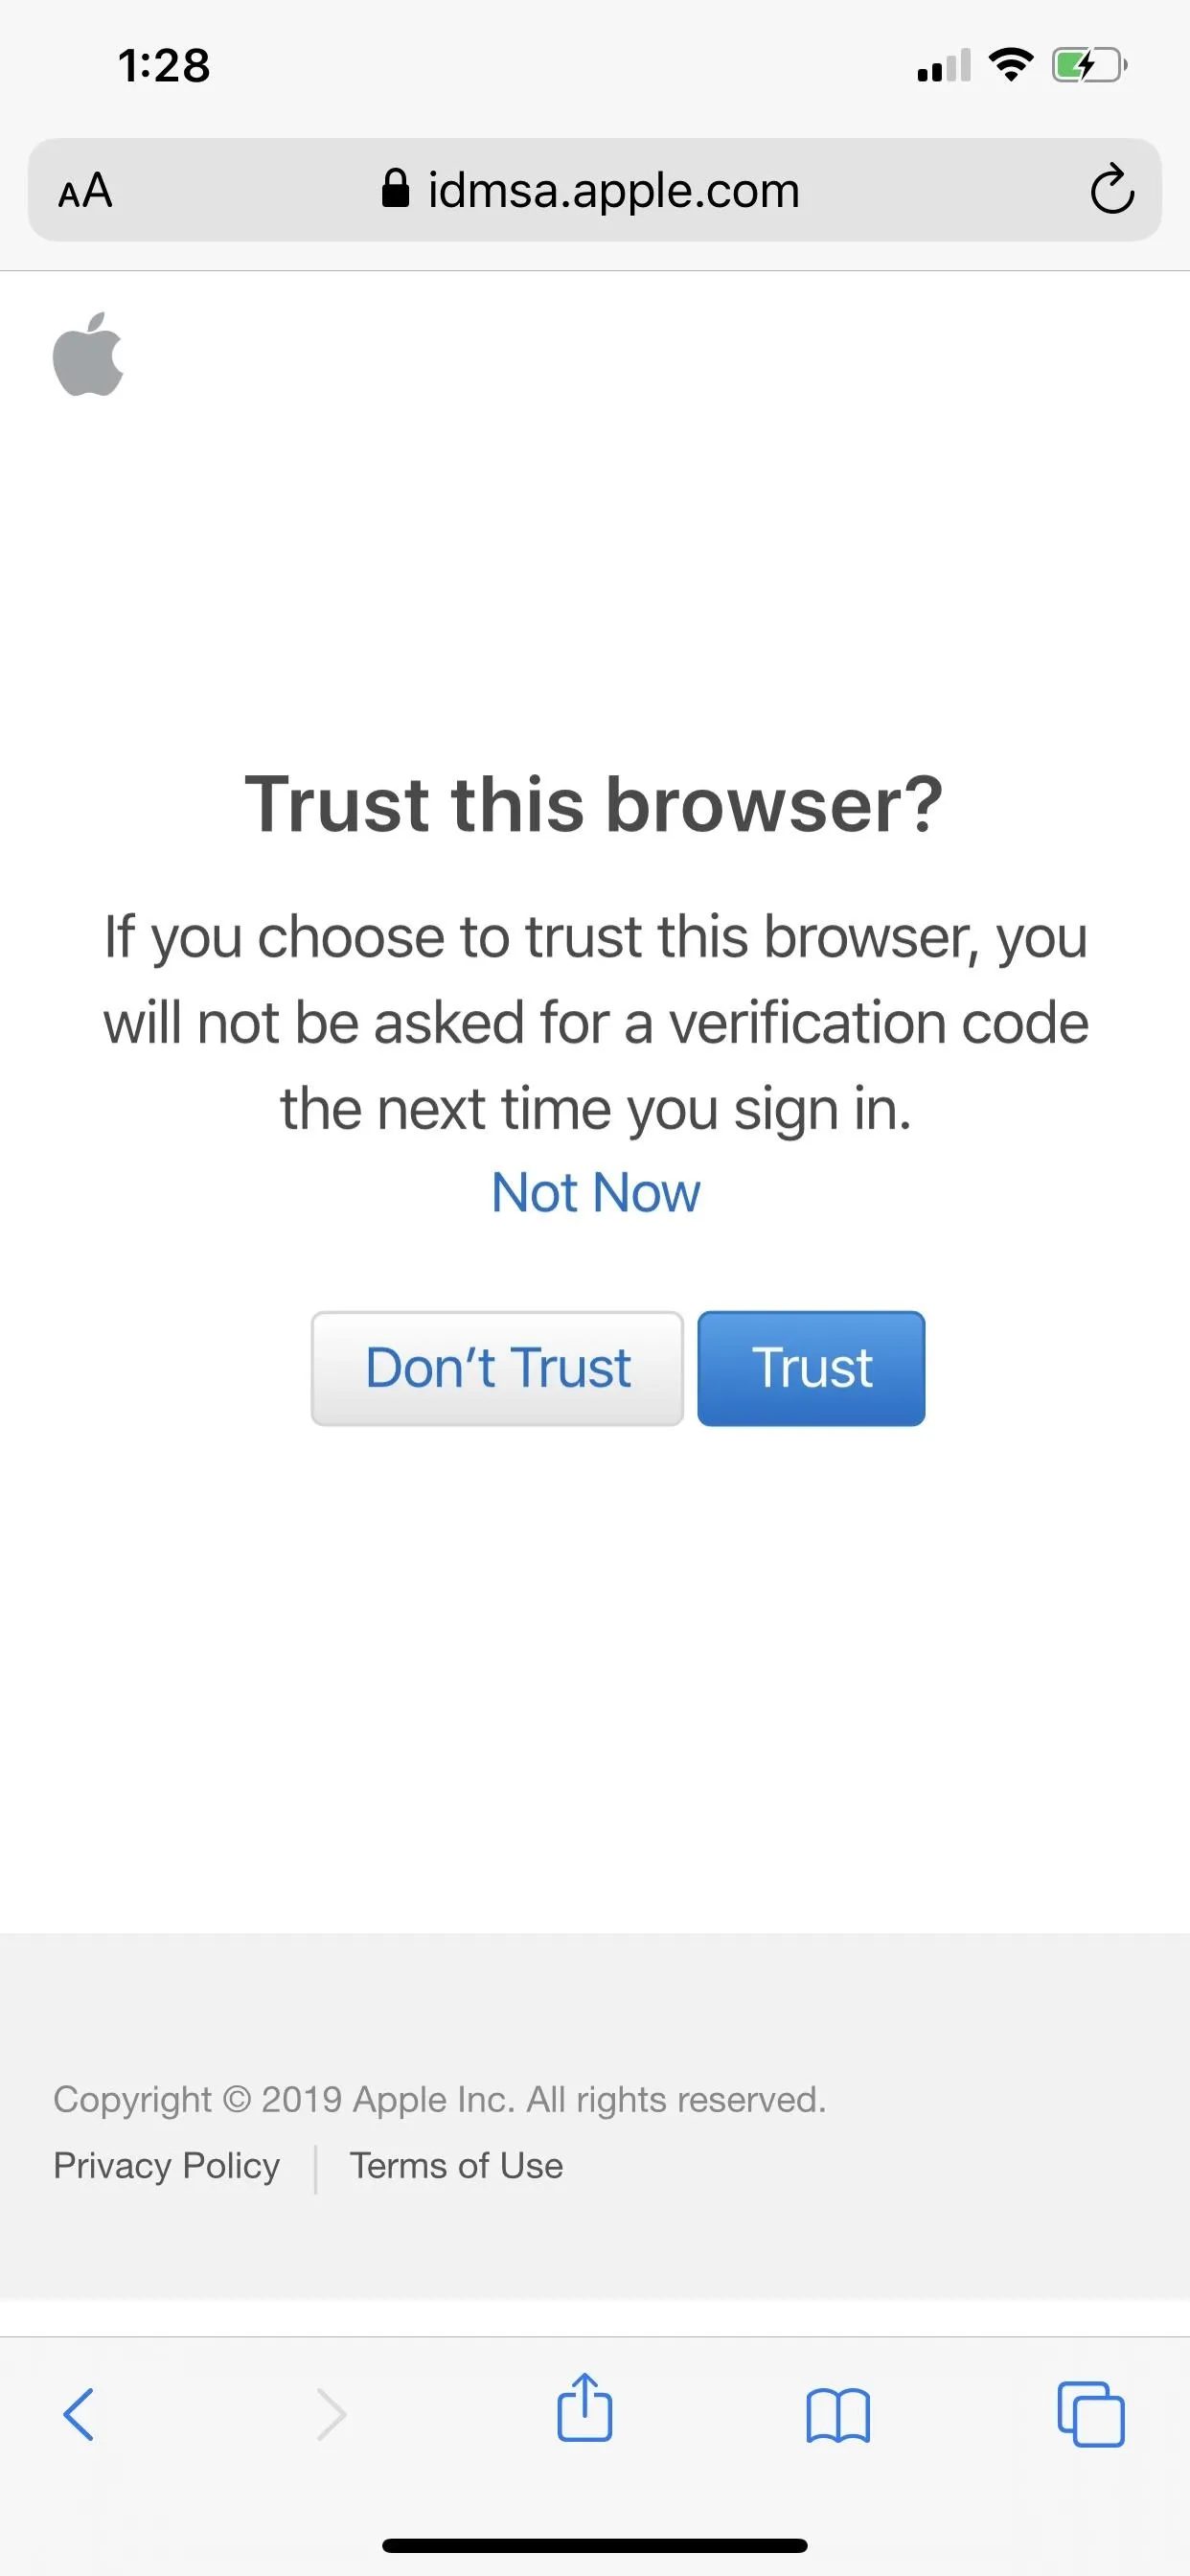
- Select "Trust" on the prompt to trust the browser, if not already trusted.
- On the Downloads page, scroll down and select "Install Profile" under iOS 13. 3 beta (or higher).
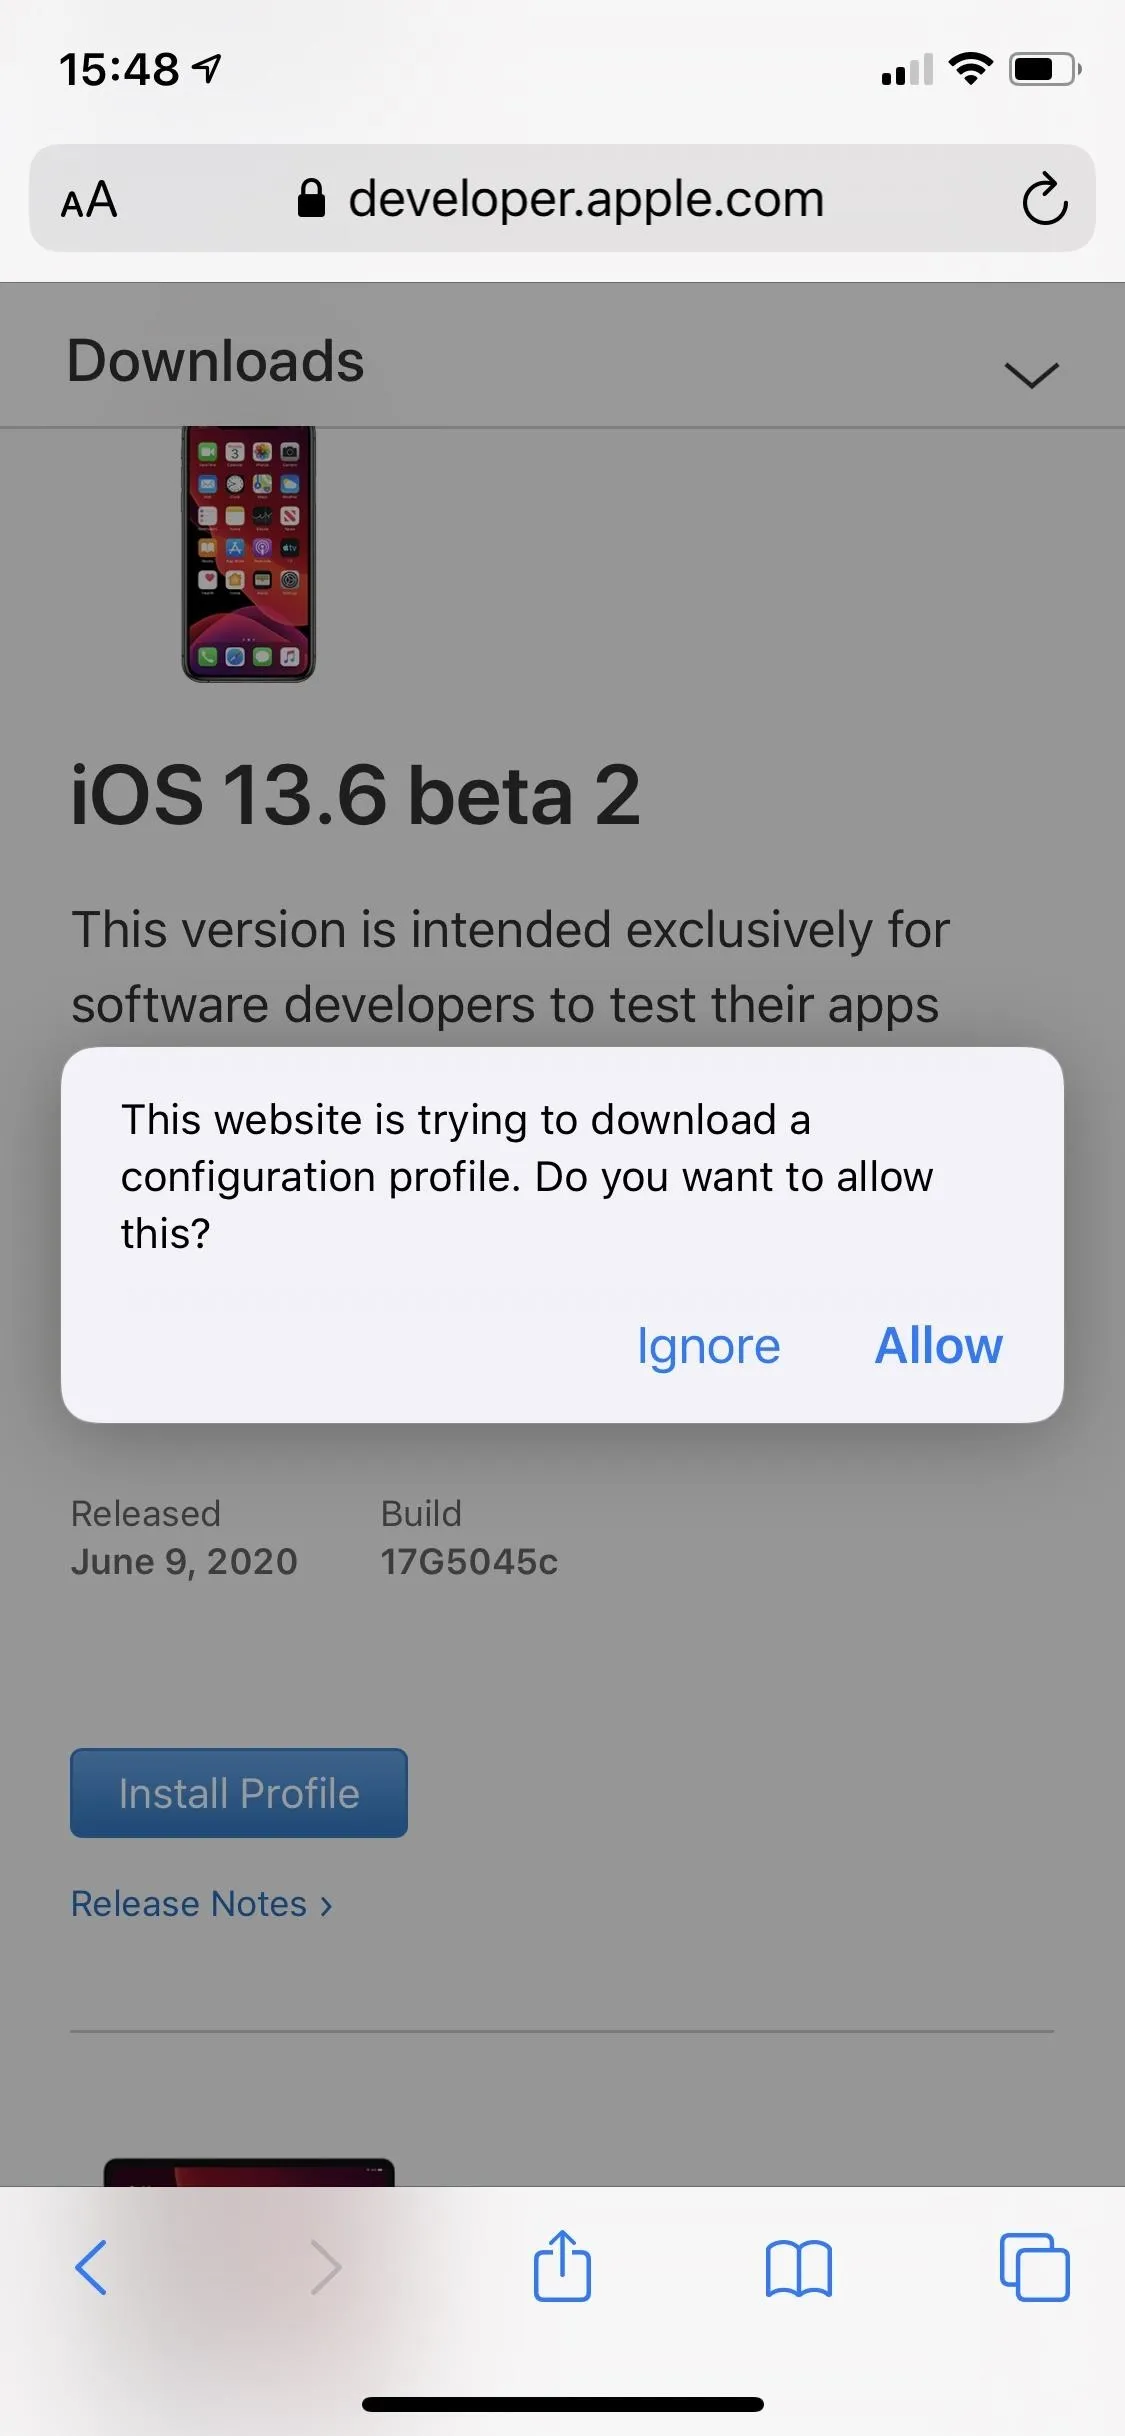
- Tap "Allow" on the prompt asking to let it download a configuration profile.
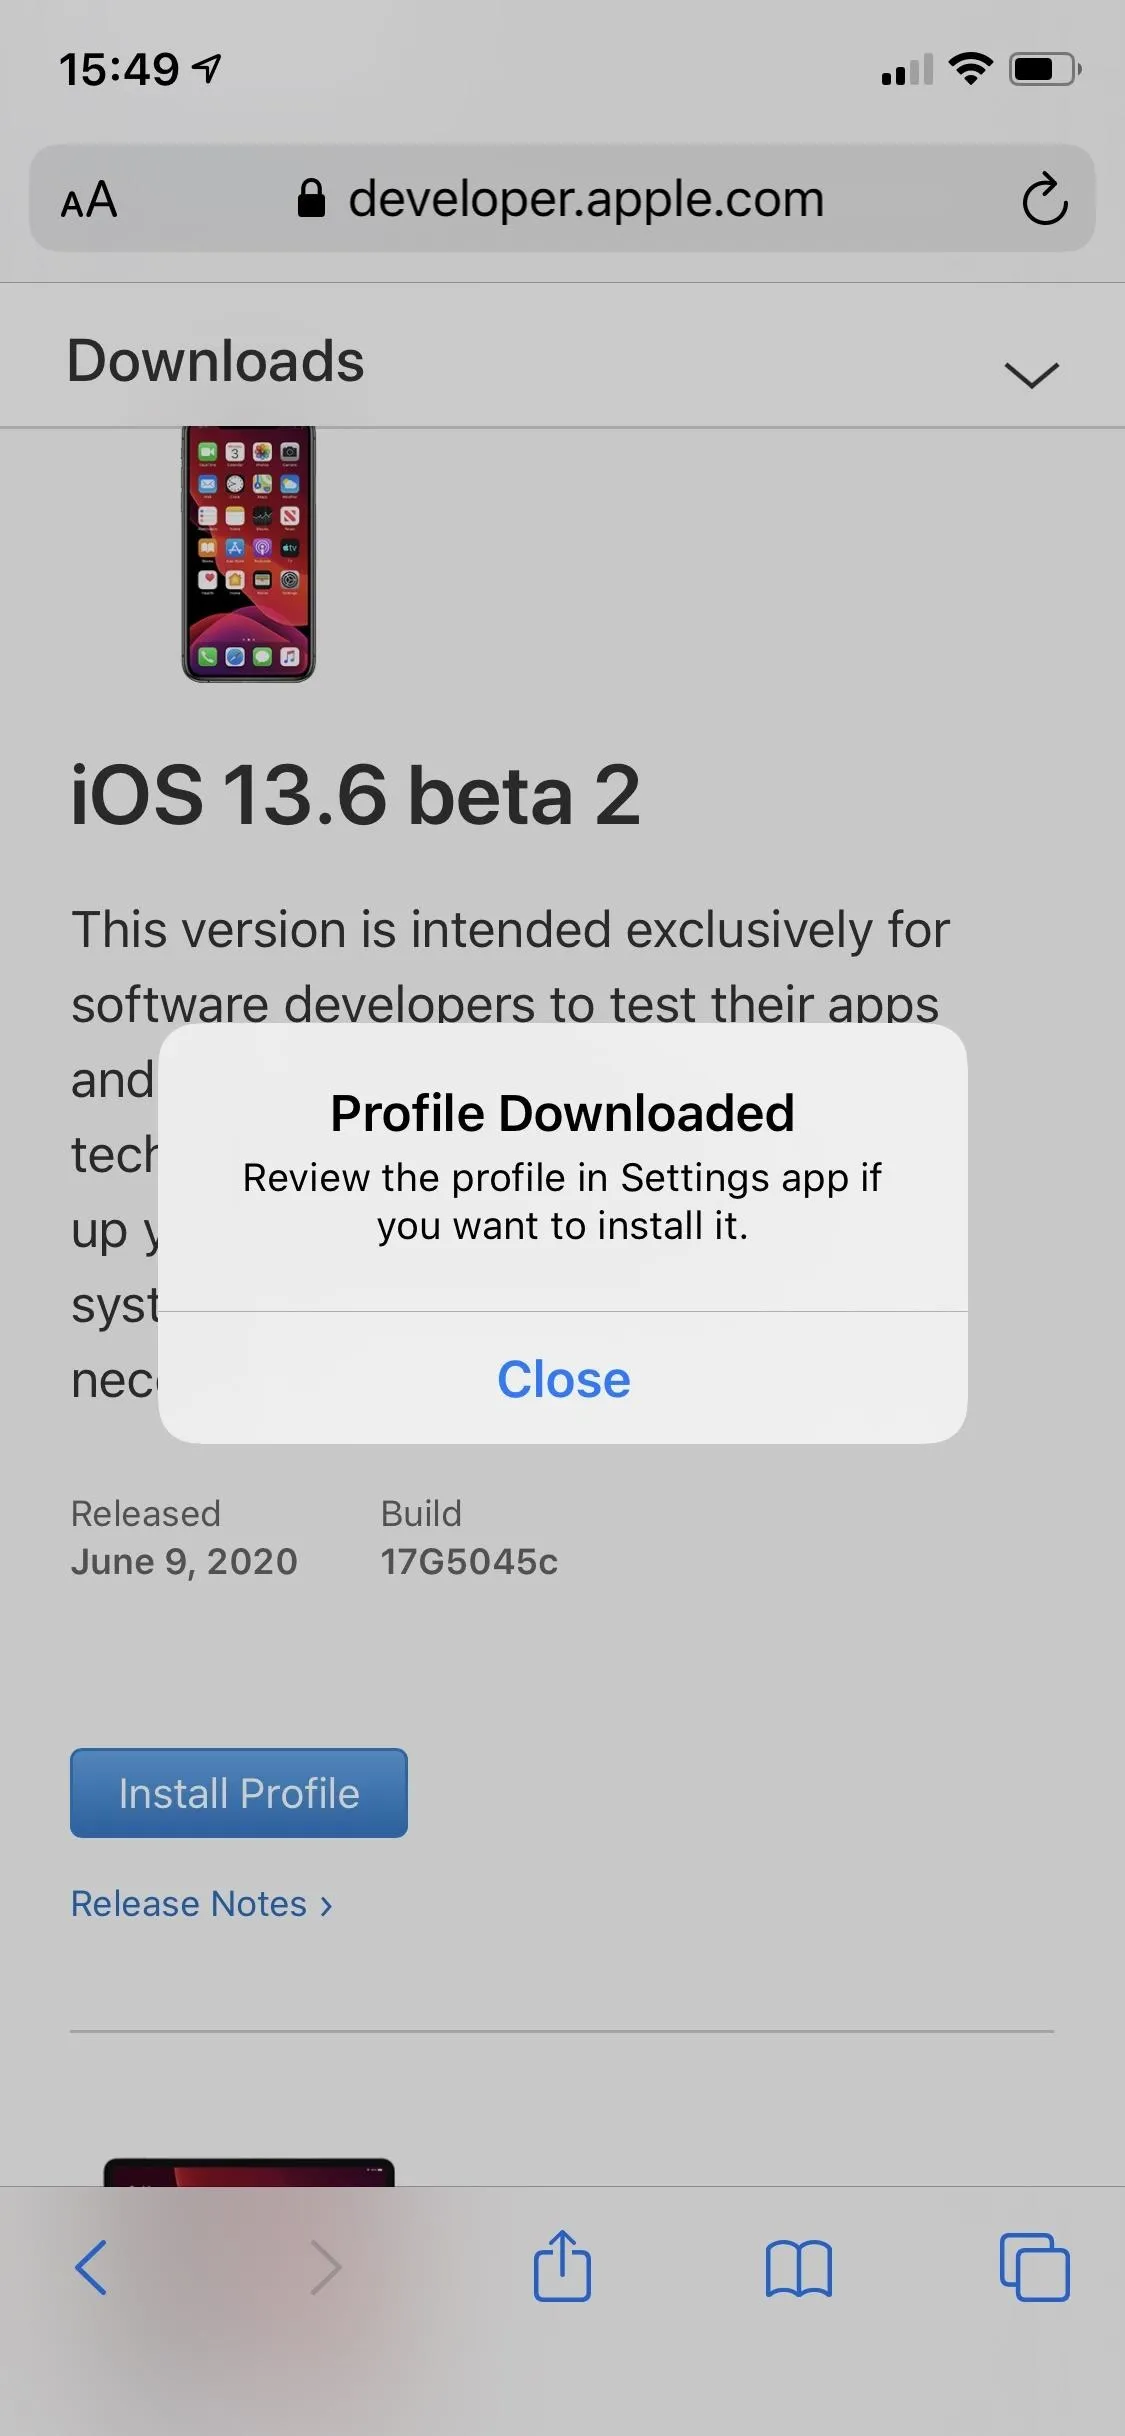
- Tap "Close" after a successful download.
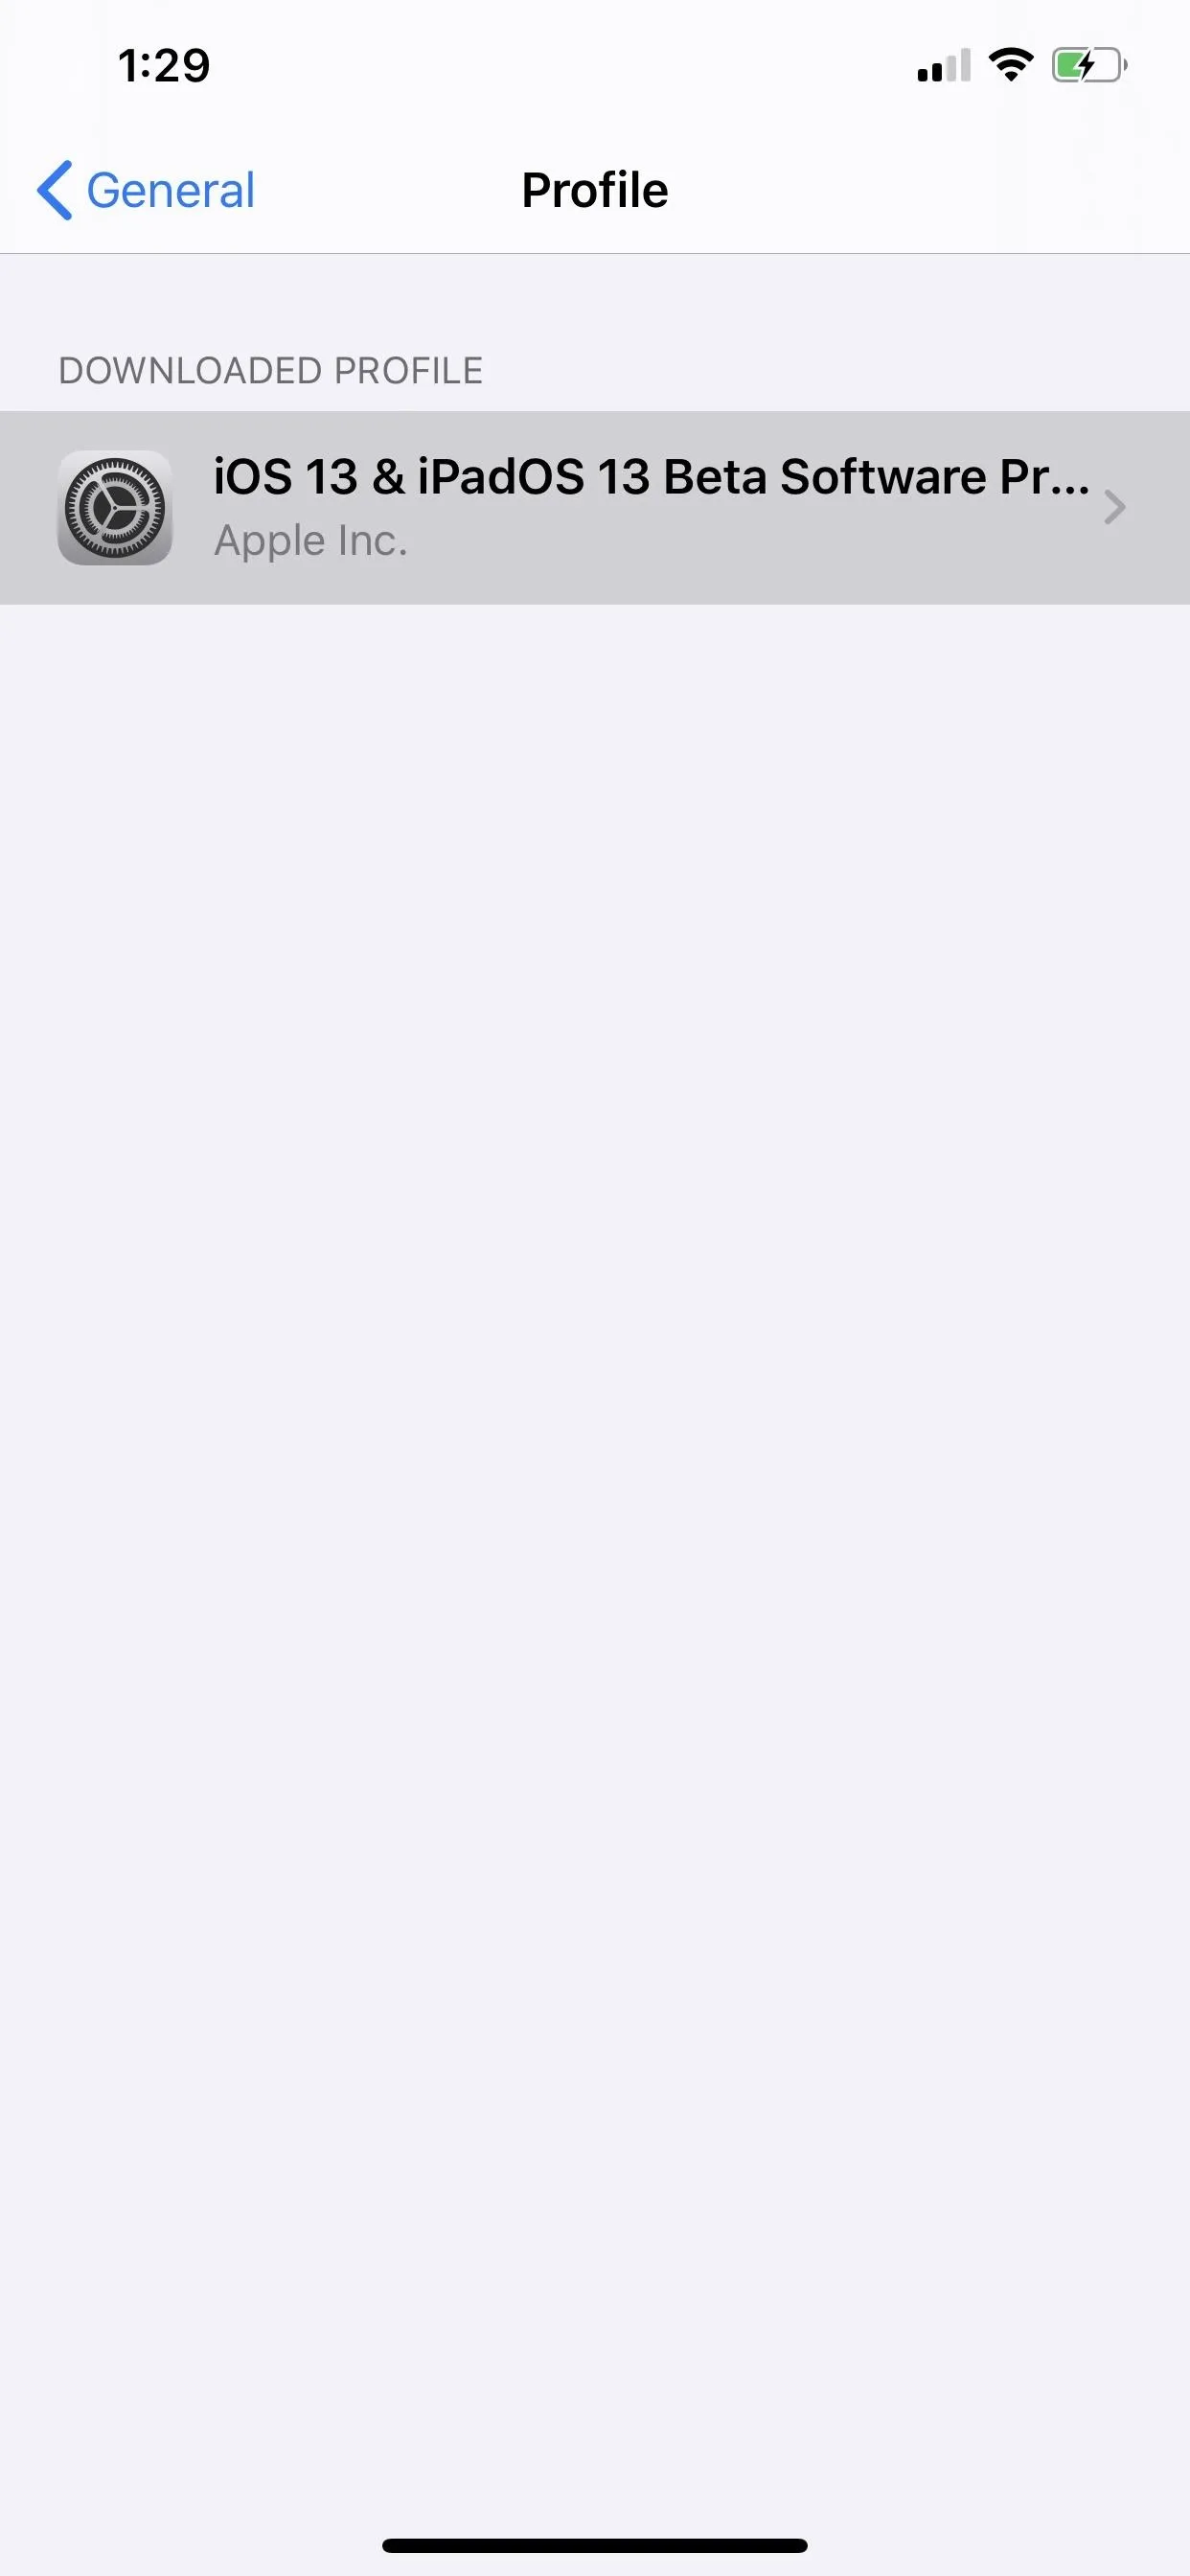
- Go to Settings –> General –> Profiles –> iOS 13 & iPadOS 13 Beta Software Profile. Alternatively, if on a newer version of iOS, you'll see a "Profile Downloaded" link at the top of the Settings app's main page — tap that.
- Select "Install" in the top right of the profile's details page.
- Enter your iPhone's passcode in to confirm.
- Read the Consent form, then tap "Install" in the top right, followed by "Install" in the action sheet to confirm.
- A prompt may tell you to restart to apply the changes. Tap "Restart" if so. Otherwise, skip to the next step.
- Once powered on, head to Settings –> General –> Software Update to see iOS 13.6 developer beta (or higher).
- Select "Download and Install," if it's not already downloading, then finish installing the iOS 13.6 beta like you would any other iOS update.
Install the iOS 13.6 Developer Beta (Mojave Restore Image)
While there is a configuration profile that can be installed, if you want a clean transition to iOS 13.6 dev beta or higher, you can still use restore images.
In order to install the IPSW restore file for your iPhone model, you will either have to install Xcode 11 beta on the latest release version of macOS 10.14 Mojave or just use macOS 10.15 Catalina. For the latter, skip to the next section.
For the Mojave method, using the following instructions. However, note that you can skip downloading Xcode itself, which is over 7 GB, and just install the mobiledevice.pkg from Xcode instead, which should also do the trick. It's a resource package hidden within Xcode's contents, and it's all you need to install iOS 13.6 in Mojave. If you do that, open up the package and install it, then skip all Xcode-related steps below.
Note: You don't need to register your device's UDID with your Apple Developer account. That's only needed when building apps that need testing.
- Visit developer.apple.com/download and sign in to your Developer account. If you have two-factor authentication enabled on your account, following the verification instructions.
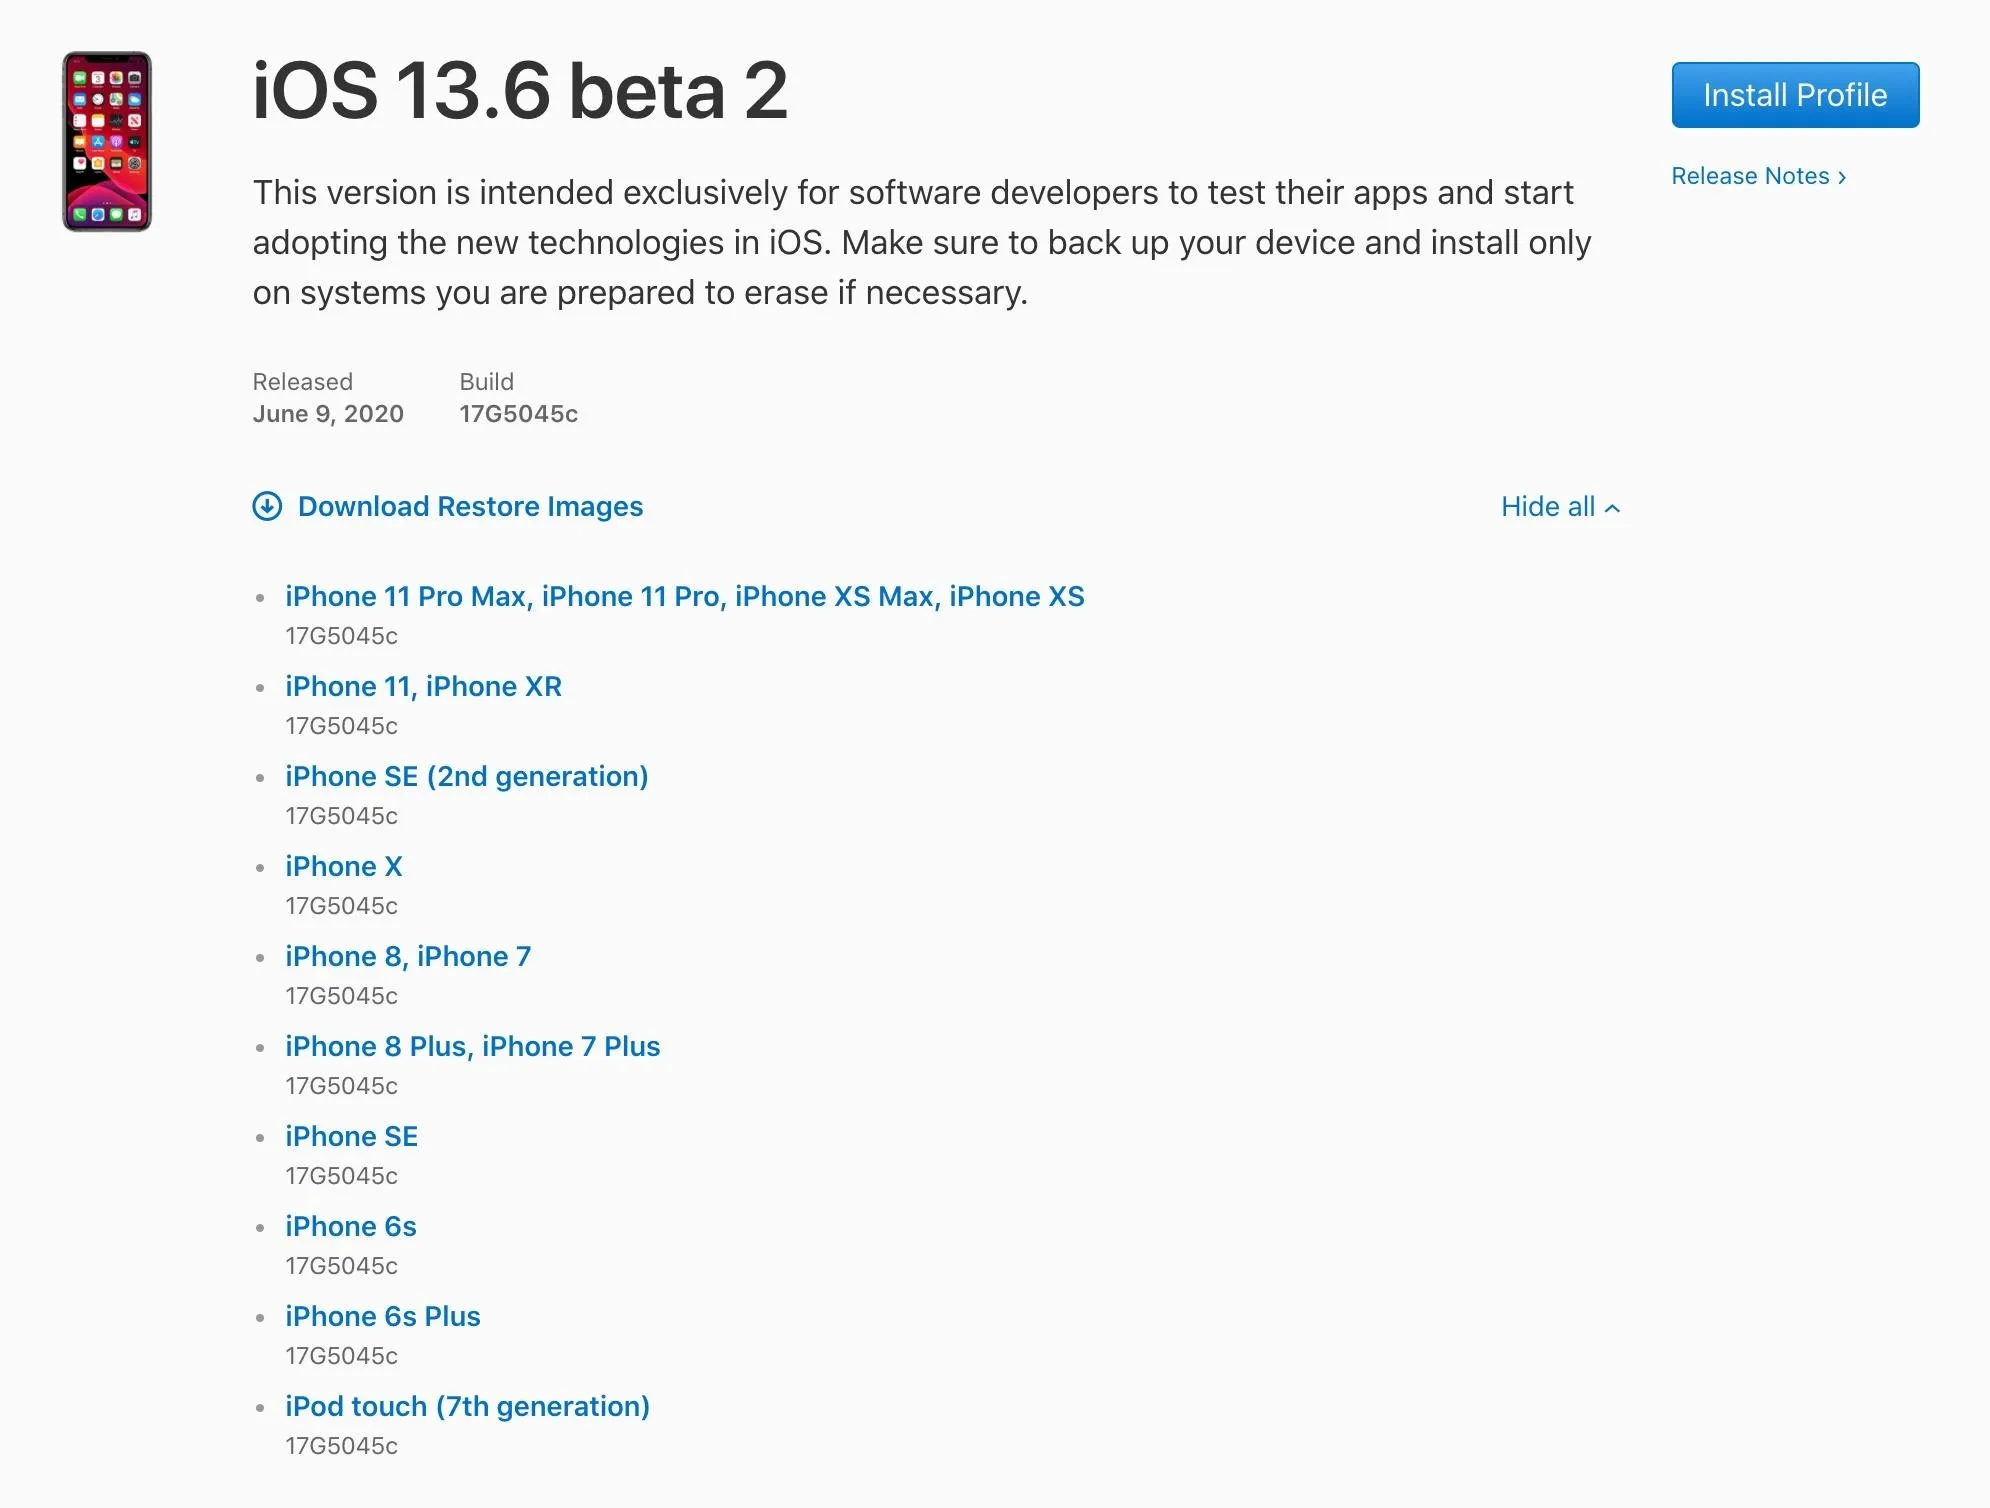
- Under the iOS 13.6 beta section, choose "View all."
- Download the IPSW file for the appropriate model iPhone. (Links also listed after these instructions for your convenience.)

- Still in the "Downloads" webpage, select the "Applications" tab and download "Xcode 11 beta." Xcode is a huge file, so it will take some time to download. (Or just download the mobiledevice.pkg file instead and jump to step 7.)
- Unpack the Xcode XIP file, which may take some time. Afterward, you will have Xcode installed.
- Open up the Xcode 11 beta app and follow the on-screen instructions to install any additional tools needed.
- Make sure you have the newest iTunes version on your computer. On macOS, you can check via the "Update" tab in the Mac App Store. For Windows, use "Check for Updates" in the "Help" menu in iTunes; If that isn't there, you can check for updates from the Microsoft Store. However, Xcode is not available for Windows so PC users are left out this time, so you can stop right here if that's you.
- Connect your iPhone to the computer with your Lightning to USB cable or Lightning to USB-C cable.
- If you see an "Unlock iPhone to Use Accessories" notification appear on your iPhone, unlock your iPhone using Face ID, Touch ID, or your passcode to proceed.
- Tap "Trust This Computer" if prompted on your iPhone, and follow the on-screen steps to trust it. You can always untrust the computer later if need be later.
- Open iTunes if it's not already opened.
- If not already logged in, sign in to your Apple account in iTunes.
- Select the iPhone in iTunes and make sure you're in the "Summary" tab.
- Back up and archive it for safe-keeping, if not already done. Make sure to use the encrypted backup option if you want to carry on Health and Activity data.
- Hold down the Option key on Mac or Shift key on Windows, then click on "Update" or "Check for Update" in iTunes to initiate the process. (Note: Some users may have issues doing it this way, so try entering DFU mode on your iPhone instead, then hold the Option key and click on "Restore" when prompted in iTunes.)
- From the selection window in iTunes, choose the IPSW restore image that you downloaded to your computer. Then, select "Open" to begin the installation.
- Once iTunes finishes installing the image, your iPhone will restart.
- Now, all that's left to do is follow the instructions on your iPhone to activate and set up iOS 13.6.
IPSW Download Links (For Beta 2)
- iPhone SE (2nd generation) (17G5045c)
- iPhone 11 Pro Max, iPhone 11 Pro, iPhone XS Max, iPhone XS (17G5045c)
- iPhone 11, iPhone XR (17G5045c)
- iPhone X (17G5045c)
- iPhone 8, iPhone 7 (17G5045c)
- iPhone 8 Plus, iPhone 7 Plus (17G5045c)
- iPhone SE (1st generation) (17G5045c)
- iPhone 6s (17G5045c)
- iPhone 6s Plus (17G5045c)
- iPod touch (7th generation) (17G5045c)
Install the iOS 13.6 Developer Beta (Catalina Restore Image)
If you've updated to macOS 10.15 Catalina already, which you may have if you couldn't get the above Mojave method to work, the process is actually pretty easy if you want to go the restore route instead of using the configuration profile's OTA update for iOS 13.6 dev beta and higher. And since there's no iTunes anymore, all of the work is done right inside the Finder app, since iOS devices mount similar to external hard drives.
Note: You don't need to register your device's UDID with your Apple Developer account. That's only needed when building apps that need testing.
- Visit developer.apple.com/download and sign in to your Developer account. If you have two-factor authentication enabled on your account, following the verification instructions.
- Under the iOS 13.6 beta section, choose "View all."
- Download the IPSW file for the appropriate model iPhone.
(Links also listed after these instructions for your convenience.)
- Connect your iPhone to the computer with your Lightning to USB cable or Lightning to USB-C cable.
- If you see an "Unlock iPhone to Use Accessories" notification appear on your iPhone, unlock your iPhone using Face ID, Touch ID, or your passcode to proceed.
- Tap "Trust This Computer" if prompted on your iPhone, and follow the on-screen steps to trust it. You can always untrust the computer later if need be later.
- Open Finder if it's not already opened.
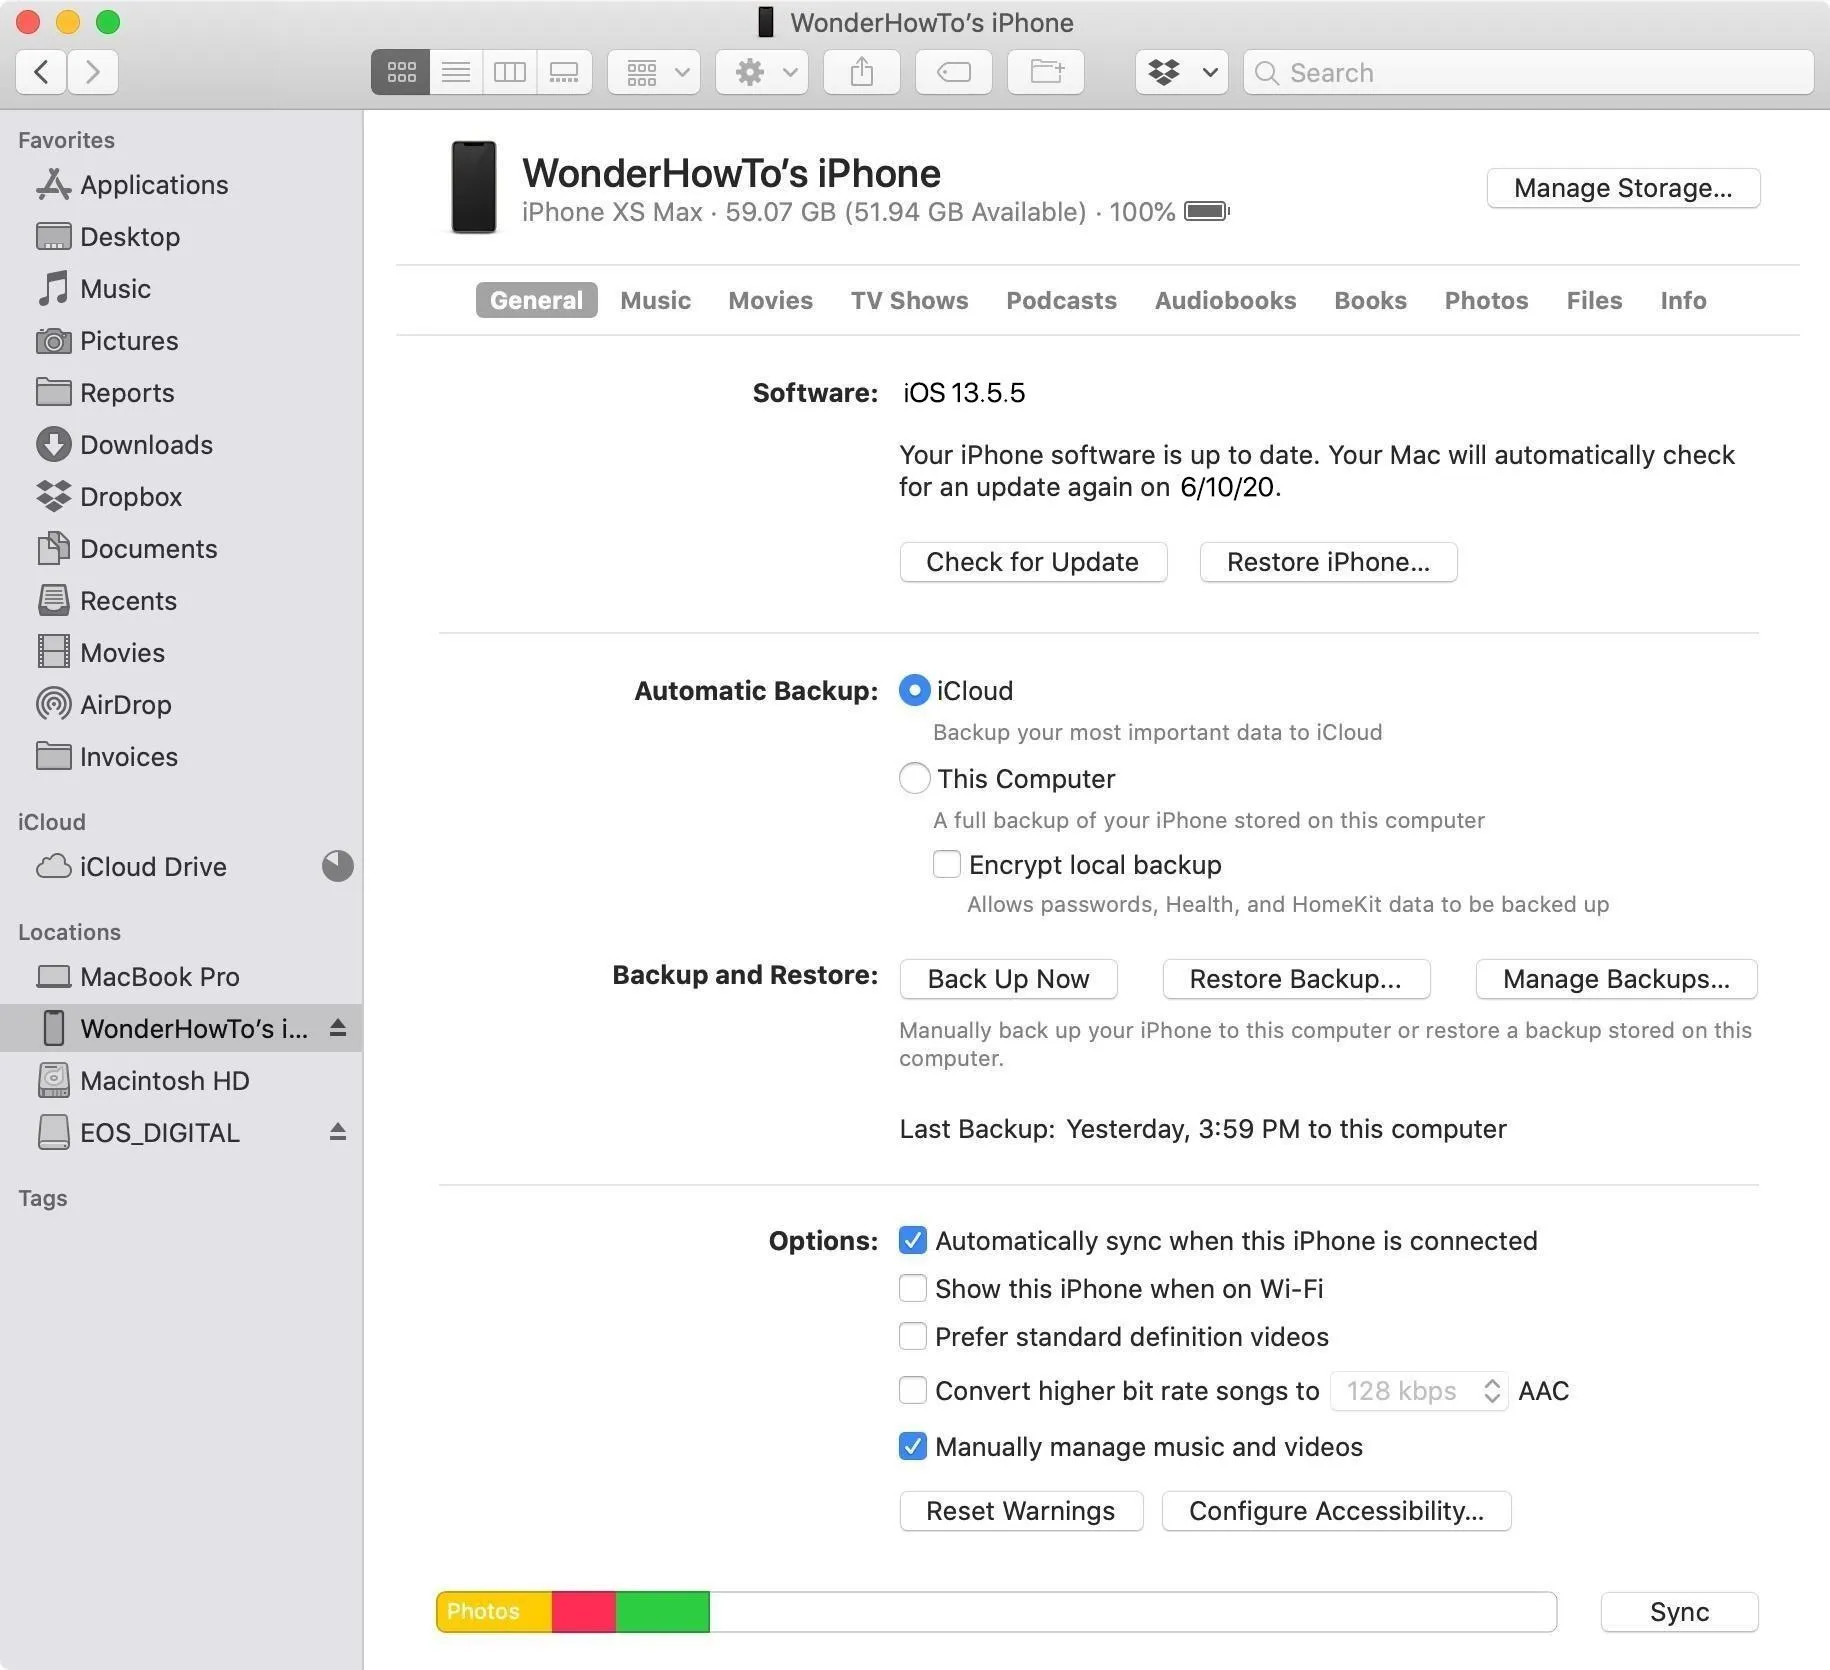
- Select the name of your iPhone in the sidebar under Locations.
- Back up and archive your last iOS 13 version for safe-keeping, if not already done. Doing so is just like in iTunes, where you manually back up in the Finder window, but instead of going in any preferences menu, click the "Manage Backups" button. Next, right-click your last backup and hit "Archive." Make sure to use the encrypted backup option if you want to carry on Health and Activity data.
- Hold down the Option key then click on "Check for Update" in Finder to initiate the process.
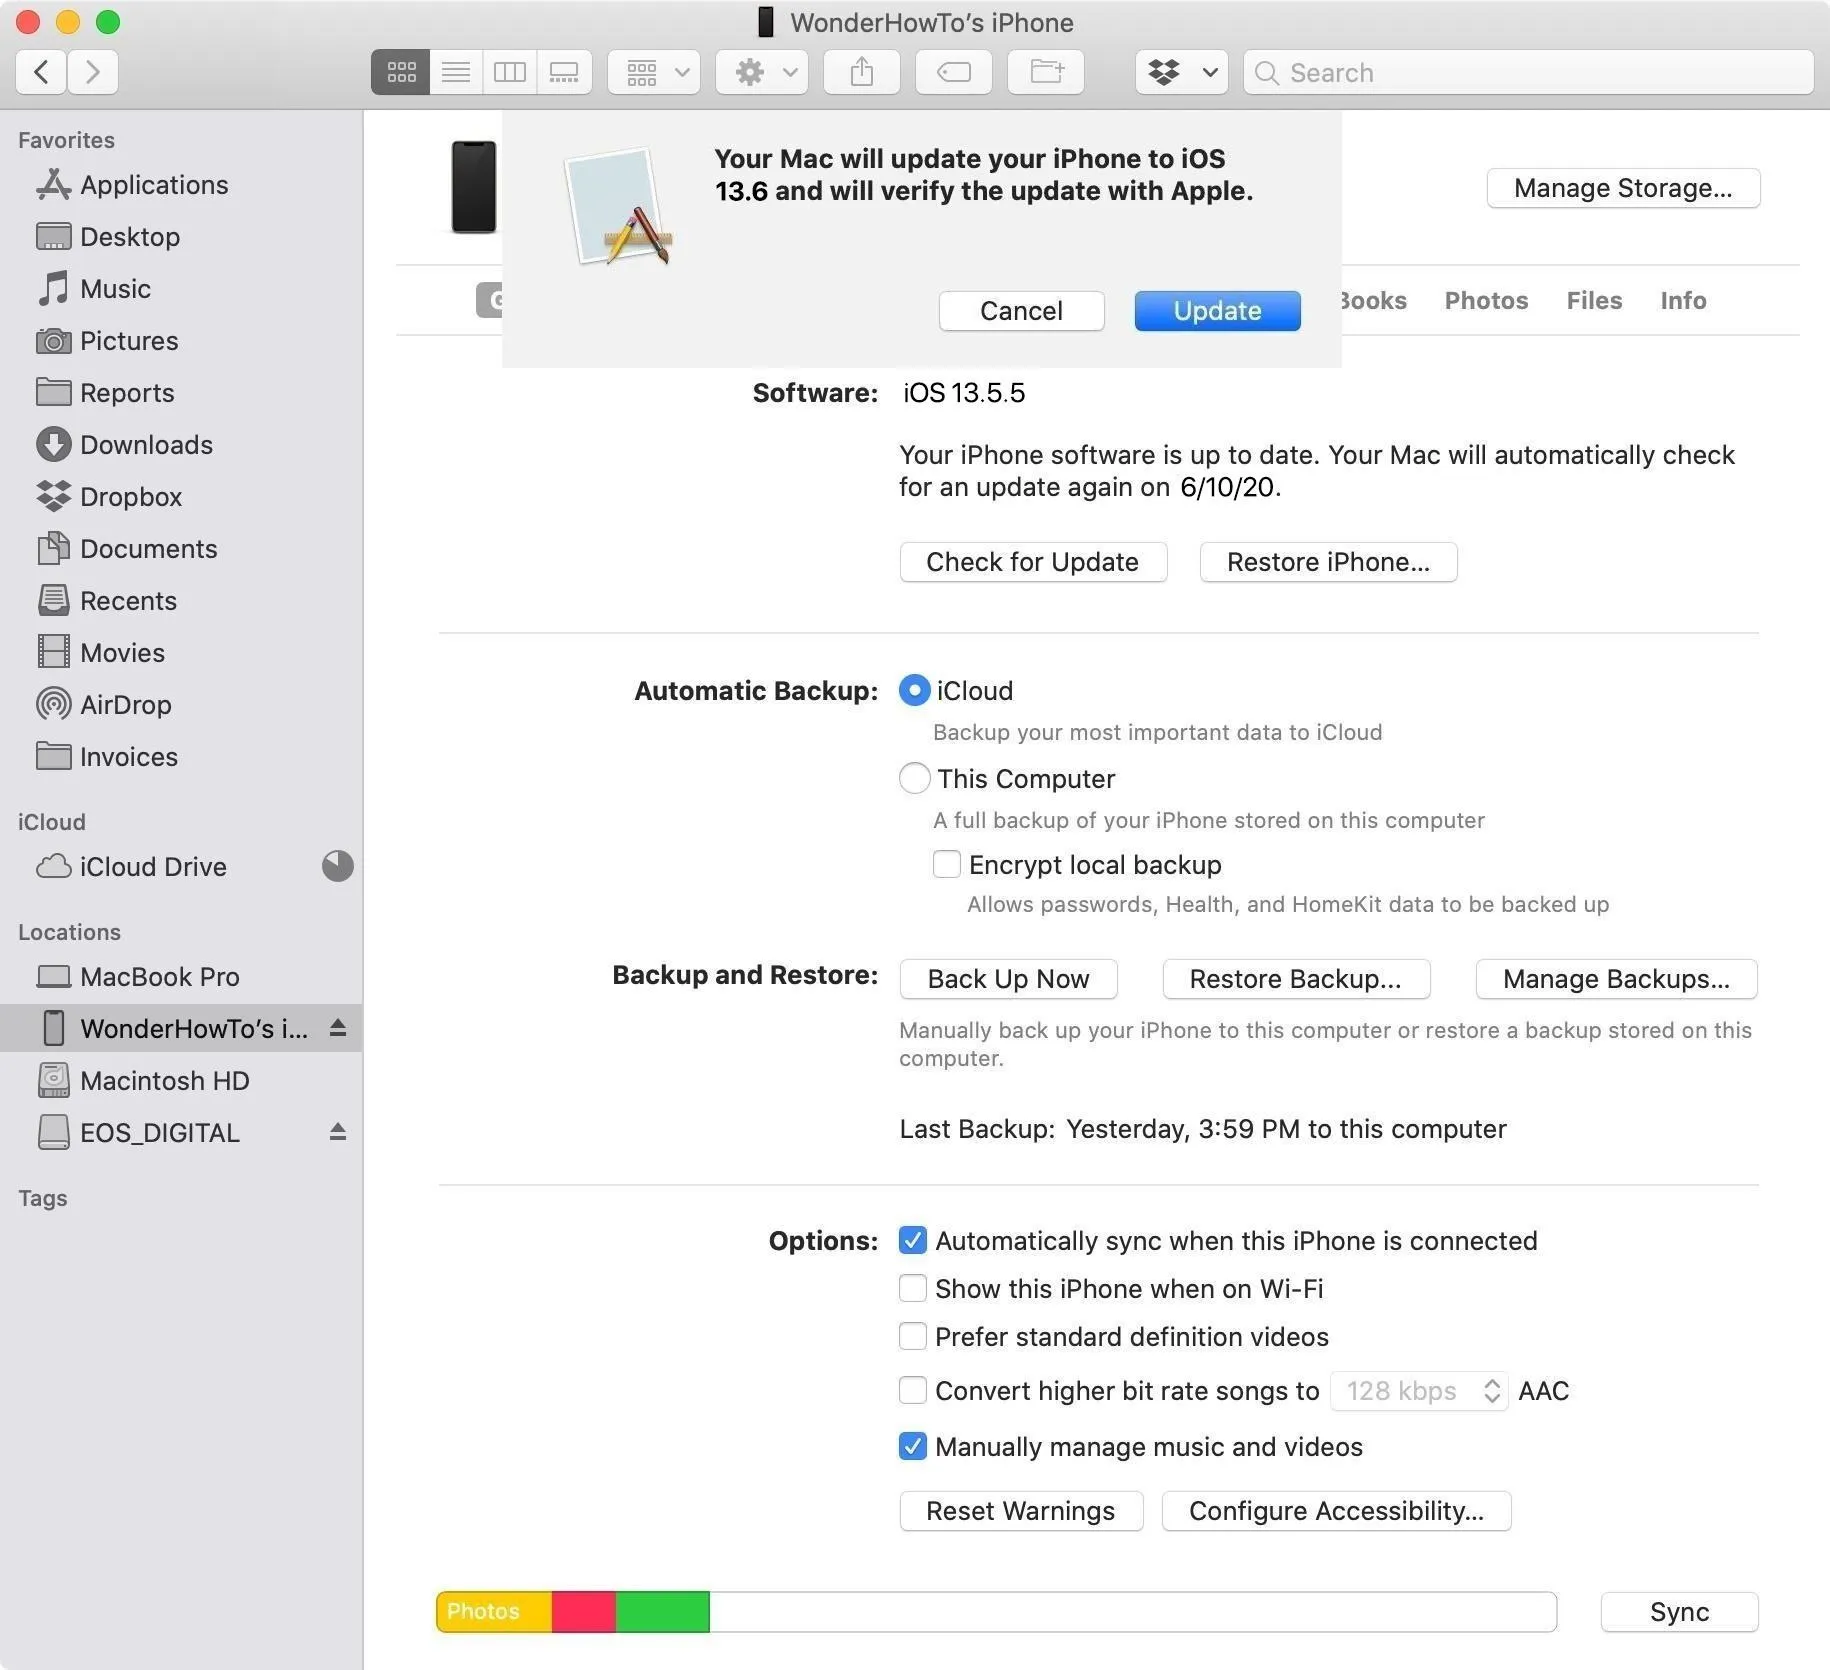
- From the selection window in iTunes, choose the IPSW restore image that you downloaded to your computer, then click on "Open."
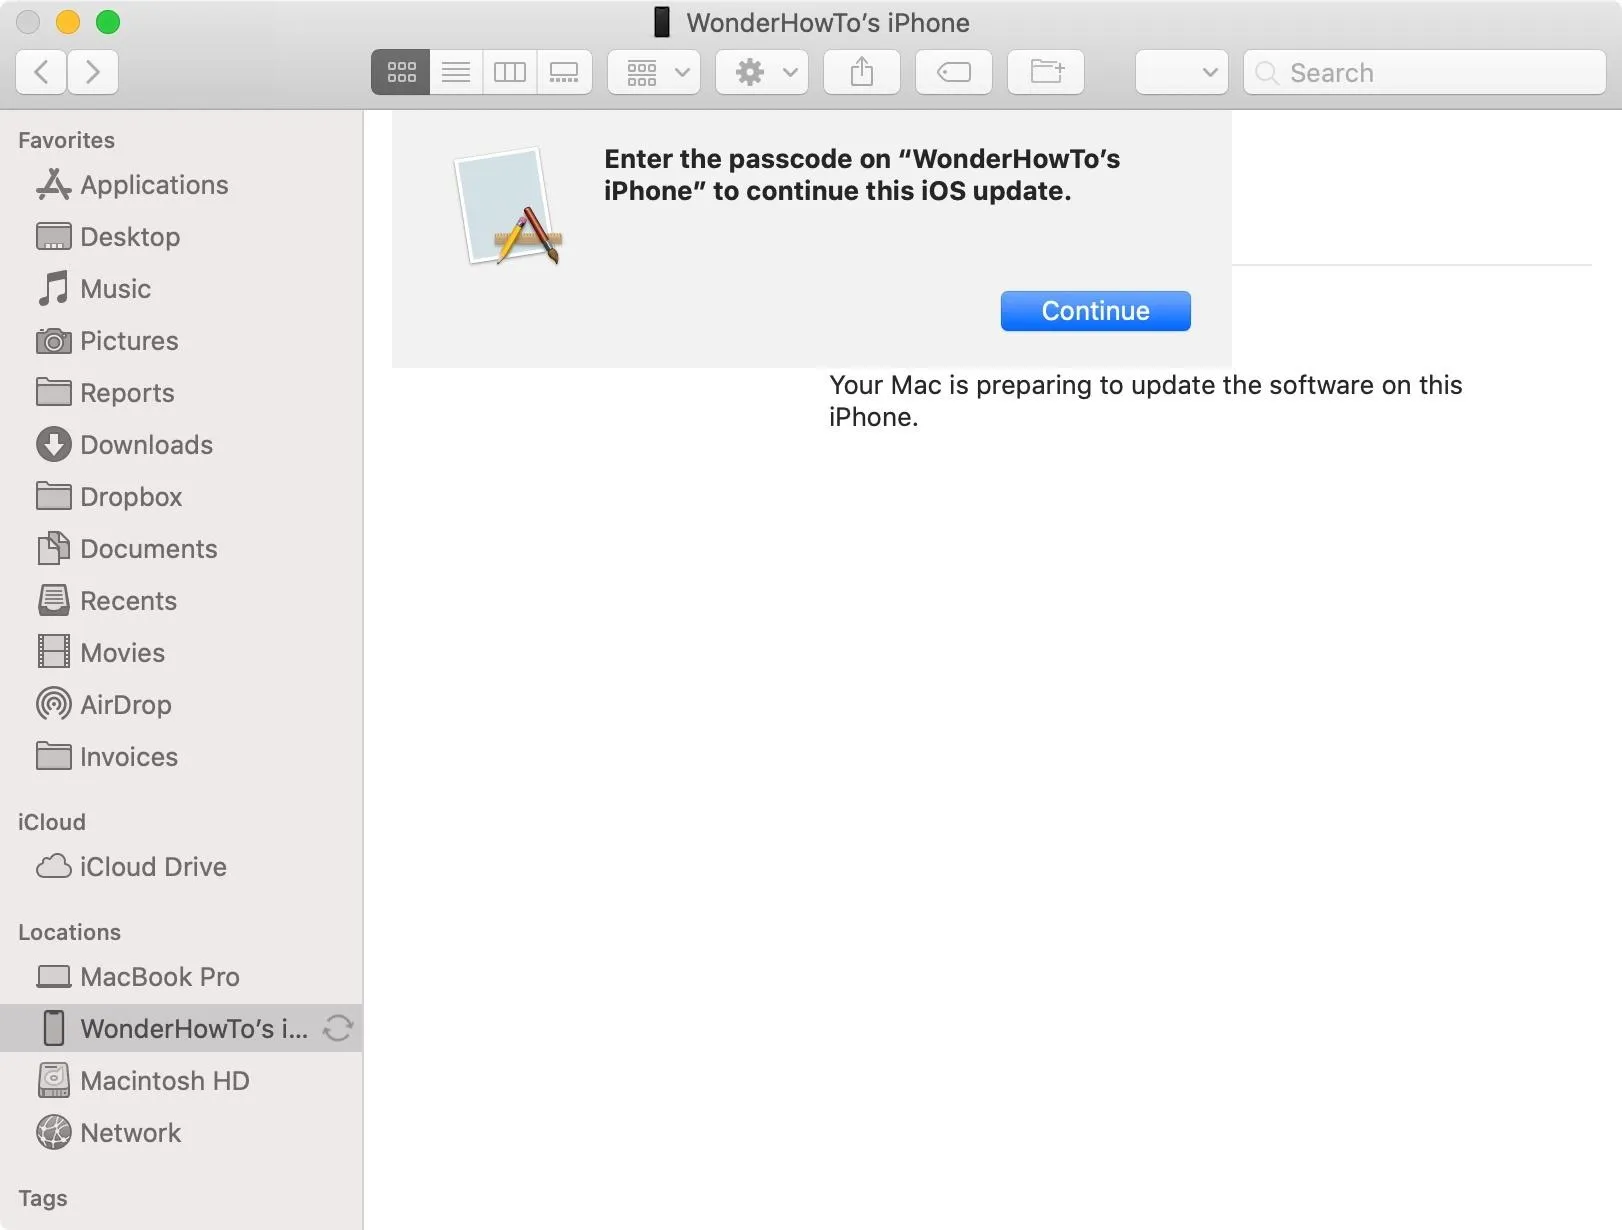
- Click on "Update" when prompted to let your Mac contact Apple to verify and install iOS 13.6.
- During the install, you will have to enter the passcode on your iPhone.
- Once Finder finishes installing the image, your iPhone will restart.
- Now, all that's left to do is follow the instructions on your iPhone to activate and set up iOS 13.6. It may already be ready to go, though, so no additional setup may be necessary.
IPSW Download Links (For Beta 2)
- iPhone SE (2nd generation) (17G5045c)
- iPhone 11 Pro Max, iPhone 11 Pro, iPhone XS Max, iPhone XS (17G5045c)
- iPhone 11, iPhone XR (17G5045c)
- iPhone X (17G5045c)
- iPhone 8, iPhone 7 (17G5045c)
- iPhone 8 Plus, iPhone 7 Plus (17G5045c)
- iPhone SE (1st generation) (17G5045c)
- iPhone 6s (17G5045c)
- iPhone 6s Plus (17G5045c)
- iPod touch (7th generation) (17G5045c)
Enjoy iOS 13.6 on Your iPhone
Congratulations! You're running iOS 13.6 before the general public. Make sure to let us and Apple know about any bugs or issues you run into while beta testing. If iOS 13.6 ends up being especially glitchy, you can always downgrade back to an official version of iOS.
Cover image by Jake Peterson/Gadget Hacks; screenshots by Justin Meyers/Gadget Hacks


Comments
Be the first, drop a comment!