While iOS offers a plentiful mix of excellent and exclusive features, what you see is what you get. Apple doesn't leave much room for customizability, meaning most people's iPhones look relatively the same. You can make yours stand out, however, by giving your apps unique and personal icons.
While you can indeed litter your home screen with as many app icons as you see fit, you can't change an app's icon easily unless the developer has included that as a feature. If you like using Shortcuts, you can create shortcuts with custom images on your home screen to the real app; it's the next best thing, especially in iOS 14 where you can really hide the actual app.
Another popular option before the release of Shortcuts in iOS 12 was to create what are called "bookmarks," similar to web shortcuts, whose icon can sport any image you like. These bookmarks can be set to open other apps, so with a little curating, your Facebook, Instagram, and Gmail apps can all appear to have their own, specific icons. If you don't like using Shortcuts, this is another way to do it on iOS 12 and later.
The instructions below cover the manual way to do it using an Apple tool on macOS, which is the safest way to make bookmarks. However, there are online tools such as iSkin that could do a lot of work for you if you trust them.
Install Apple Configurator 2
In the past, users could use a tool called iPhone Configuration Utility to customize their app icons, a program that worked on both Mac and PCs. However, that utility has been retired and replaced with Apple Configurator 2, a Mac-exclusive application. If you want to use this method and have a PC, you'll have to find a friend with a Mac.
You can download Apple Configurator 2 from the Mac App Store. We'll be using it specifically to make new custom icons for our home screen apps, but it's also handy for other things such as downloading IPA files and rearranging your home screen.
- Mac App Store Link: Apple Configurator 2 (free)
Create a Profile
To add bookmarks to your iPhone's home screen, you'll need to create a profile. A profile is like a software pack, adding new features, or, in some cases, an entirely new OS, to your iPhone. To run the iOS 14 beta or use a data-only SIM such as FreedomPop, you need to download a profile that lets you, for example.
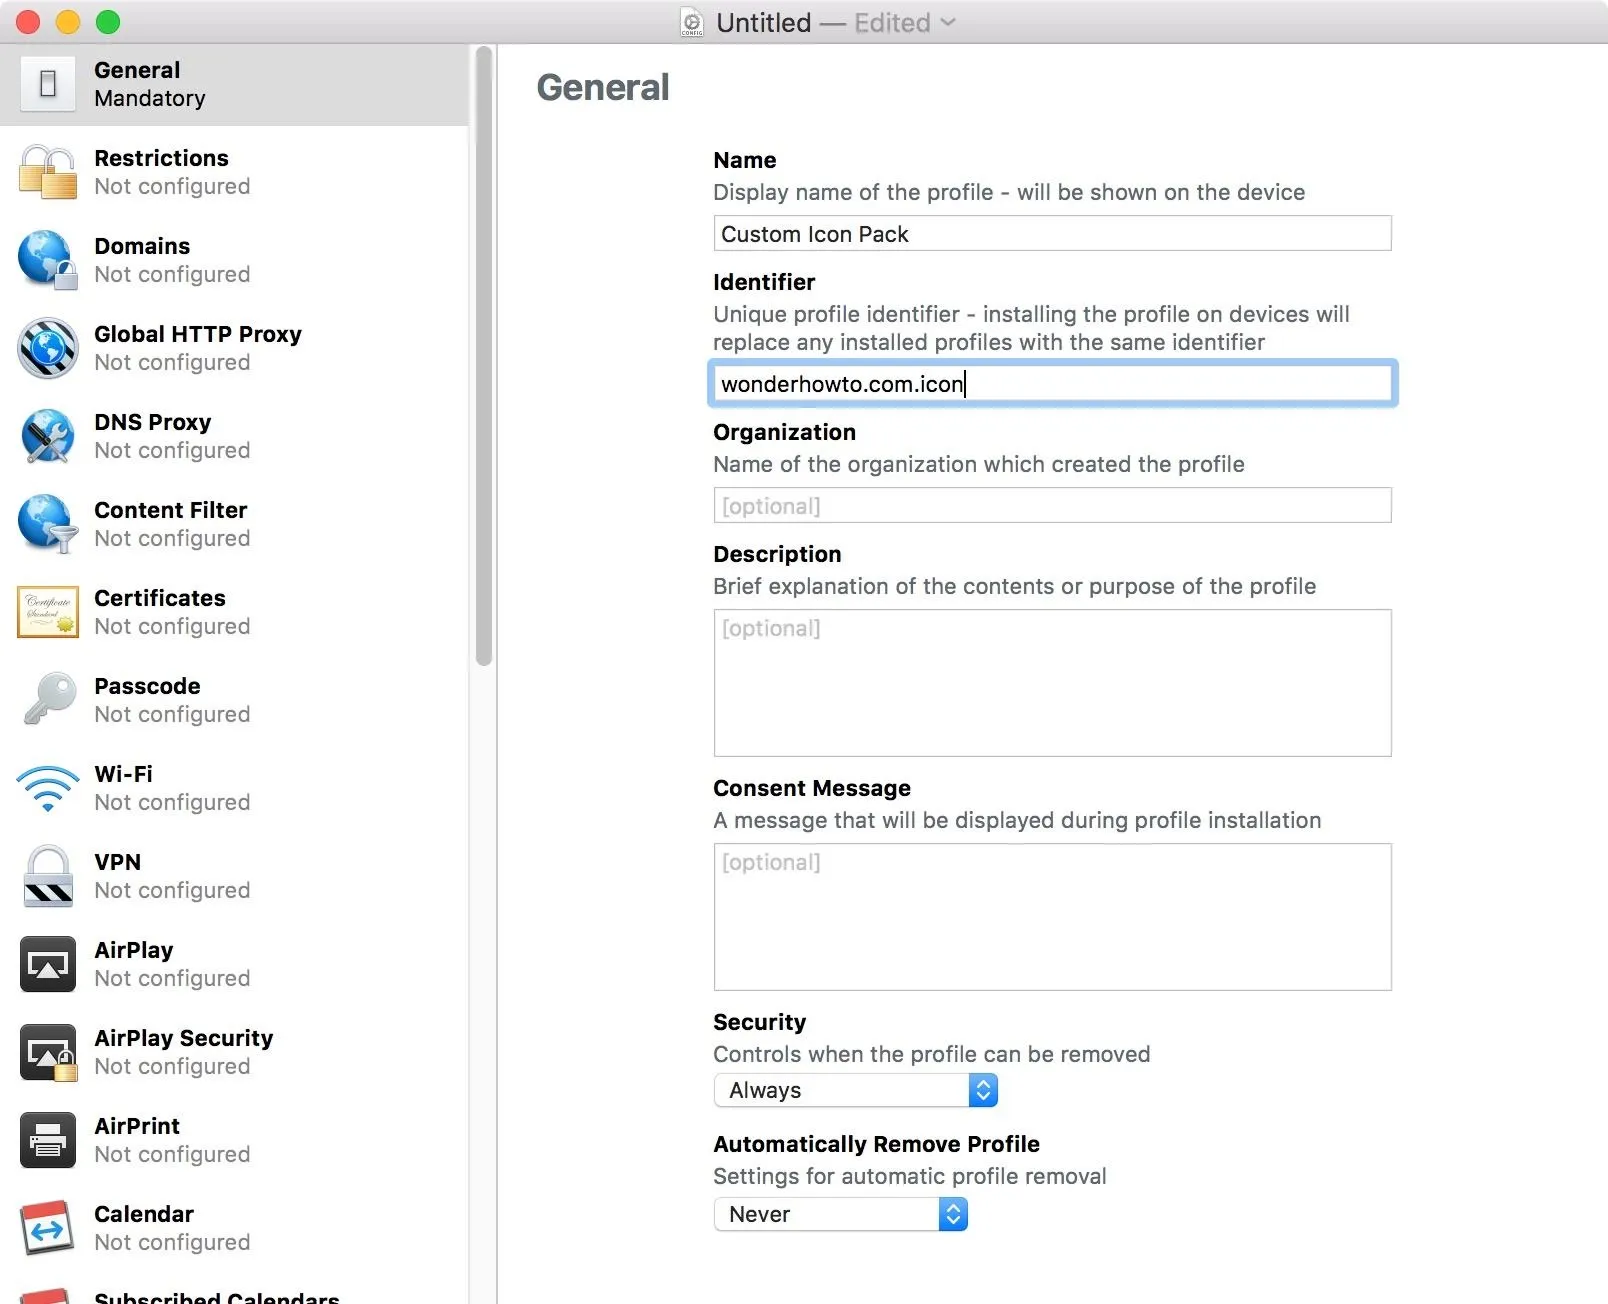
In our case, we'll use Apple Configurator 2 to create this profile. Once open and signed in to your Apple account, click "File" in the menu bar, then "New Profile," or just press Command-N. On the following window, select the "General" tab. Give your new profile a name under Name. You can call this whatever you'd like, but it might be best to name it something related to its purpose (e.g., Custom Icon Pack).
Next, fill out the "Identifier" field, which your iPhone uses to determine whether or not this profile is an update to a preexisting profile or something new entirely. Identifiers usually follow a reverse domain address, com.wonderhowto.icon, but as you can see below, our identifier of wonderhowto.com.icon works just fine. You can totally make this up, such as com.stupidname.icon or stupidname.com.icon.
Ignore the rest of the options here.
Create the Bookmark(s)
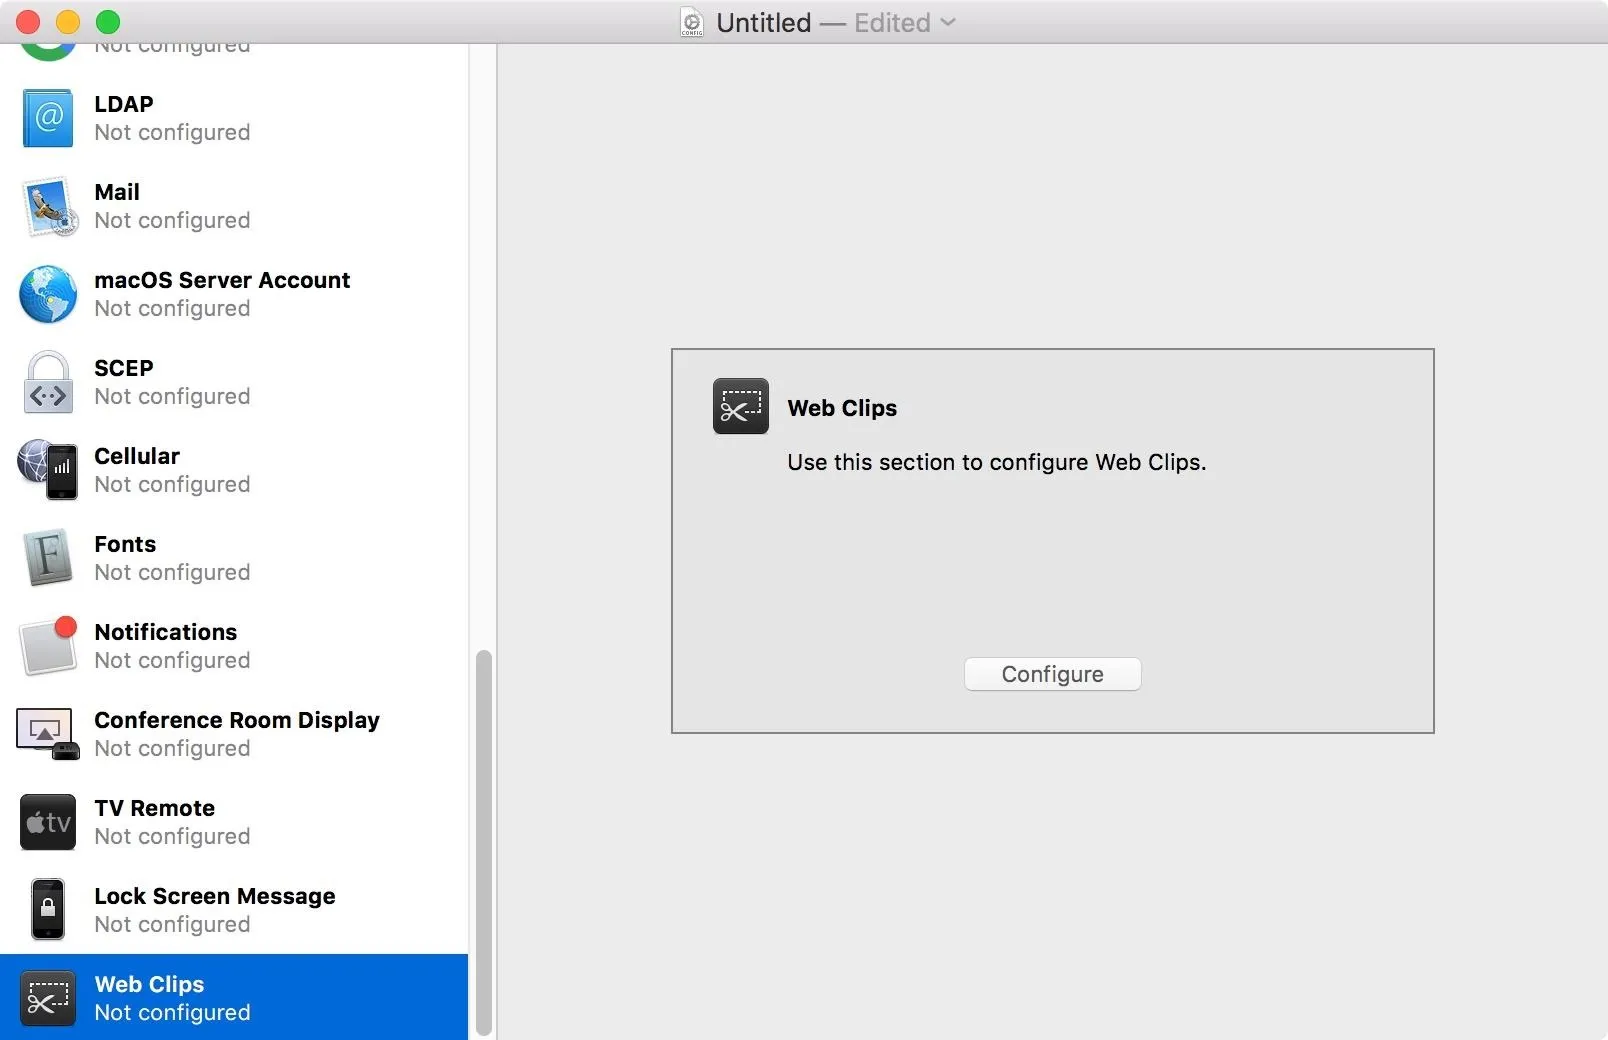
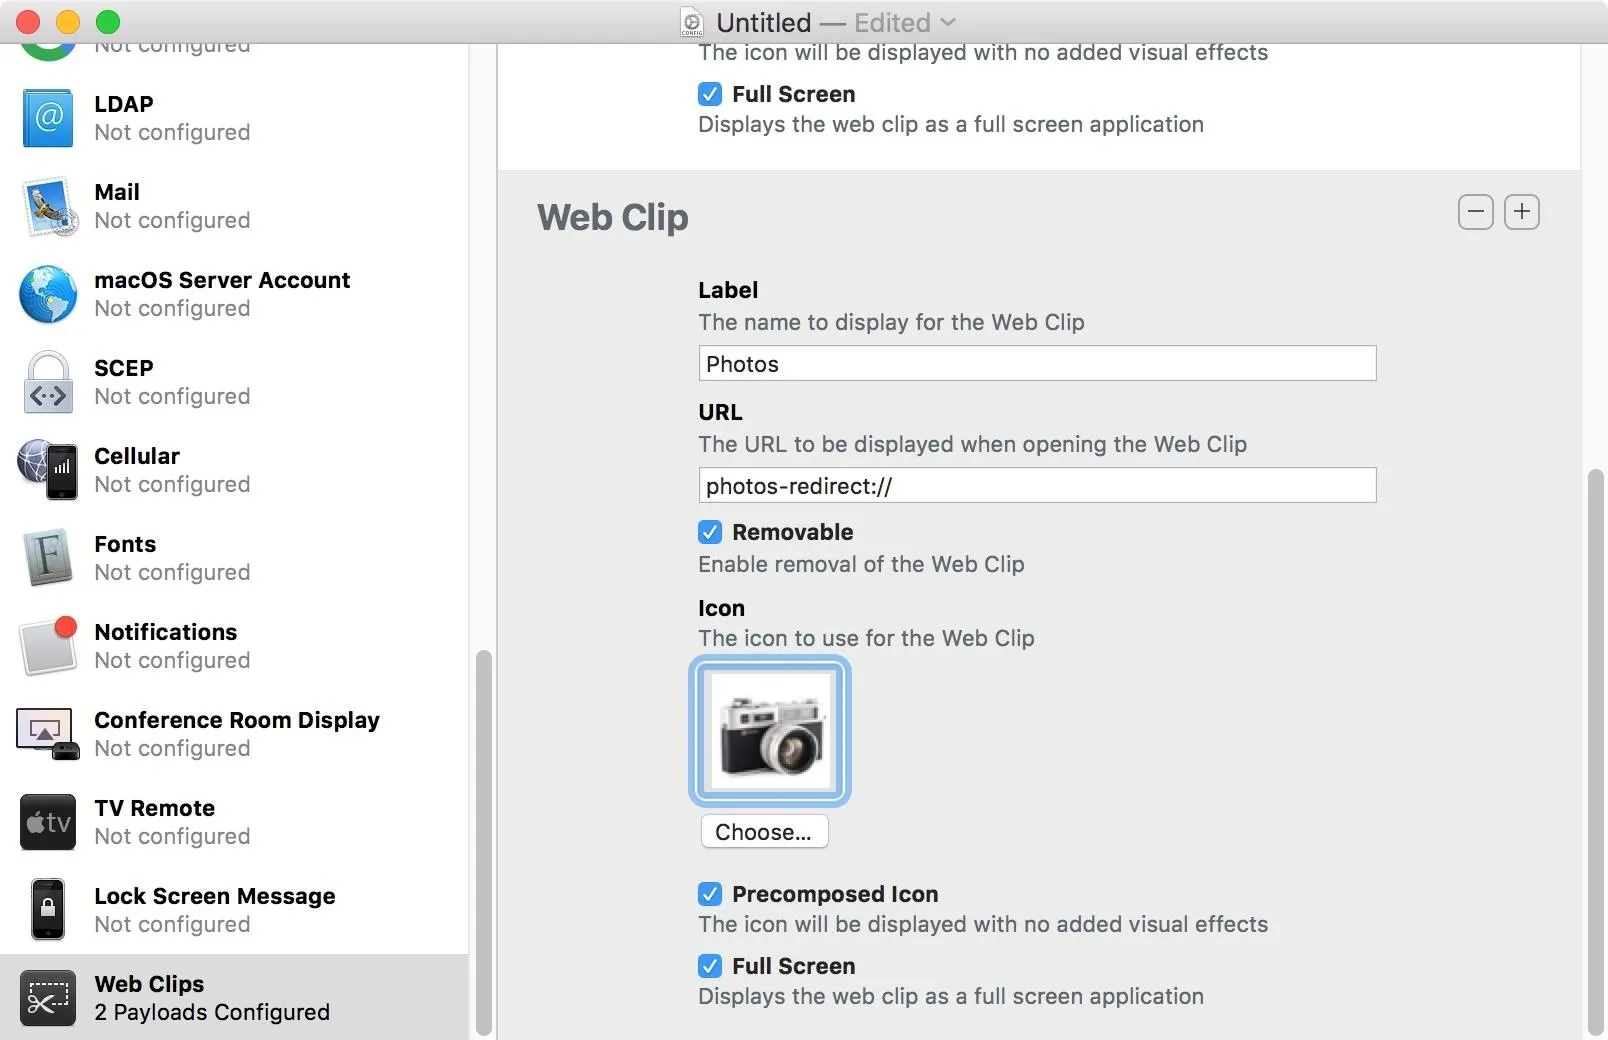
Once finished here, scroll down the sidebar tab menu to the bottom to find "Web Clips." Select it, then click "Configure." This is where you create your new icons.
In the Label field, type in the name of the icon you'd like to create. Ideally, it should match the corresponding app. Next up, URL. This field is looking for the URL scheme name for this bookmark's corresponding app. Unfortunately, this information can be tricky to find for each iOS app, but you can check out our always-updated list of URL scheme names for iOS apps to find the right thing for your app-in-question.
Make sure "Removable" is checked. You don't want that icon frozen on your home screen. Also, check the "Precomposed Icon" box as well as the "Full Screen" box before continuing.
Now, the part you've been waiting for — the icon itself. Here, you can choose an image from your Mac to use as this bookmark's icon. Unfortunately, your iPhone is very picky about what images it uses for icons, so you'll need to make sure yours is less than 1.4 MB.
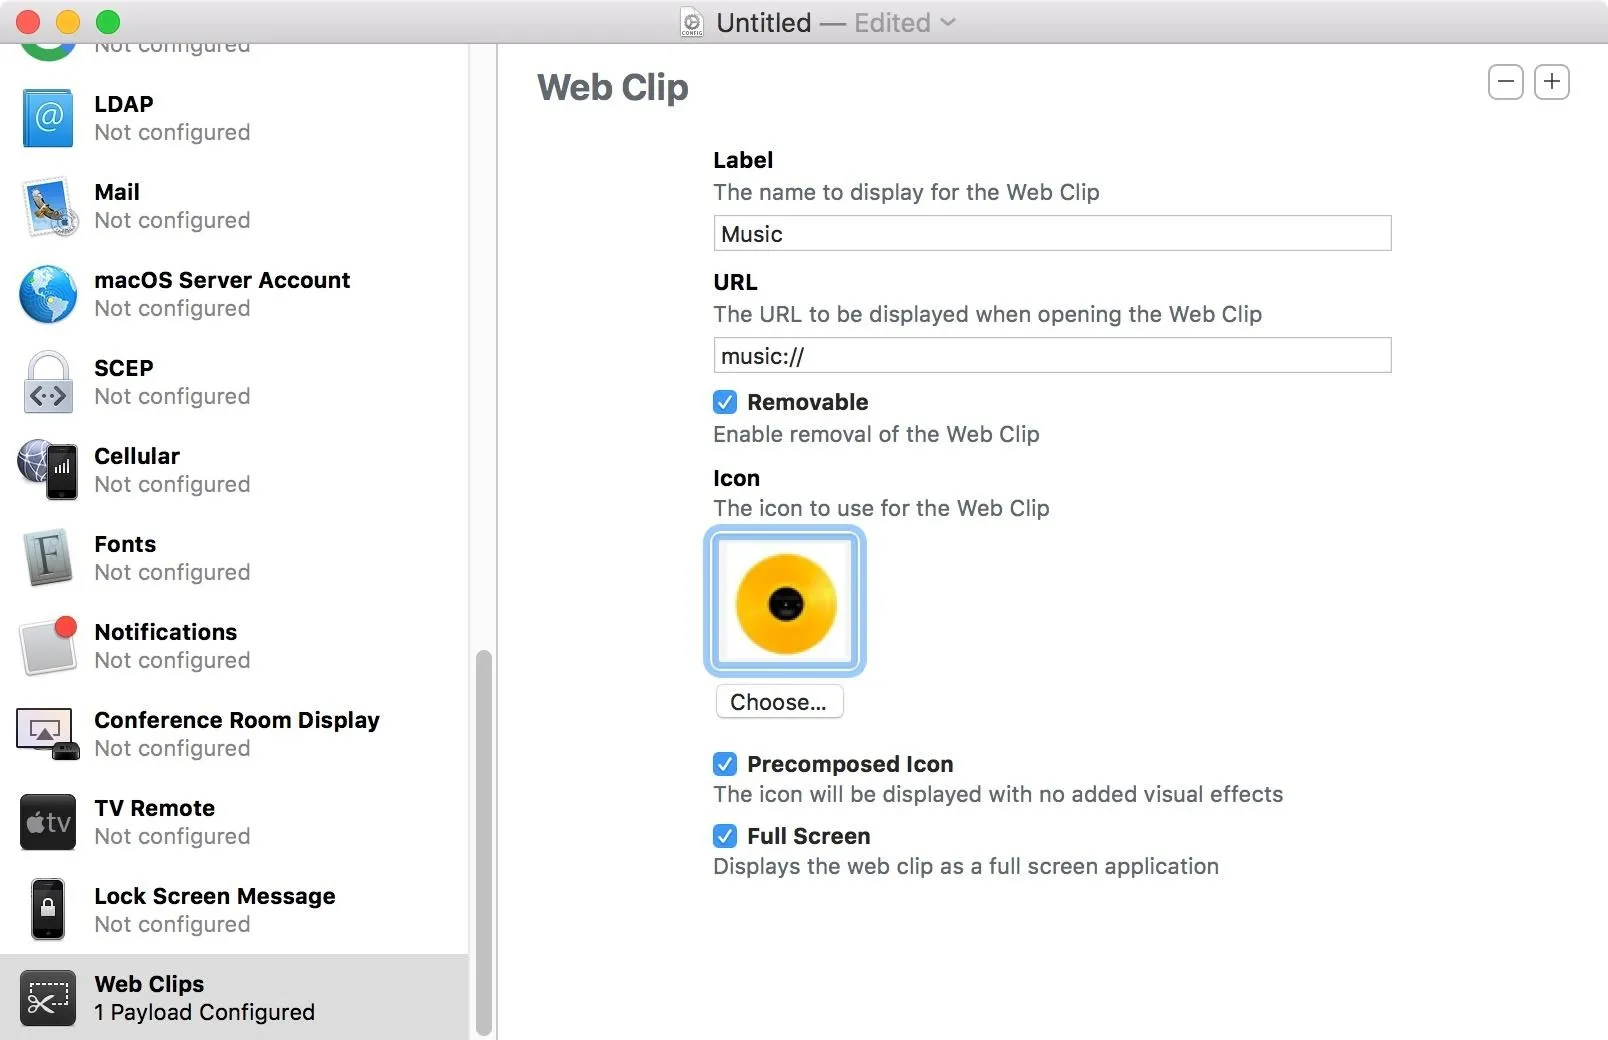
You can repeat this process for as many bookmarks as you like by tapping the (+) symbol in the top-right corner of the Web Clip box. You can tap the (–) symbol to delete a bookmark, too, but make sure you tap the symbol corresponding to the bookmark you'd like to delete.
Save the Profile
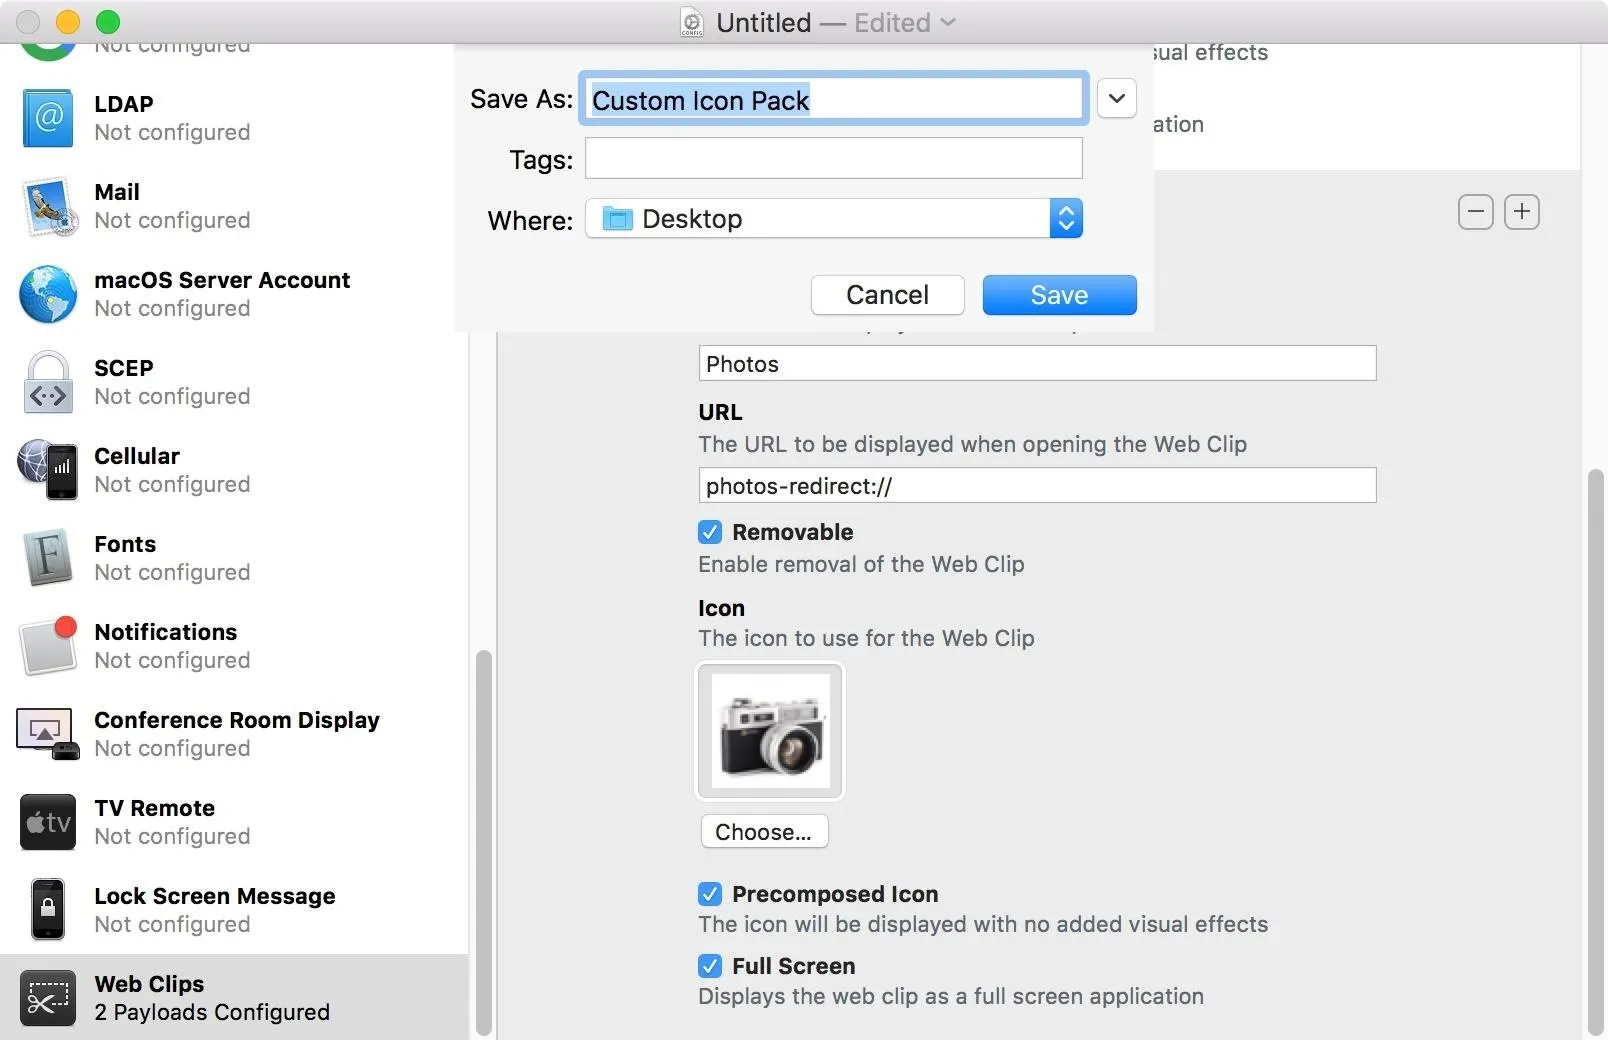
Once you have created all the bookmarks you'd like, you should save your profile. You can save by going to "File," then "Save" in the menu bar, or just by pressing Command-S. If this is the first time you're saving the profile, your Mac will ask you to select a destination for it. Make sure to keep track of where you save your profile, as you'll need to retrieve it during the next step.
Export the Profile
Once you have created all the bookmarks you'd like, you can export the entire profile to your iPhone for use. Connect your iPhone to your Mac, then "Trust" your computer on your iPhone if it's not already trusted.
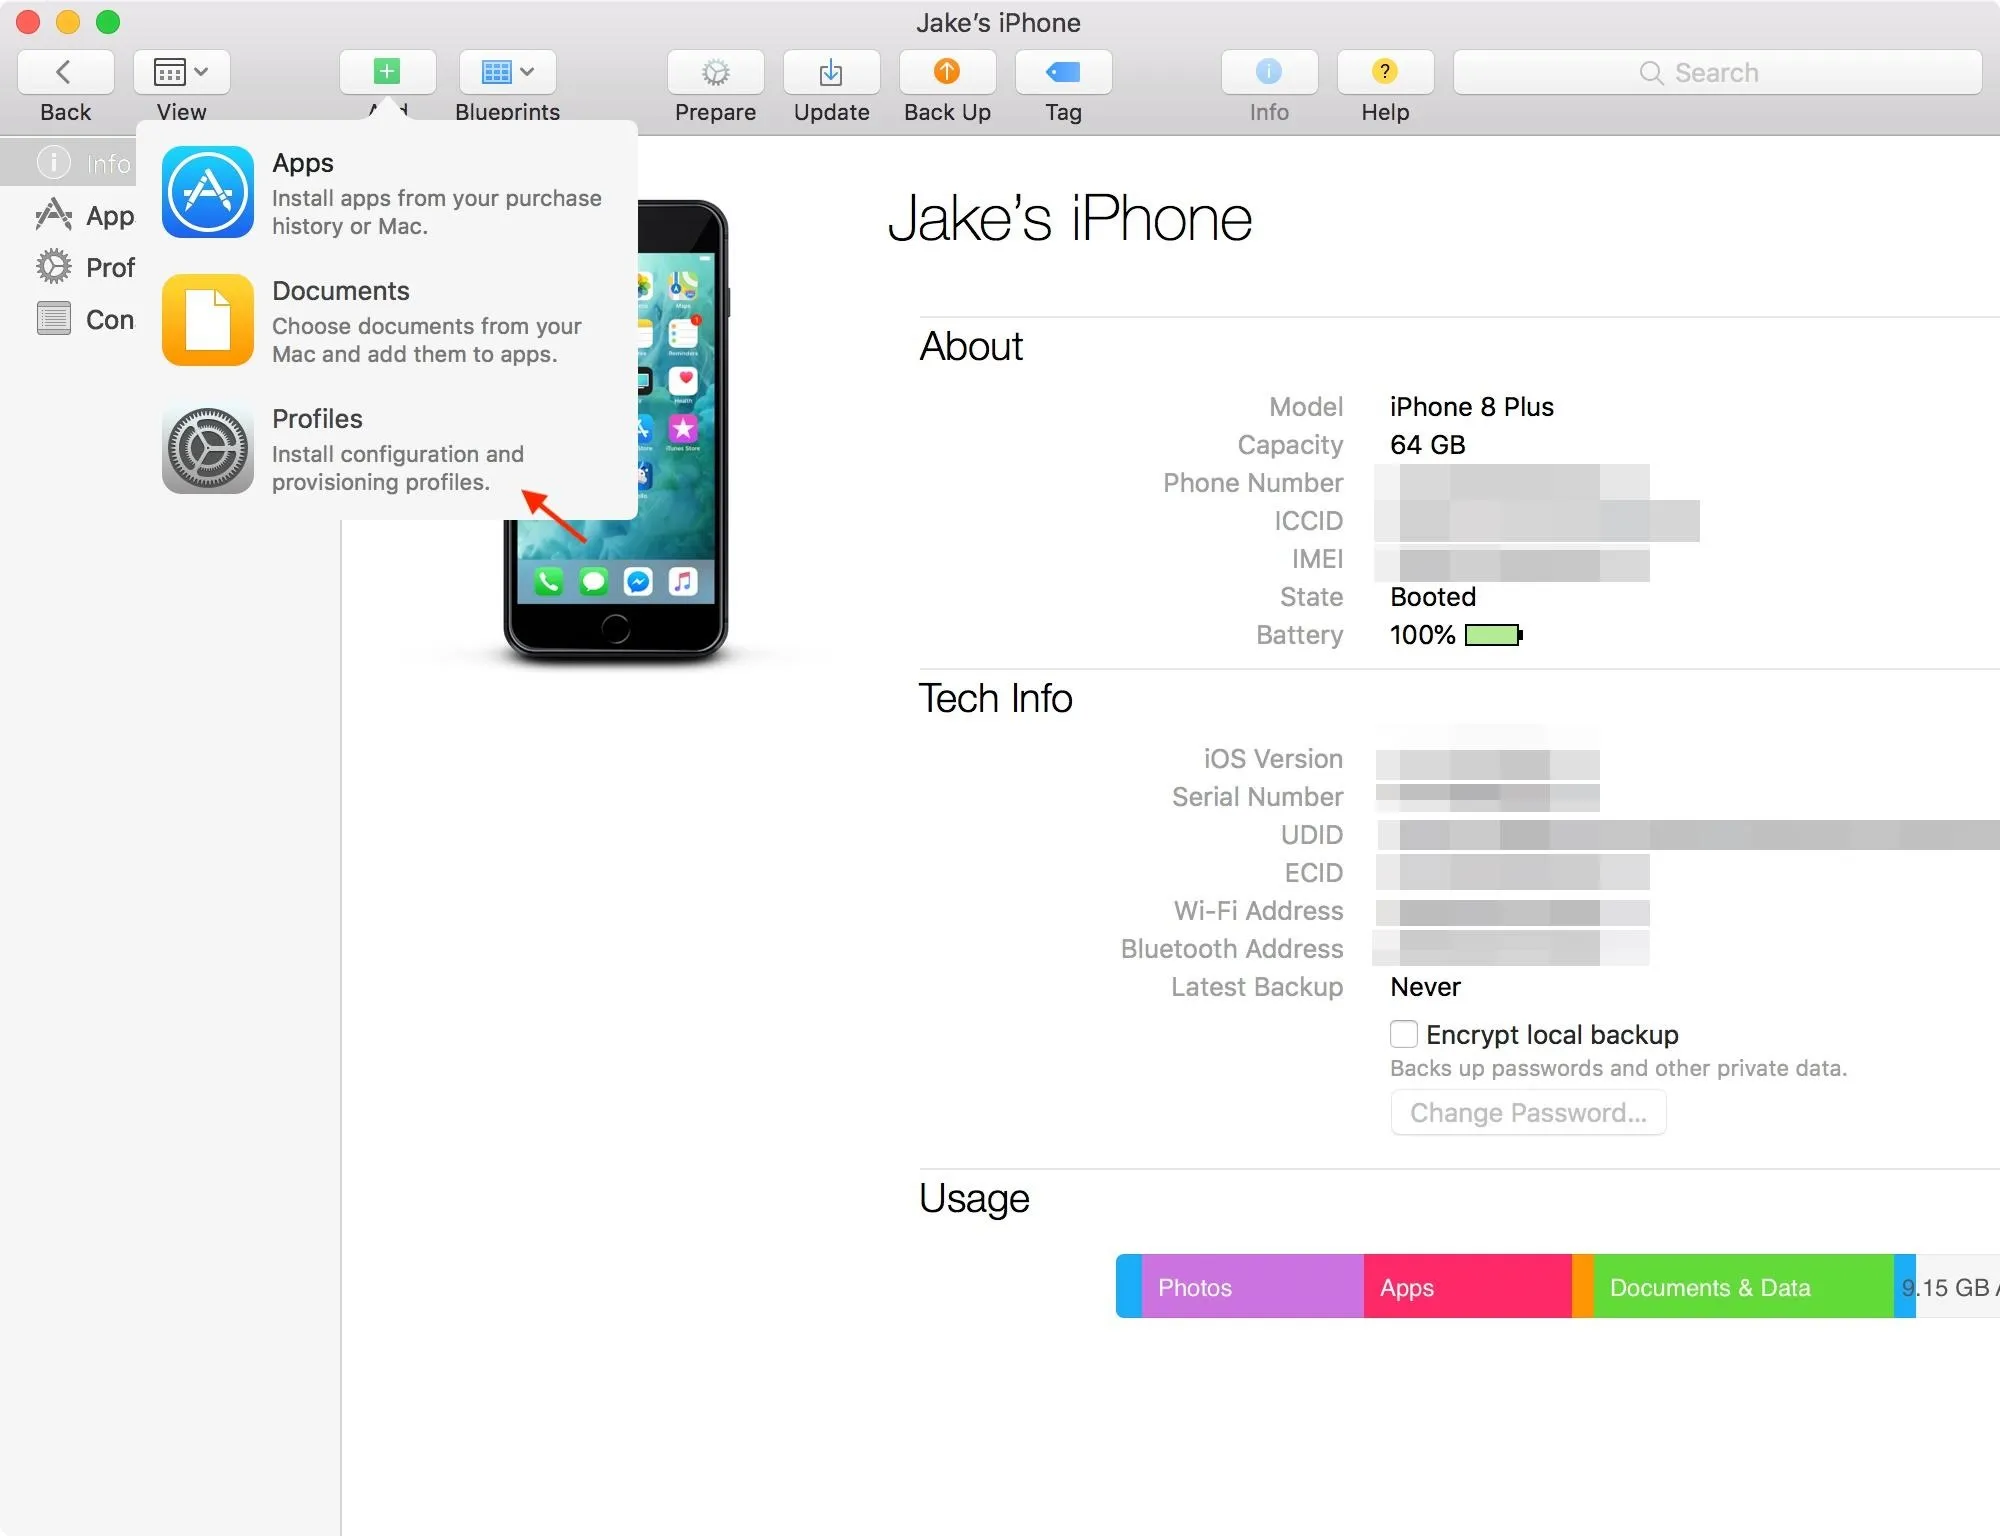
You should see your iPhone load in Apple Configurator 2's main window (you may have to unlock your iPhone to proceed). Double-click on your iPhone's image, then select "Actions" in the menu bar, then "Add" and "Profiles." Alternatively, you could just click the "Add" button in the toolbar, then click "Profiles."
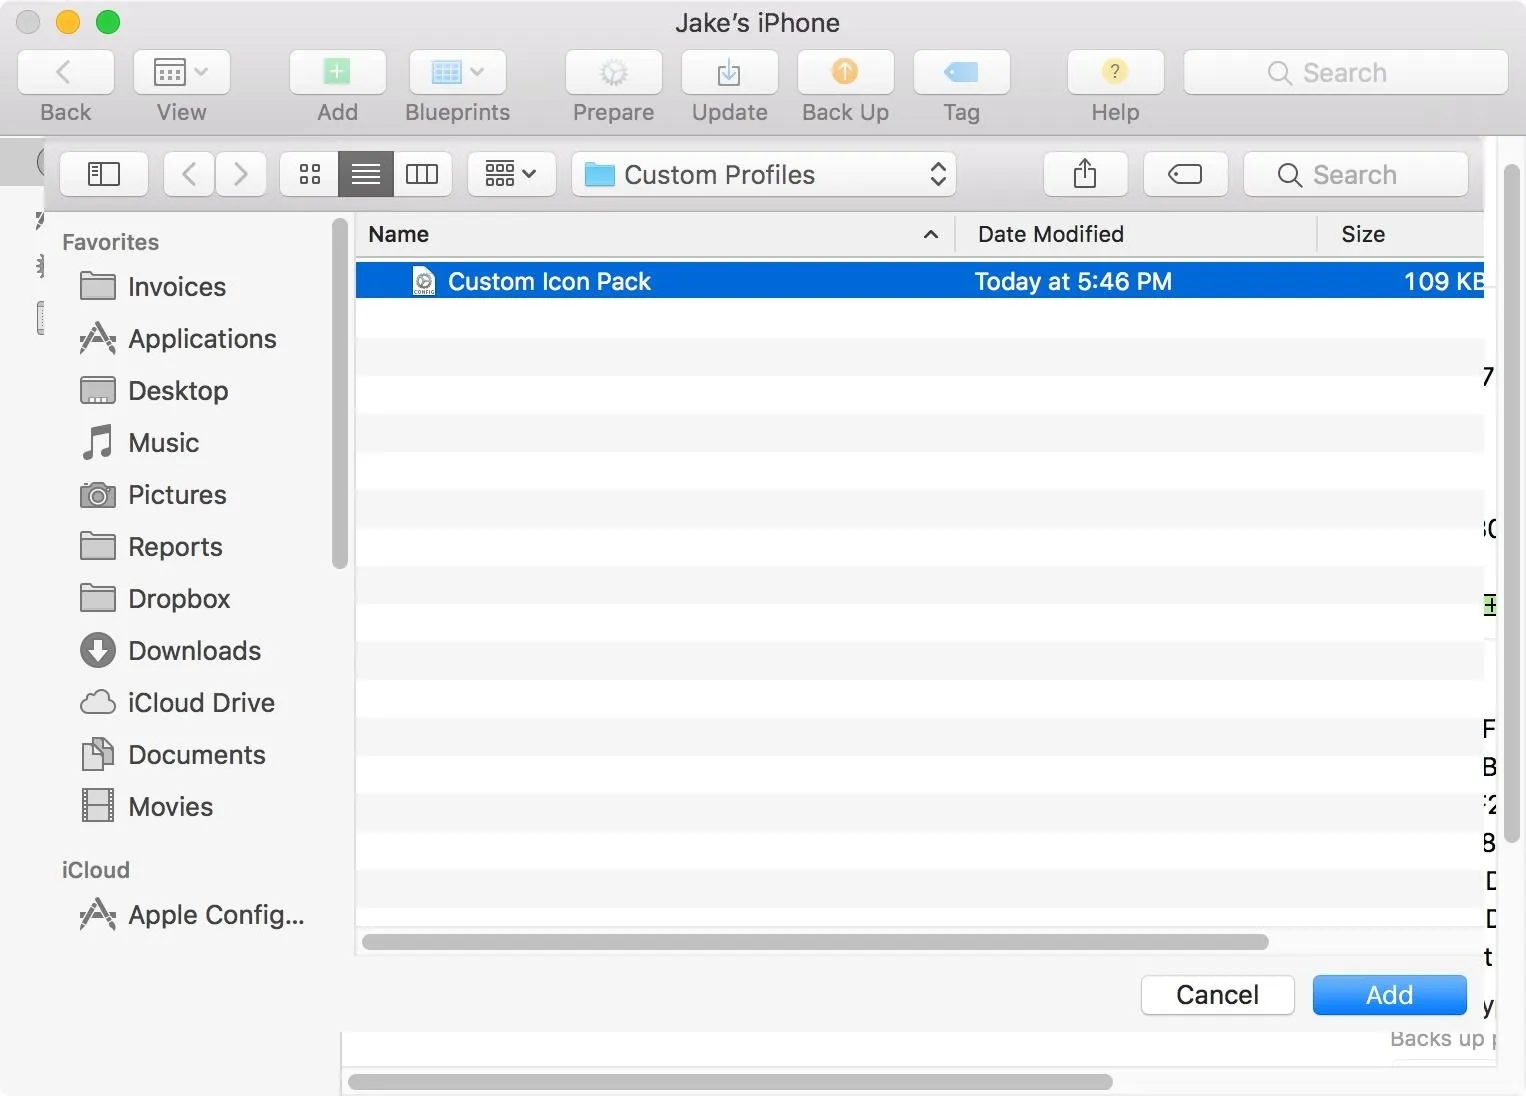
Apple Configurator 2 will then bring up a Finder window. Find and select your custom profile, then tap the Add" button.
From here, it's out of your Mac's hands. Turn to your iPhone, which should have automatically loaded up the profile. Tap "Install," then, when prompted, enter your passcode. Tap "Install" again, then tap the red "Install" popup at the bottom of the display. If the profile works, you should see "Done" in the top-right corner of the display.
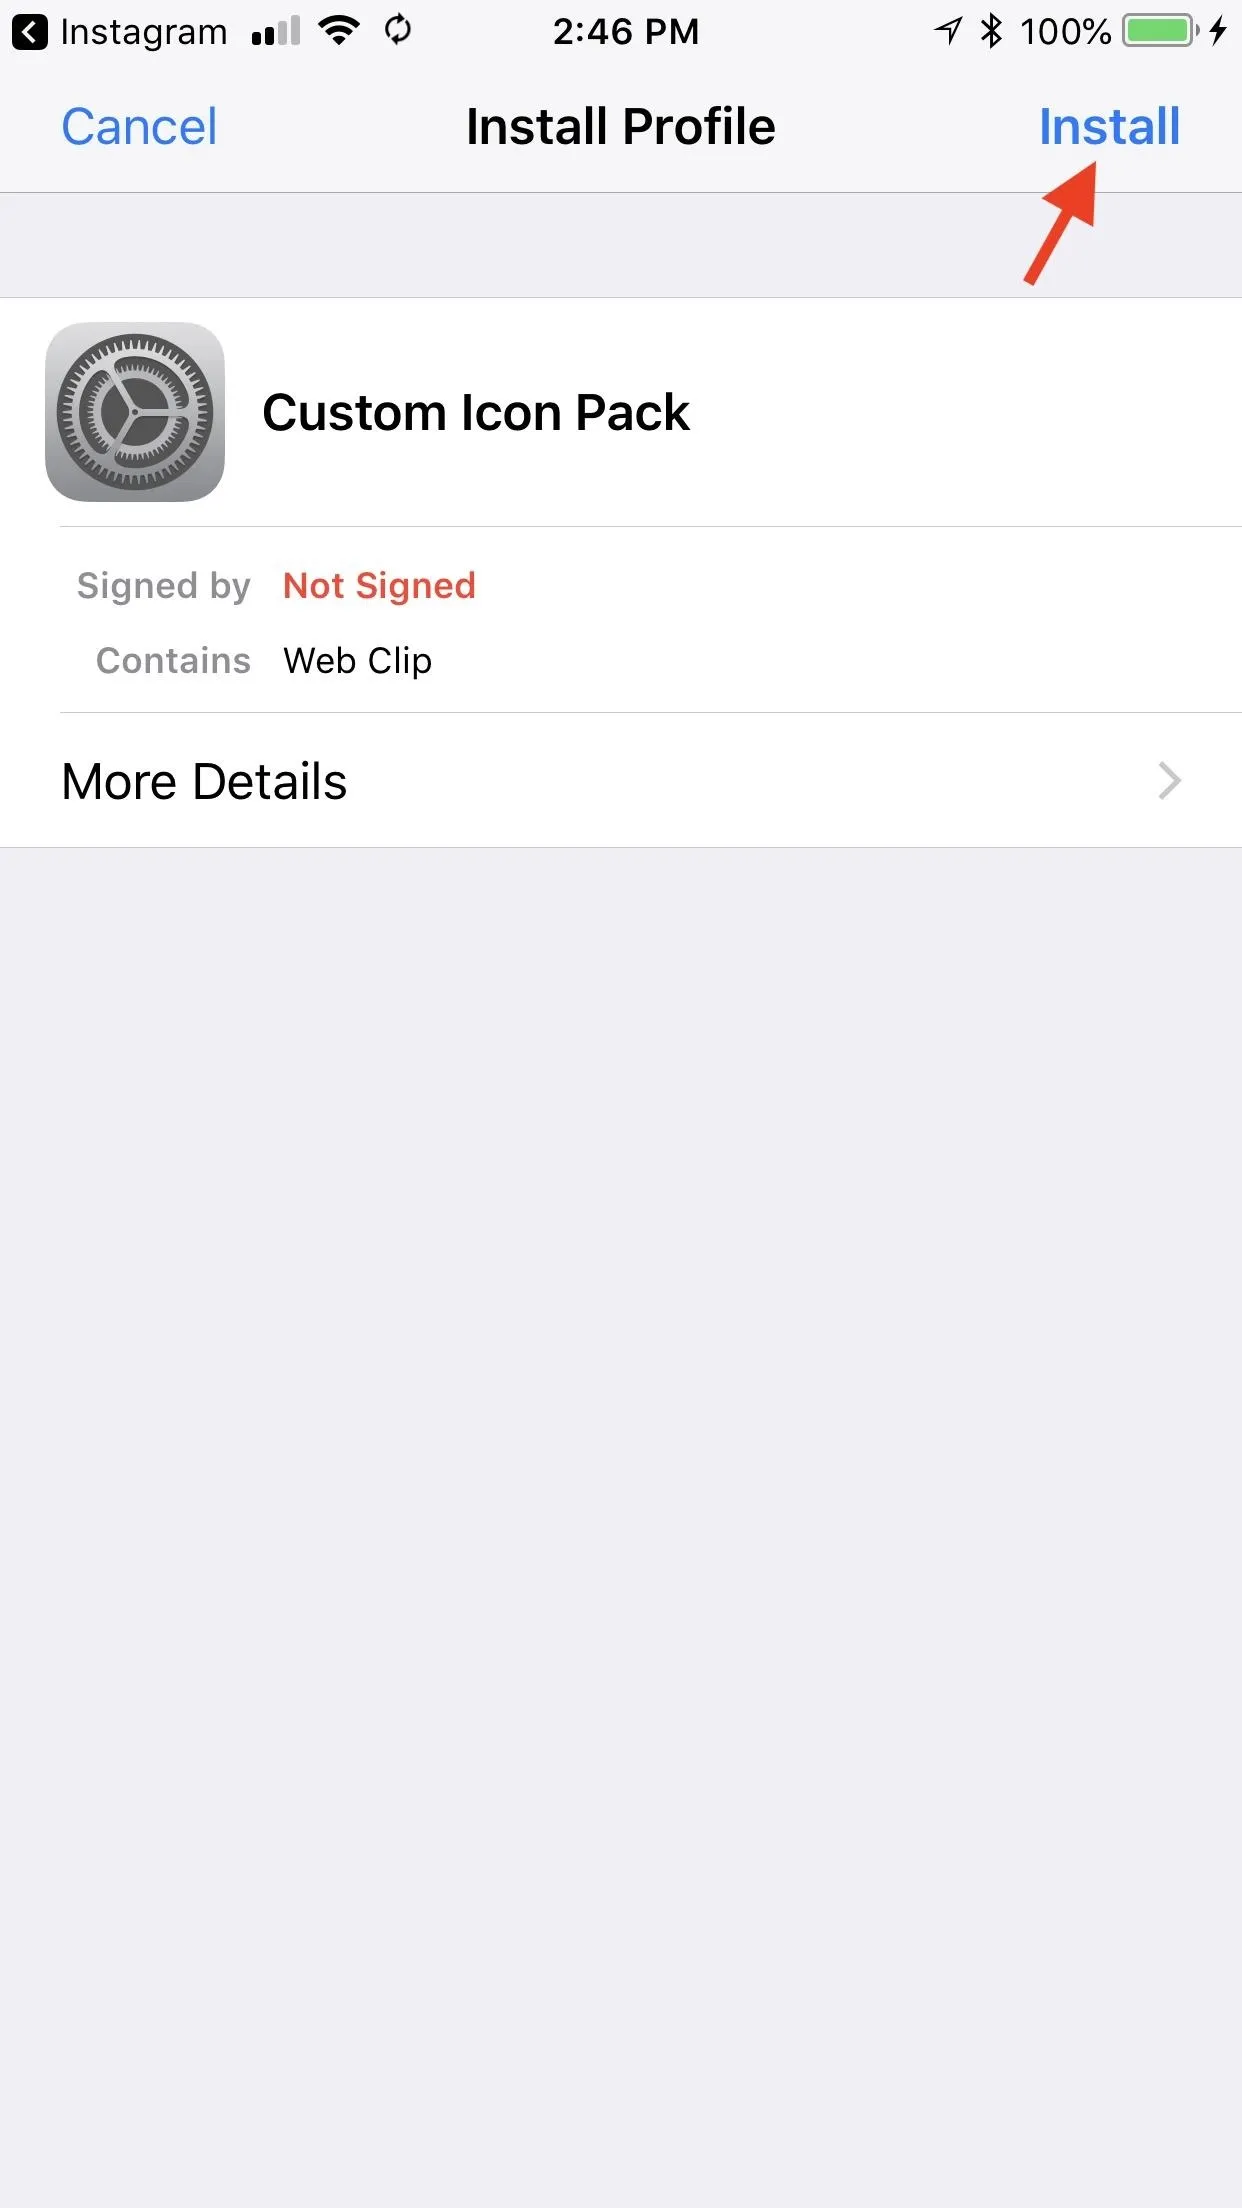
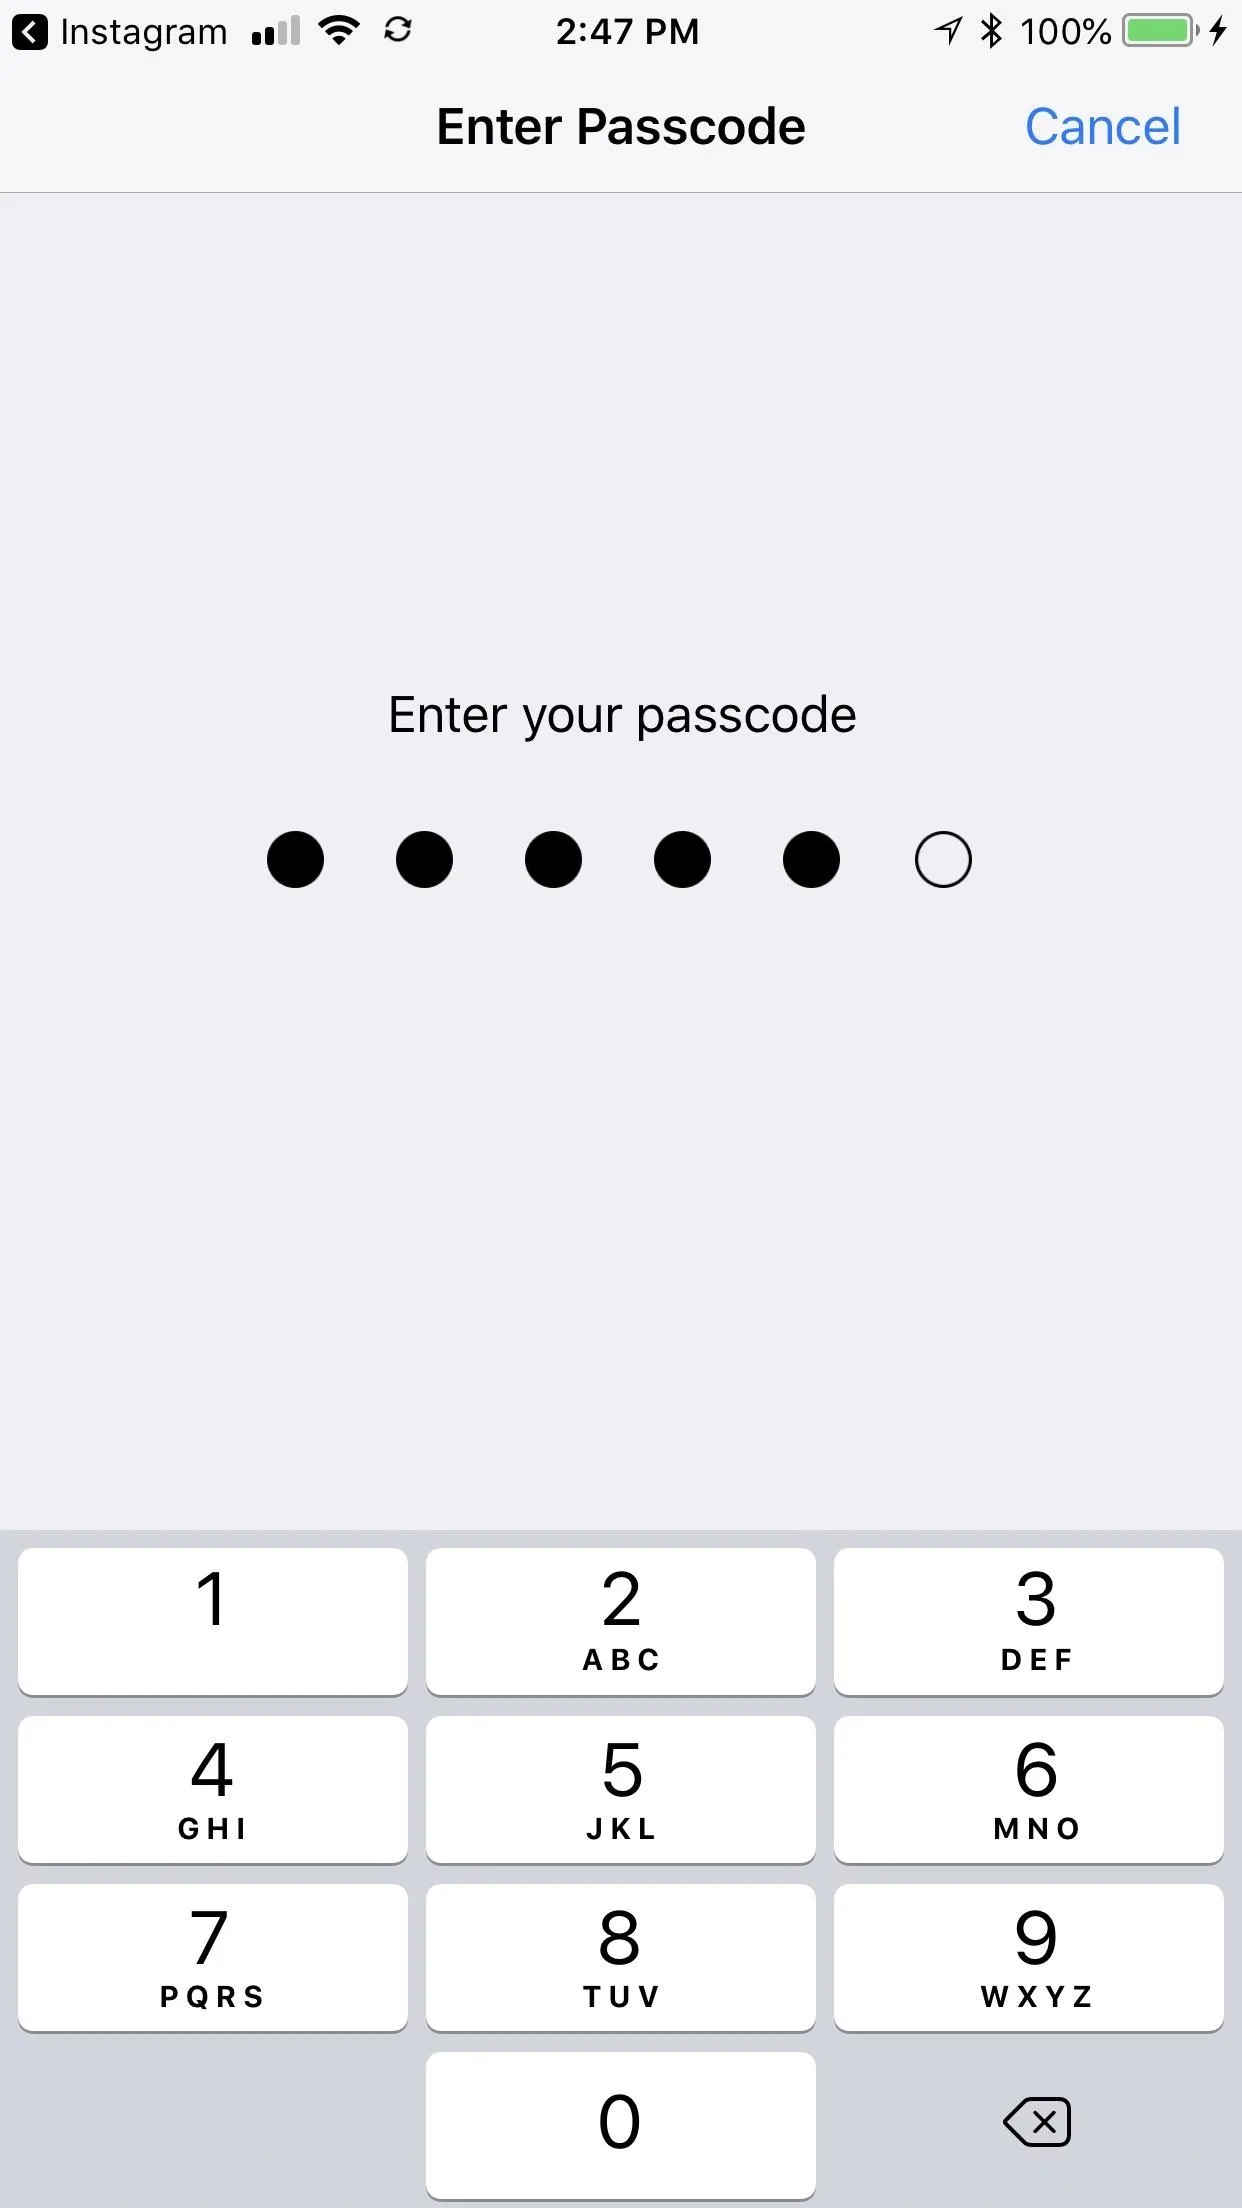
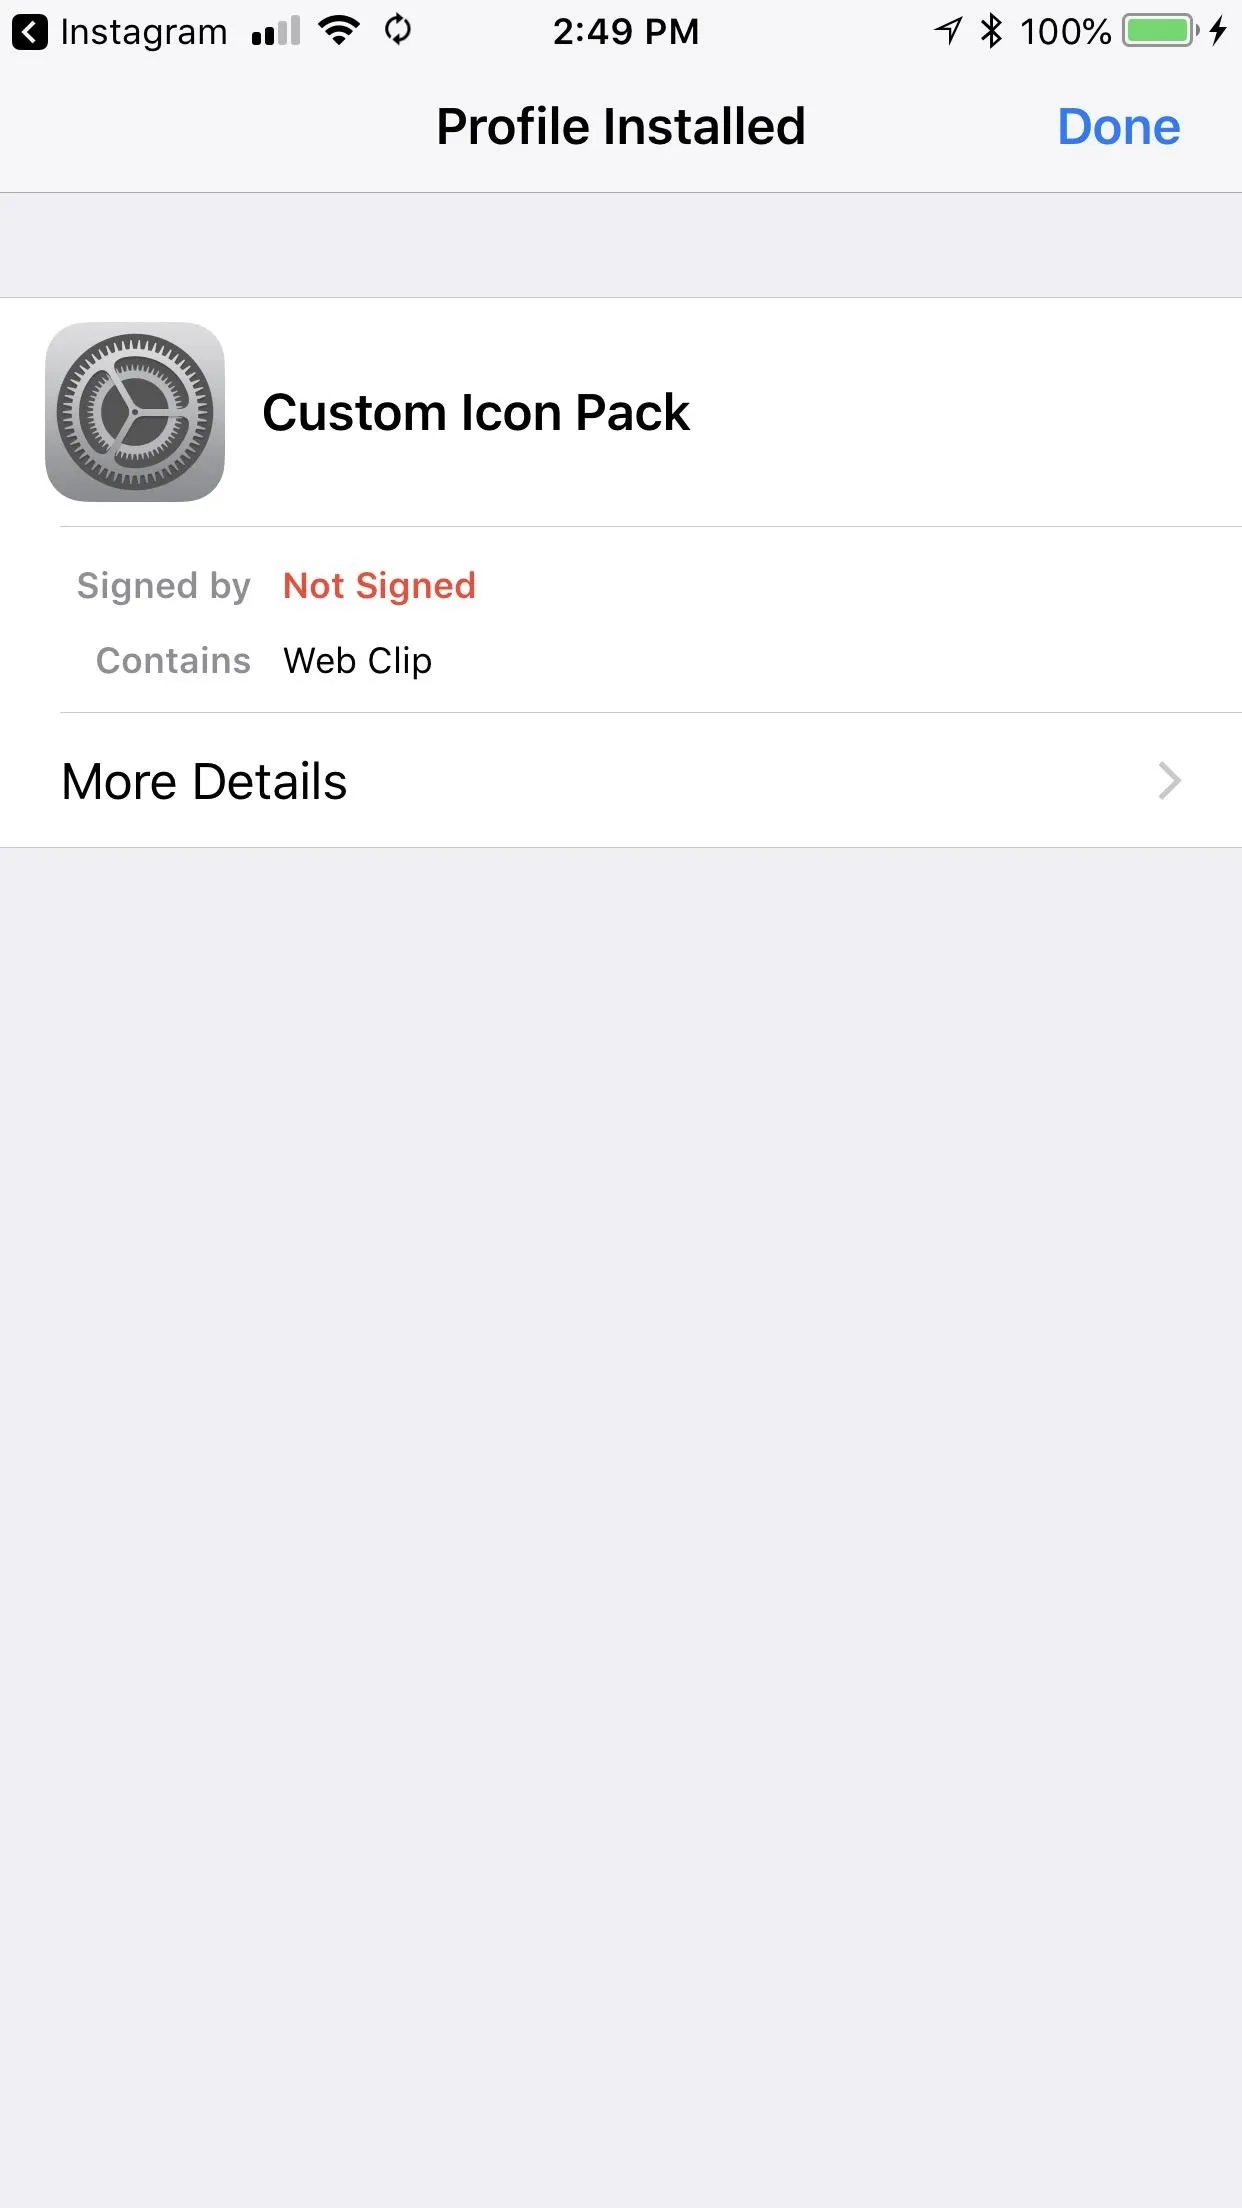


If you receive an error message on your iPhone, however, there's something wrong with the profile and thus cannot be installed. In my experience, if you've checked and your profile follows all the steps above, there's an issue with the image you've selected as your icon. Try using another image and see if the profile takes.
Enjoy Your New App Icons
If the profile took, congratulations! You now have a suite of new icons to replace your old, stock ones. How you arrange things is up to you, but it might make sense to round up the real apps into one folder or home screen page to keep things clean. You want to make the original apps as unnoticeable as possible, otherwise what's the point of these custom icons to begin with?
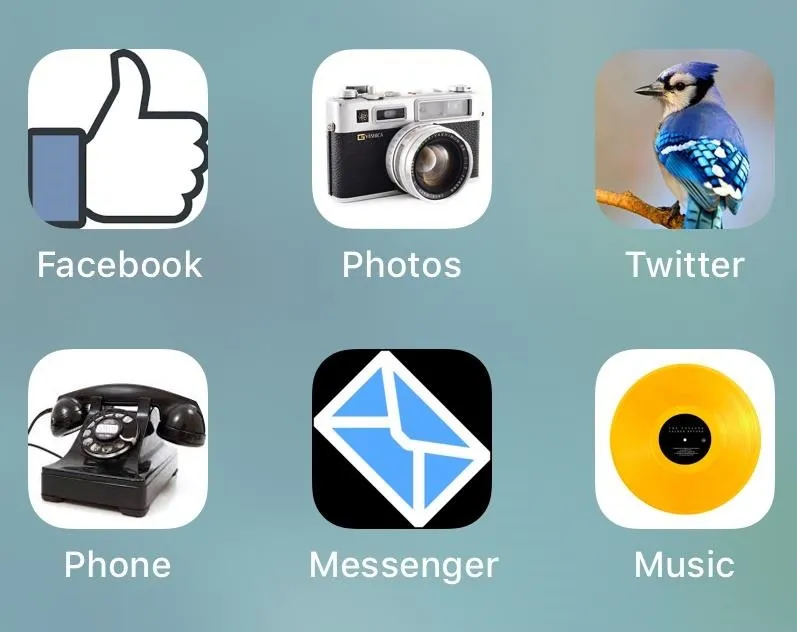
If you find that one of your bookmarks does not open the correct app — or anything at all — dive back into the "Web Clips" section of the profile. Double check the URL scheme name for the app in question and make sure it reflects what you see on our list or in the app's IPA file.
Cover image and screenshots by Jake Peterson/Gadget Hacks


![Short Cuts (The Criterion Collection) [Blu-ray]](https://m.media-amazon.com/images/I/712N05DgTZL._AC_UY218_.jpg)


Comments
Be the first, drop a comment!