In iOS 13, Safari has become even more powerful, especially when it comes to privacy. The browser will warn you when you create a weak password for a new account. Your history and synced tabs in iCloud are end-to-end encrypted now. And there are per-site settings that let you choose which domains can and can't have permission to use particular device hardware or sensors.
By device hardware and sensors, we mean your camera, mics, and location data. Before, if a website needed access to any of those, you gave it access indefinitely. At least, until you cleared your website data or turned off access to your camera, microphone, and location services for Safari altogether. Now, in iOS 13, you can choose exactly which websites can access what information on your iPhone.
- Don't Miss: 200+ Exciting New iOS 13 Features for iPhone
Want only one website to be able to use your camera? You can set that up. What if there are only a couple of webpages you need to give permission to use your microphones or current location? You can customize those sites to do just that. Managing device permissions in iOS 13 couldn't be easier.
Customize Device Permissions from Safari
By default, Safari will always ask you if you'd like to "Allow" or "Don't Allow" a website access to your camera, microphone, or current location whenever that website requests permission. When that happens, obviously, you can allow or deny access. If you denied access and change your mind, you can always refresh the page to bring the prompt up again and enable it.
Anytime you interact with a prompt for access to either your camera, microphone, or current location, Safari adds fine-tuned controls to that website's settings. To access those settings, tap the "AA" icon in the address bar, then choose "Website Settings." Here, no matter what access was requested, you'll see "Camera," "Microphone," and "Location" under the Allow [Domain Name] to Access. If you don't see any of those, the site has not tried to access any permissions yet.


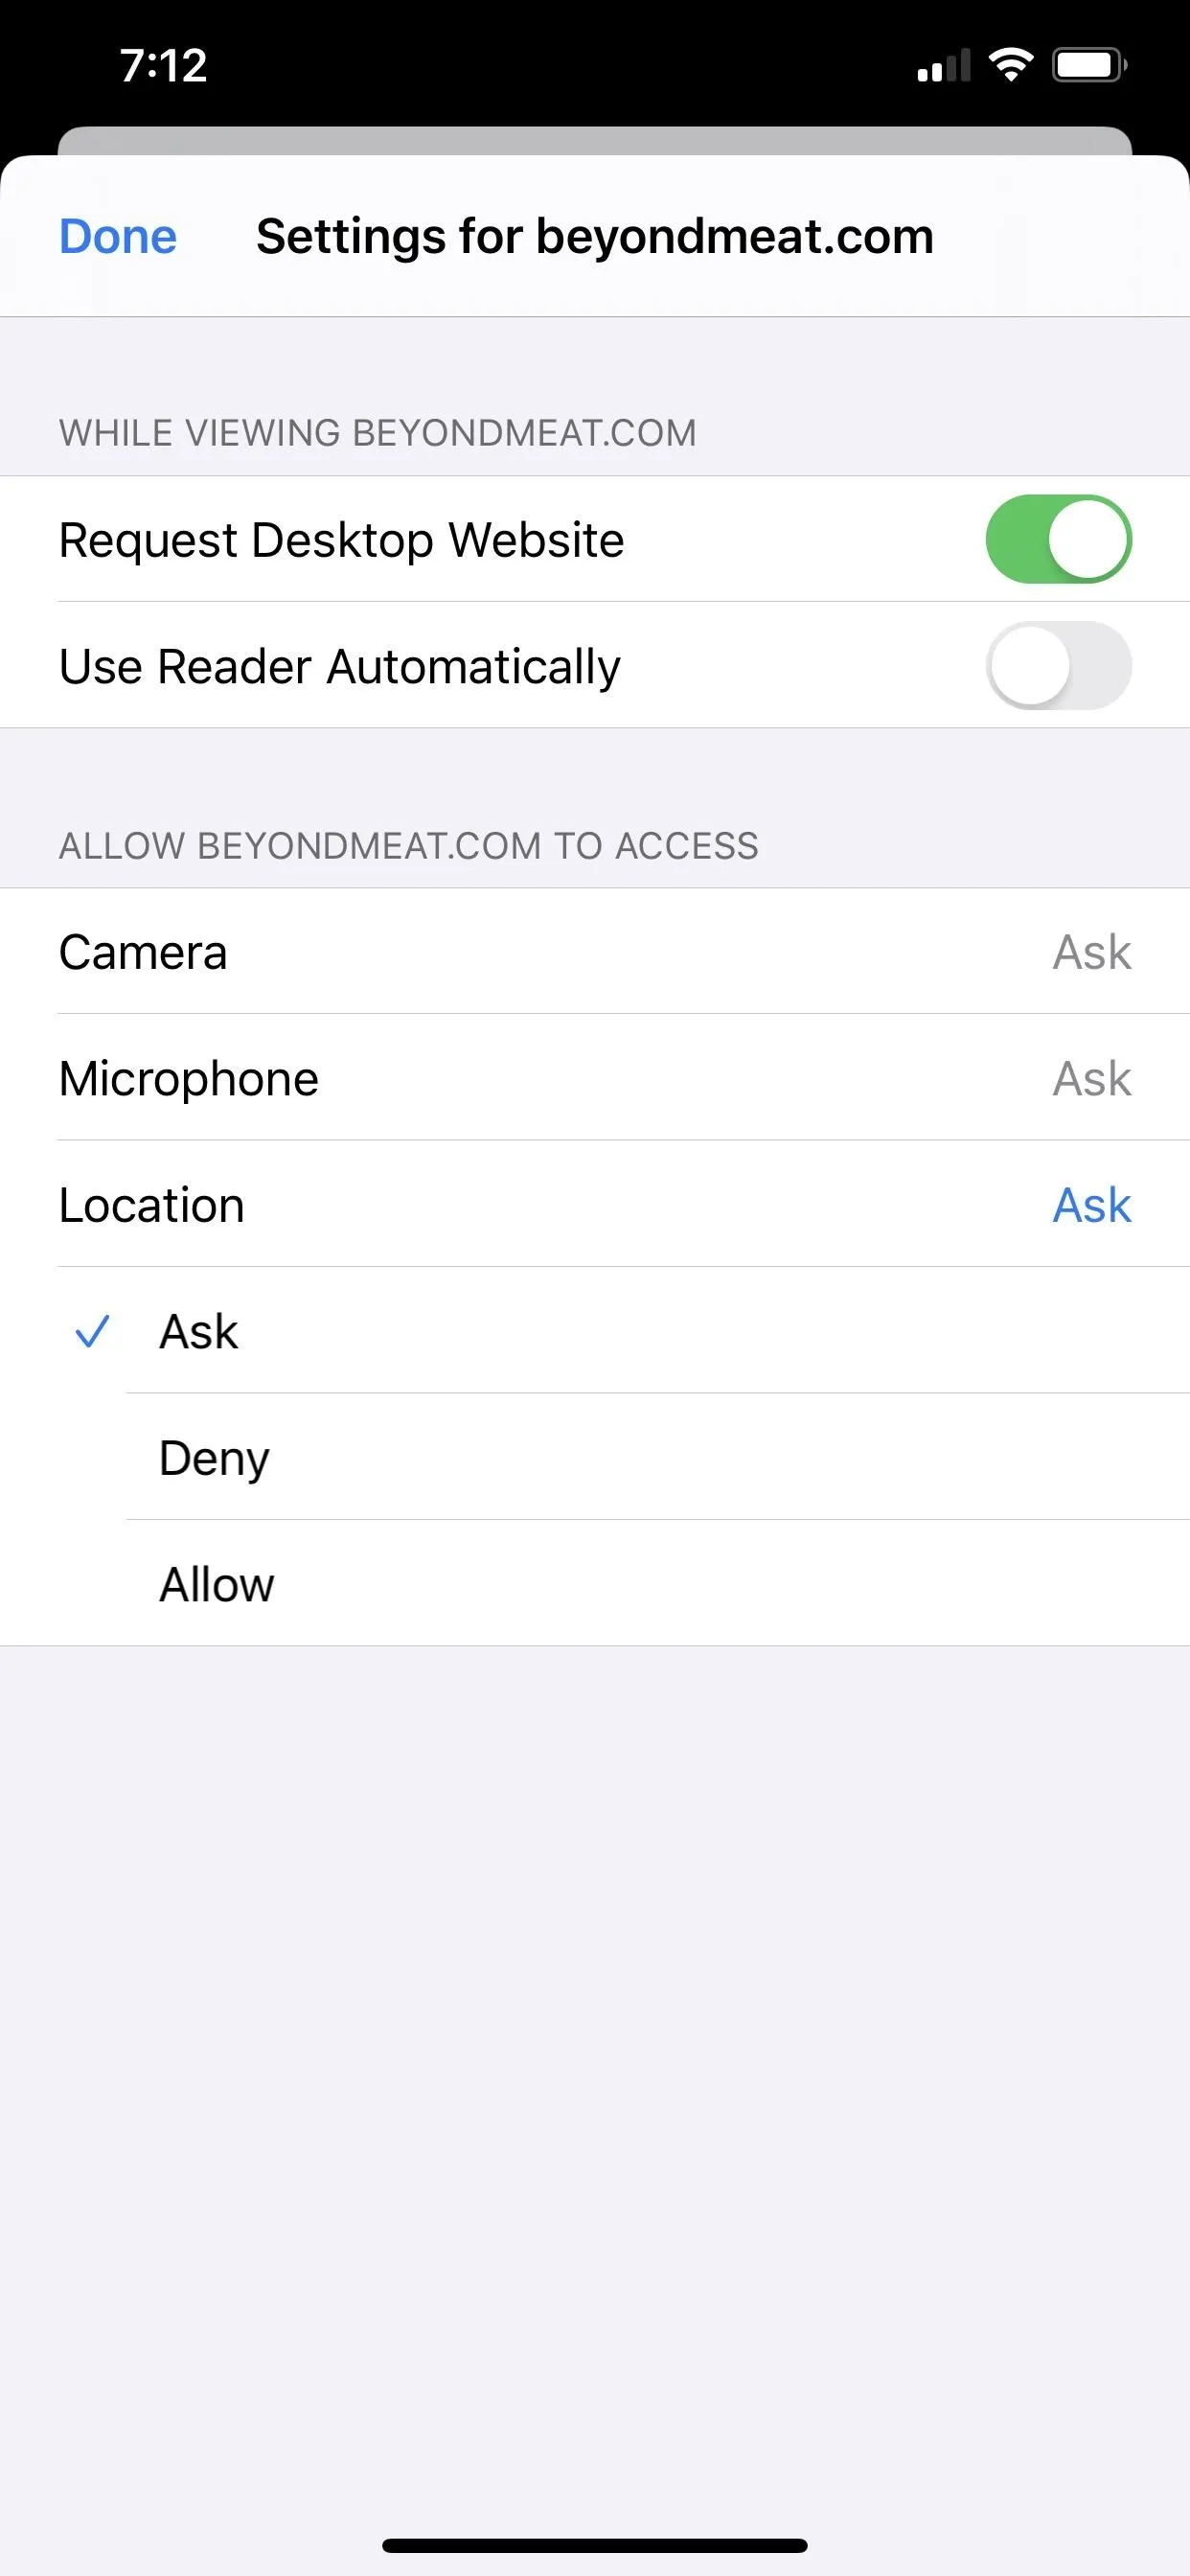


Each of the three permissions will be set to "Ask," but you can tap on each on to change it to either "Deny" or "Allow." The former will always prevent the website from getting or even asking permission, while the latter will grant them use always until you change your mind. With "Ask" set, it will simply ask you every time a site needs access.
Customize Device Permissions from Settings
You can also manage which sites requested permission to your camera, microphone, or current location from within Safari's main settings. Here, you can also adjust the default settings for all websites or sites you haven't set custom permissions for.
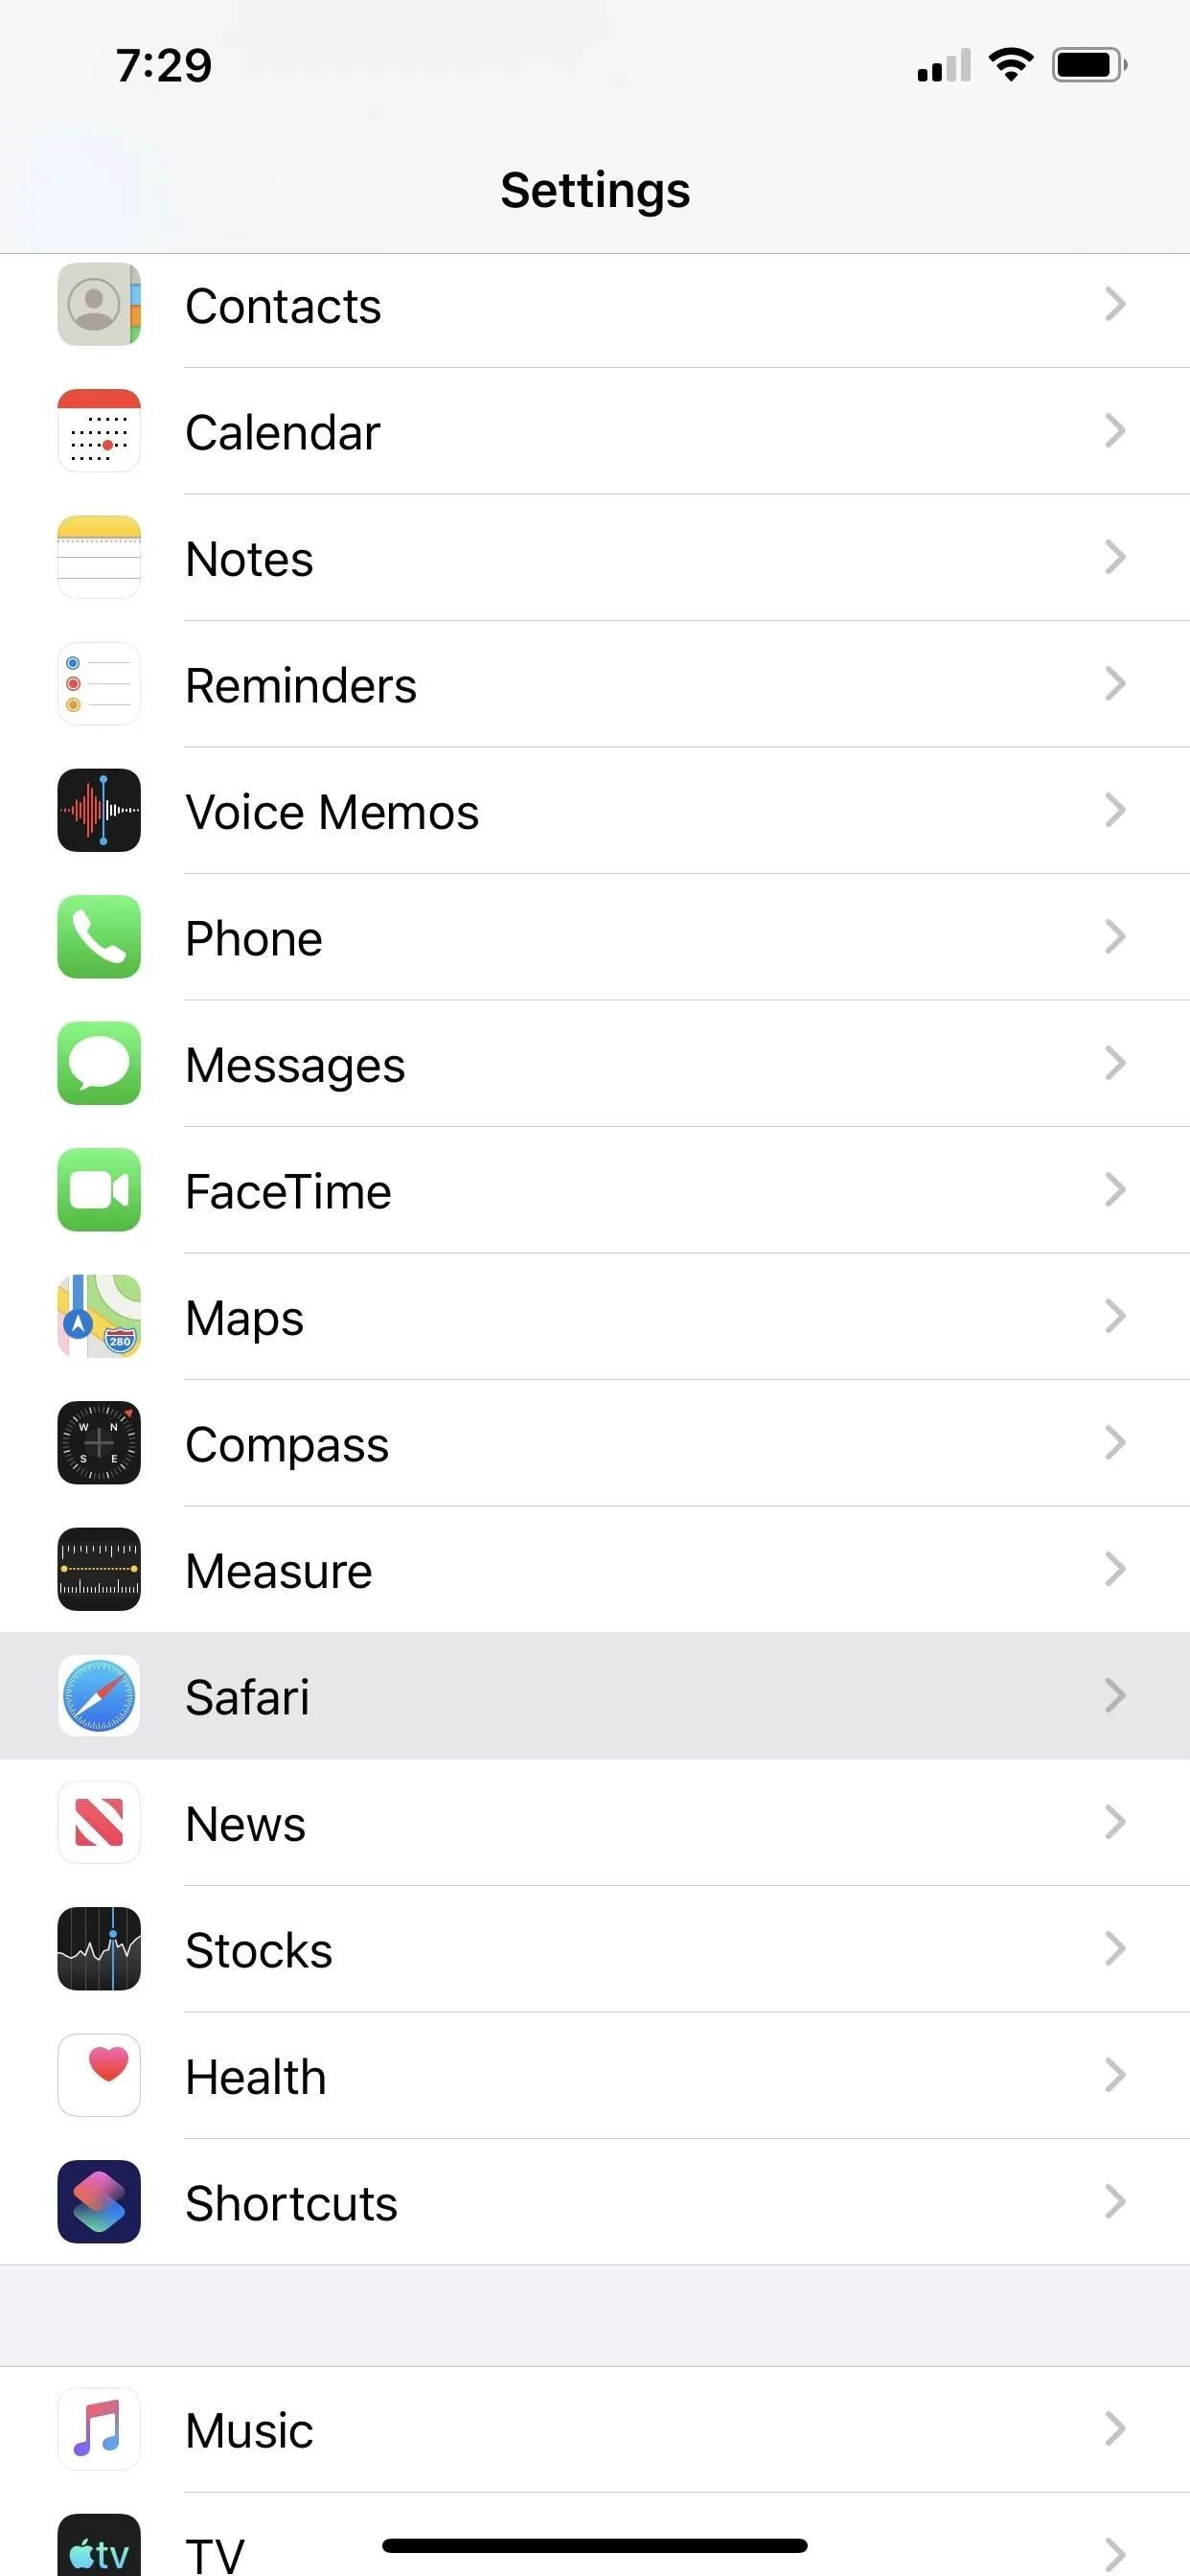
In the Settings app, tap "Safari," then find the Settings for Websites section. You'll see ways to manage settings for page zoom levels, desktop vs. mobile site defaults, and whether sites use Reader or not. Below those, you'll see the options for "Camera," "Microphone," and "Location."
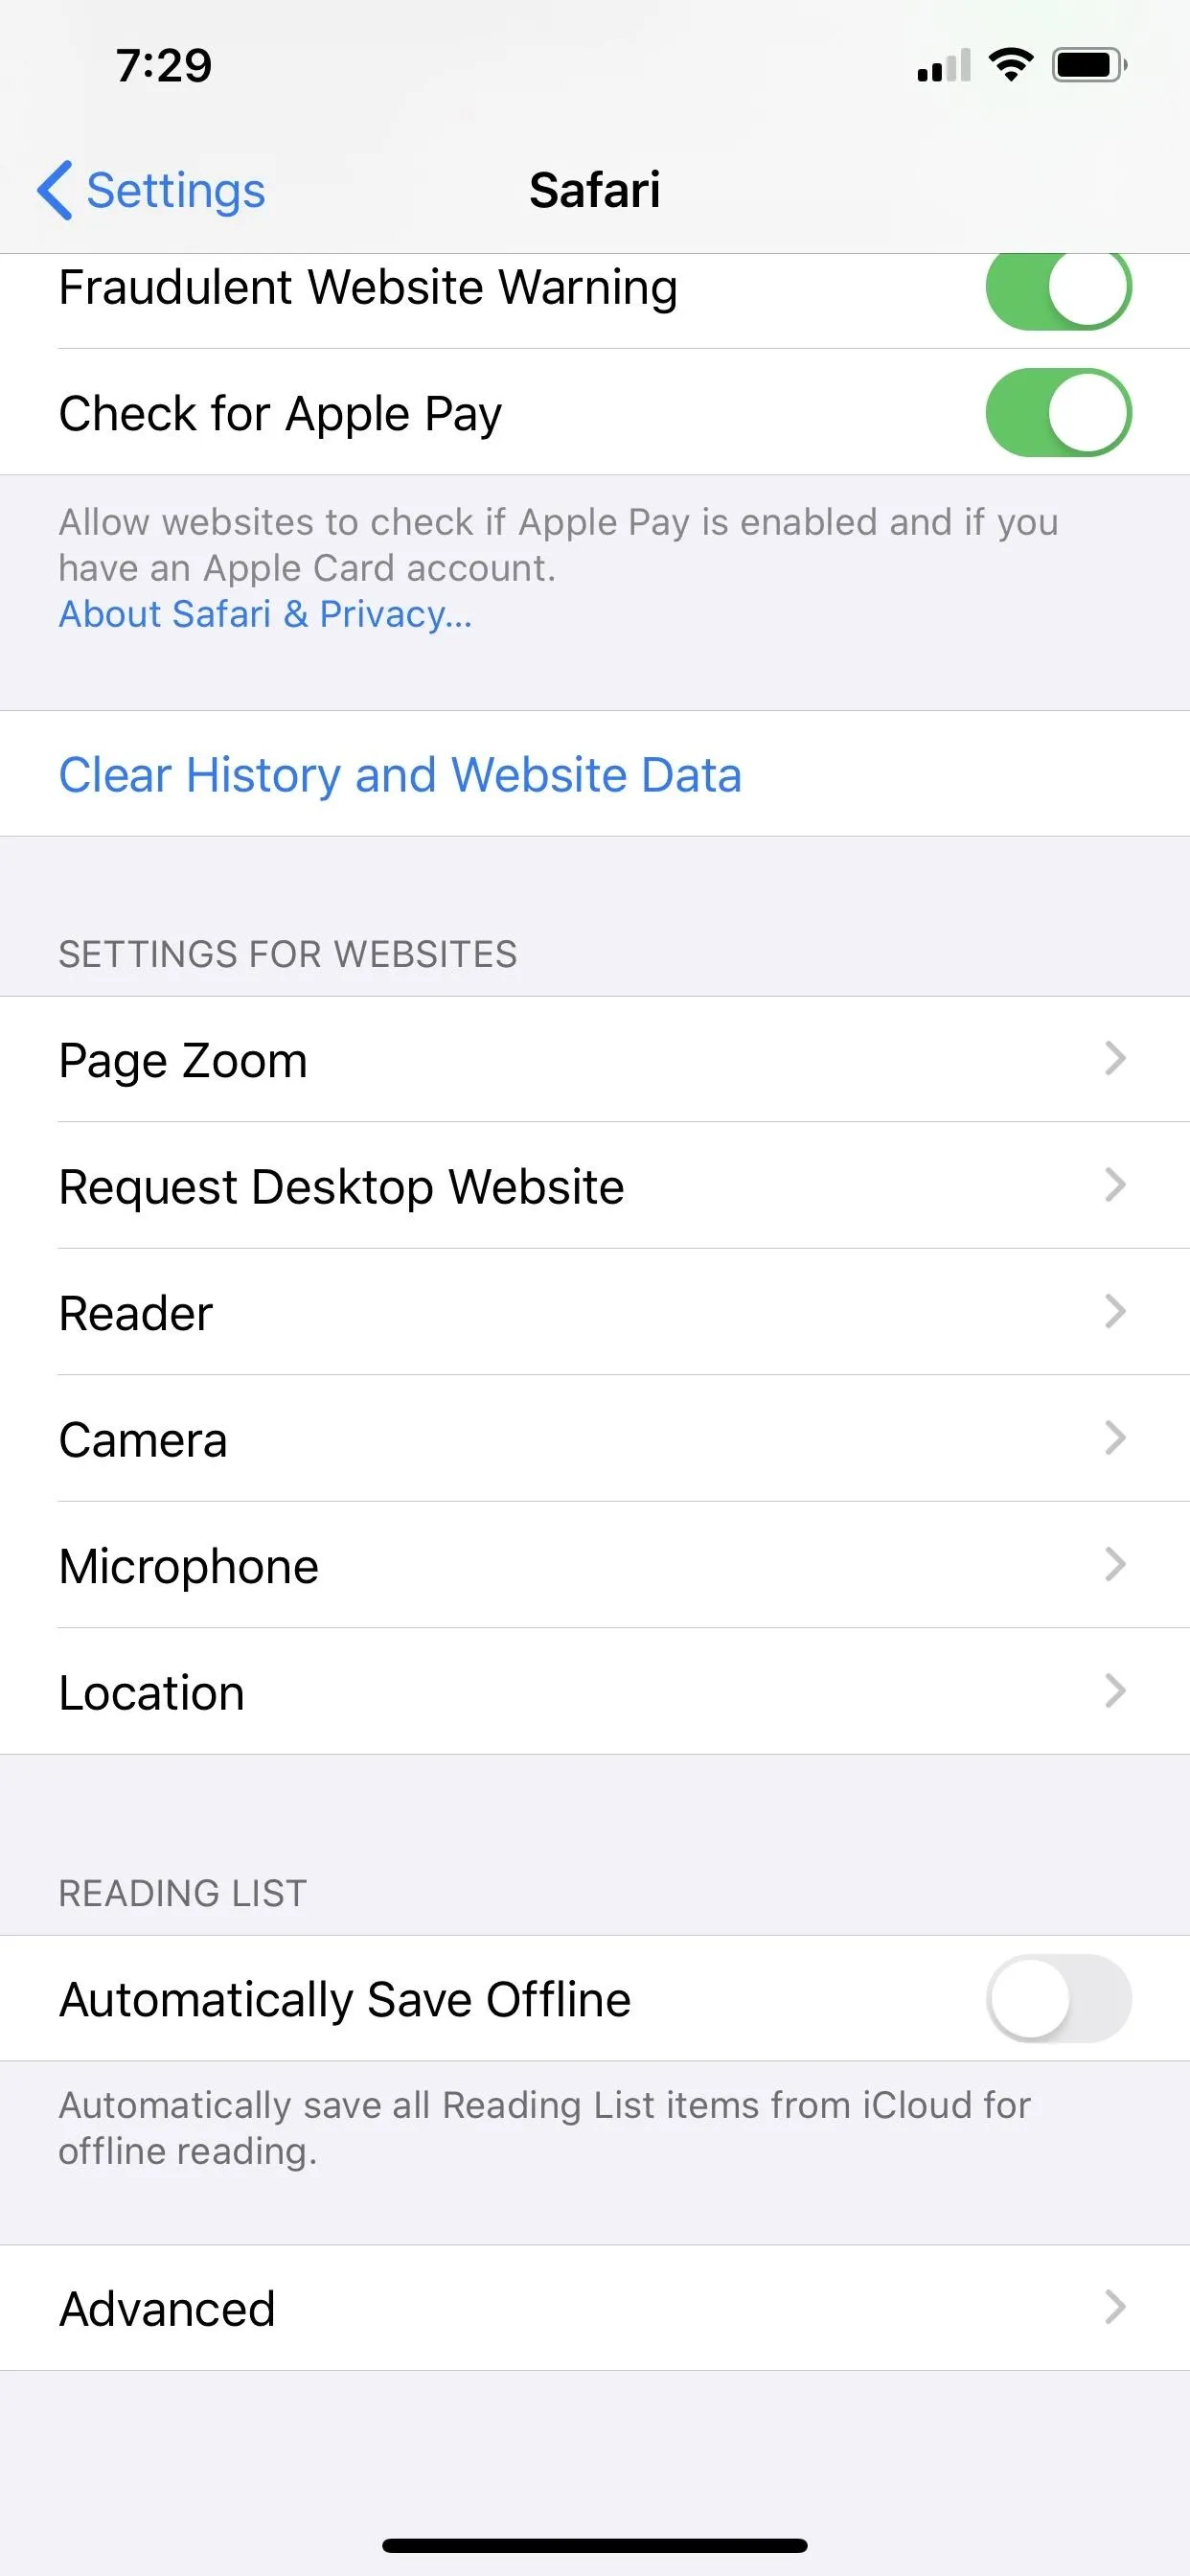


For each option, you can change the default setting to either forcing every website to "Ask" to use the sensor, "Deny" all websites' requests, or "Allow" all websites' requests. Ideally, for the default settings for Safari as a whole, we recommend switching to "Ask" as it provides the most control on a case-by-case basis.
If you gave specific websites permissions as seen in Option 1 above, they'd be listed first, then the default settings for all Other Websites below. You can tap on each website to change each one's settings.
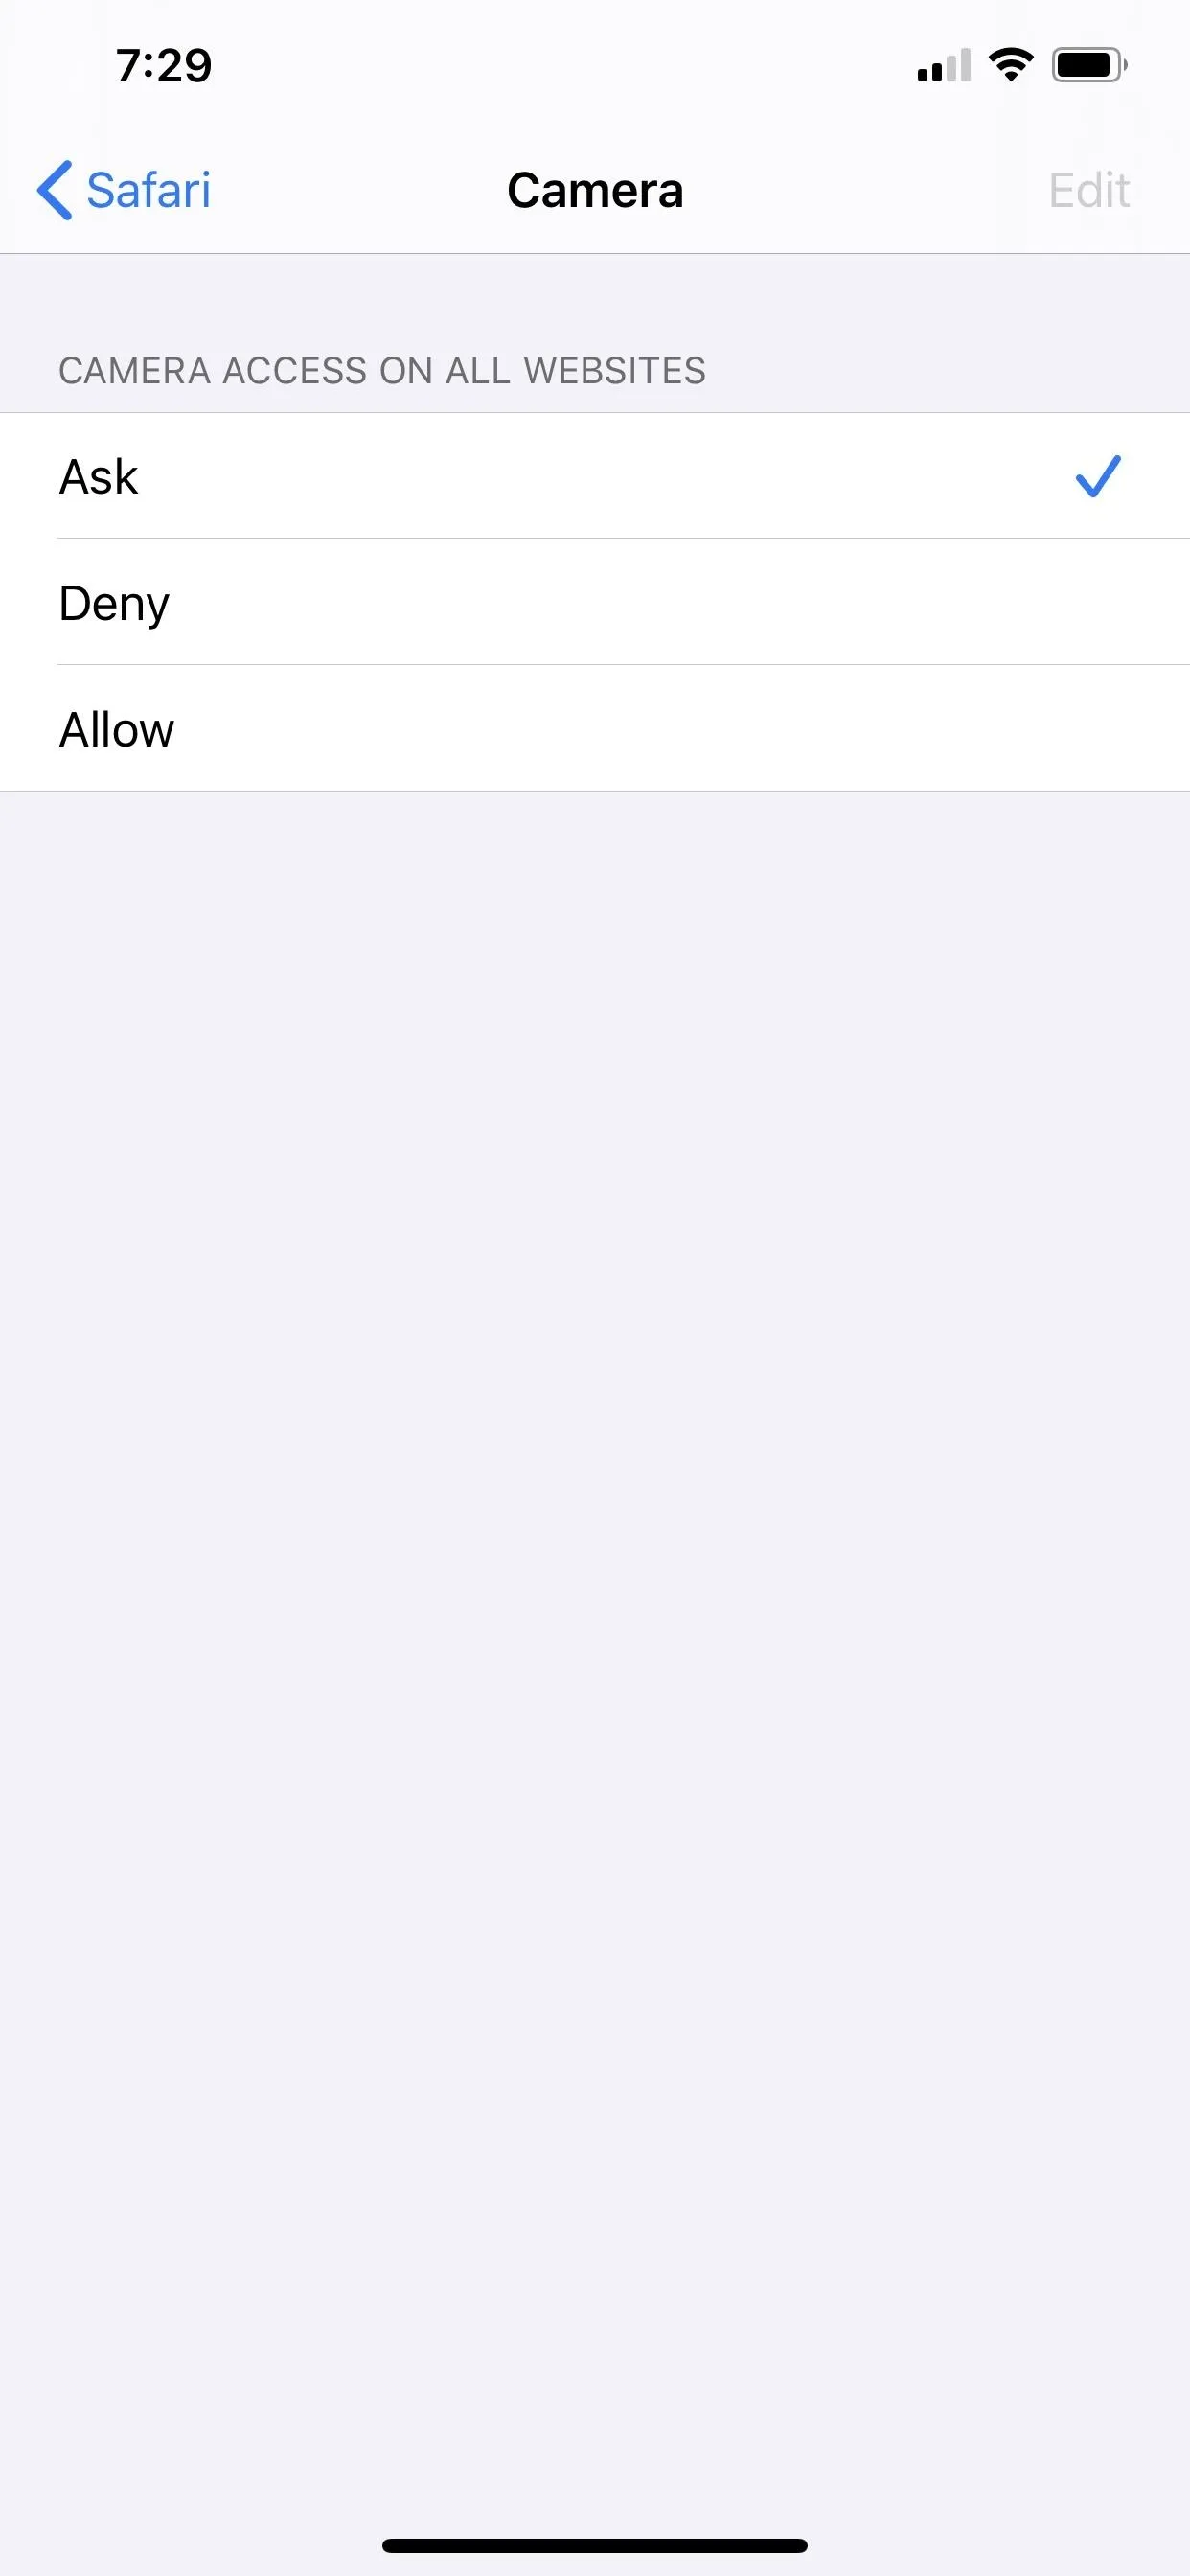
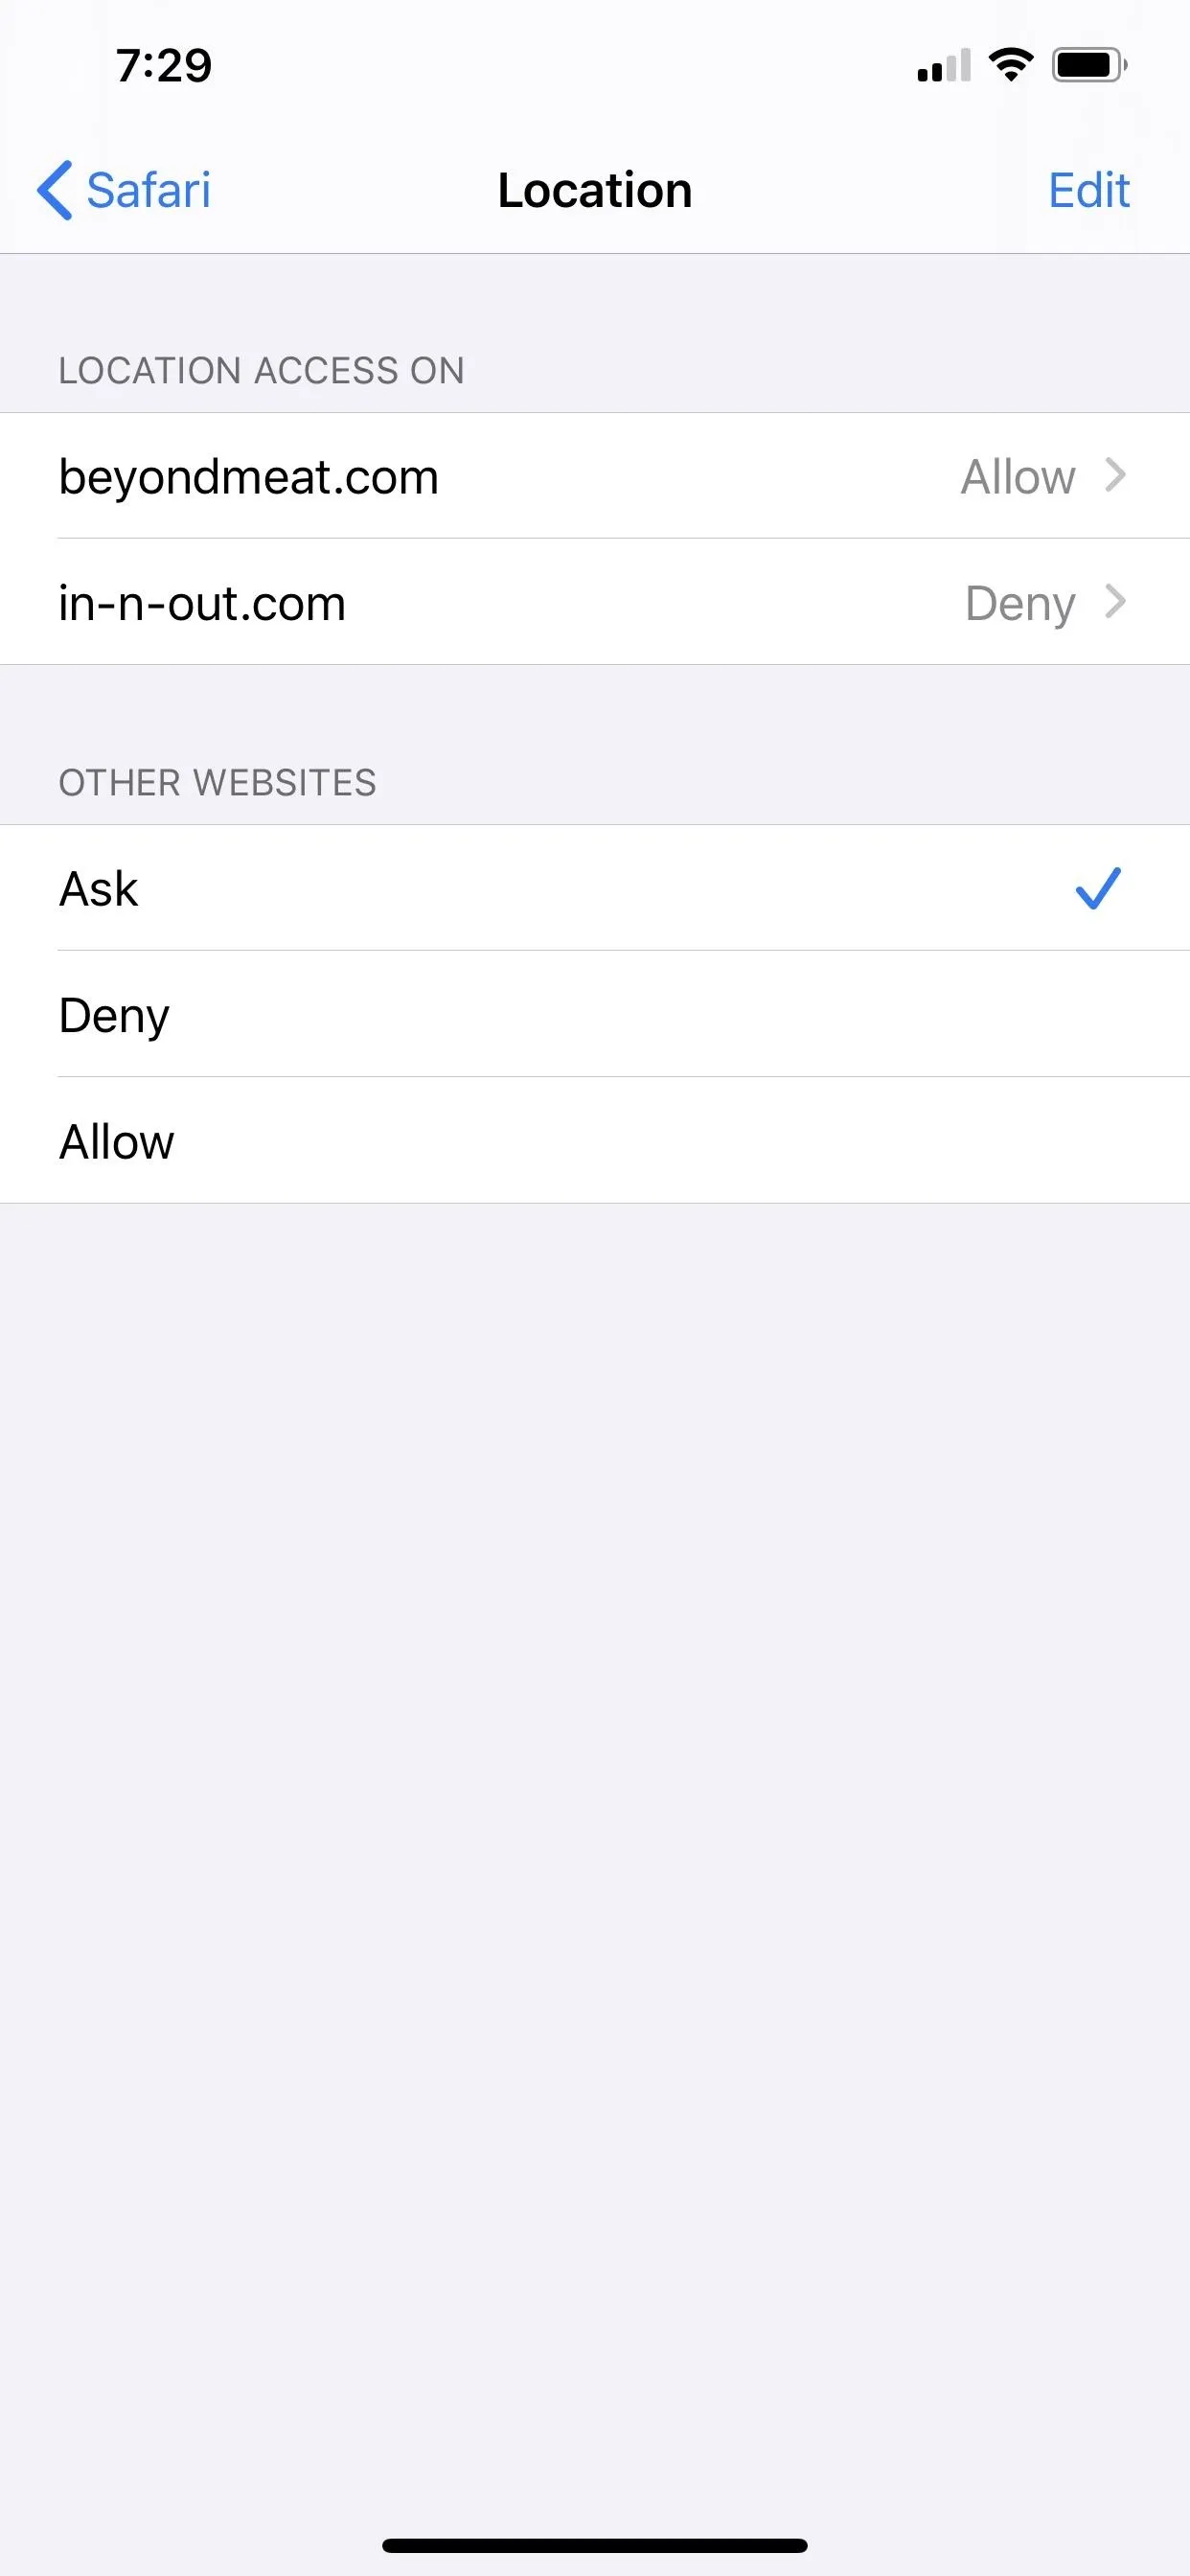


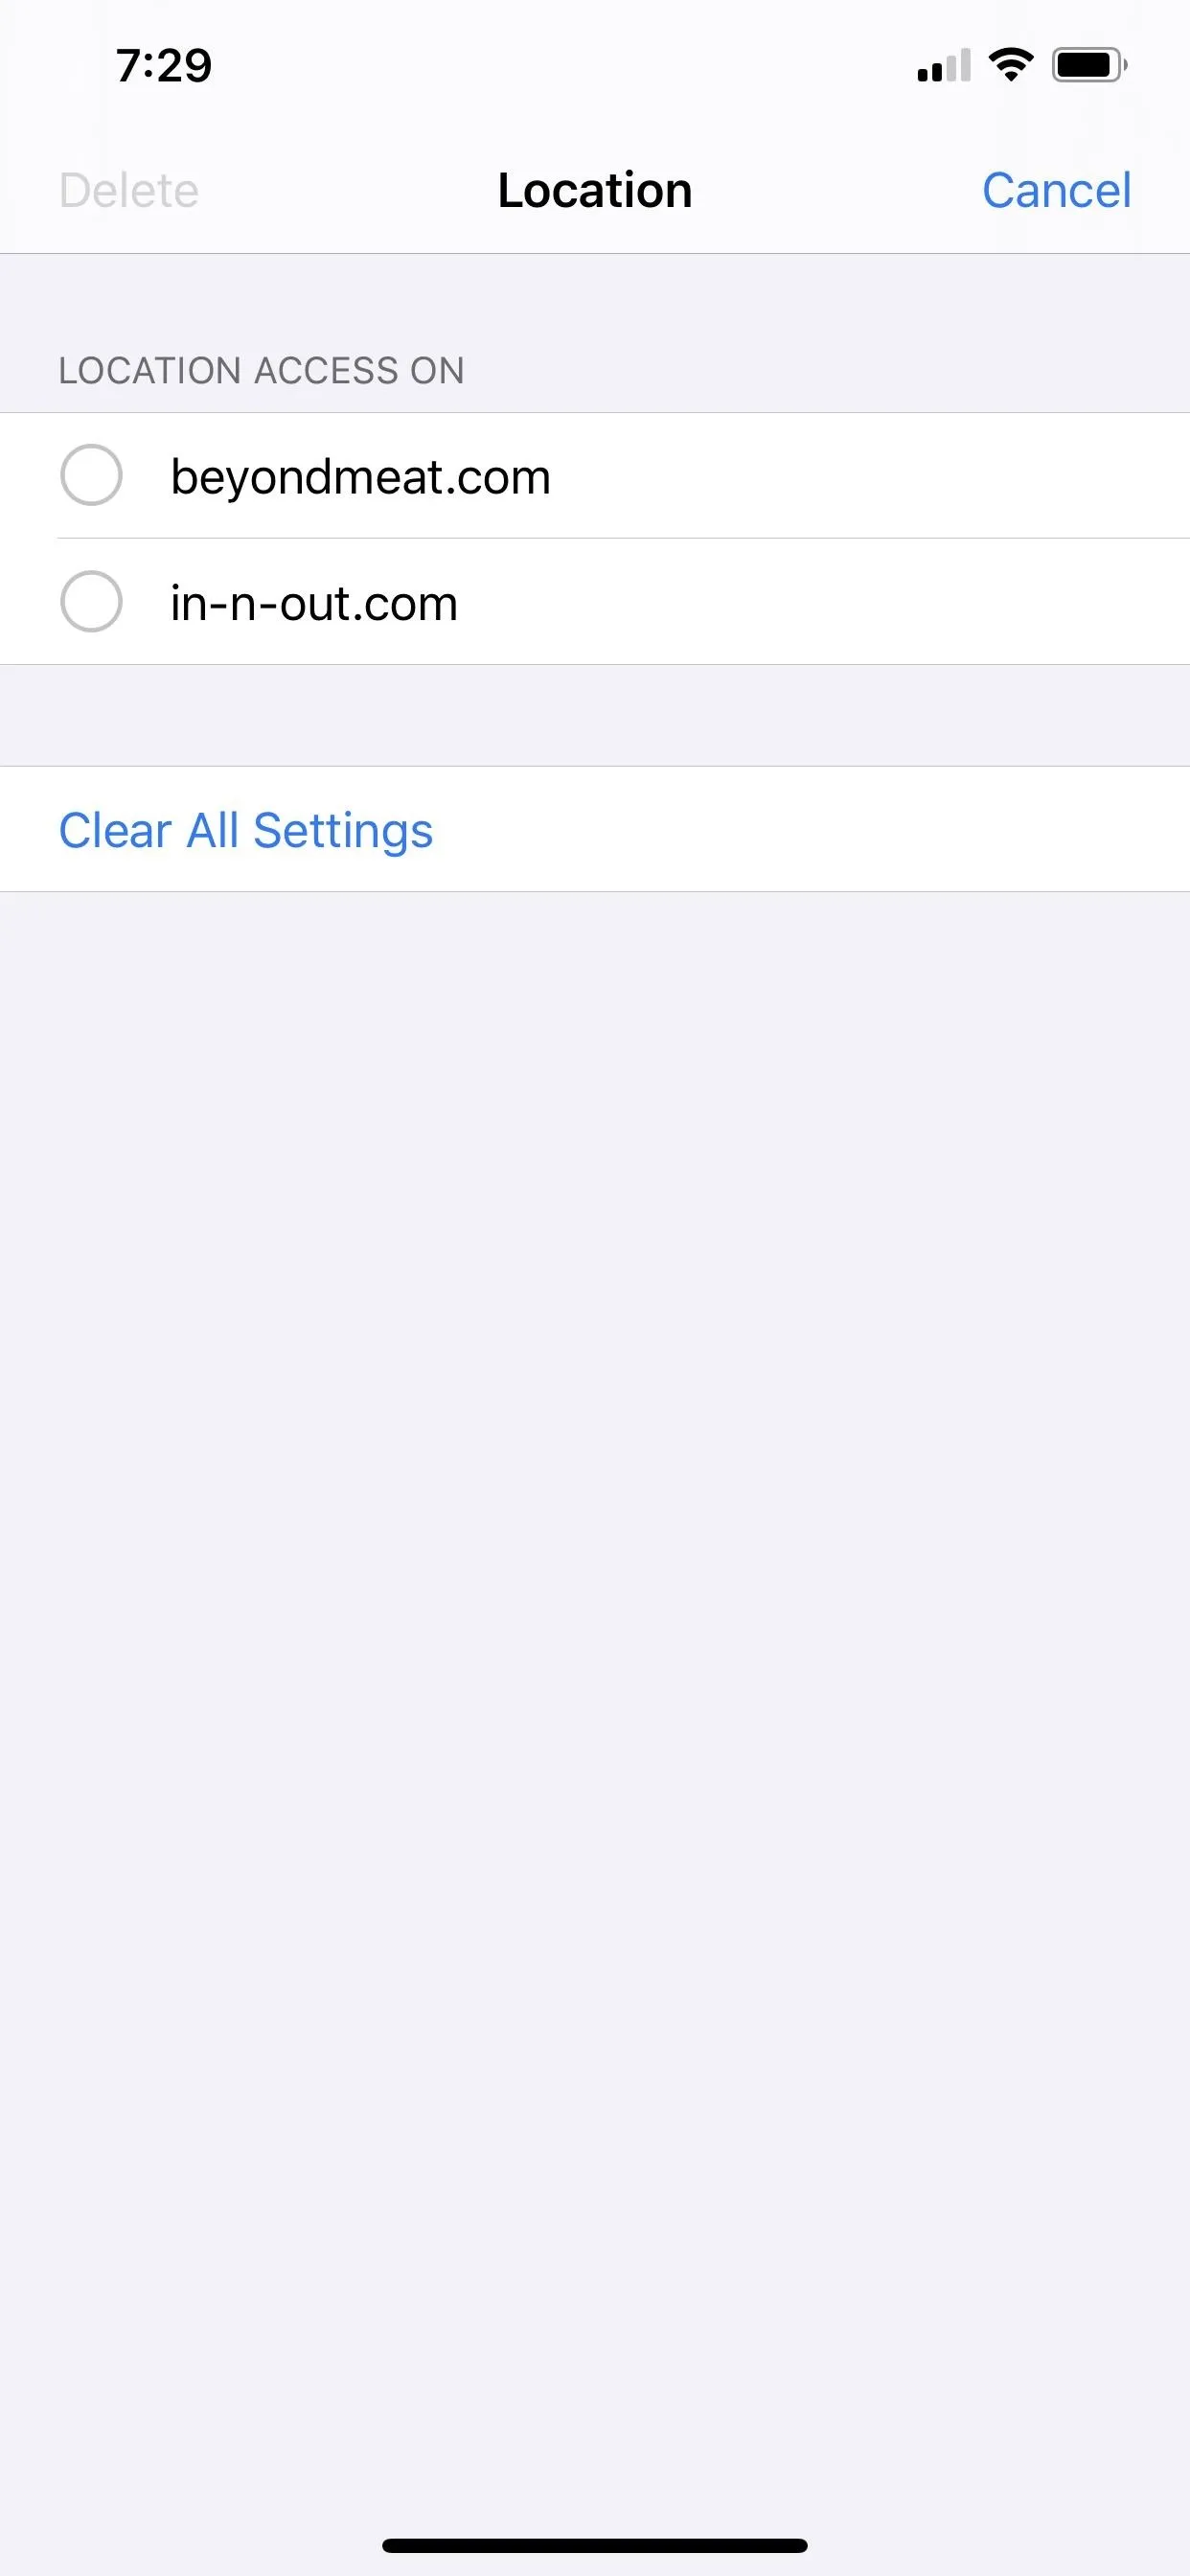
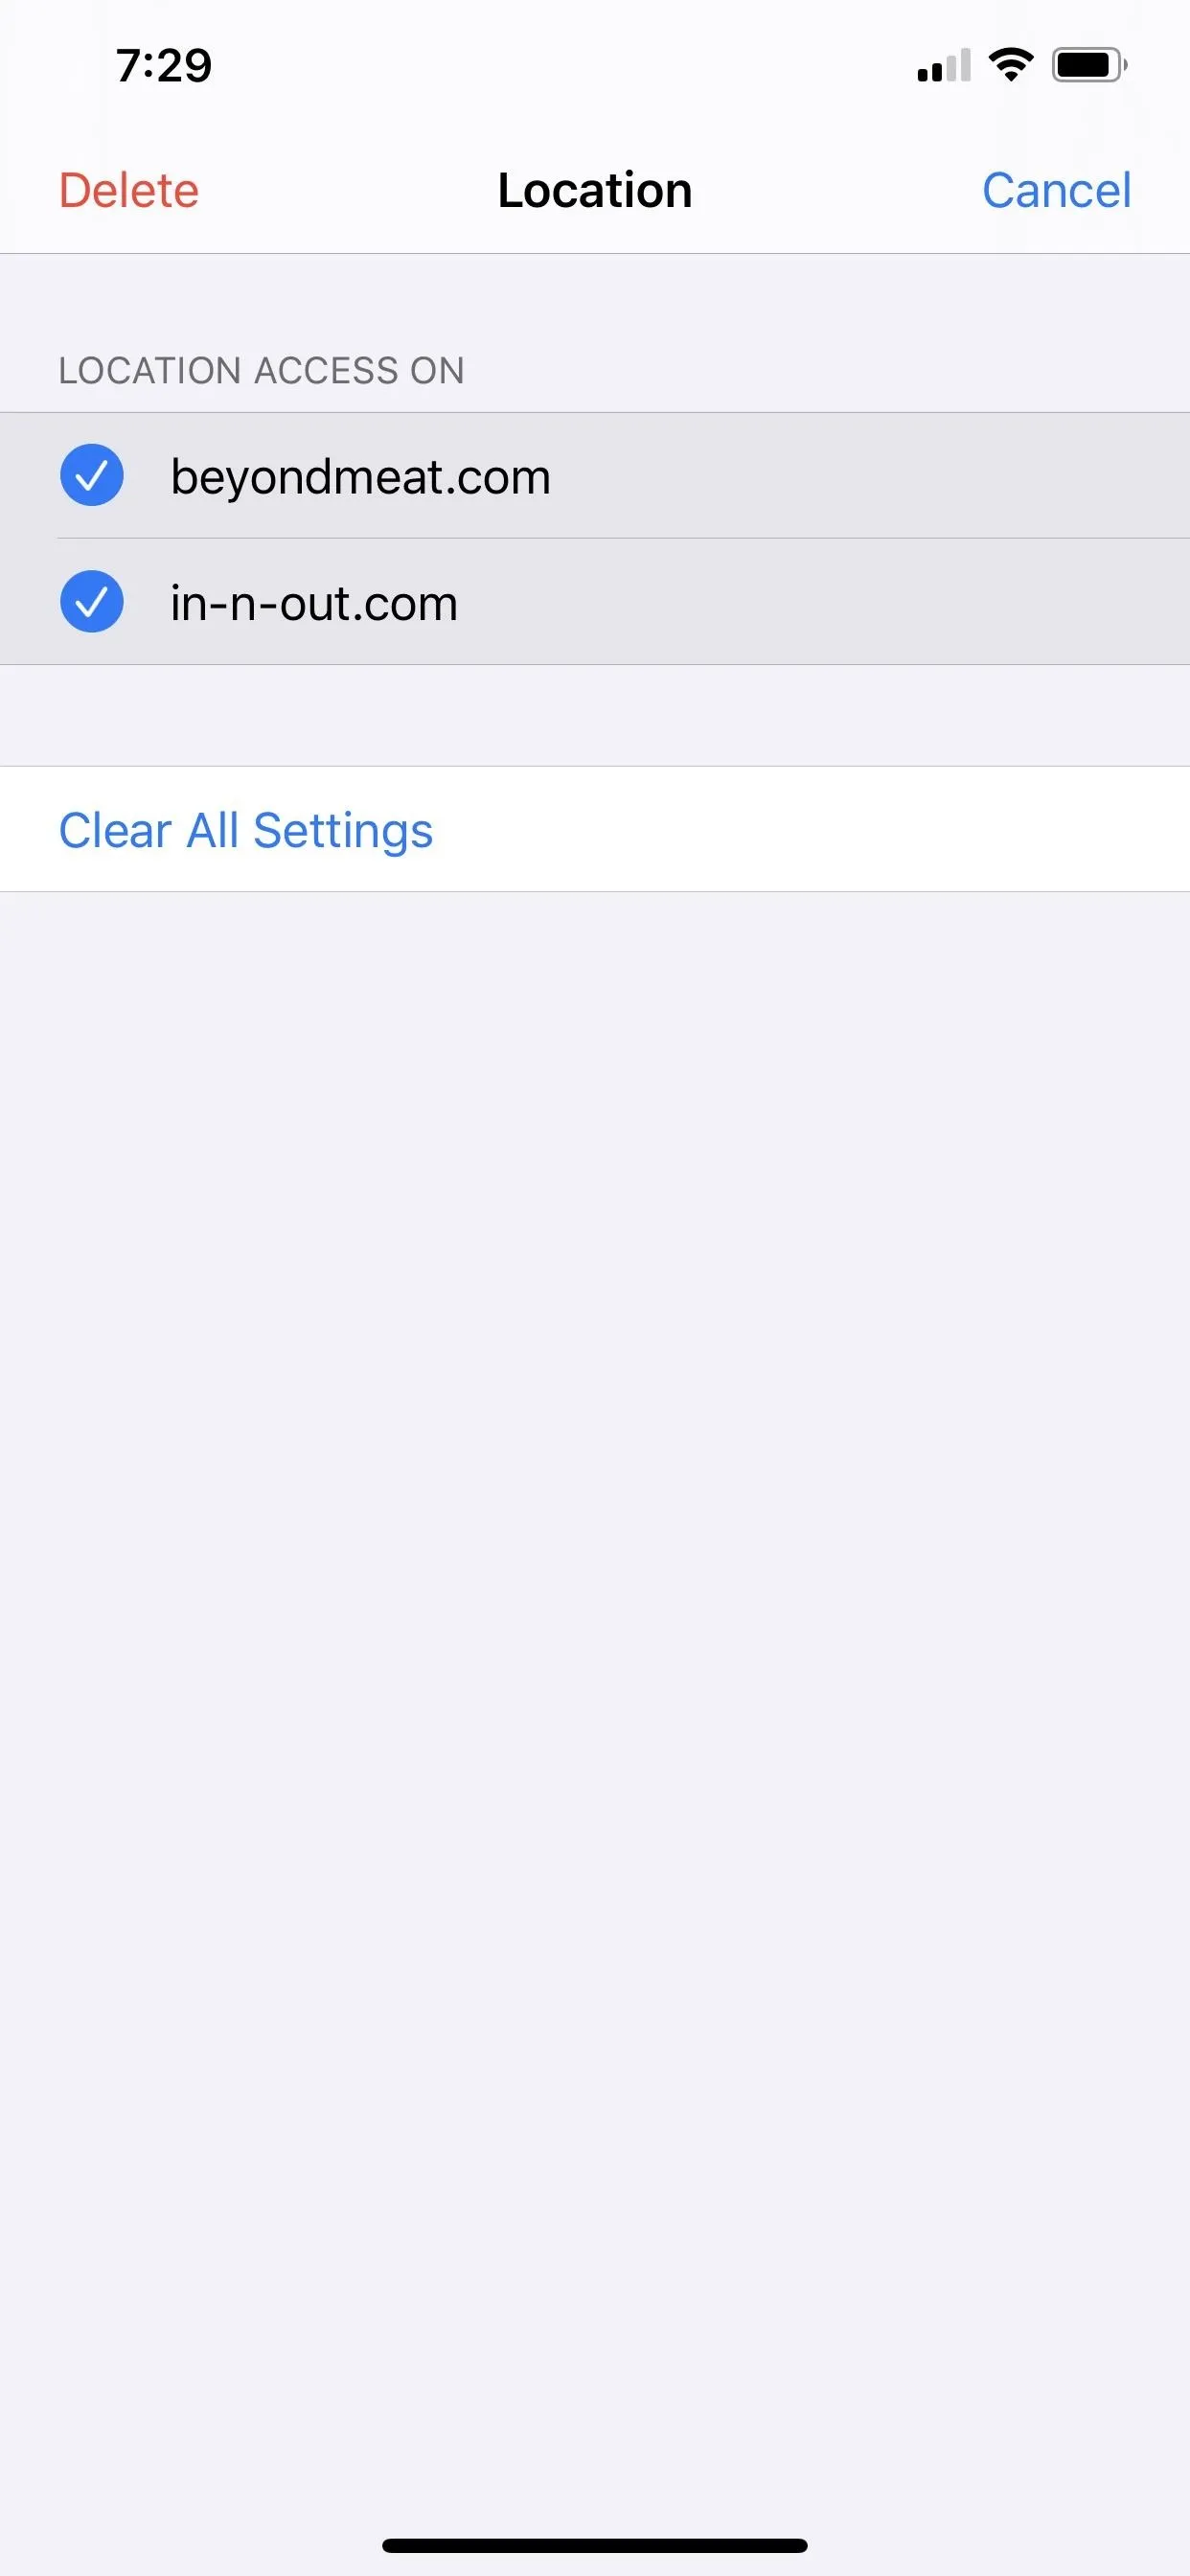
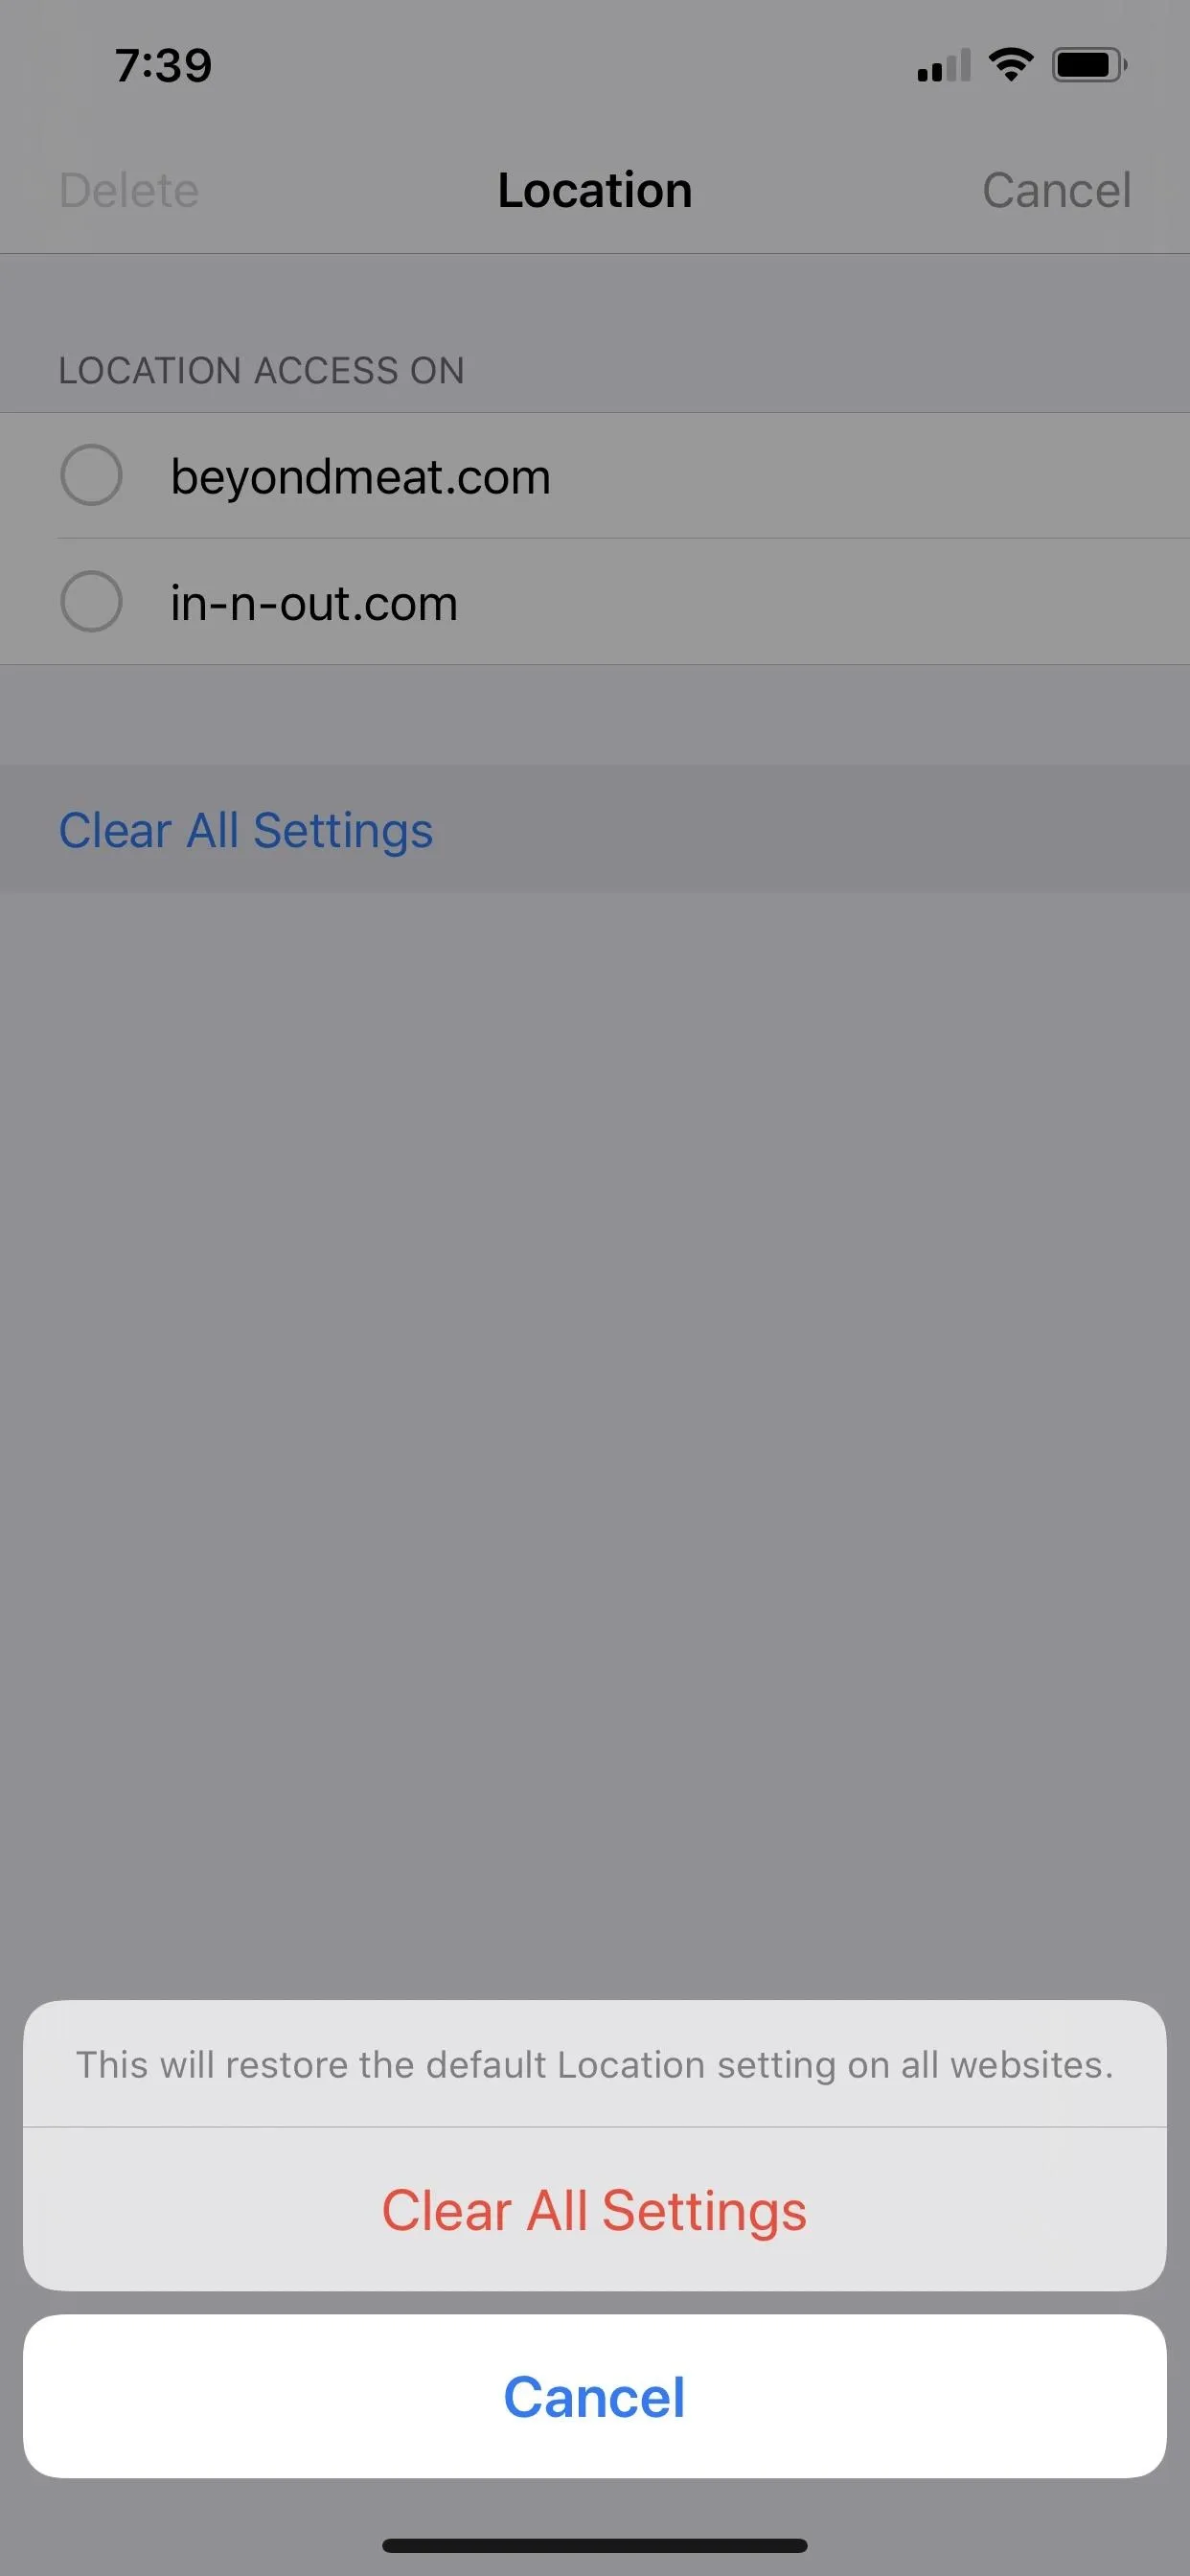
When you have individual site settings for each tool, you can tap "Edit" in the top right to bring up options to delete or clear the settings. To delete site preferences, tap each one to highlight them, then tap "Delete" in the top left. To delete all preferences, tap "Clear All Settings," followed by the same in the action sheet.


Cover photo and screenshots by Justin Meyers/Gadget Hacks


Comments
Be the first, drop a comment!