When your iPhone is being sluggish, one thing you can do to get performance back up to snuff is clear the device's random access memory. It's not a publicized feature from Apple, but it's there nonetheless. And while it's easy enough to utilize on iPhones with Home buttons, the iPhone X is a little trickier.
First, you may be wondering why you would want to clear the RAM on your iPhone X, and that's a good question. Your iPhone X has a decent 3 GB of RAM, and it's generally good about allocating which apps and system services are using their fair share. Even when the RAM is full, there shouldn't be too much of an issue, as iOS will clear some RAM automatically to make room for apps/services that need it.
So why would you want to clear RAM yourself? The issue has more to do with runaway apps and services that are hogging all the RAM for themselves. Generally, if you have an unresponsive or erratically behaving app, you would just force-close the app from the app switcher, but while this "looks" like your quitting the app, it still may be eating up some of your iPhone X's precious resources.
When that happens, the next thing you would normally want do is force-restart the iPhone X altogether. While this could definitely solve any performance issues you're experiencing, it's easy to forget the button sequence needed to do the force restart, and that's where the RAM-clearing trick comes into play.
Activate AssistiveTouch on Your iPhone X
While your iPhone X's Side button is all magical, it can't be used to clear the RAM like the Home button can on other iPhone models, so we'll need to use the virtual Home button found in the AssistiveTouch menu instead.
Open up your Settings app, tap "General," then "Accessibility." Under the Interaction subheading, tap on "AssistiveTouch" to view its preferences. There are some custom actions and gestures you can set up here, but for our purposes here, just toggle on "AssistiveTouch" and you'll see a gray and white circle that looks like a Home button pop up on your screen. Tap that to open up the AssistiveTouch menu.
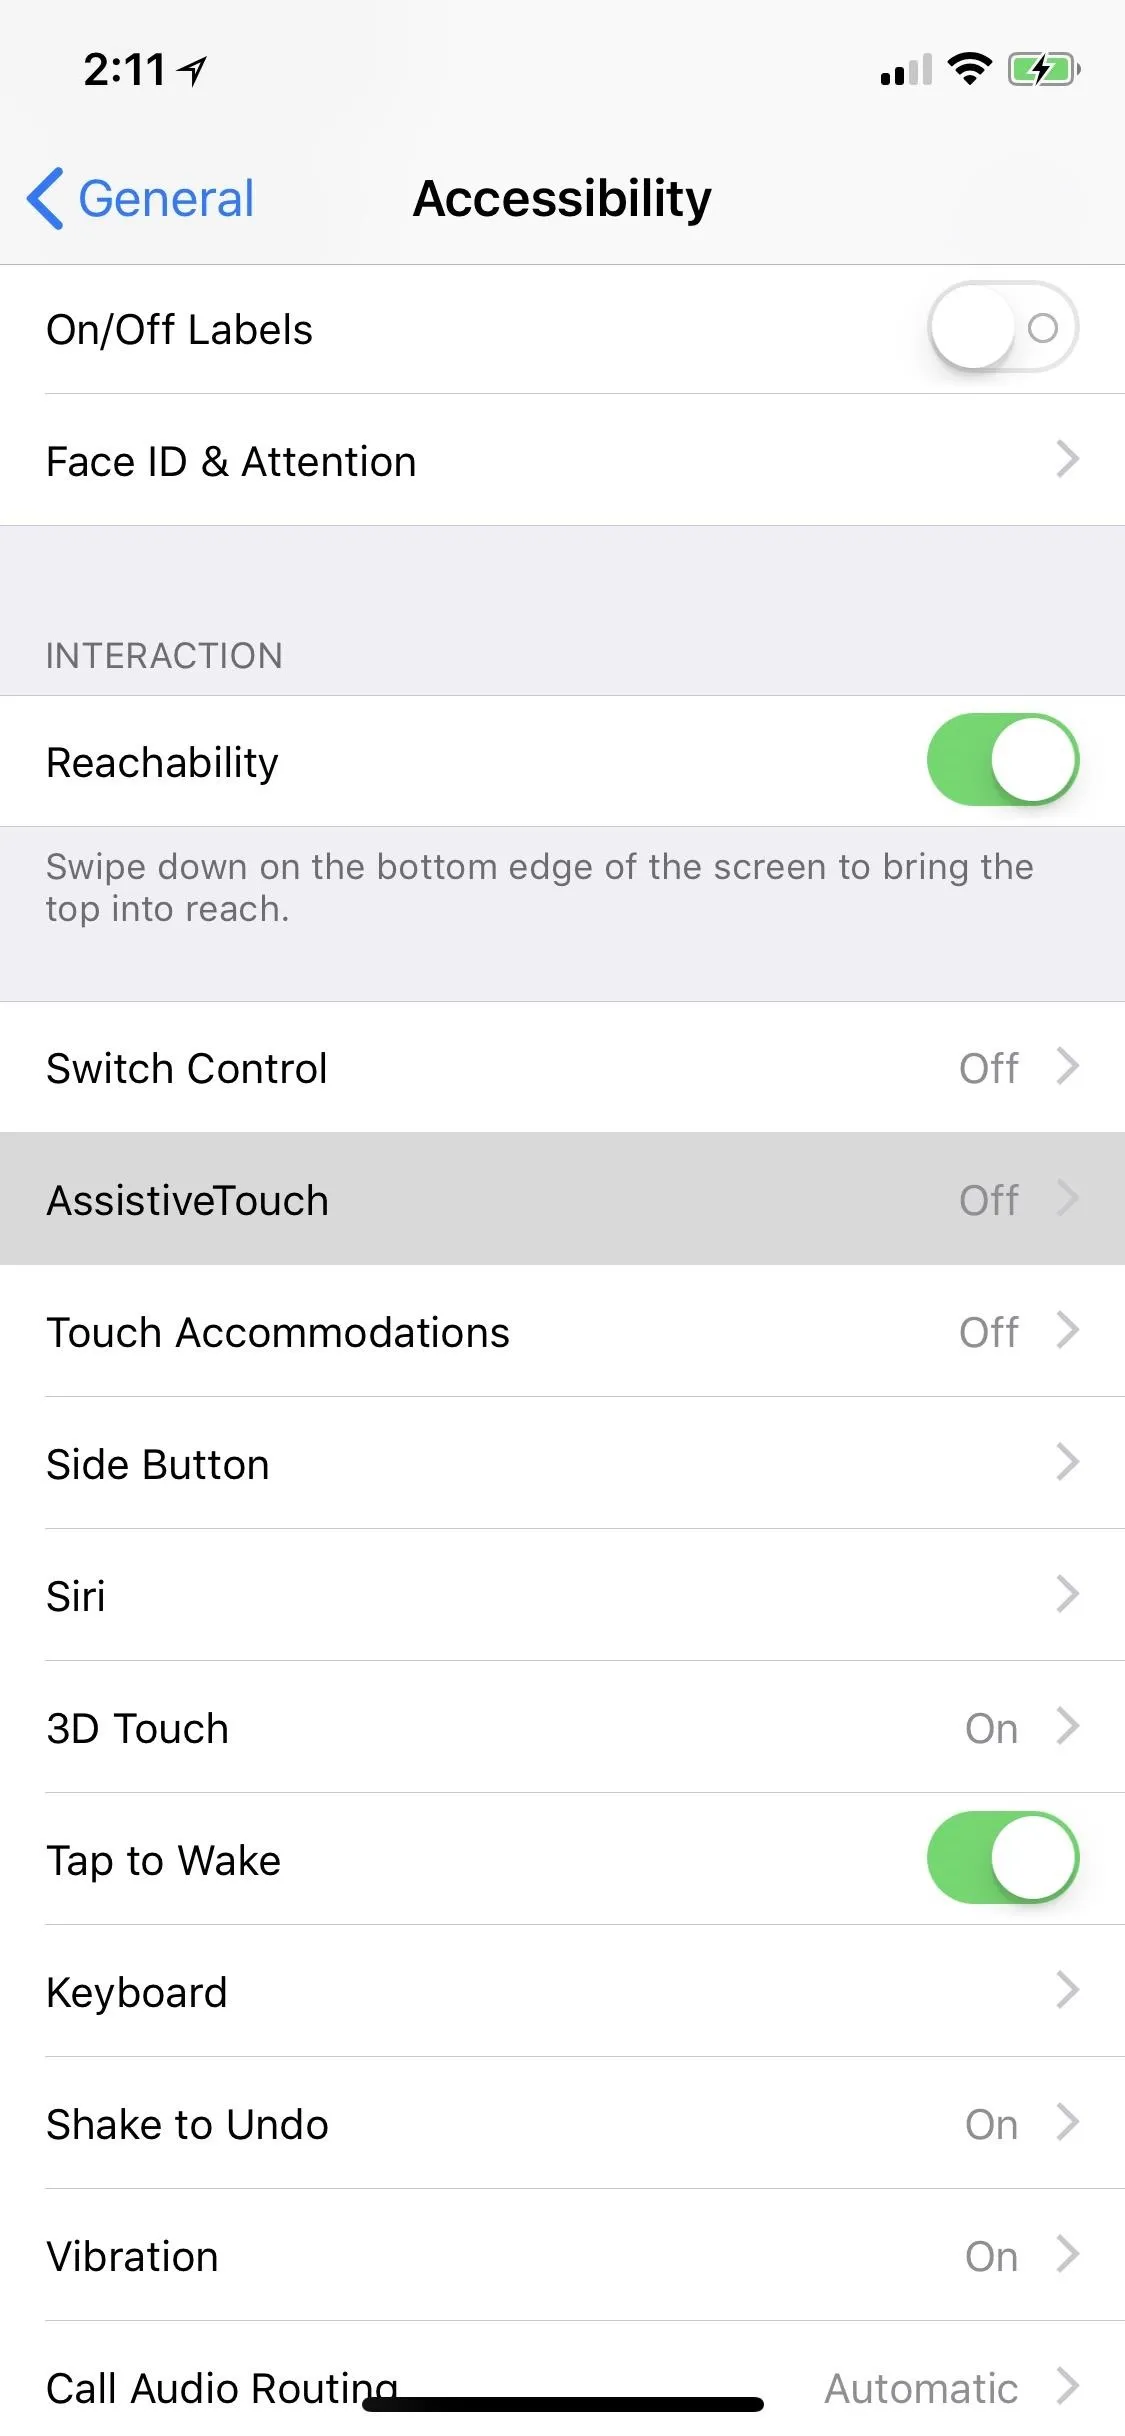
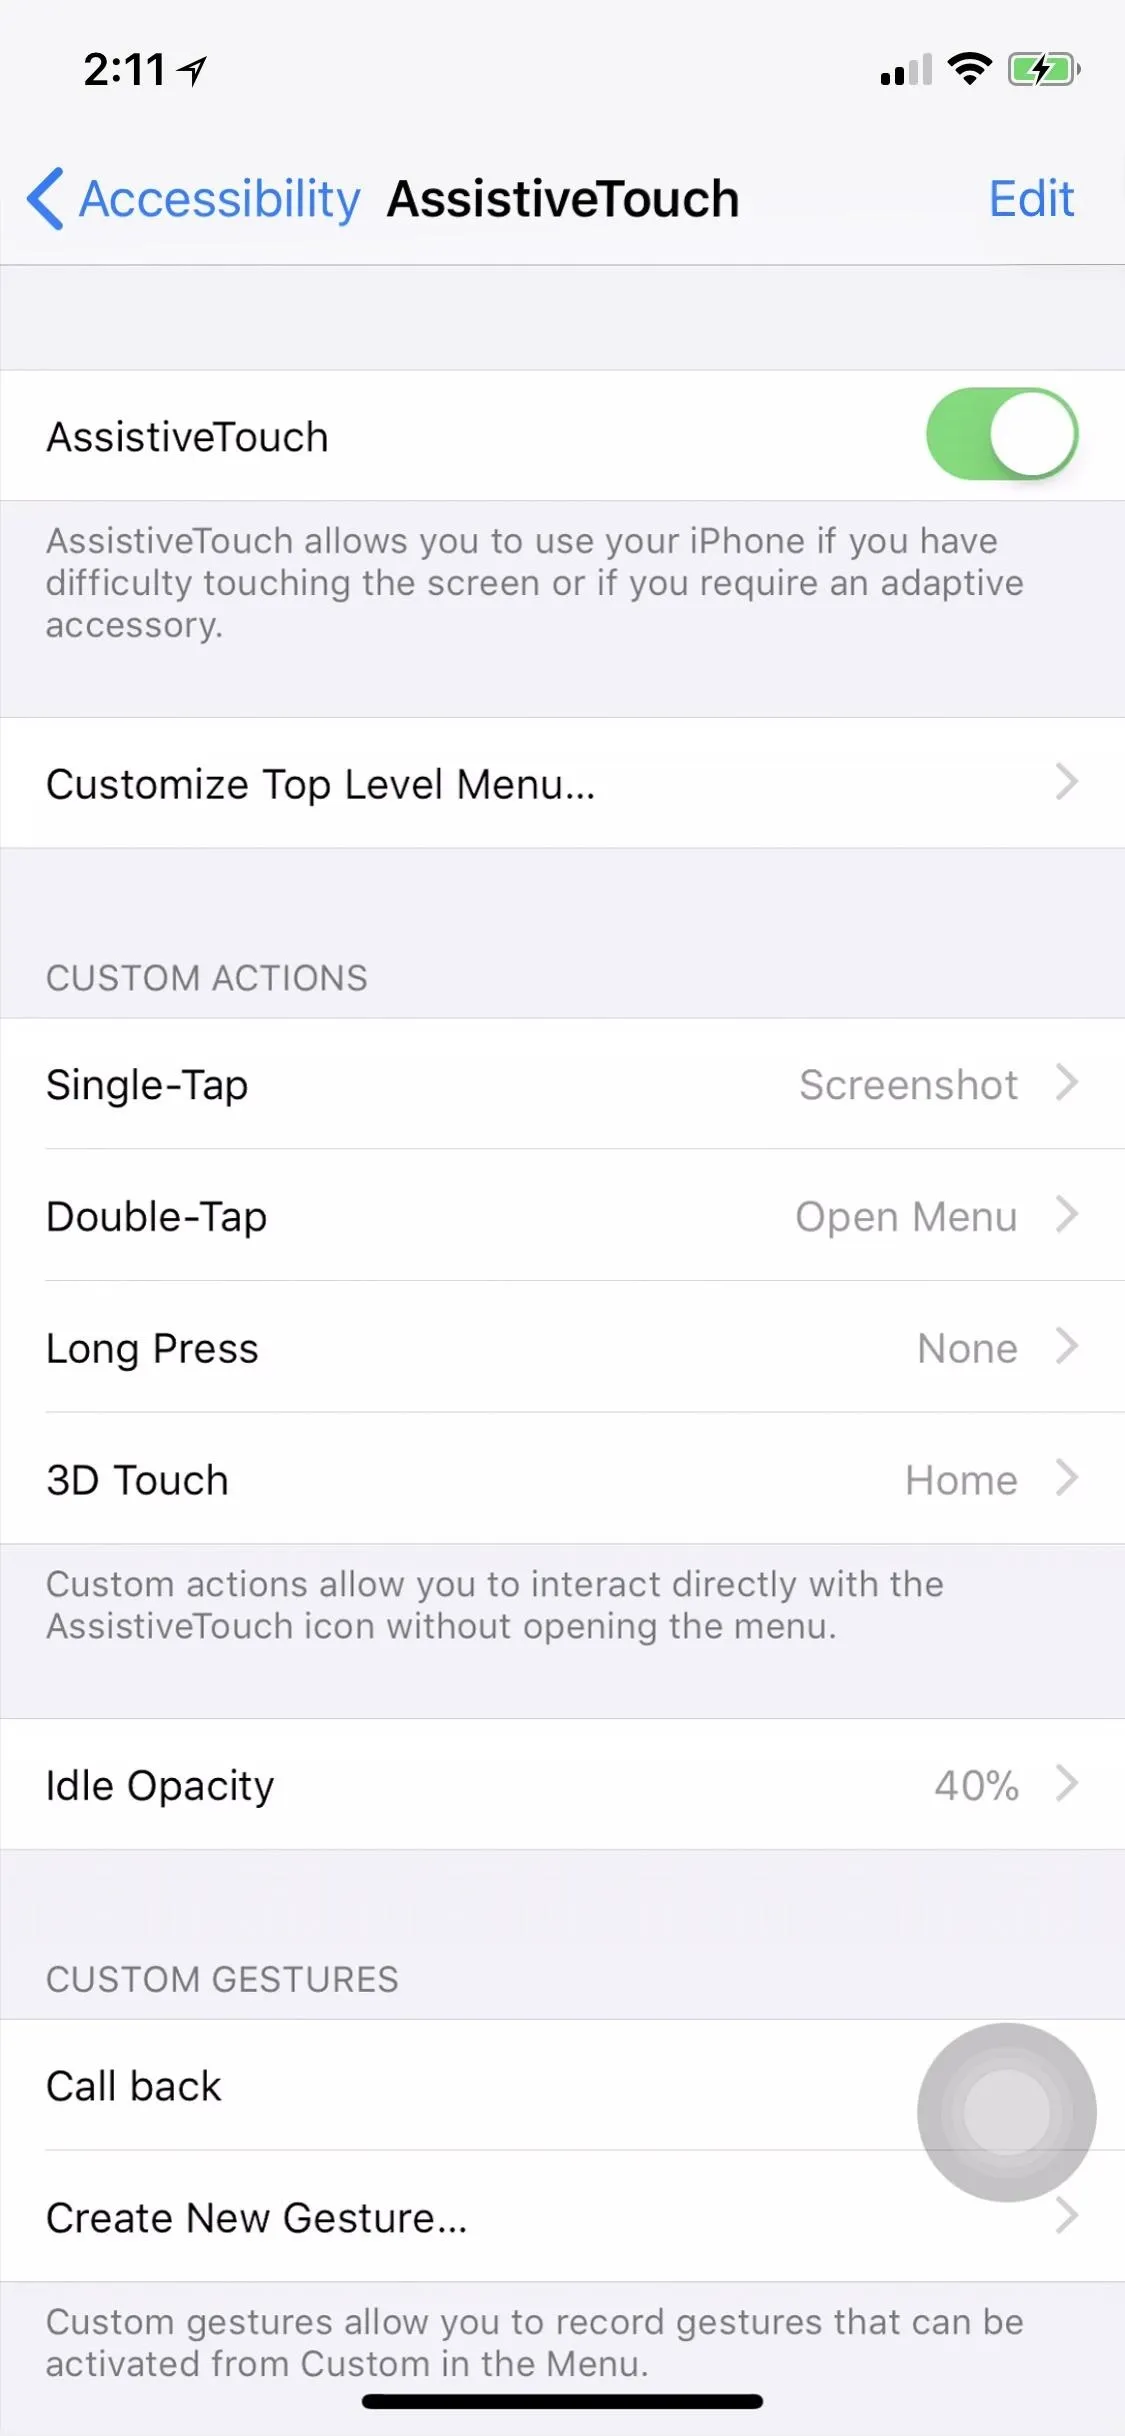
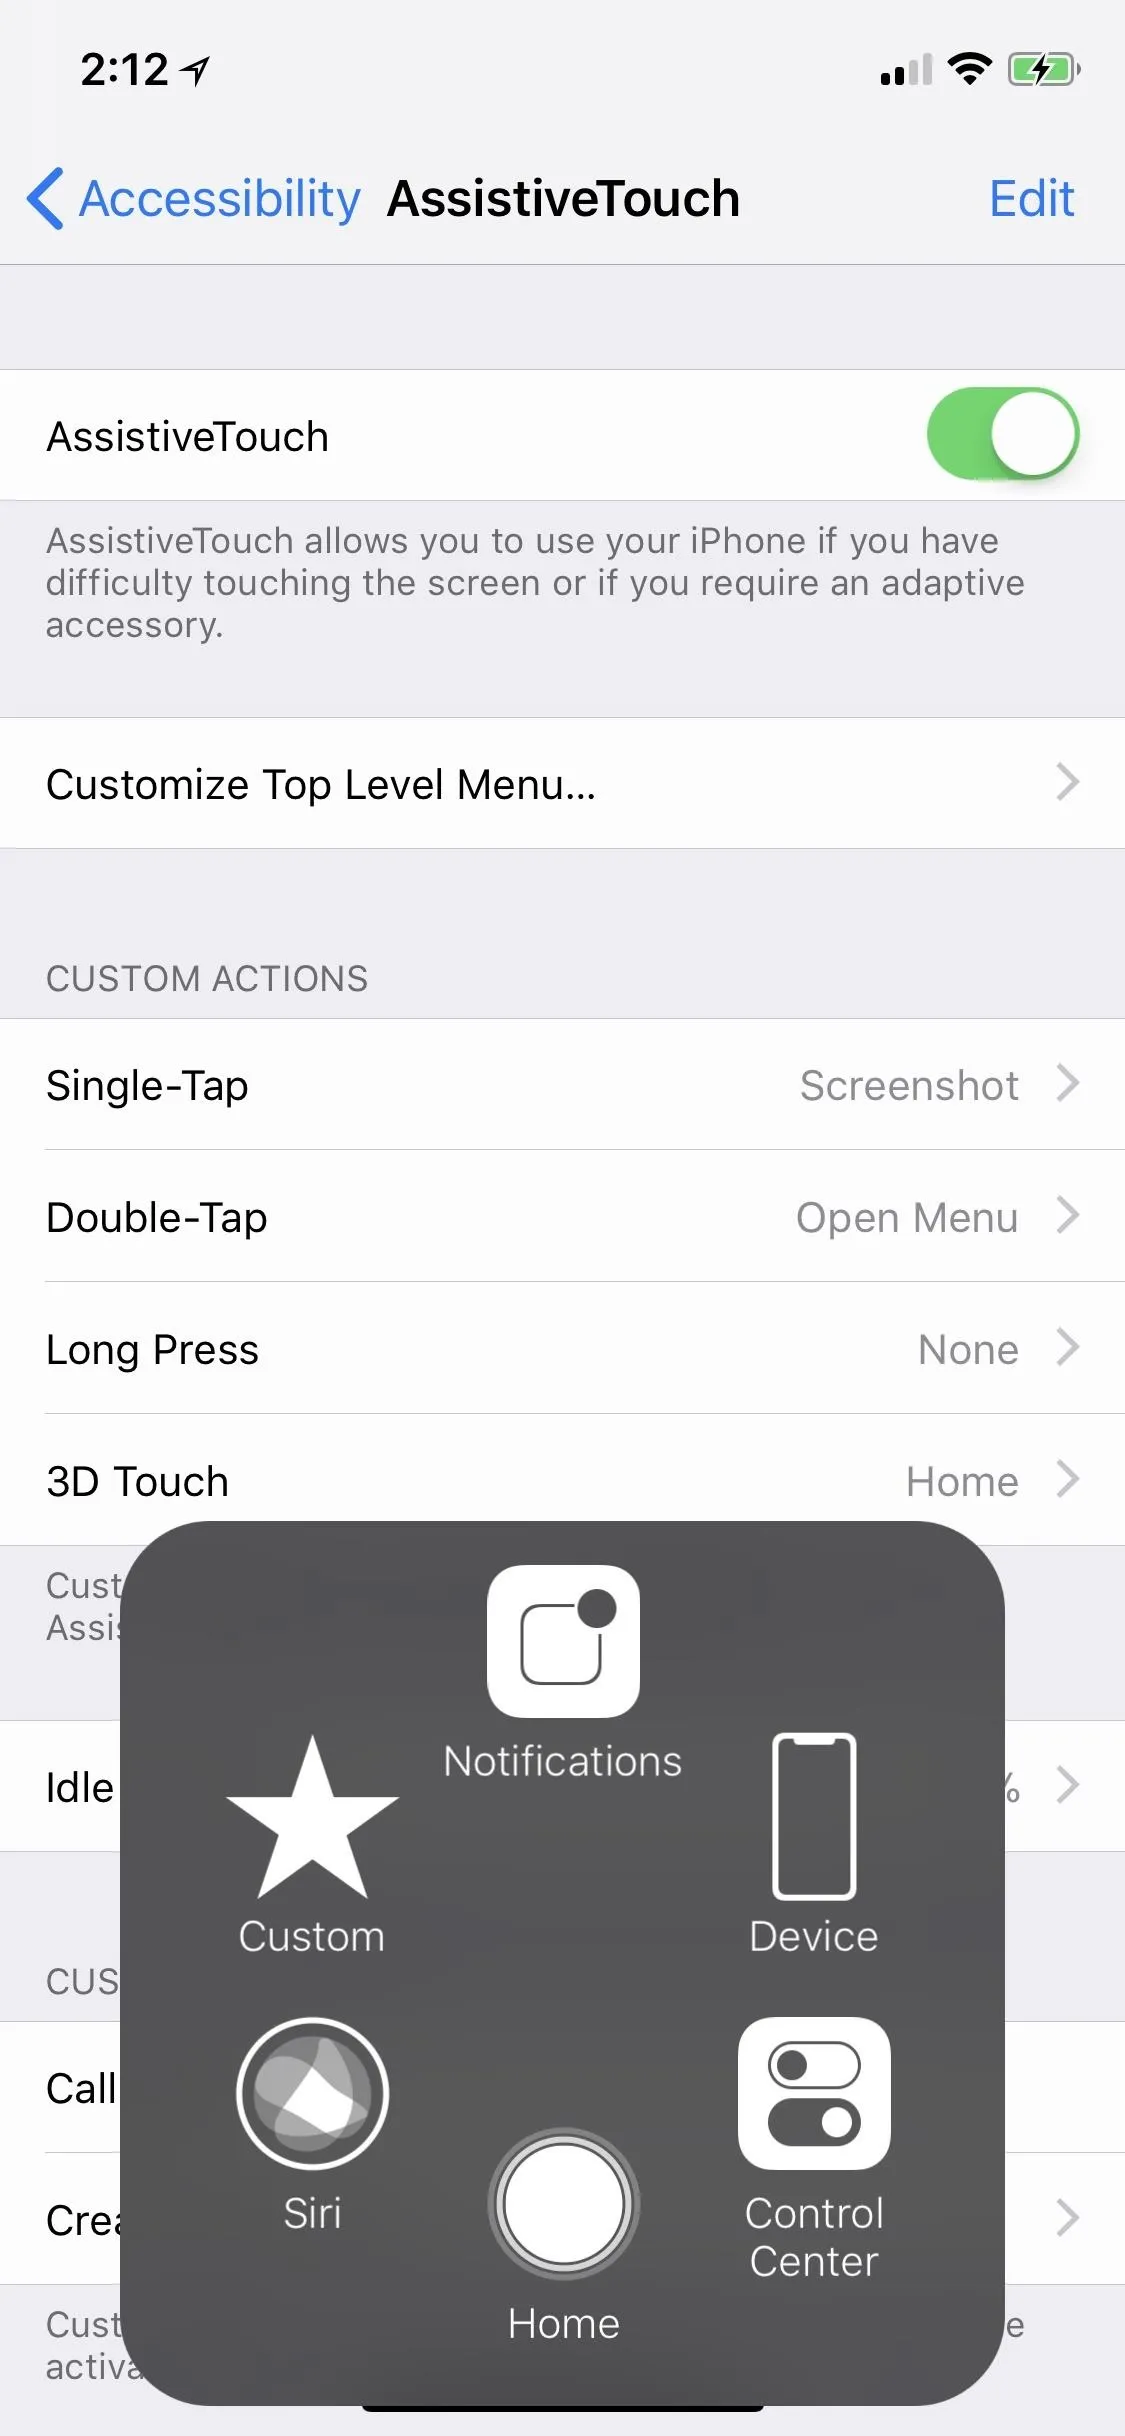


As you can tell from the screenshots above, I've actually switched the single-tap action to take a screenshot and changed opening the menu to a double-tap.
Make a Shortcut to the AssistiveTouch Menu (Optional)
If you don't think you'll be using this RAM-clearing trick very often, feel free to skip down to Step 3, but if you plan on using this a lot, it might be easier to set up a shortcut to activate and deactivate AssistiveTouch on your iPhone X without having to dig through the Settings app each time.
From the "AssistiveTouch" menu, go back to the "Accessibility" main menu, then scroll down to the bottom and select "Accessibility Shortcuts." Here, just make sure "AssistiveTouch" is checked. When you triple-click the Side button, the AssistiveTouch icon should open or close on your screen. If you have more than one thing checked as an accessibility shortcut, the triple-click Side button shortcut will open a menu where you can tap on "AssistiveTouch" to open or close it.
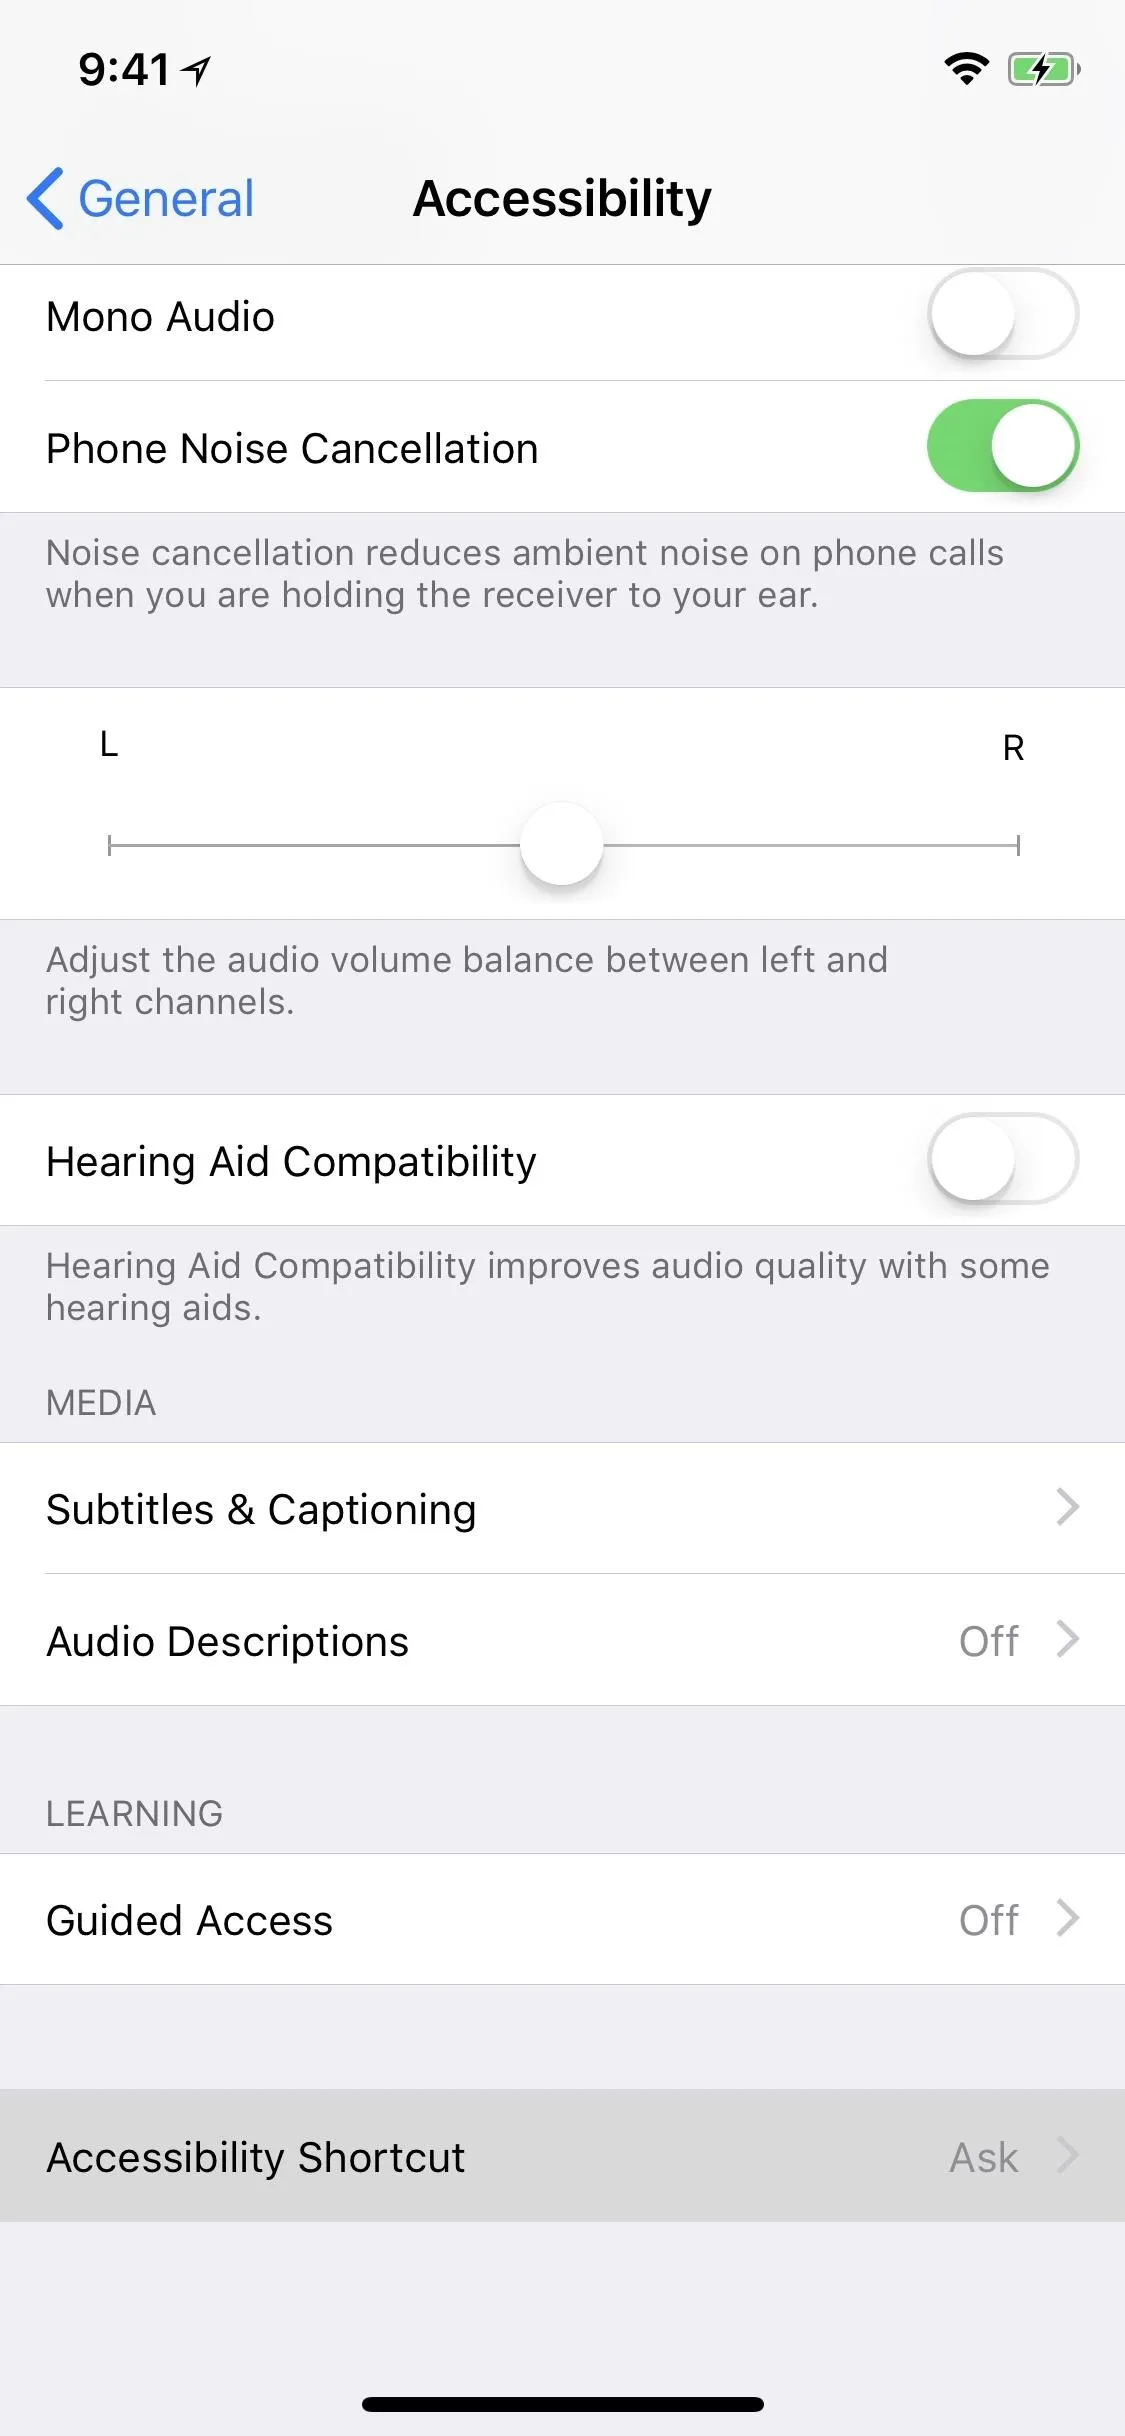
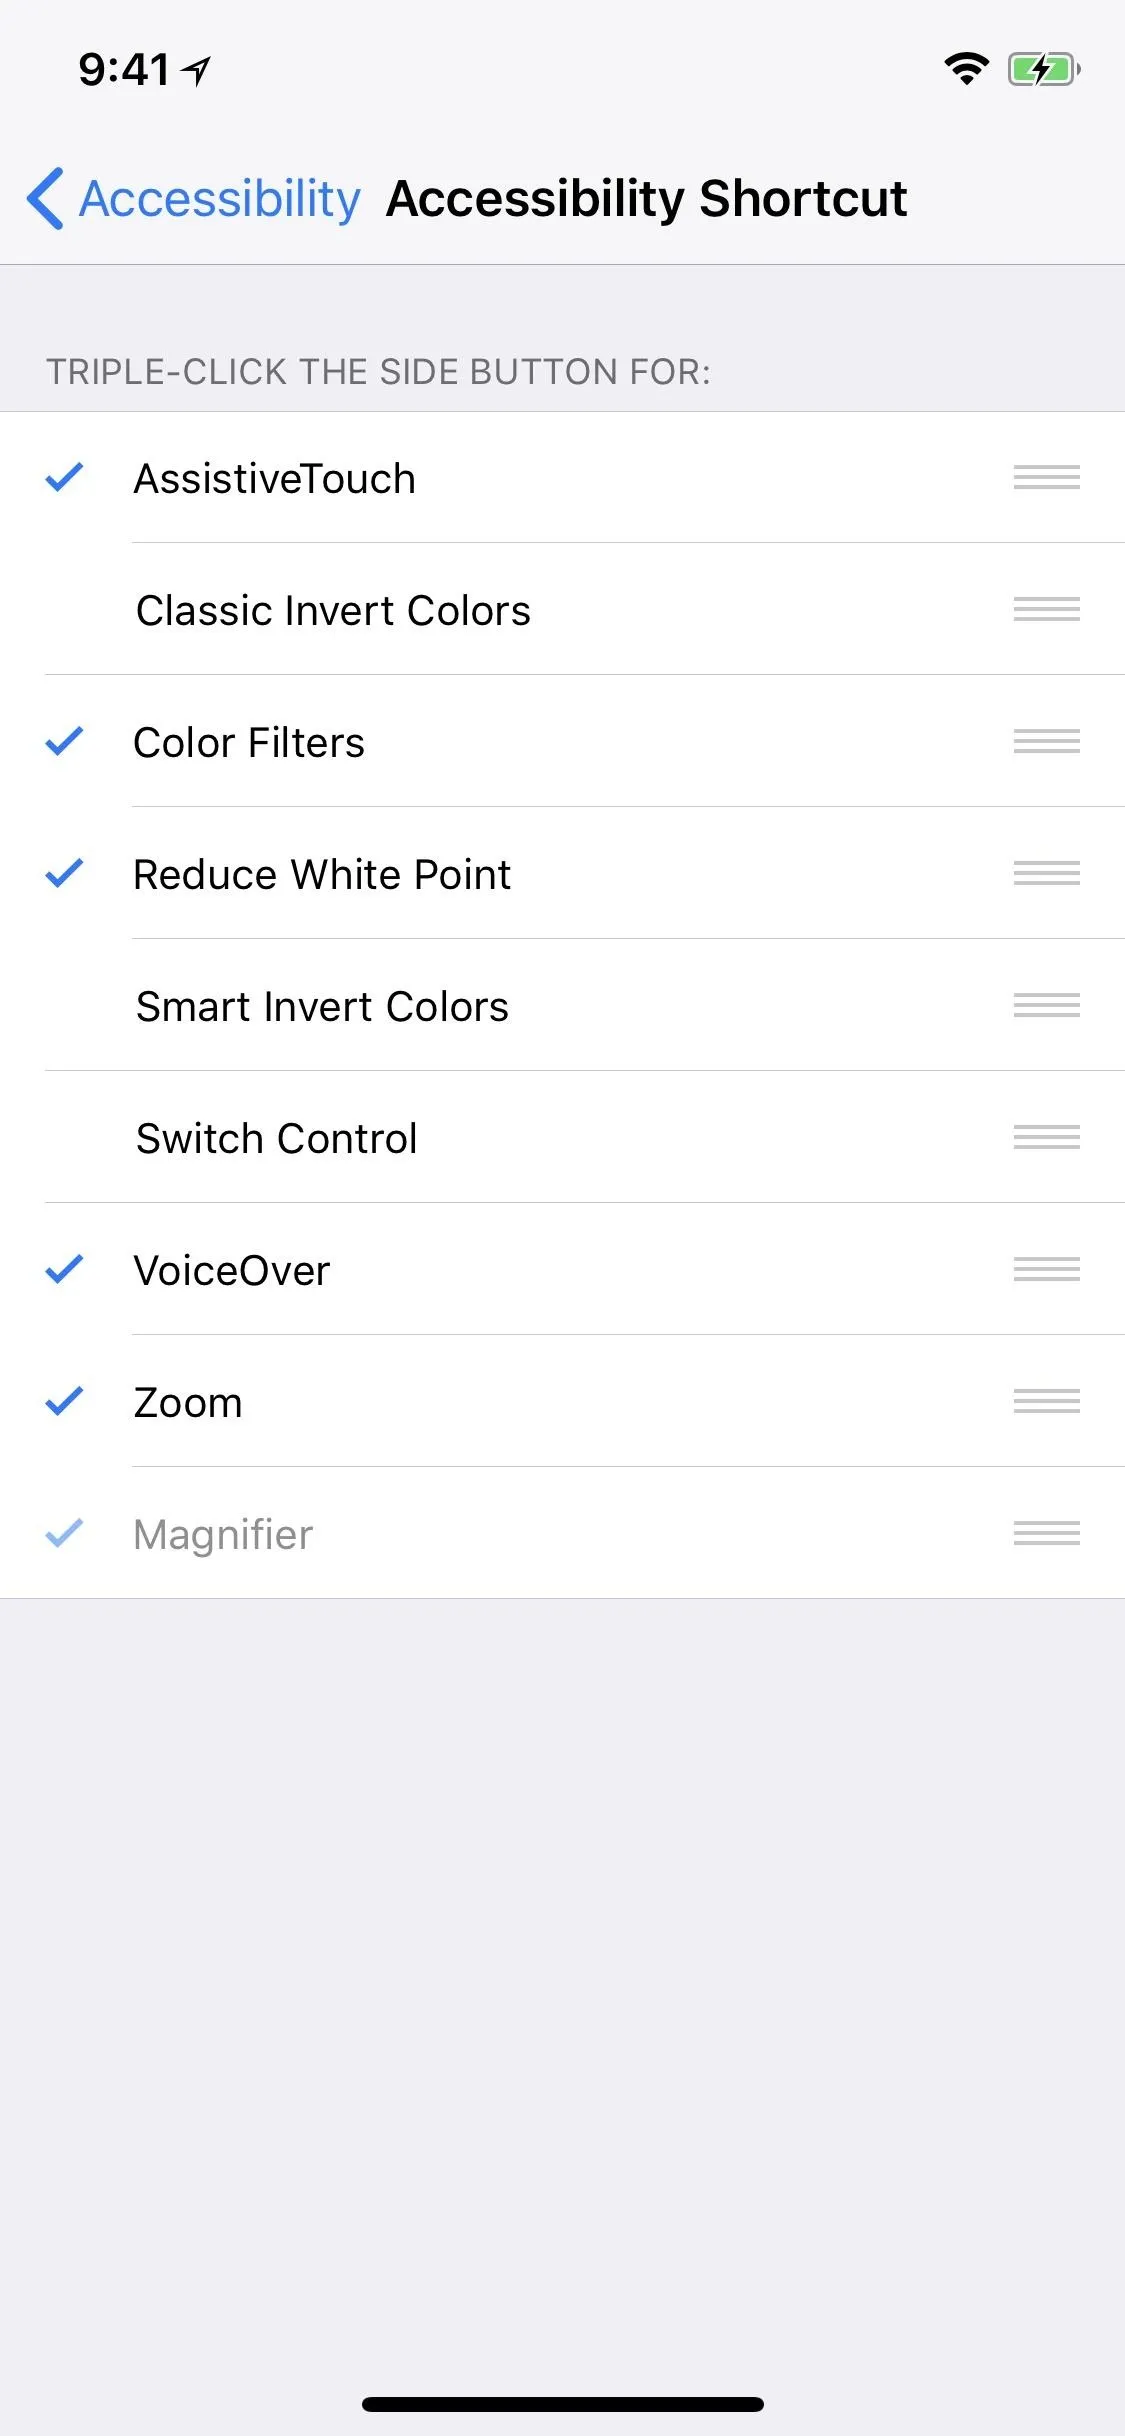



After making sure "AssistiveTouch" is an accessibility shortcut, you can also enable the "Accessibility Shortcuts" toggle in the Control Center if you don't like using the Side button to open and close the AssistiveTouch on-screen toggle.
Shut Down Your iPhone X from the Settings
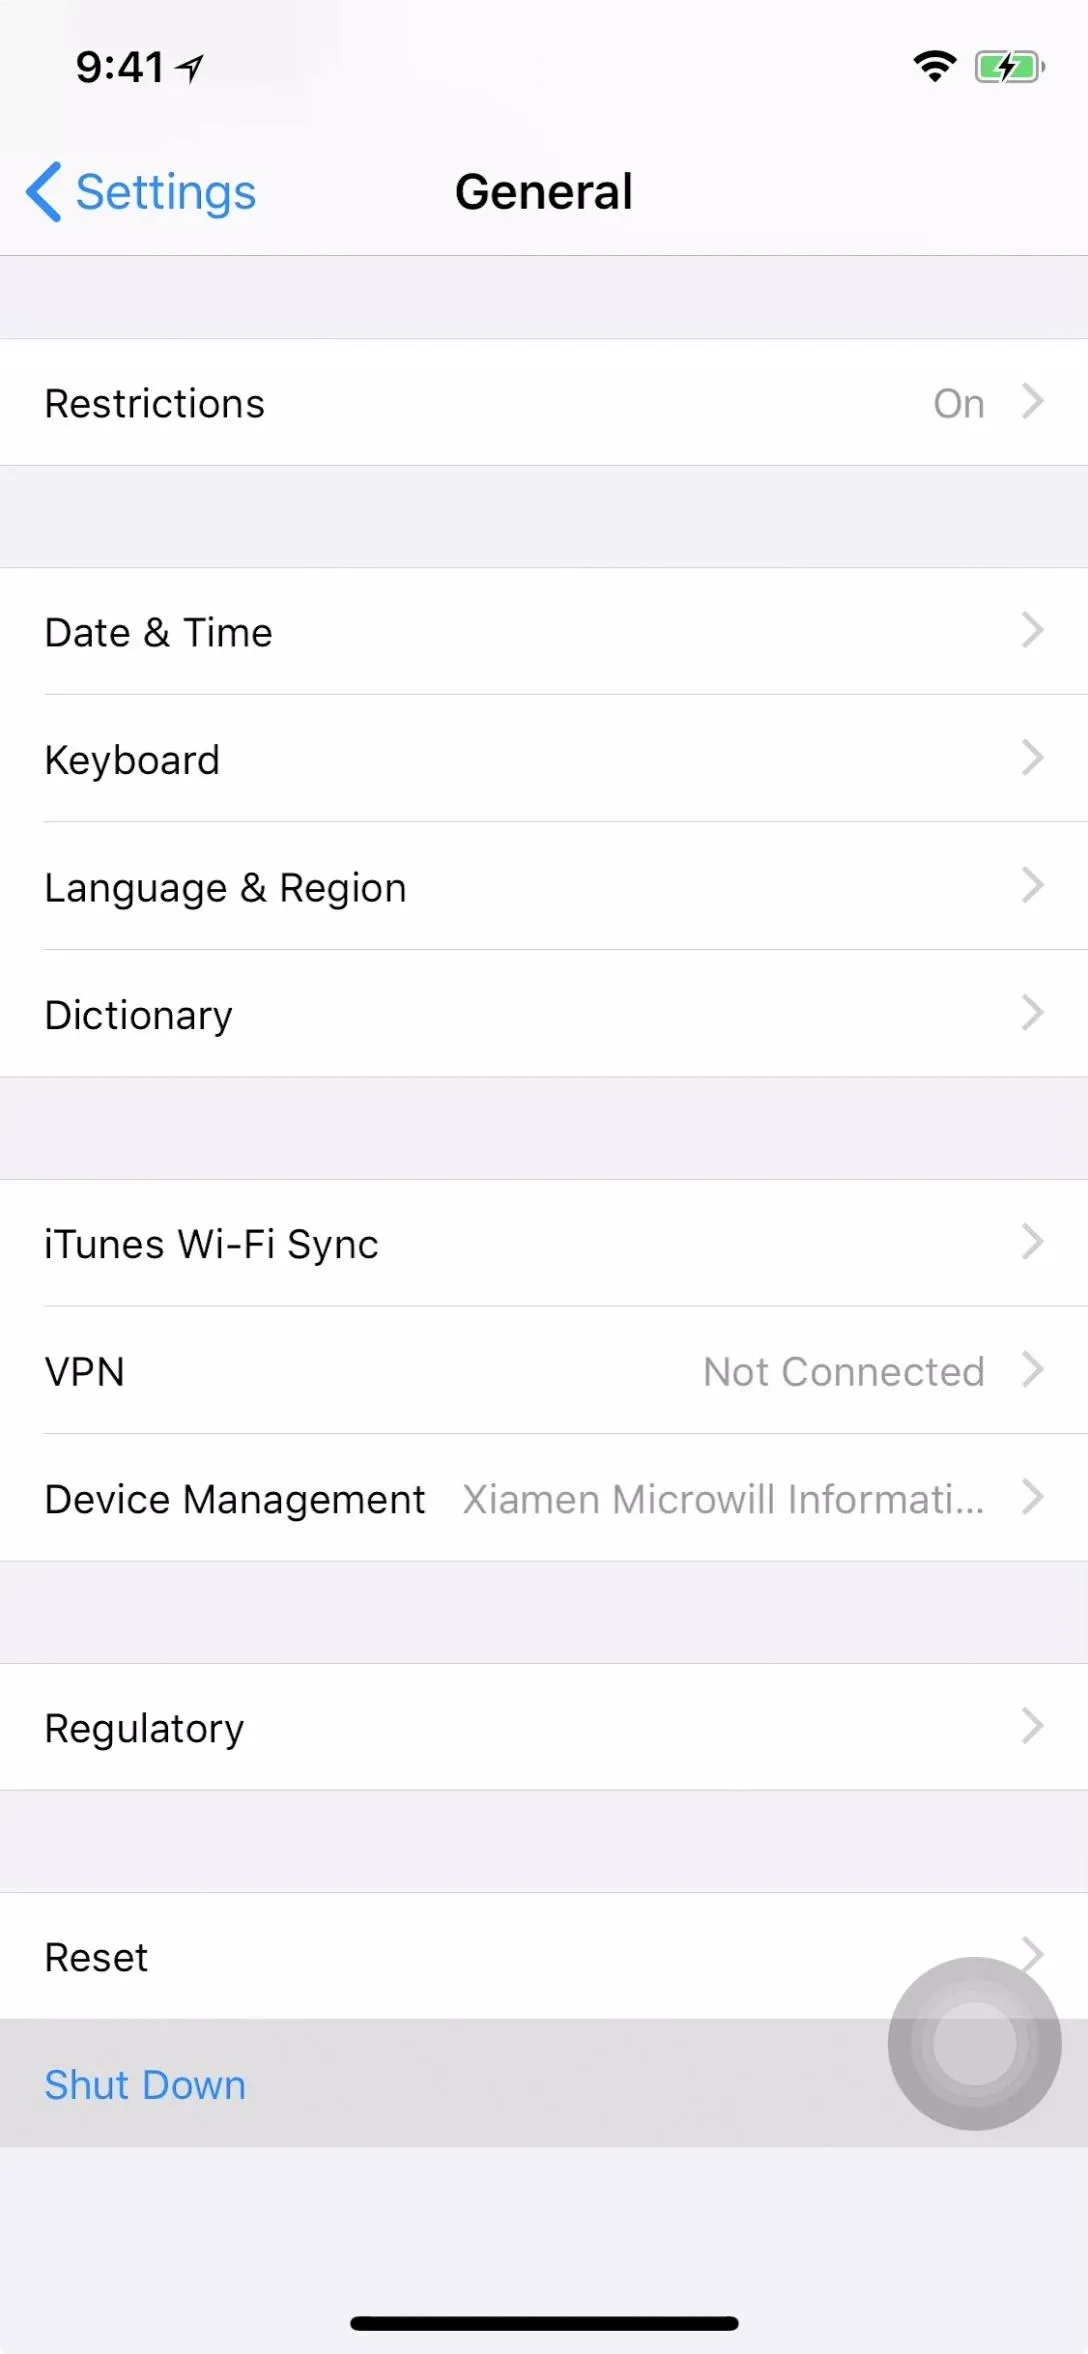
This is an important step. While on every other iPhone model, you can do this from any screen as long as the iPhone isn't locked or on the lock screen, for the iPhone X, you will need to stay in your Settings app.
In fact, you have to actually use iOS 11's new "Shut Down" button in the Settings app itself — you can't use the shortcut with the button presses which will automatically lock the device and disable Face ID. So, navigate back to the "General" menu in Settings, then scroll all the way down and tap "Shut Down."
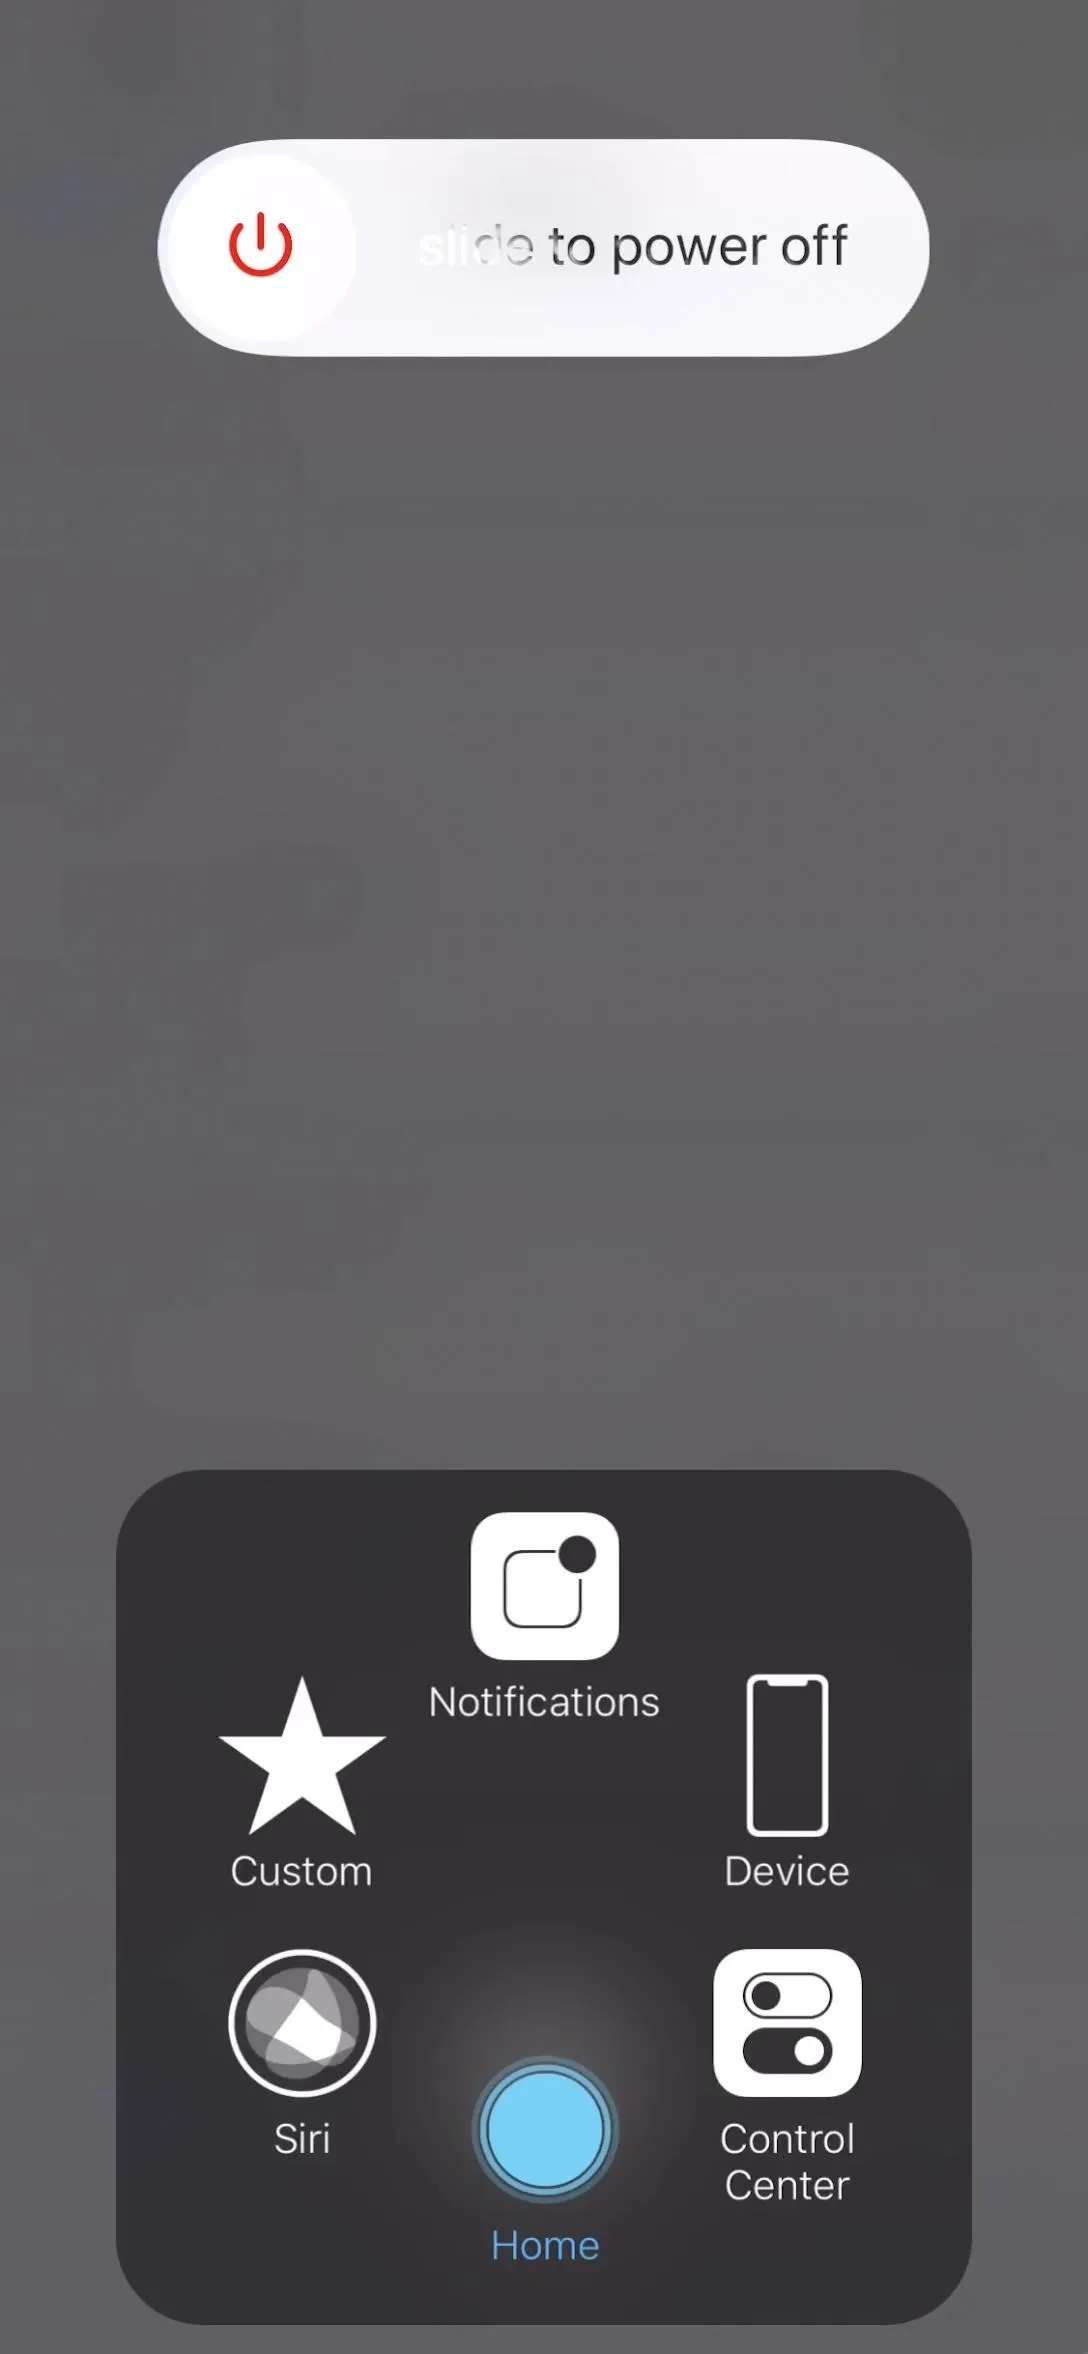
If you see the "Emergency SOS" option on the screen along with the "Slide to Power Off" option, then you used the button press method which won't work. You have to use the Settings' option for "Shut Down."


Clear Your RAM with the Virtual Home Button
Now, if you went straight to Step 3 from Step 1, the AssistiveTouch menu button should already be present on the screen. If you made a shortcut in Step 2, you may need to activate it to make sure AssistiveTouch is on your screen, ready to go.
Now, tap on the AssistiveTouch on-screen icon (or double-tap, long-press, or 3D touch it if you customized the "Open Menu" action in Step 2), then tap-and-hold on the "Home" button in the Assistive Touch menu until the screen turns black, then flashes white, and returns to where you were before.
This action clears the RAM of background processes, besides system processes and apps that have special permission to continue running as is, and all temporary files will be wiped from the temporary storage. This will not remove any apps from your app switcher, but most apps will be refreshed when you go back to access them.
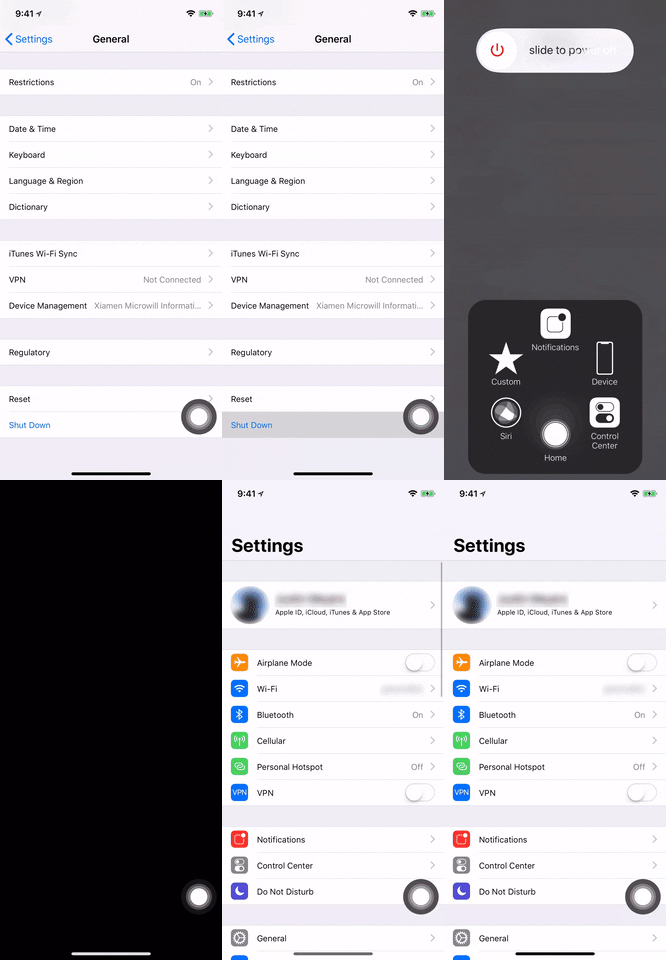


Thanks to how fast the iPhone X runs, when you use the app switcher or 3D Touch shortcut to switch apps quickly, the apps will need to be refreshed since they were wiped from the RAM, but it's hardly noticeable. In some cases, the app will refresh back to its initial home page, but sometimes it stays right where you were last.
If you have other iOS devices, this trick will also work on them as long as they're running iOS 11 or higher. If they're running iOS 10.3.3 or lower, well, they can just use the normal Home button method instead.
I actually reached out to Apple to see why they included this secret RAM-clearing trick into iOS for the iPhone X and other iPhone models, but at the time of this writing, I haven't heard back. I'll update you if I ever get an official response.
- Follow Gadget Hacks on Facebook, Twitter, YouTube, and Flipboard
- Follow WonderHowTo on Facebook, Twitter, Pinterest, and Flipboard
Cover photo, screenshots, and GIFs by Justin Meyers/Gadget Hacks


Comments
Be the first, drop a comment!