Apple introduced layered recordings in Voice Memos back in September, and the feature finally arrived with the latest update for the iPhone 16 Pro and 16 Pro Max. This exciting addition transforms the app into a versatile tool for musicians and storytellers, making it easier than ever to craft songs, narrations, or other creative projects.
Imagine recording an instrumental track, then seamlessly layering vocals or a voiceover on top. Or take a lyric-filled recording and enhance it with live instruments. As you capture the second layer, the app lets you hear the first track through your device's speakers or headphones, keeping everything in sync. Once saved, you can fine-tune the recording, adjusting settings like the balance slider to emphasize one layer over the other.
- Don't Miss: The Complete iOS 18.2 Features Guide — Here's Everything New and Improved for Your iPhone
Before diving into dual-layer recording in Voice Memos, you'll want to know the following:
- Dual-layer recording works on iPhone 16 Pro and iPhone 16 Pro Max, running iOS 18.2 or later.
- Dual-layer audio files are saved in QuickTime Audio (QTA) format and are playable on any device running at least iOS 18.2, iPadOS 18.2, or macOS Sequoia 15.2. They are not visible on devices running older software.
- Separated track layers are saved in M4A format and are playable on devices running older software.
- You can enable stereo recording via Settings » Apps » Voice Memos » Stereo Recording, but it only applies to the first layer. The additional layer will be recorded in mono.
- You can import dual-layer audio files into Logic Pro.
Now, let's see how it all works.
Recording a Second Audio Track
Open Voice Memos, select the audio recording you want to add a layer to, then tap the waveform icon to open the editor view. You can also tap the More (•••) button, then "Edit Recording," to open the editor. On the waveform layer, tap the new plus (+) button.
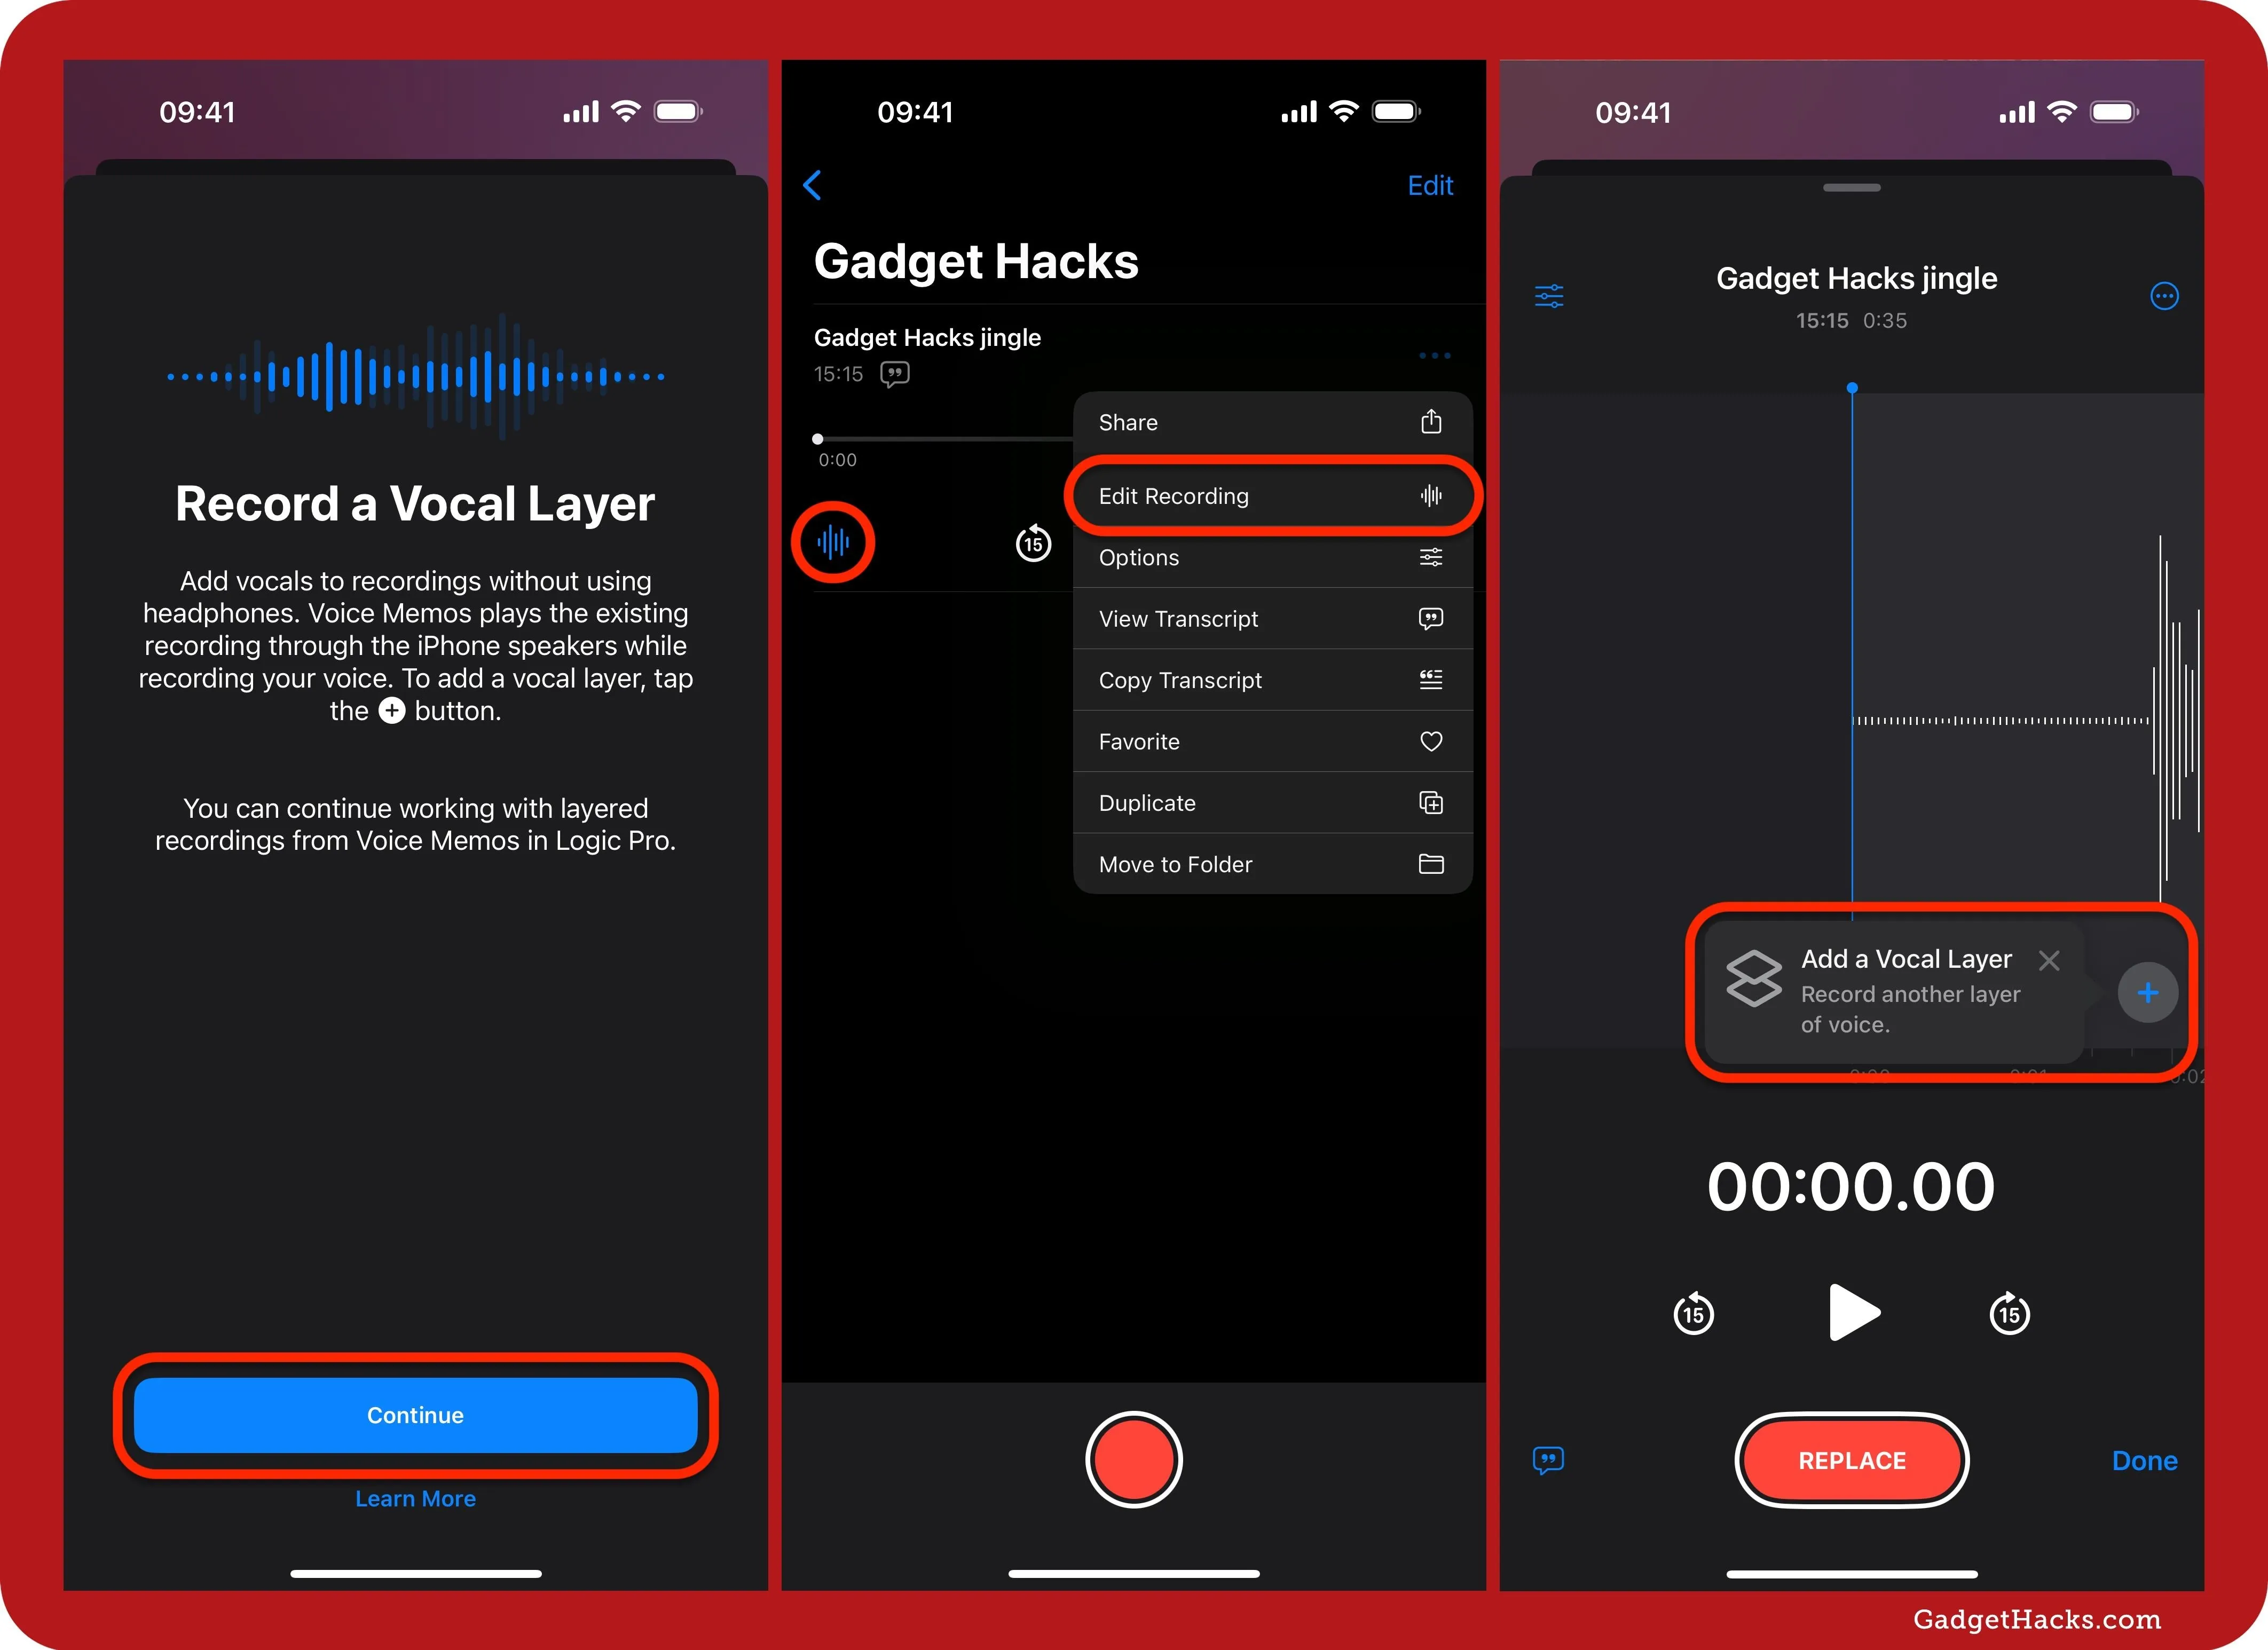
Choose which layer to record on; layer "1" is your existing recording, while "2" is empty. If adding a new layer, keep it on "2" and hit the record button. If replacing the current layer, switch it to "1" and hit the "Replace" button.
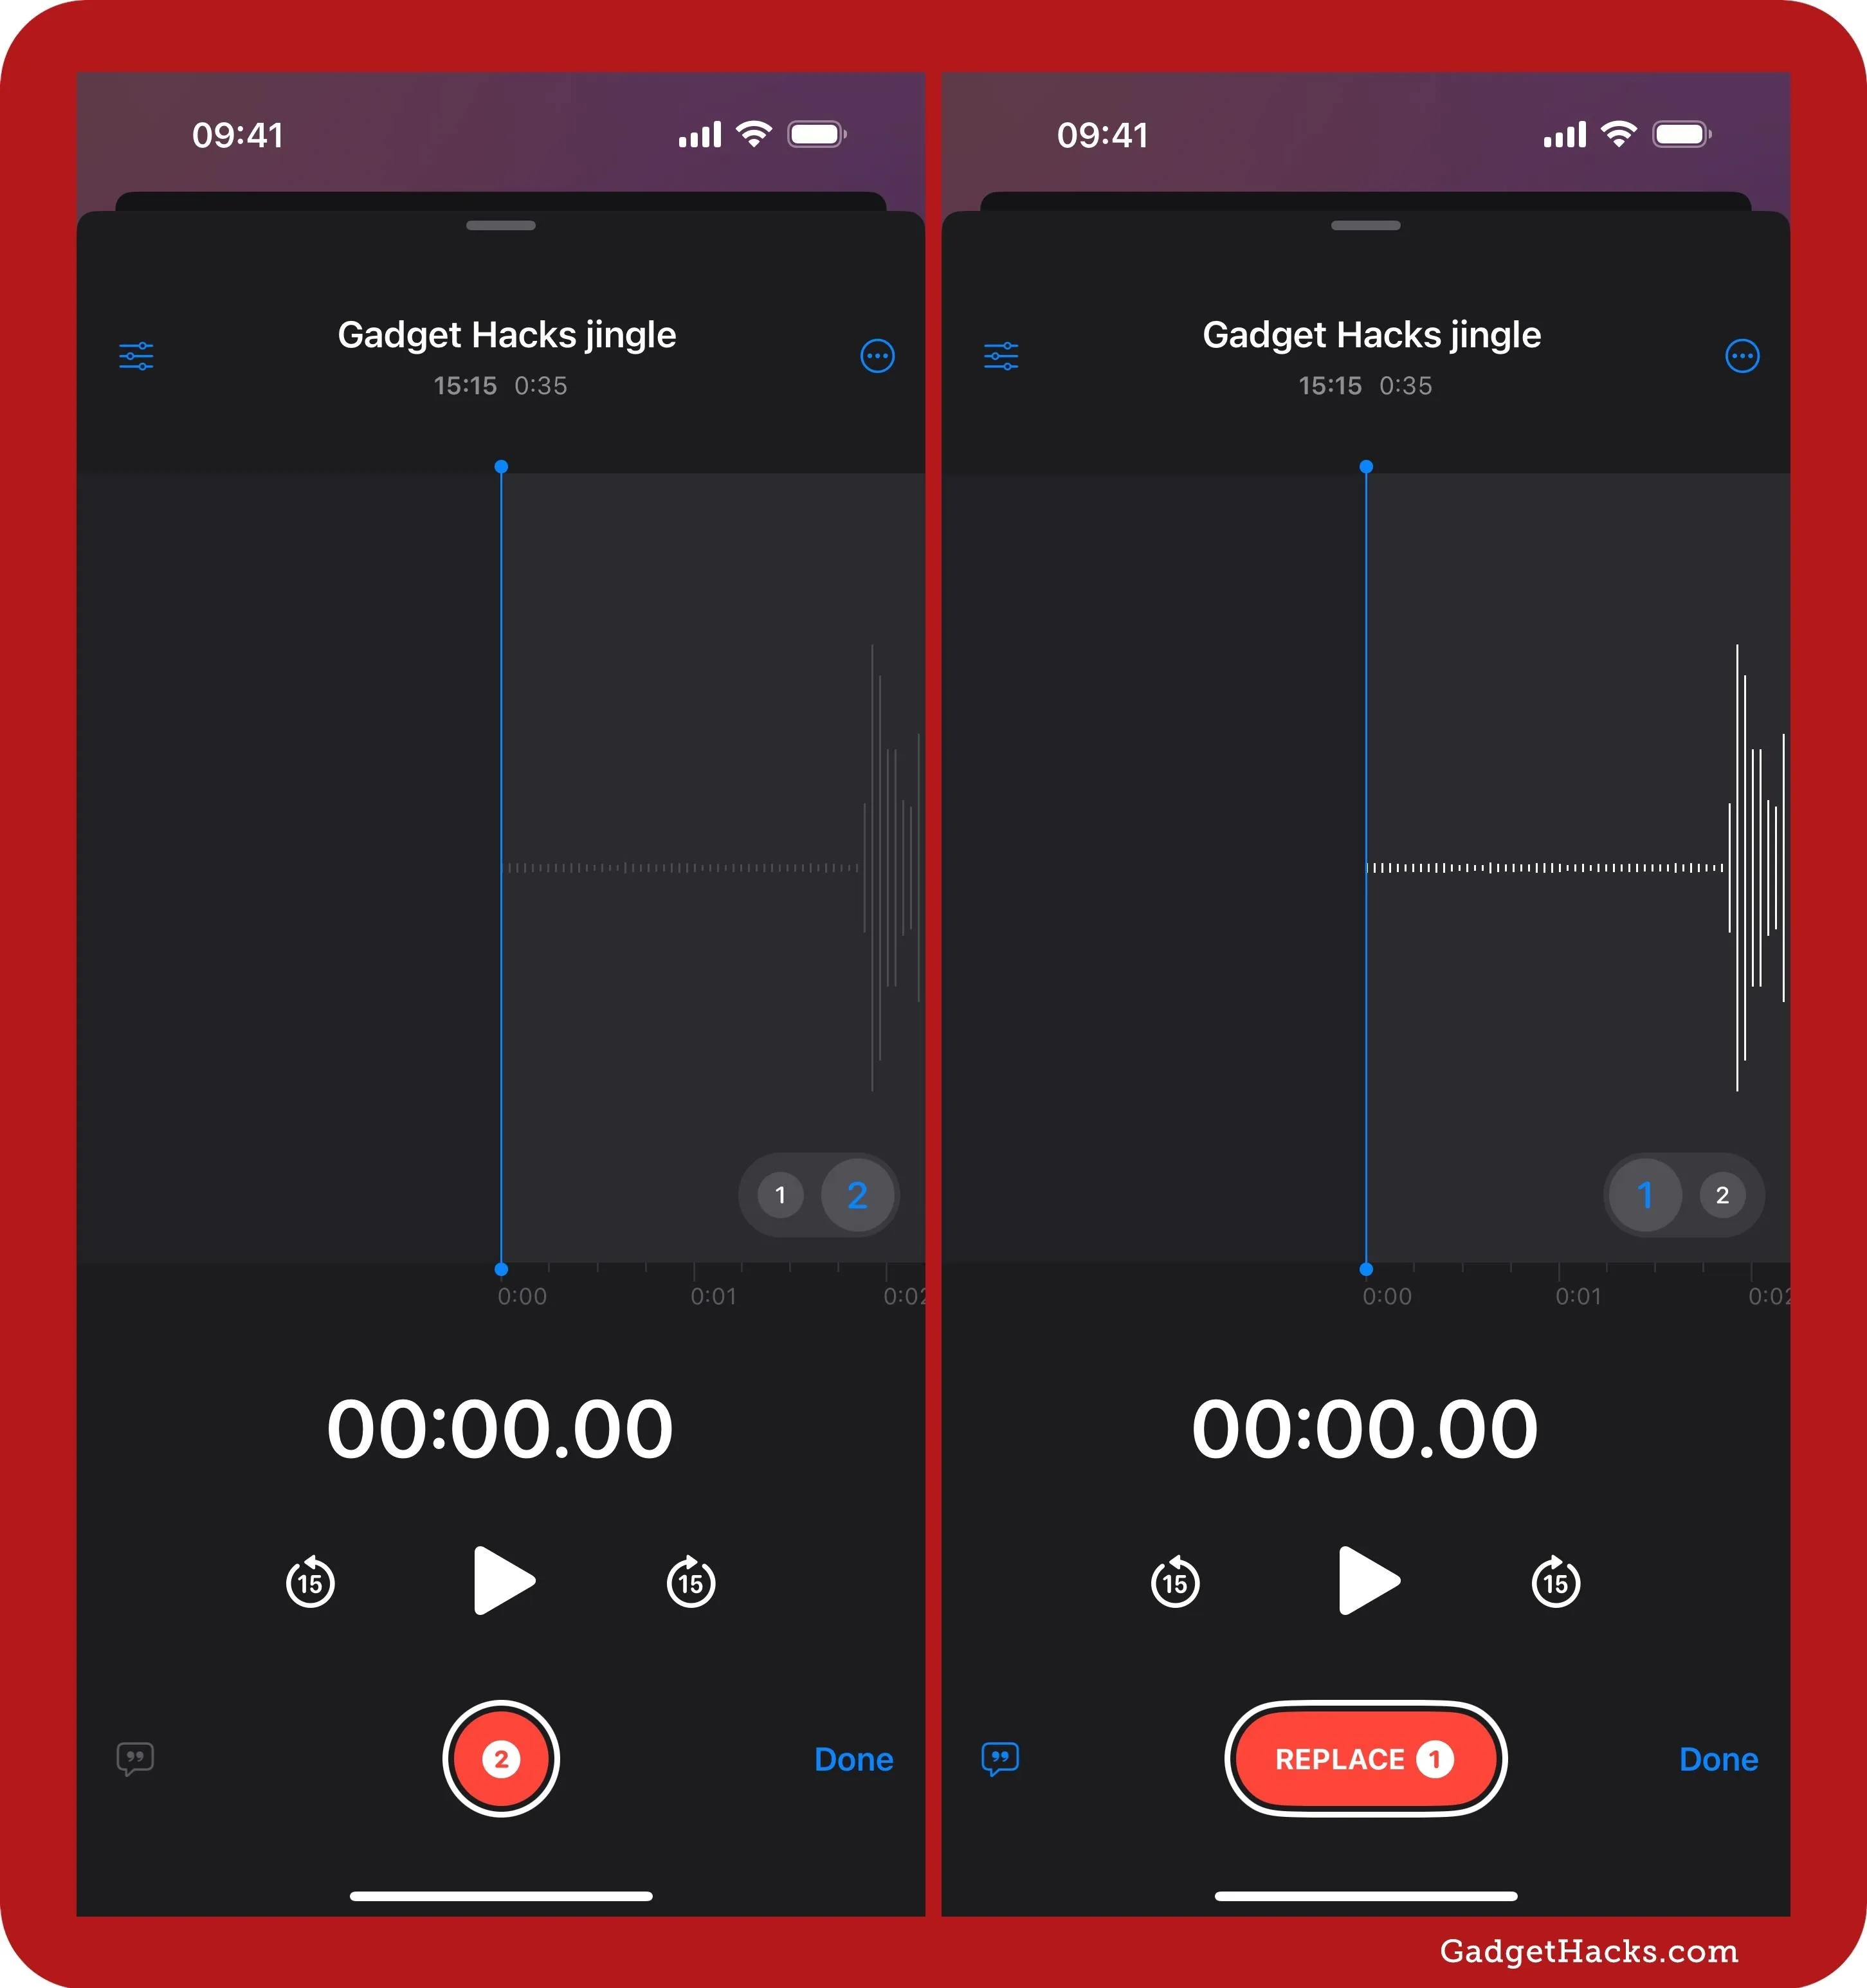
The original layer will play over your iPhone's built-in speakers so you can follow along while recording the second layer. You can also wear AirPods or other mic-equipped headphones to listen and record simultaneously with greater clarity.
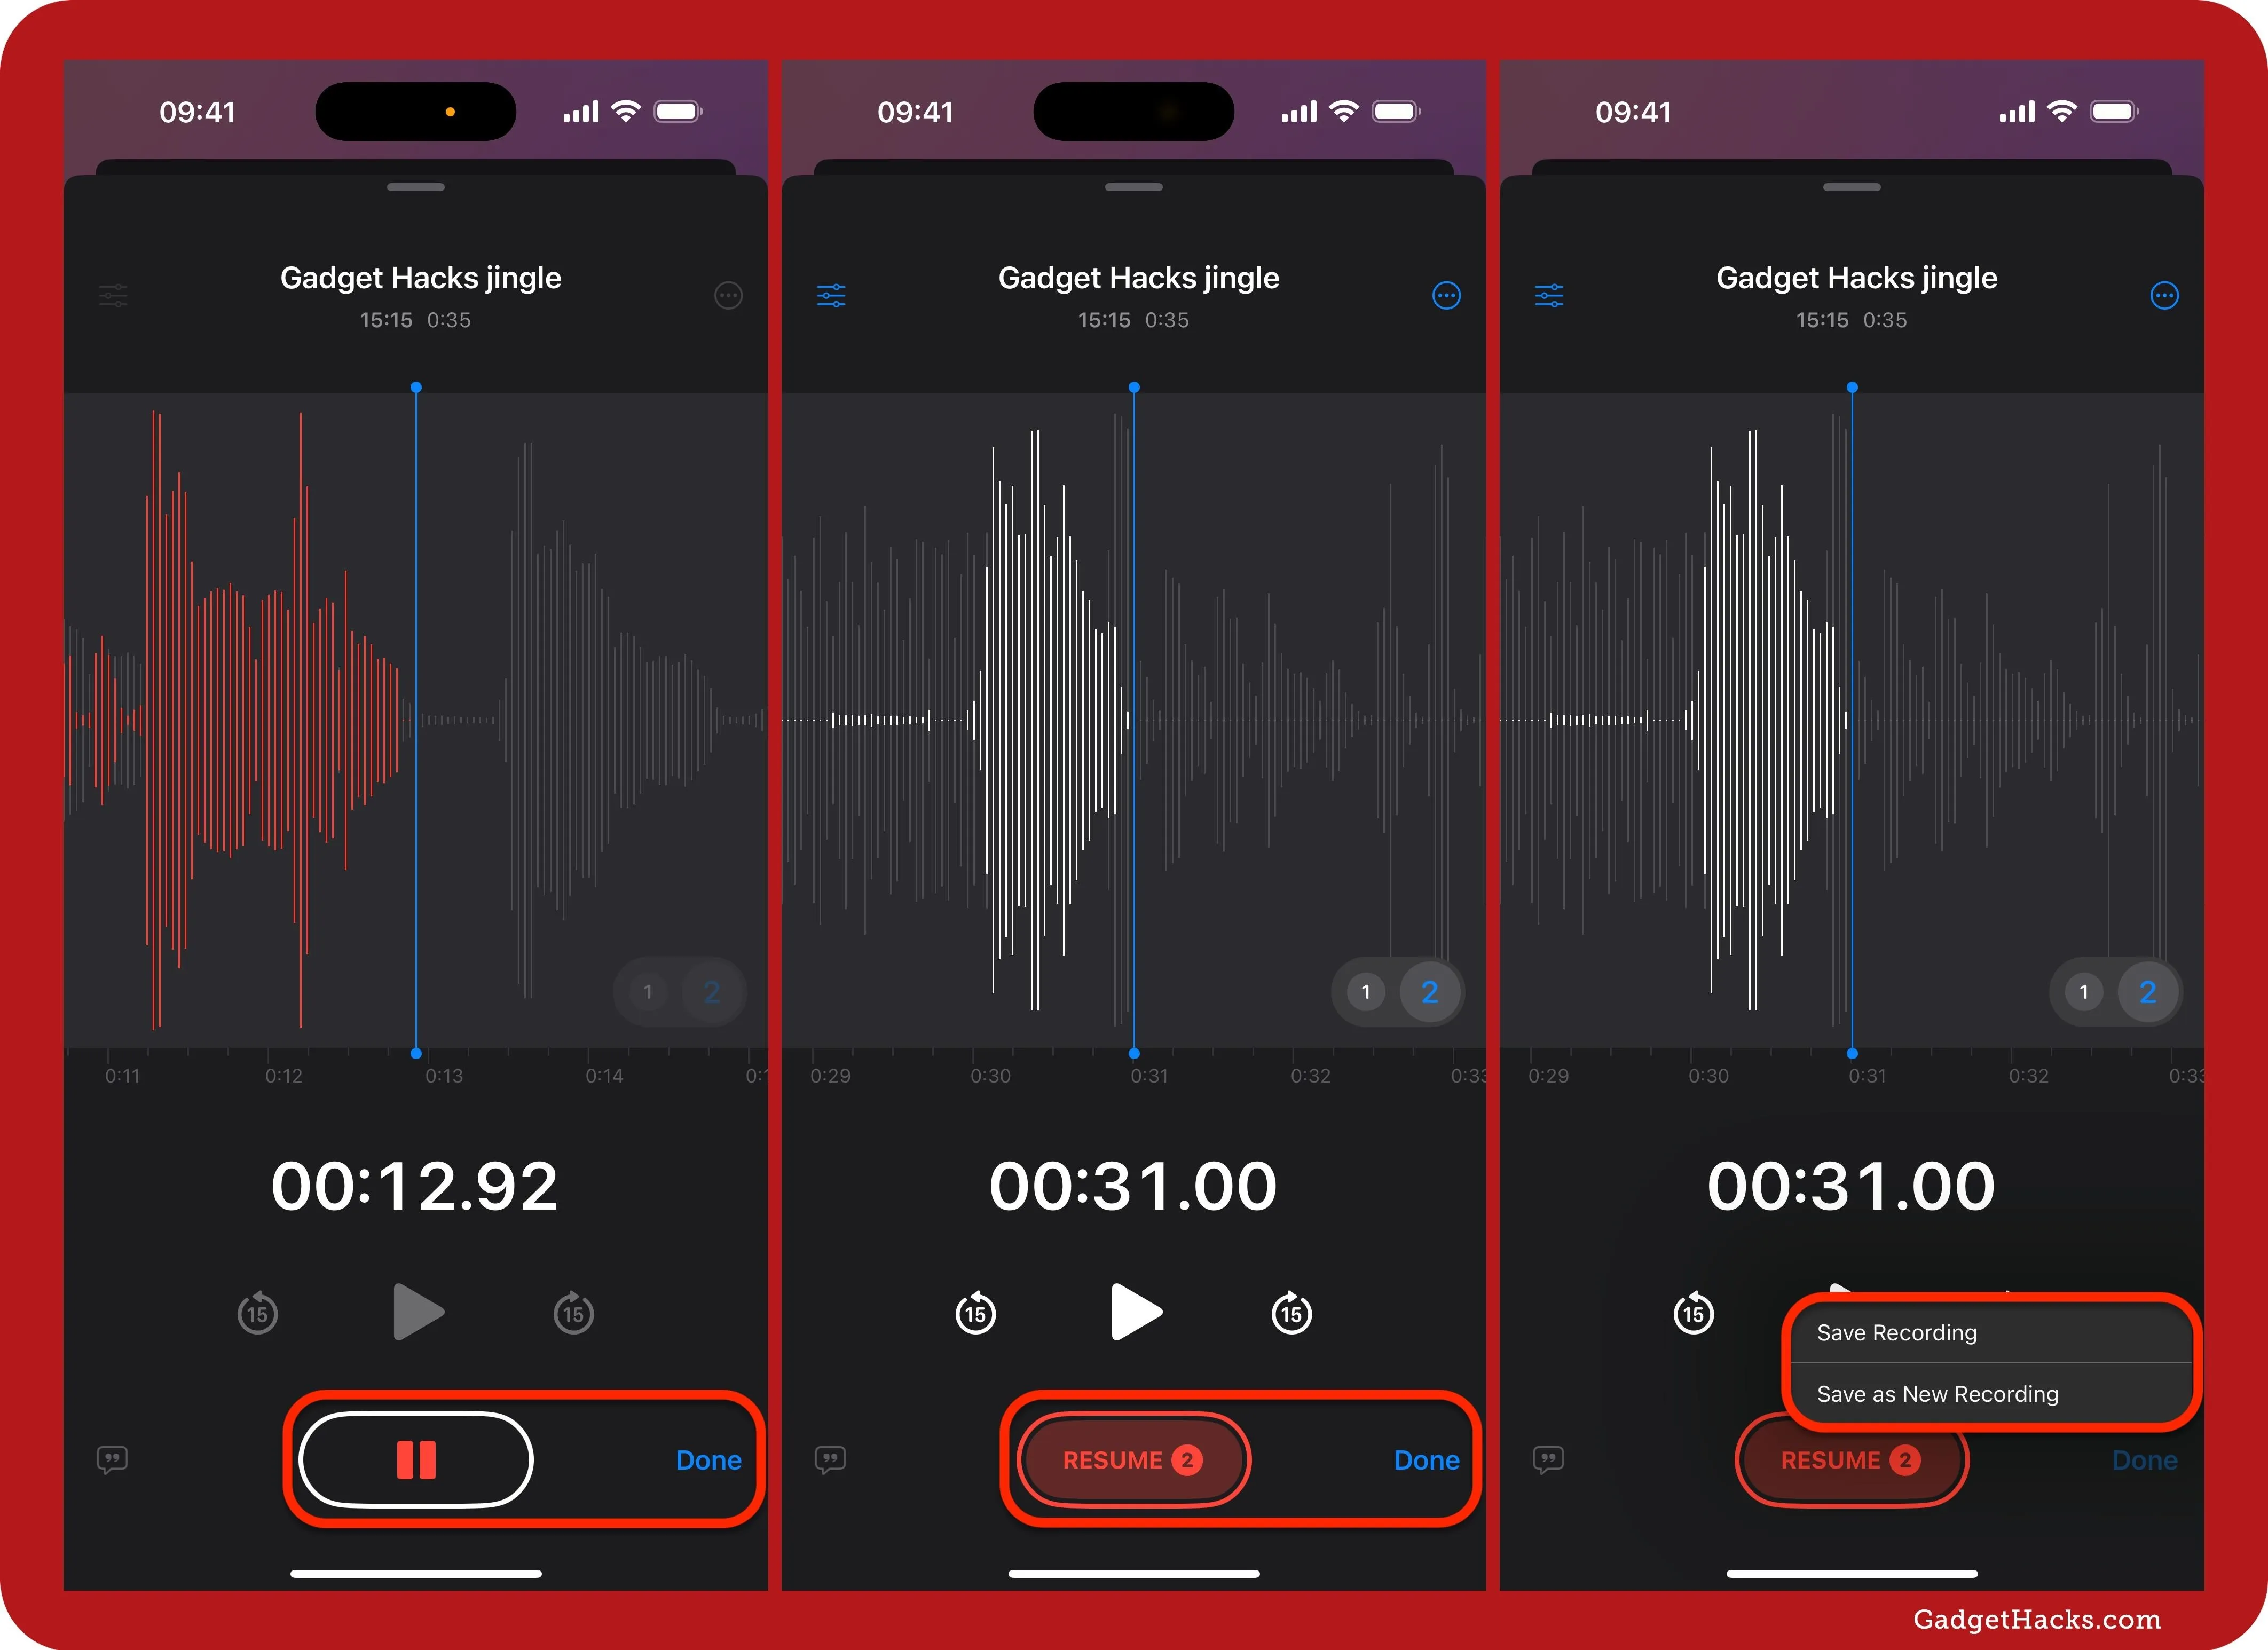
You can pause as many times as you need during recording. When paused, you can also move the play head around on the track to skip ahead or go back and make changes to what you just recorded. Tap "Resume" or "Replace" as necessary until the track is as you want.
To save, tap "Done," then choose between "Save Recording," which saves the new track to the current audio file, and "Save as New Recording," which duplicates everything into a new audio file, leaving the current one untouched.
Finding Your Dual-Track Recordings
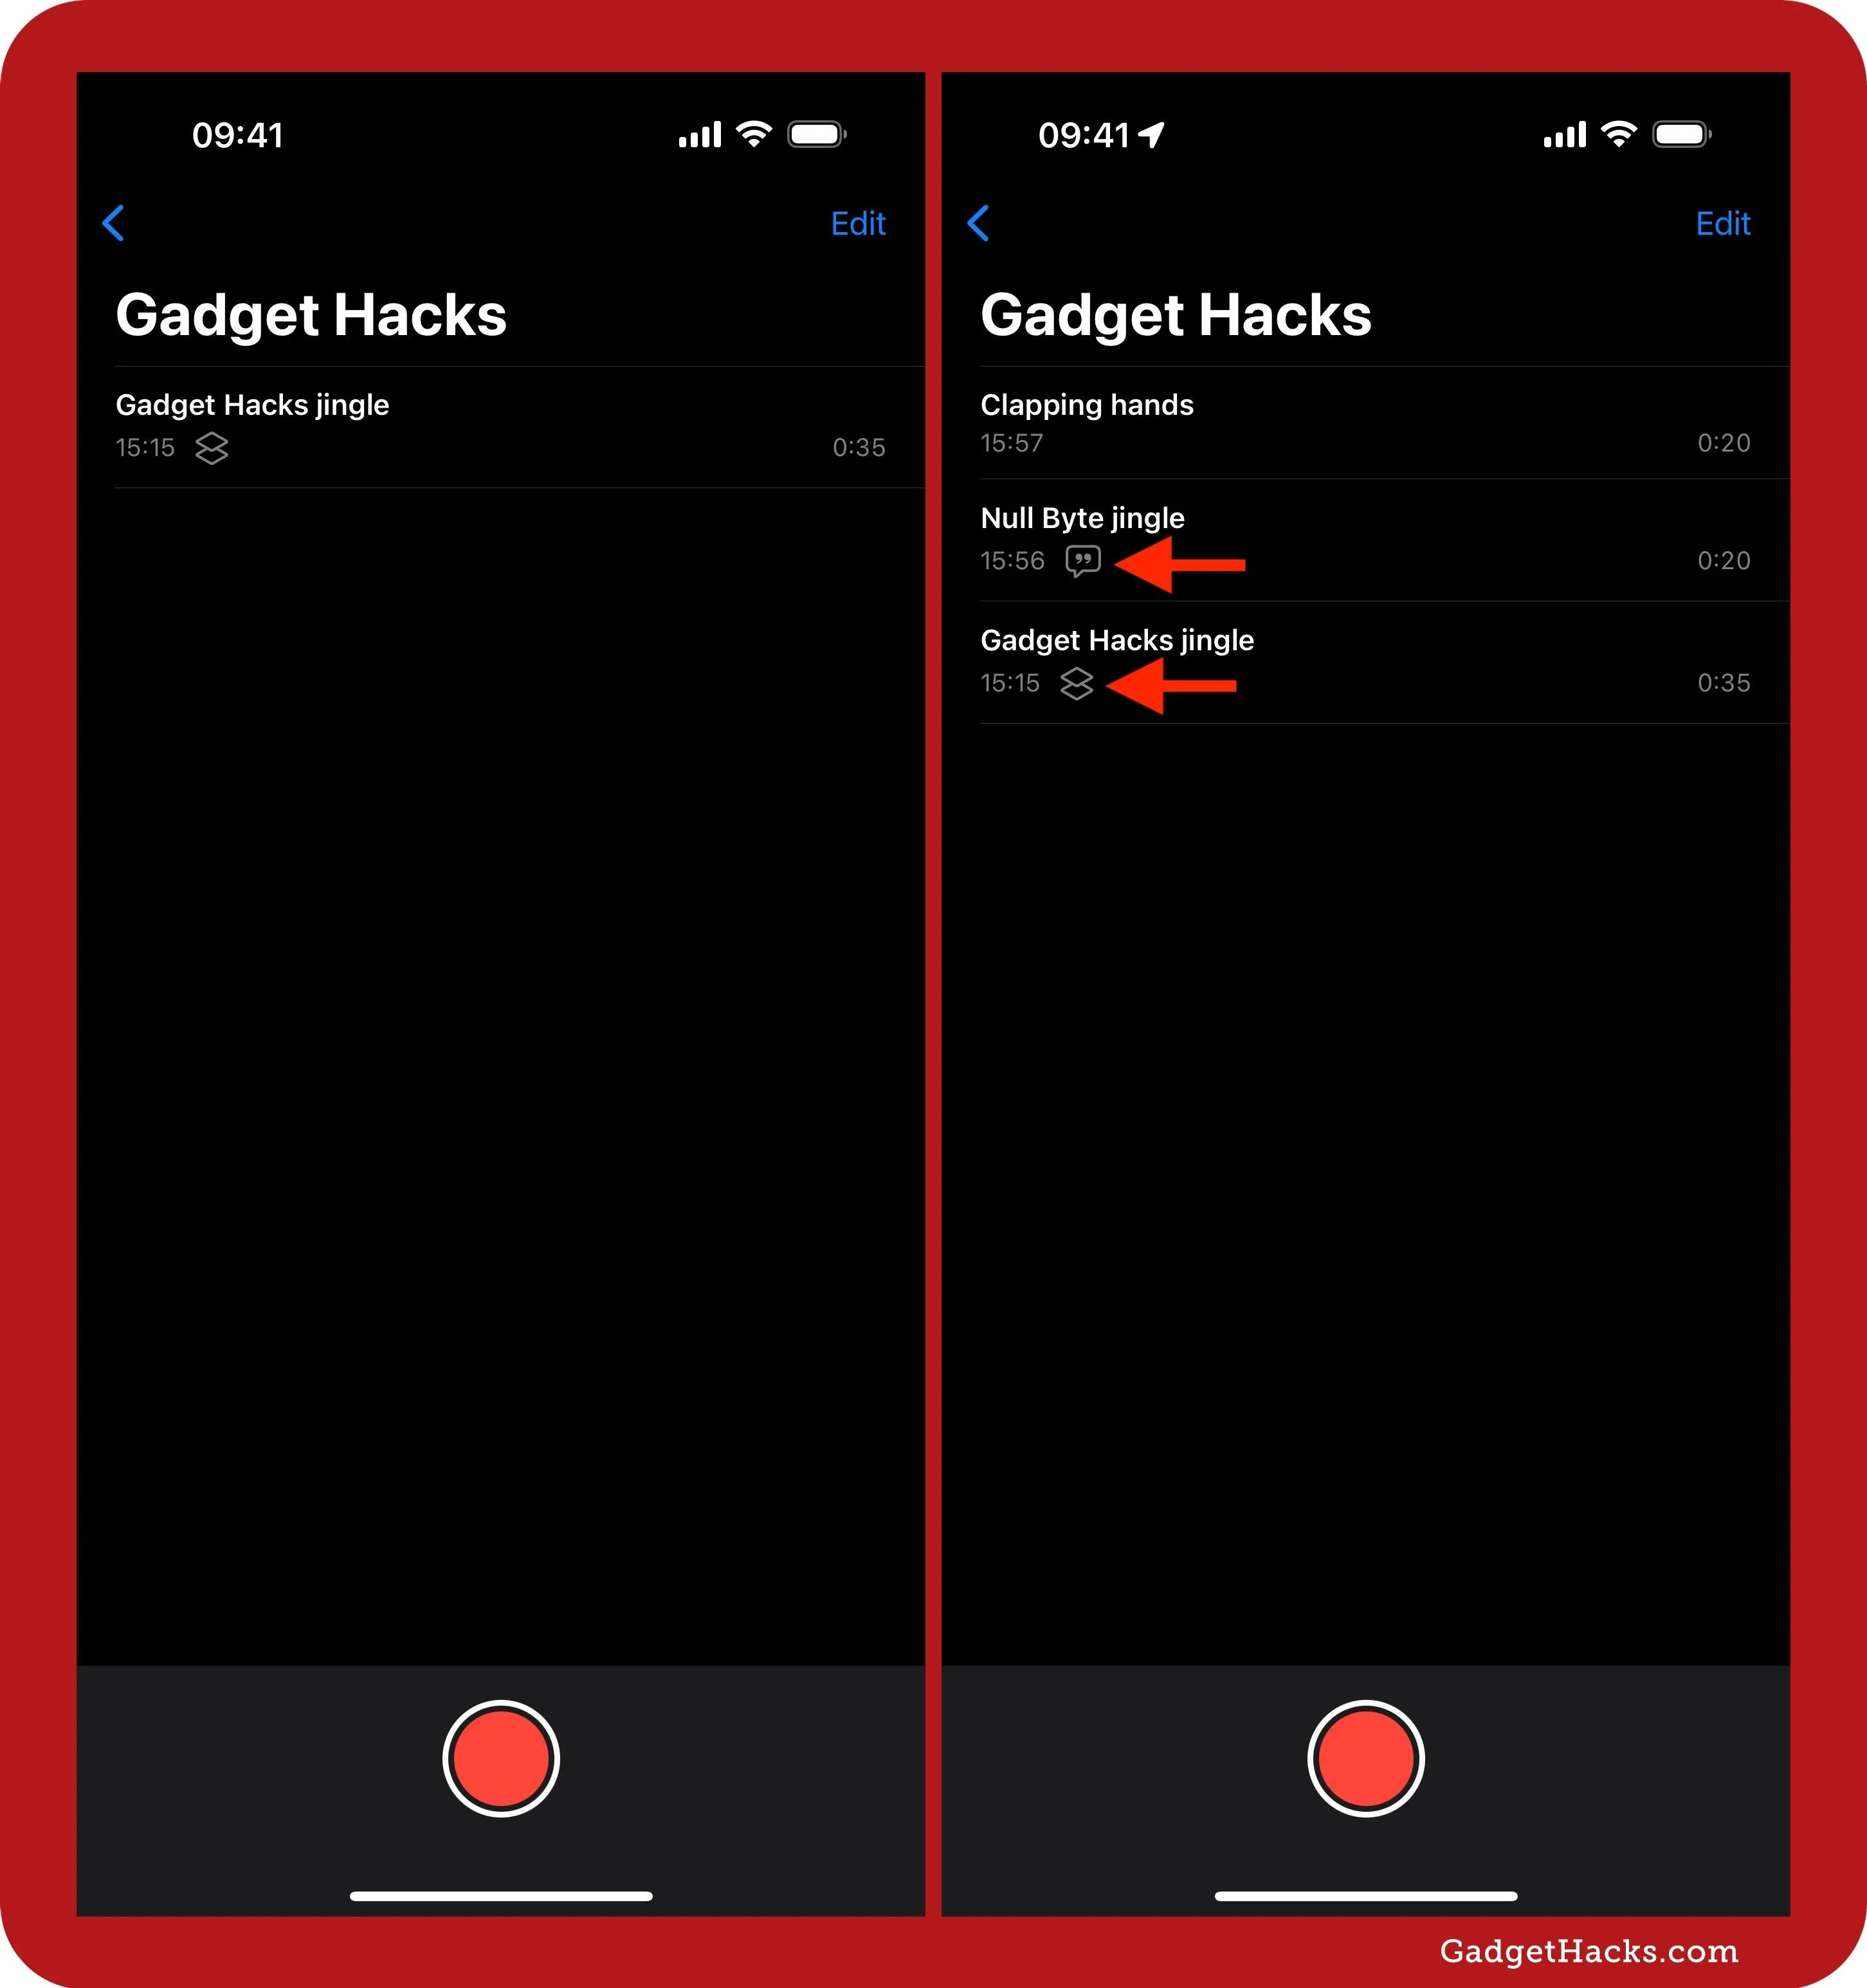
An audio recording with two tracks will be labeled with a dual-track symbol, making it easy to differentiate from single-track recordings that have either a speech bubble or nothing.
Separating Track Layers into Their Own Files
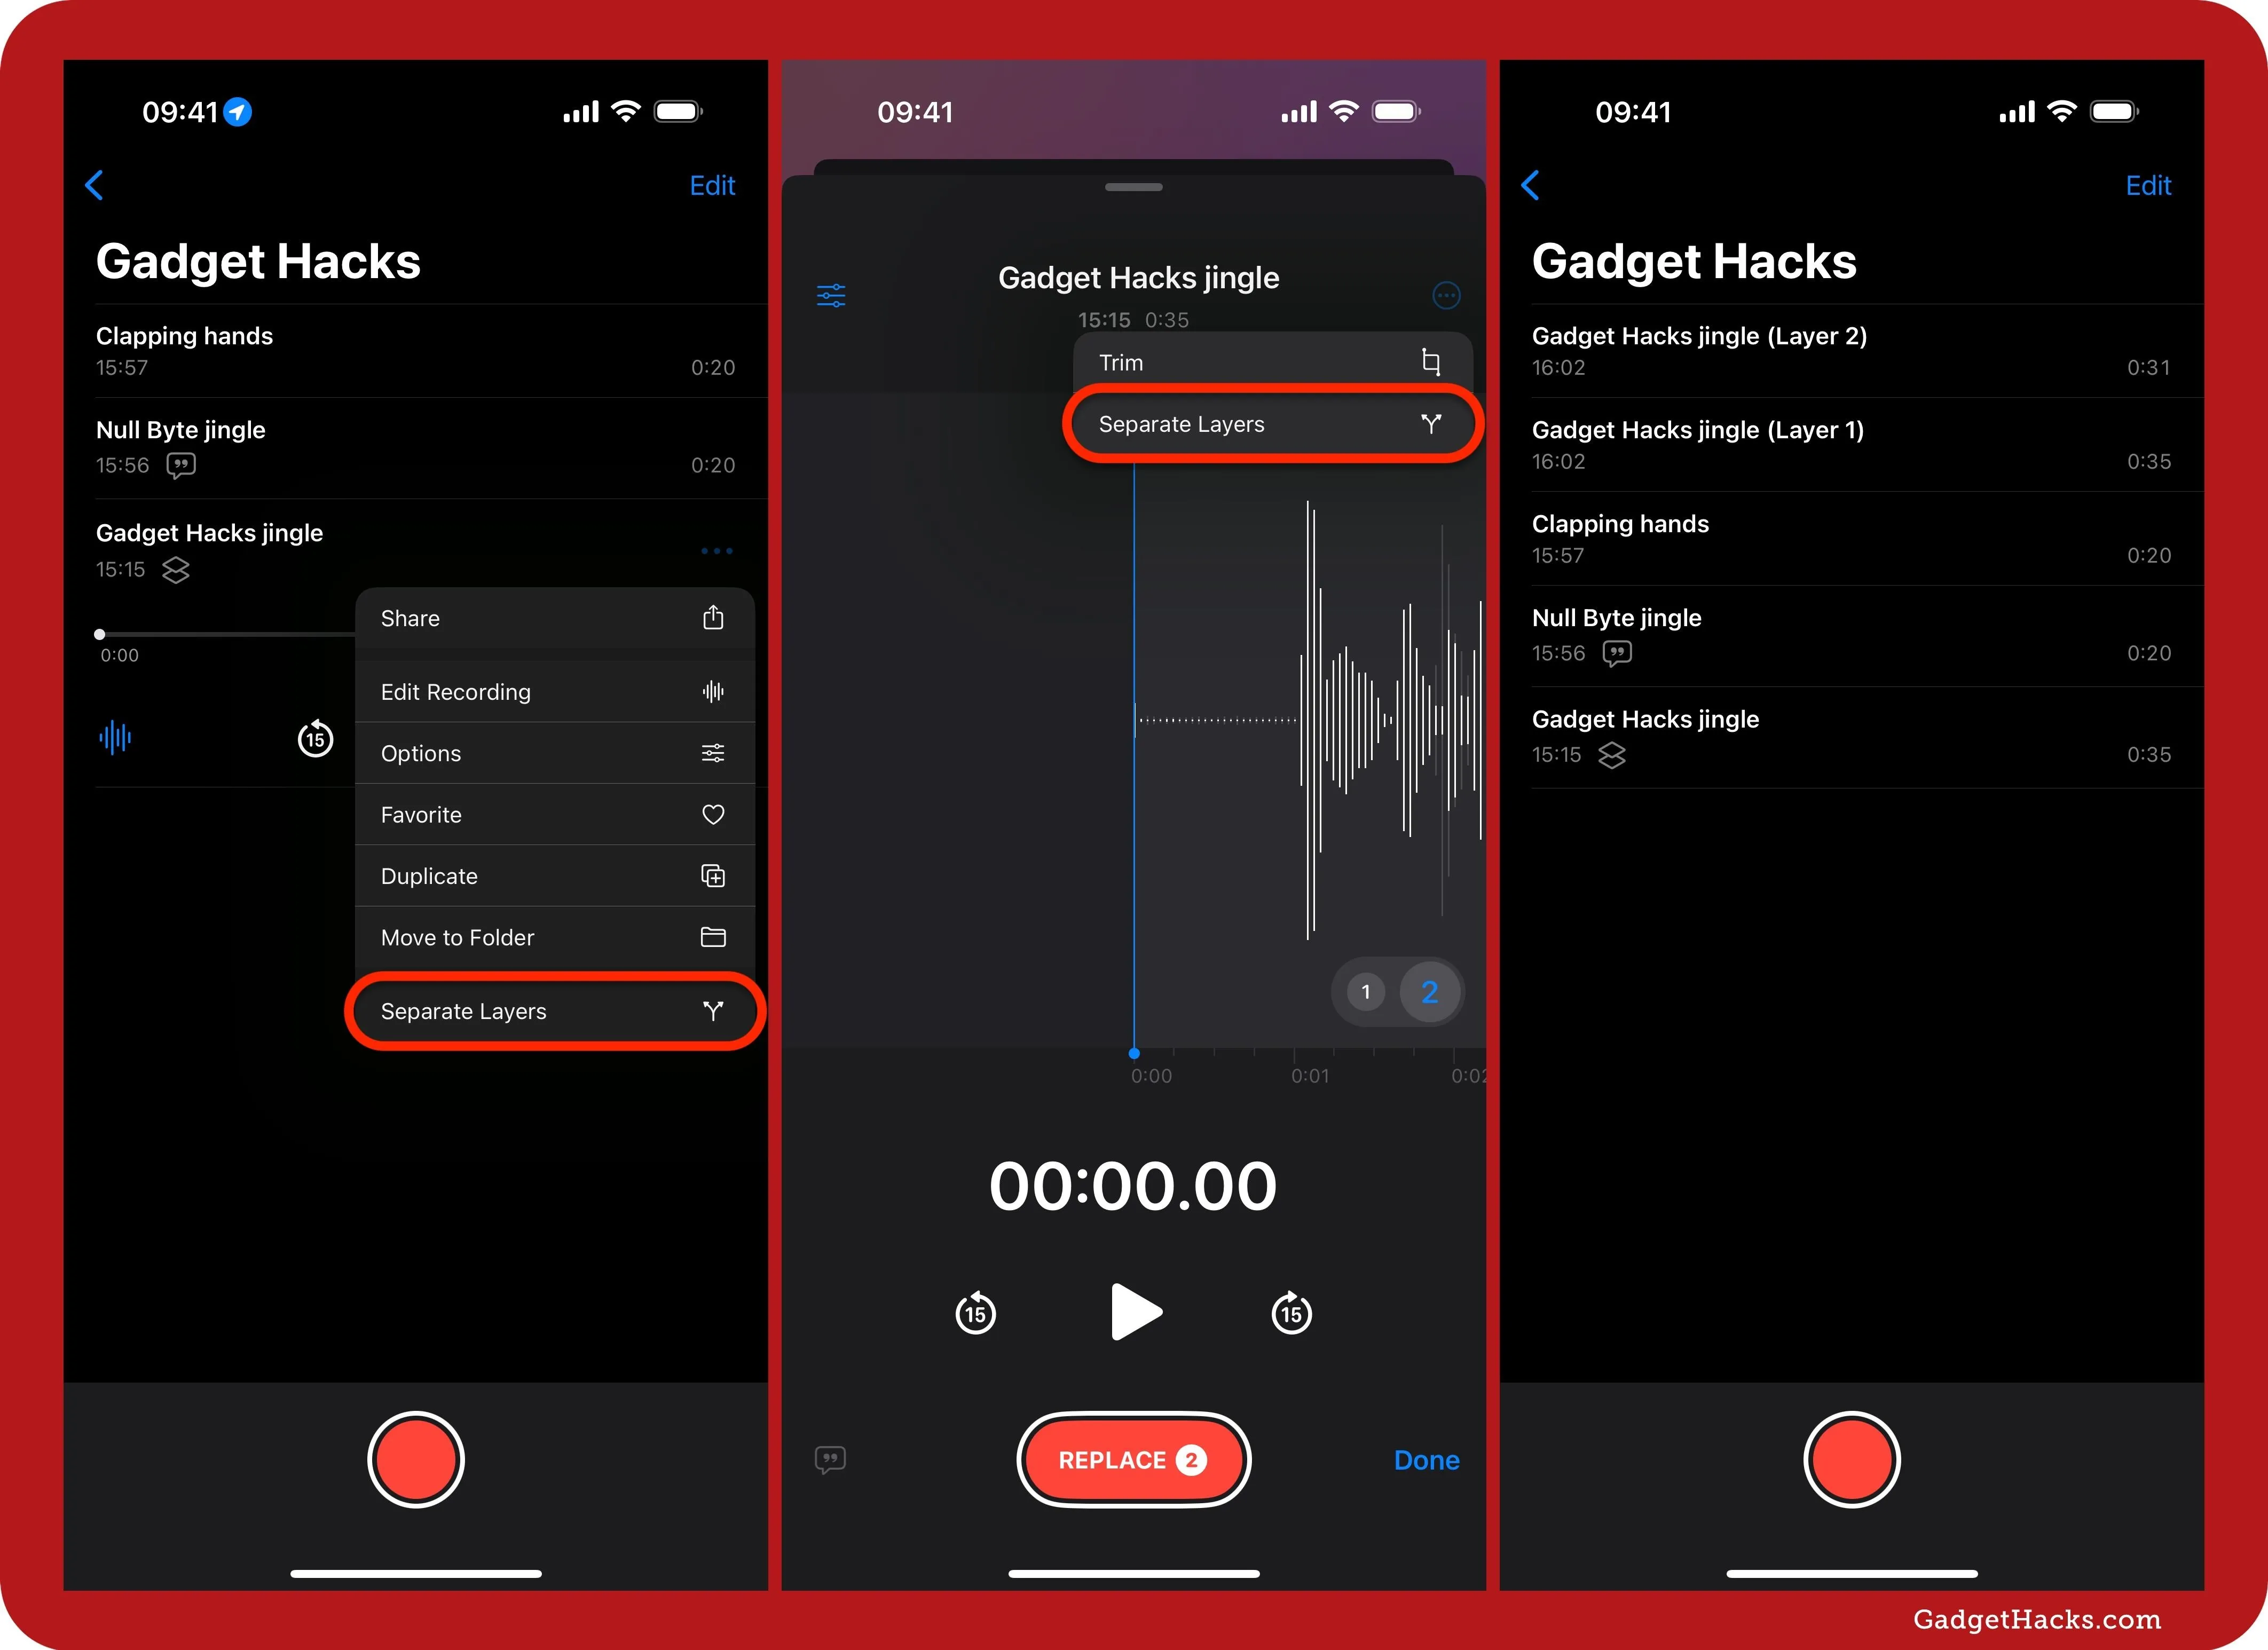
If you want to work with just one of the layers in a dual-track recording, you can separate them from the QTA file into individual M4A files. To do so, select the file from the list view, hit the More (•••) button, and choose "Separate Layers." Alternatively, open the editor for the file, tap More (•••), and choose "Separate Layers."
You can view the separated tracks in "All Recordings." If the original file was in a custom folder, the separated tracks will, unfortunately, not appear in it, too. But you can find them in "All Recordings."
Mixing the Layers in a Dual-Track Recording
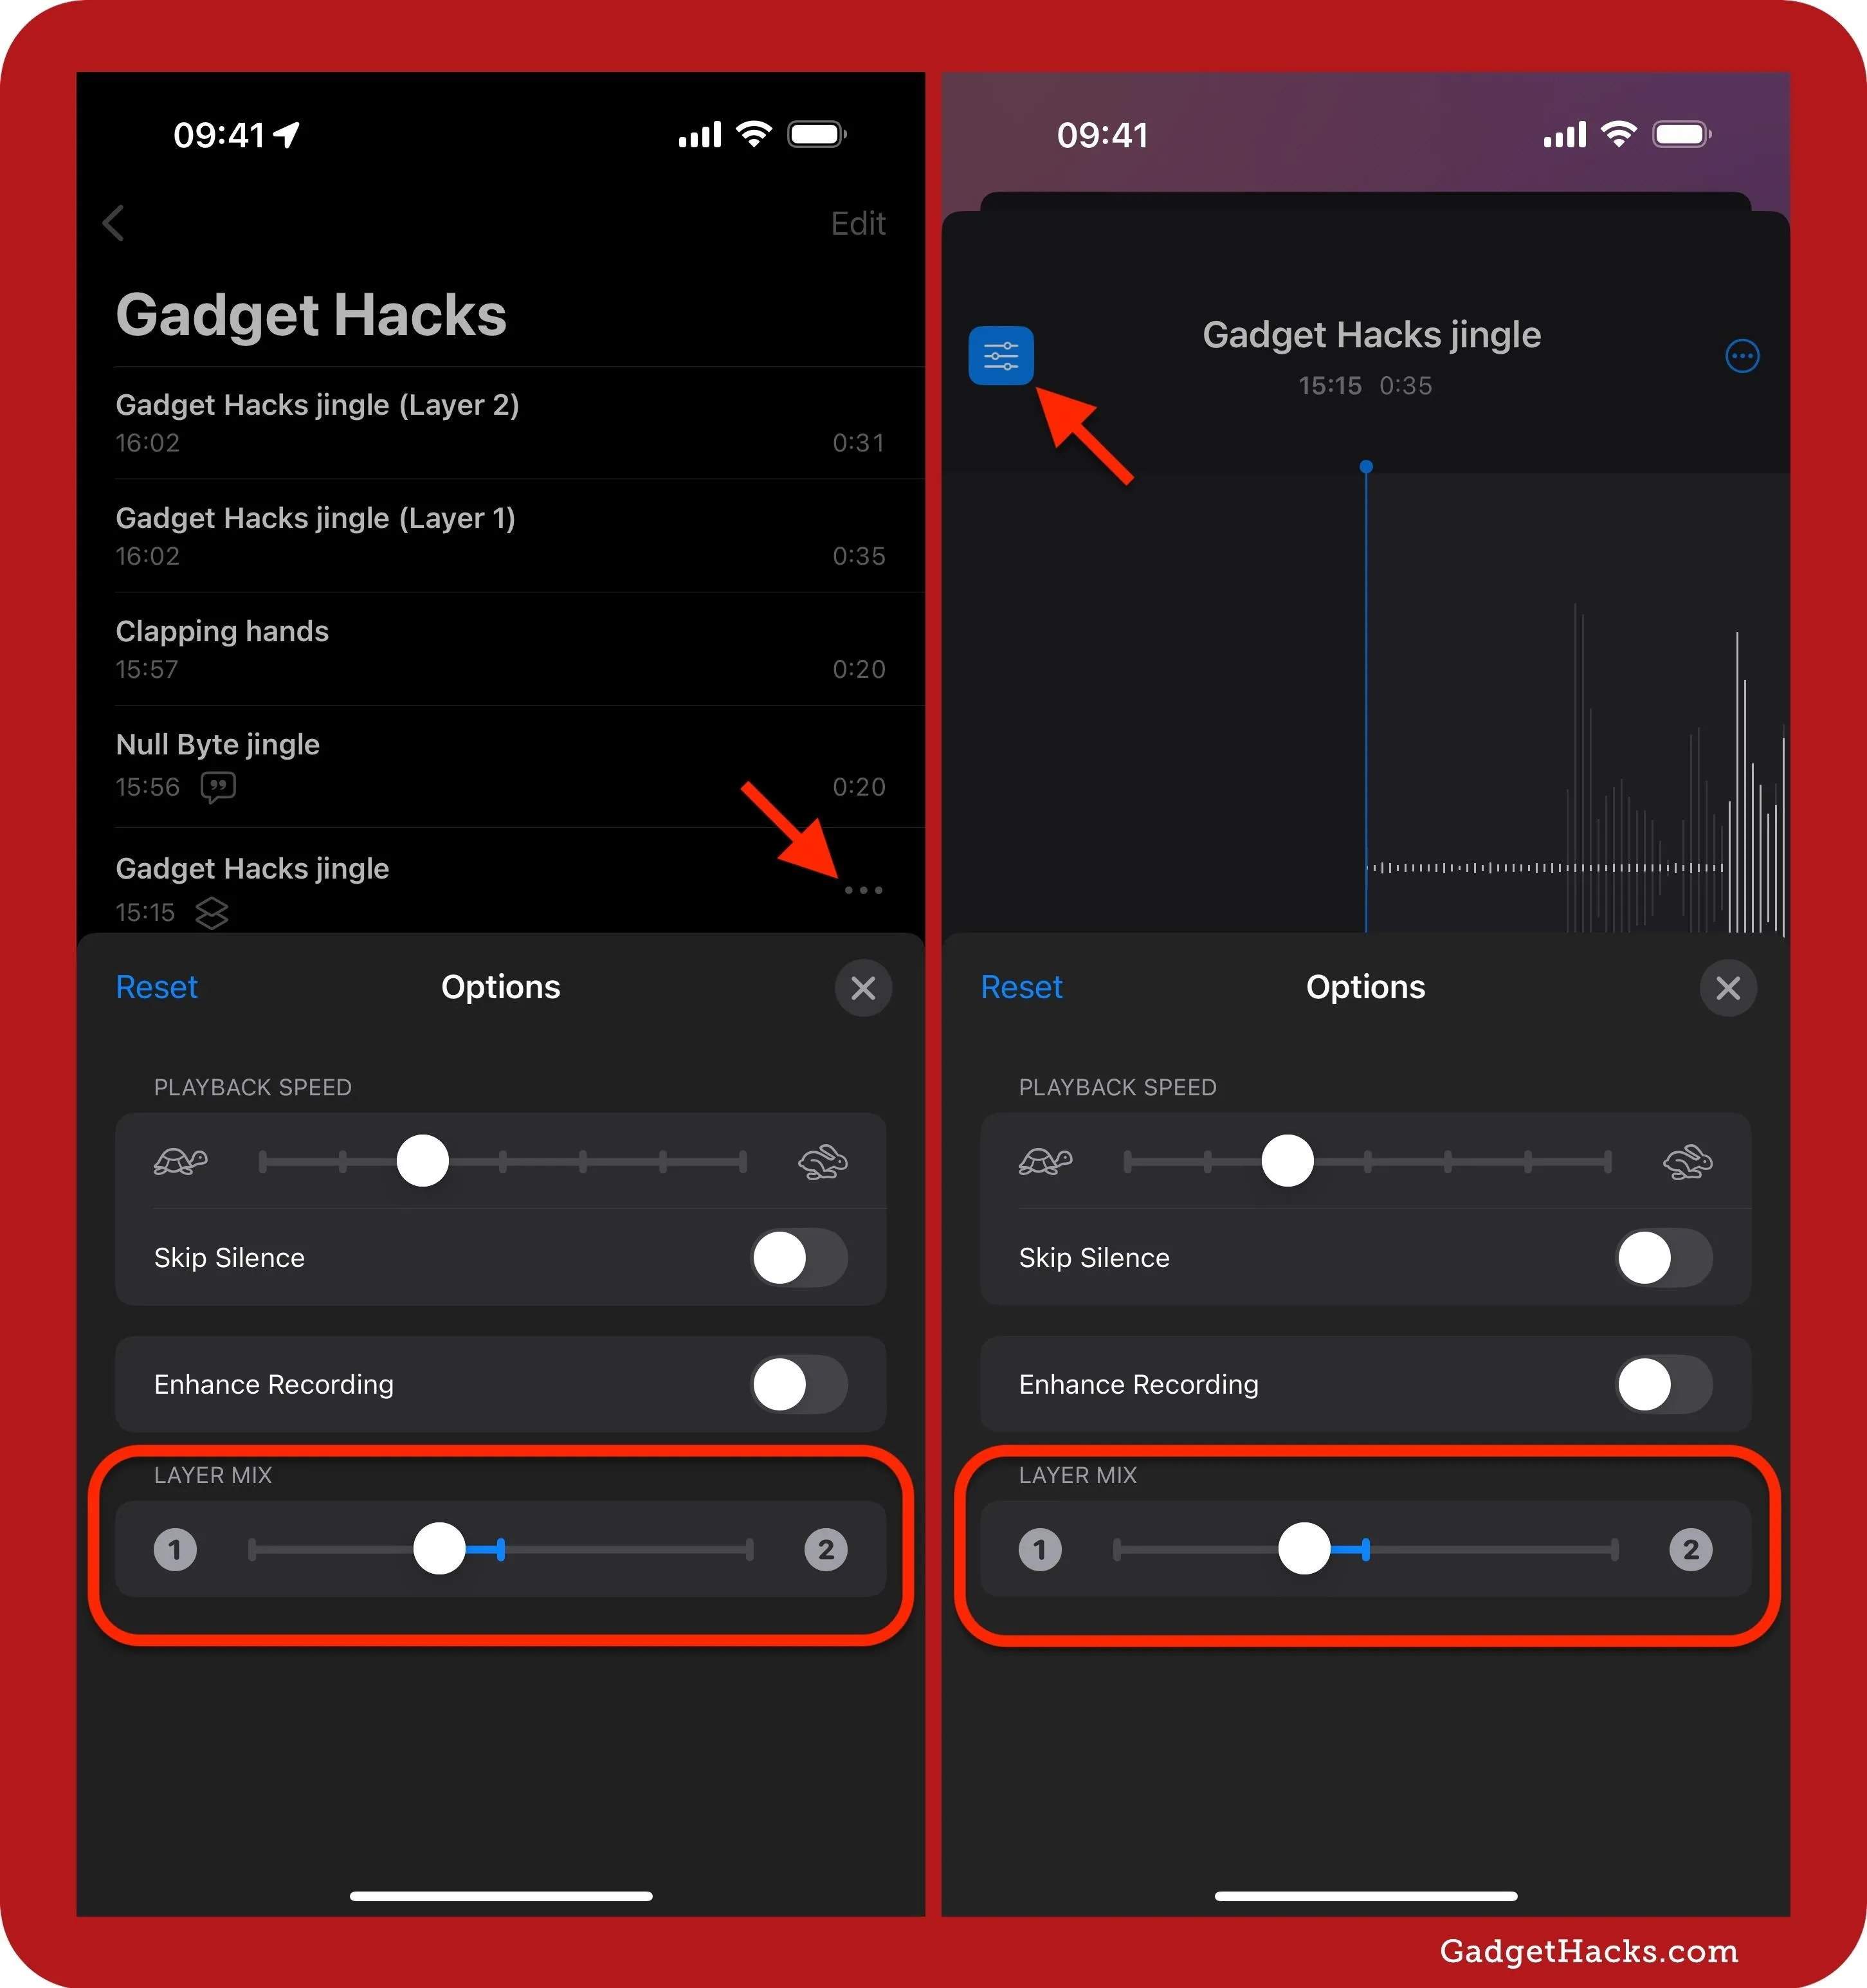
You can mix the two layers as needed via the Playback options. To do so, select the file from the list view, hit the More (•••) button, and choose "Options." Alternatively, open the editor for the file and then hit the Playback options icon. Then, just drag the Layer Mix slider left or right.
Cover photo and screenshots by Gadget Hacks


Comments
Be the first, drop a comment!