The new and improved Side button, as well as a plethora of new swipe gestures, are responsible for picking up the slack left by the missing Home button on the iPhone X. If you're really missing that Home button, however, Apple's built-in AssistiveTouch tool can help you out by adding a virtual Home button on your iPhone X's screen.
AssistiveTouch has been around in iOS for a long time but has mostly only been used by those with problems navigating their iPads and iPhones with button press and swipe gestures. However, it's a really handy tool for just about anyone that doesn't want to put all of that effort into gestures or button combinations. Plus, it can perform some pretty cool superpowers if you set it up right.
Enable AssistiveTouch
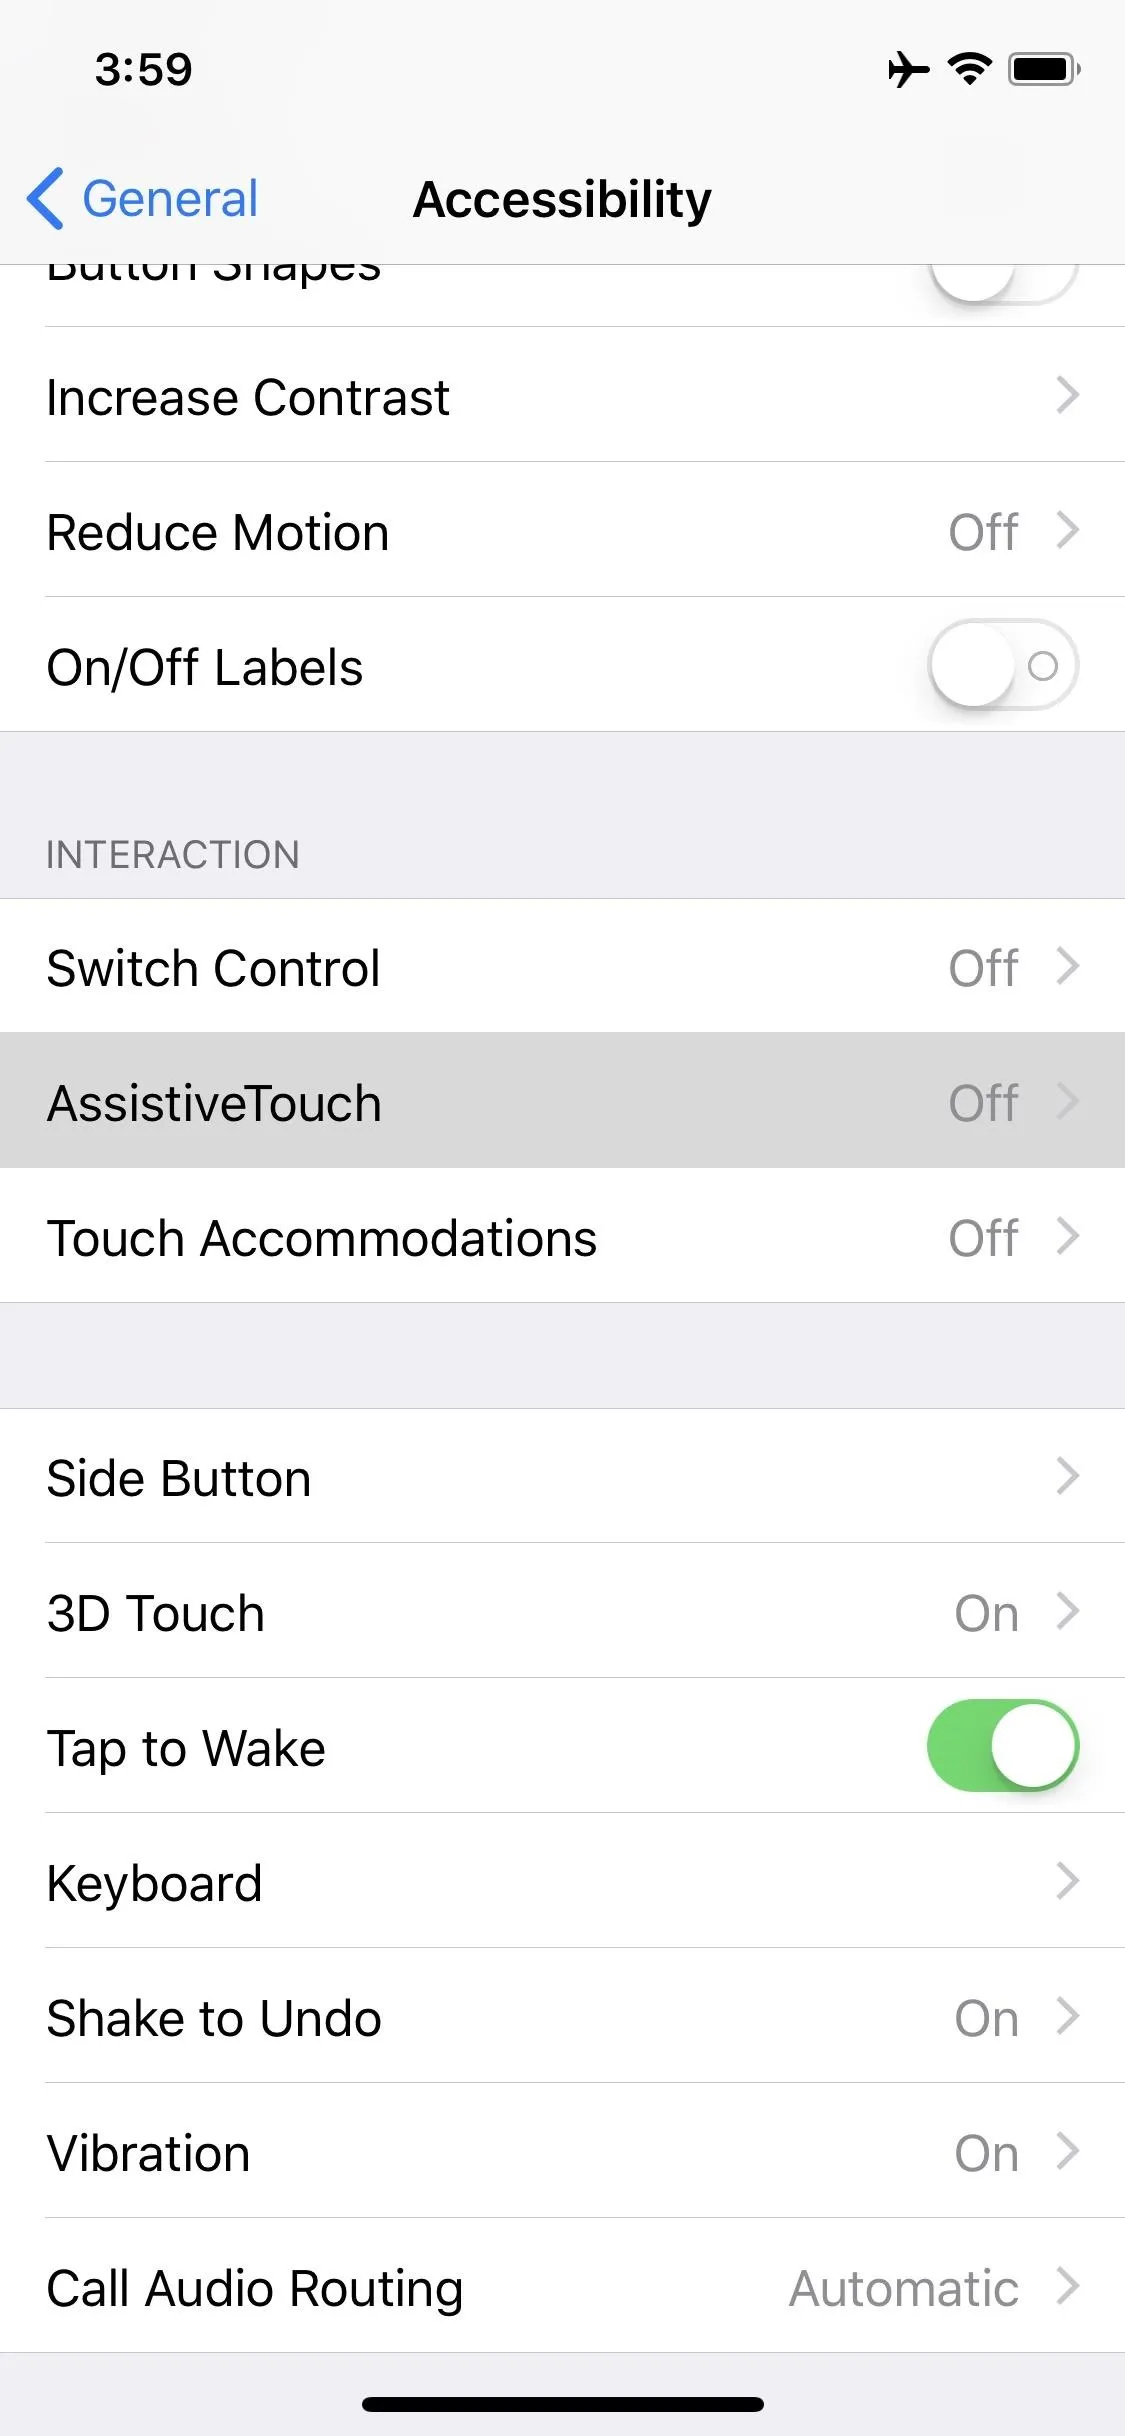
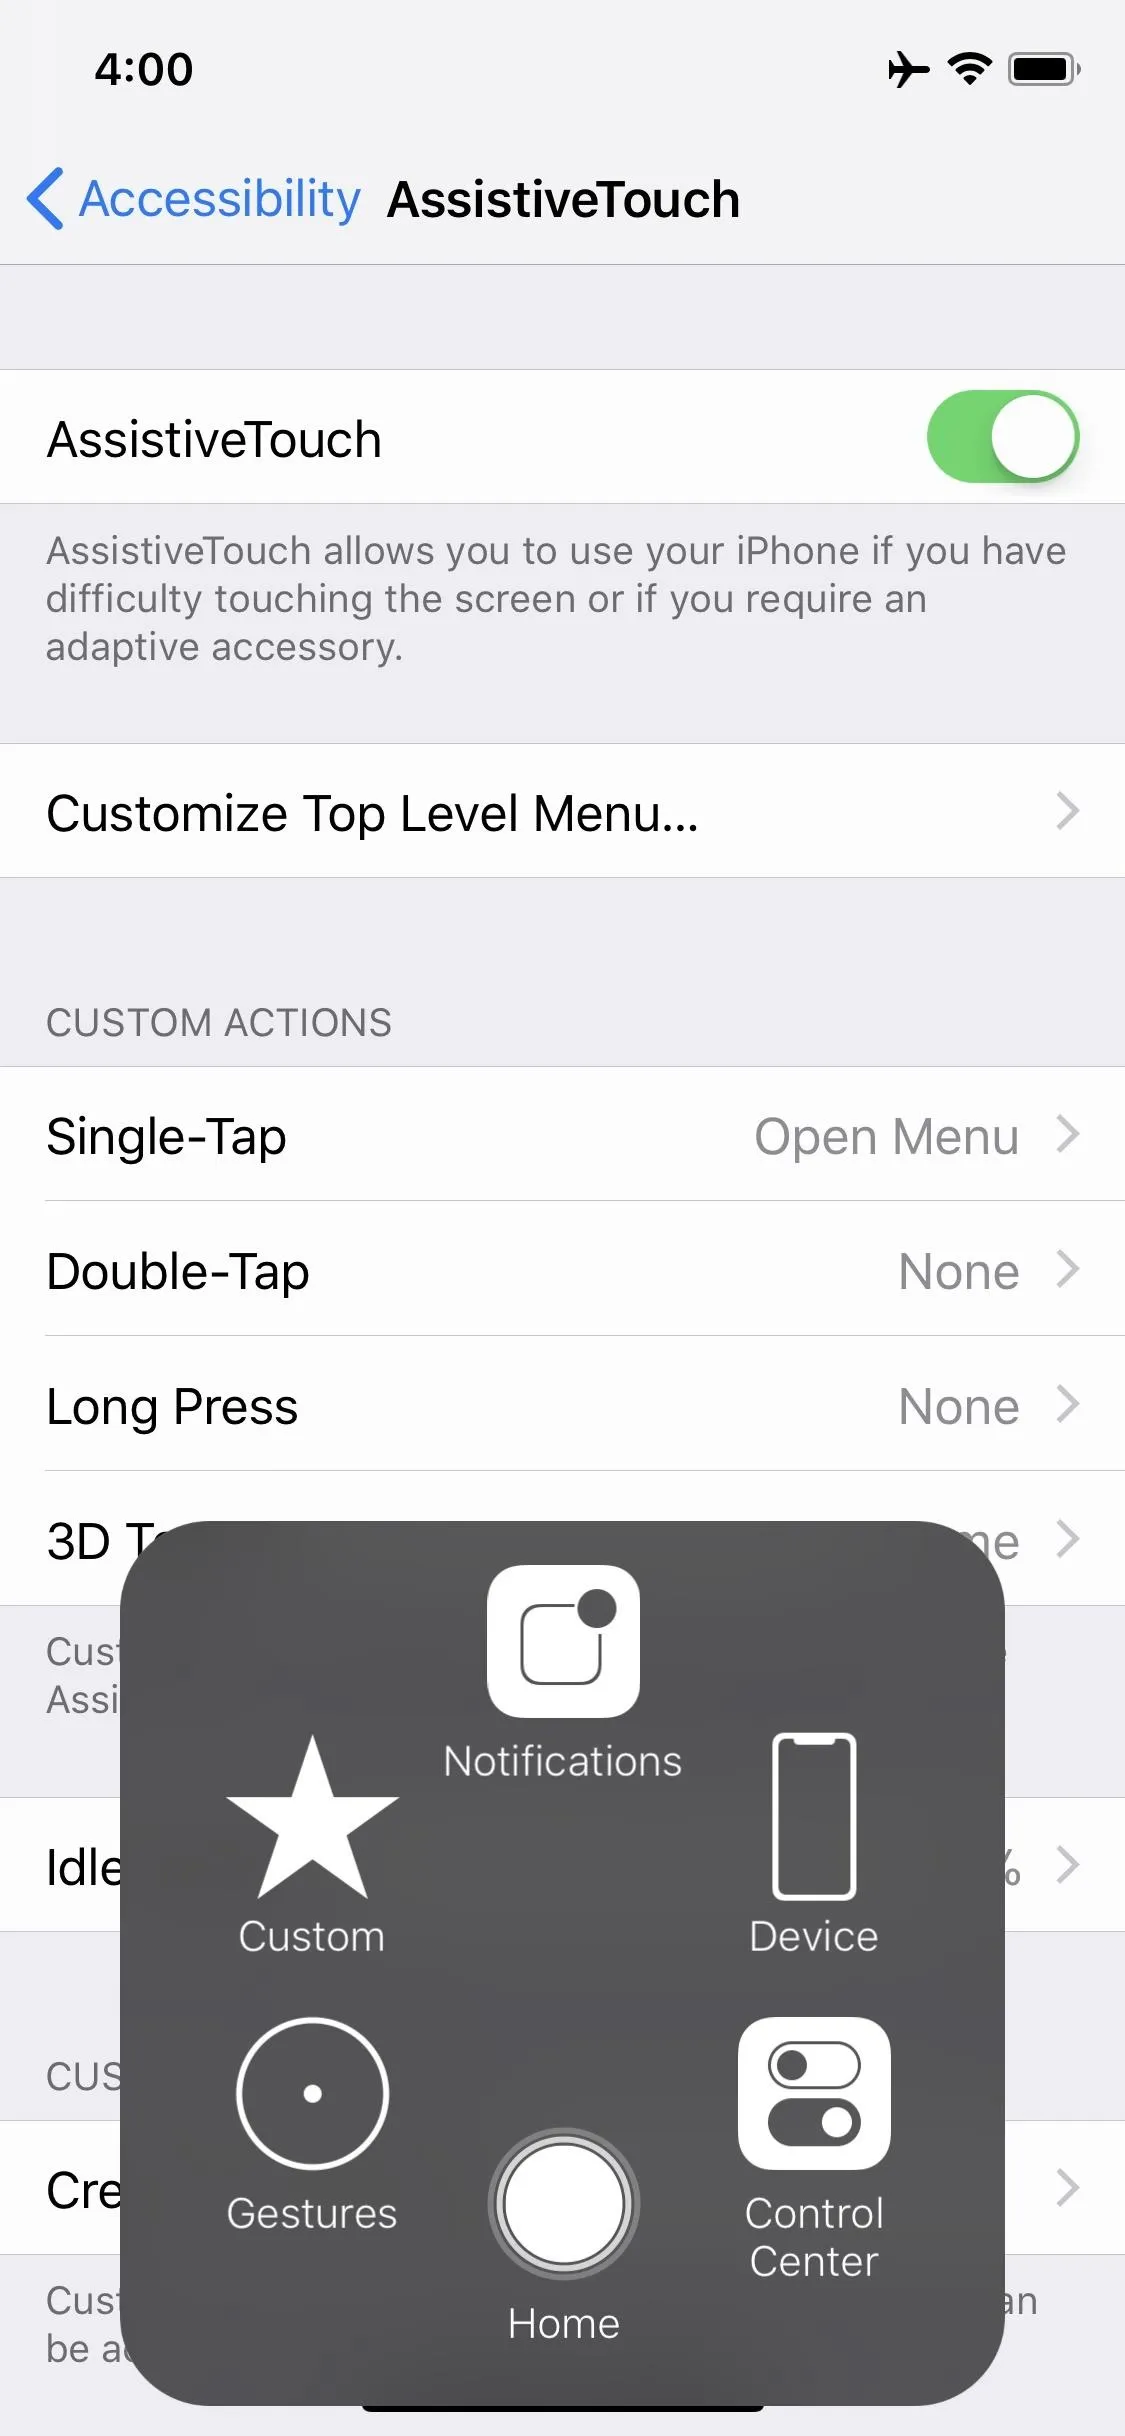
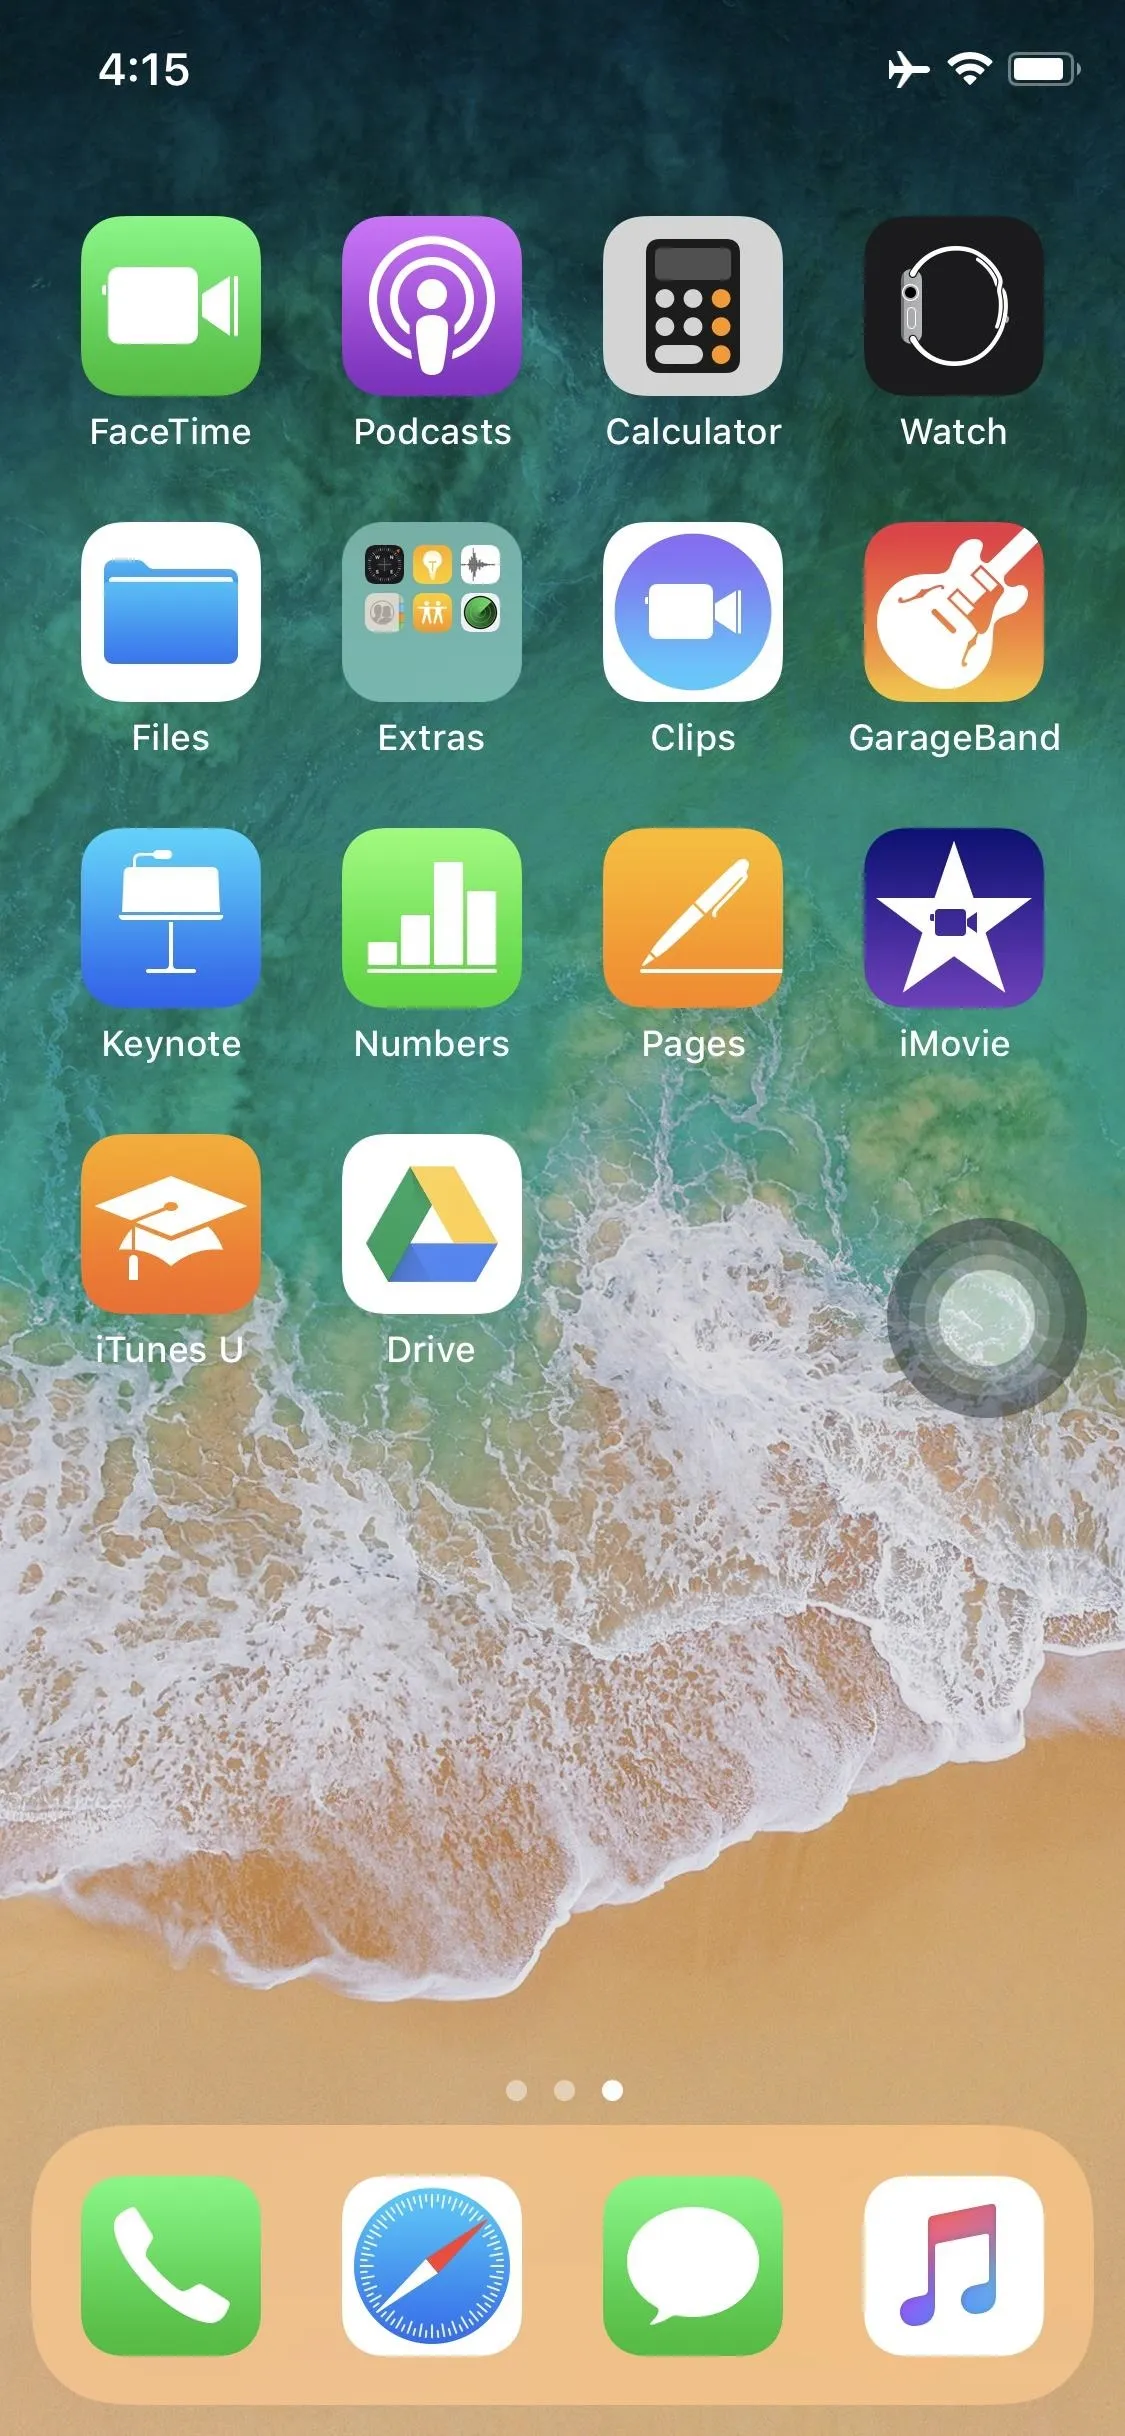
To set it up, open up your Settings app, then tap "General" followed by "Accessibility." Under the Interaction subheading, tap on "AssistiveTouch" to view its preferences. There are some custom actions and gestures available here, but let's stick to the basics for now. Just toggle on "AssistiveTouch" and you'll see a gray and white circle that looks like a Home button pop up on your screen.


Toggle It Off/On
Most of you will probably not want this little gray and white circle on your screen all the time, but there's a better way to turn it off and on besides going into your Settings app every time.
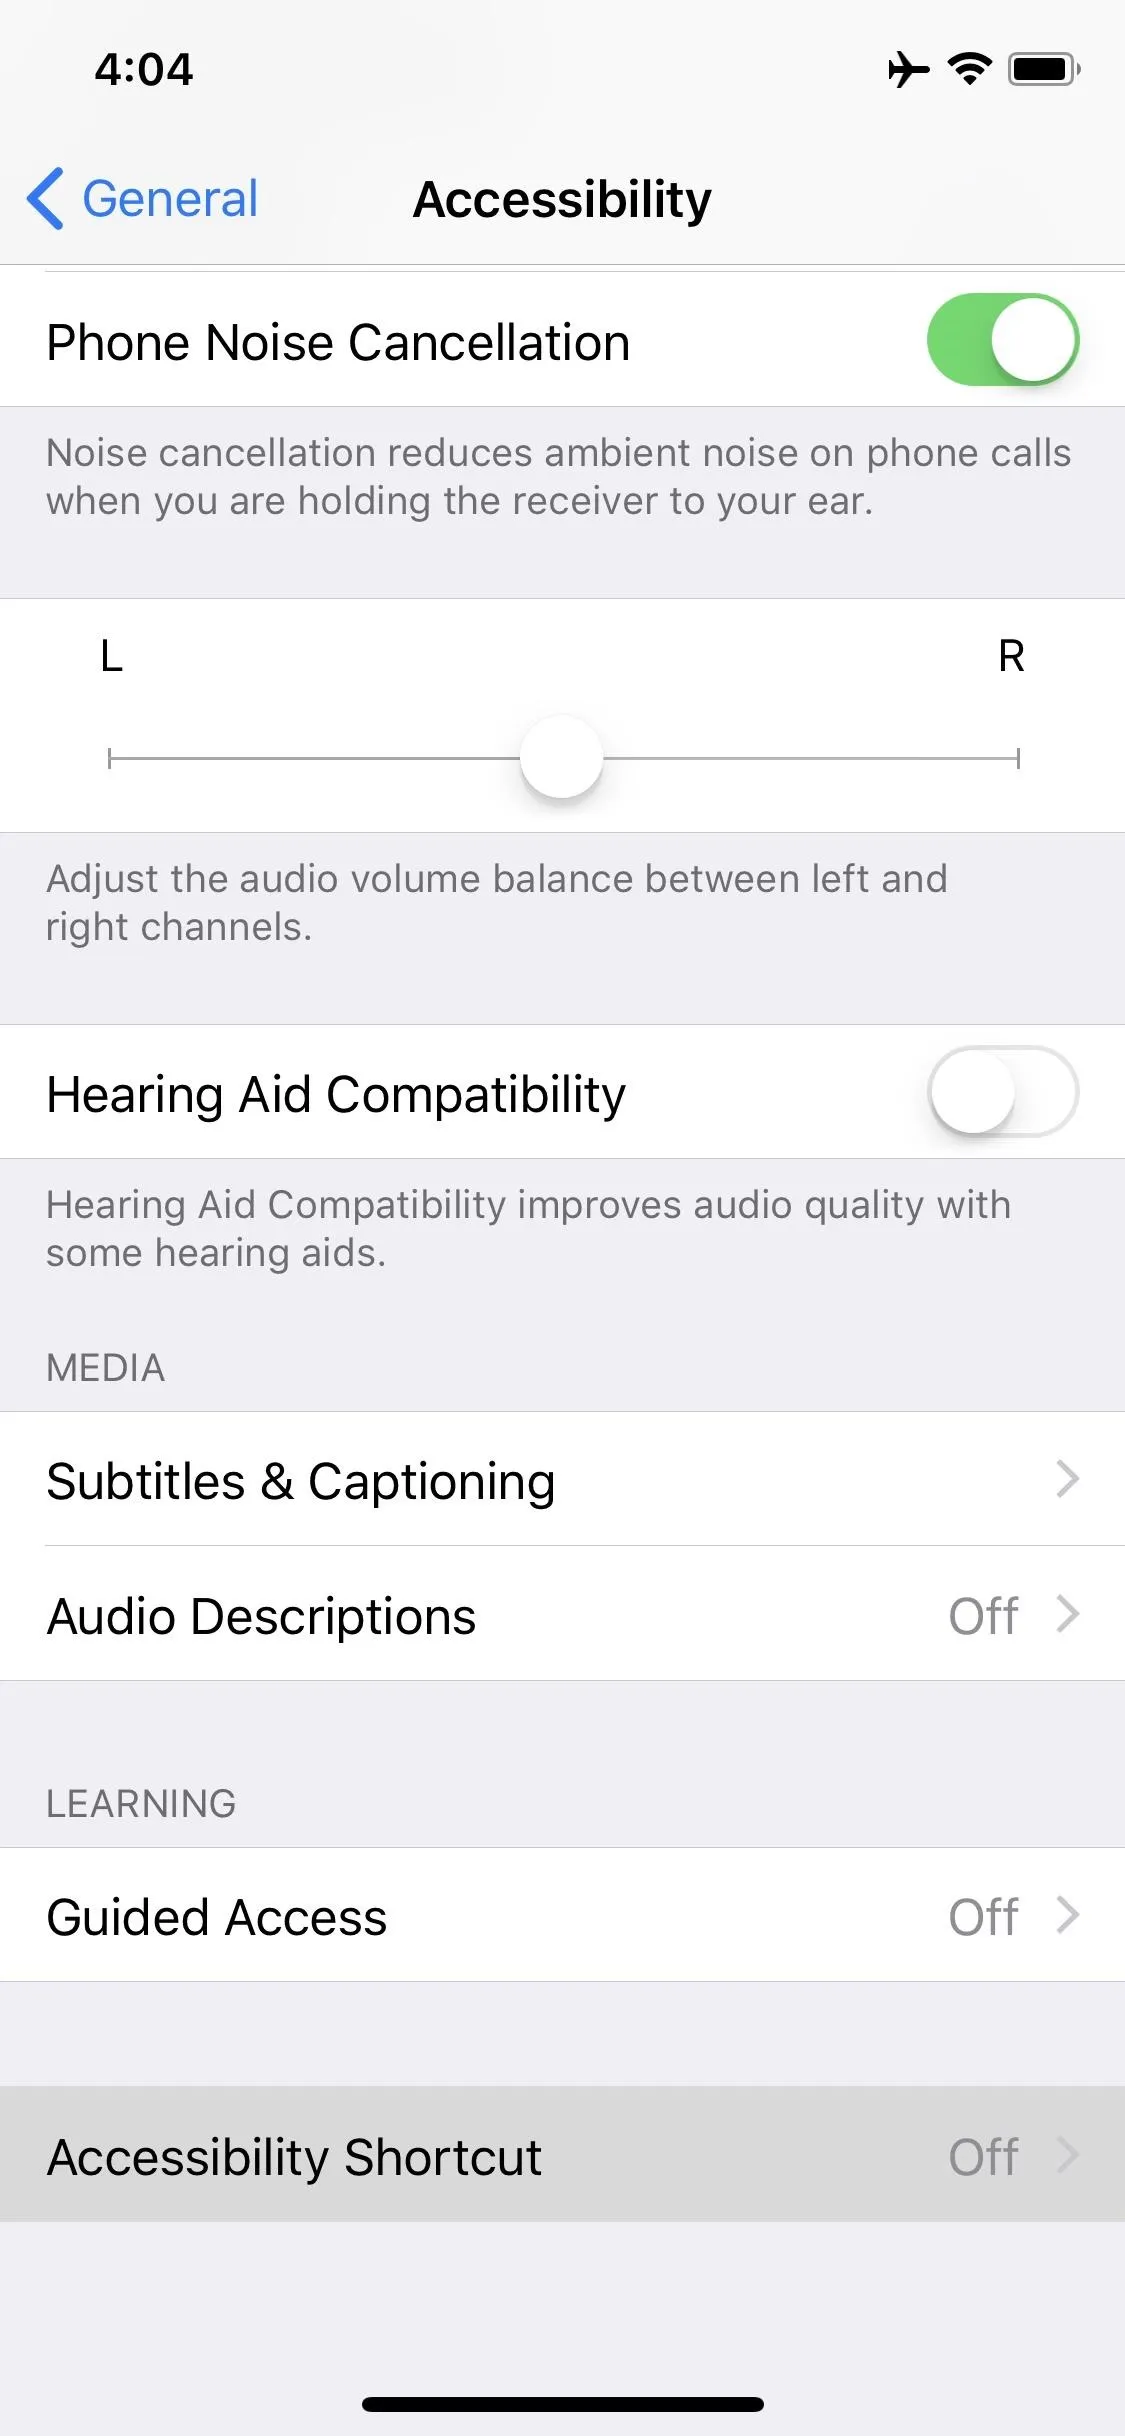
In the "Accessibility" settings, scroll all the way to the bottom of the page and select "Accessibility Shortcuts." From the list that pops up, tap "AssistiveTouch" to check it, then back out of the settings. With this option set, you can now triple-click the Side button to open or close the AssistiveTouch tool on your screen.
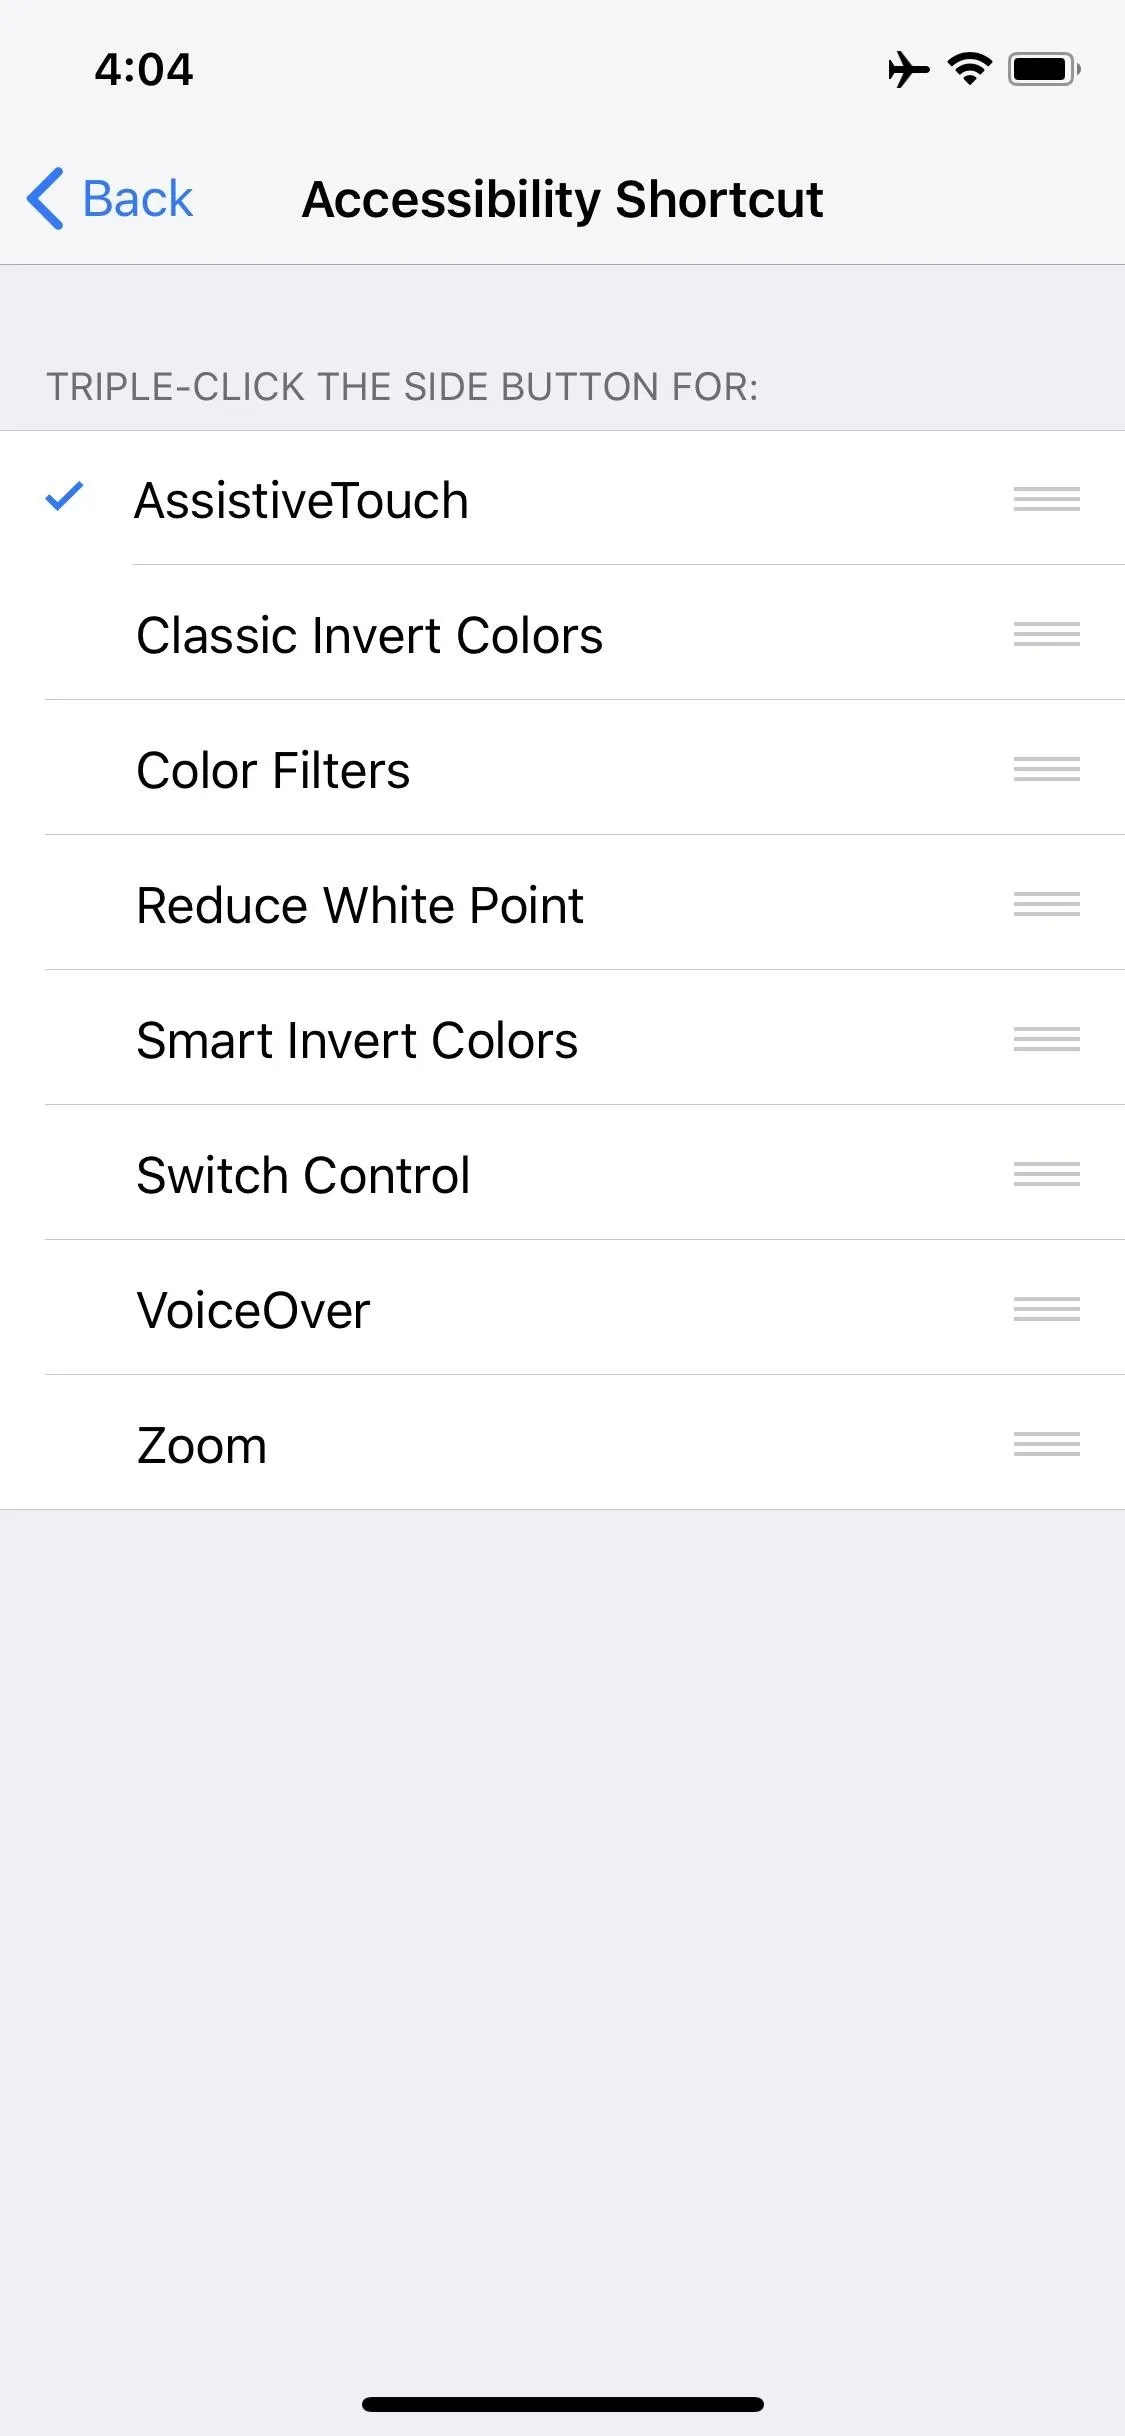


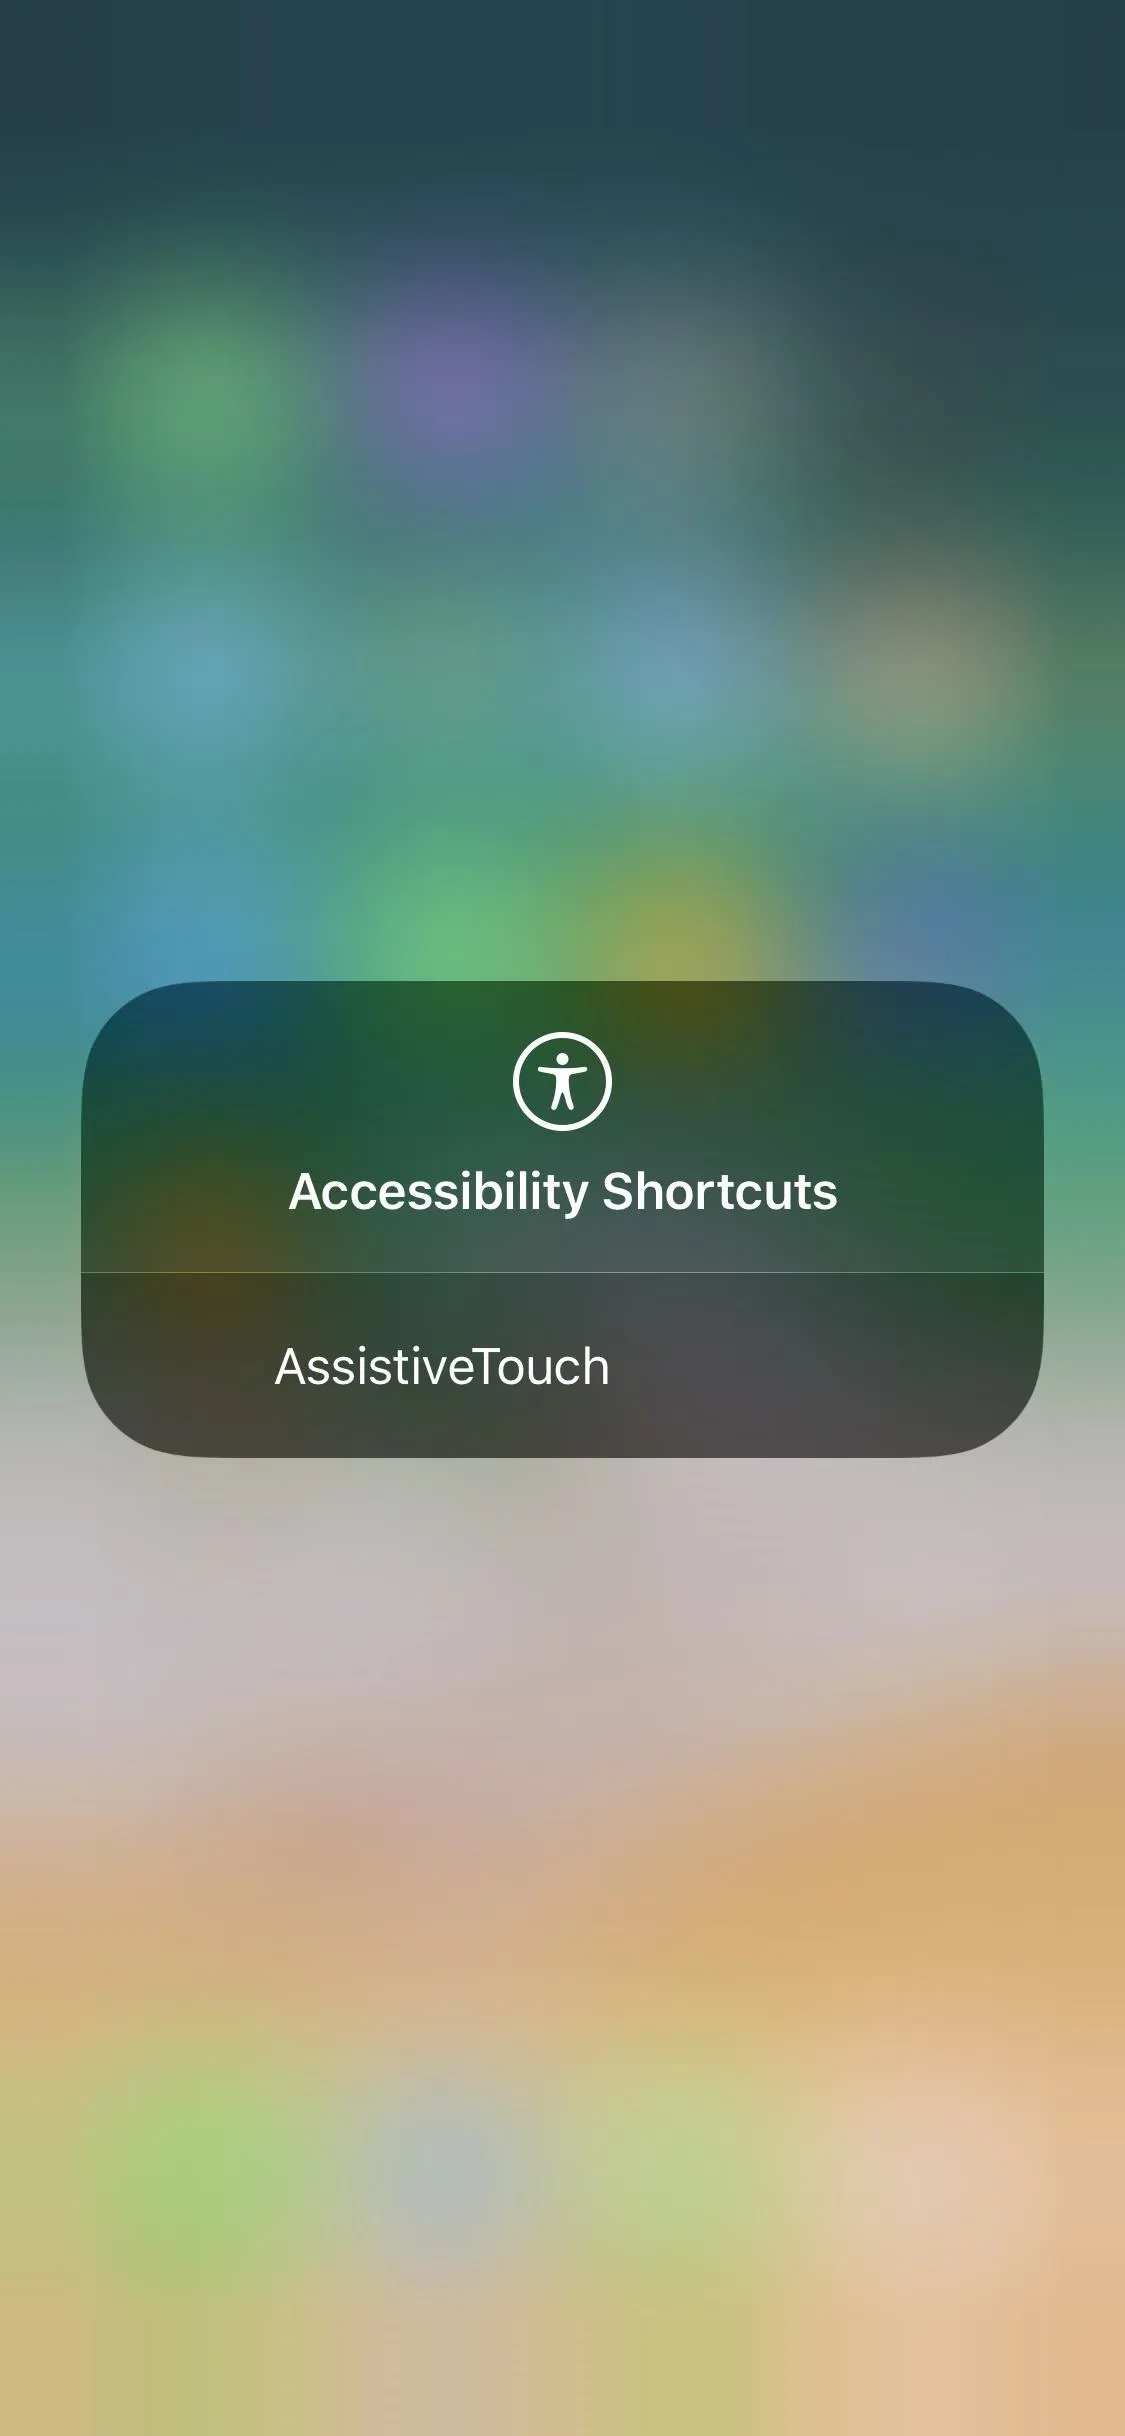
Note, if you have more than one Accessibility Shortcut enabled, such as Magnifier, Guided Access, VoiceOver, Zoom, etc., you will get a menu with all of these options visible after triple-clicking the Side button, then you can just tap AssistiveTouch on or off from there.
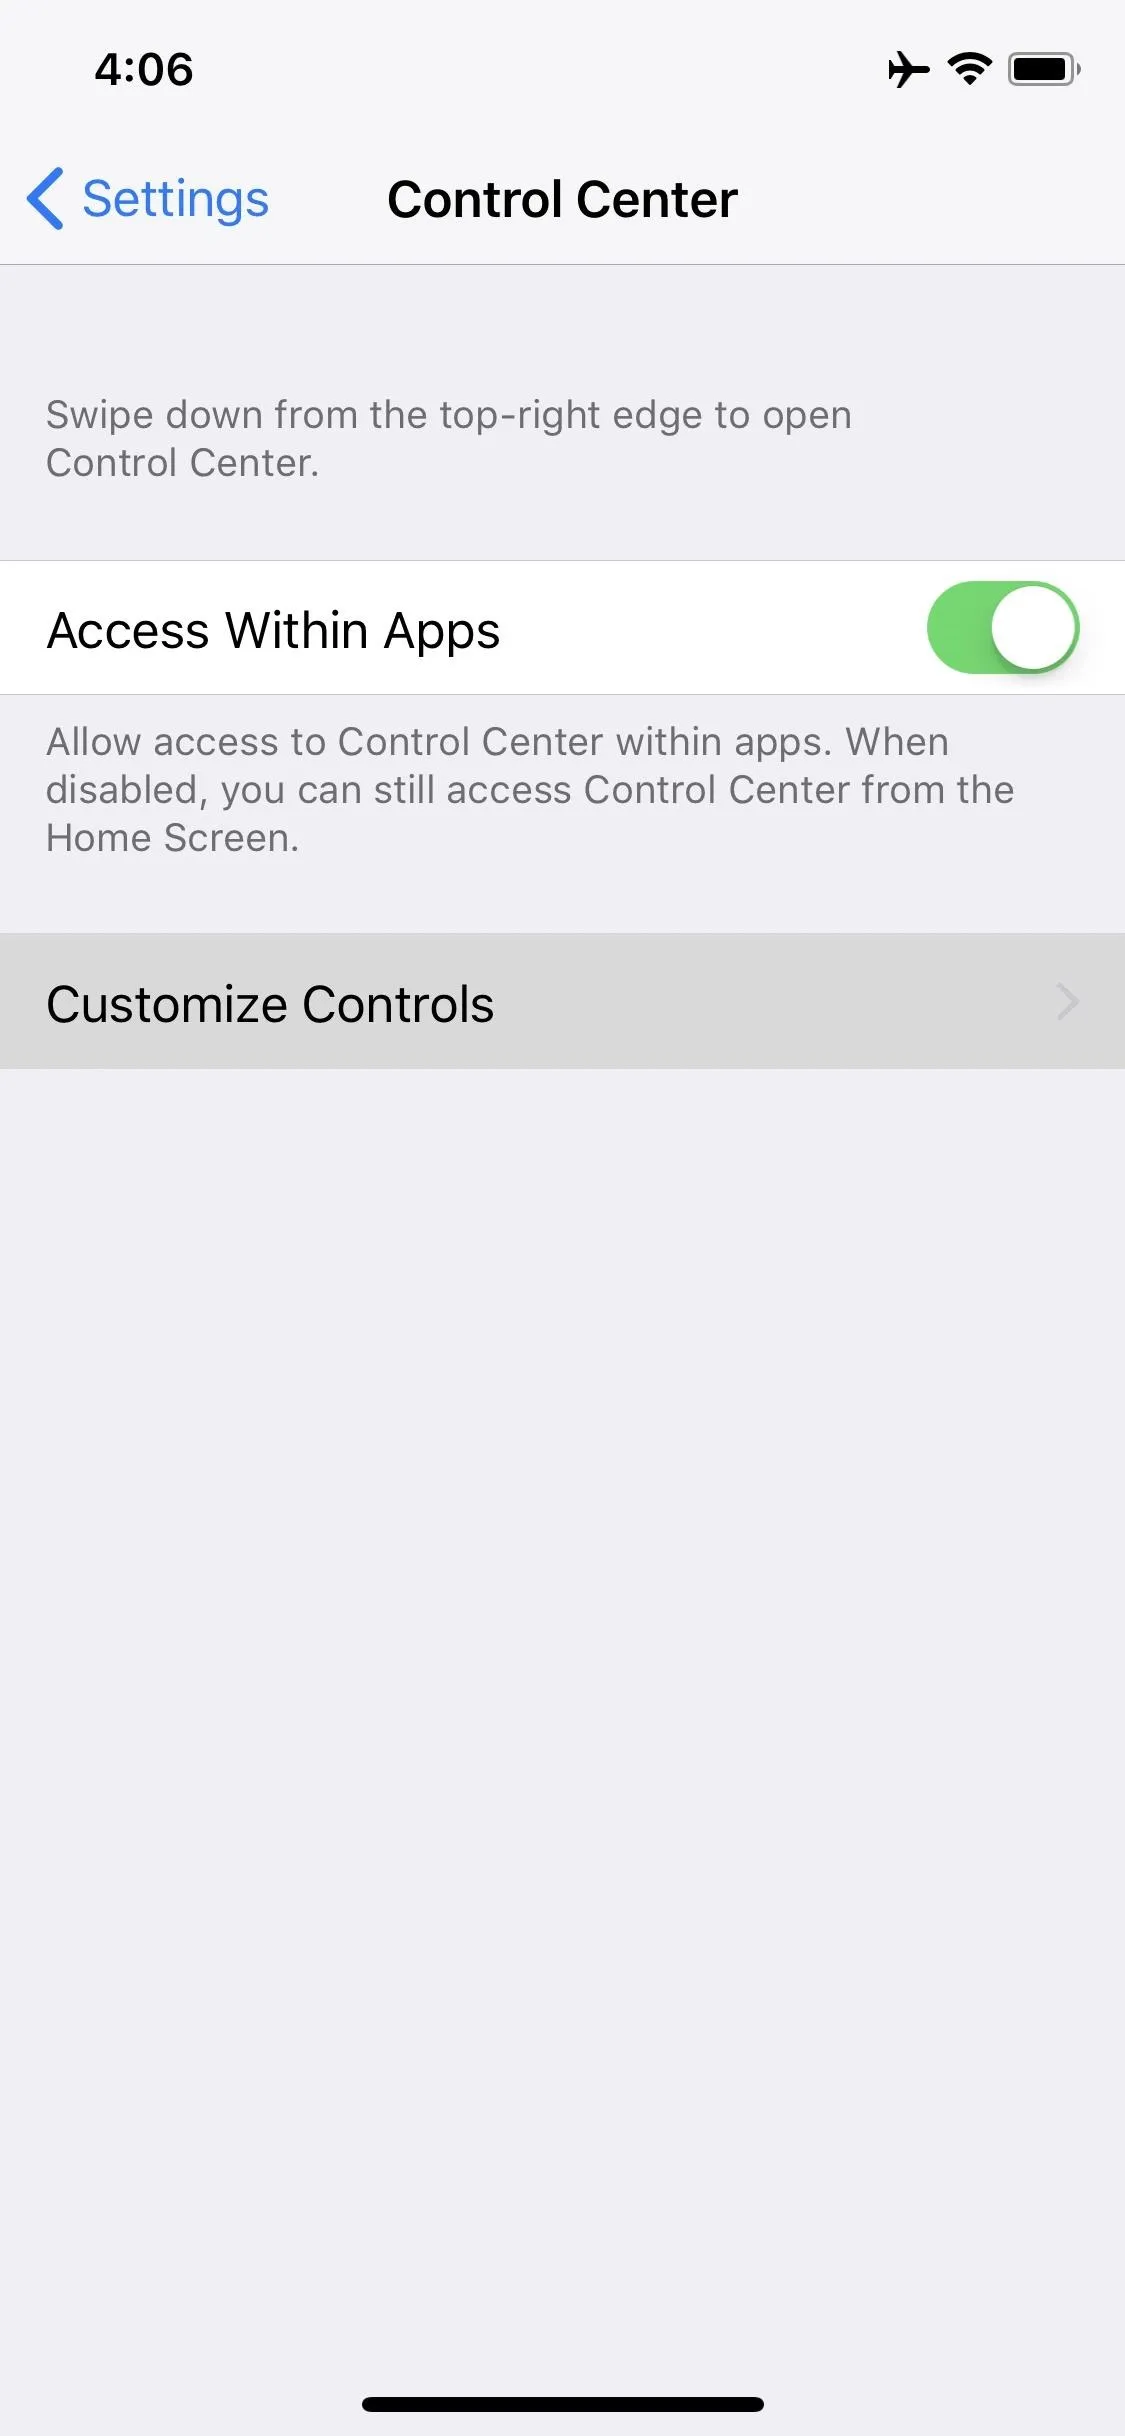
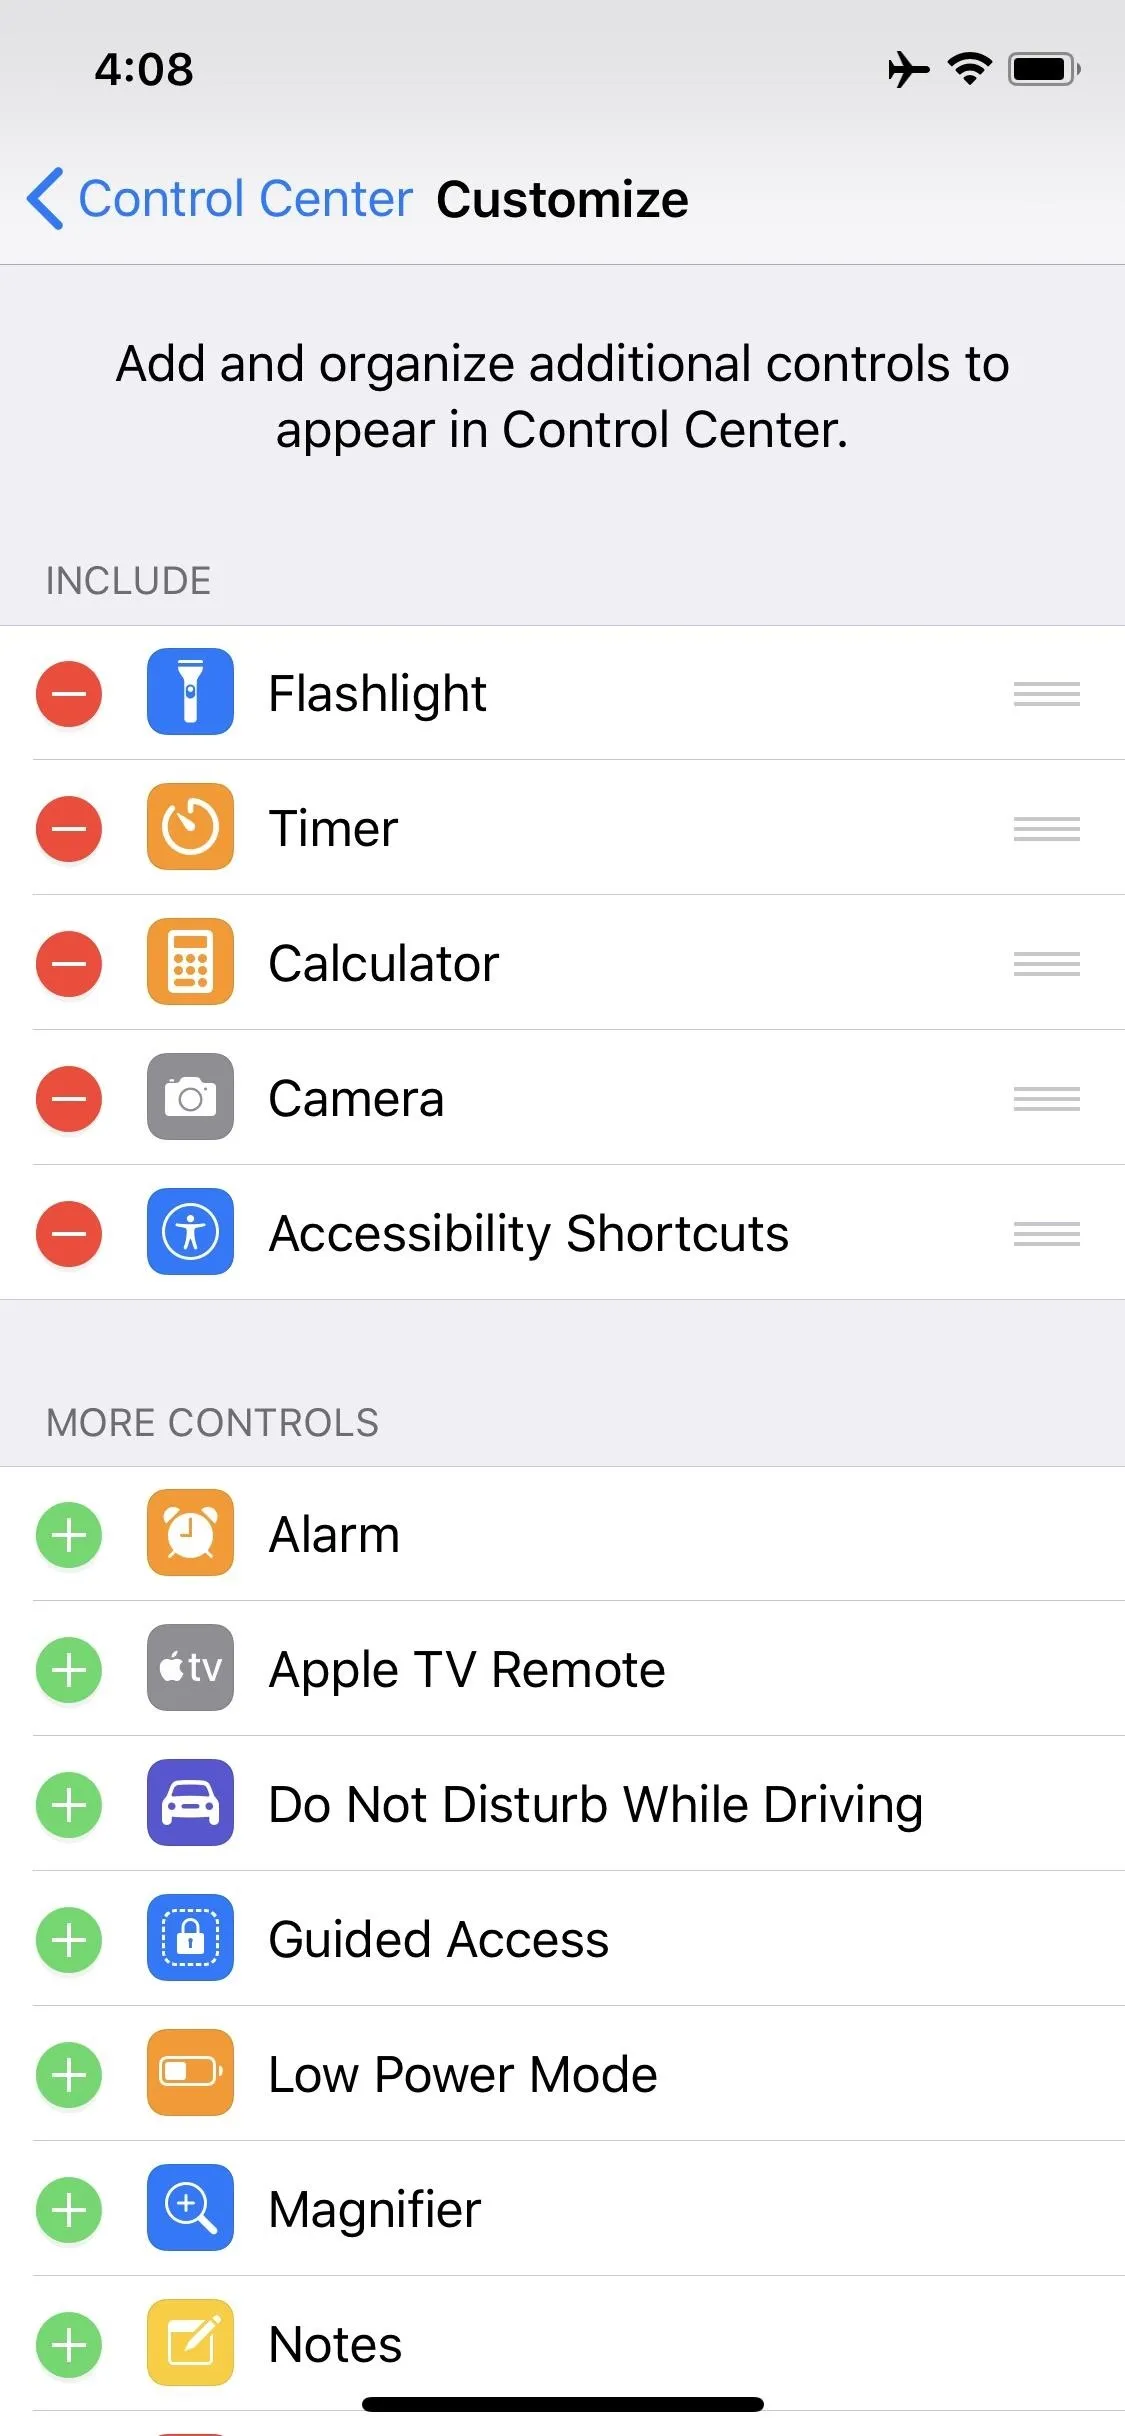
Alternatively, you can toggle AssistiveTouch on and off from the Control Center. Before you can do so, though, you'll have to enable the "Accessibility Shortcuts" control. So, head to "Control Center" in the Settings app, then tap "Customize Controls." From the bottom section, under More Controls, tap the + sign next to "Accessibility Shortcuts" then back out of the settings.


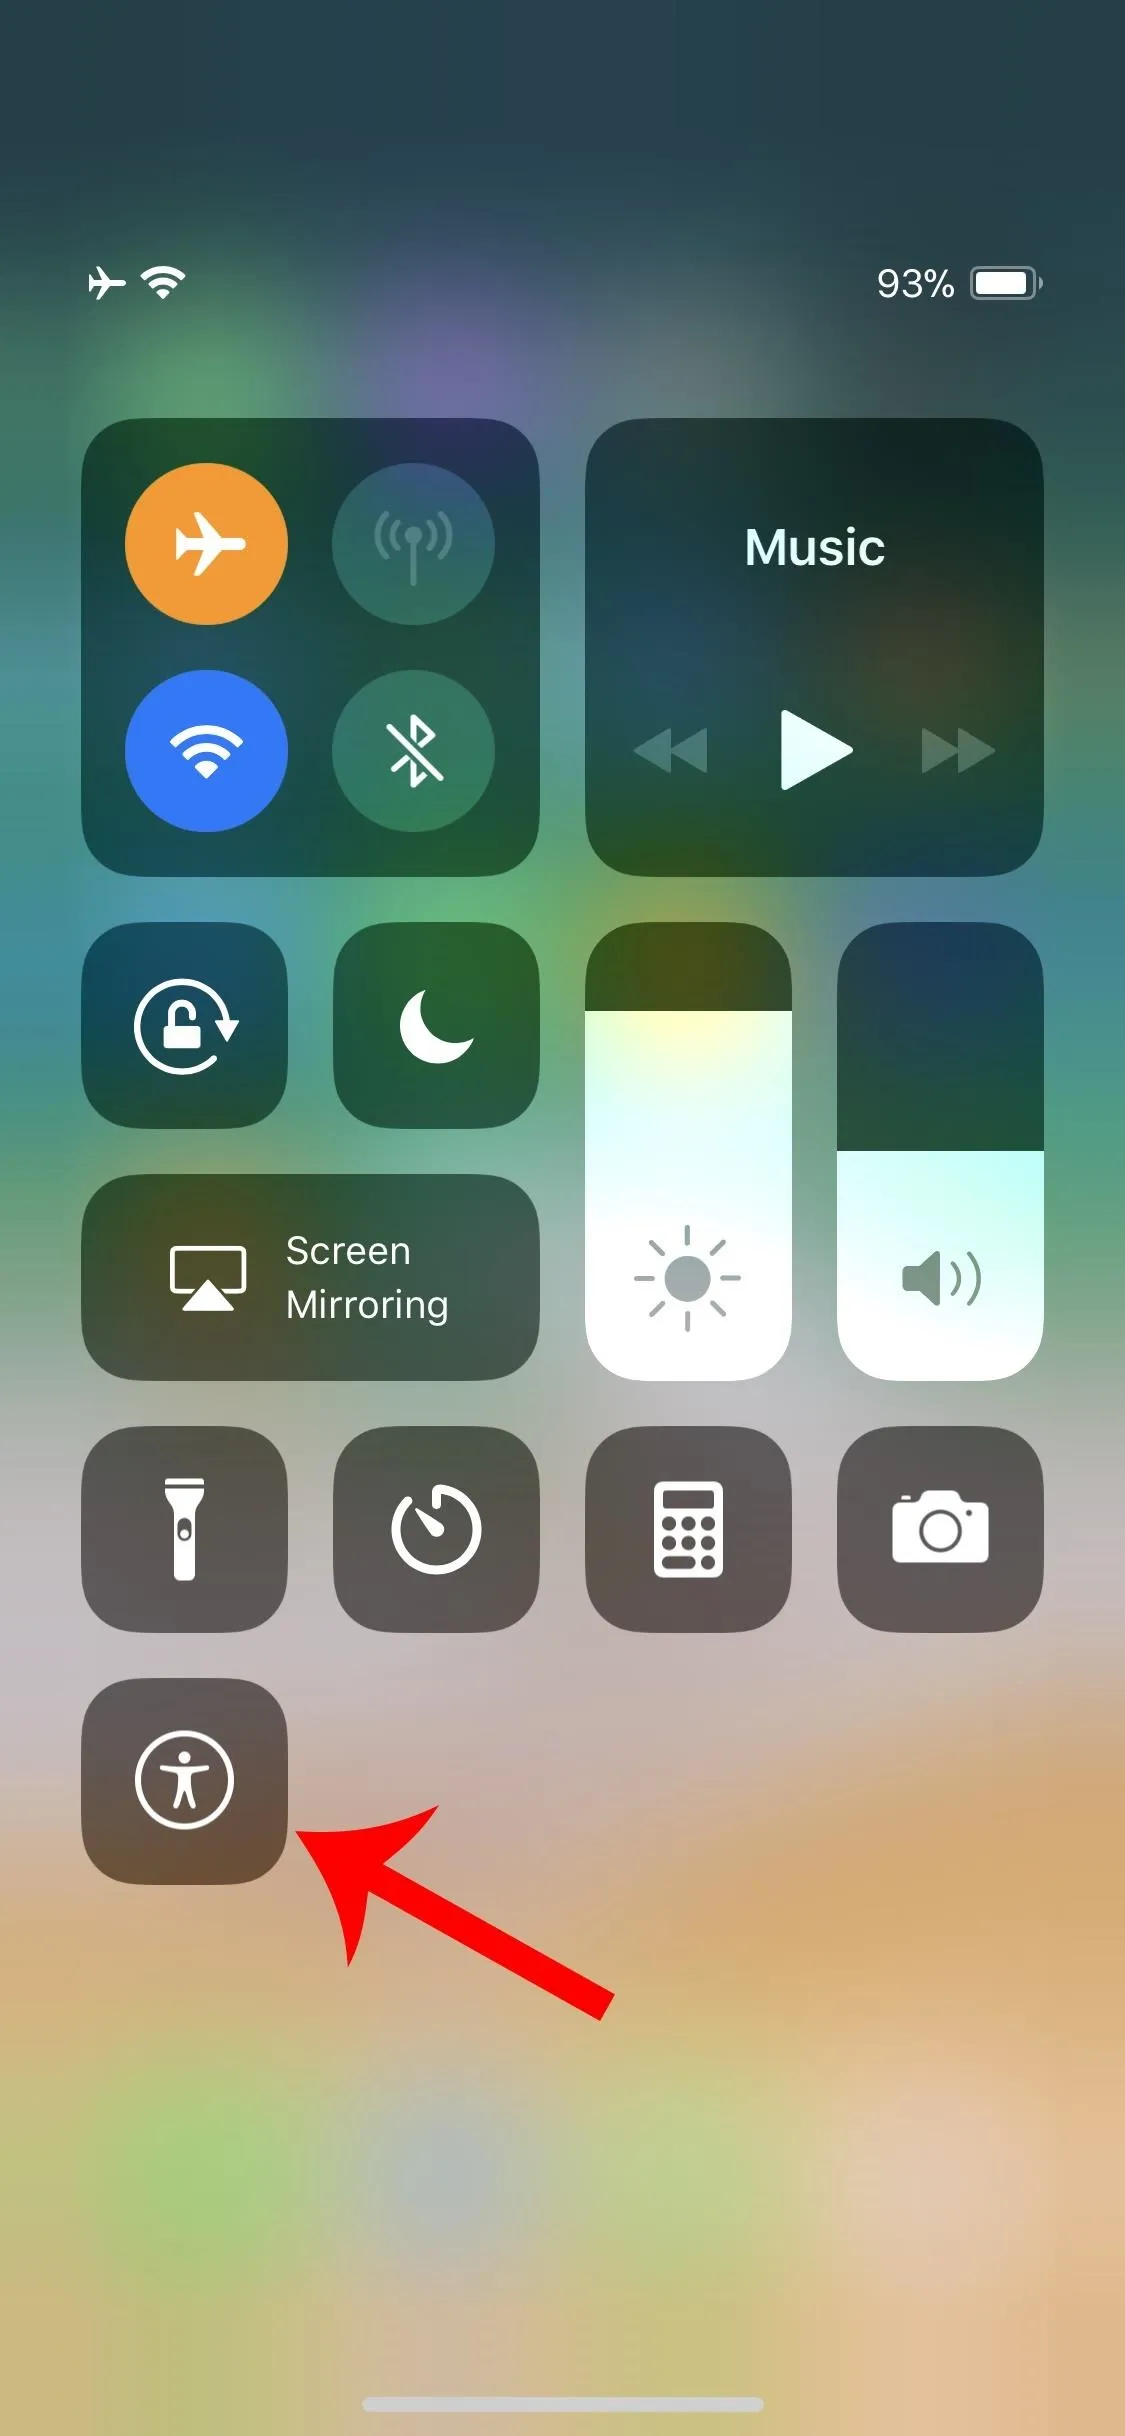
When ready, open up the Control Center, then tap the Accessibility Shortcuts icon (a person in a circle). Here, you can tap "AssistiveTouch" to turn it on or off.


Perform Home Button Actions
With the AssistiveTouch tool enabled and turned on, you'll see the gray and white circle icon that looks like a Home button. If you don't like where it's at, you can drag it around your screen until it's somewhere out of the way. When it's not in use, it will become translucent, so it's even less noticeable.
Now, just tap on the button to bring up the AssistiveTouch menu. By default, there are quick-tap options to open up your notifications, activate Siri, bring up the Control Center, and return to the home screen.
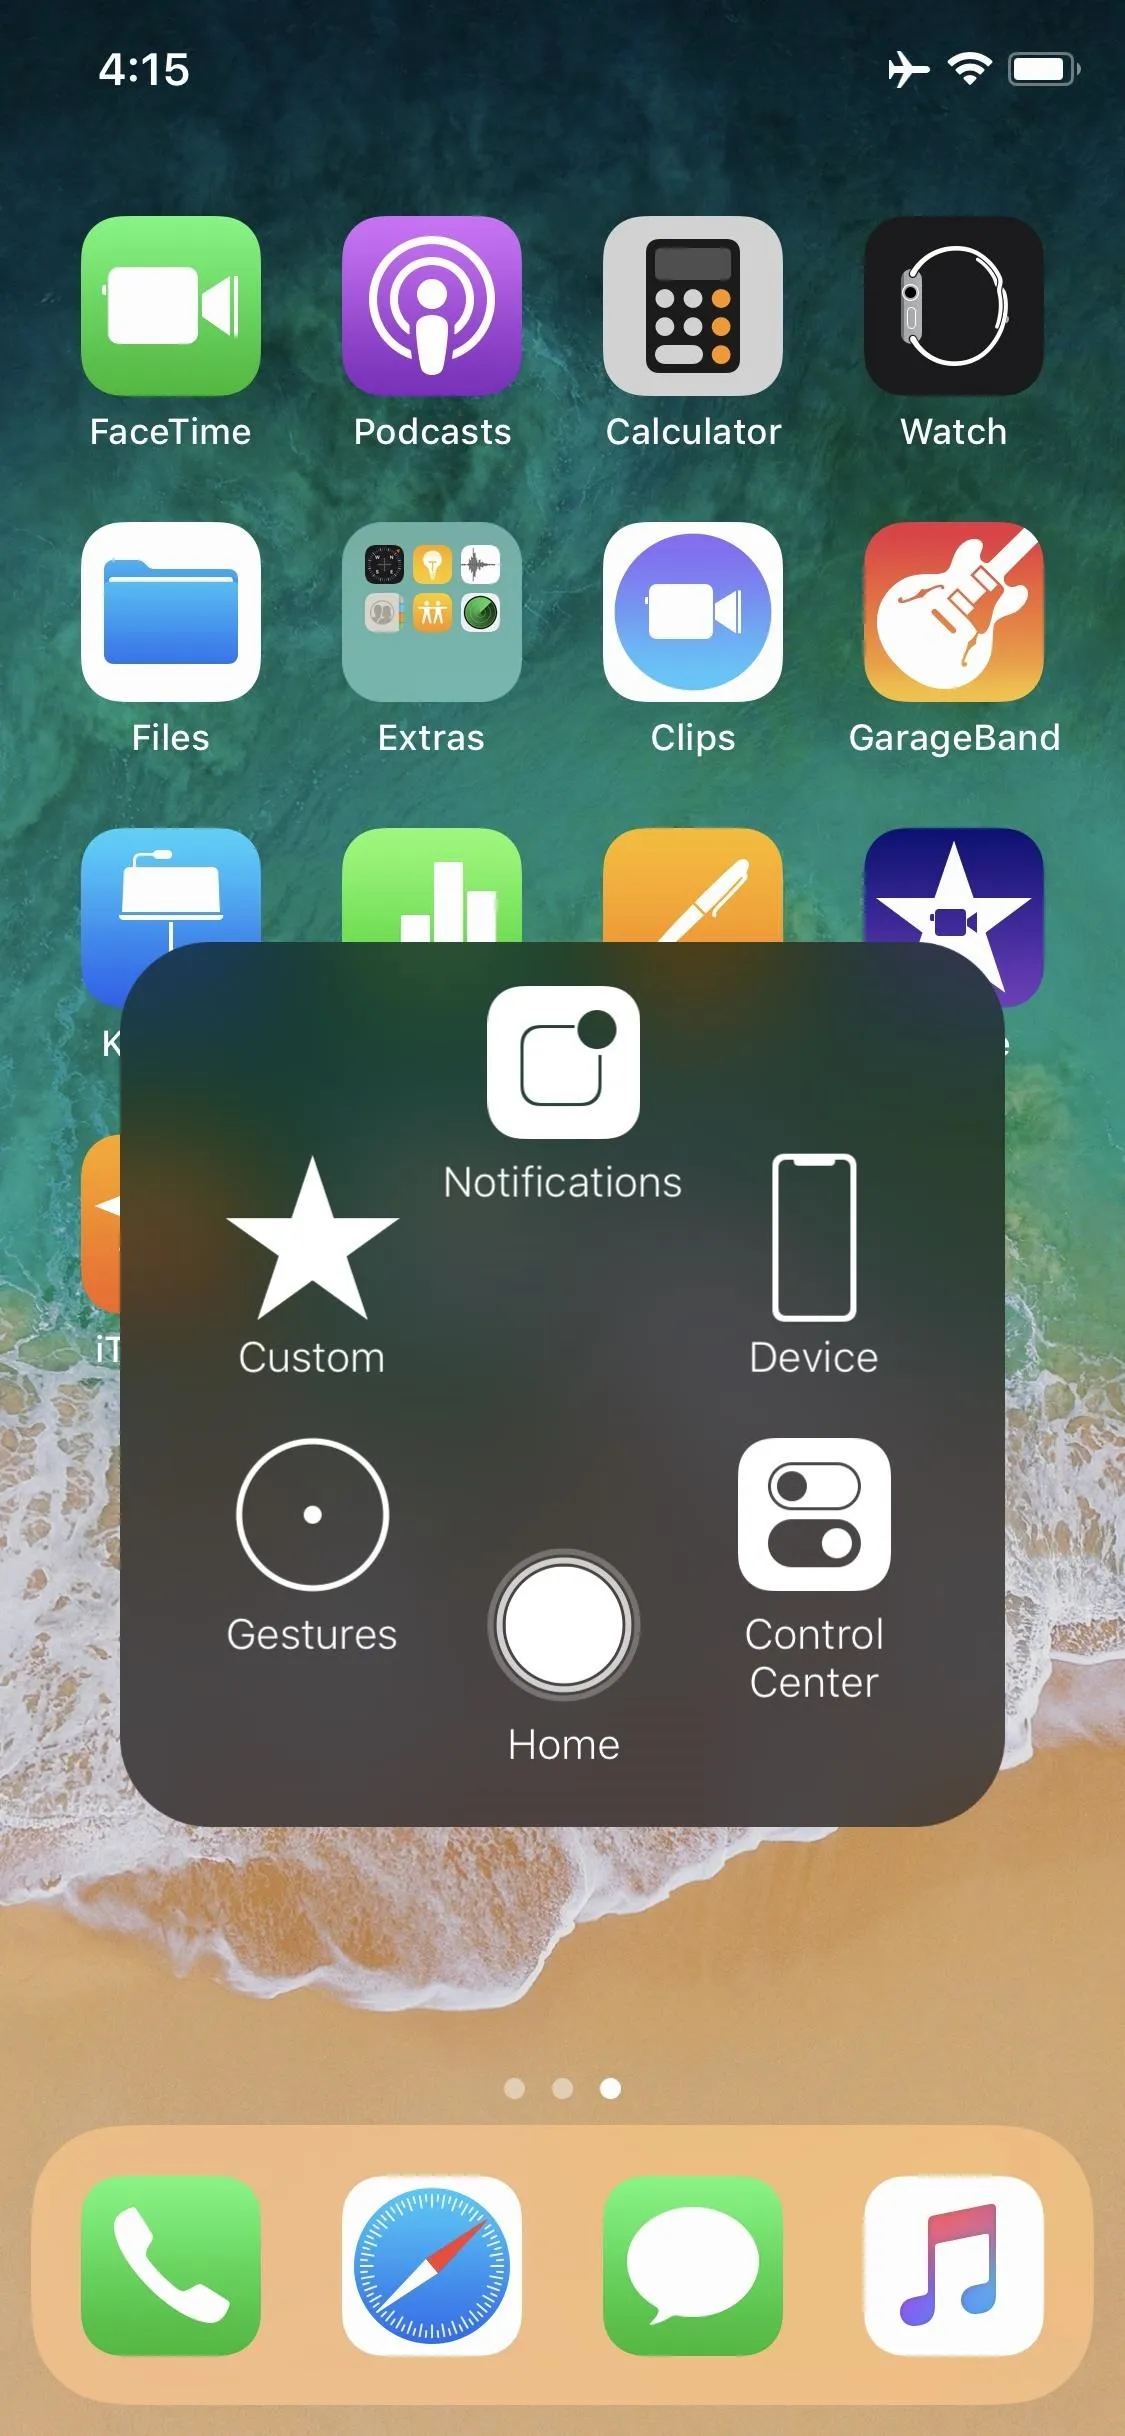


You can also tap on "Device" to do things like lock or rotate the screen, adjust volume, mute or unmute, take a screenshot, activate Emergency SOS, restart the device, toggle on Reachability, open Apple Pay/Wallet, open up the app switcher, and perform the shake gesture (for undoing text).
You can even select "Gestures" from the Device options to perform two-, three-, four-, and five-finger swipe gestures with only one finger. Also, from the "Custom" option in the top-level menu, you perform pinch-to-zooms, 3D Touch, and double-tap gestures.
Customize It
To make this work more smoothly for your own personal needs, you can do so from the "AssitiveTouch" menu in the Accessibility settings.
If you only want to use AssistiveTouch to take a screenshot, you can change the "Single-Tap" action to "Screenshot" instead of "Open Menu." (The gray/white circle will not appear in screenshots.) Or, you could assign it to the "Double-Tap" or "Long Press" action. You can also assign an action for when you "3D Touch" the icon.
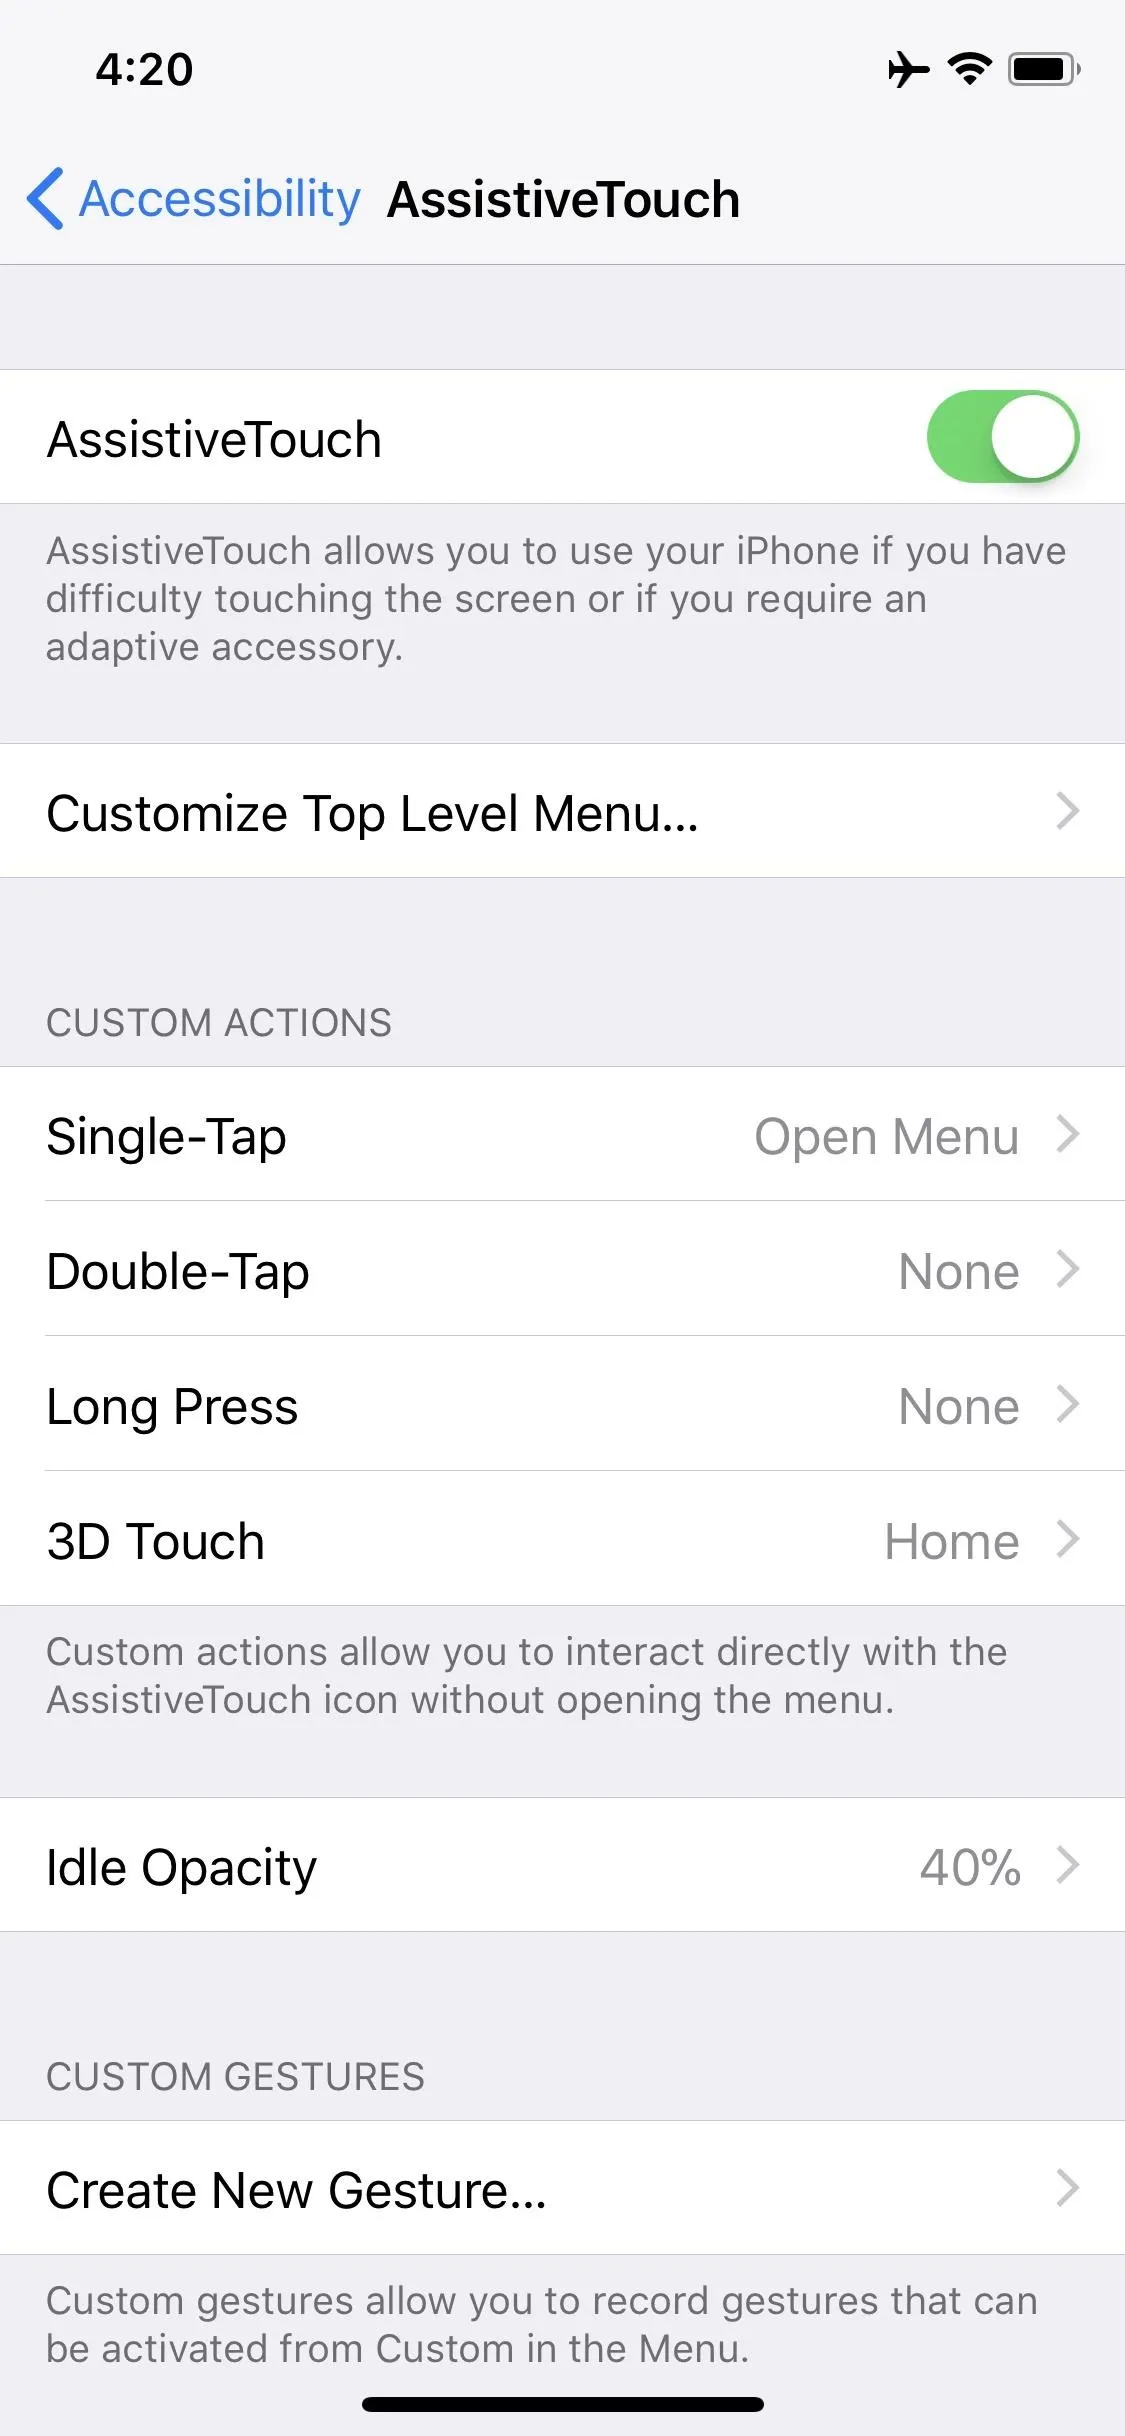
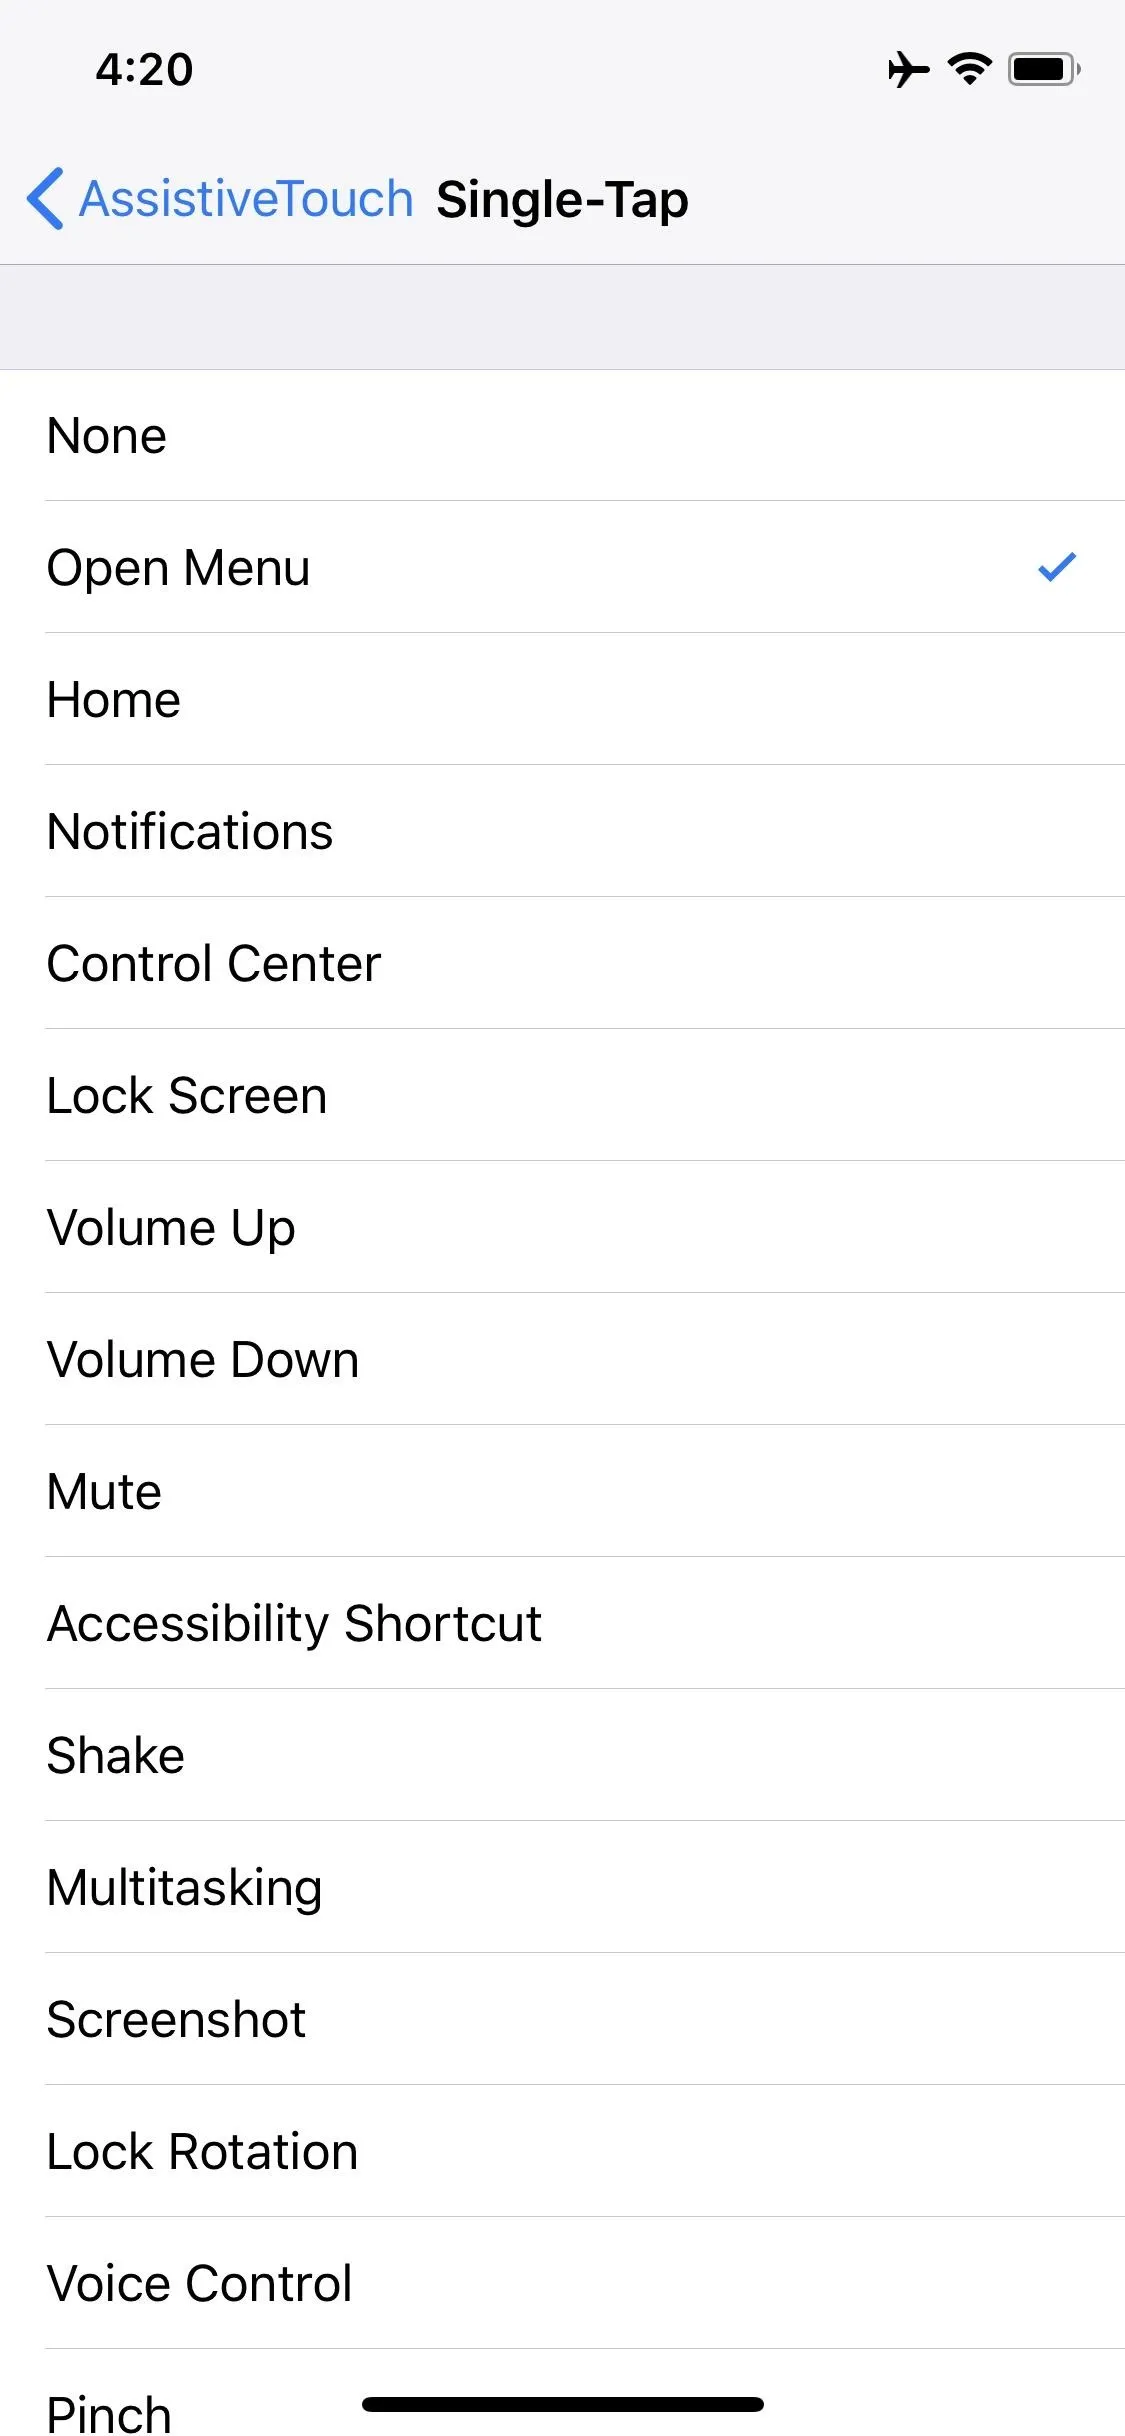


To make the gray/white icon even less noticeable on the screen when it's in its translucent state, you can select "Idle Opacity" and make it lower than the default 40% visibility.
If you'd rather adjust the main AssistiveTouch menu, you can choose "Customize Top Level Menu" to add more button options to the list and/or change which buttons appear in the menu.
Really, it will take some playing around on your part to get things how you want them. You can even create new gestures using the "Create New Gesture" option in the settings or by selecting "Custom" from the AssistiveTouch menu and tapping on a + sign to add a new one.
- Follow Gadget Hacks on Facebook, Twitter, Google+, YouTube, and Instagram
- Follow WonderHowTo on Facebook, Twitter, Pinterest, and Google+
Cover photo and screenshots by Justin Meyers/Gadget Hacks


Comments
Be the first, drop a comment!