
Apple said goodbye to iTunes with the release of macOS Catalina, breaking up music, videos, and podcasts into their own respective apps, Music, TV, and Podcasts. But without iTunes, what app's in charge of interfacing with your iPhone? That would be Finder, and you use it to sync your iPhone, as well as back it up and archive backups for emergency restores.
If you're a Windows PC user, you still use iTunes to do all of your iPhone syncing and backing up. But on a Mac running the latest operating system, whether that's macOS Catalina 10.15, Big Sur 11, Monterey 12, or Ventura 13, Finder takes over the duties. It may seem strange, but Apple has made the process even easier than using iTunes in macOS Mojave 10.14 and earlier.
Aside from backing up your device in Finder in macOS 10.15 and higher, we'll show you how to find your iPhone on your computer, encrypt your backups, delete old and space-hogging backups, and archive backups. And if you don't like using your Mac to backup your personal files and data on iOS 13 and later, you can still use iCloud to do that on the web without a Mac.
Step 1: Find Your iPhone on Your Mac
Using a Lightning to USB or Lightning to USB-C cable, connect your iPhone to your MacBook, iMac, Mac Pro, or other Mac computer. If the connection is good, your iPhone will appear in the left column of any Finder window you open under the Locations section. Whatever the name of your iPhone is should appear.
Note: If the two devices have never been connected, you'll need to pair them, which Finder will walk you through. All you have to do is click on "Pair" on your computer, tap on "Pair" on your device, and enter your passcode on your iPhone when prompted.

Step 2: Choose a Backup Option
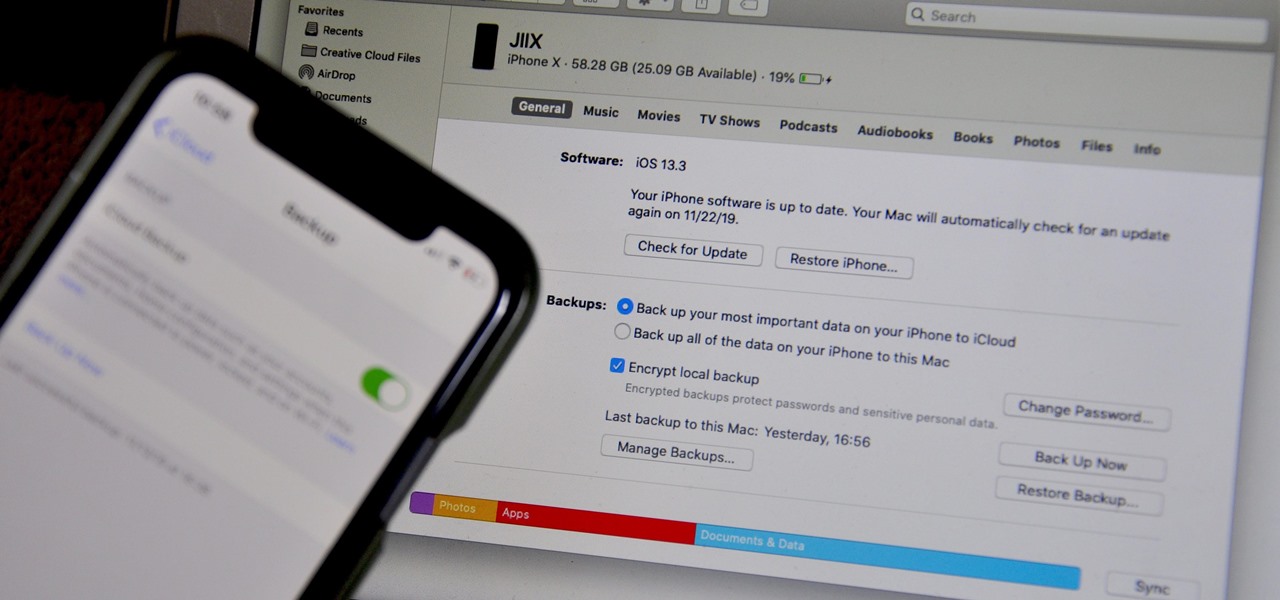
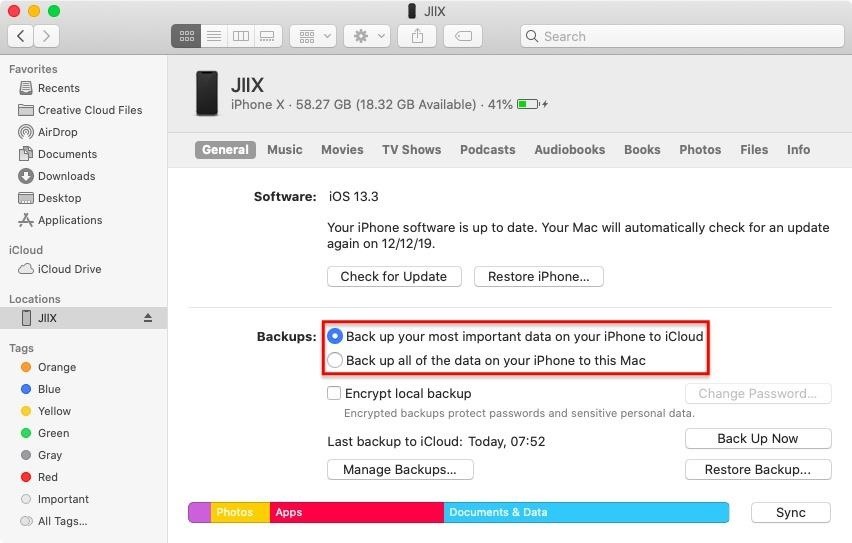
Click on your iPhone in Finder, and you'll see information about your iPhone on the Summary screen, including software version, storage, music, and more — similar to the interface that existed on iTunes. Under the Backups section, you have two choices to back up your device:
- Back up the most important data on your iPhone to iCloud: A backup of what Apple deems "most important," including application data, device settings, messages, photos, and more.
- Back up all of the data on your iPhone to this Mac: A backup of everything on your device, including music and videos not purchased or downloaded from Apple Music and other items not uploaded to your iCloud. This is a good option if you don't have a lot of iCloud storage, or if you want to archive a backup when joining a beta.
Step 3: Encrypt Your Local Backups (Optional)
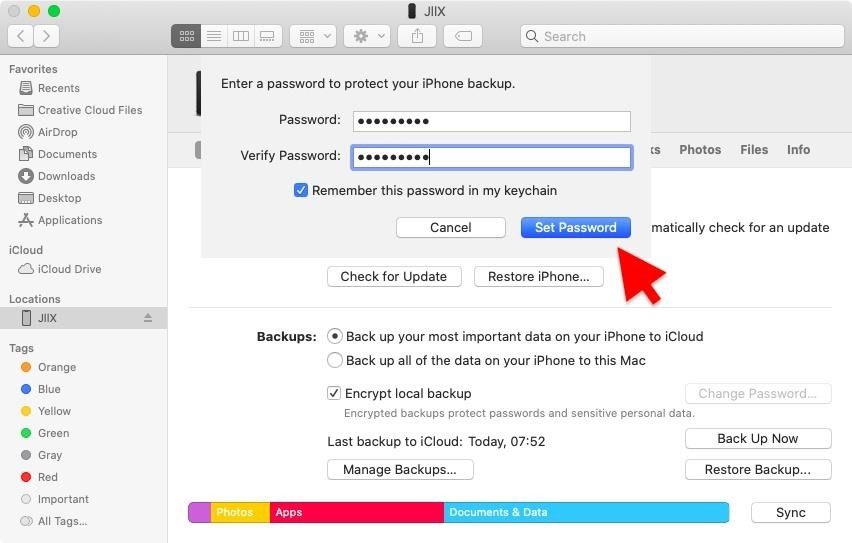
If you want to encrypt your local iPhone backup to your Mac, you can check the box next to "Encrypt local backup" before backing up your device. Not only does this better protect your precious backups, but it also allows your passwords to be saved so that you don't have to reenter them when you restore your apps, data, and settings. It also stores your personal health and activity data.
As soon as you click on the encrypt option, a small window will appear in Finder asking you to enter and verify a password for your backup. When done, click on "Set Password" and all of your future local backups will be password-protected, meaning you'll need to enter that password when restoring your device from one those backups. If you want a new password, click on "Change Password" and enter a new code.
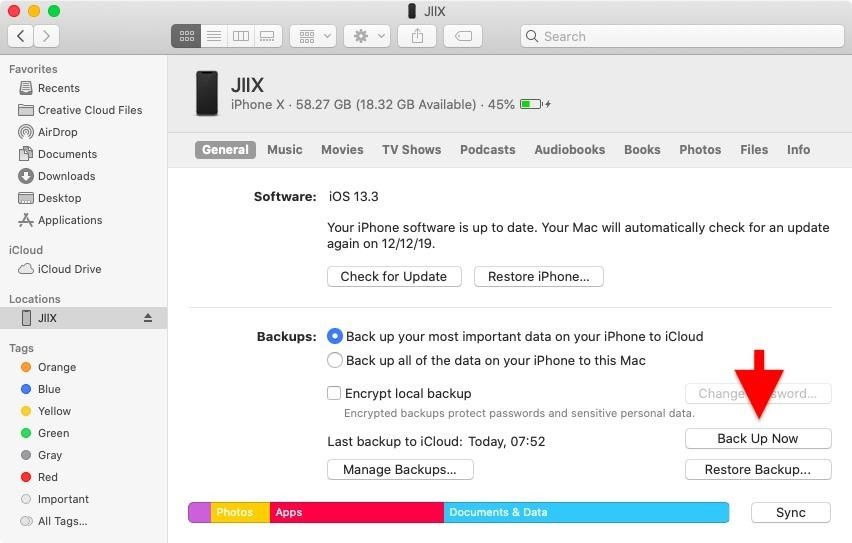
Step 4: Back Up iPhone
Once your type of backup is selected, and encryption is enabled (if desired), click on "Back Up Now" to back up your device. If your backup is encrypted, you may be asked to enter your passcode on your iPhone to begin the backup.
It won't be very noticeable that you're backing up your device, but you'll know it's working by the icon next to your iPhone's name in Finder: first, semi-circles rotating around each other (processing), and then a circle filling up (backing up). Once the circle fills up and the date and time of the last backup are updated on the Summary screen, your backup is complete.
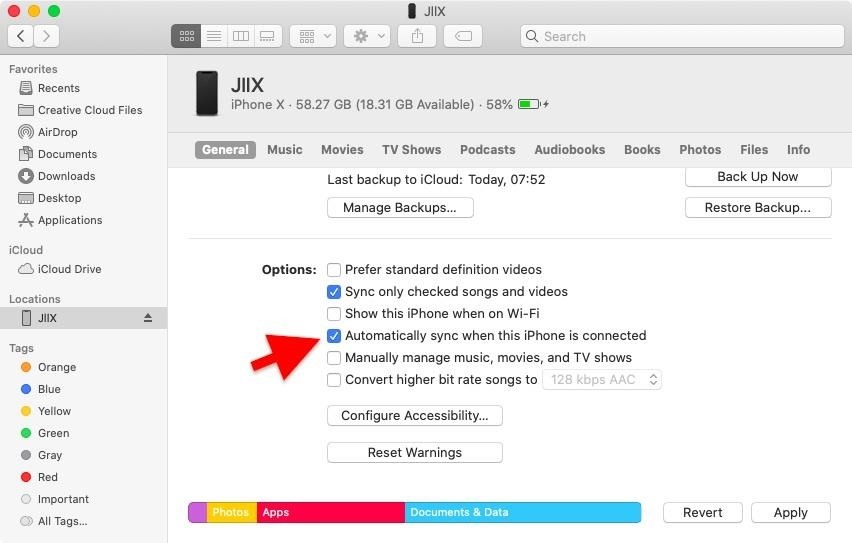
Additionally, if you want to simplify the process of backing up your iPhone, you can enable a feature so that your iPhone is automatically backed up every time you connect your device to your Mac. To do this, scroll down to the bottom of the Summary screen and click on the "Automatically sync when this iPhone is connected" option.
Step 5: Manage Backups (Optional)
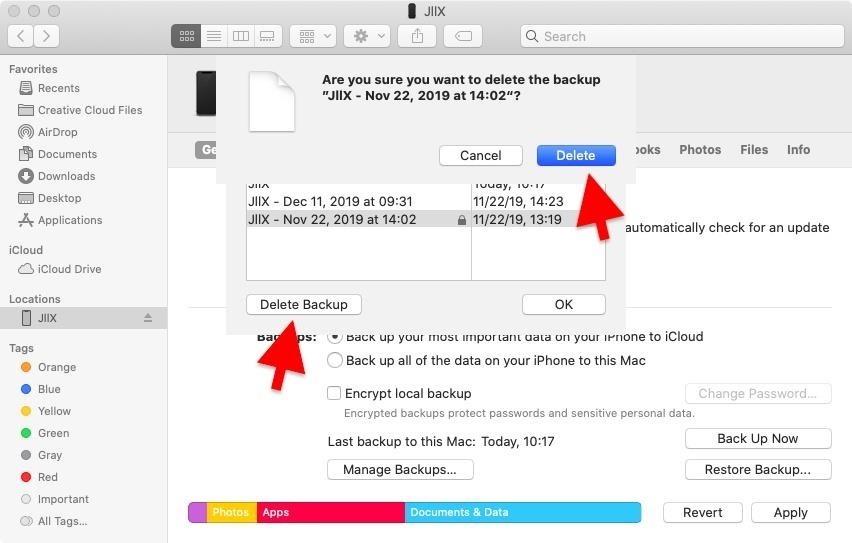
You can free up storage space on your Mac by deleting old or duplicate backups. To do this in Finder, simply click on "Manage Backups." A window with all of your backups will appear, showing the name of the device and the date and time it was backed up. If you see a lock icon next to a backup, that means it's archived (more about that in the next step). To remove a backup, click on the backup, then on "Delete Backup," and then on "Delete" in the pop-up that appears.
Step 6: Archive Backups (Optional)
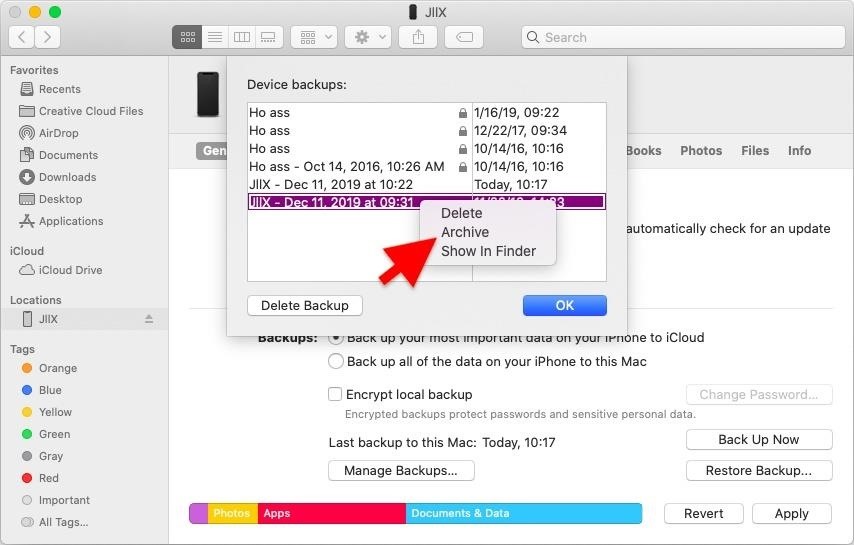
By default, Finder only keeps a single backup of your iPhone on your Mac, in most cases. Whenever you create a new backup, the previous one is overwritten, but you can change the setting of your backup to keep it archived on your computer in case you ever want to restore your device using an older backup.
In the Finder summary screen for your device, click on "Manage Backups" and right-click on a backup. A menu with a few options will appear — click on "Archive" to lock the backup and make it so that it isn't written over with future backups. A lock icon next to the backup name means the backup is archived.
Just updated your iPhone? You'll find new emoji, enhanced security, podcast transcripts, Apple Cash virtual numbers, and other useful features. There are even new additions hidden within Safari. Find out what's new and changed on your iPhone with the iOS 17.4 update.


Be the First to Comment
Share Your Thoughts