
Your iPhone's Health app has a new medications hub that can be a one-stop destination for all the medicine, vitamins, and supplements you're taking. Adding new entries is easy and well worth the effort to get reminders to take your meds, learn about drug interactions, easily share your routine, and track your history to see what is and isn't working for you.
On iOS 16 and later, there's a new medications category where all this information lives. It's even easier to work with if you connect your health records, which you can do from "Add Account" in the "Browse" tab. With your accounts connected, you can simply transfer all your prescribed medications from your health records to the new medications hub.
Unless you haven't ever taken or don't currently take any medicine, vitamins, or supplements, this is the one tool you should probably be using on Apple Health — even if you don't like Apple Health. It helps you stay on schedule, but it can also help you discover how your body responds in certain conditions, such as when taking medicine with or without food, mixing prescriptions, skipping doses, overdosing, and more.
Before continuing below to start adding and tracking your meds, heed Apple's warning: "The Medications feature is not a substitute for professional medical judgment. Additional information is available on the labels of your medications. Consult your healthcare provider prior to making any decisions related to your health."
Step 1: Visit the New Medications Category
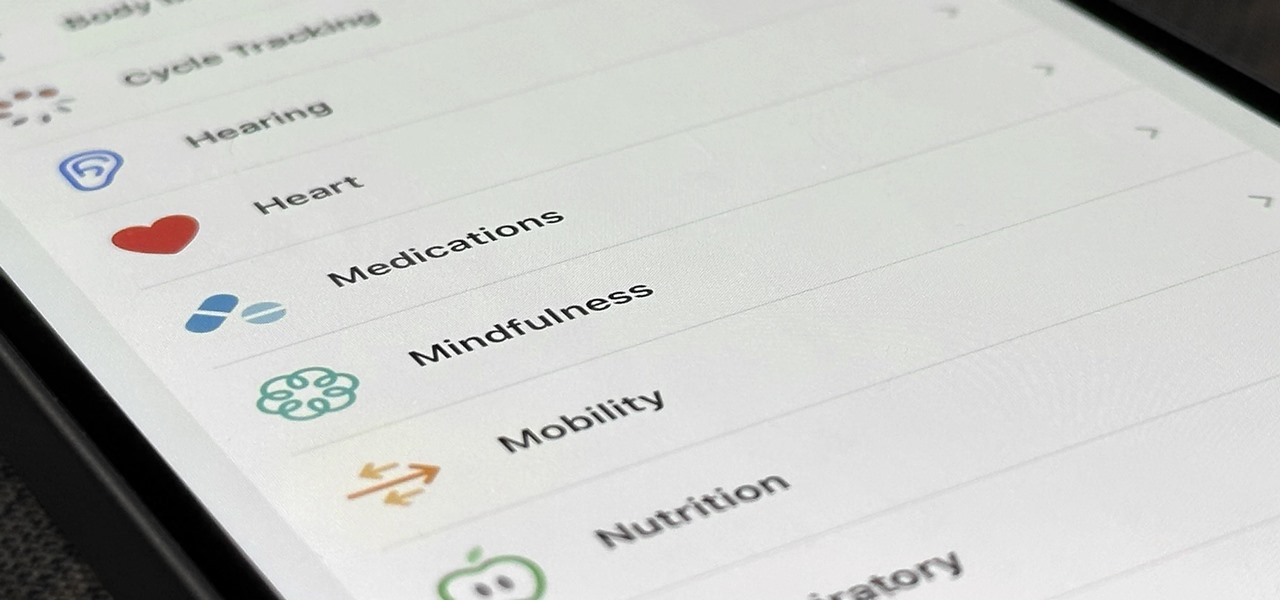
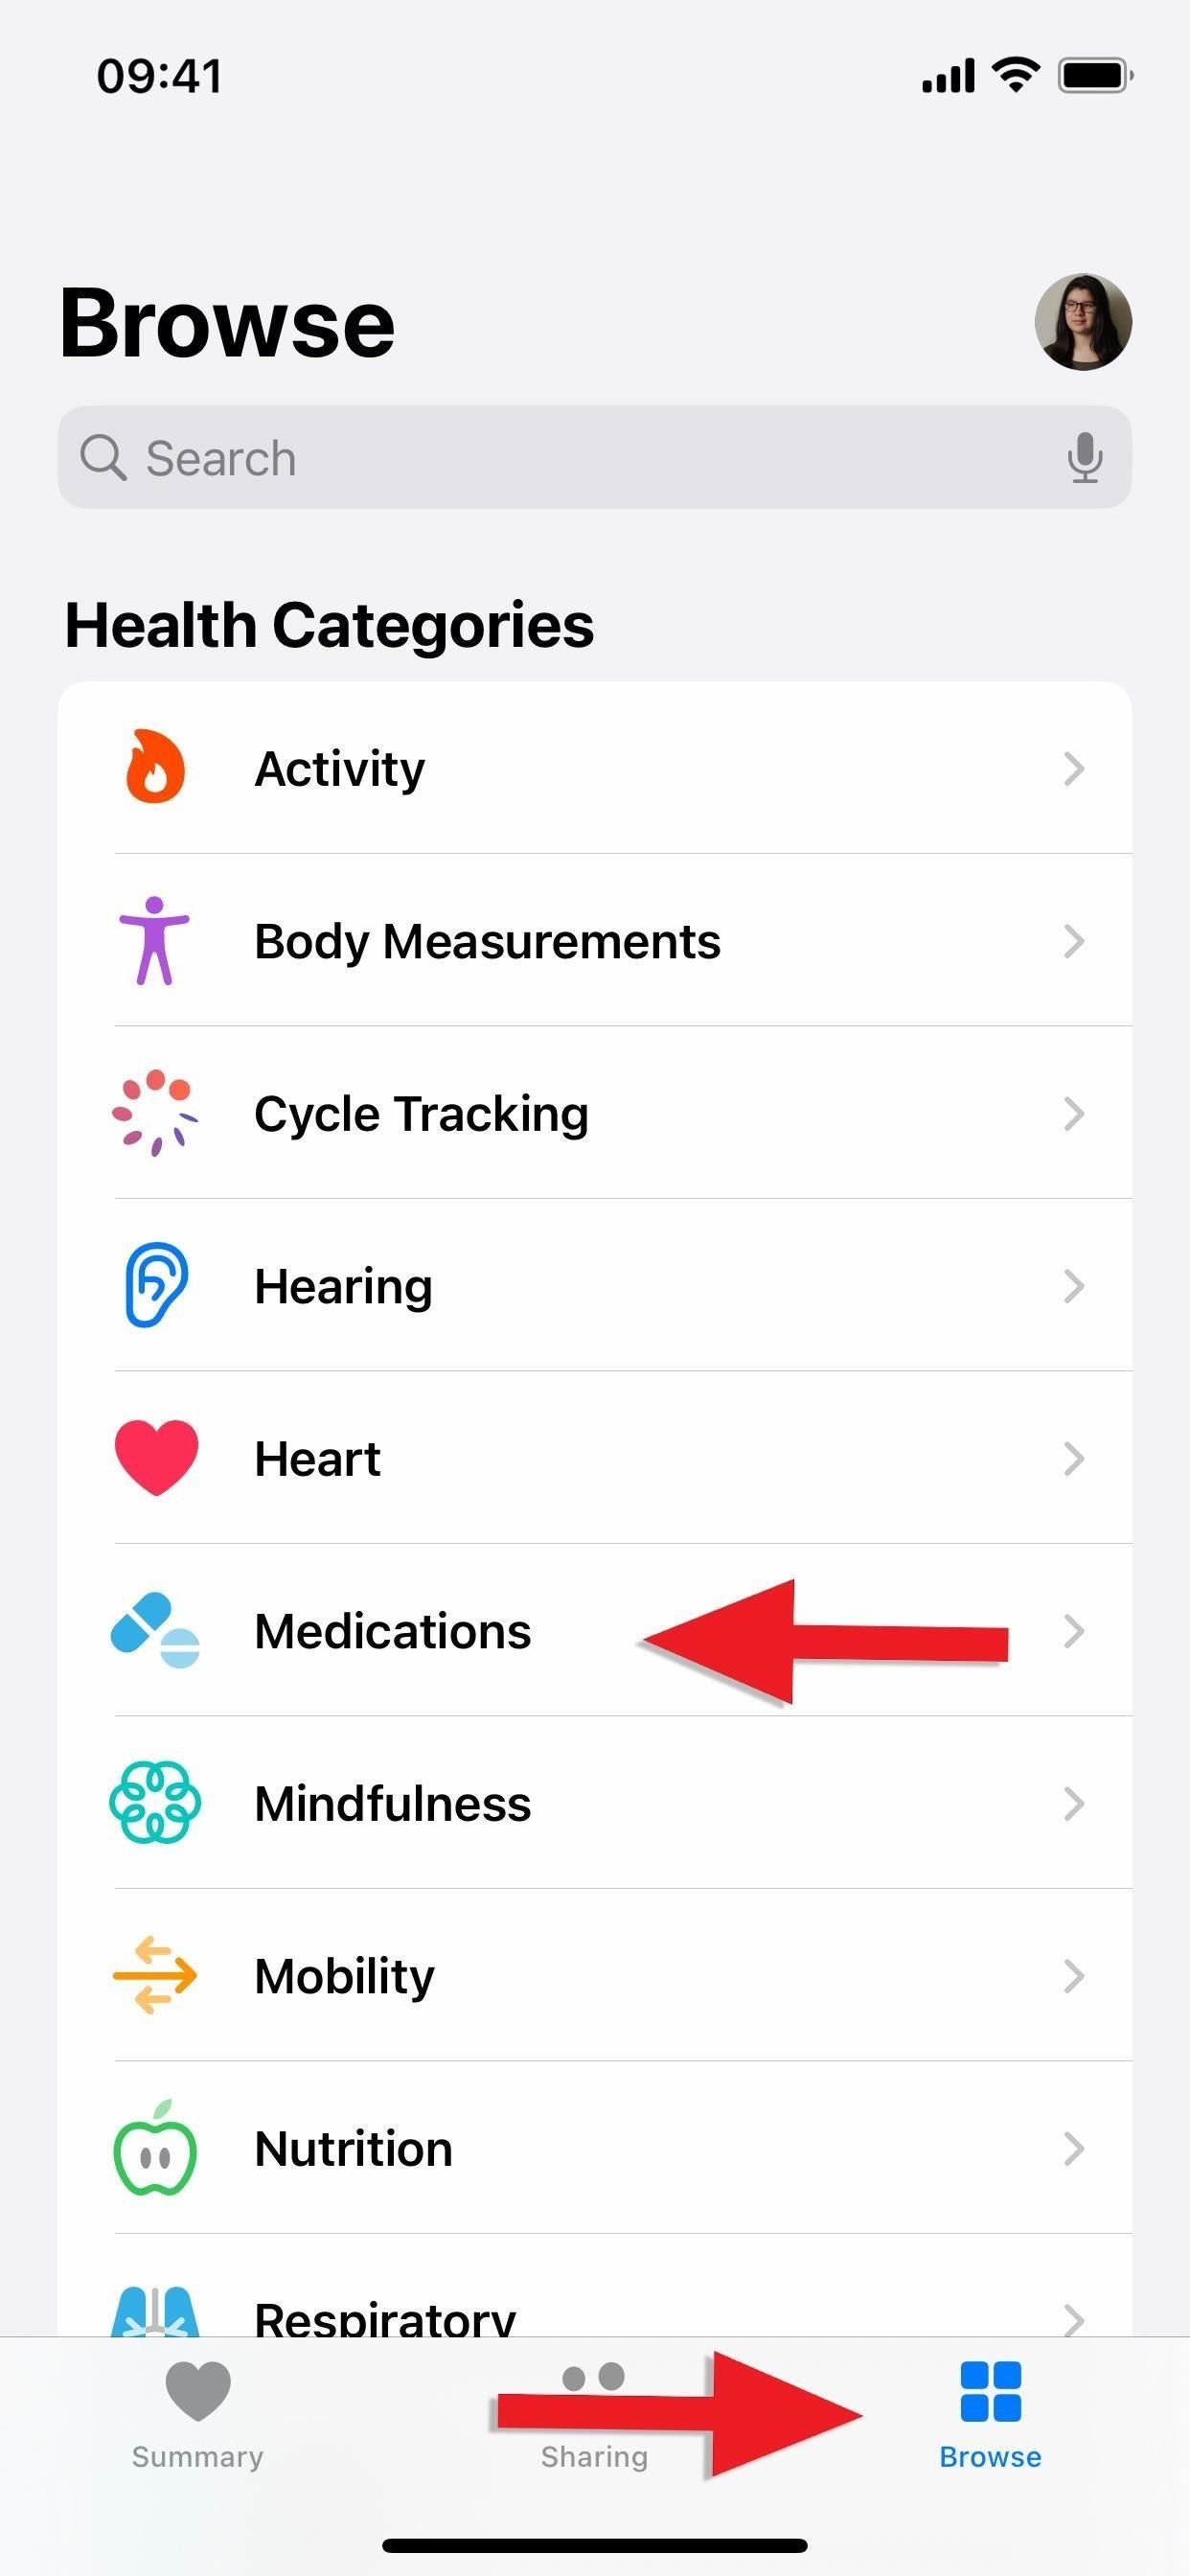
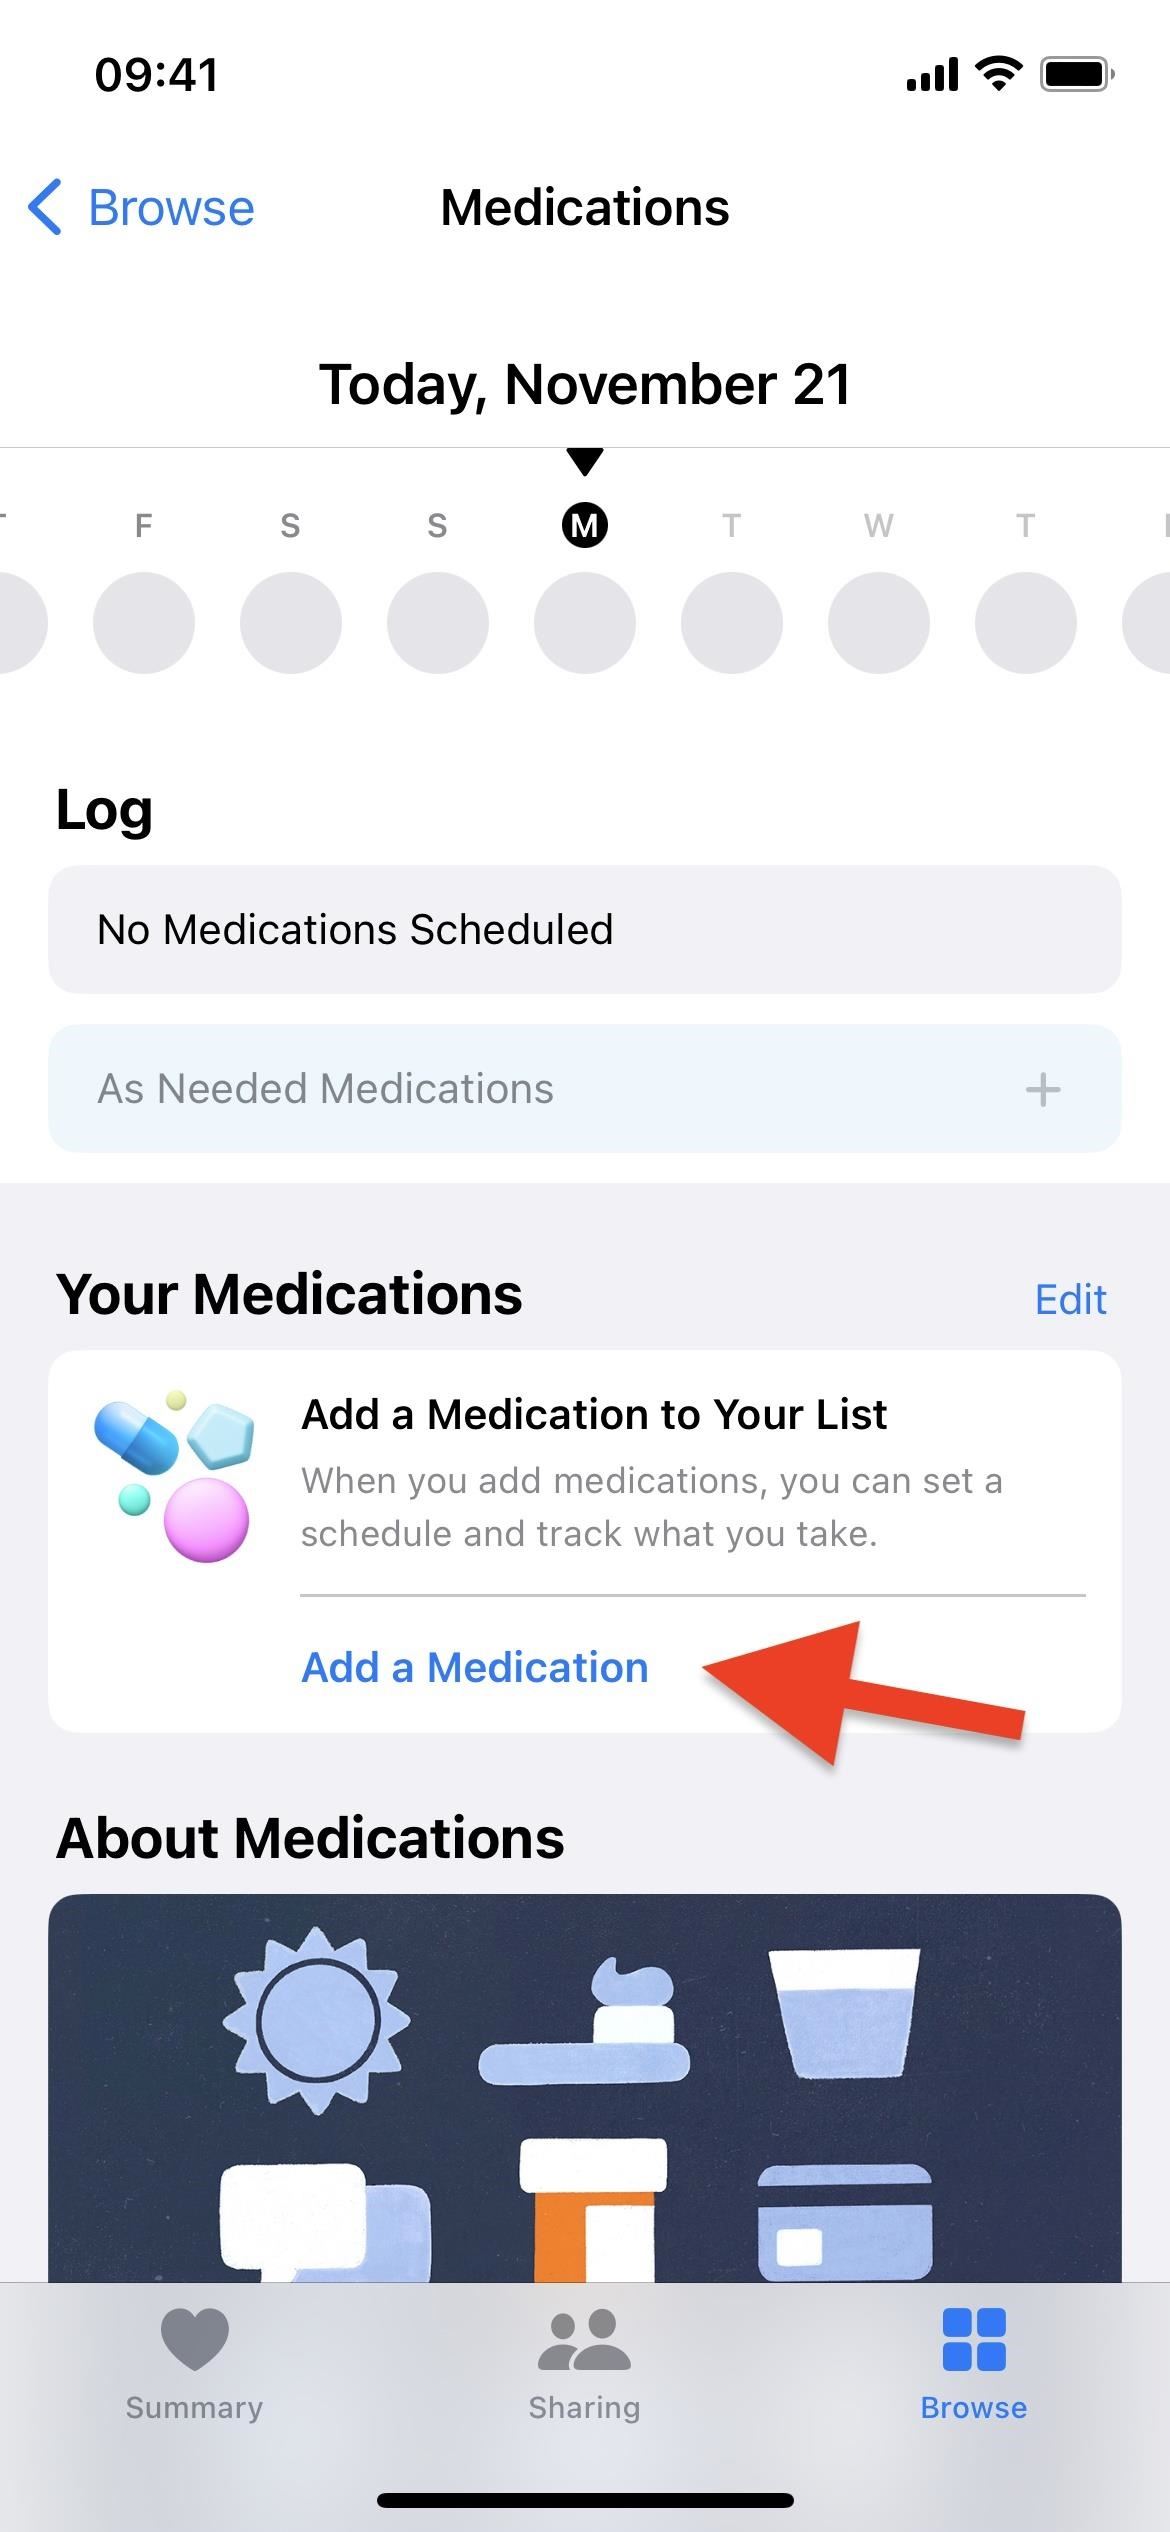
Open the Health app, go to the "Browse" tab, and tap "Medications." Prior to iOS 16, this category did not exist; There was a "Medications" category under the Health Records section if you had a connected health account, but that was just your medications history, which is now called "Medications Records."
Step 2: Search for Your Medication
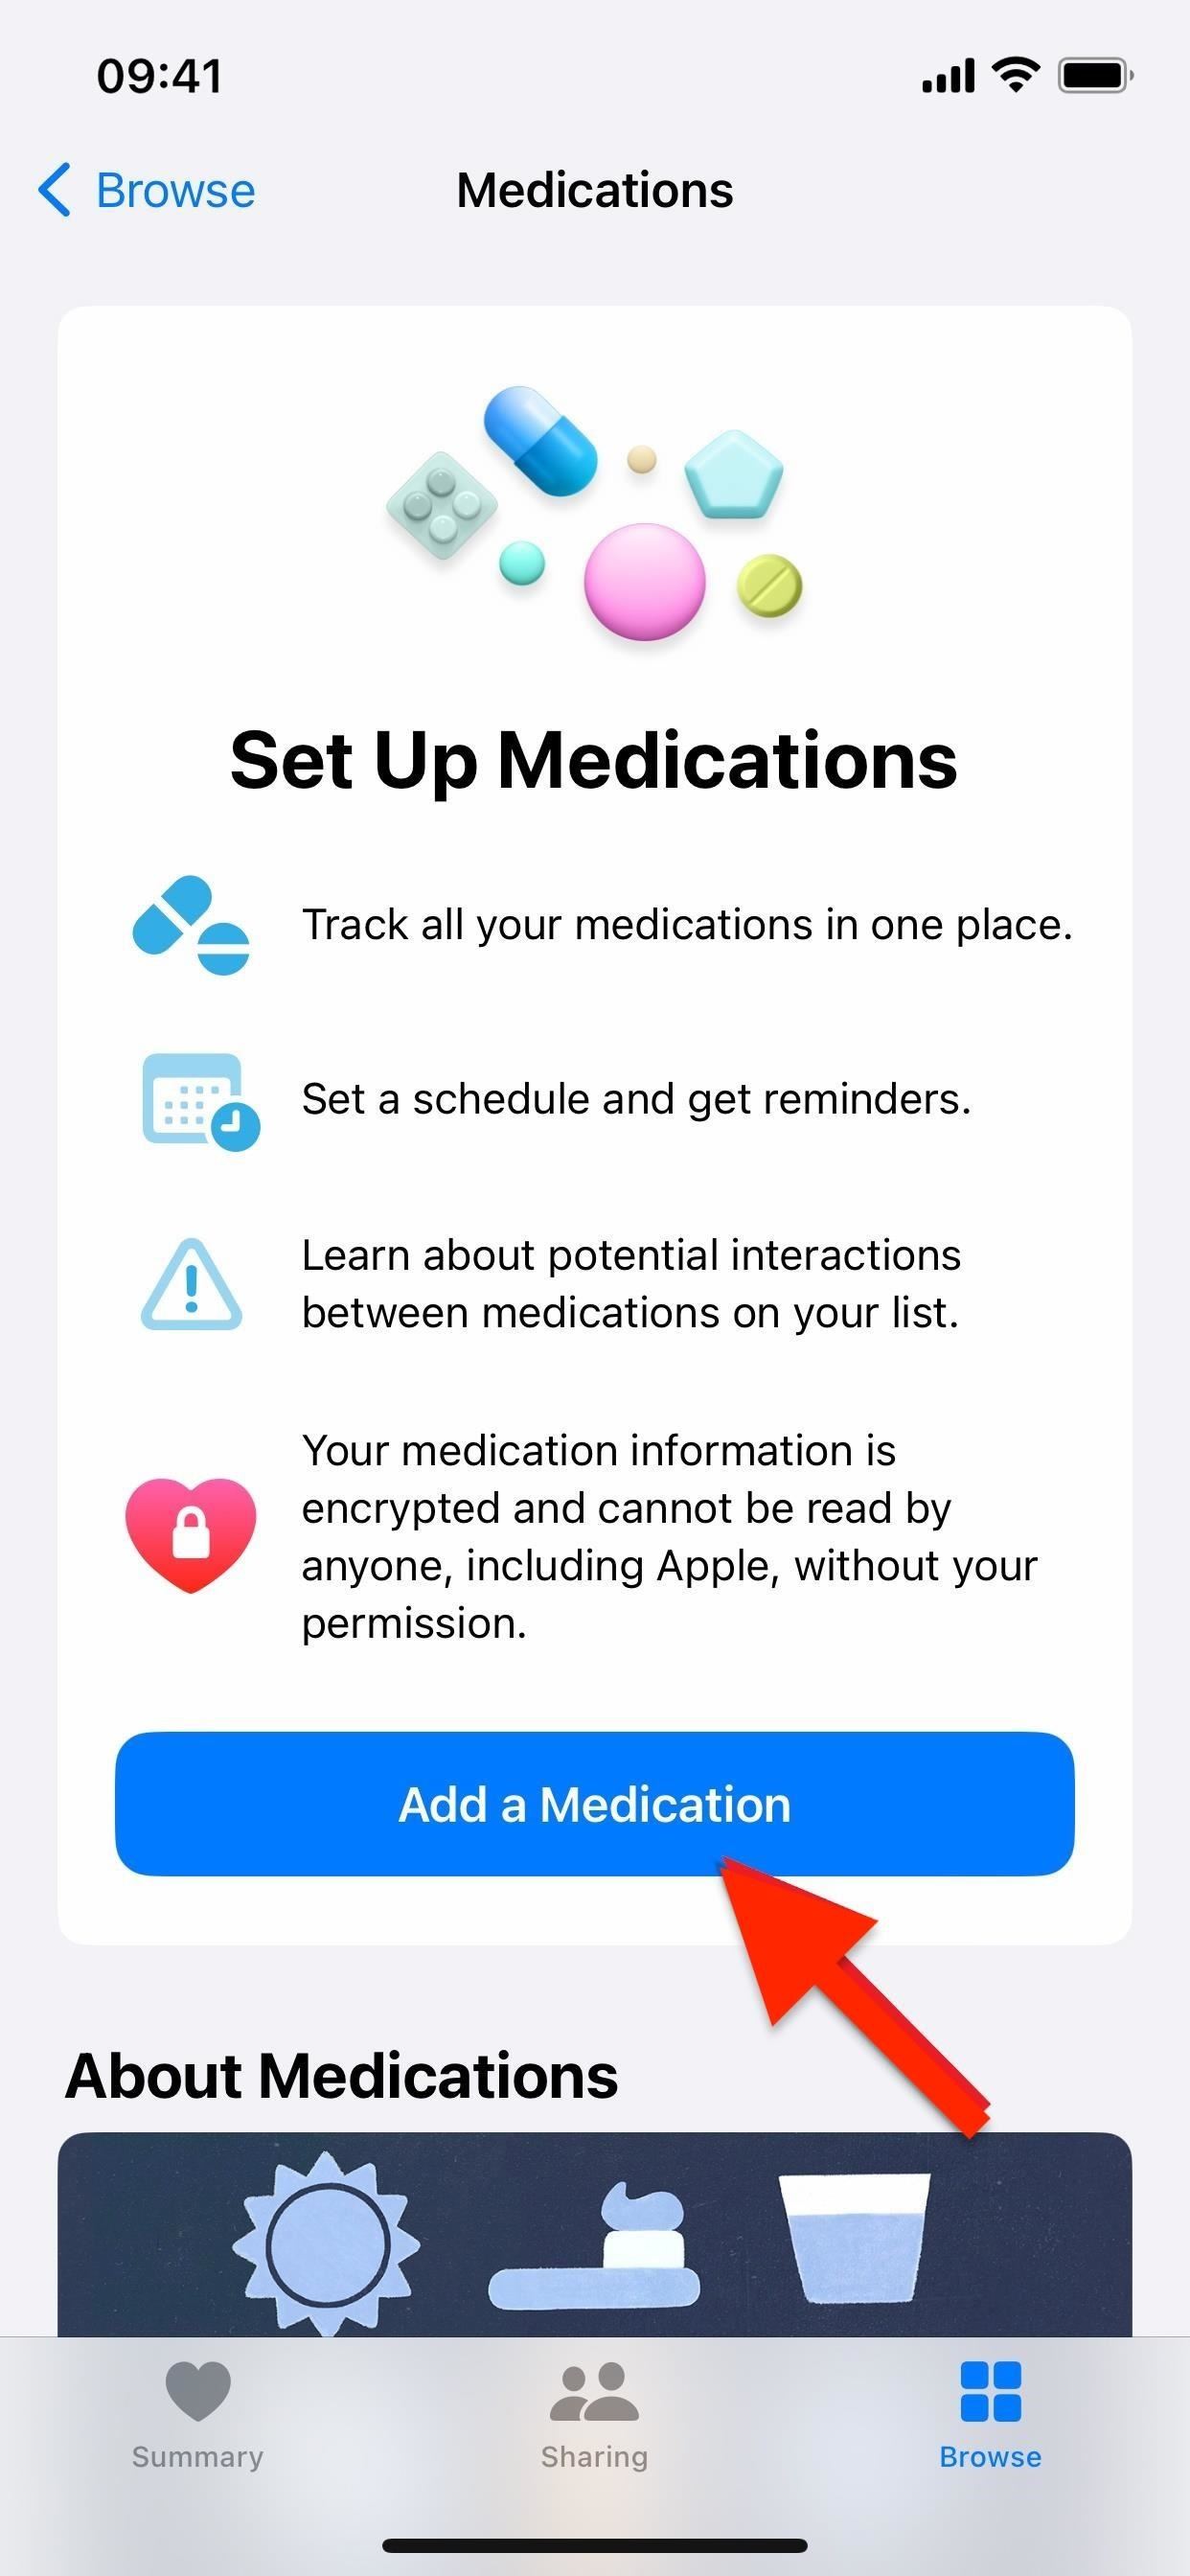
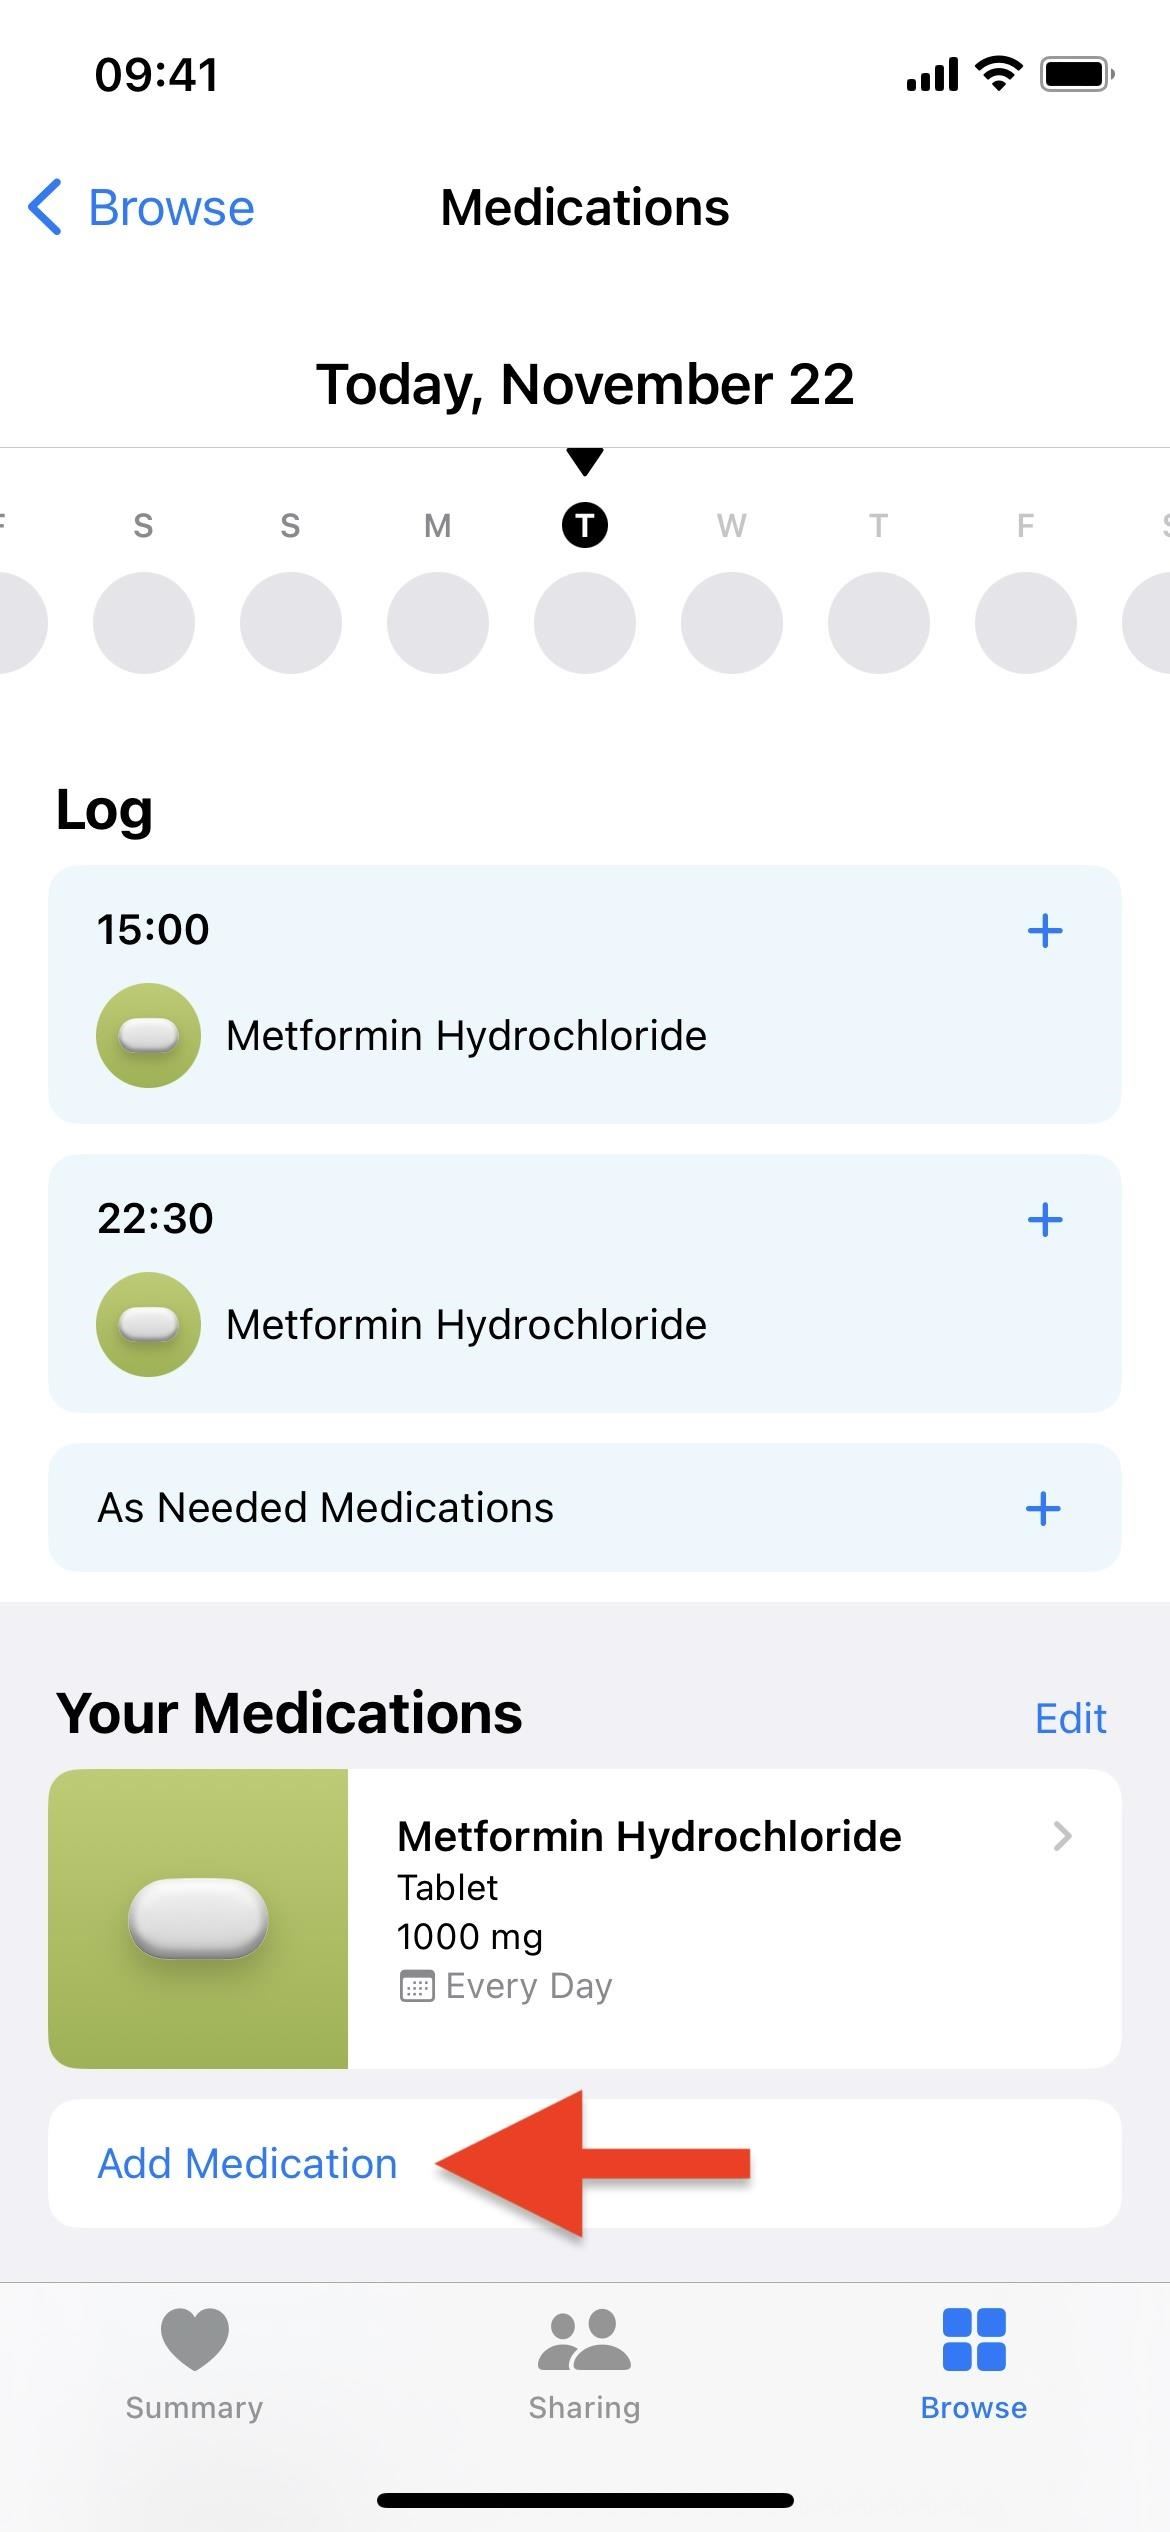
On the medications page, tap the "Add a Medication" button from the large or small explainer box. If you already have one or more medications added, tap "Add Medication" under the last one in the list. You can also tap "Edit" in the "Your Medications" section, then "Add Medication."
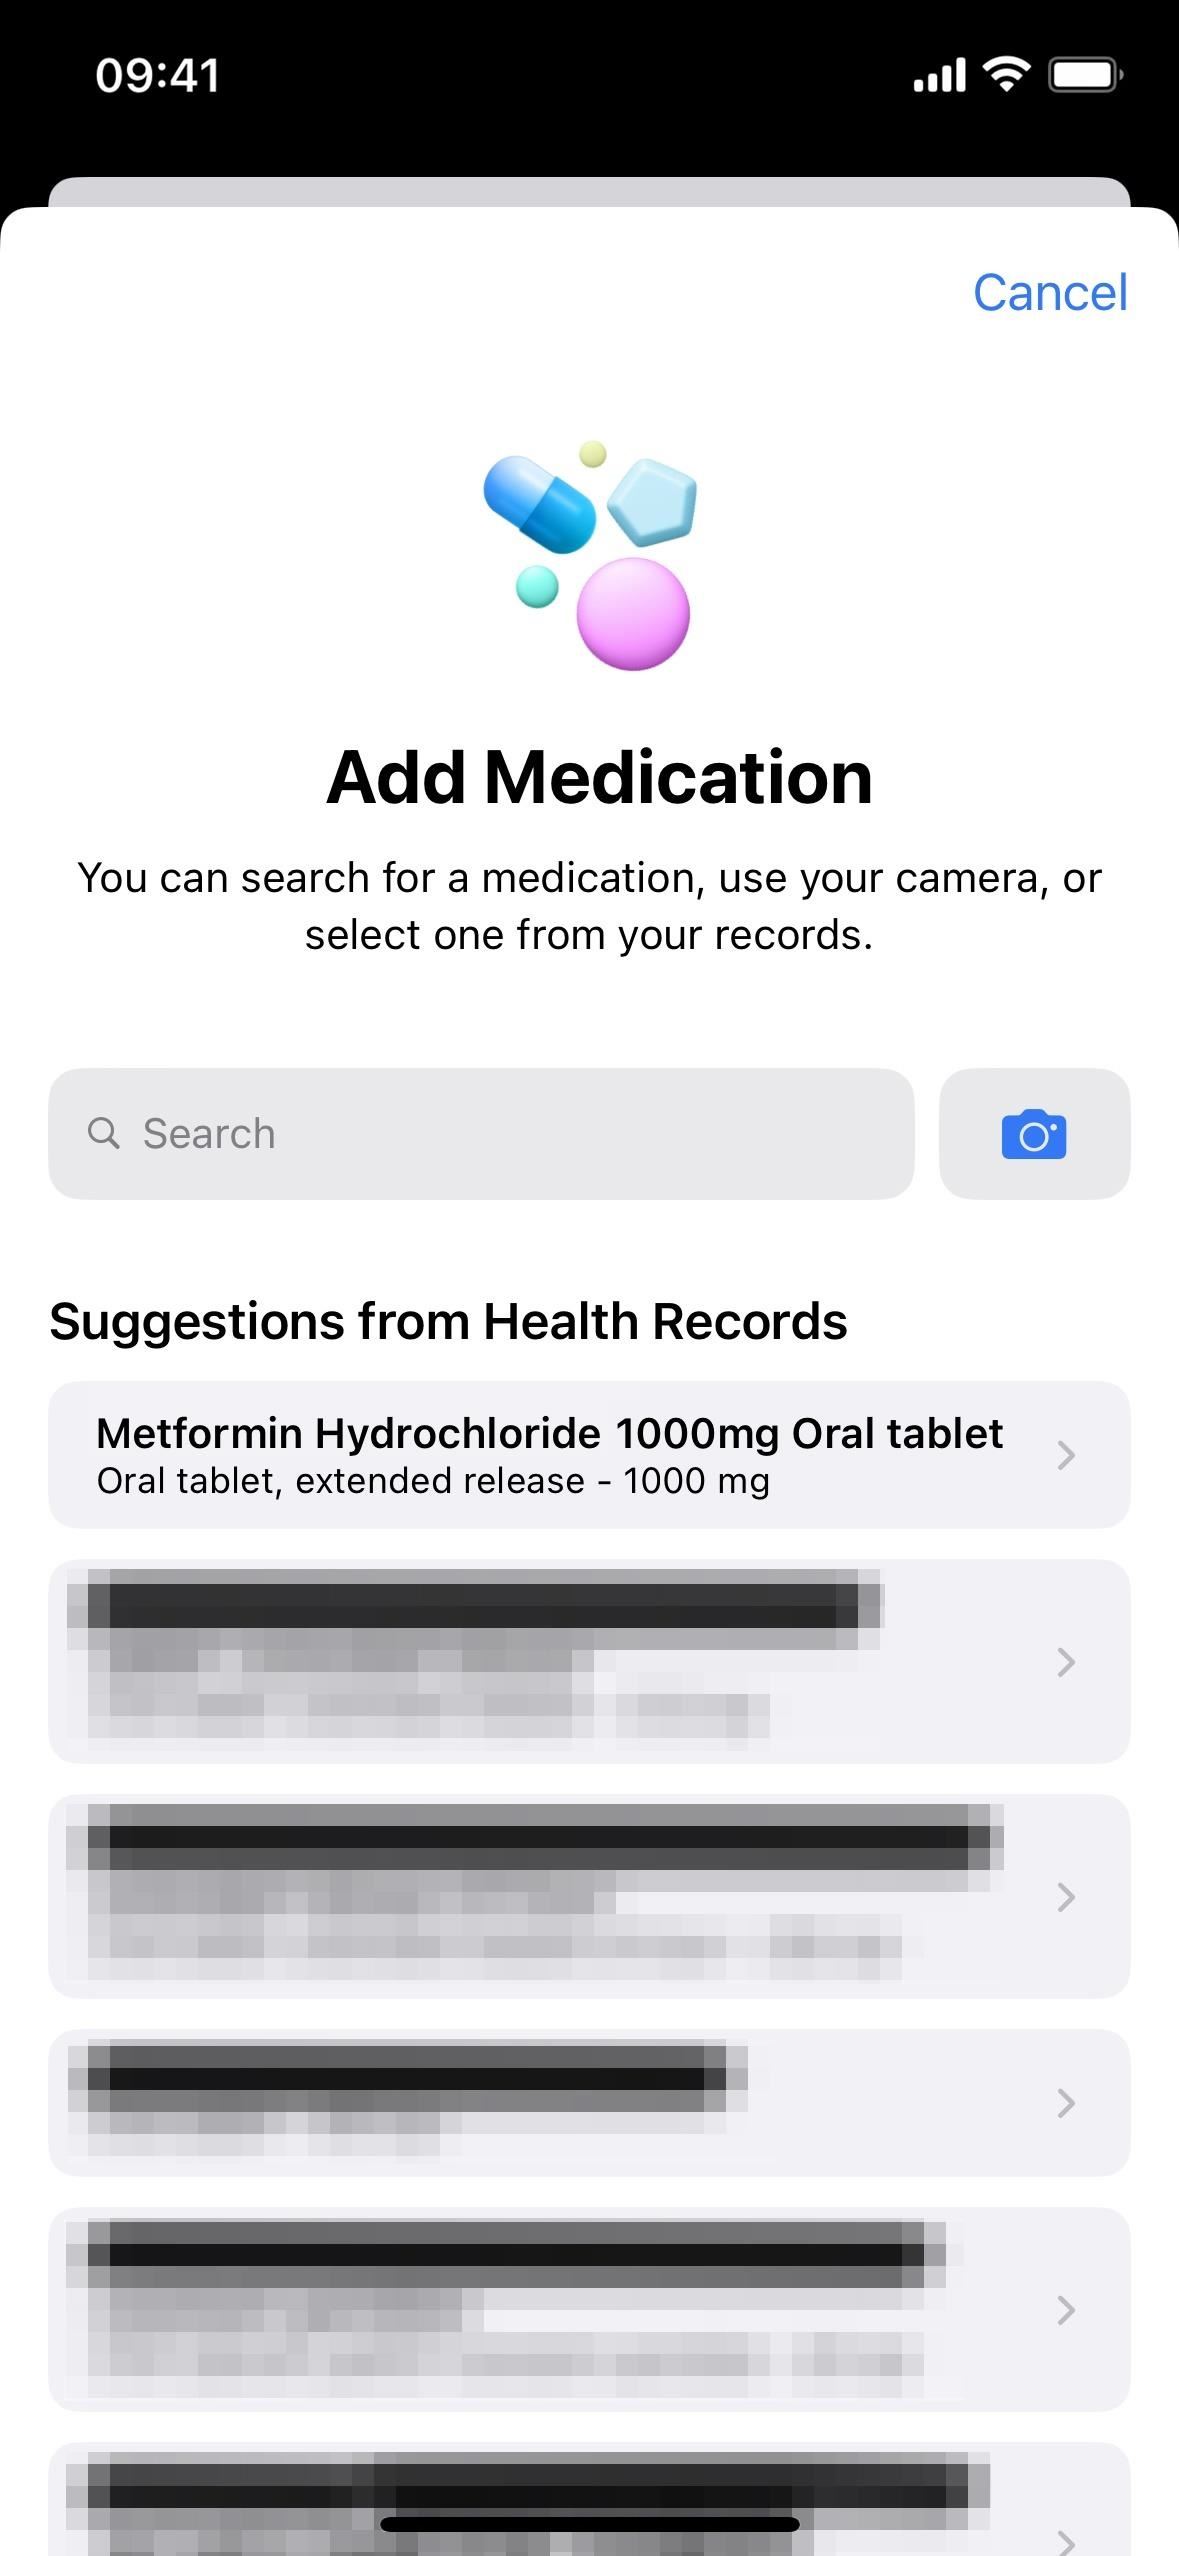
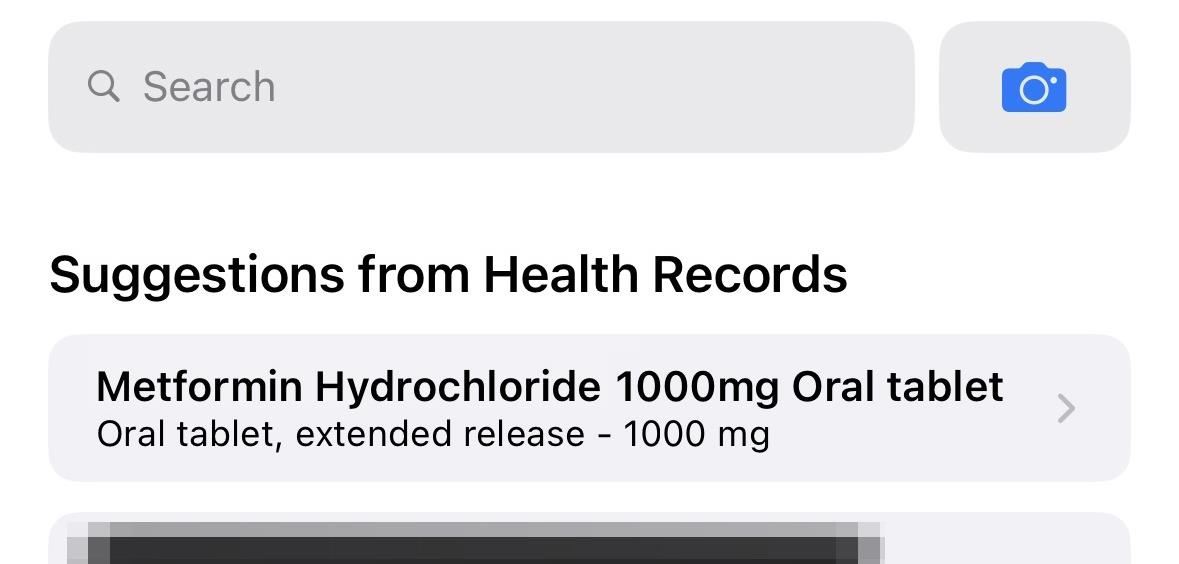
On the modal screen that appears, you'll see a search box and camera icon. If you've connected your health records, you may also see suggestions from your medication history appear below those items.
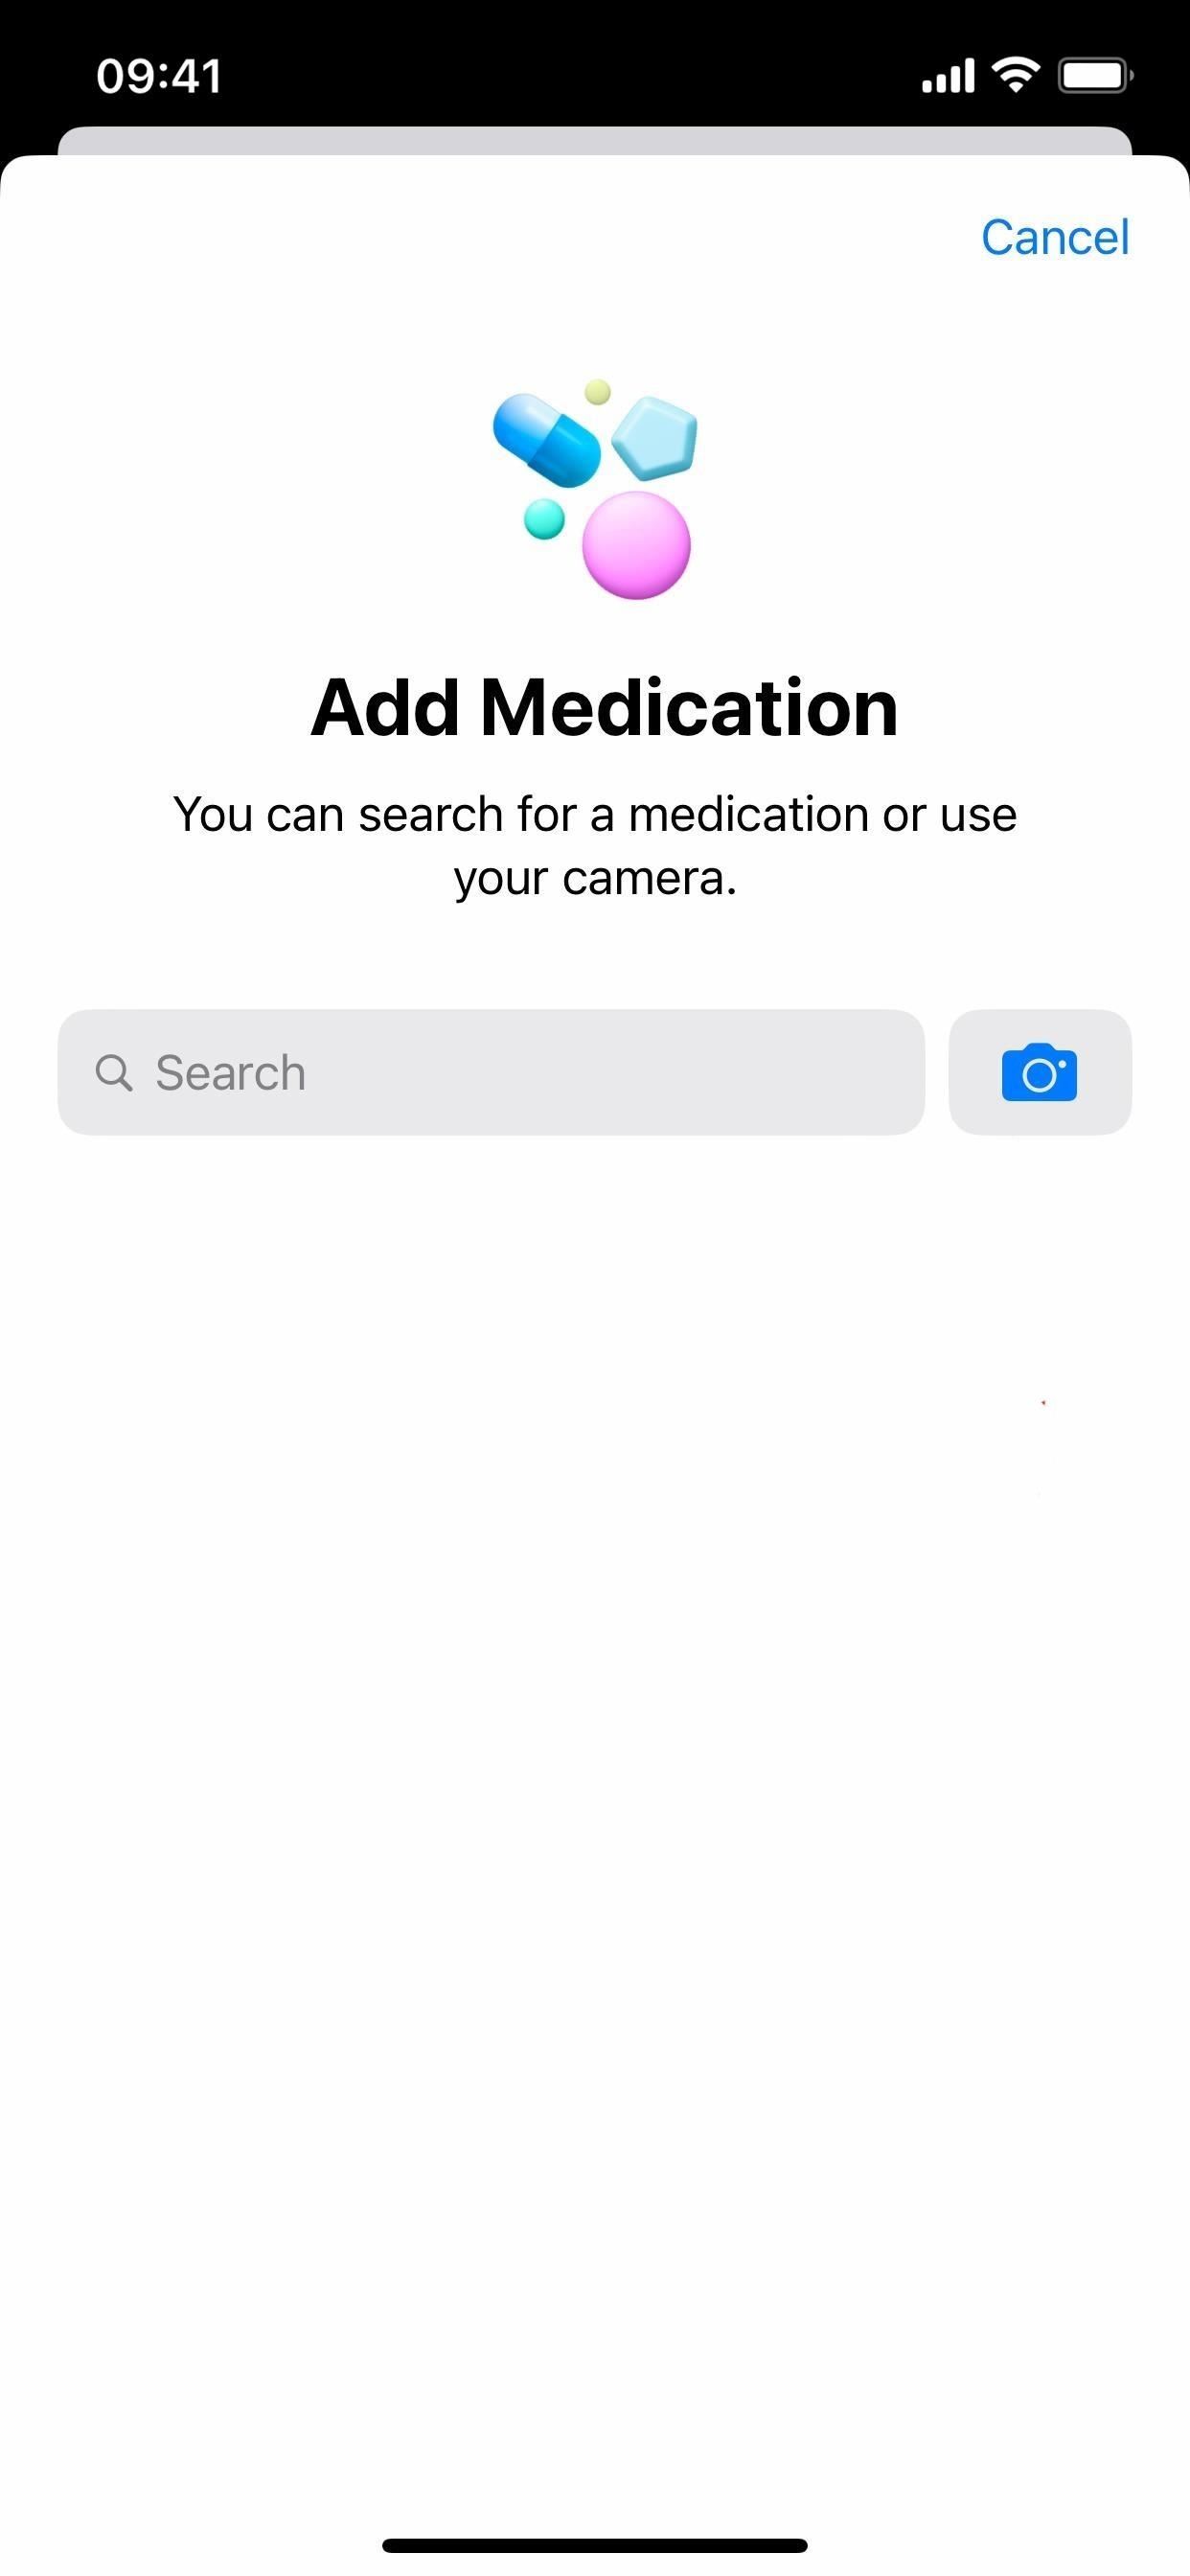
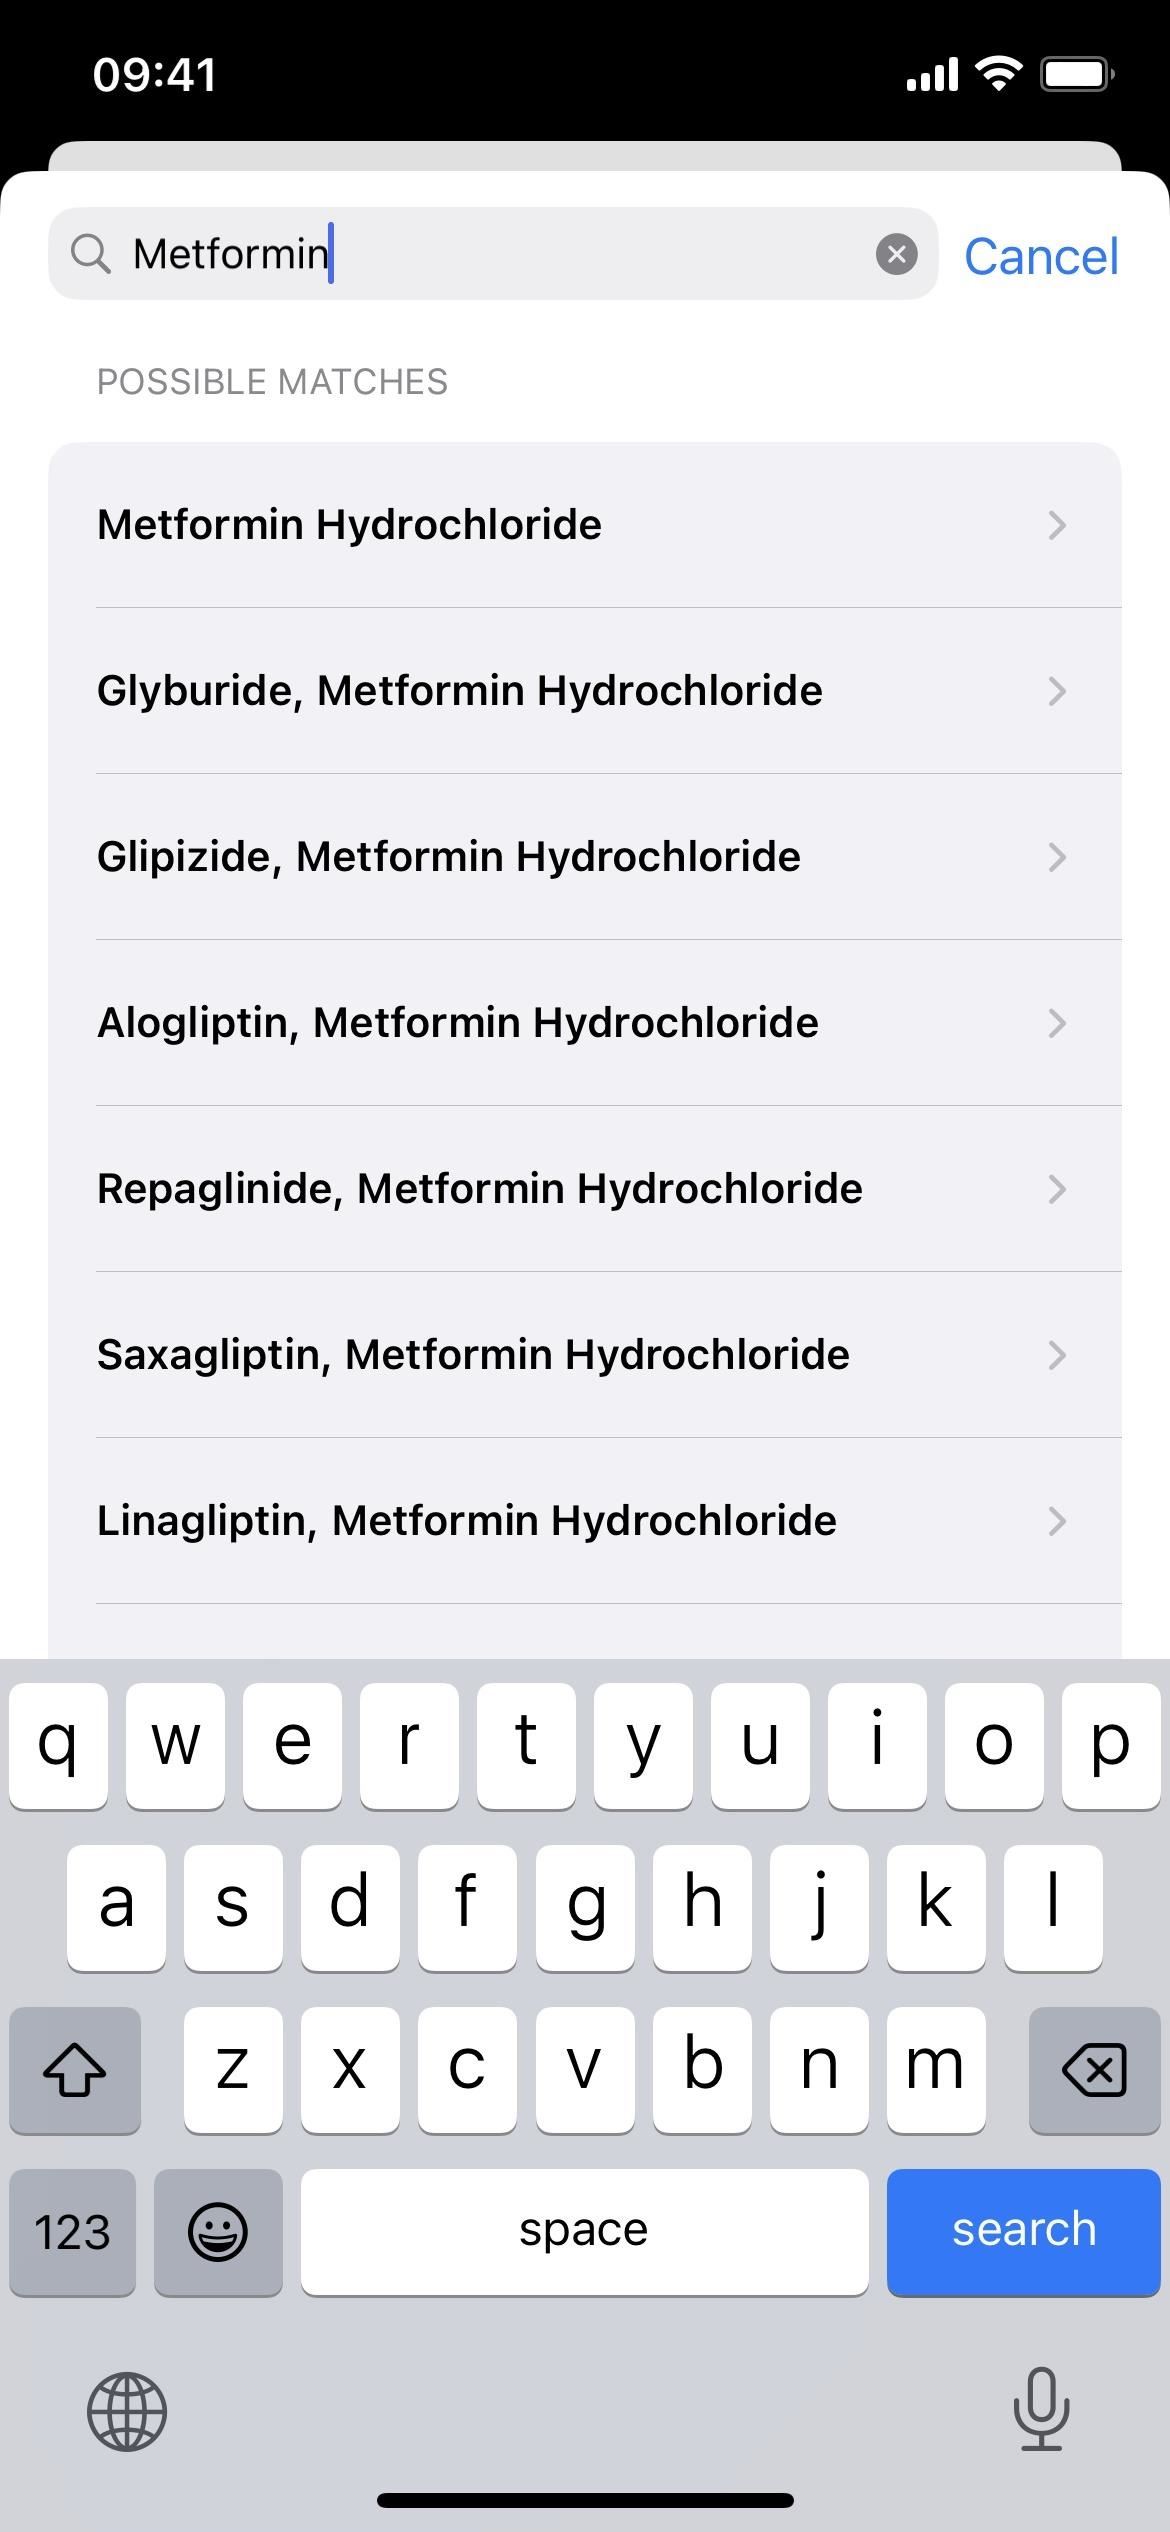
Option 1: Search by Name
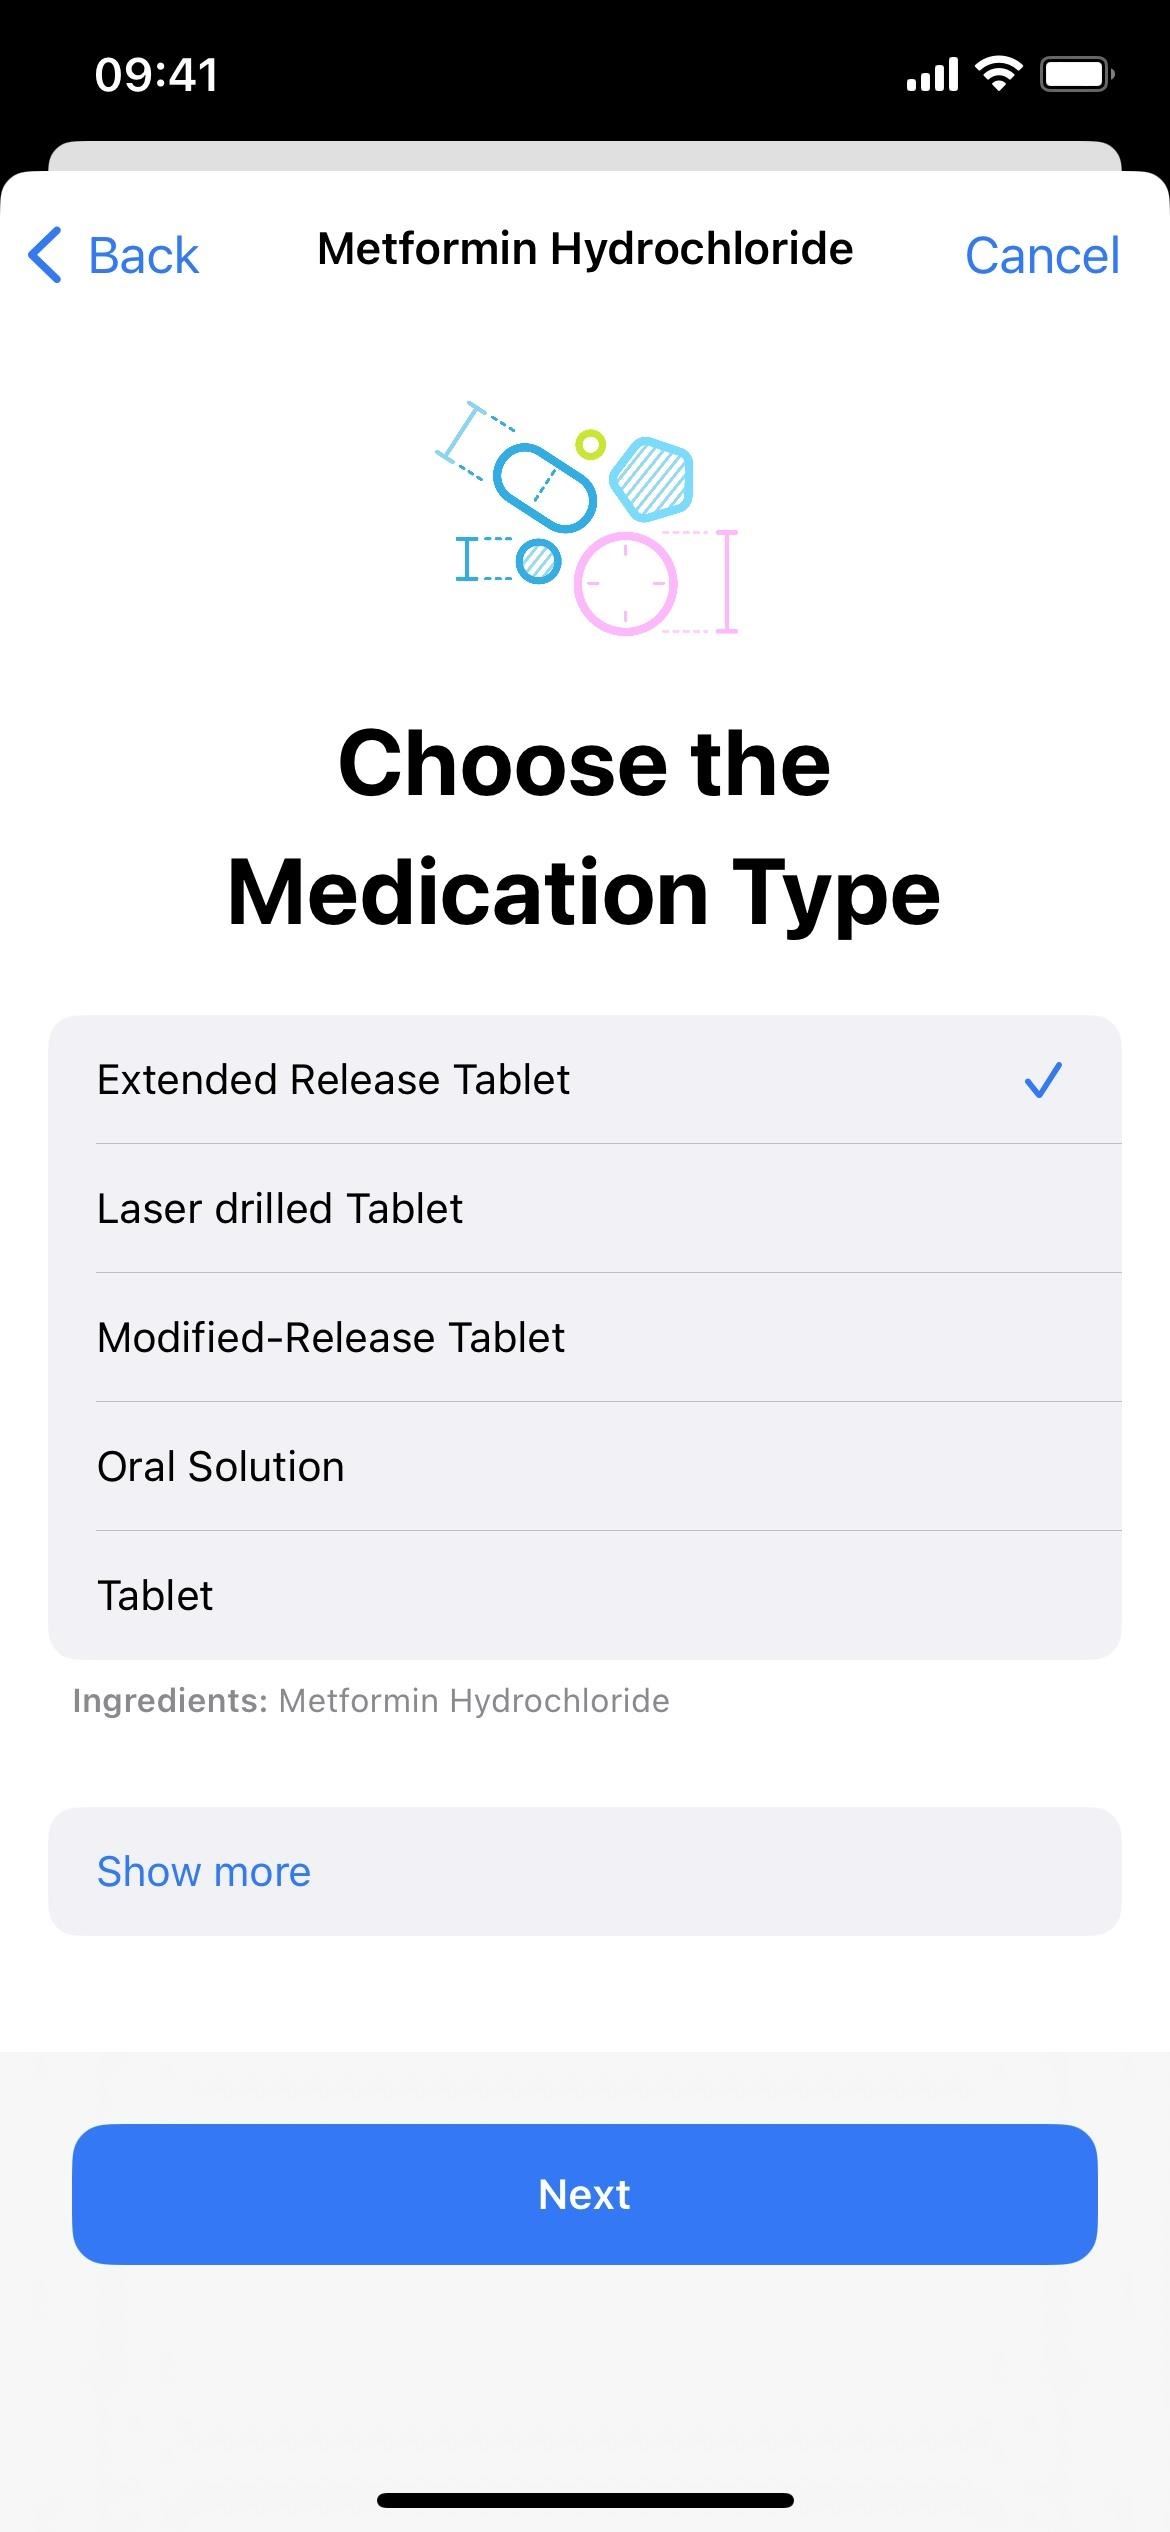
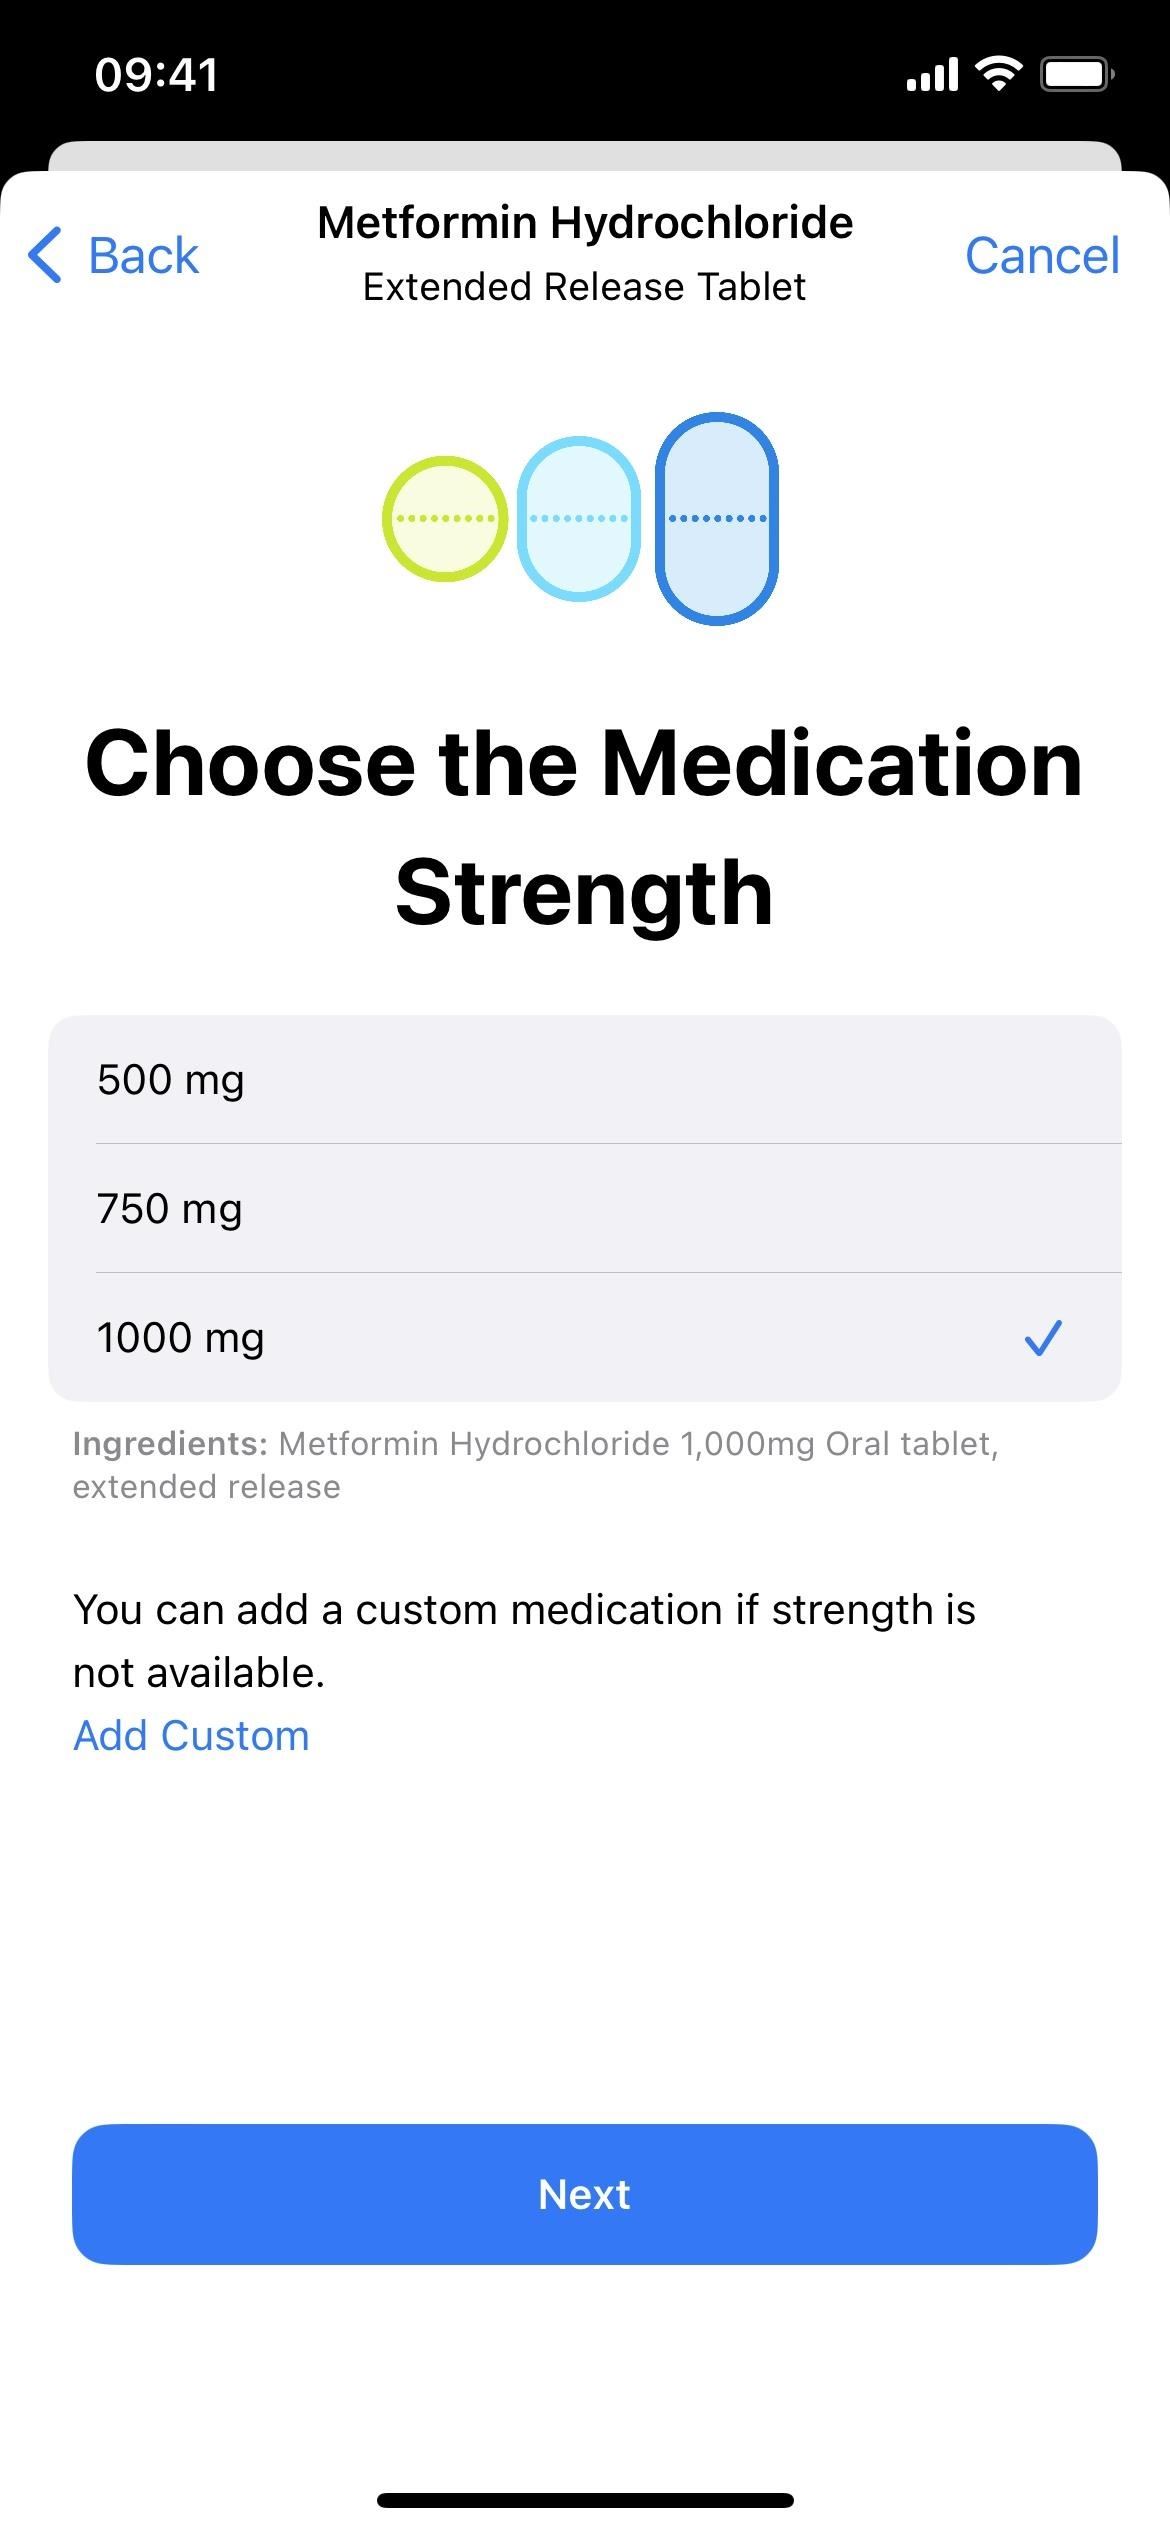
Type your medication, vitamin, or supplement in the search box. You'll see possible matches appear as you type. Select the right one if listed, or tap "Add '[Name]'" if not. Then, choose the type (capsule, tablet, cream, gel, spray, injection, etc.) and hit "Next." Then, select or add the correct strength and hit "Next."
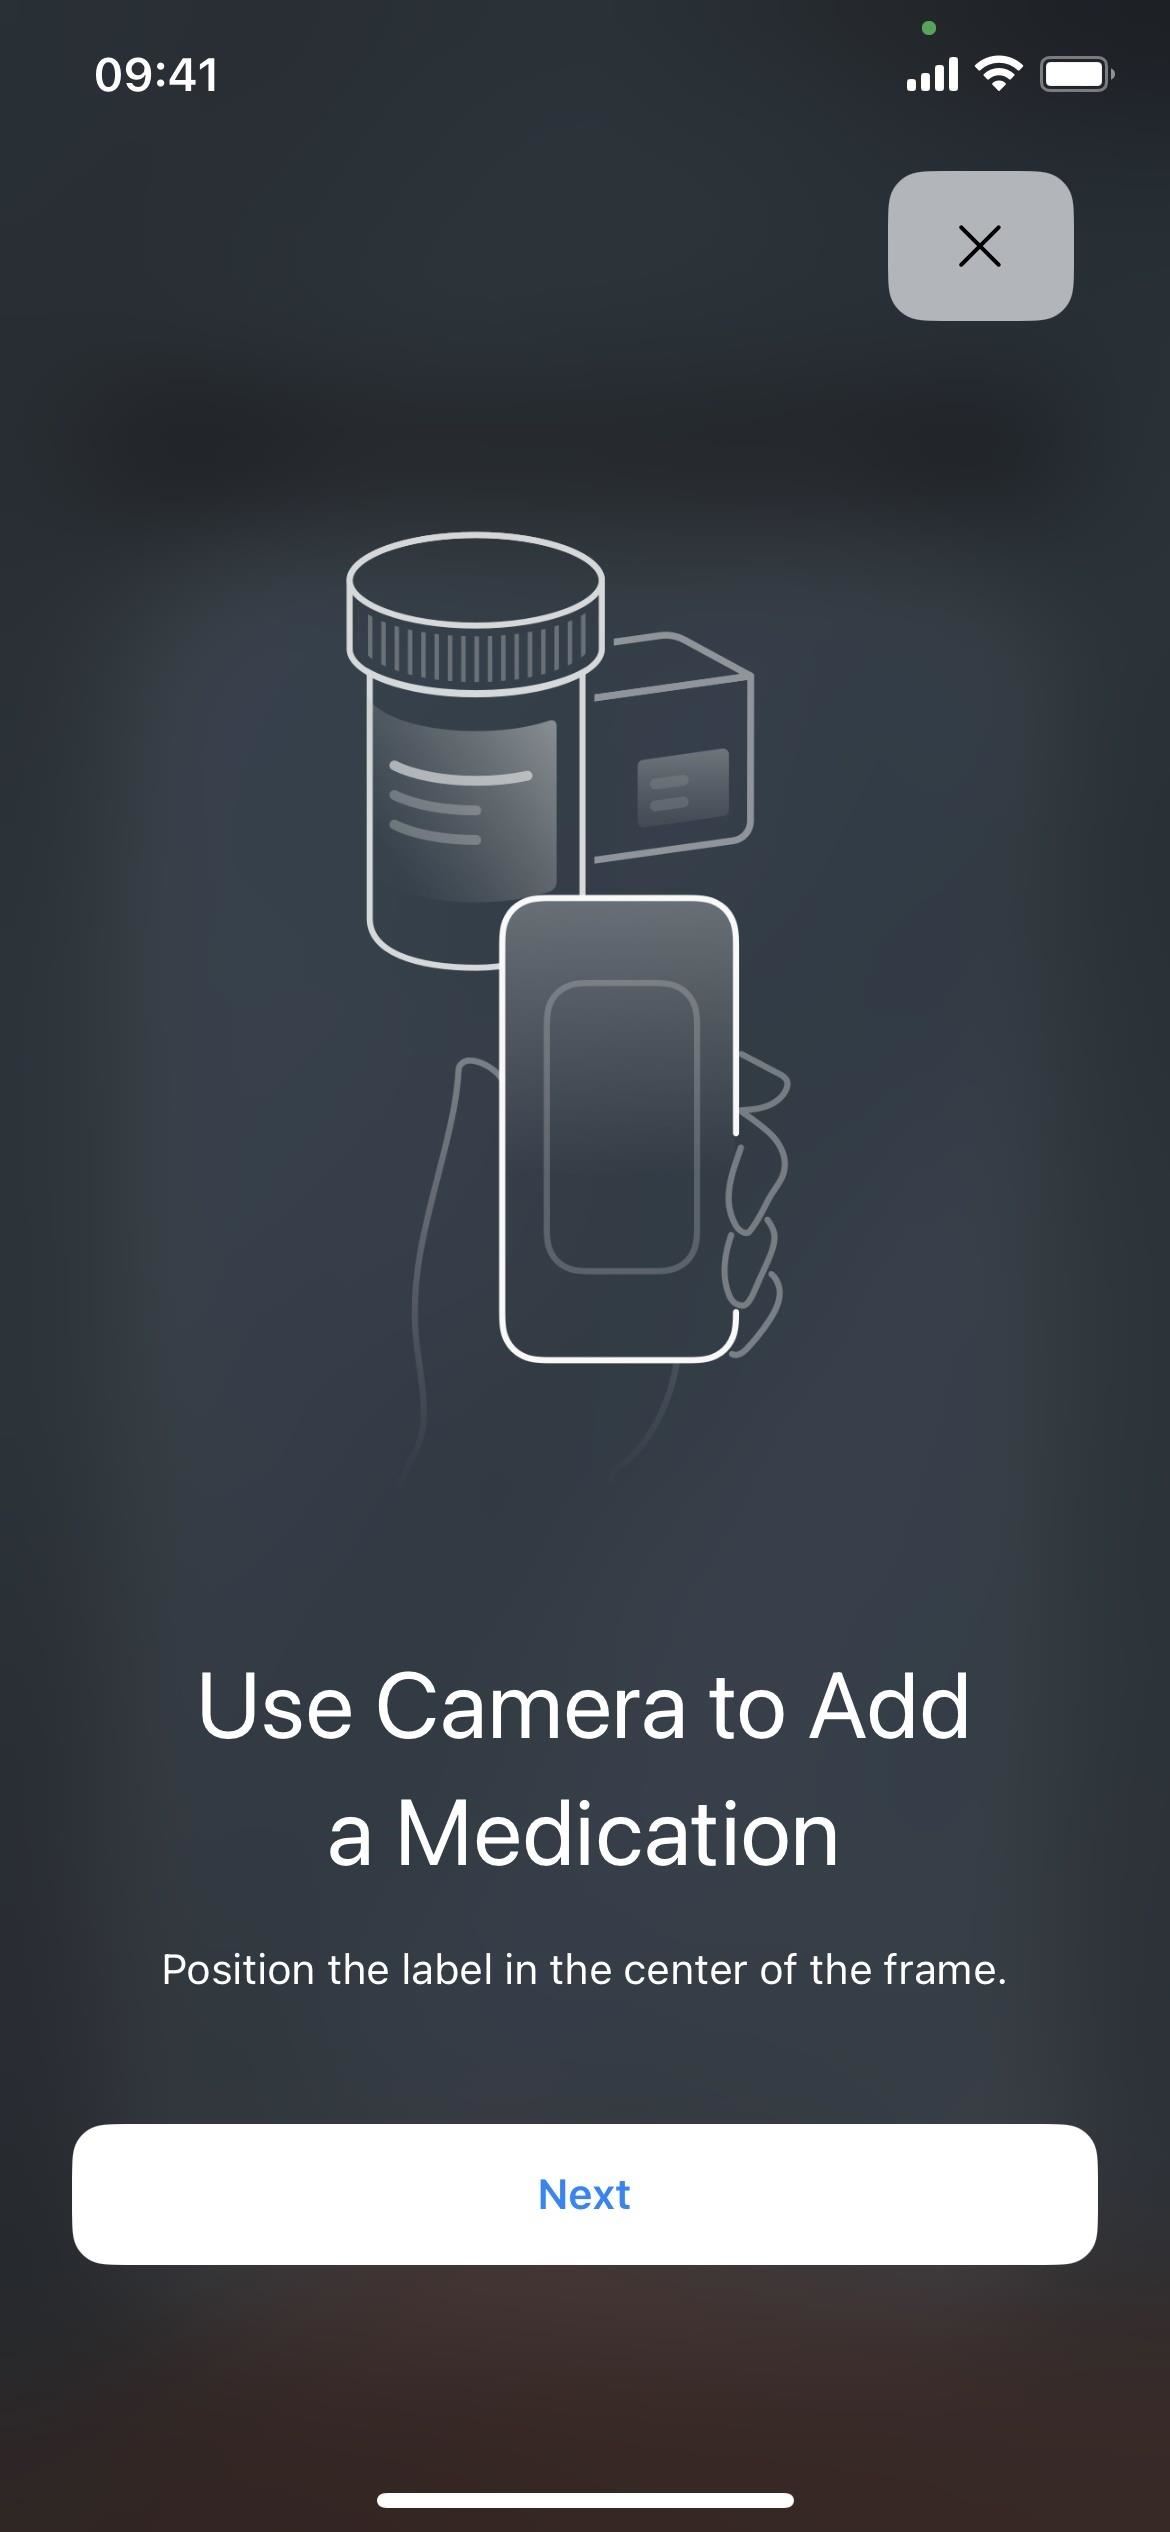
Option 2: Search by Camera
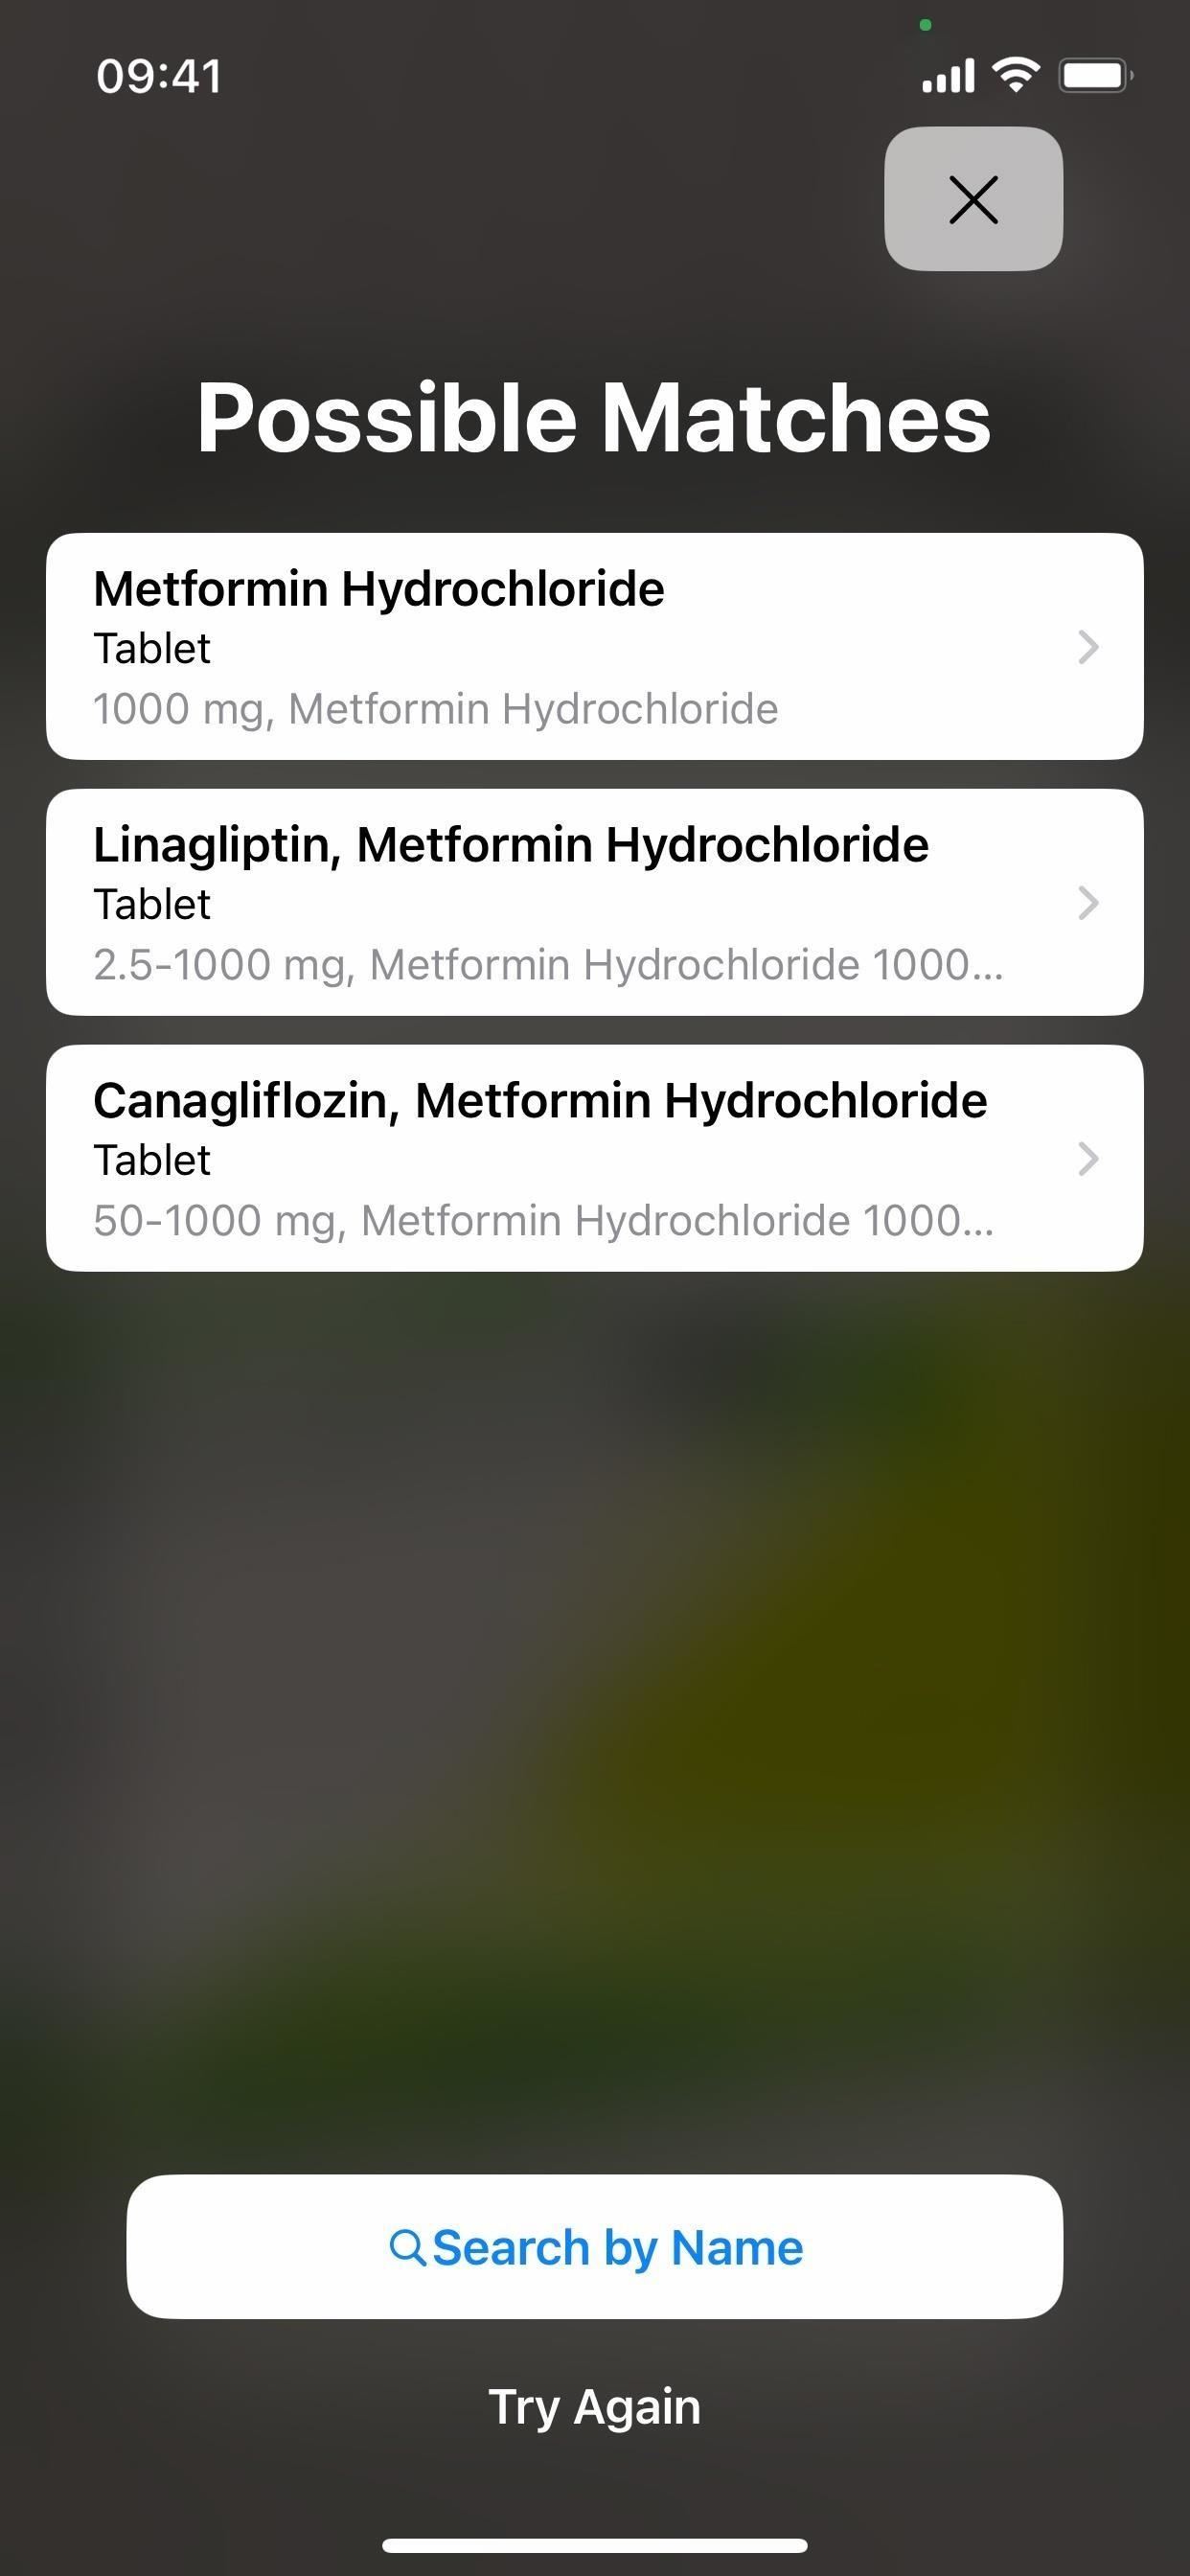
Tap the camera button. If it's your first time using the camera in the Health app, give Health permission. Then, position the label on the medication's bottle or package within the frame in the viewfinder. After it scans the label, you'll see possible matches appear. Select the right one. If the correct medication doesn't show up, tap "Try Again" to rescan it or "Search by Name" and follow the directions in Option 1 above.
The camera option is only available in the U.S. to start and only on iPhone models that support Live Text and Visual Look Up. You can find the complete list of supported devices at the end of this article.

Option 3: Search by History
Tap the correct medication from the suggestions section under the search bar and camera icon. This only appears if you have connected health records with medicine logged.
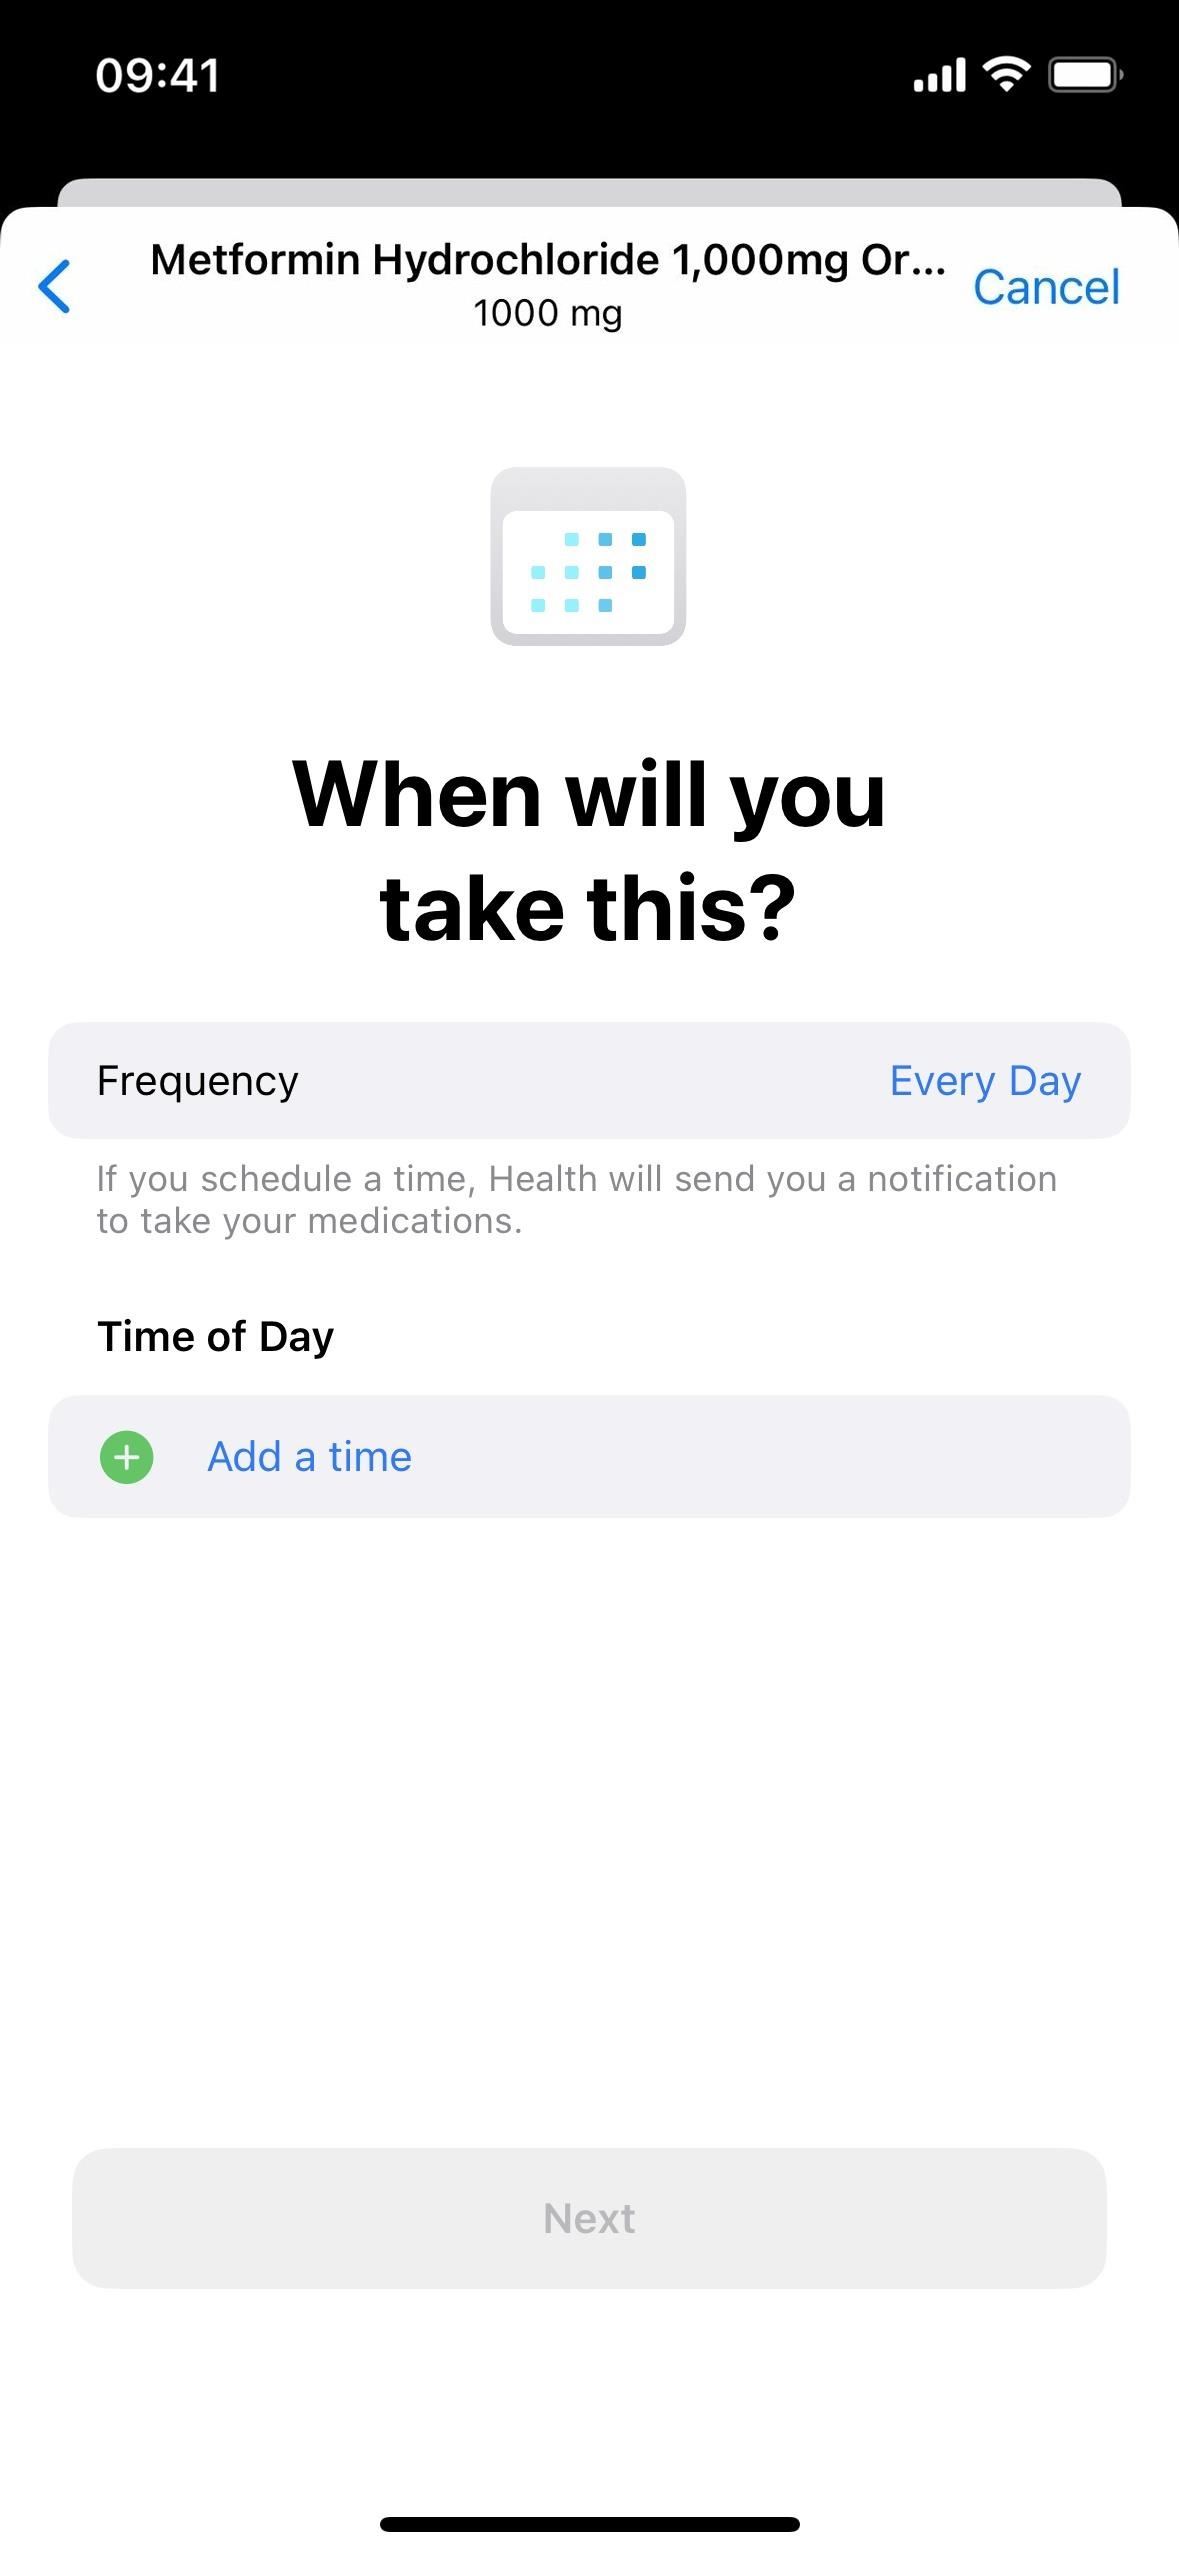
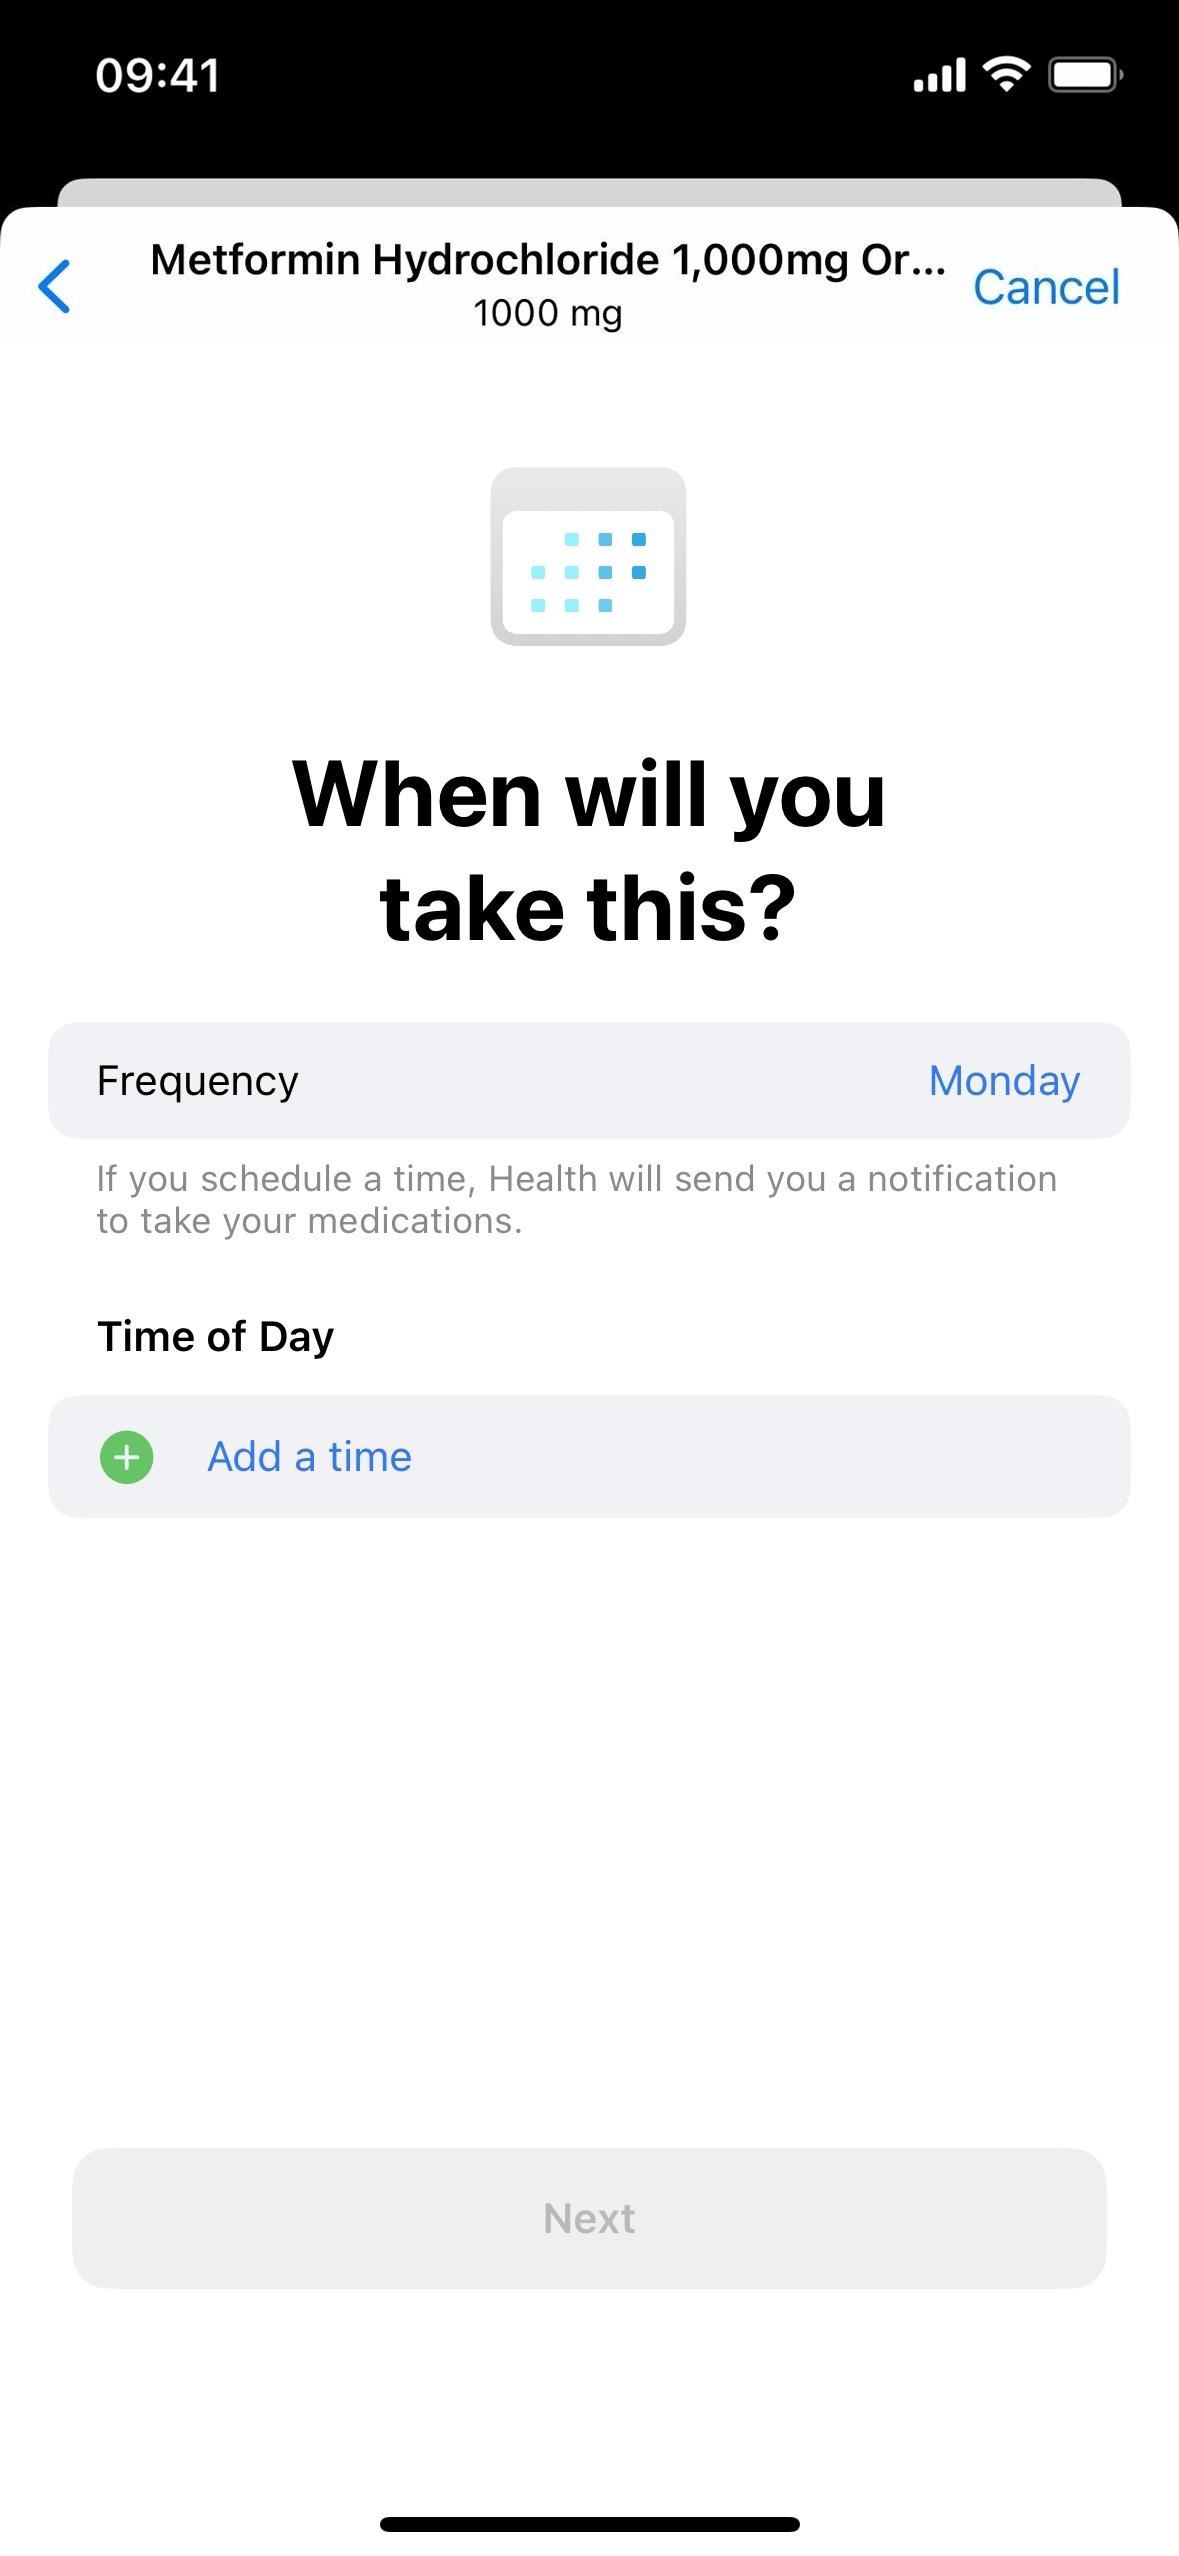
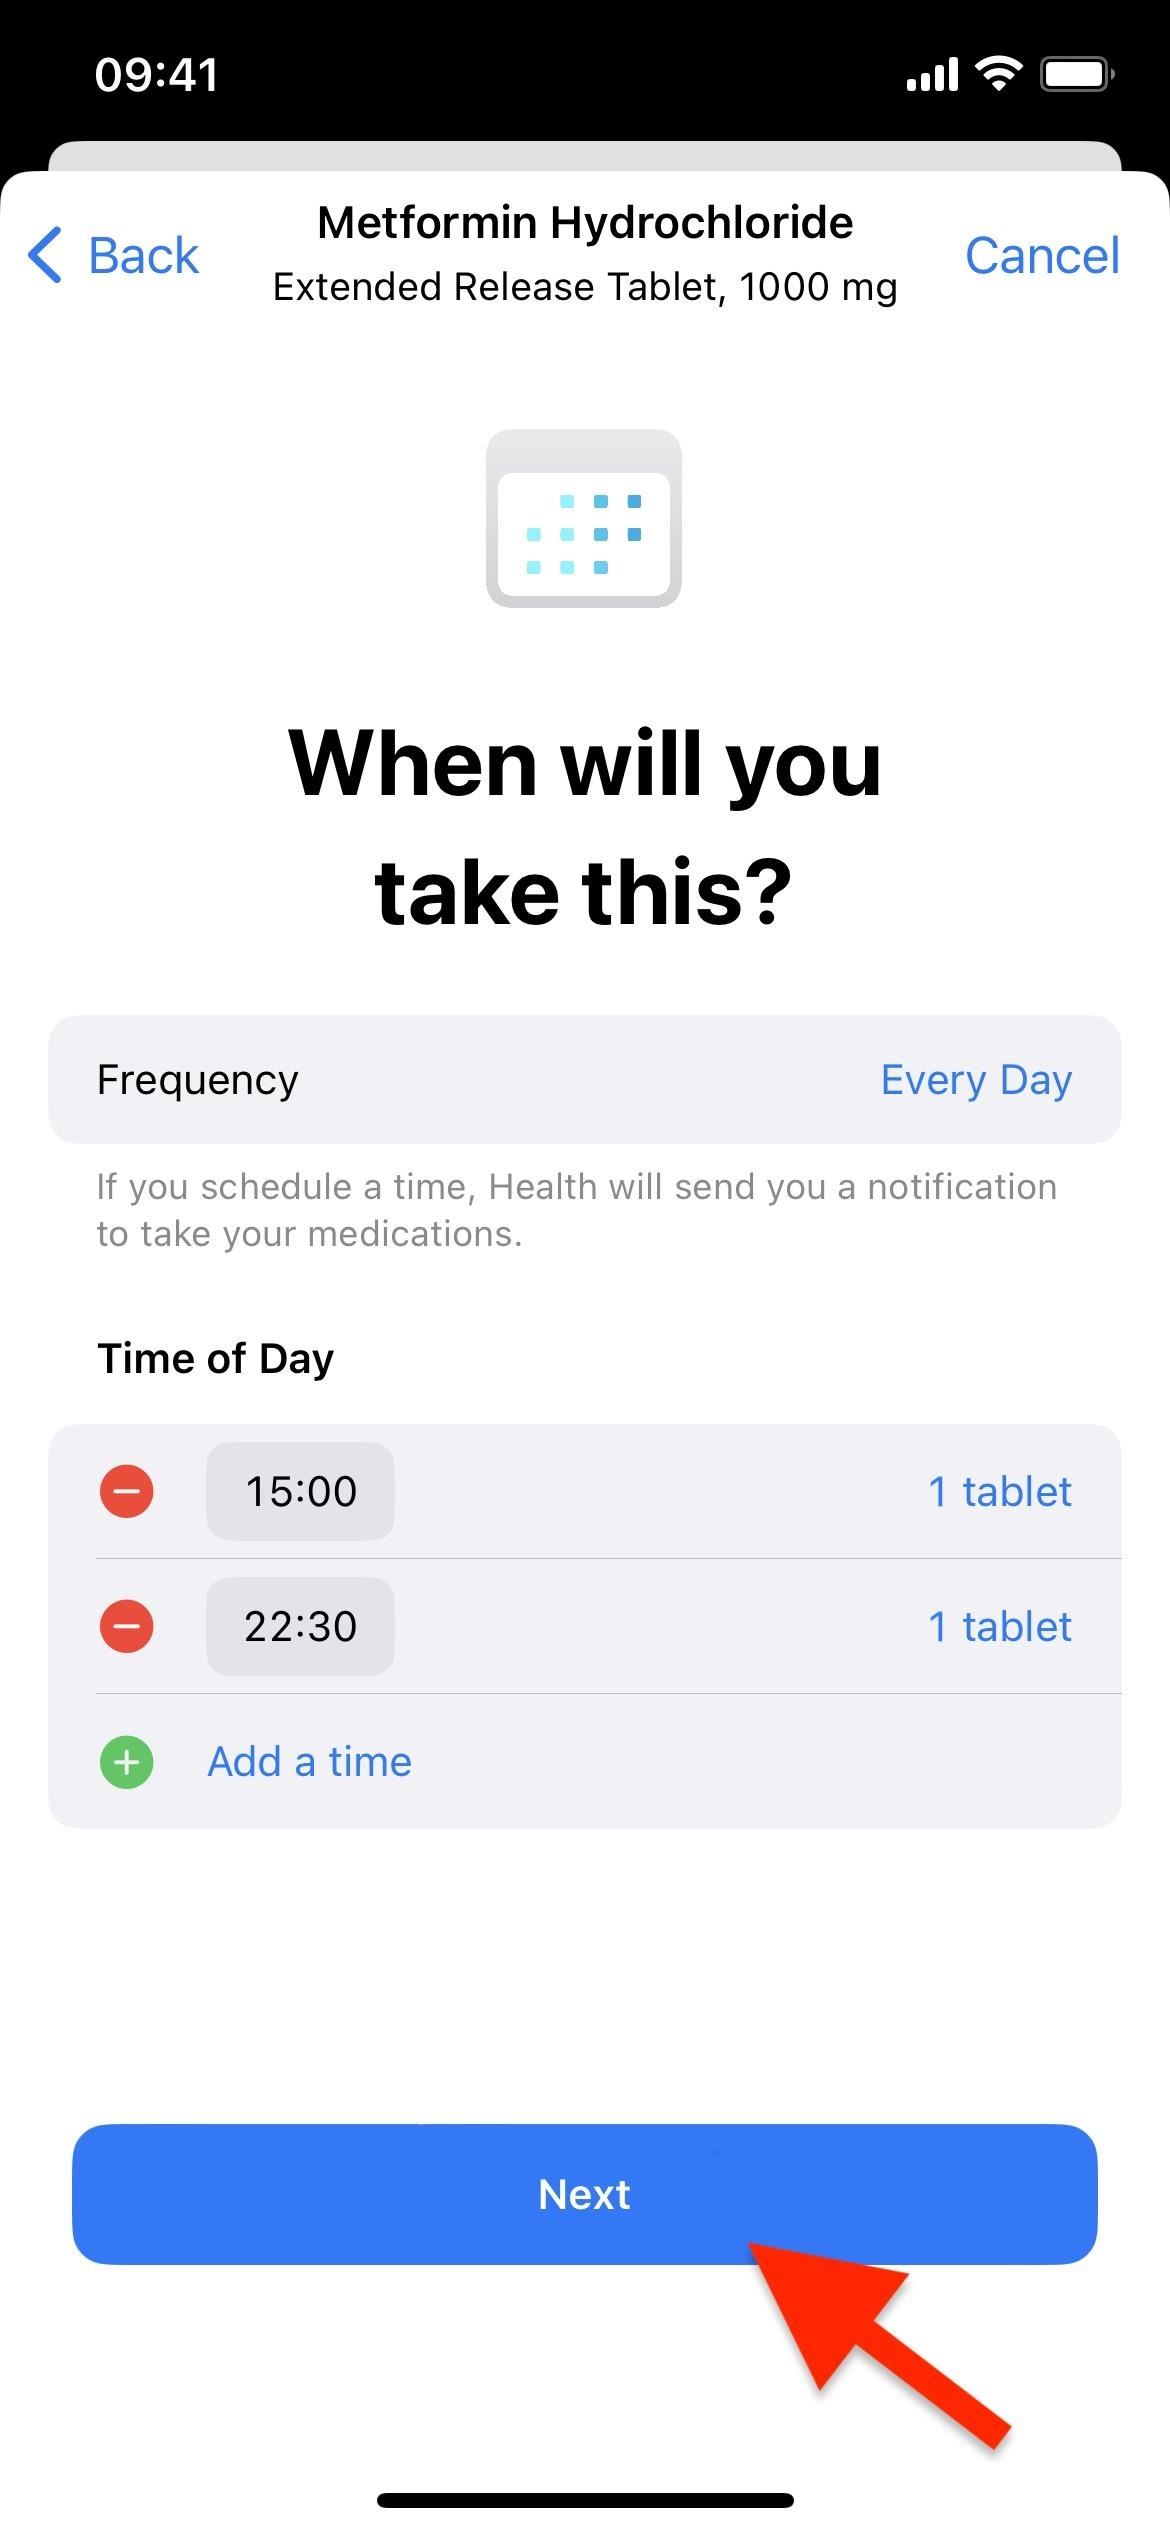
Step 3: Schedule the Frequency
Once you've chosen the proper medication, vitamin, or supplement, you'll be able to schedule the frequency and time you need to take it. There are a few options to choose from.
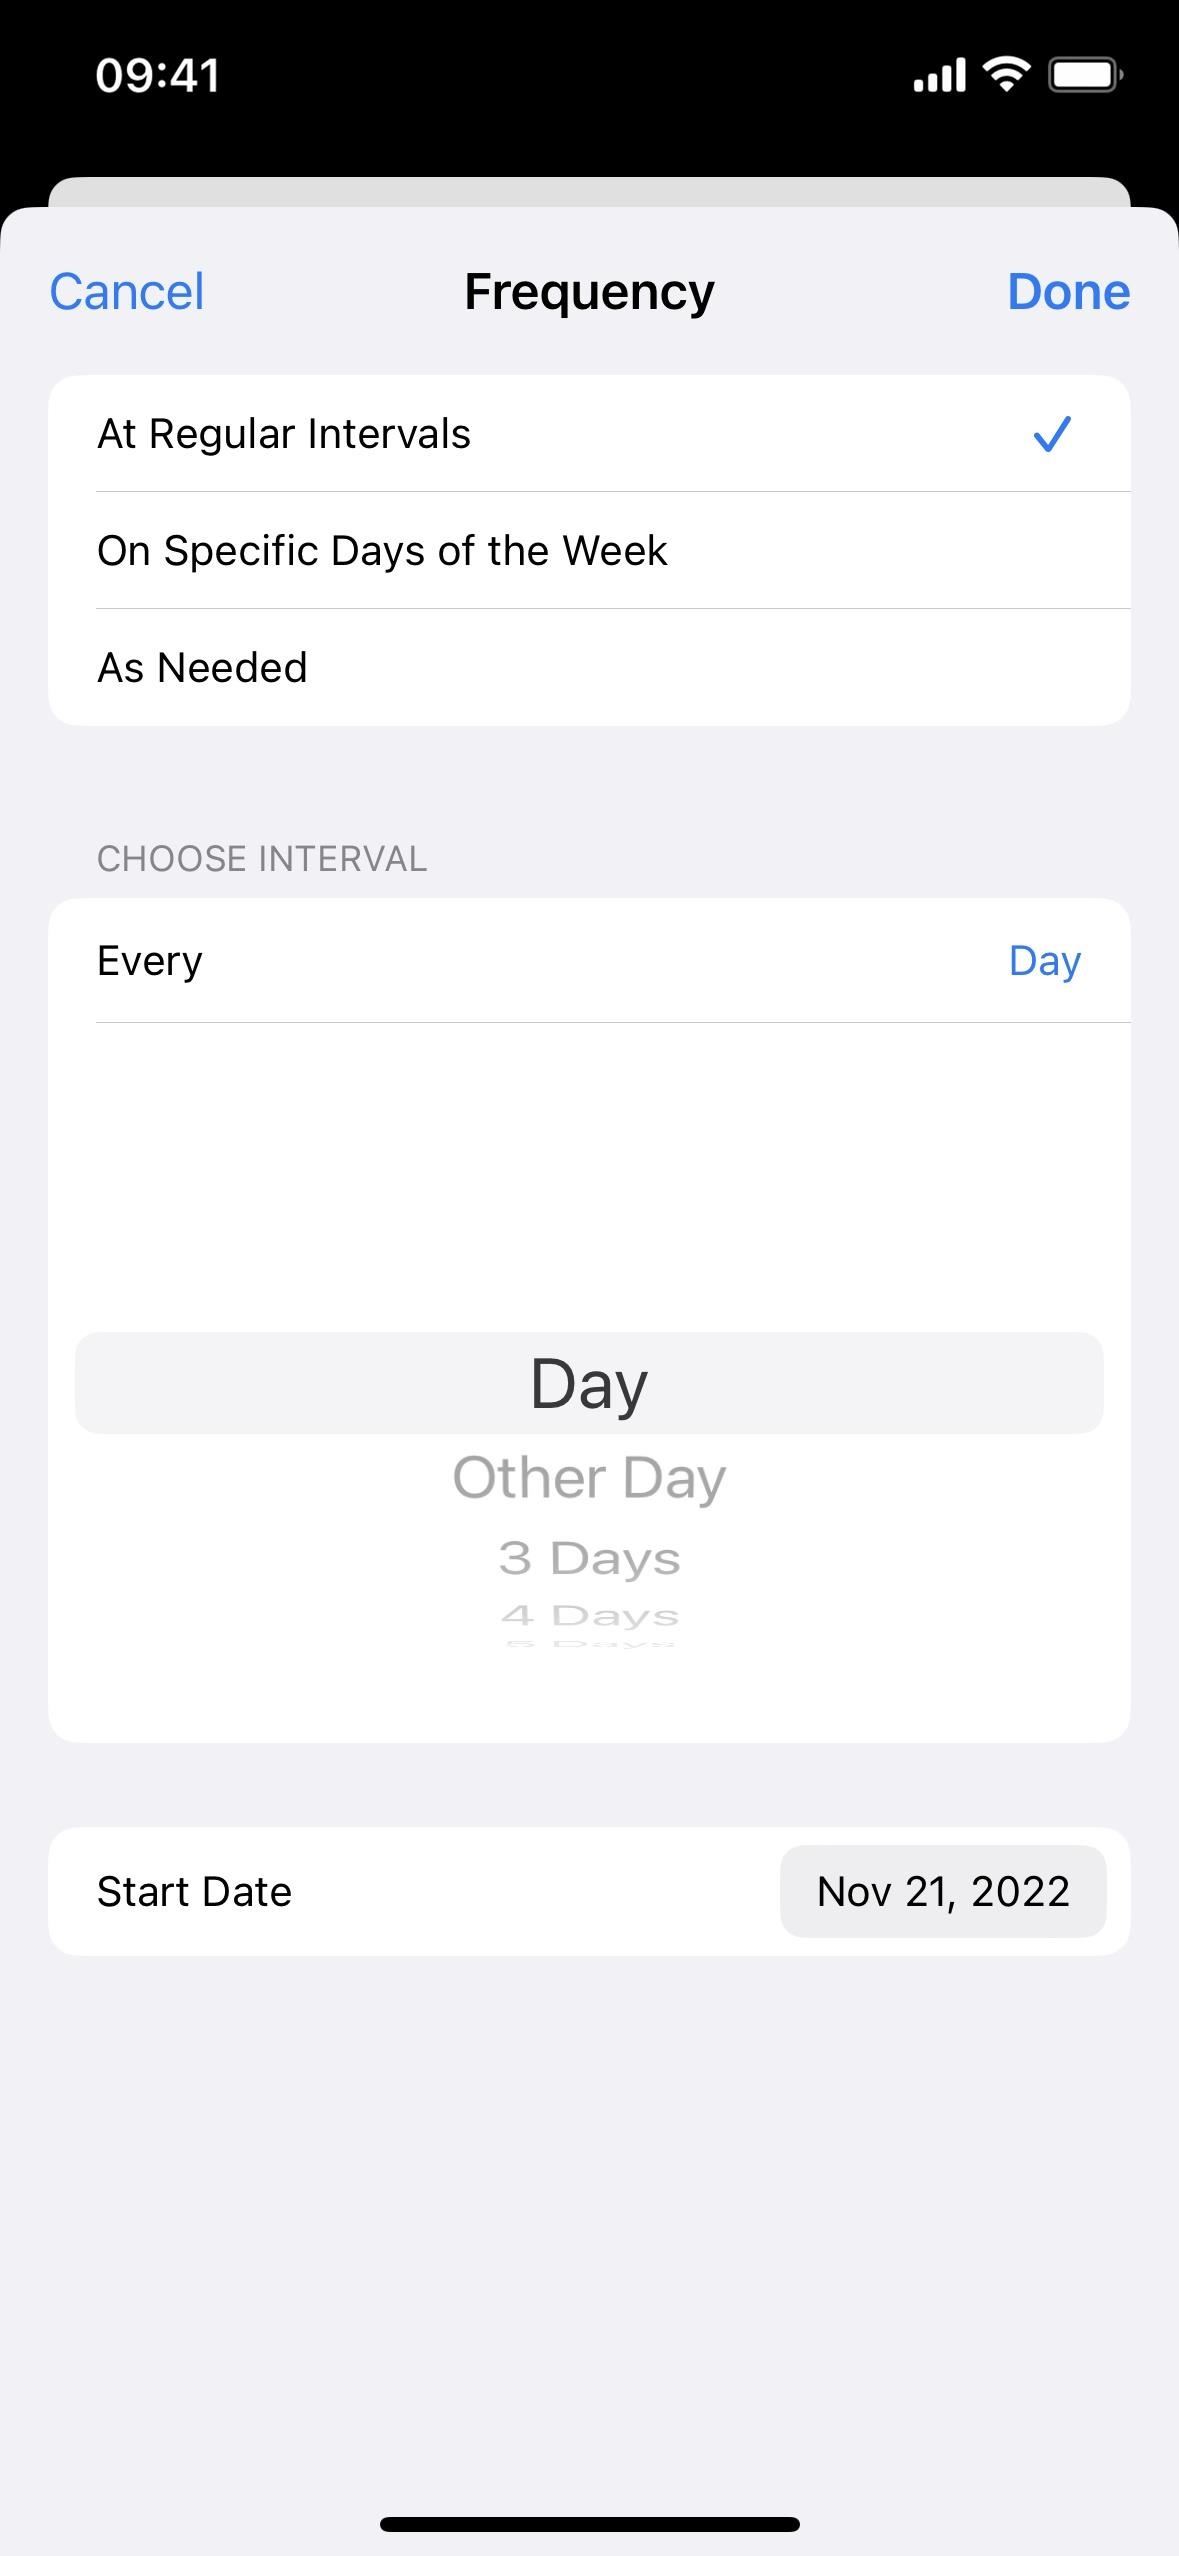
Option 1: At Regular Intervals
Tap on the "Frequency" area, then select "At Regular Intervals" if you want to take the medication daily or at set lengths. Use the interval picker to choose daily, every other day, or every three or more days. You can also select a start date if it's not today. Hit "Done," choose the time of day if you want, and tap "Next." If you schedule a time, you'll receive a reminder notification when the time approaches (unless you toggle "Dose Reminders" off from "Options" medications home page).
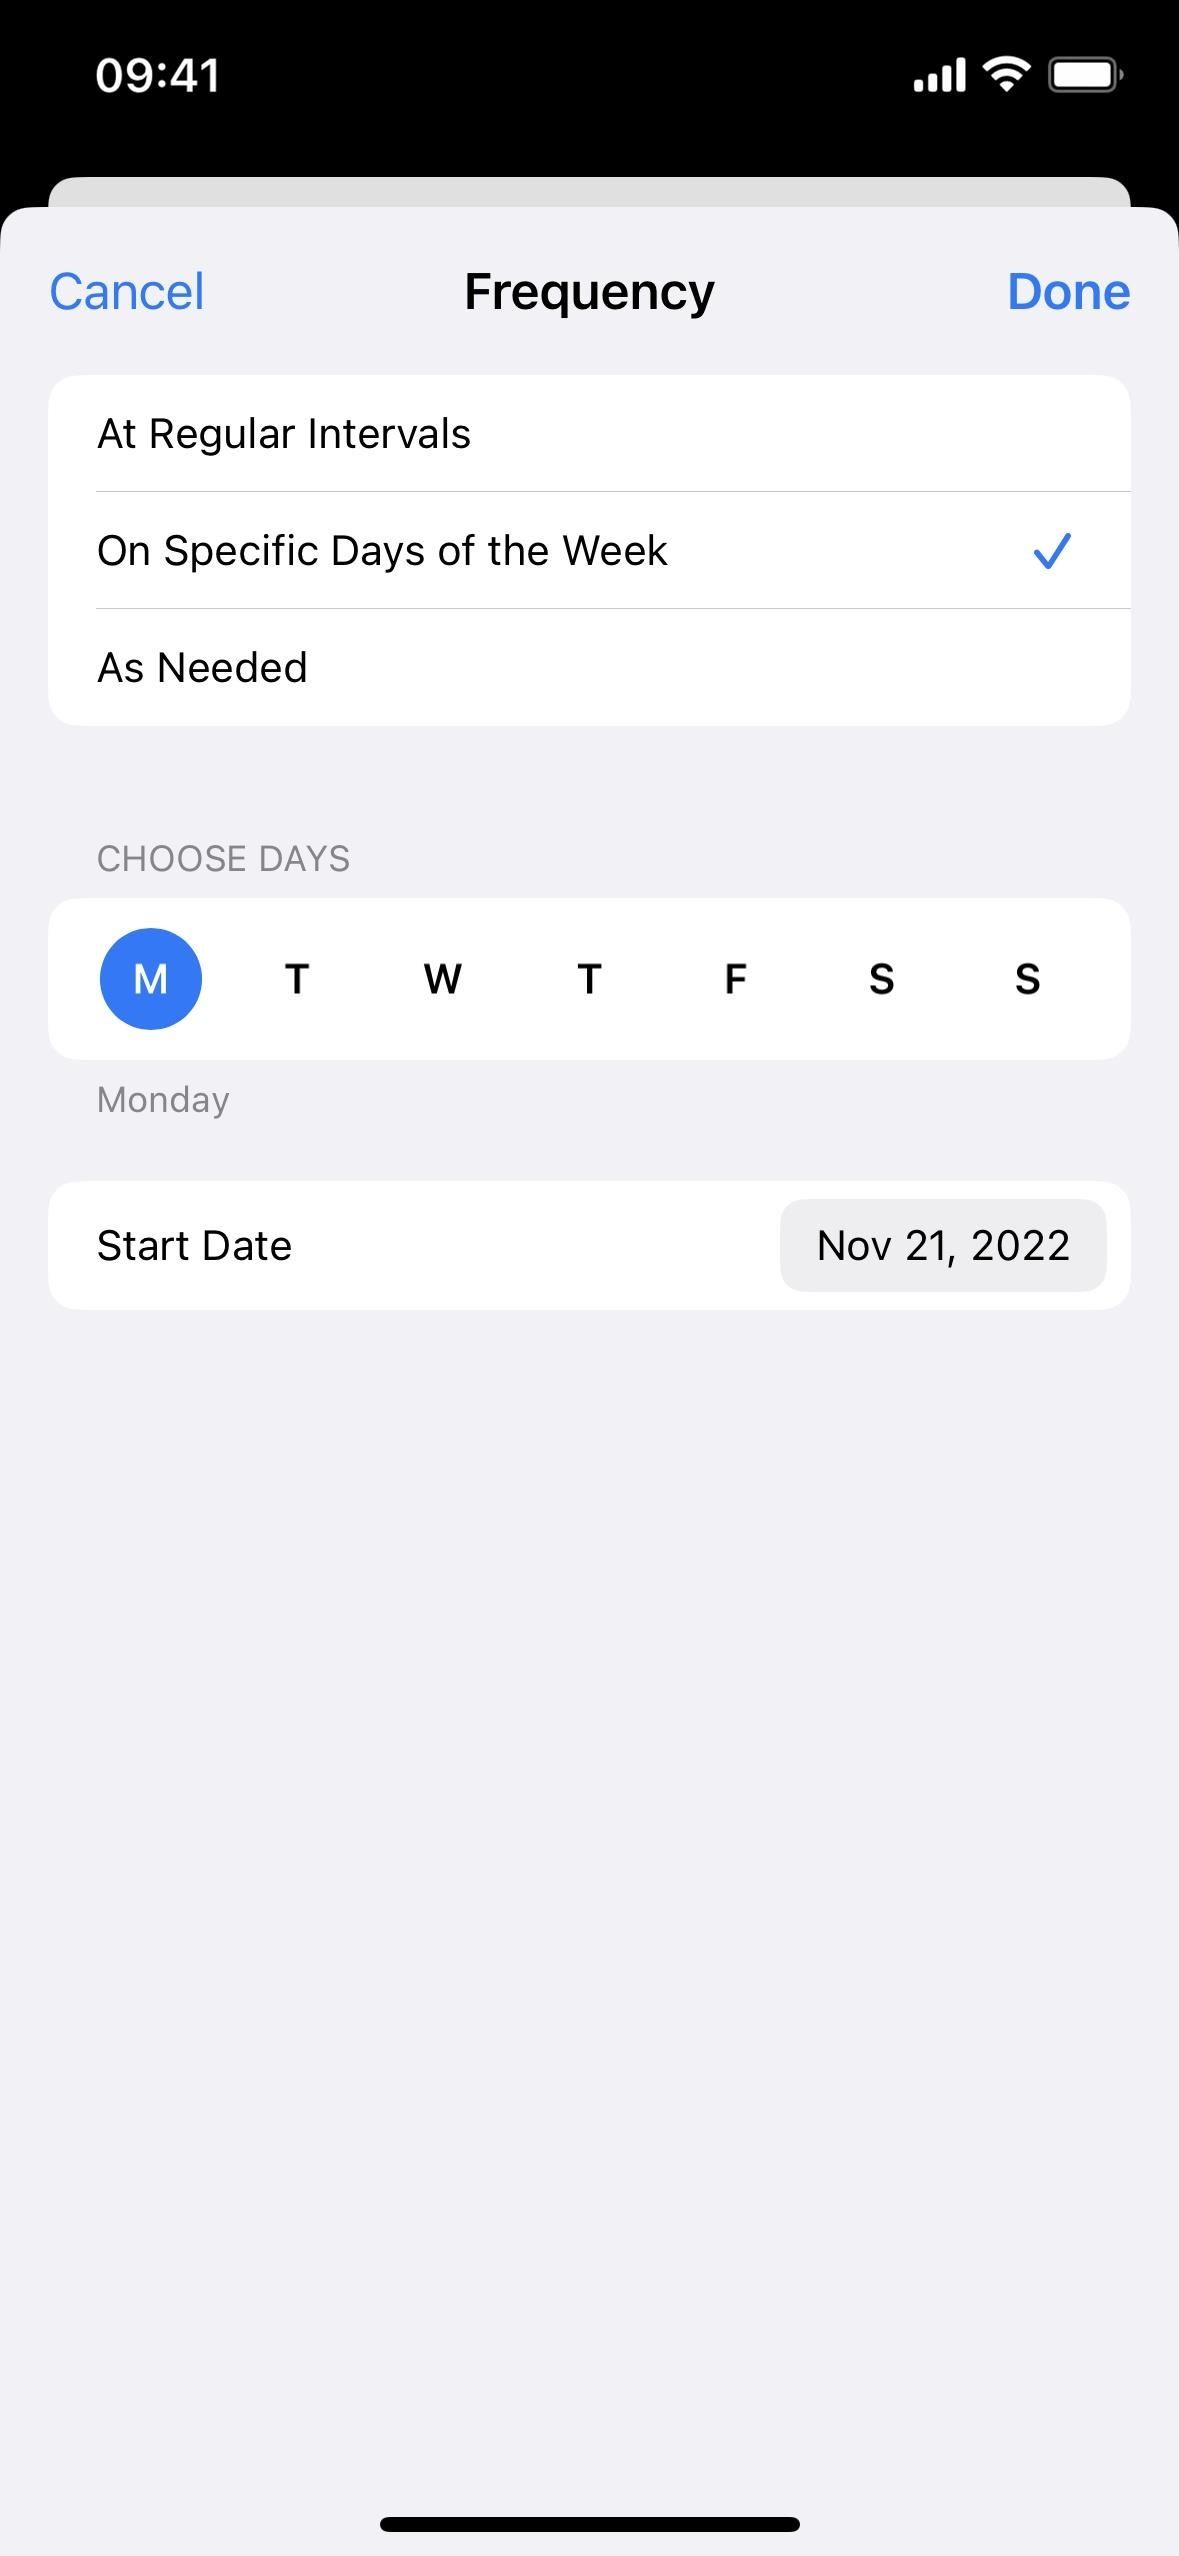
Option 2: On Specific Days of the Week
Tap on the "Frequency" area, then select "On Specific Days of the Week" if you want to take the medication on one or more days of the week. Use the day selector to choose one or more days between Monday and Sunday. You can also select a start date if it's not today. Hit "Done," choose the time of day if you want, and tap "Next." If you schedule a time, you'll receive a reminder notification when the time approaches (unless you toggle "Dose Reminders" off from "Options" medications home page).
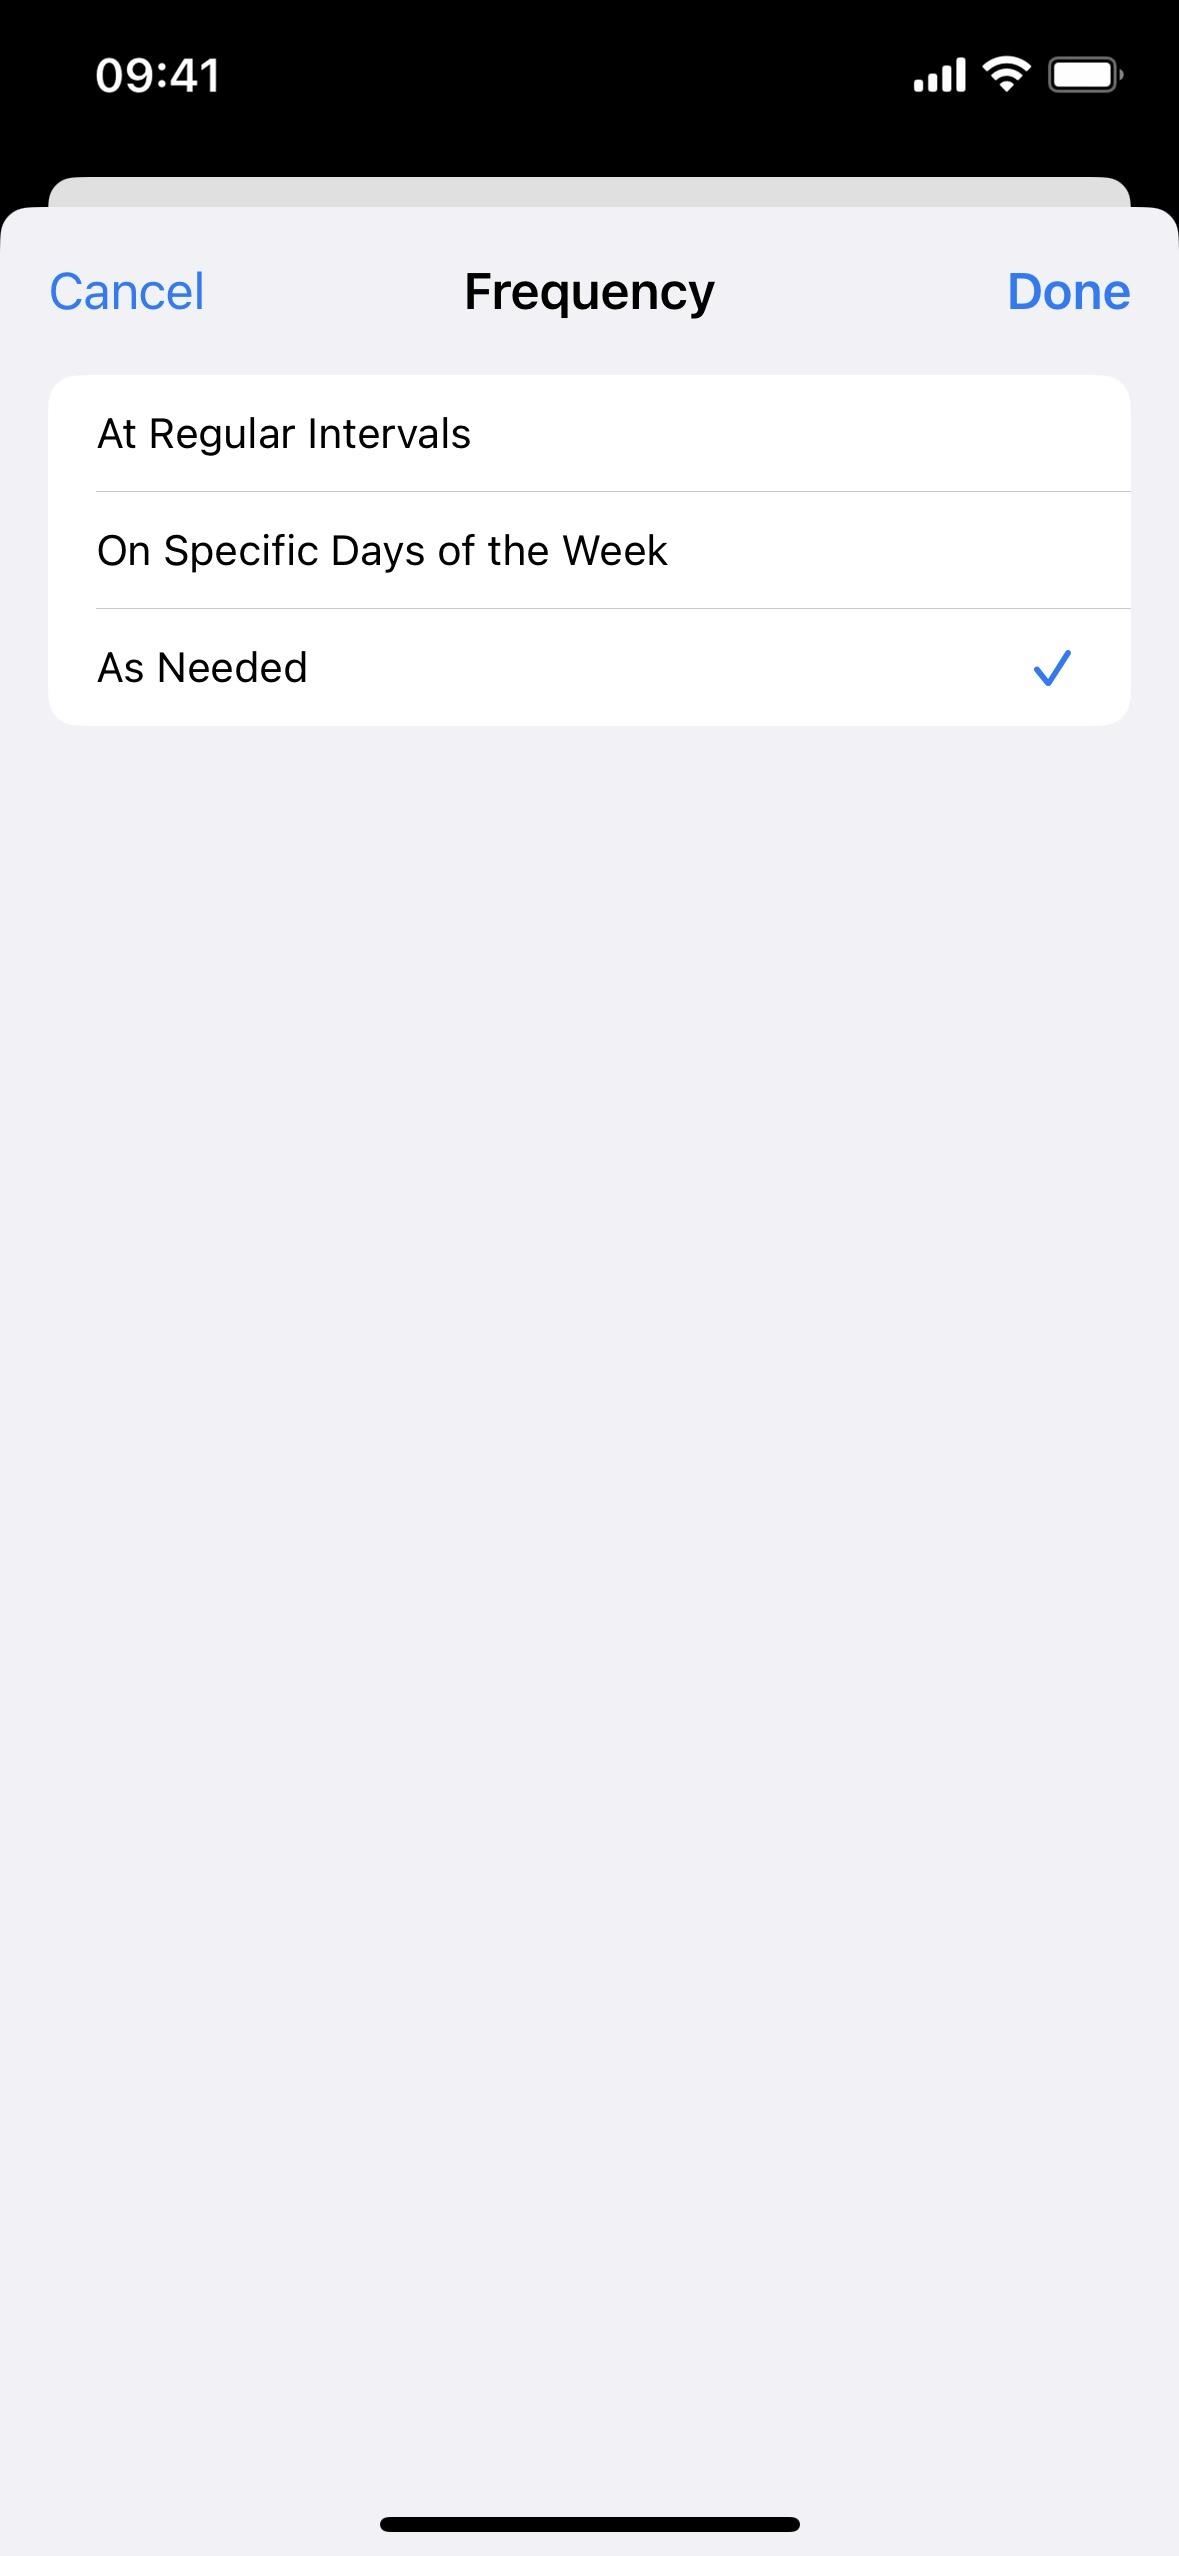
Option 3: As Needed
Tap on the "Frequency" area, then select "As Needed" if you want to take the medication whenever necessary. Hit "Done" and tap "Next."

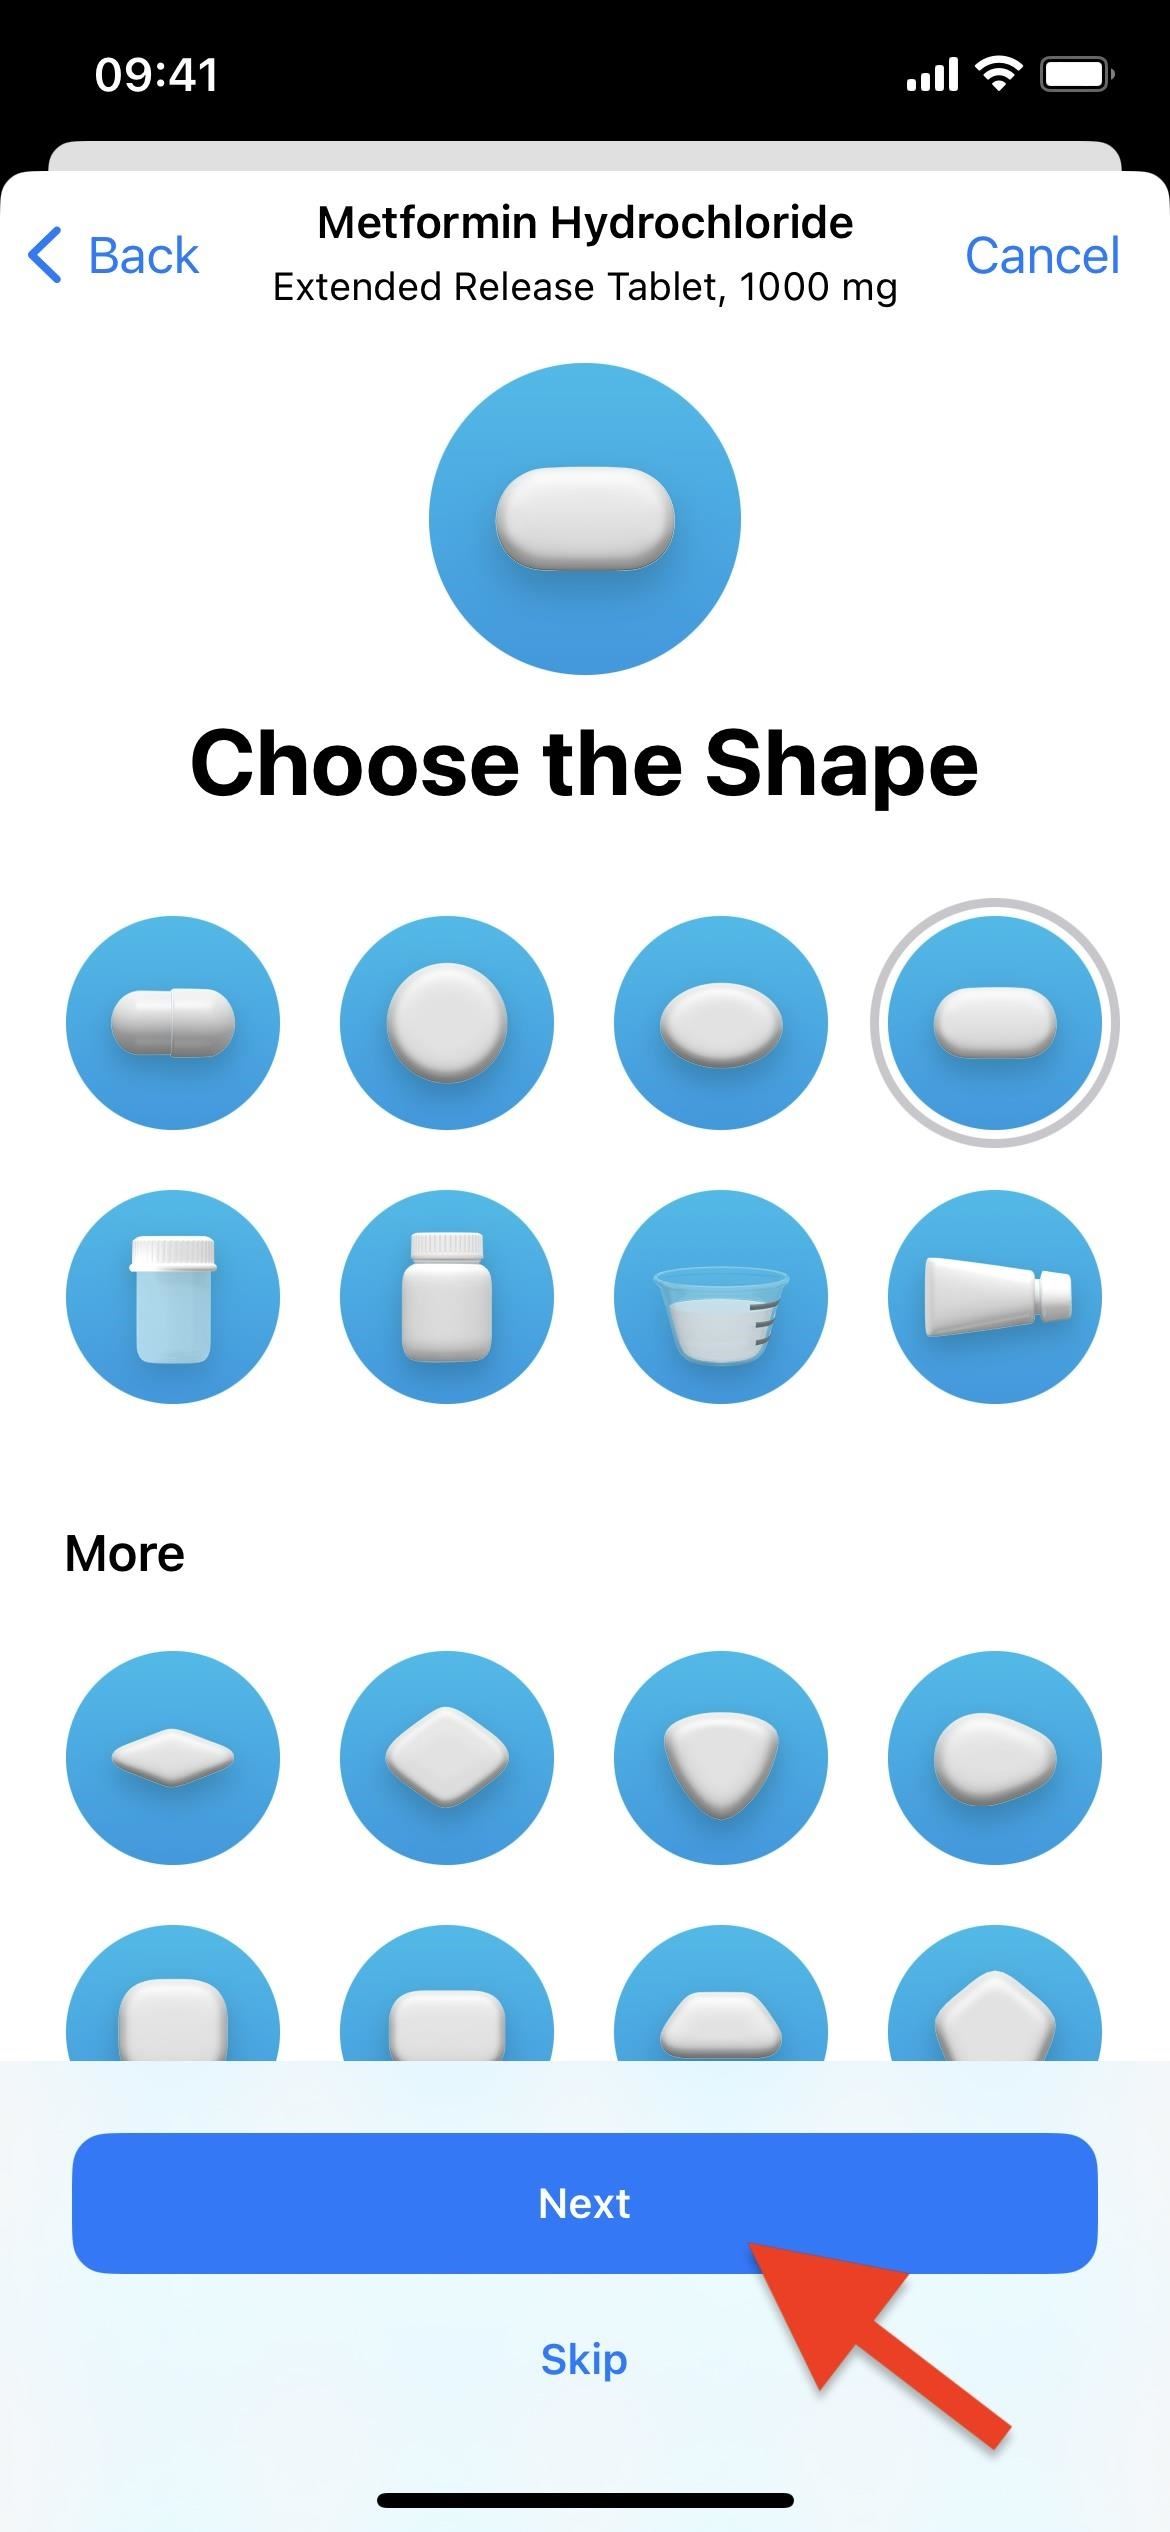
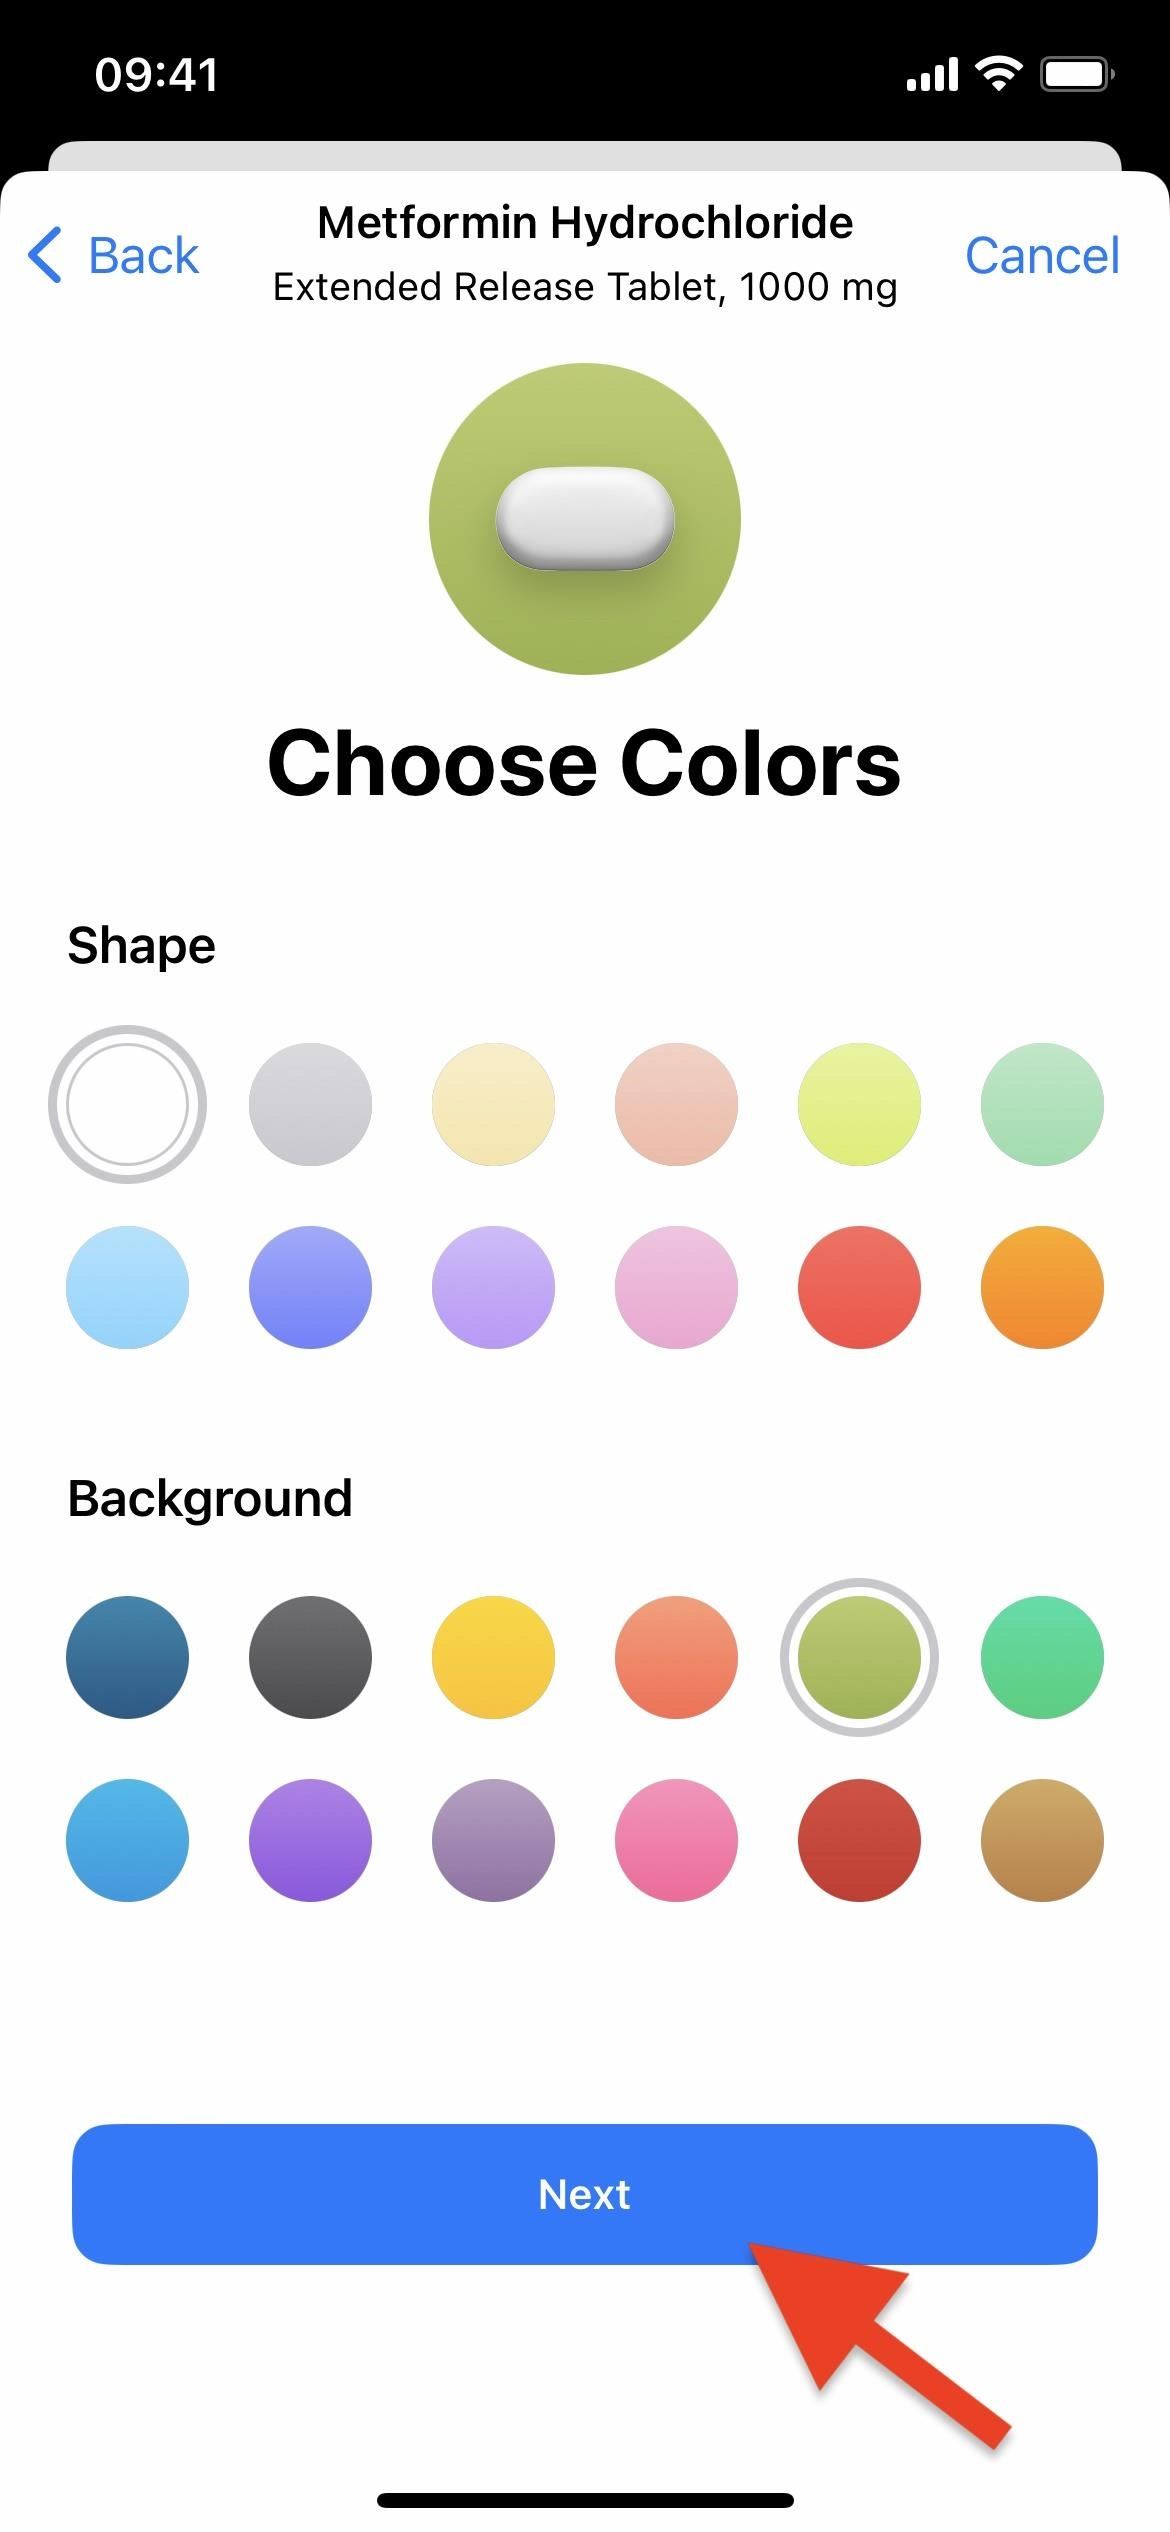
Step 4: Choose Medication Identifiers
After you choose your schedule, you can assign a shape to the color to help you better identify it in the app. Then, you can select a color that best matches the real pill's color and add a background color. Hit "Next" to continue.
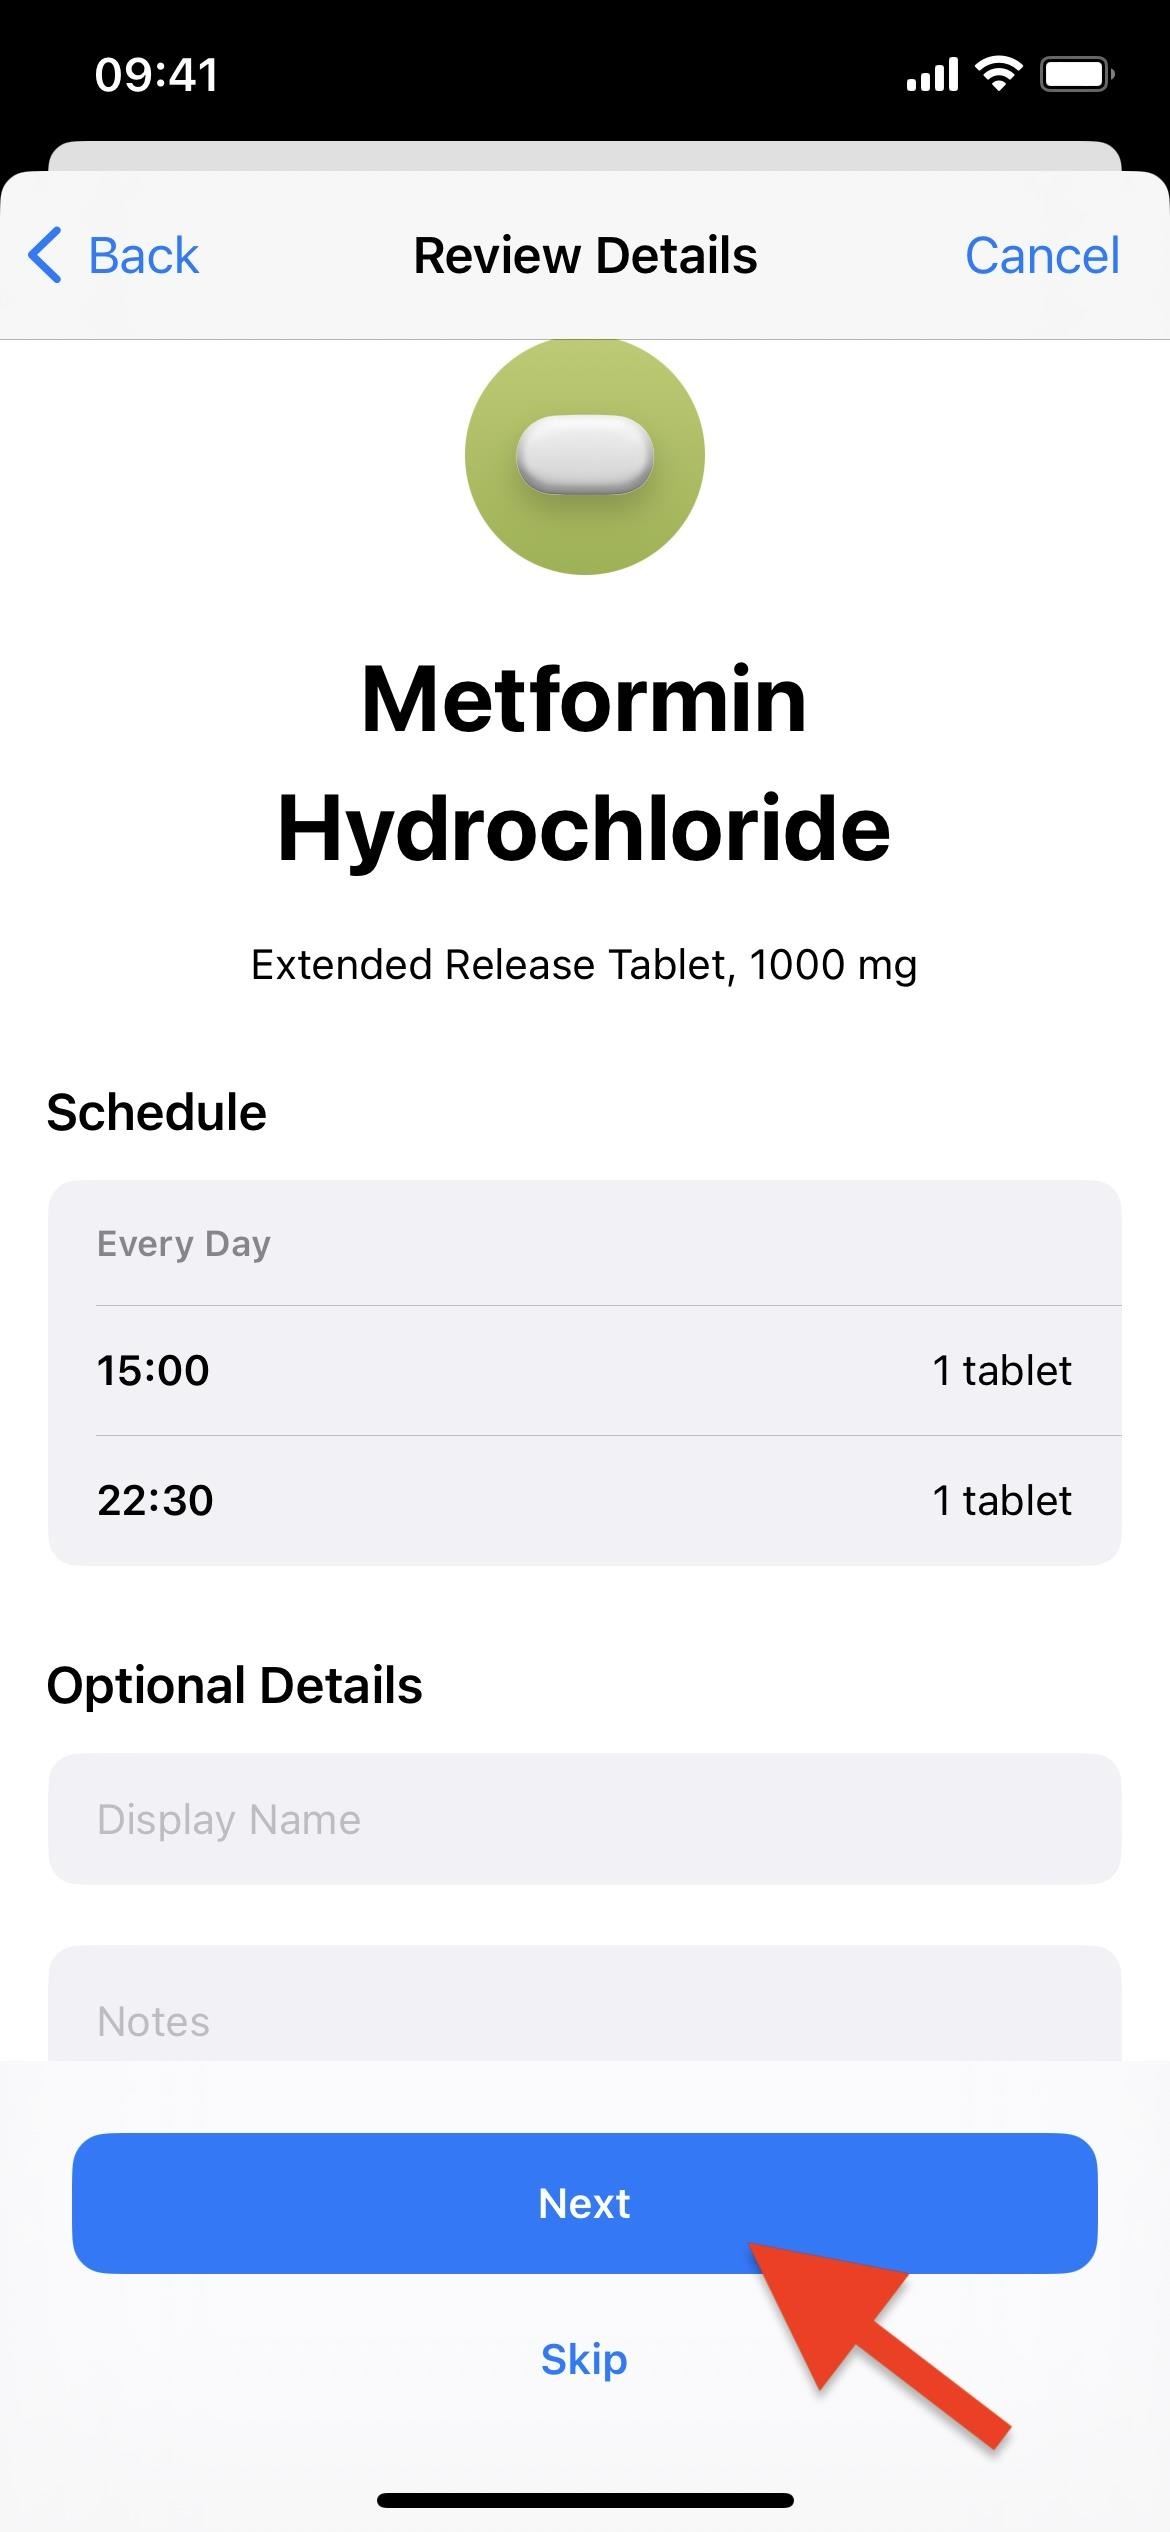
Step 5: Review and Add Known Interactions
You'll then be able to review the details you've entered and enter a display name if you want it to say something different than the medication's real name. Notes can also be added.
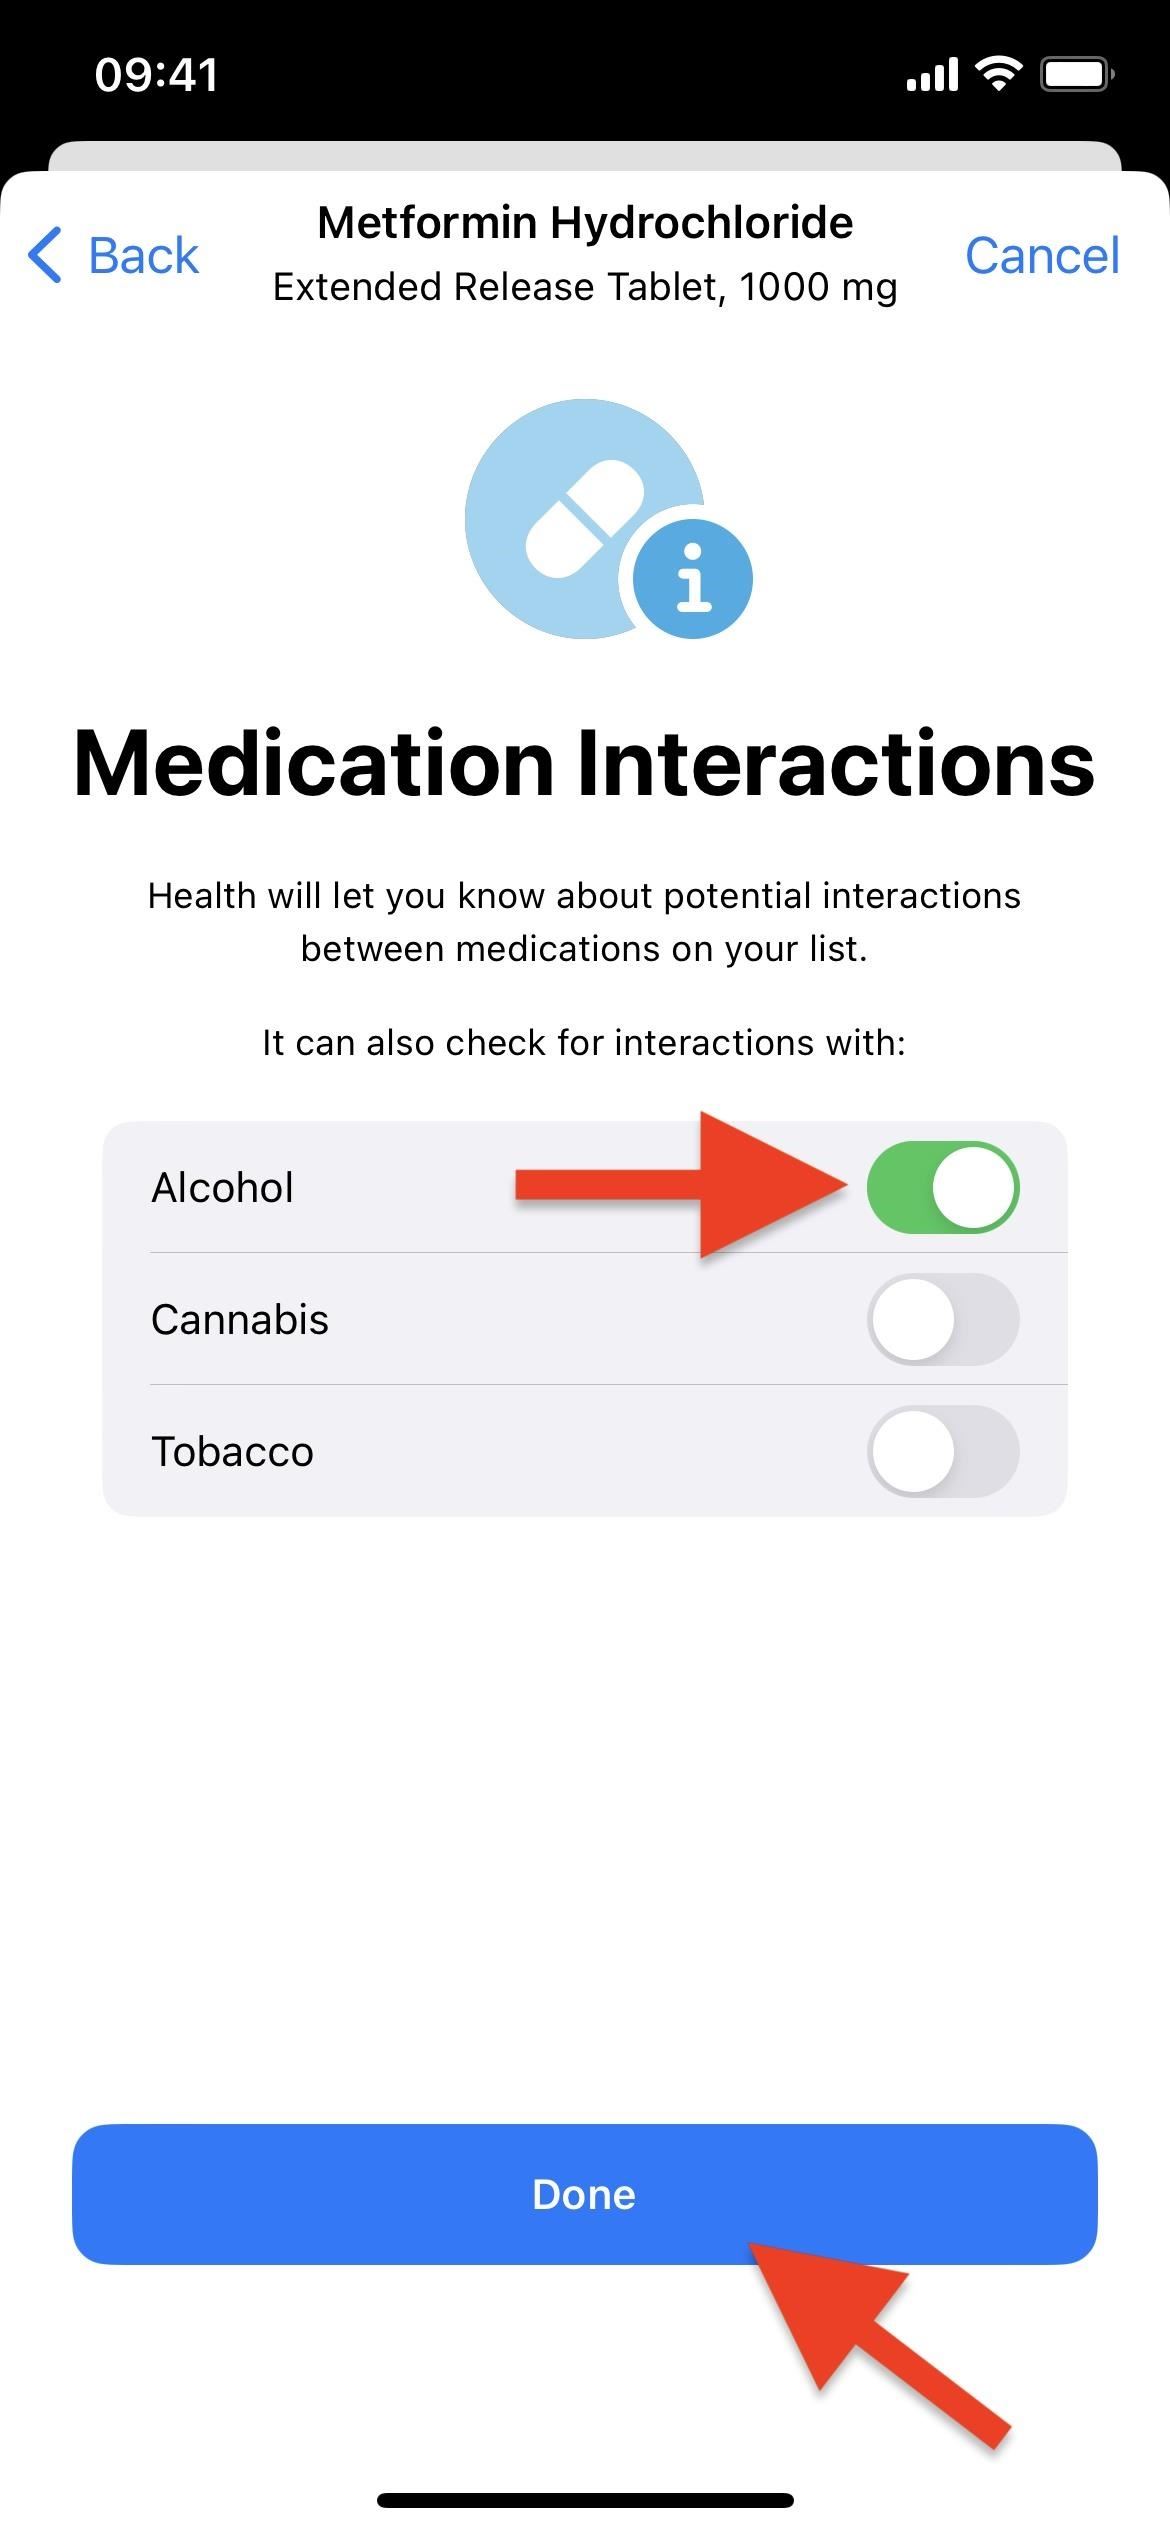
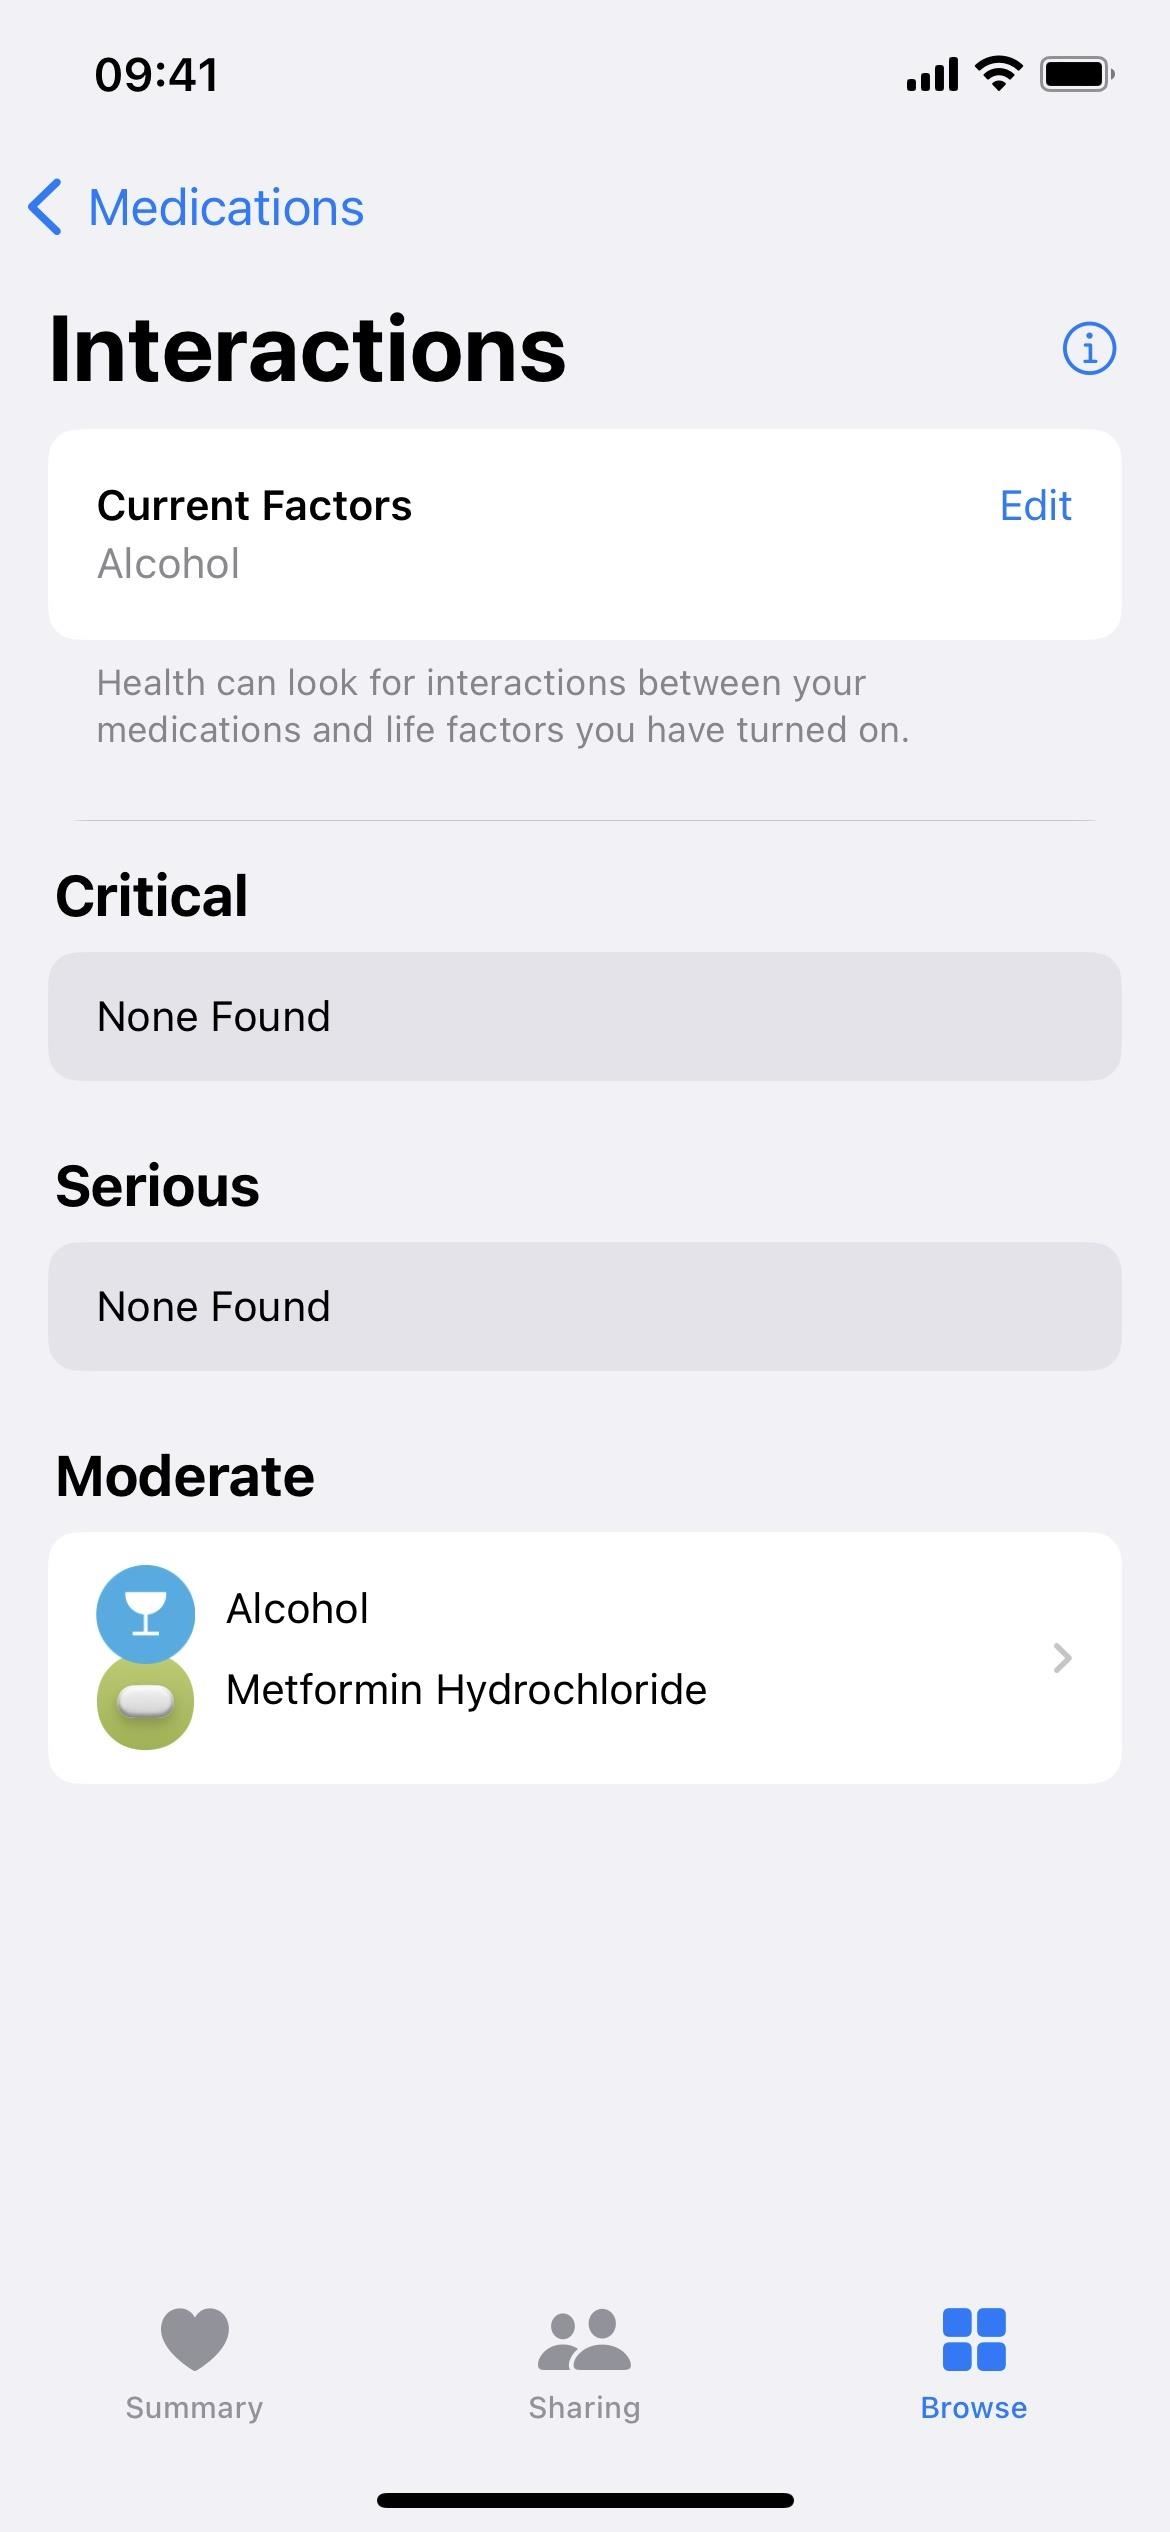
After hitting "Next" to continue, you can select whether or not the medication interacts with alcohol, cannabis, or tobacco. Potential interactions with other medicines you've added to Health will also be shown. Tap "Done" to finish adding the medication.
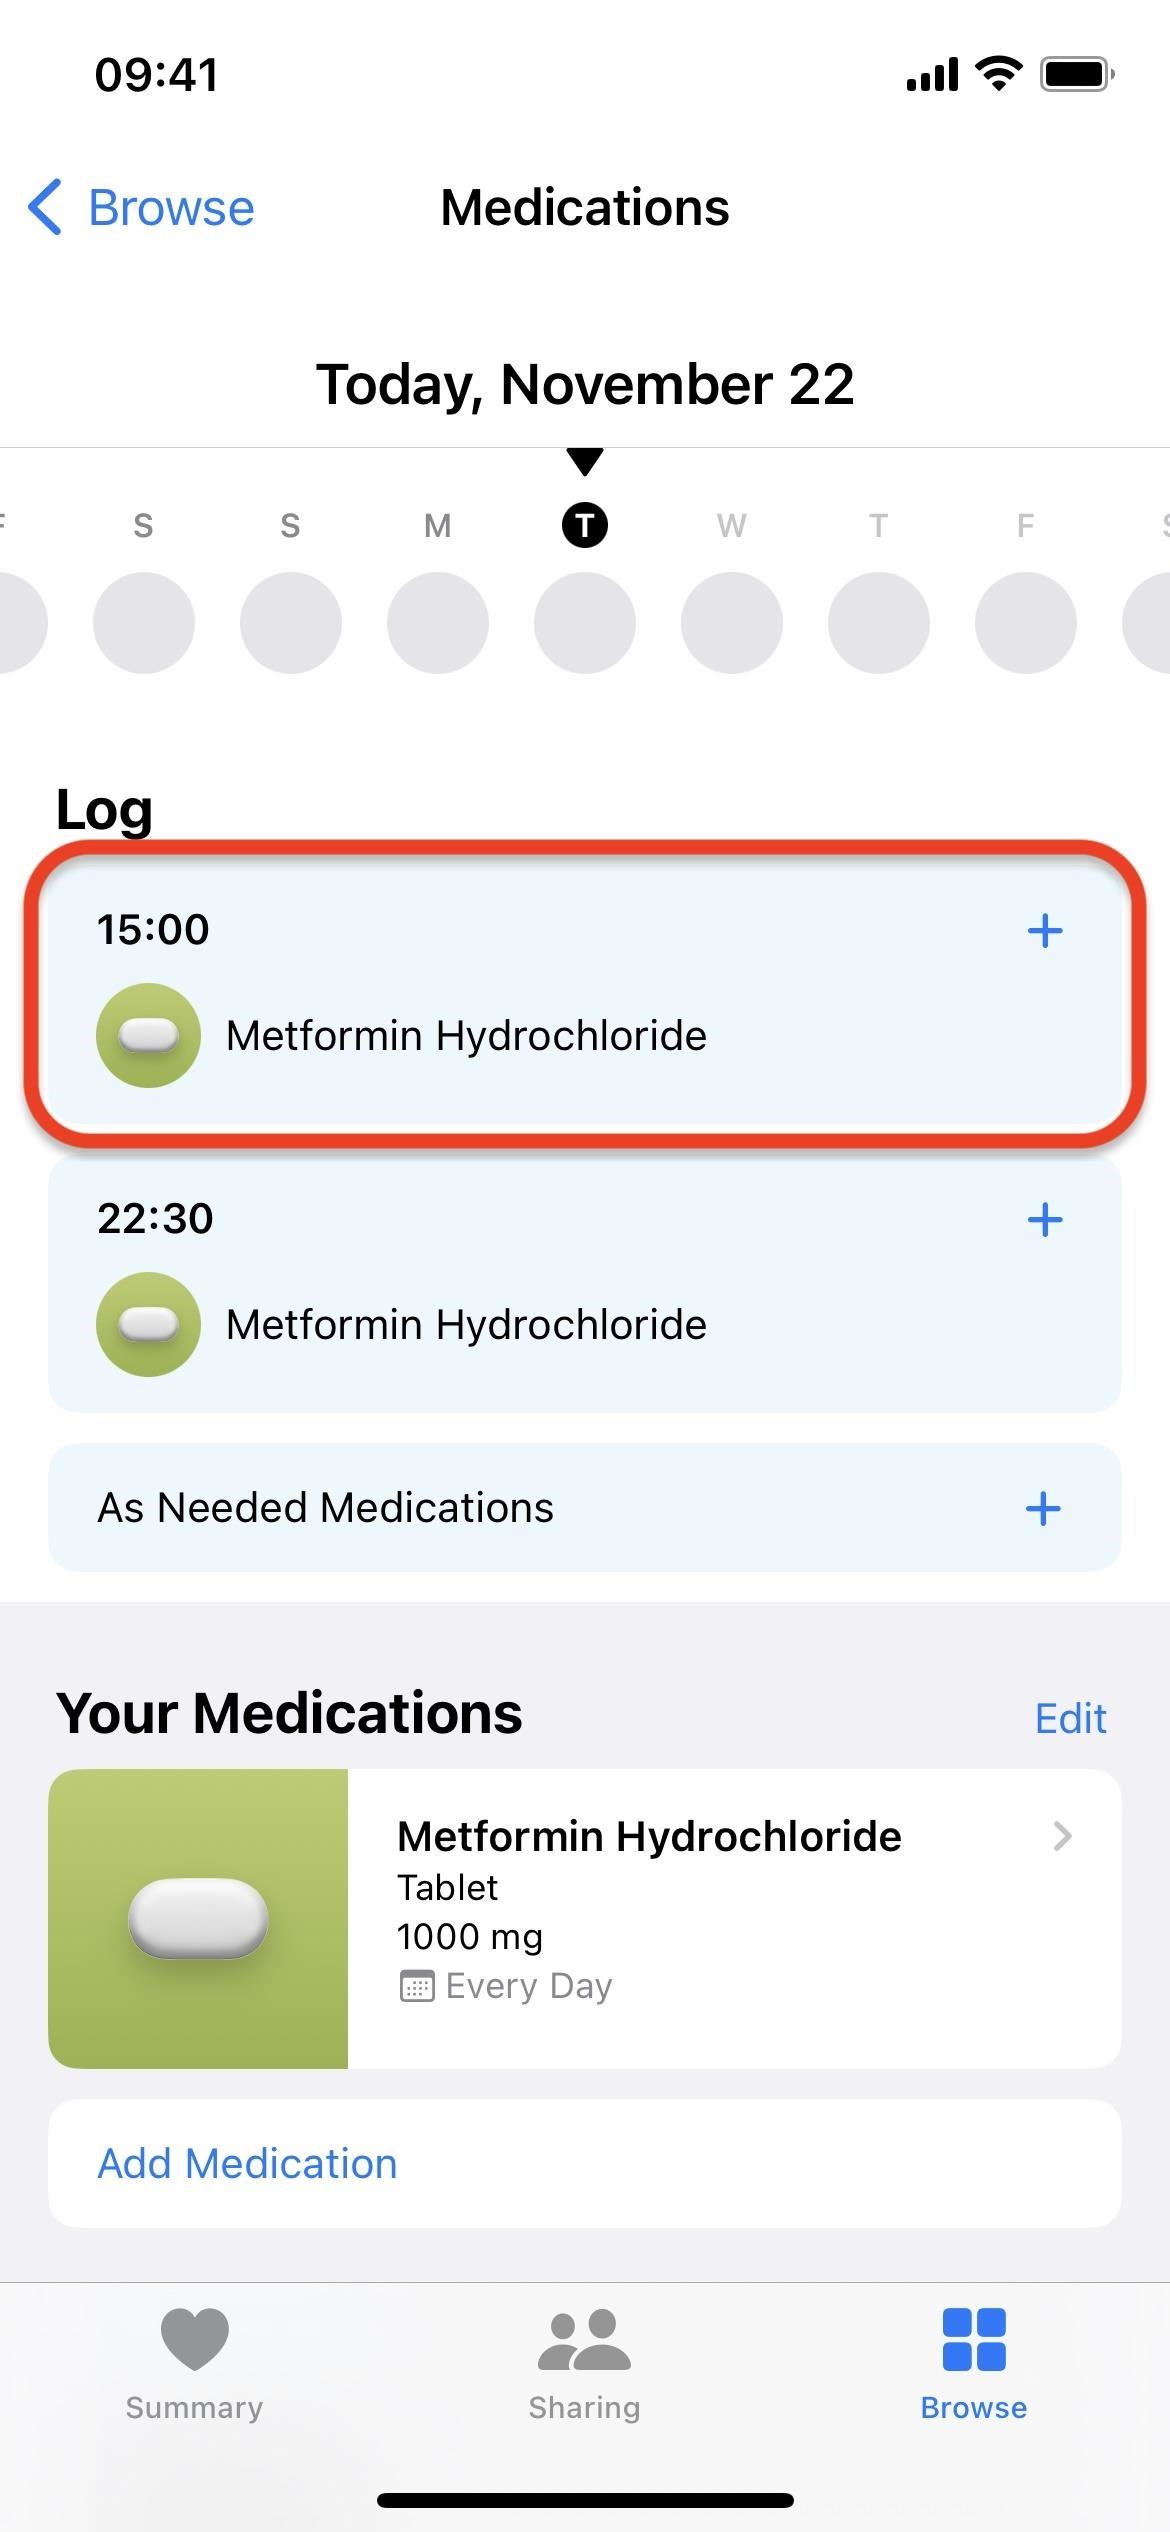
Step 6: Log Medication as Taken or Skipped
After you add a medication, you'll return to the medication tracking screen. The upcoming medicines you need to take show up in the log.
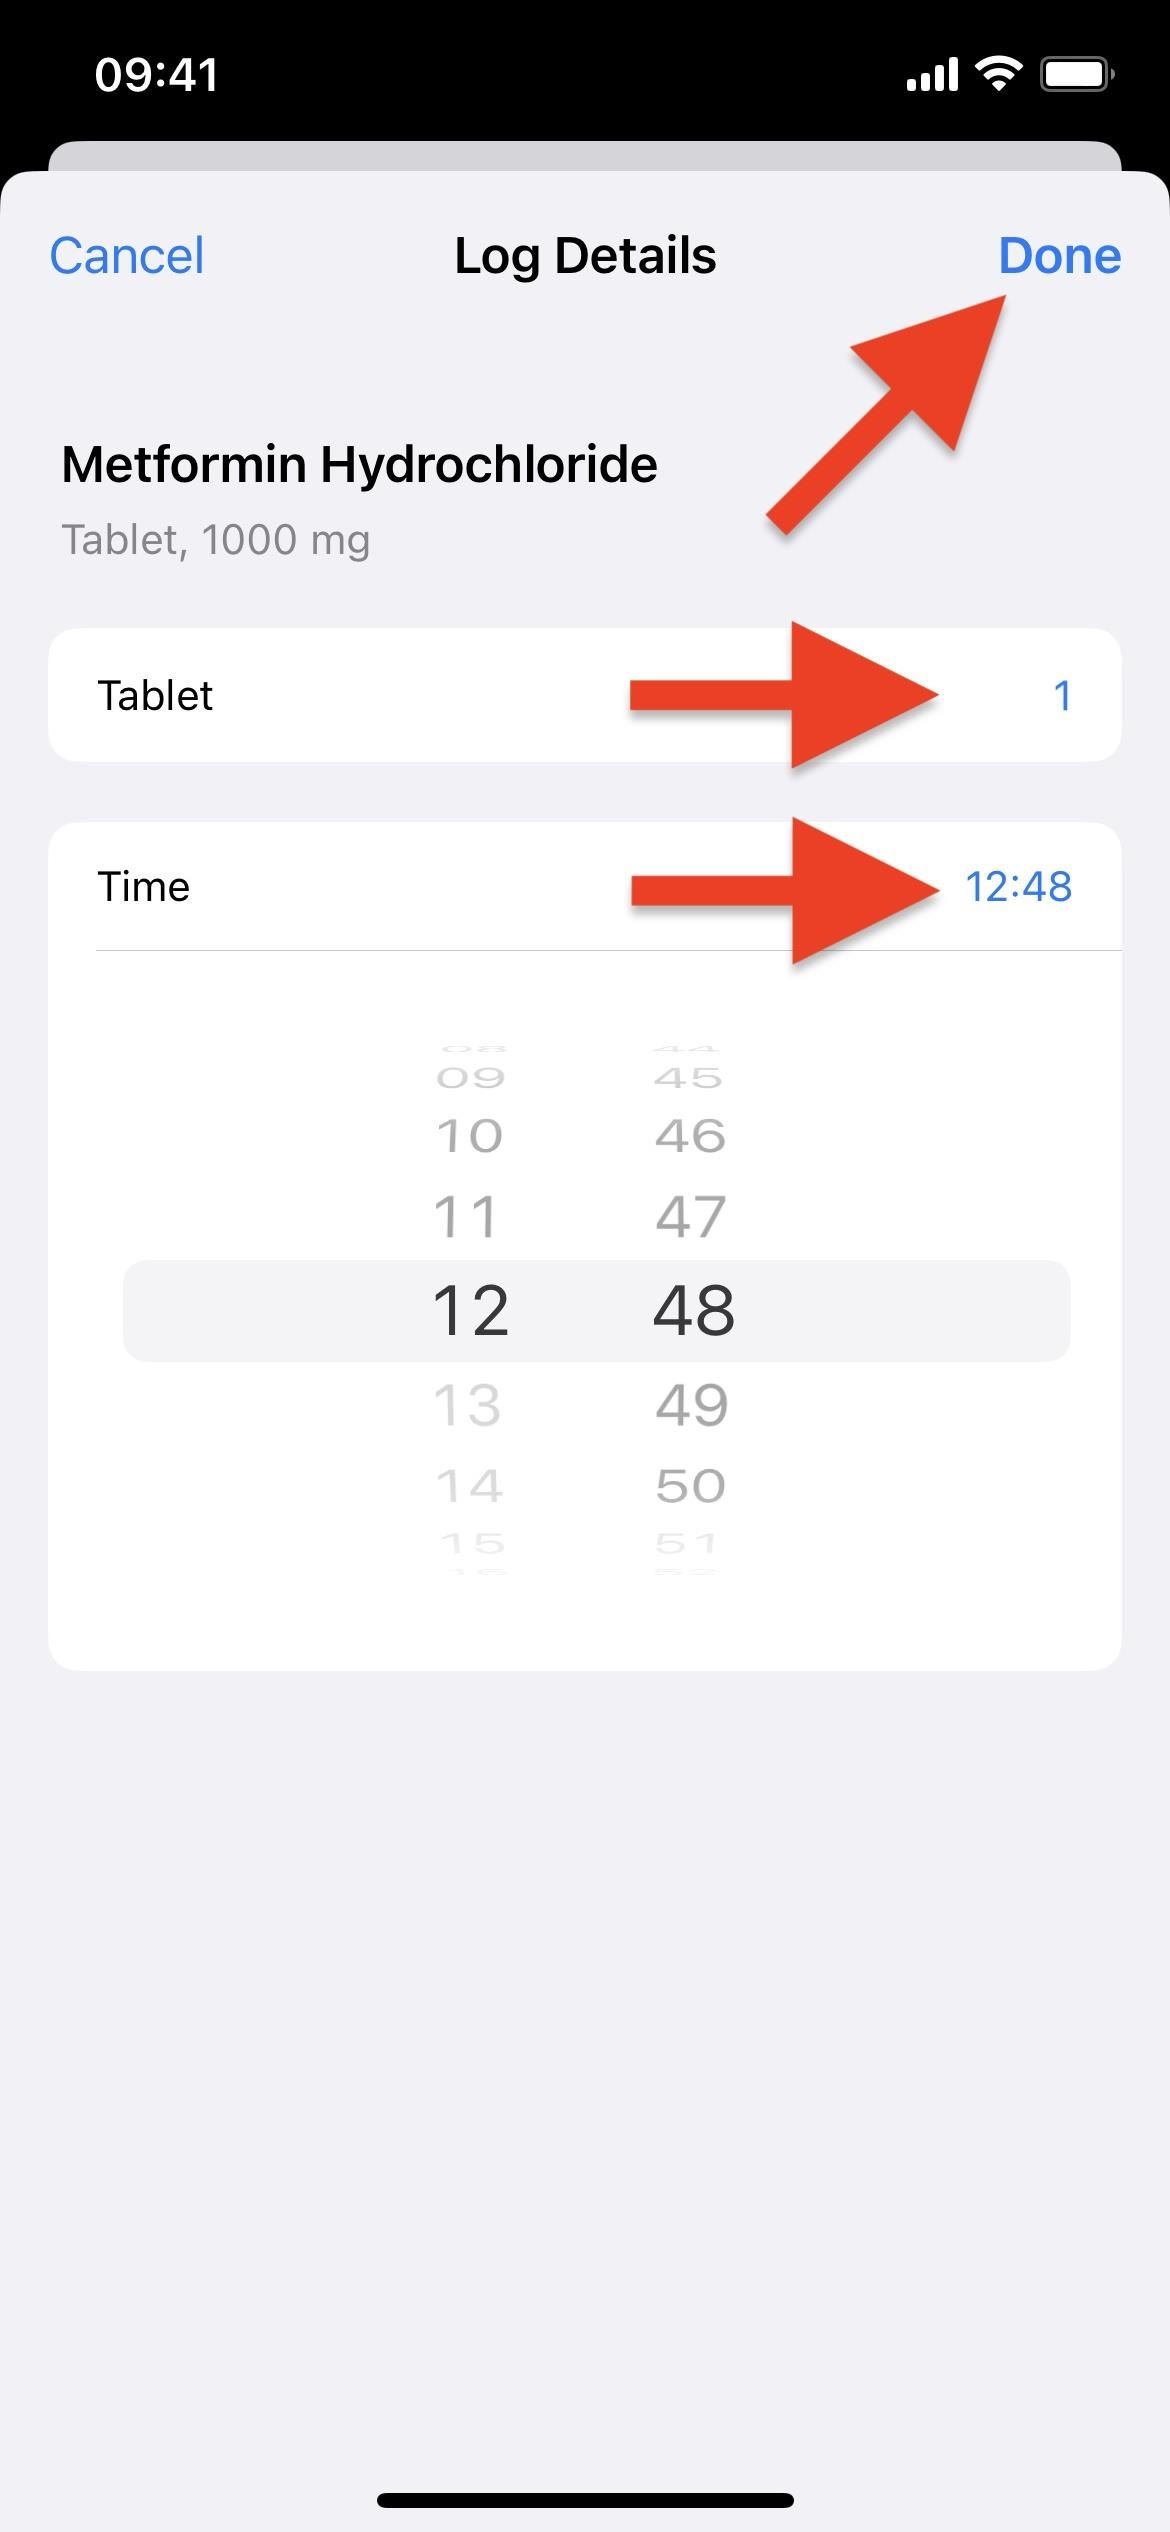
Tap one, and you can mark all time slots from that day as taken or just that specific time slot. If you took the medicine at a different time, you could record the actual time for your records, as well as change the quantity taken. You can also skip the specific time slot if you didn't or aren't going to take your meds then. Whatever you choose, tap "Done" to continue.
You can also tap "As Needed Medications" from the log screen to add something you took that is not currently listed in your schedule.
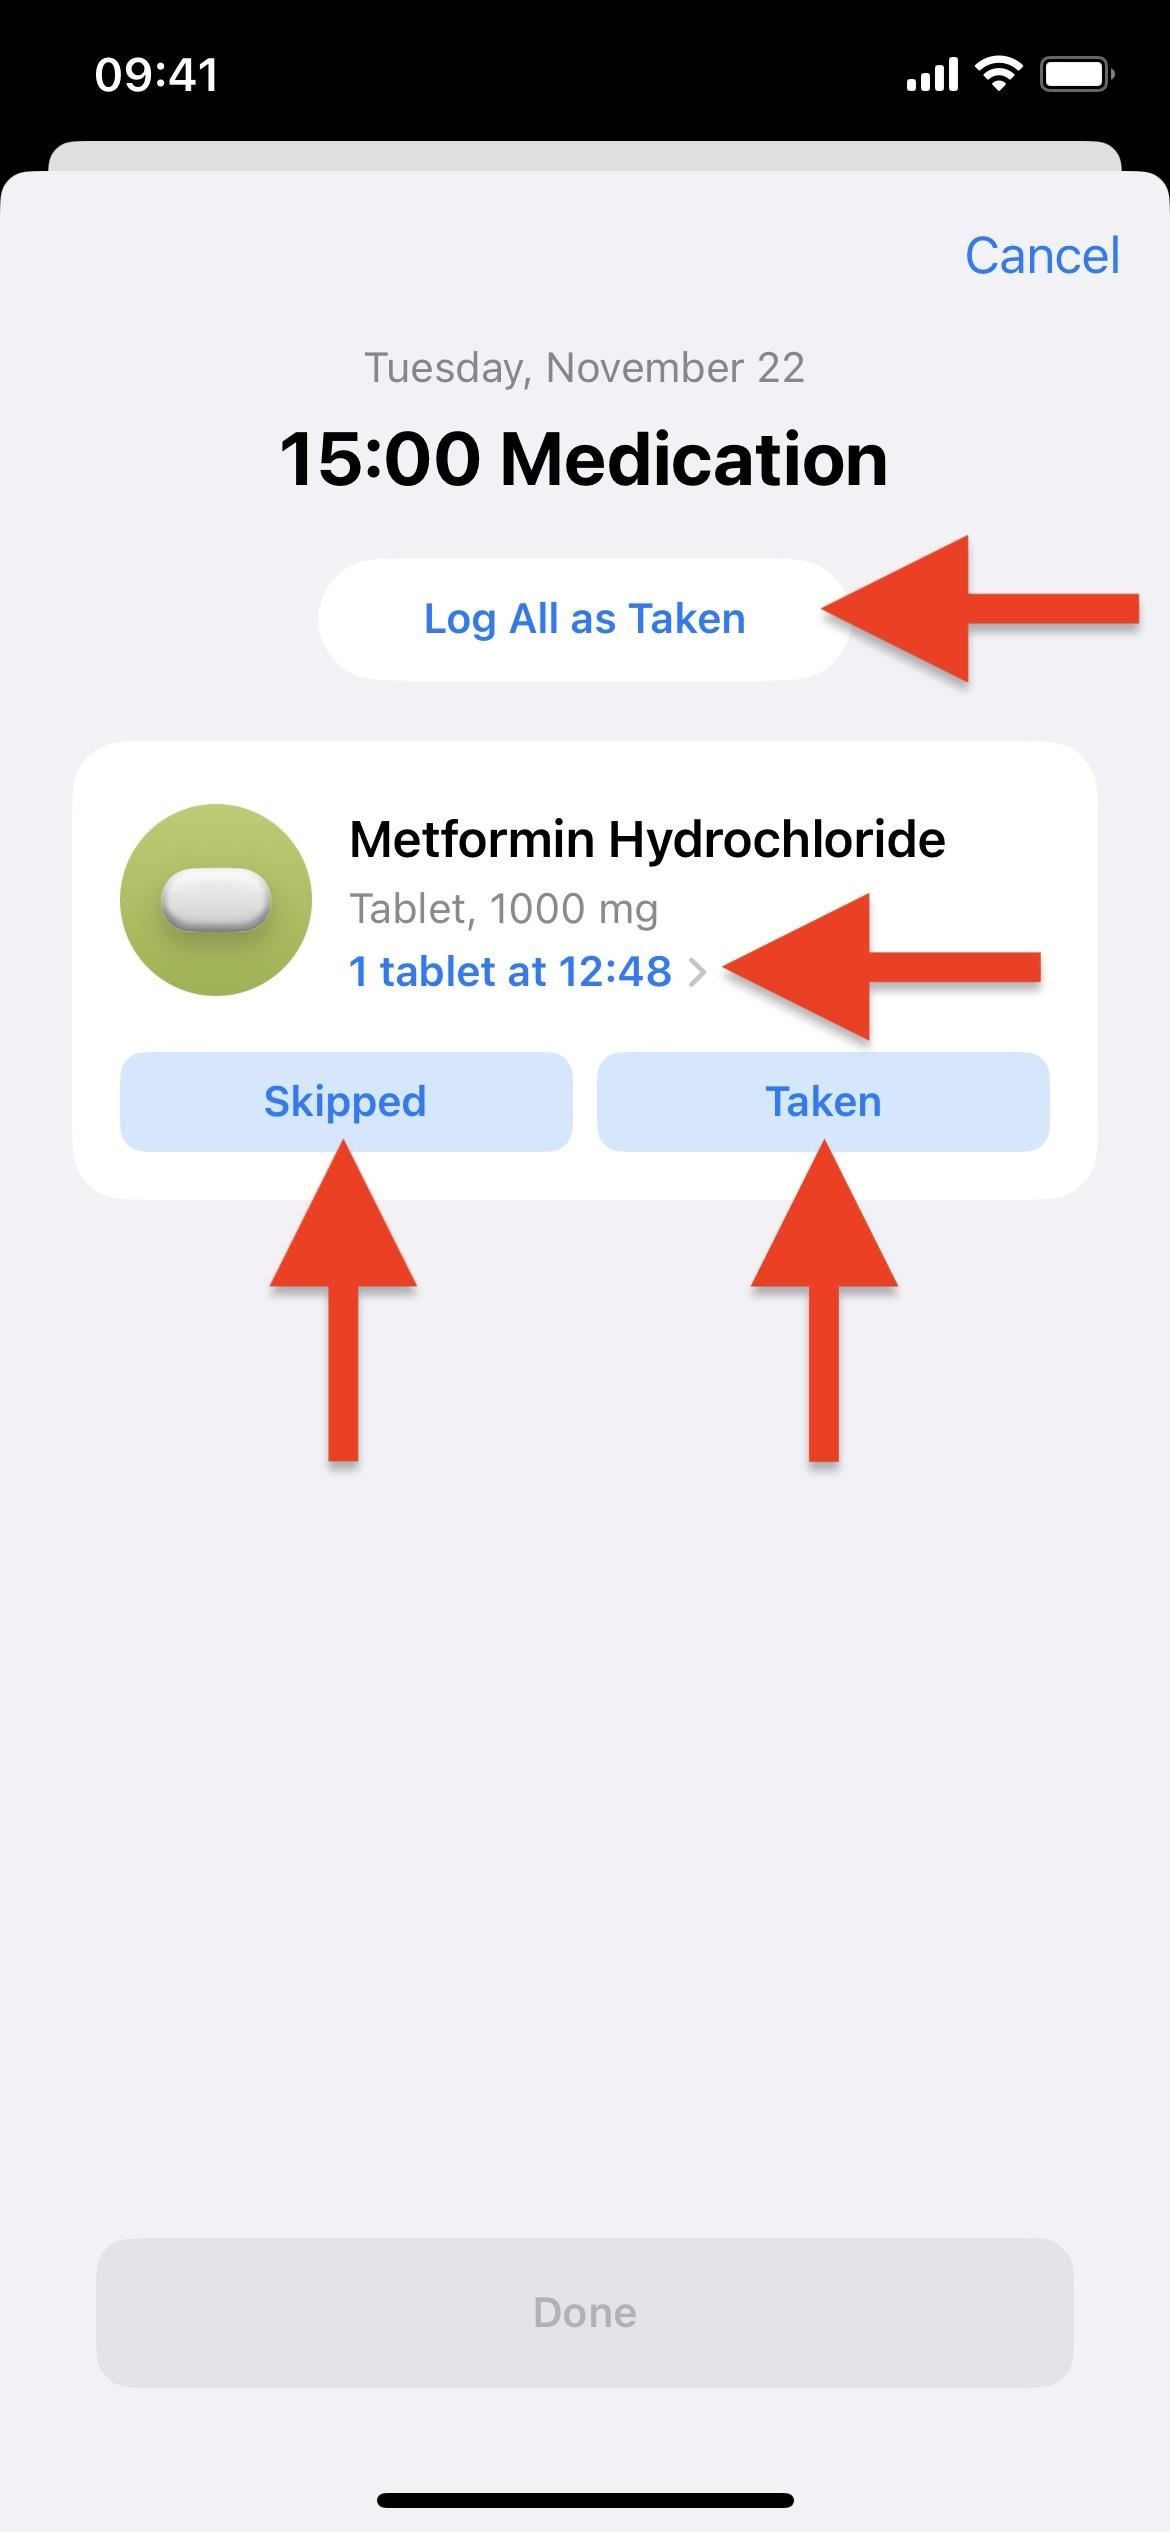
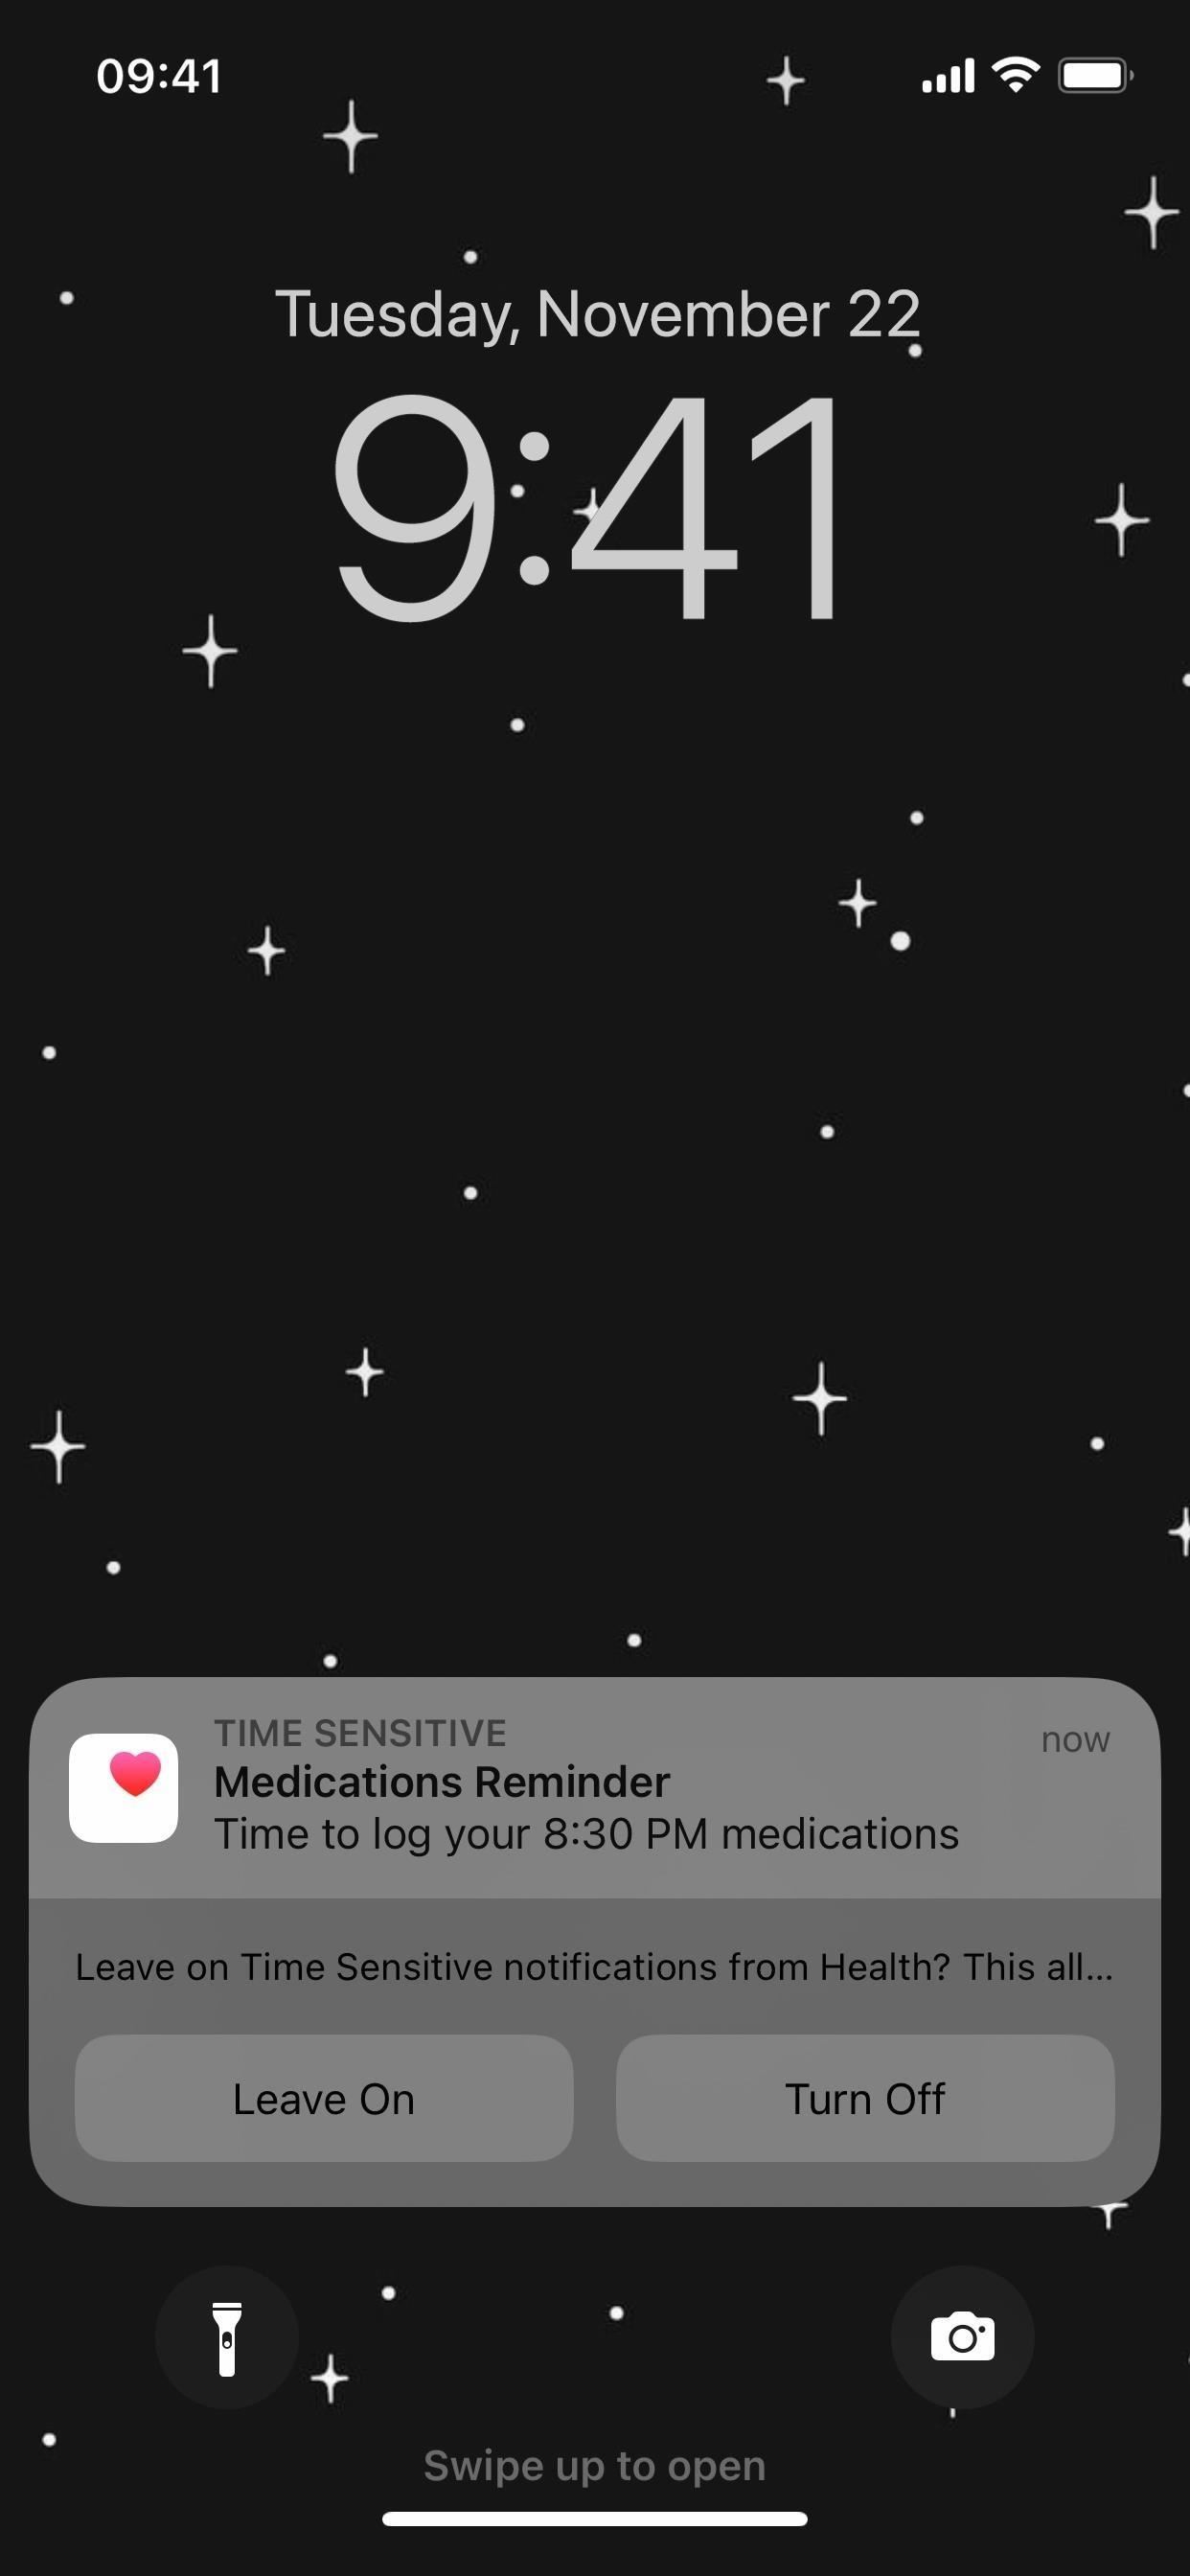
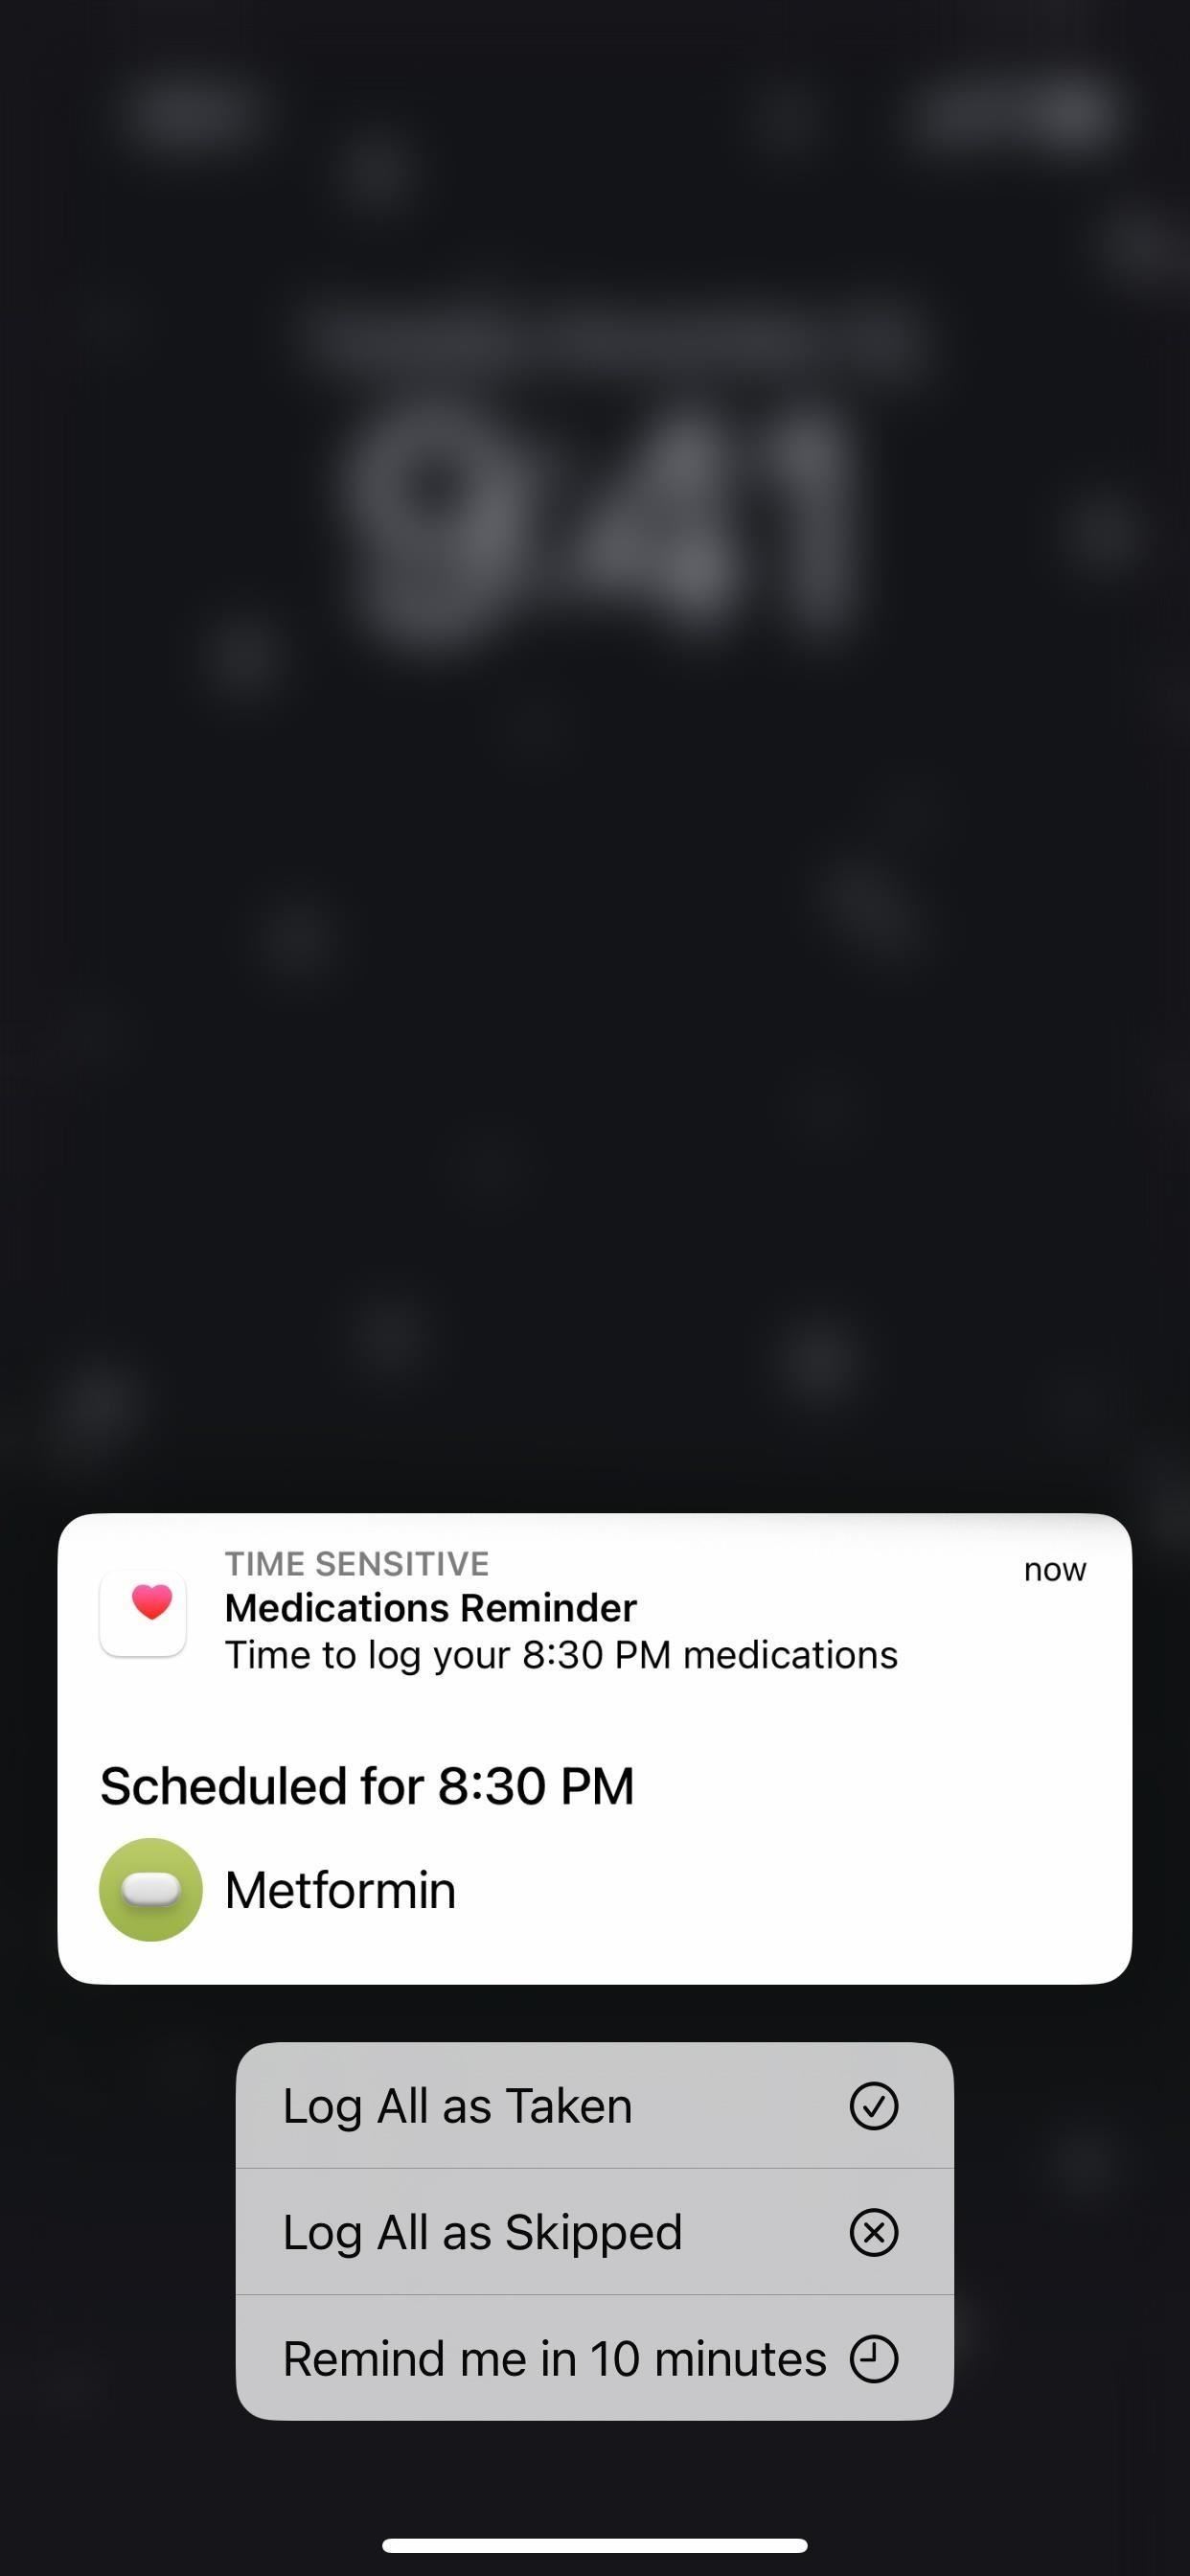
Alternatively, when you receive a time-sensitive reminder notification to log a scheduled medication, tap and hold it, then choose between "Log All as Taken," "Log All as Skipped," or "Remind me in 10 minutes."
Step 7: Edit Medications and Schedules (When Necessary)
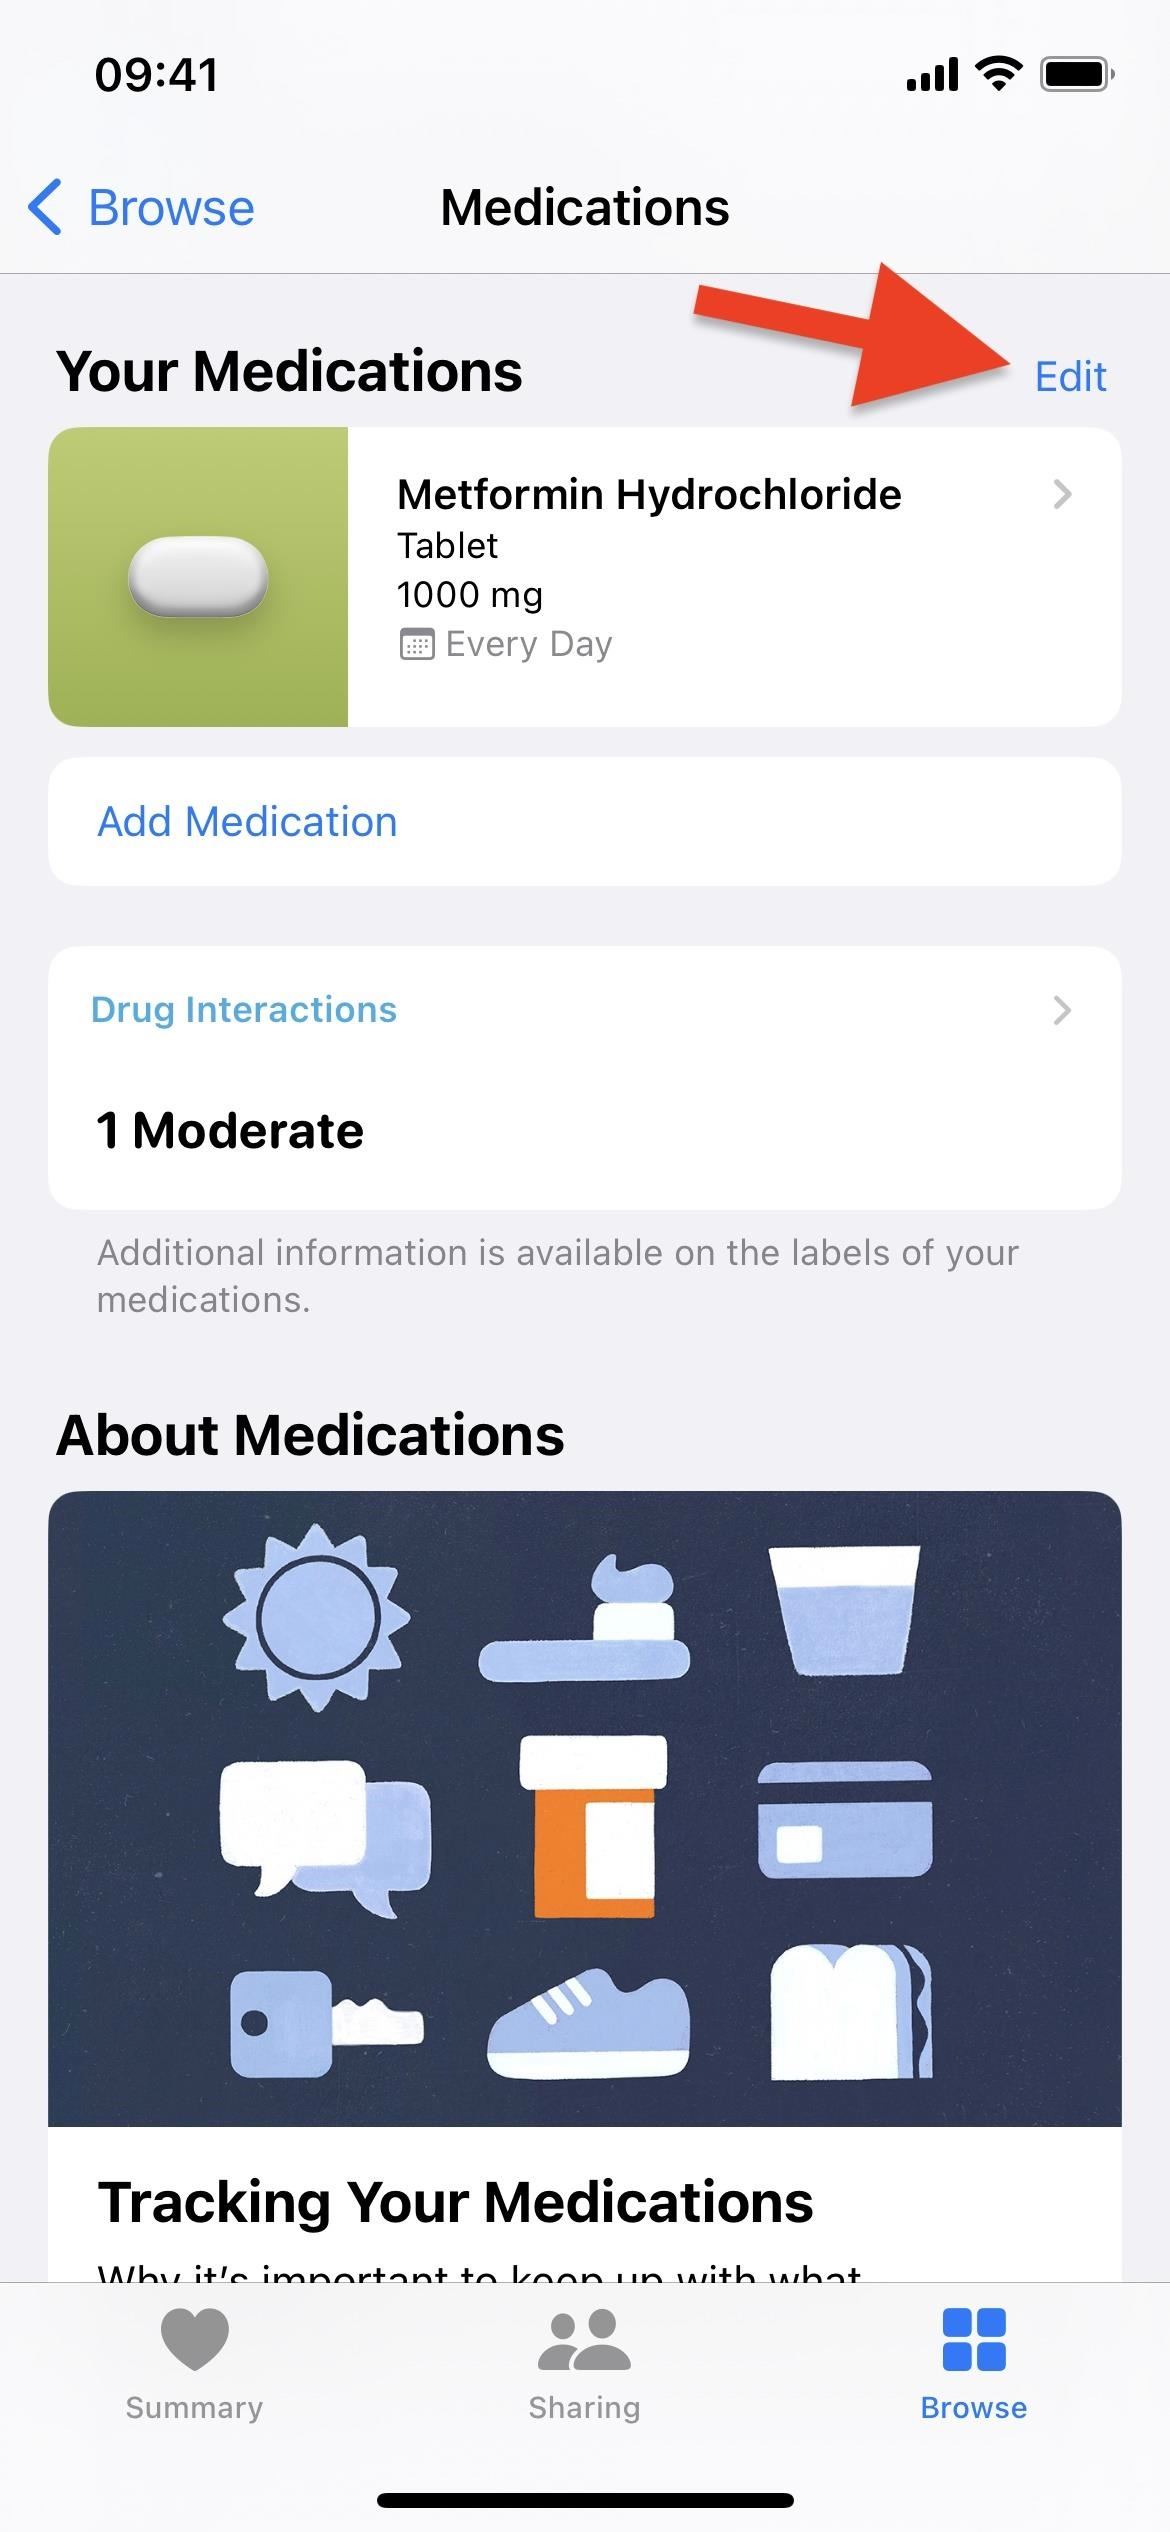
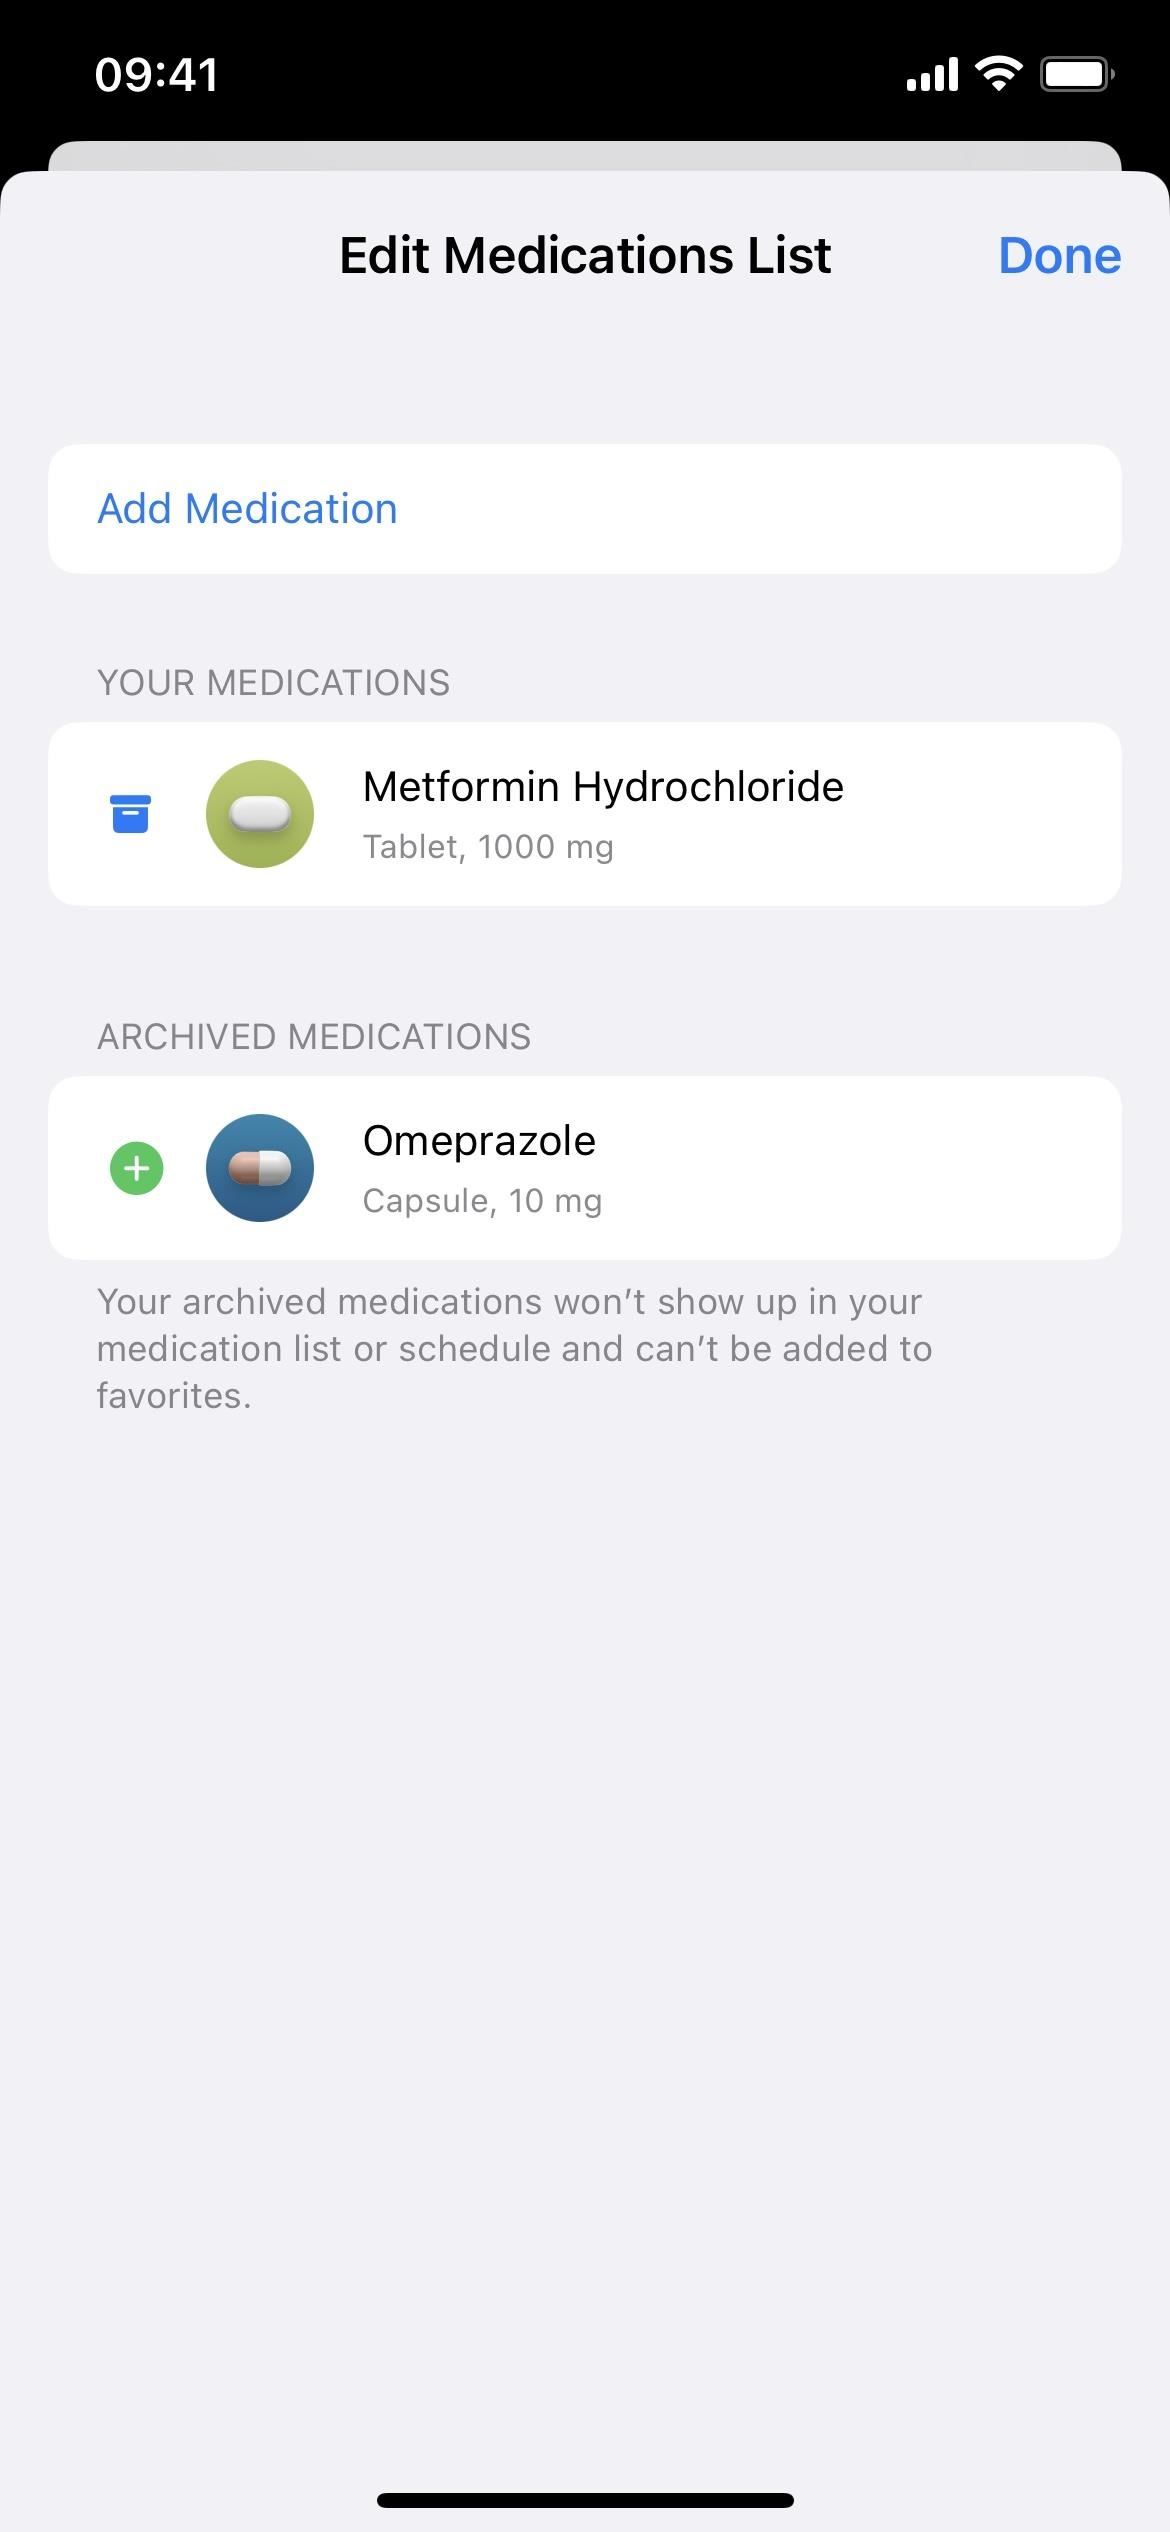
On the medication tracking screen, you can edit a medication if needed. Tap "Edit" next to the Your Medications section, and you can add another drug, bring an archived medication back into your current schedule, or archive an existing prescription.
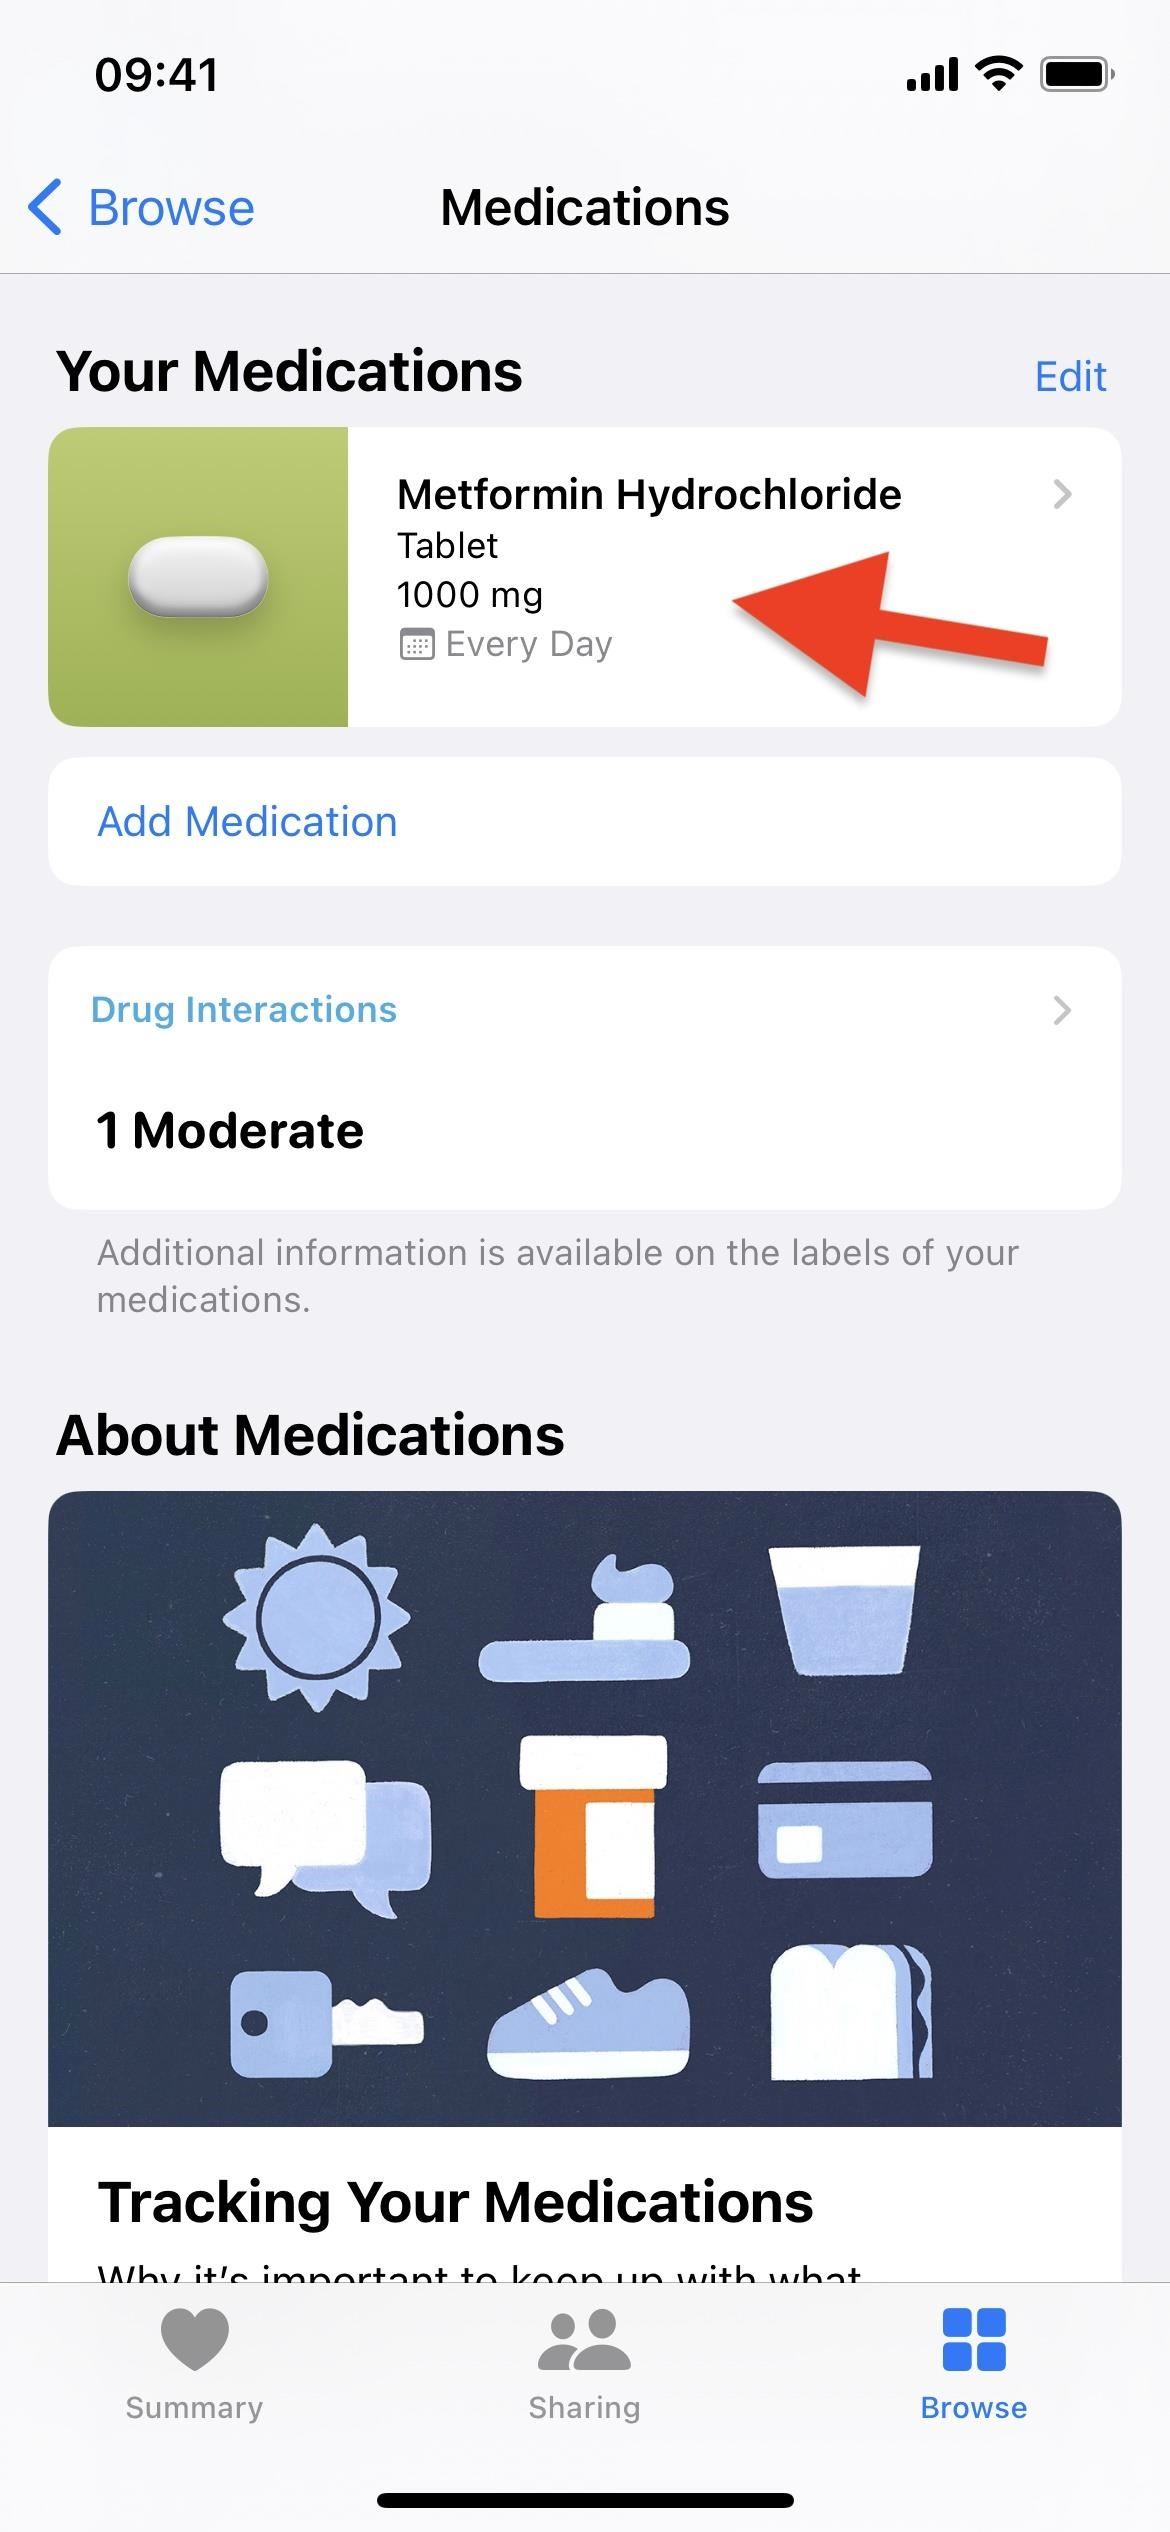
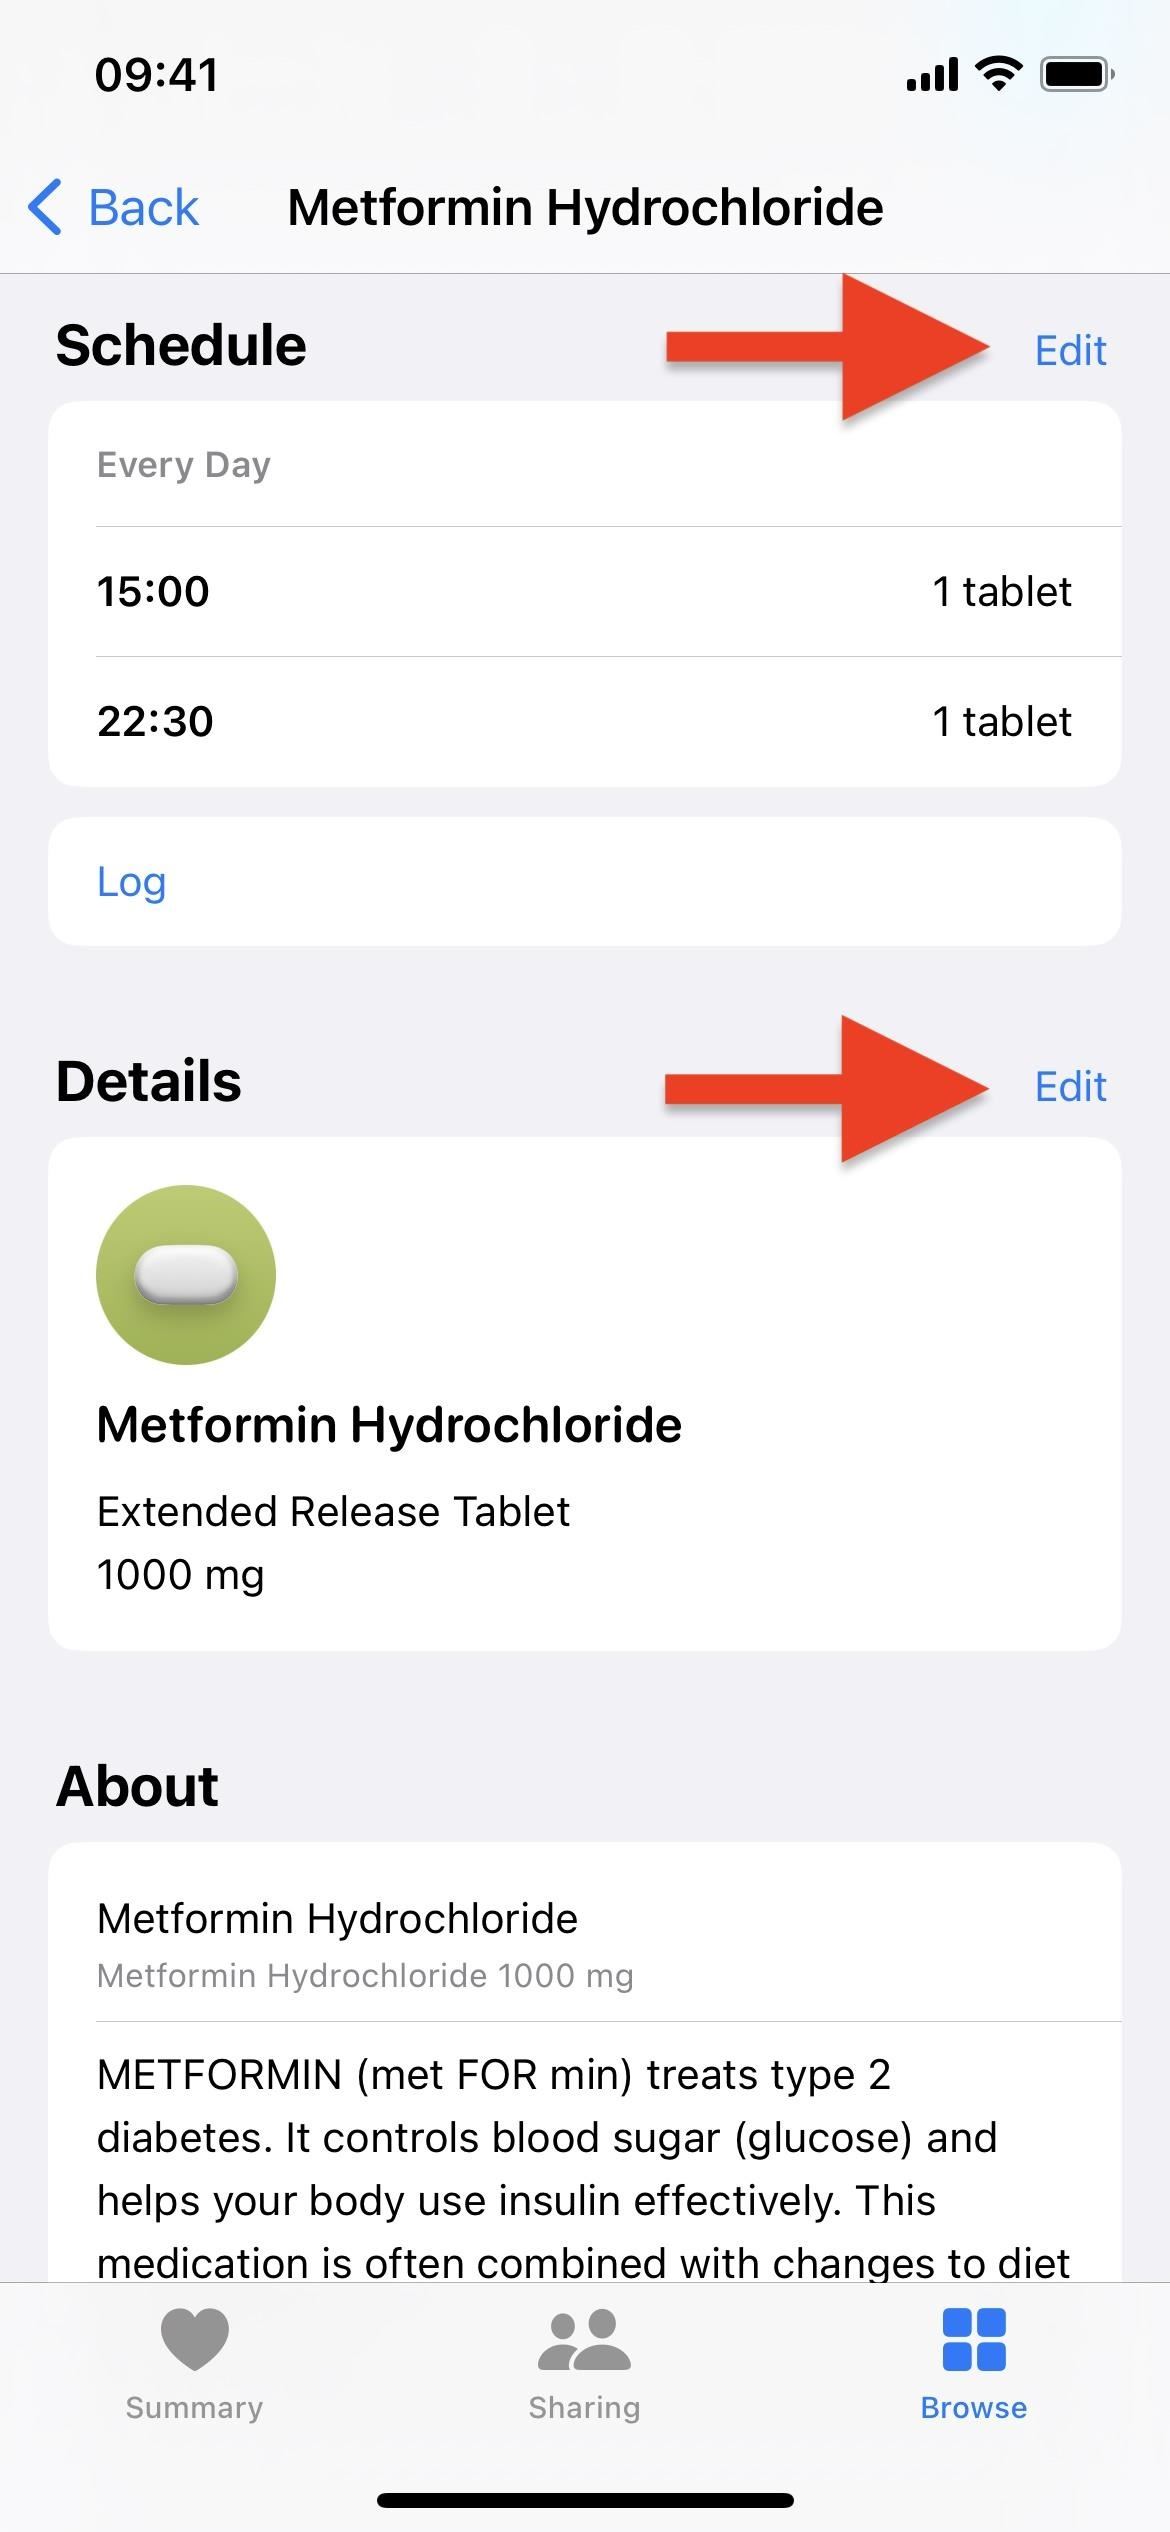
Tap the drug under Your Medications to edit a specific medication's details. You'll be able to adjust the schedule and edit the details for the medication, such as notes, display name, and shape and color.
Step 8: Learn More About Your Medications (Optional)
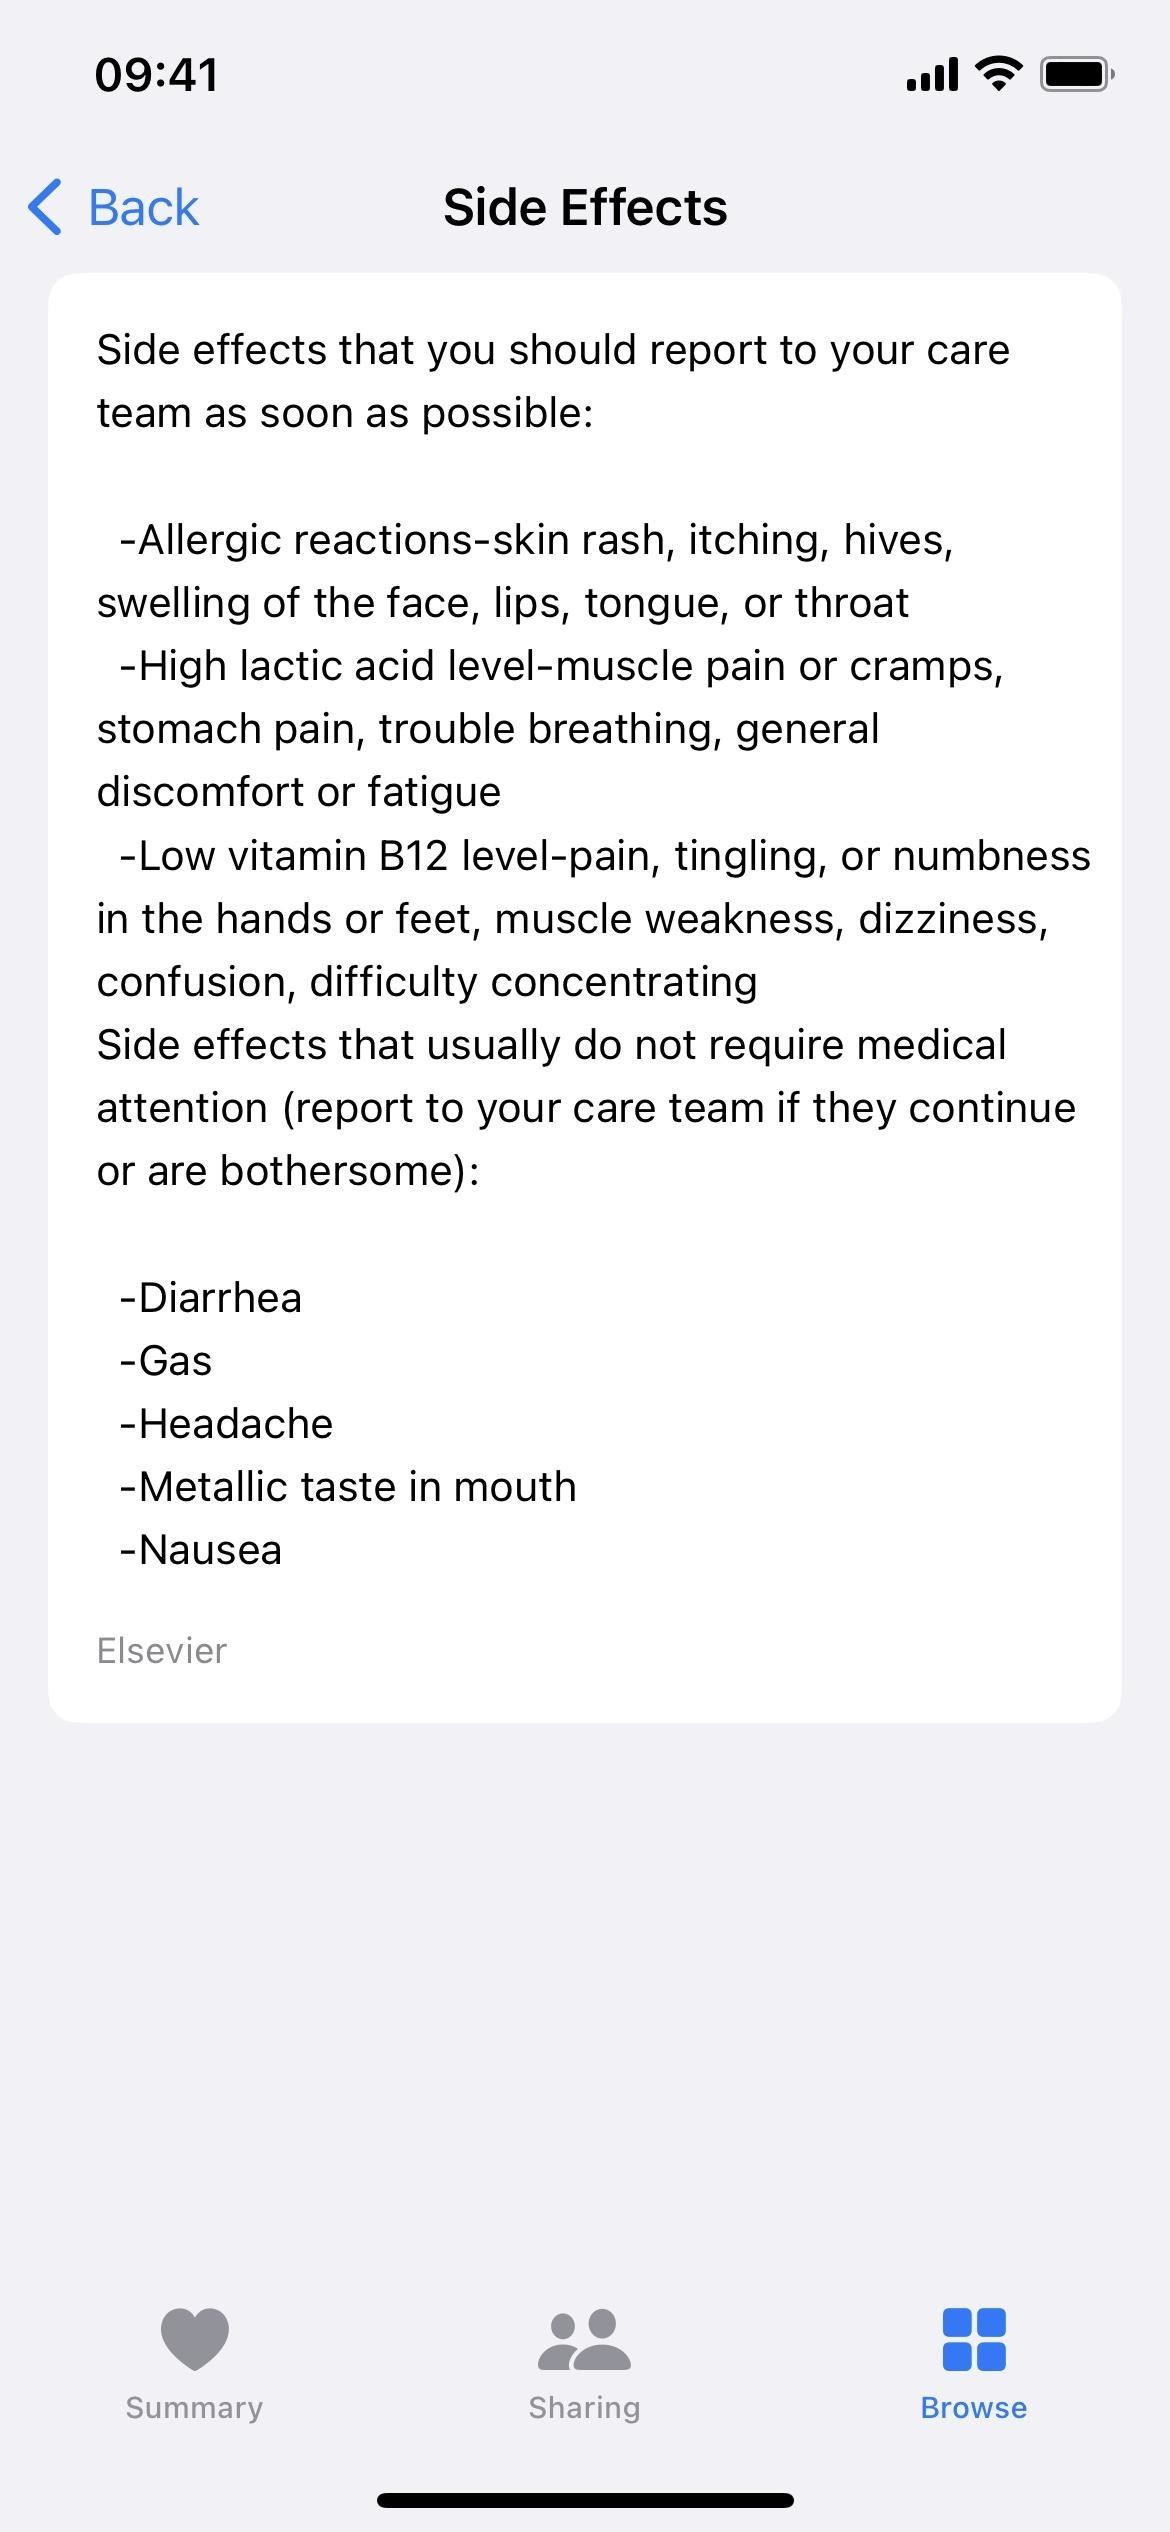
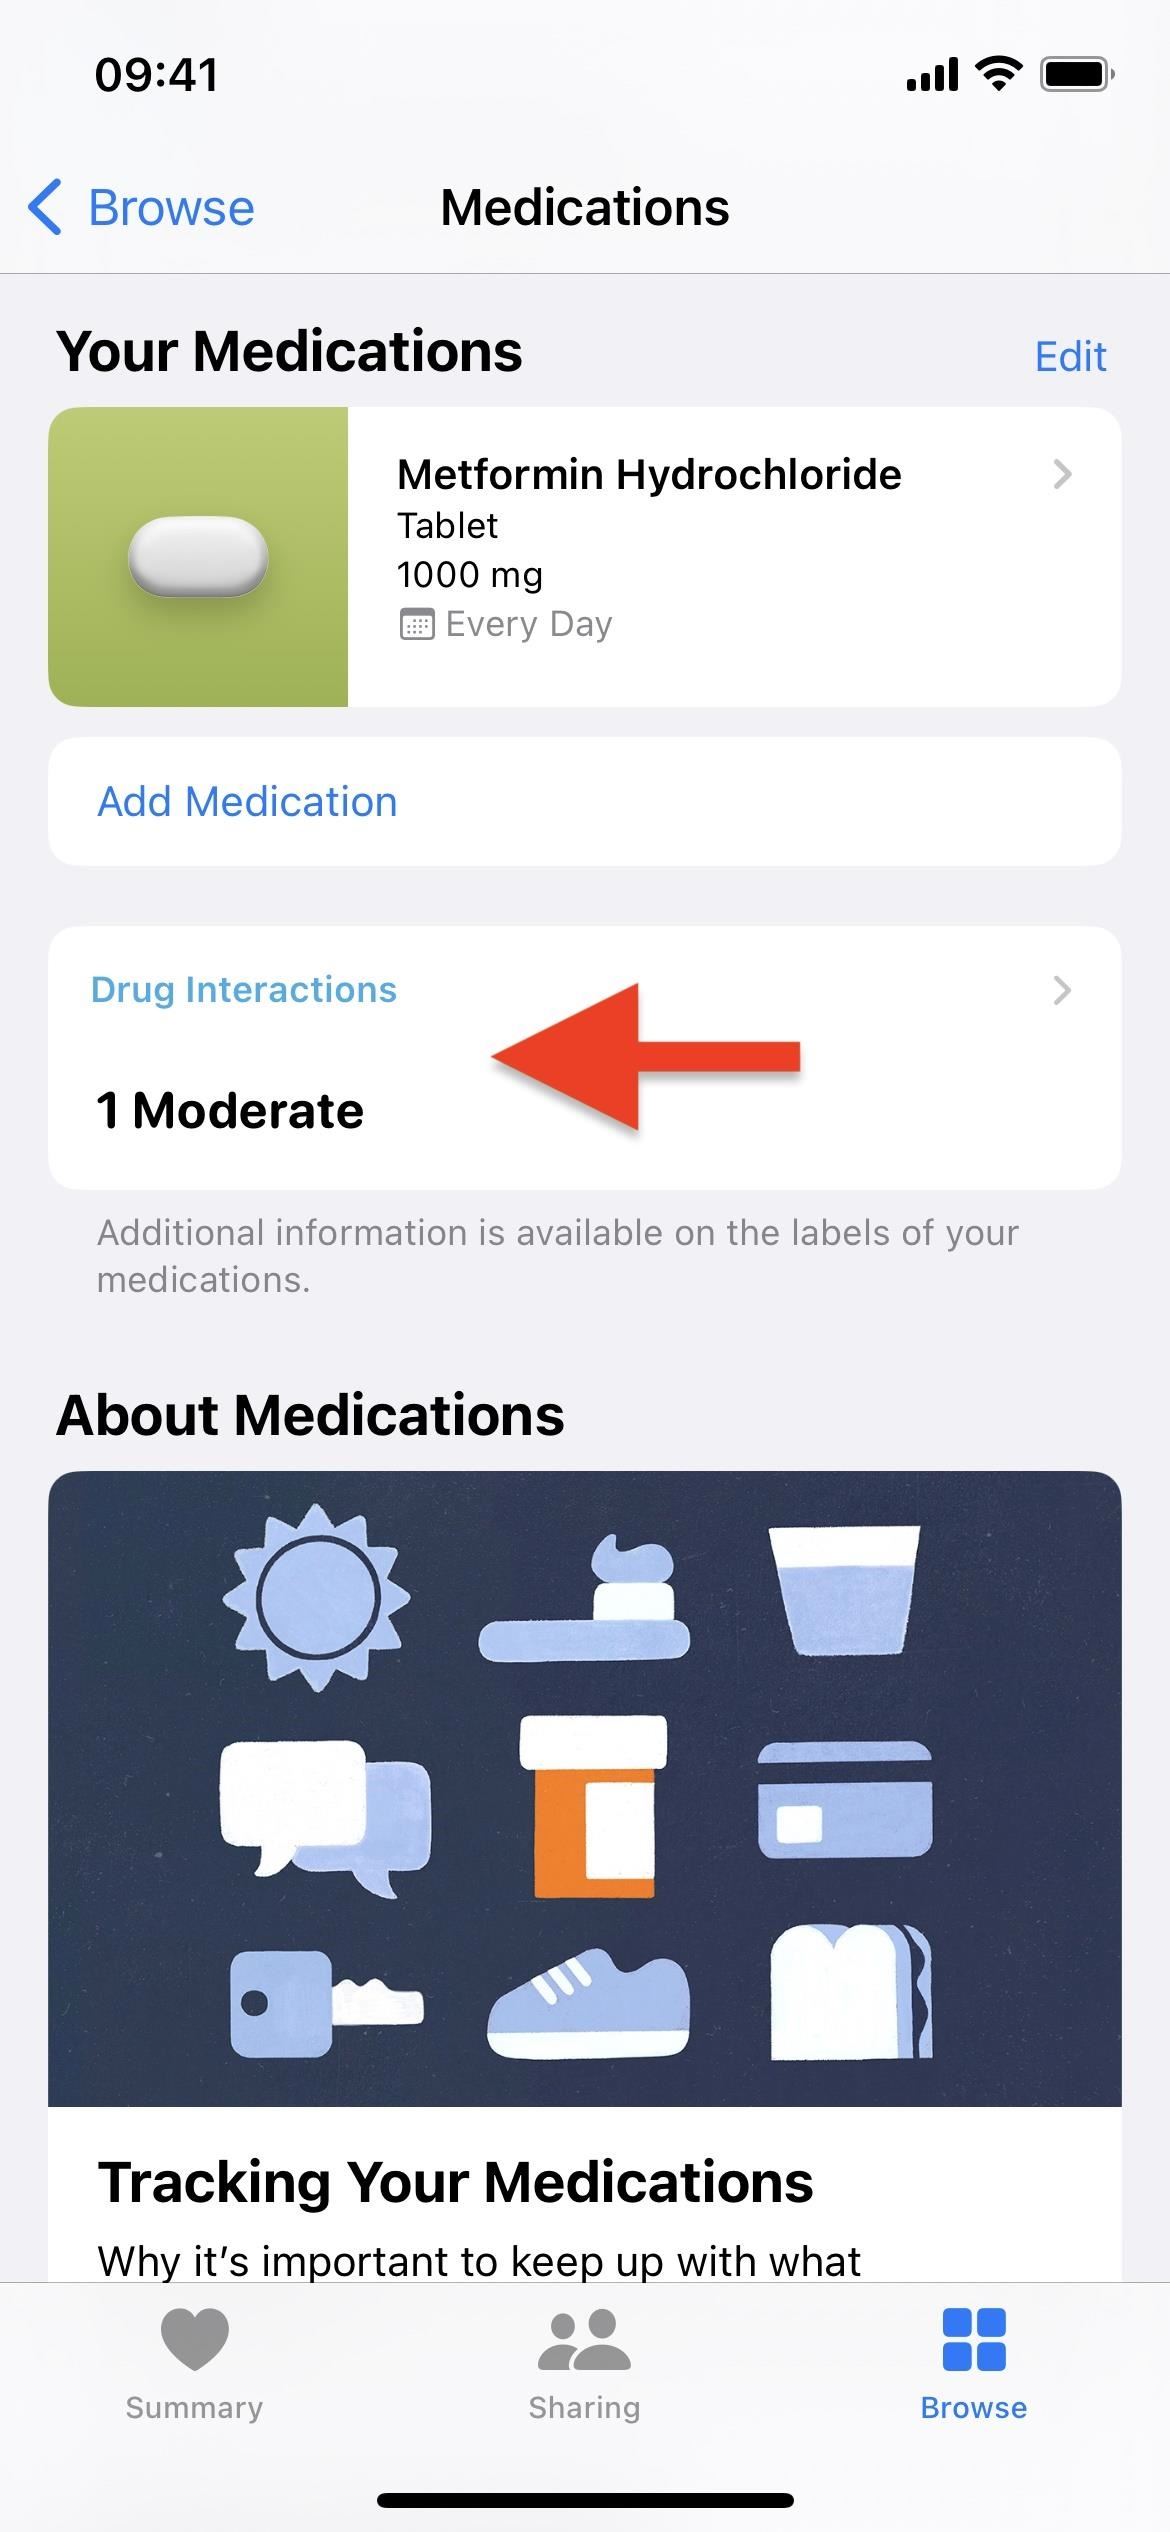
When you tap on a drug under Your Medications, you can also learn more about it in the About section. You'll see general information about your medication, and you can tap "Side Effects" if you want to read about the side effects of your medications. You can also tap "Drug Interactions" to see or edit interactions.
The "About" section to learn more about your medications, including general information, side effects, and drug interactions, is currently available in the U.S. only.
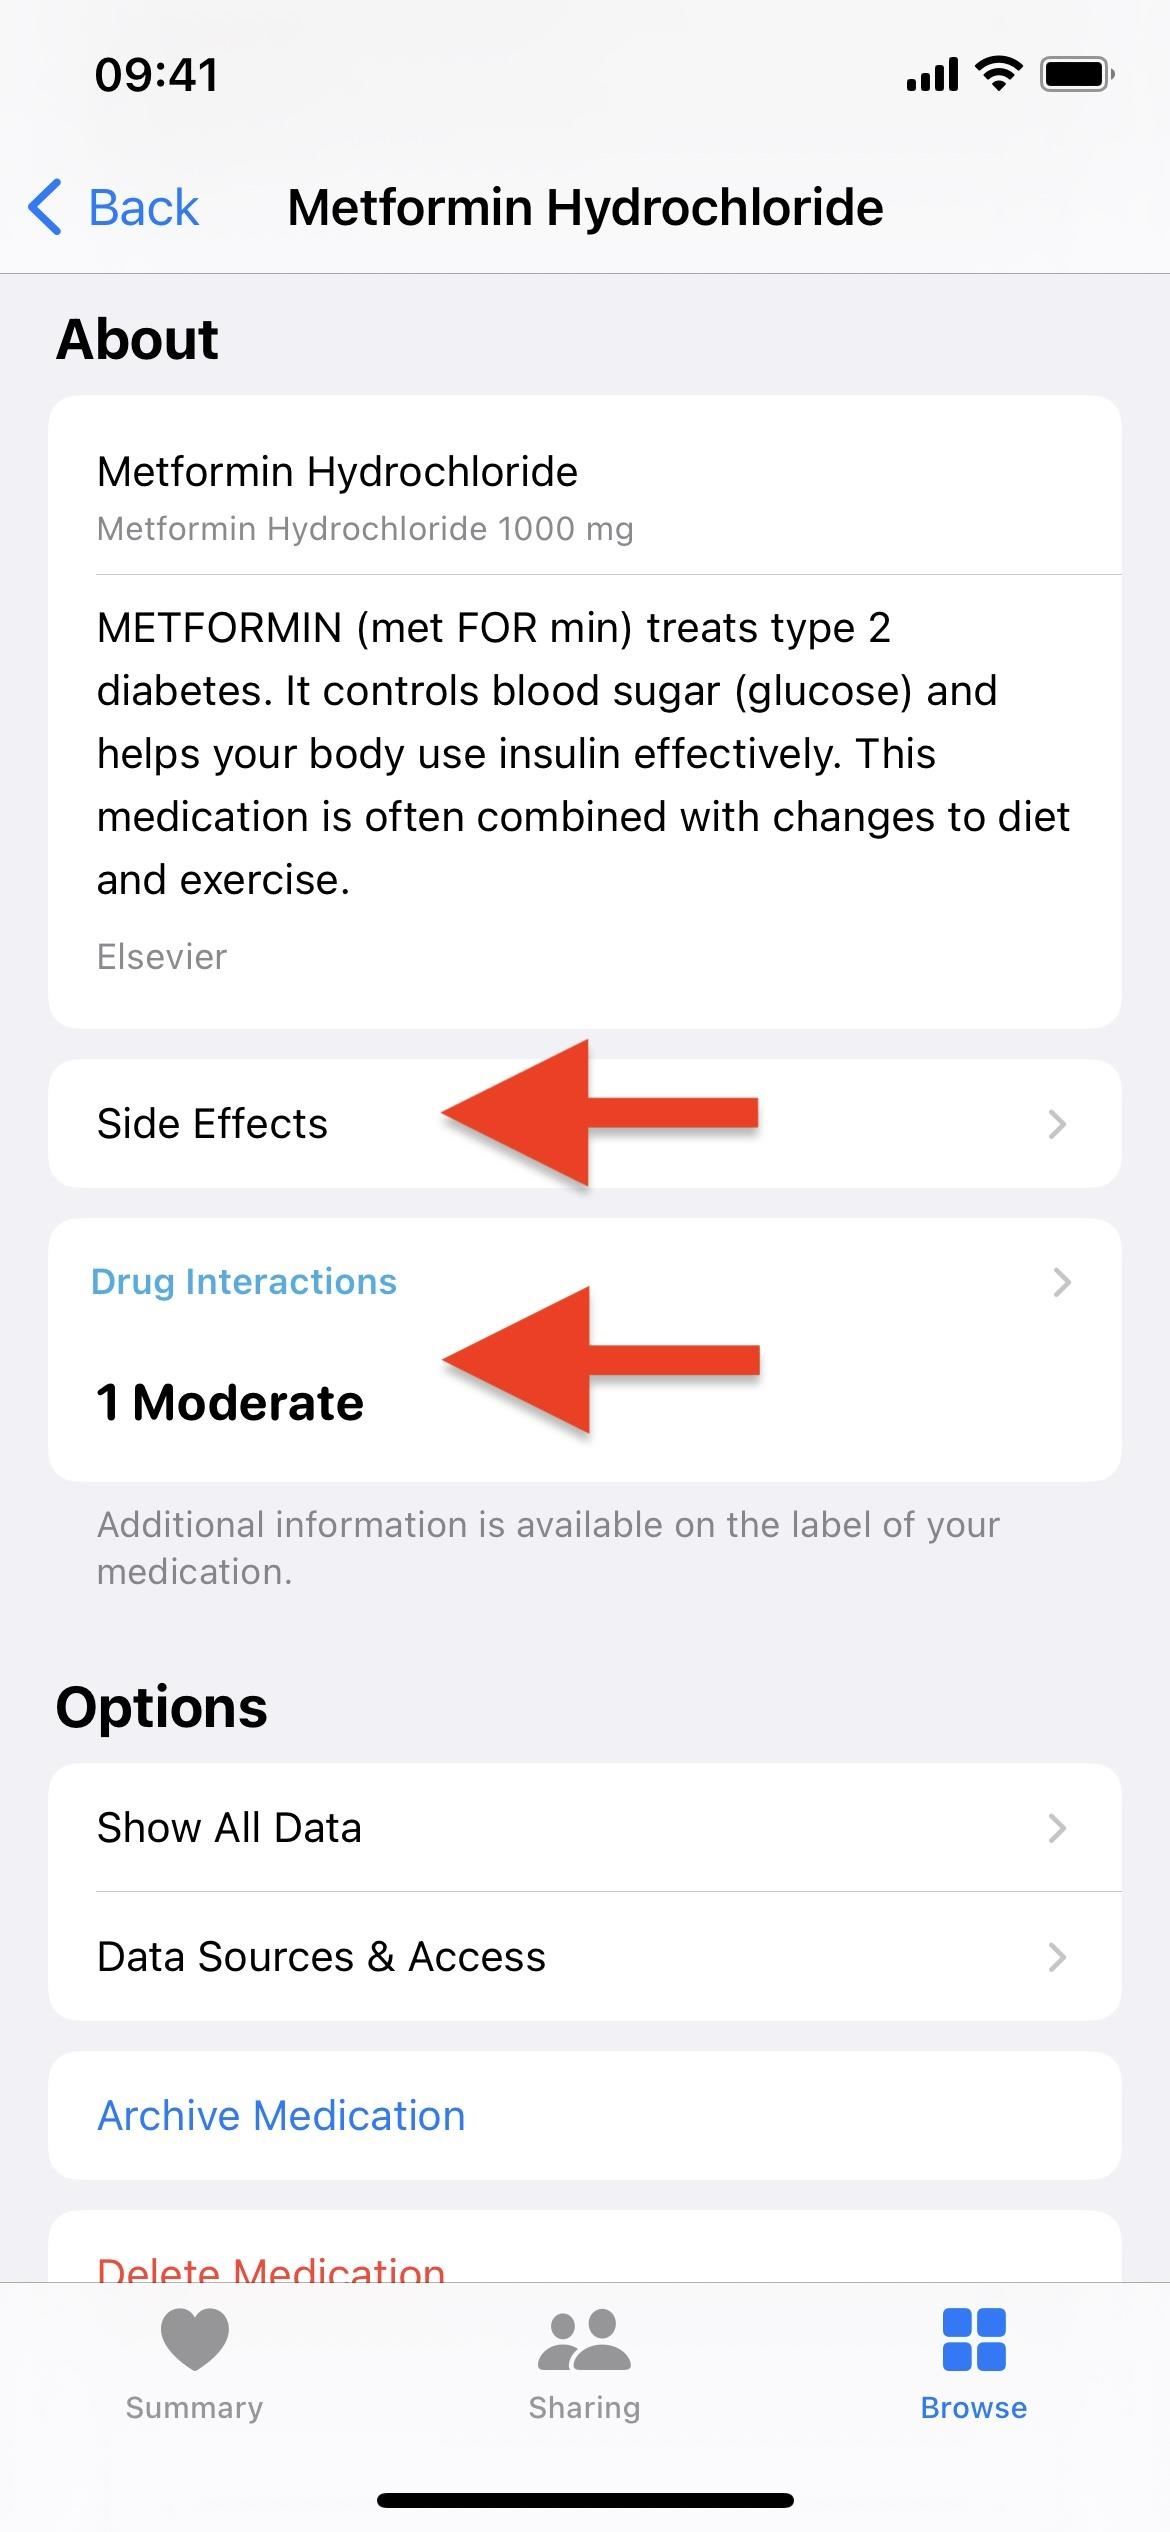
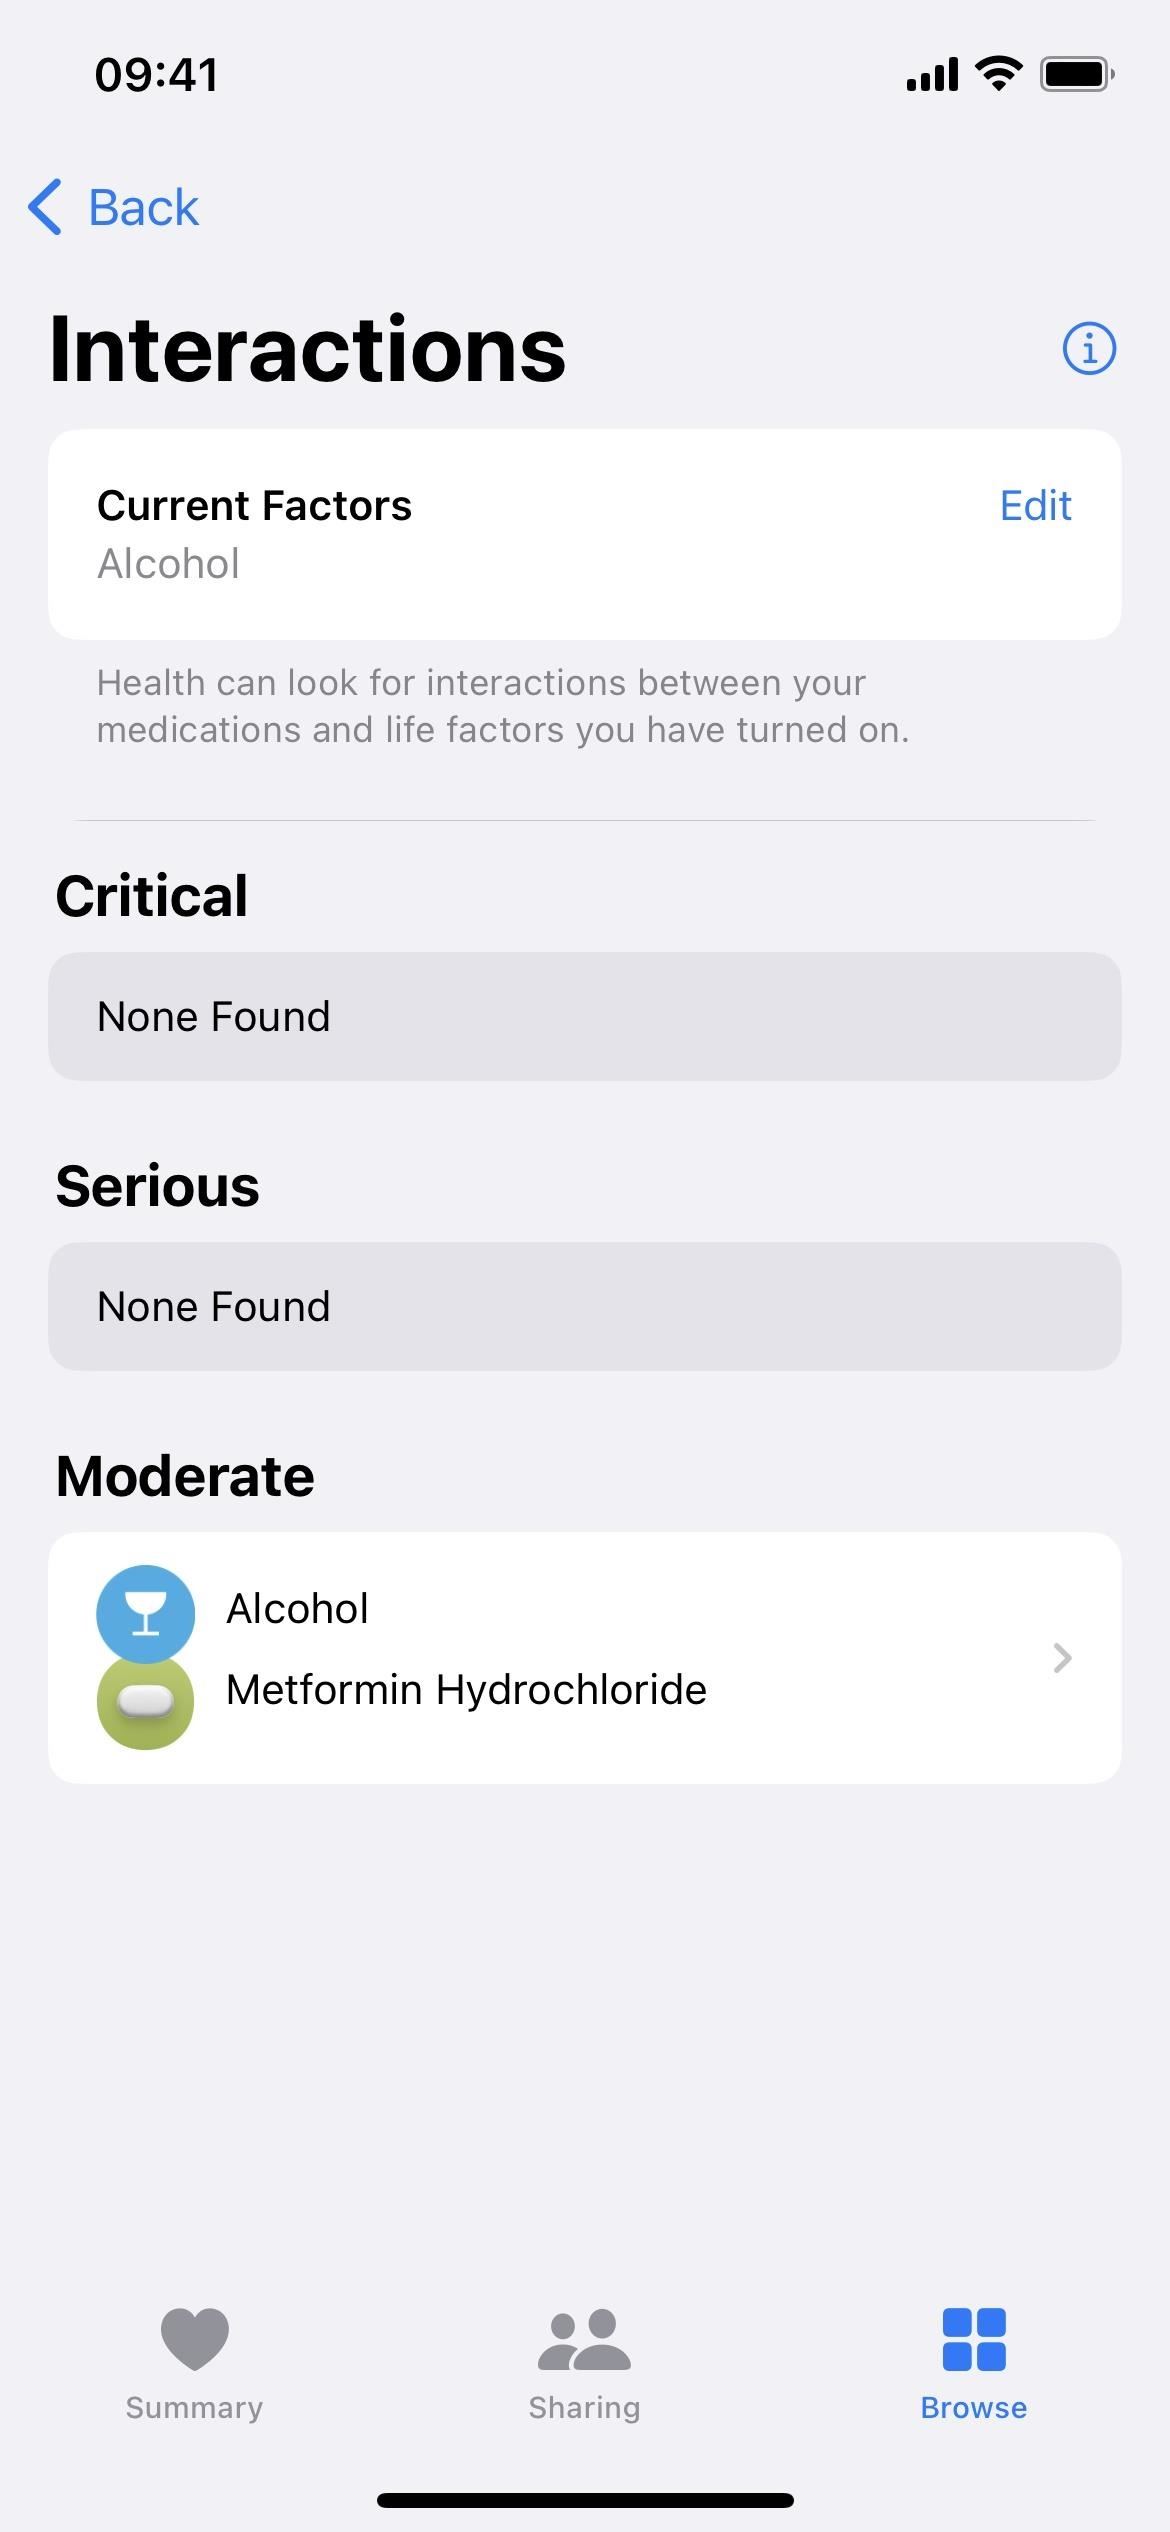
Another way to open the interactions is to scroll down on the medications tracking screen and tap "Drug Interactions" under the Your Medications section.
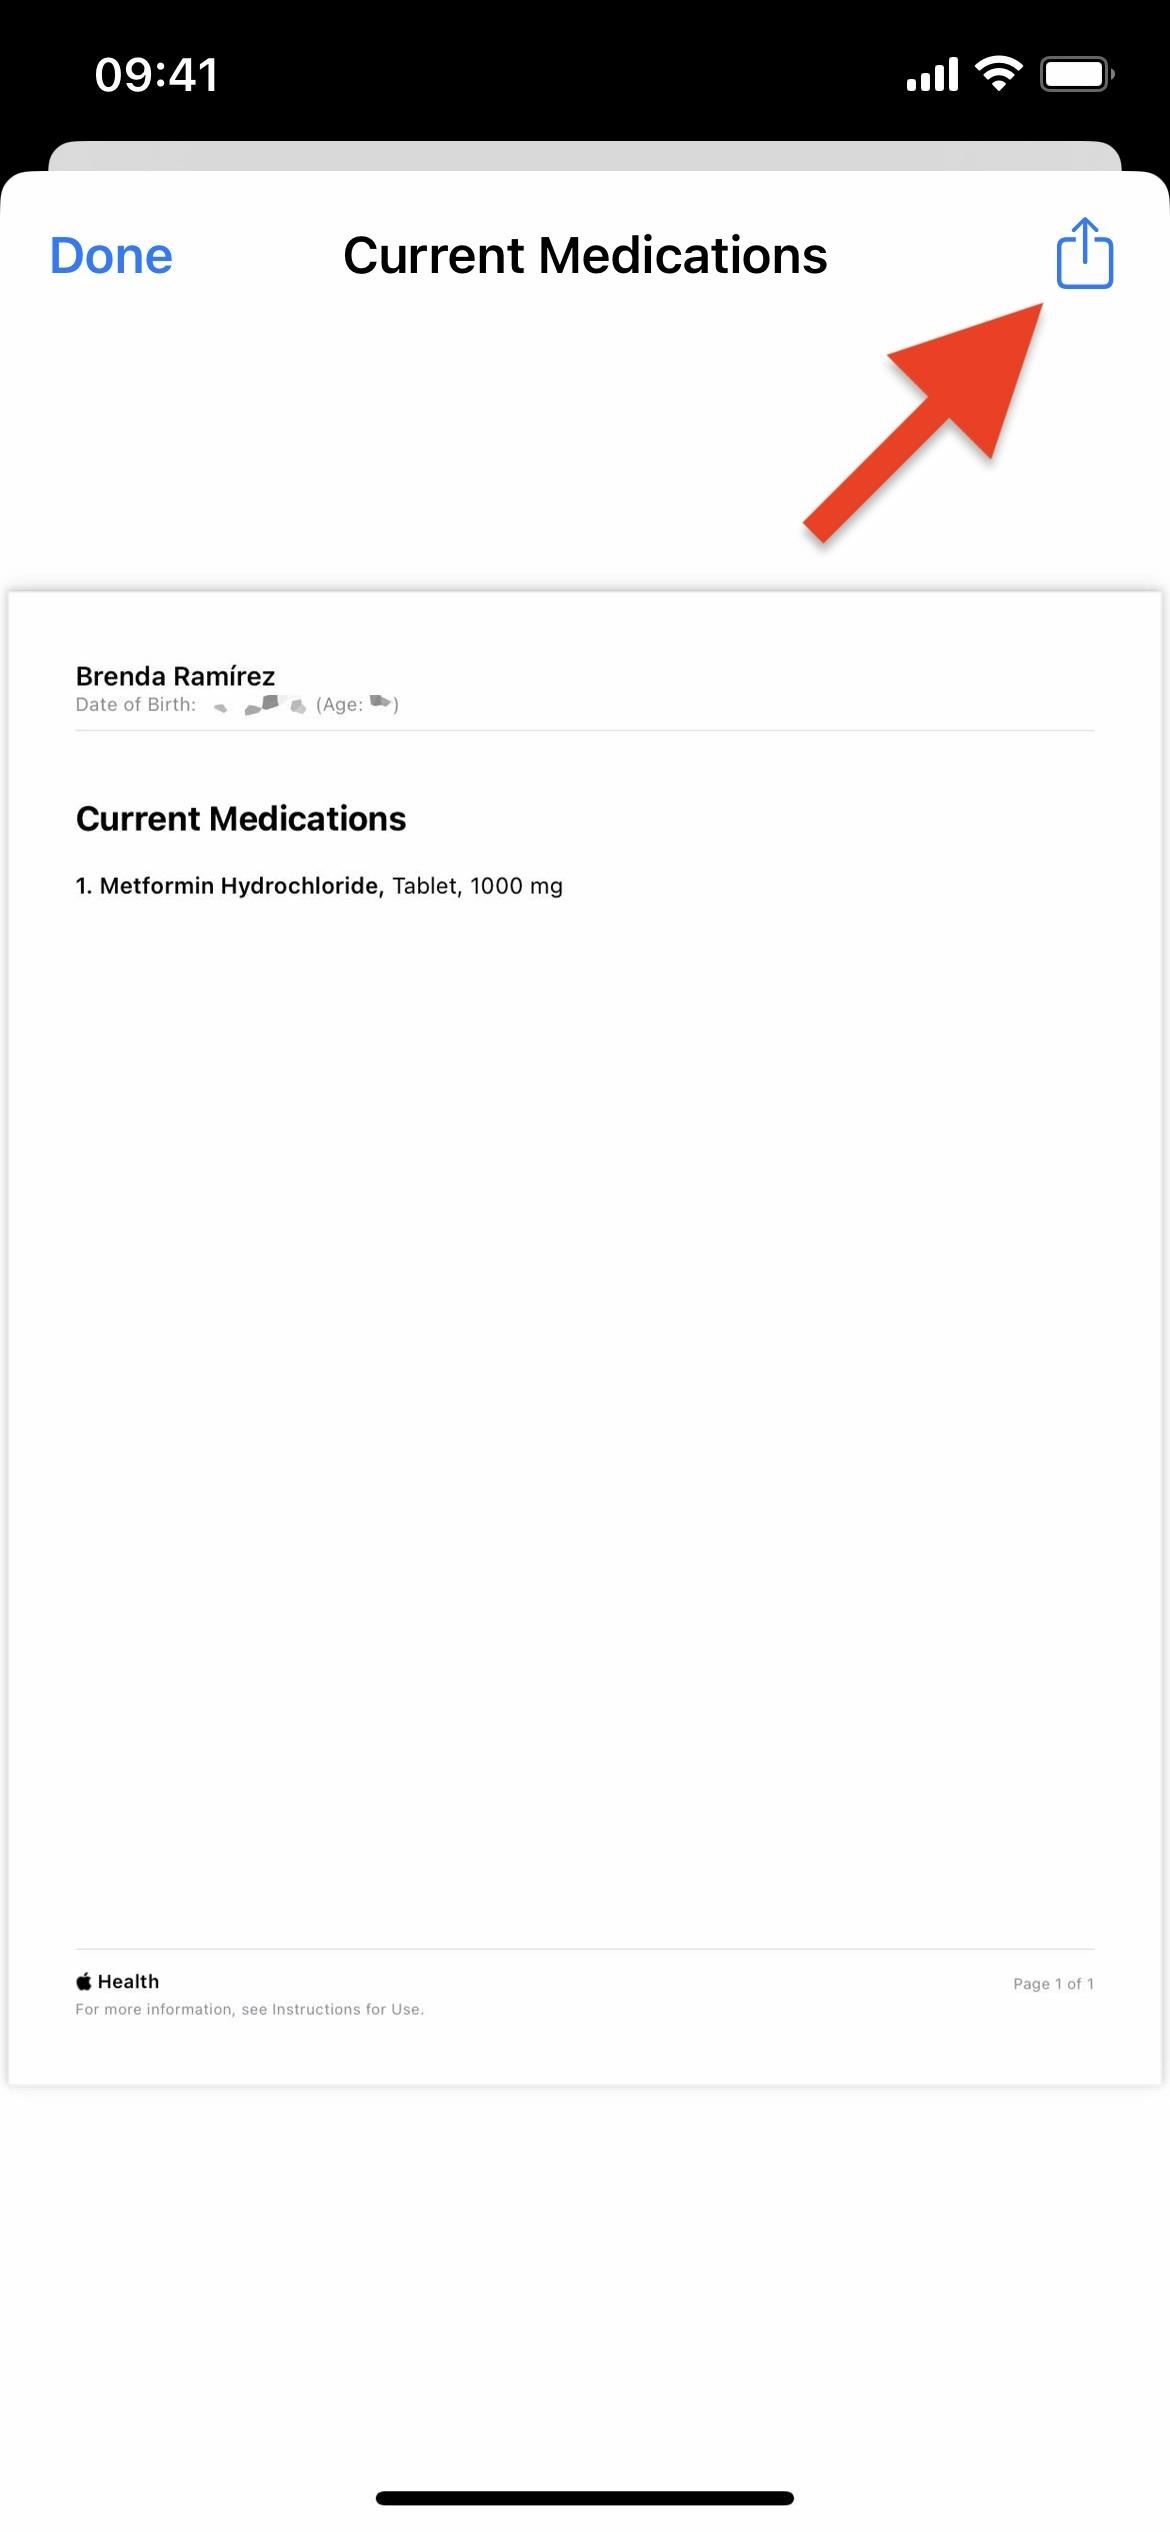
Step 9: Share Your Medication List (Optional)
At the bottom of the medications tracking screen, tap "Export PDF" to save your list. A PDF file listing your medications, vitamins, and supplements will be created, and you can tap the share button to choose who and how to share it.
iPhone Models That Support Label Scanning with the Camera
- iPhone XS
- iPhone XS Max
- iPhone XR
- iPhone 11
- iPhone 11 Pro
- iPhone 11 Pro Max
- iPhone SE (2nd generation)
- iPhone 12
- iPhone 12 mini
- iPhone 12 Pro
- iPhone 12 Pro Max
- iPhone 13
- iPhone 13 mini
- iPhone 13 Pro
- iPhone 13 Pro Max
- iPhone SE (3rd generation)
- iPhone 14
- iPhone 14 Plus
- iPhone 14 Pro
- iPhone 14 Pro Max
Just updated your iPhone? You'll find new emoji, enhanced security, podcast transcripts, Apple Cash virtual numbers, and other useful features. There are even new additions hidden within Safari. Find out what's new and changed on your iPhone with the iOS 17.4 update.


Be the First to Comment
Share Your Thoughts