
While it doesn't come with any iPad models out of the box, the Apple Pencil is perhaps the best iPad accessory you can get. It's a powerful writing and drawing tool with an intuitive design and user-friendliness that makes it easy to take notes, draw sketches, mark up documents, and more. And there's a lot you can do with it — some of which you may not have noticed yet.
What you can do on your iPad using an Apple Pencil varies on the Apple Pencil model you have. The first model came out alongside iOS 9.1 and the first-generation iPad Pro in 2015, and you have to charge it via the iPad's Lightning port. It has a round design and a cap at the end that covers its Lightning connector.
A more advanced Apple Pencil was released in 2018 alongside the third-generation iPad Pro. It charges wirelessly, magnetically connected to the side of any iPad with a USB-C port. Its one-piece design also comes with a touch-sensitive button that can perform shortcuts to speed up your workflow.
iPad Compatibility with Apple Pencil Models
Each Apple Pencil is compatible with different iPad models, so if an iPad supports the Apple Pencil (1st generation), it won't support the Apple Pencil (2nd generation), and vice versa. Basically, any iPad with USB-C supports the second-gen Apple Pencil, while any iPad with a Lightning port supports the first-gen Apple Pencil.
Apple Pencil (2nd Generation)
- iPad mini (6th generation)
- iPad Air (4th generation and later)
- iPad Pro 11-inch (1st generation and later)
- iPad Pro 12.9-inch (3rd generation and later)
Apple Pencil (1st Generation)
- iPad mini (5th generation)
- iPad (6th generation and later)
- iPad Air (3rd generation)
- iPad Pro 9.7-inch
- iPad Pro 10.5-inch
- iPad Pro 12.9-inch (1st and 2nd generation)
Tip 1: Enter Text by Handwriting
On iPadOS, you can use your Apple Pencil's Scribble feature to enter typed text in any text field on your iPad through handwriting recognition — all without having to open the on-screen keyboard. So you can write something by hand with your Apple Pencil, and your iPad will automatically convert as if you typed it out.
All text conversions are performed on your iPad, so anything you write out with your Apple Pencil stays private. It recognizes handwriting in English, Cantonese, Chinese, French, German, Italian, Japanese, Spanish, and Portuguese.*
Try using it to search in Safari, write a reminder, reply to a message, draft an email, and more. Anywhere you can input text, you can handwrite with Scribble. You don't even have to tap the field to start handwriting — just start on top of the text field, and it'll know what you're doing. And as long you don't pause when handwriting, you can continue writing with the Apple Pencil outside the text field.
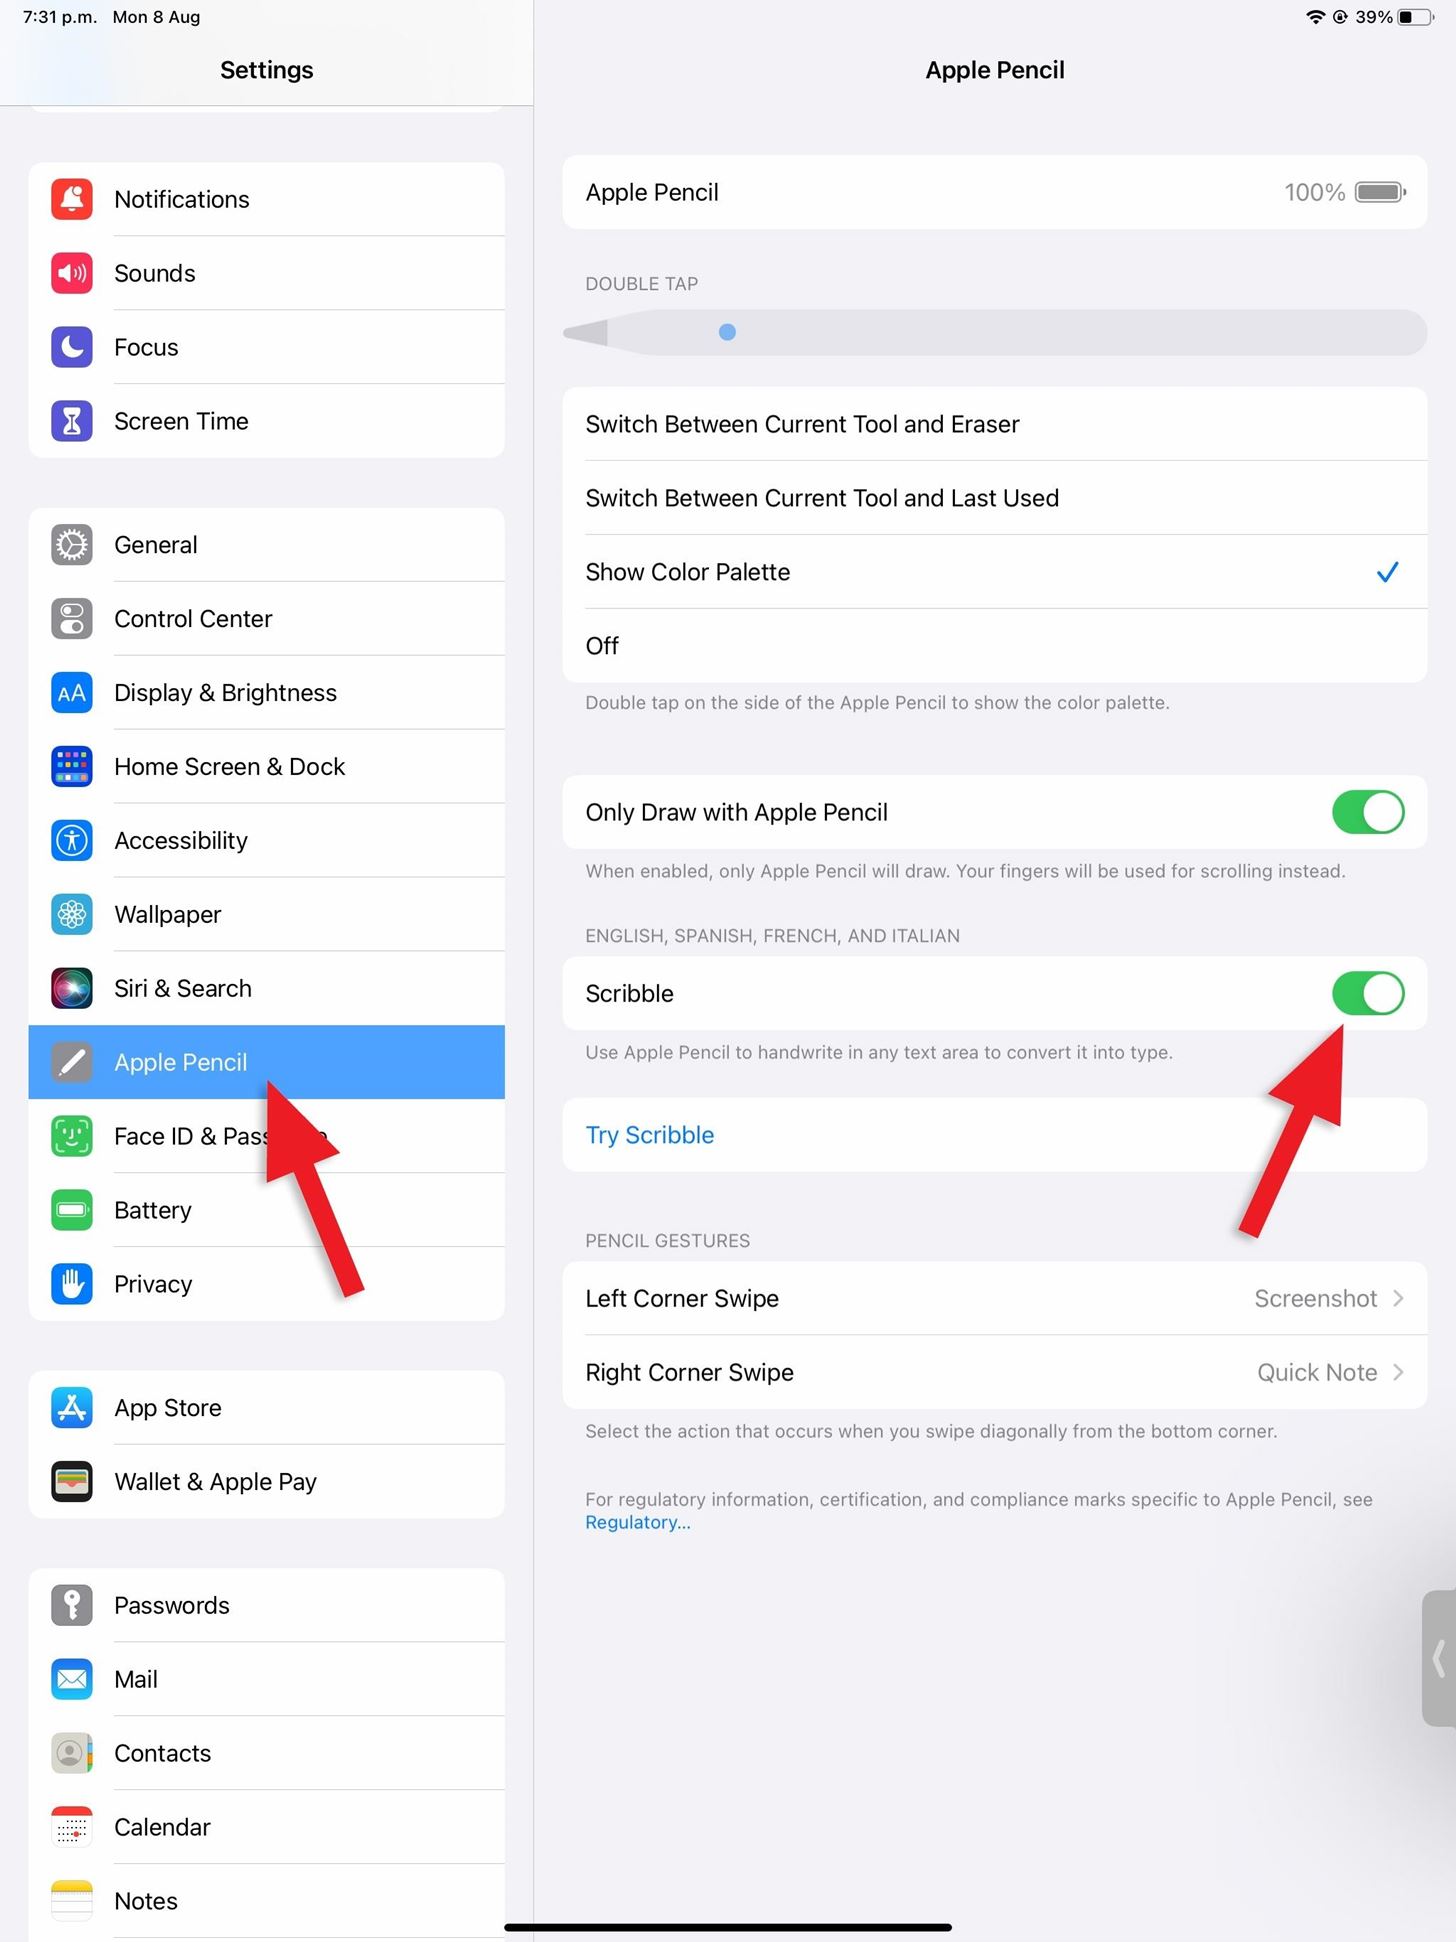
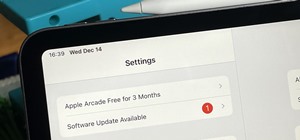
It should be working by default, but if not, go to Settings –> Apple Pencil, then make sure to toggle on the "Scribble" switch.
Tip 2: Select and Edit Converted Text
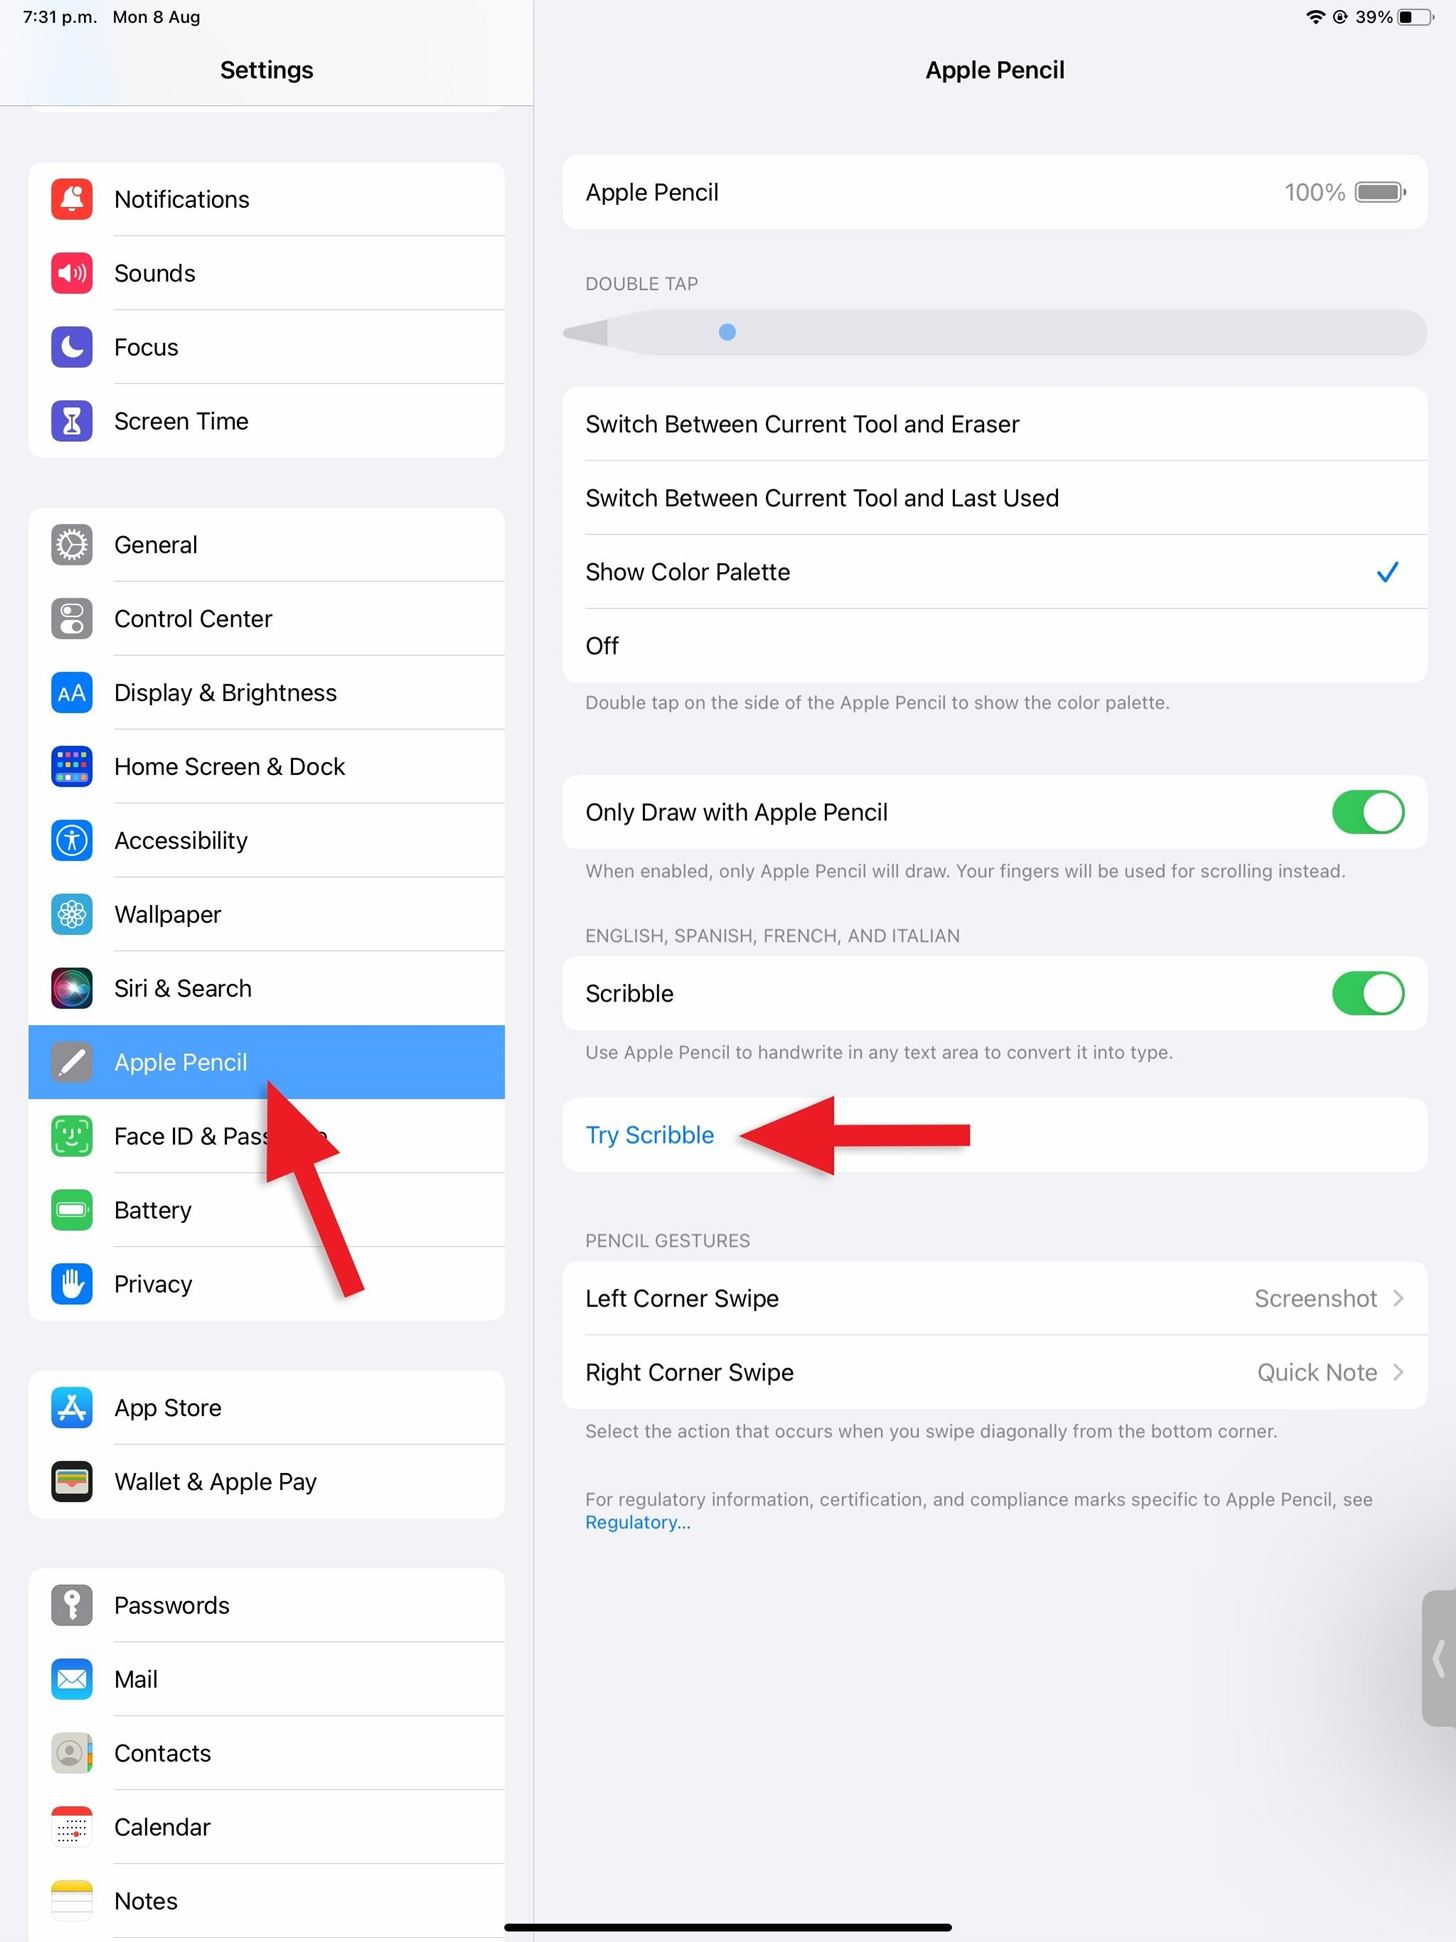
You're bound to make mistakes when using Scribble with your Apple Pencil to convert handwriting to typed text, but there are some easy tricks to fixing any errors. To try some of the ones listed below, go to Settings –> Apple Pencil, then tap "Try Scribble."
Selecting Text:
- Draw a circle around a word, number, phrase, sentence, paragraph, or an entire page to select it.
- Drag a line across a word, number, phrase, sentence, paragraph, or an entire page to select it.
- Underline a word, number, phrase, or an entire line to select it.
- Double-tap a word or number to select it.
- Double-tap and hold a word or number, then drag in either direction to select more text.
- Triple-tap a word or number to select its entire paragraph.
- Drag the ends of selected text to change the selection.
Editing Text:
- Scratch out a word, number, phrase, sentence, paragraph, or an entire page horizontally or vertically to delete it.
- Tap and hold a text area to insert additional text, and write what you need in the open space before it disappears.
- Tap a text area to insert the cursor and write what you need.
- Draw a vertical line between characters to join or separate them.
Tip 3: Use the Double-Tap Shortcut
The second-generation Apple Pencil has a hidden "button" on its flat side, near the tip, which you can double-tap to perform a specific action. By default, the double-tap shortcut will switch between the current tool and the eraser, but you can go to Settings –> Apple Pencil to choose any of these options under the Double Tap header:
- Switch Between Current Tool and Eraser
- Switch Between Current Tool and Last Used
- Show Color Palette
- Off
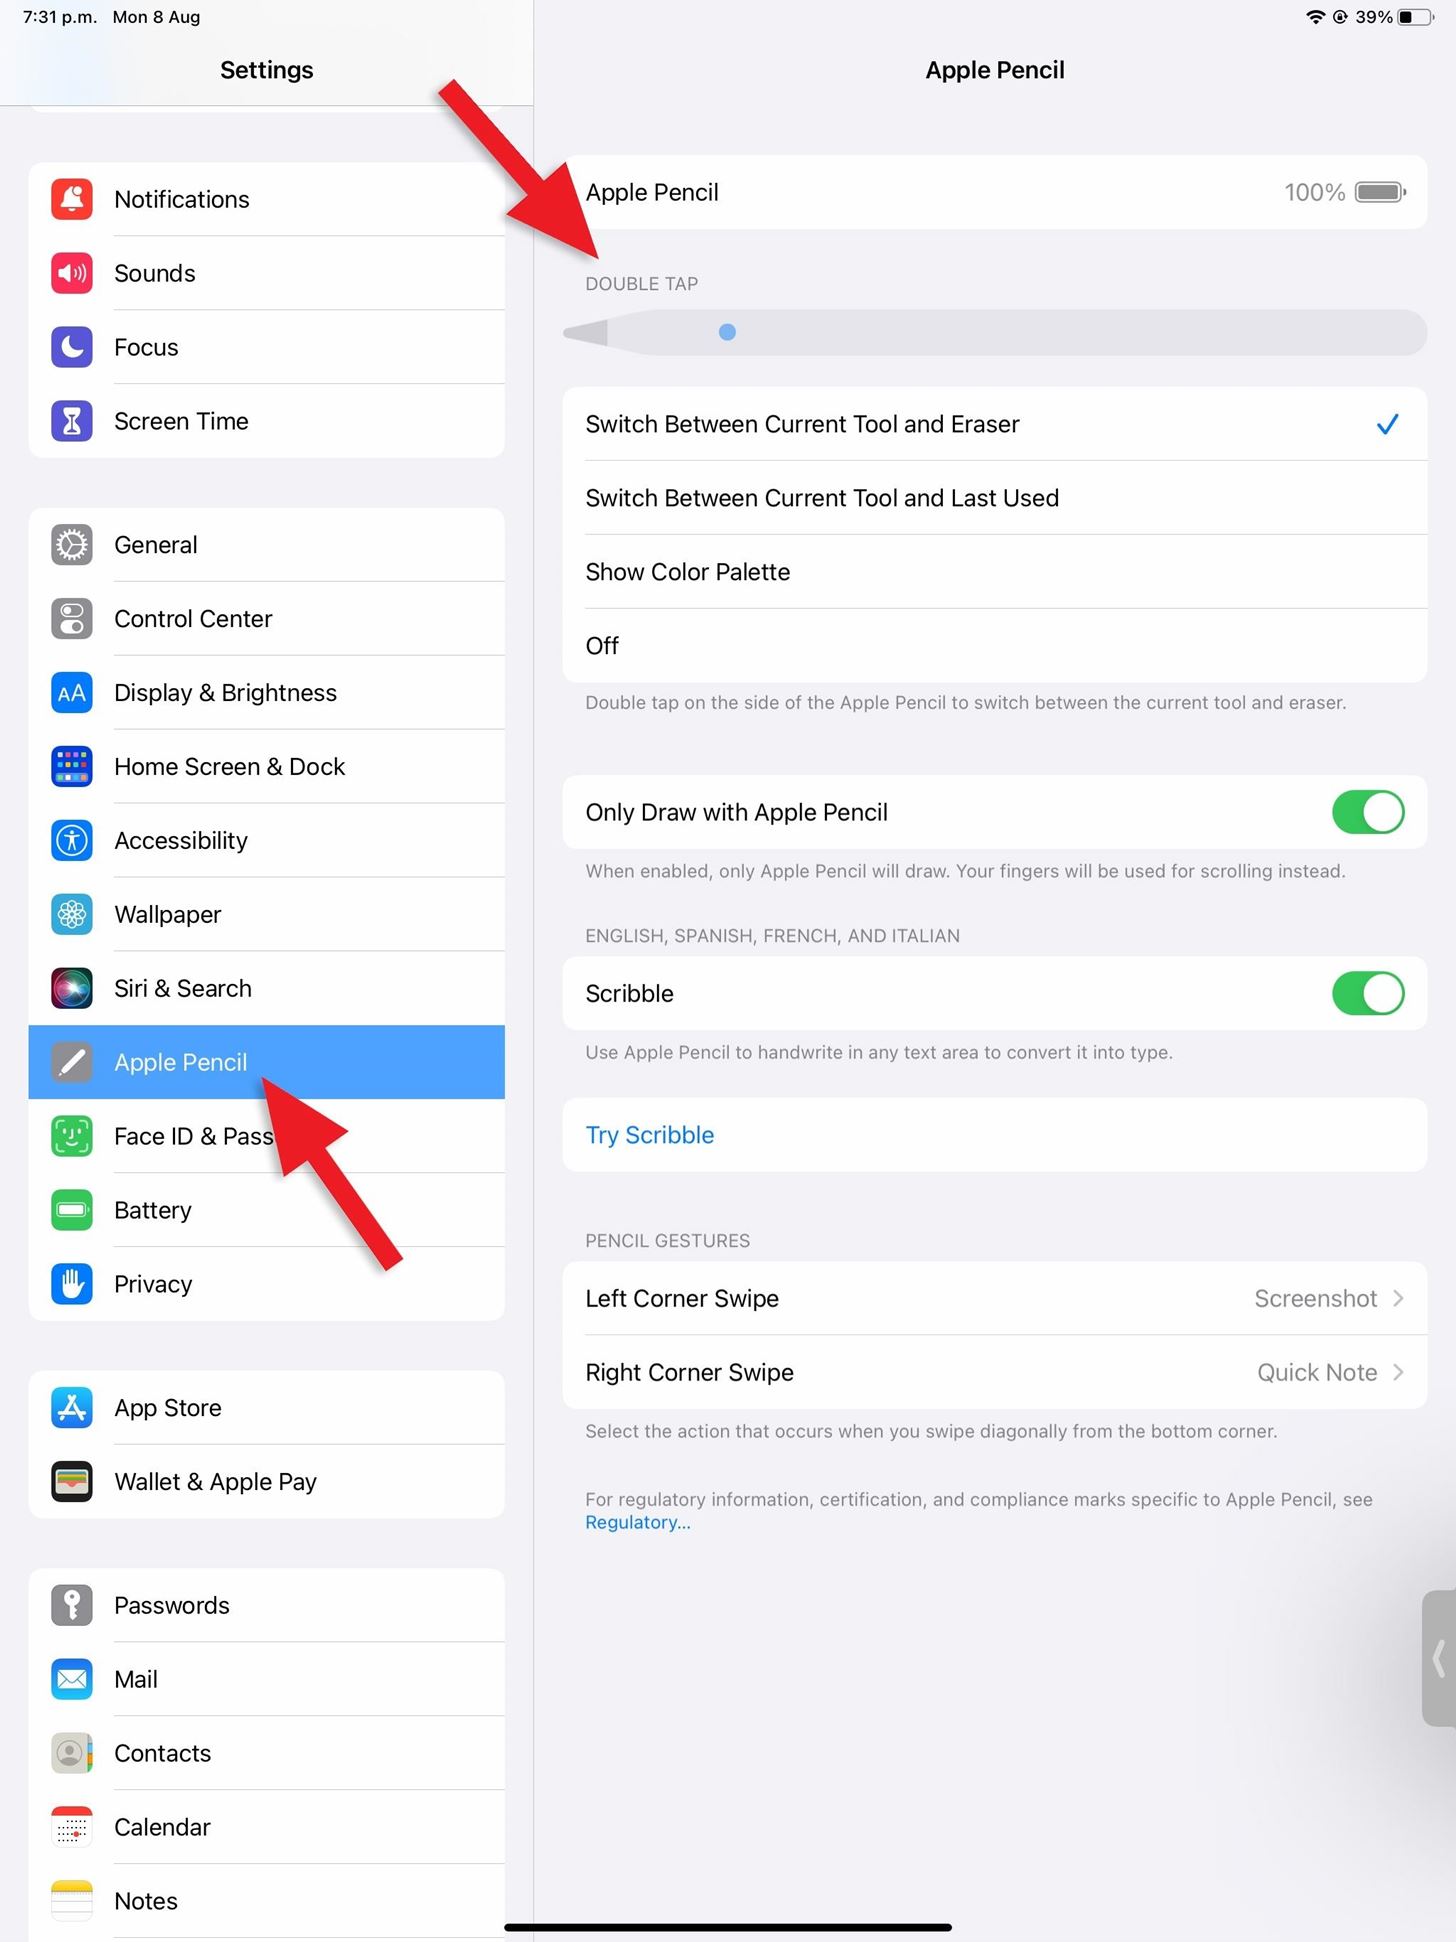
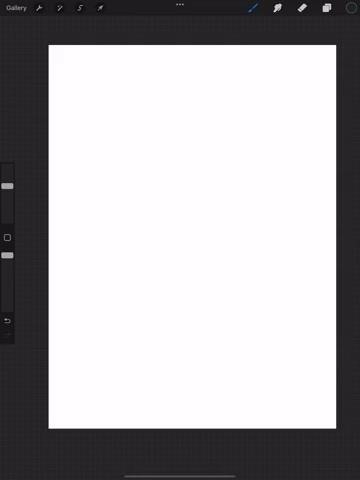
The double-tap shortcut only works in supported apps. It works excellent in Notes, and you can use it anywhere you draw or use markup, like in Mail, Photos, Files, etc. Many third-party apps also support it, such as Procreate.
Tip 4: Use the Corner Swipe Gestures
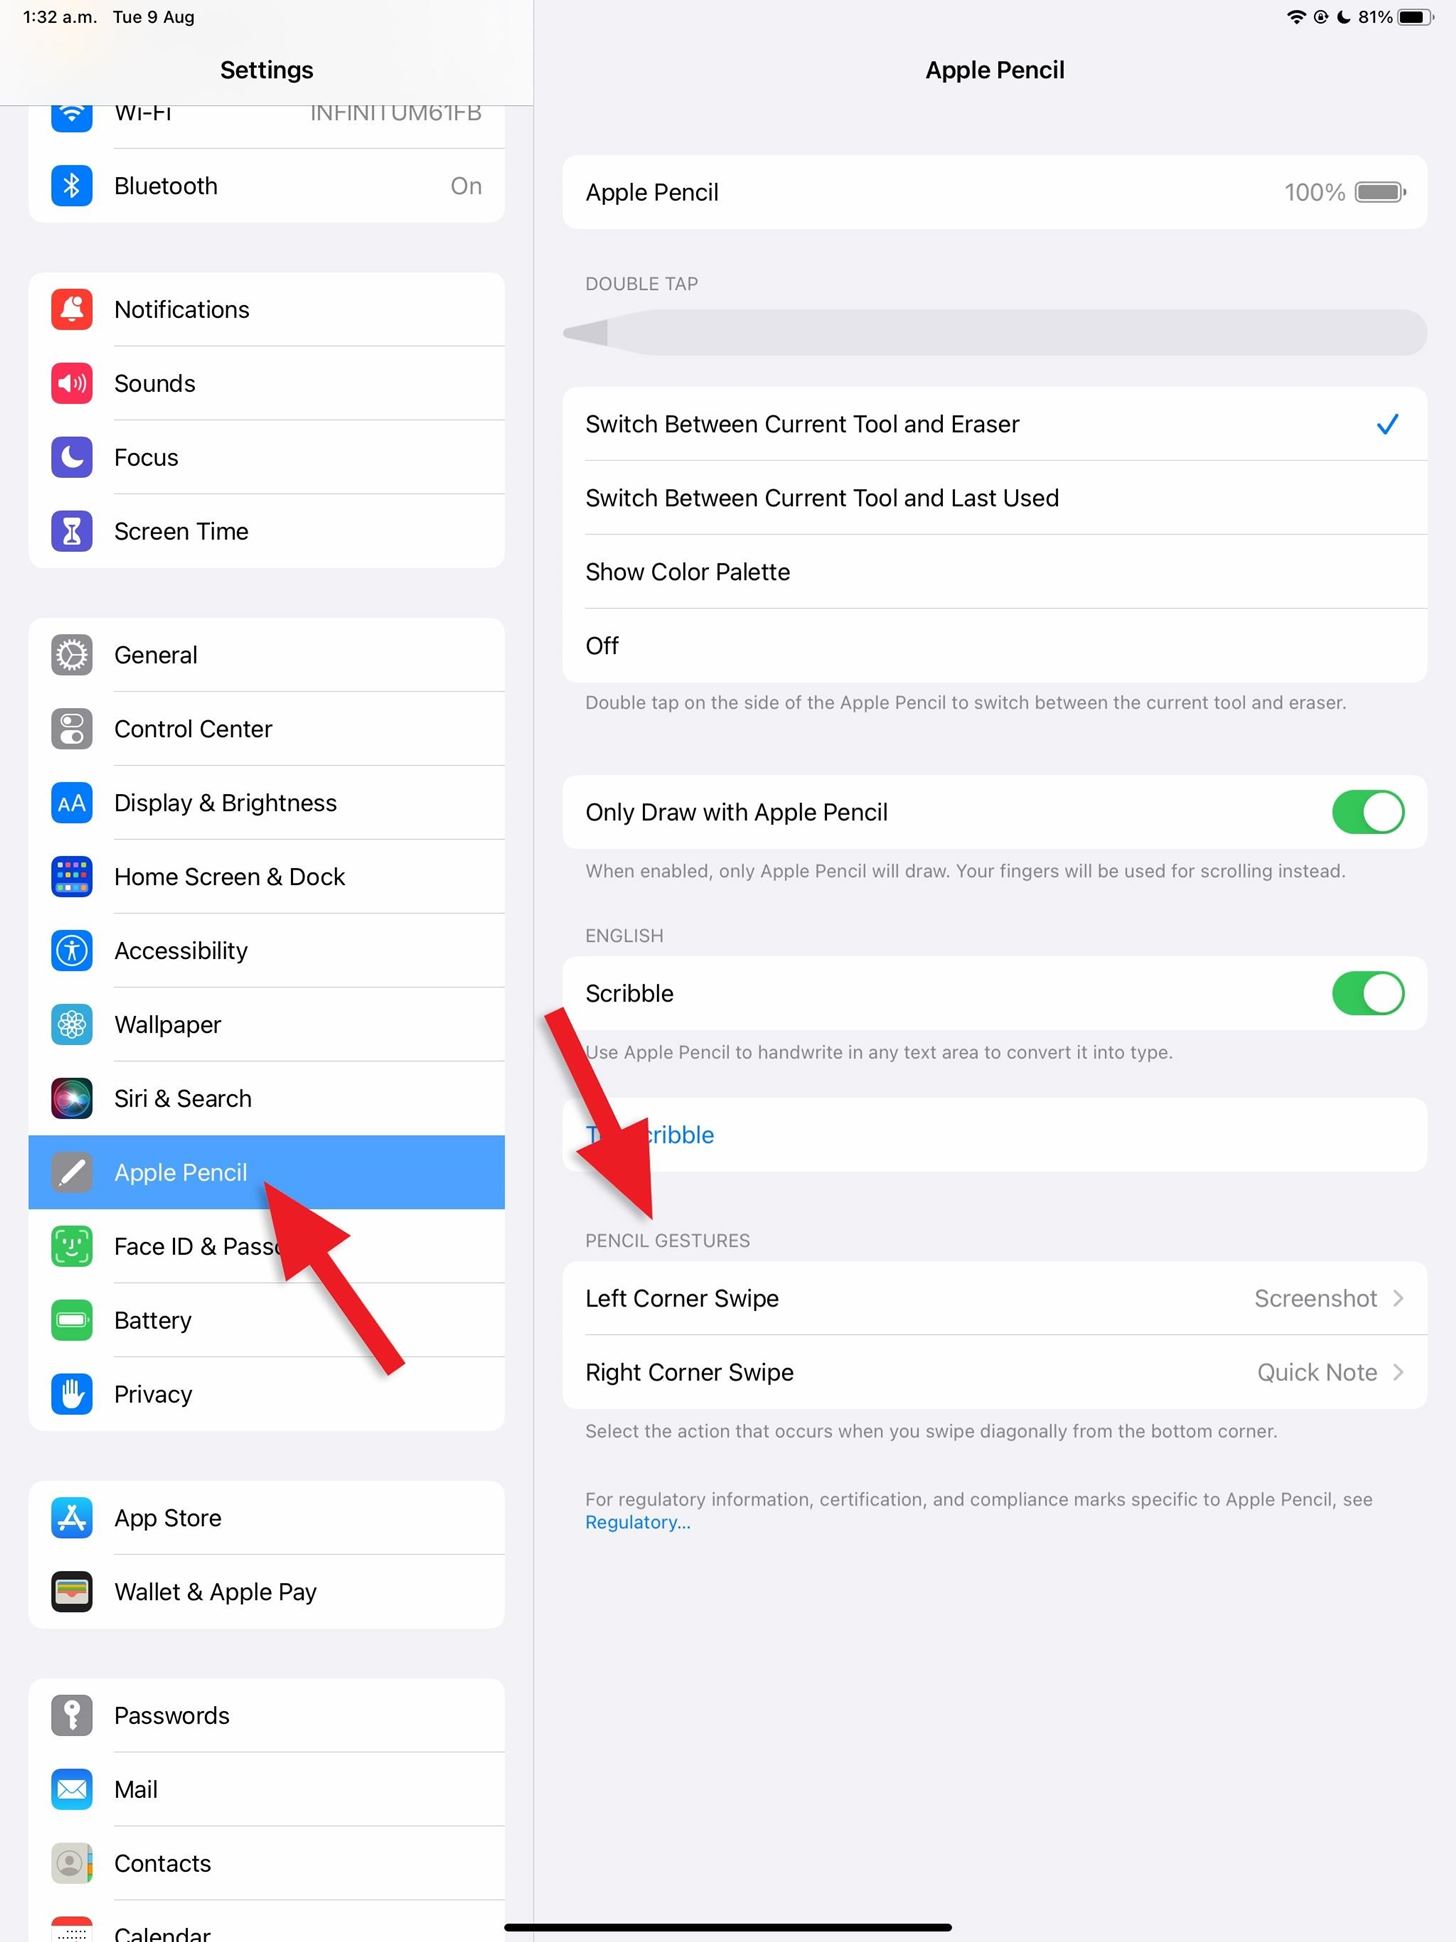
On your iPad, you can swipe diagonally with your Apple Pencil from the bottom left or right corner of the display to perform a specific action. By default, swiping in from the bottom left will take a screenshot, while swiping in from the bottom right will open a Quick Note.
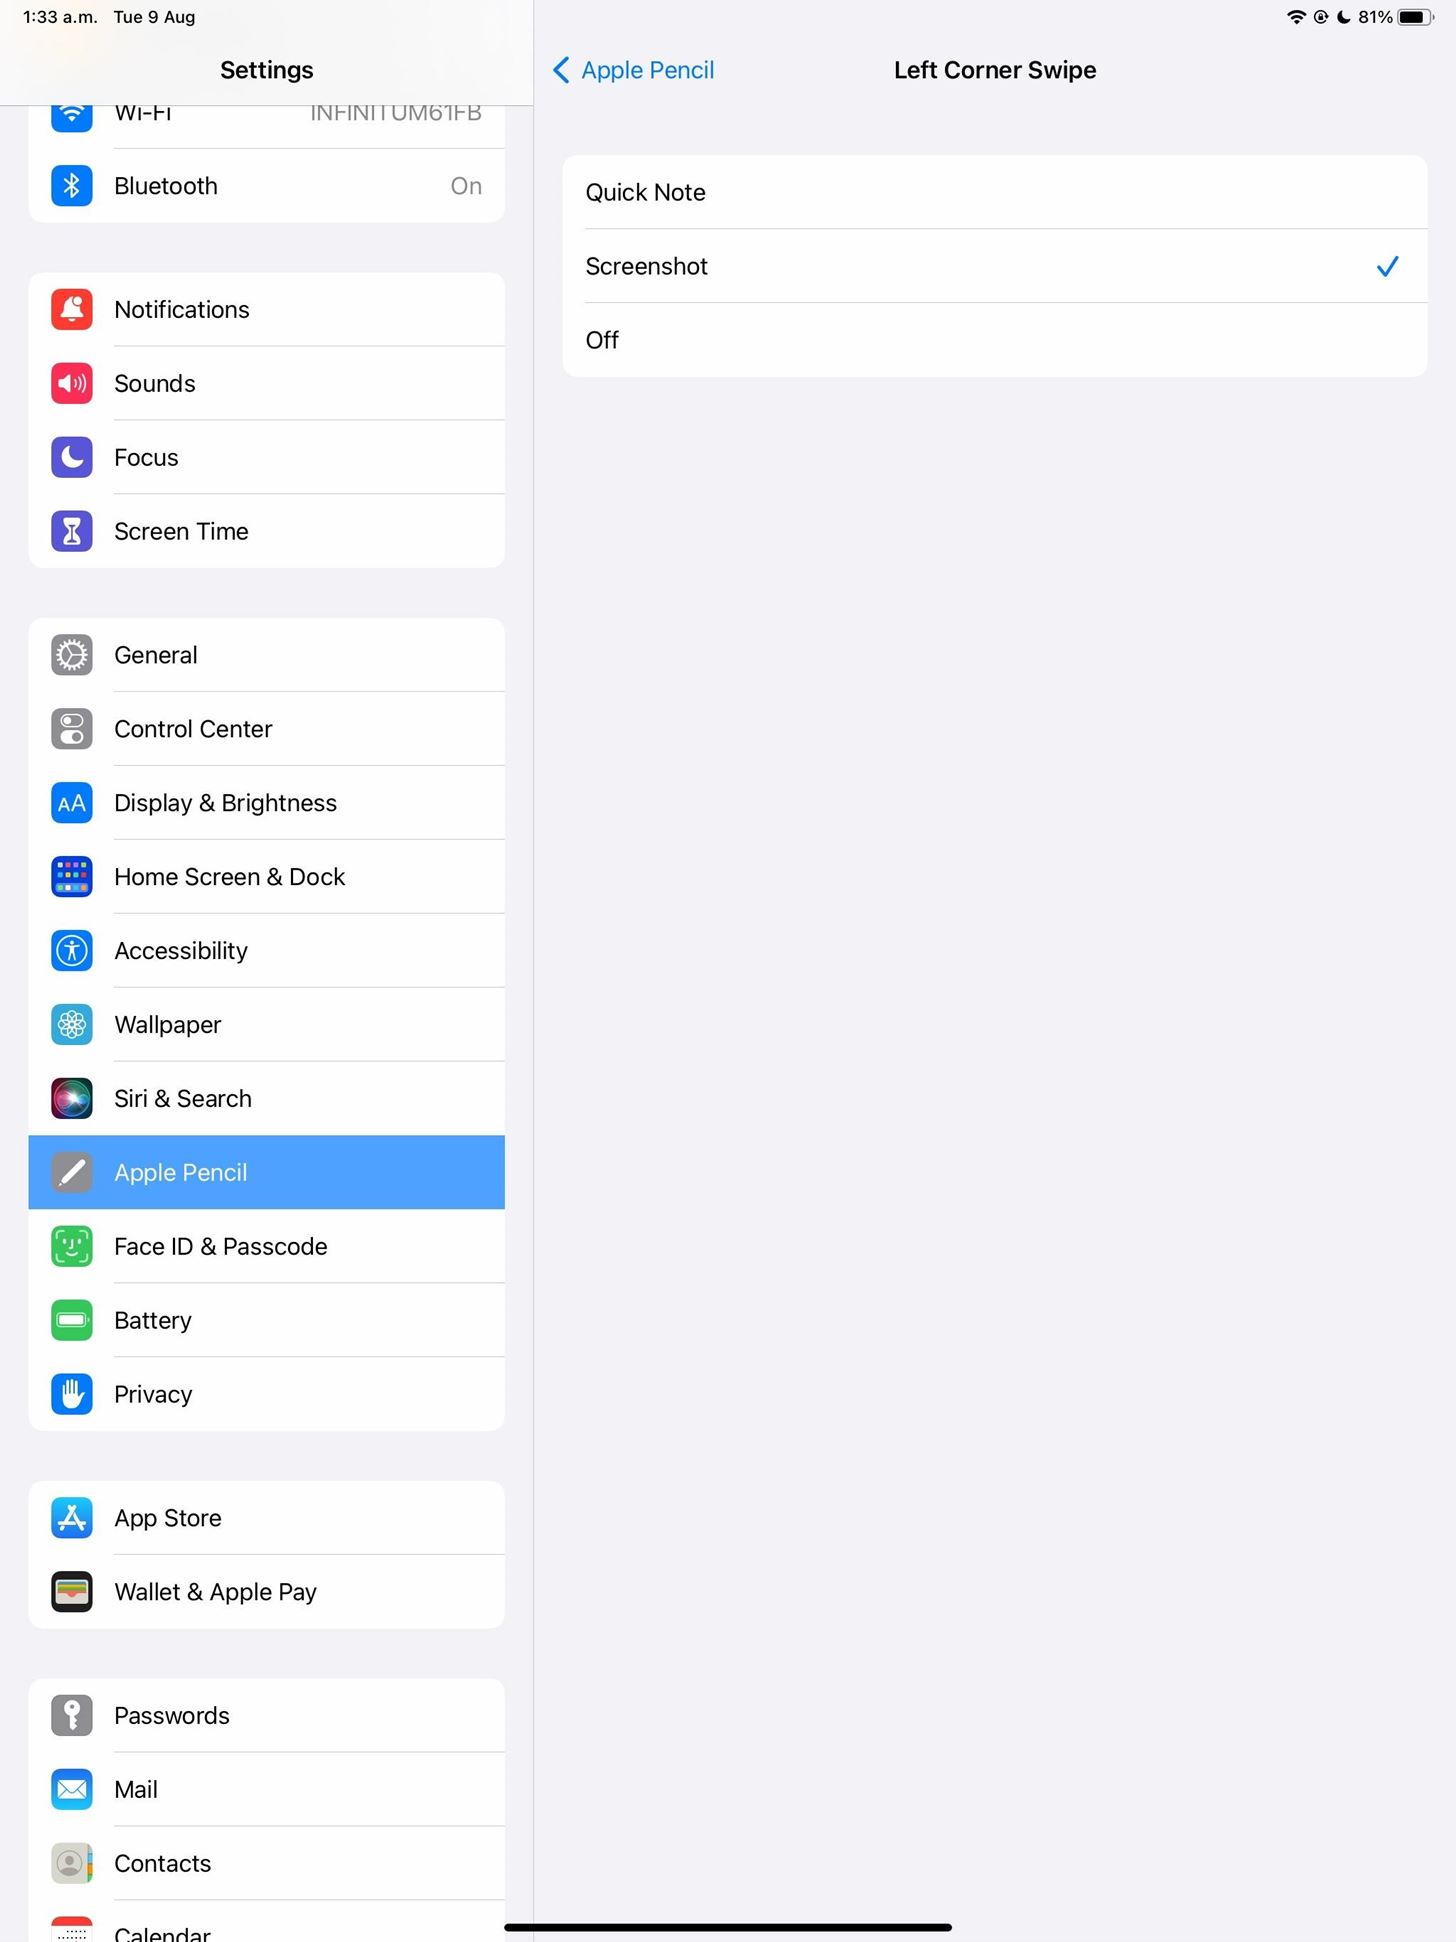
You can go to Settings –> Apple Pencil, then choose a different action for the "Left Corner Swipe" or "Right Corner Swipe" under the Pencil Gestures header.
Unfortunately, the only actions available are "Screenshot" and "Quick Note," so the most you can do here is switch the actions around or make either trigger do the same thing. You can also disable the triggers entirely if you find yourself triggering them accidentally more than you'd like.
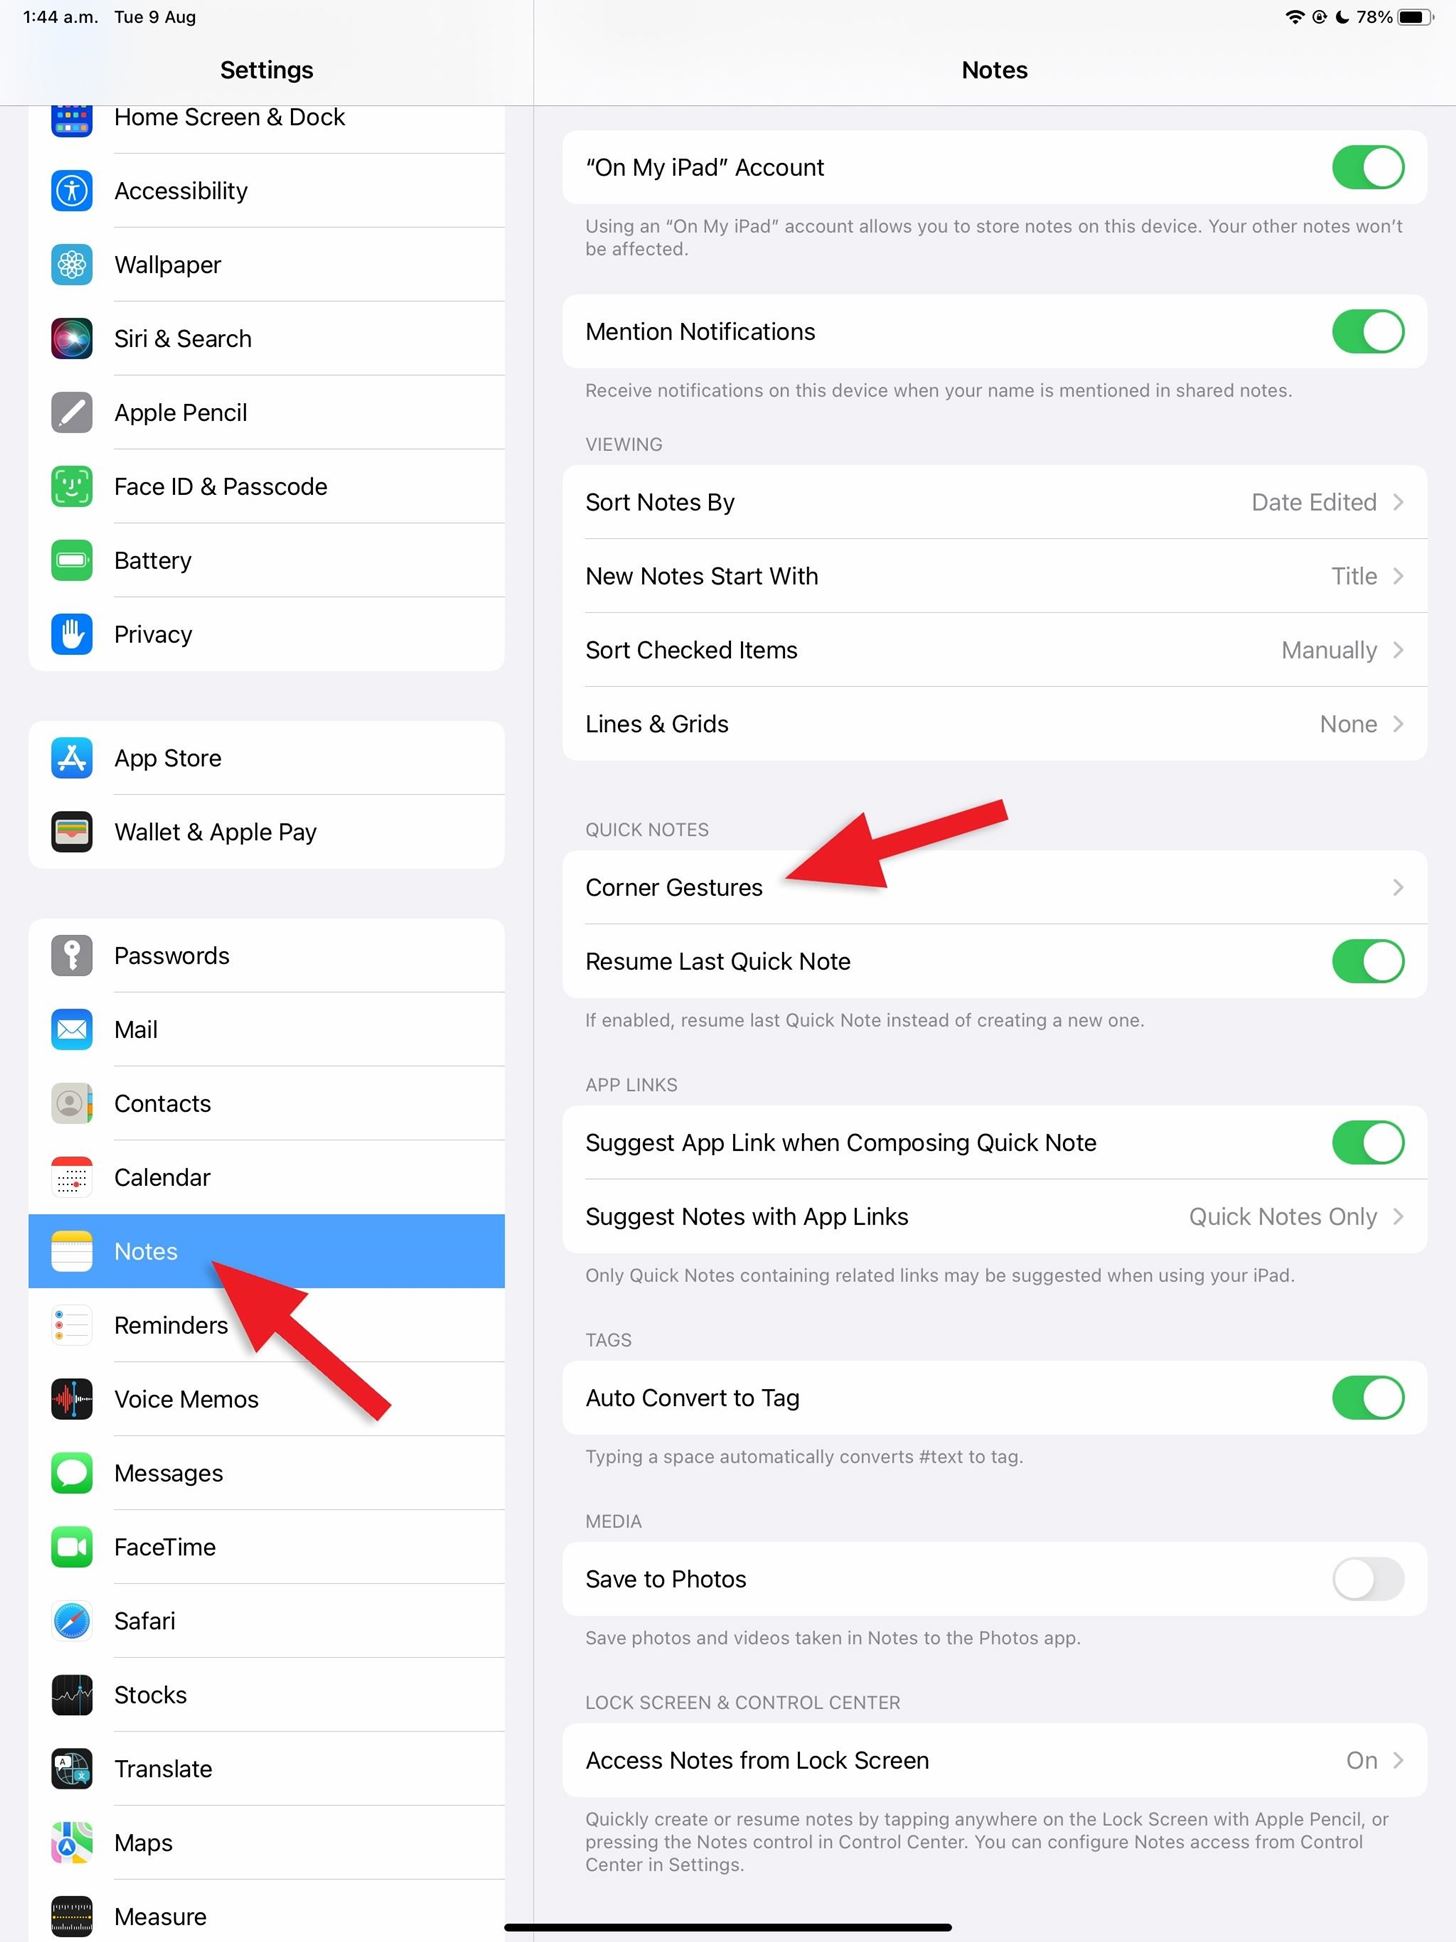
Tip 5: Configure the Quick Note Gesture
If you like the Quick Note corner-swipe gesture but don't like how it will resume the last Quick Note instead of starting a new one, you can fix that via Settings –> Notes. In the Quick Notes section, toggle the "Resume Last Quick Note" switch on or off as desired.
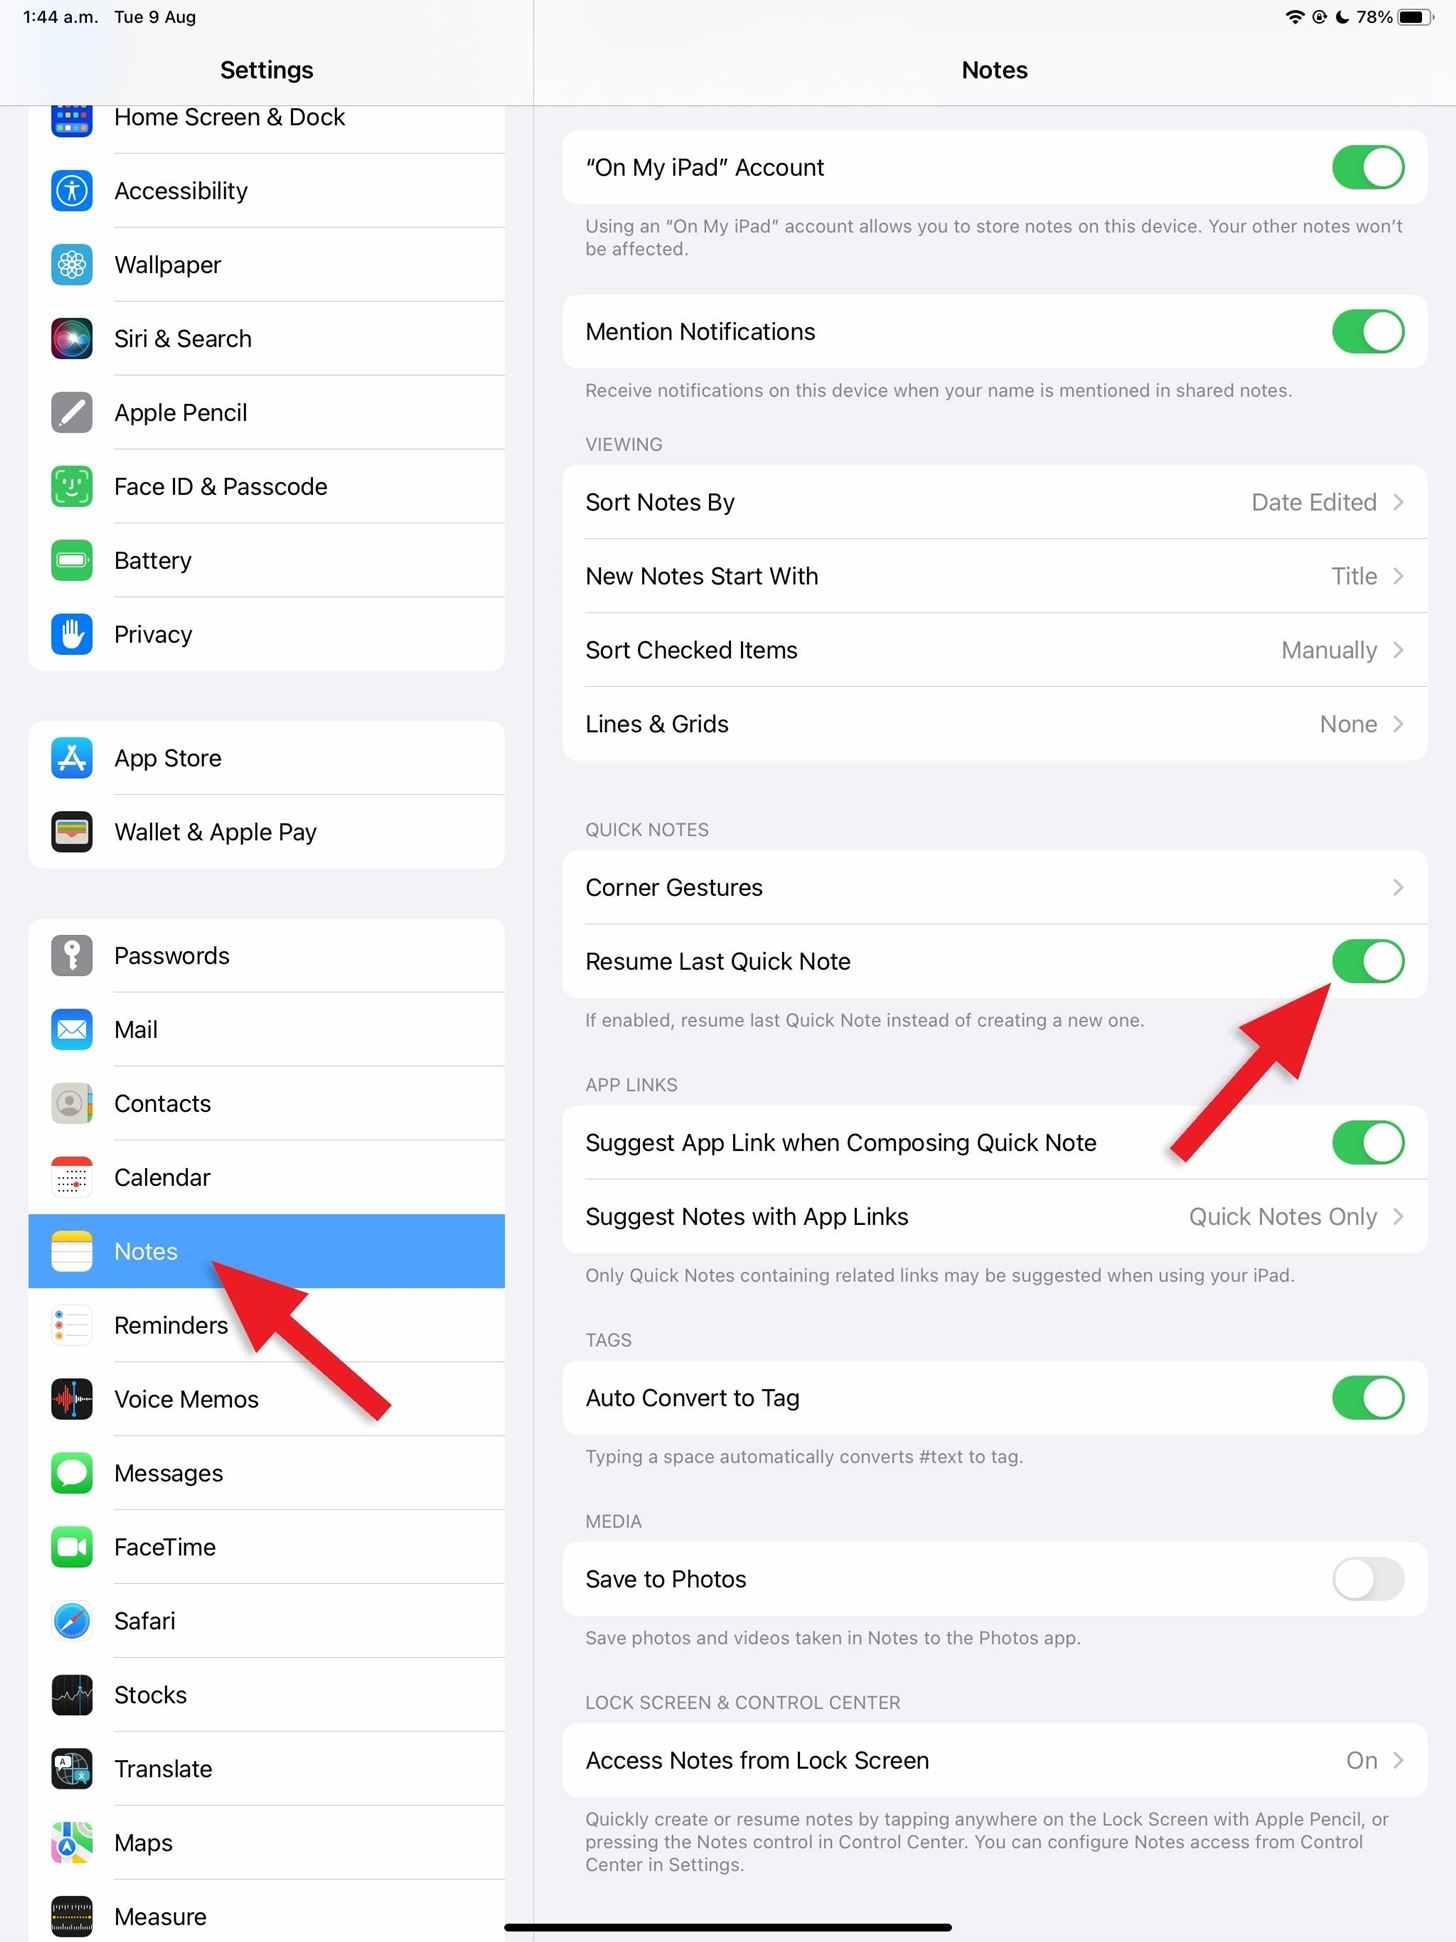
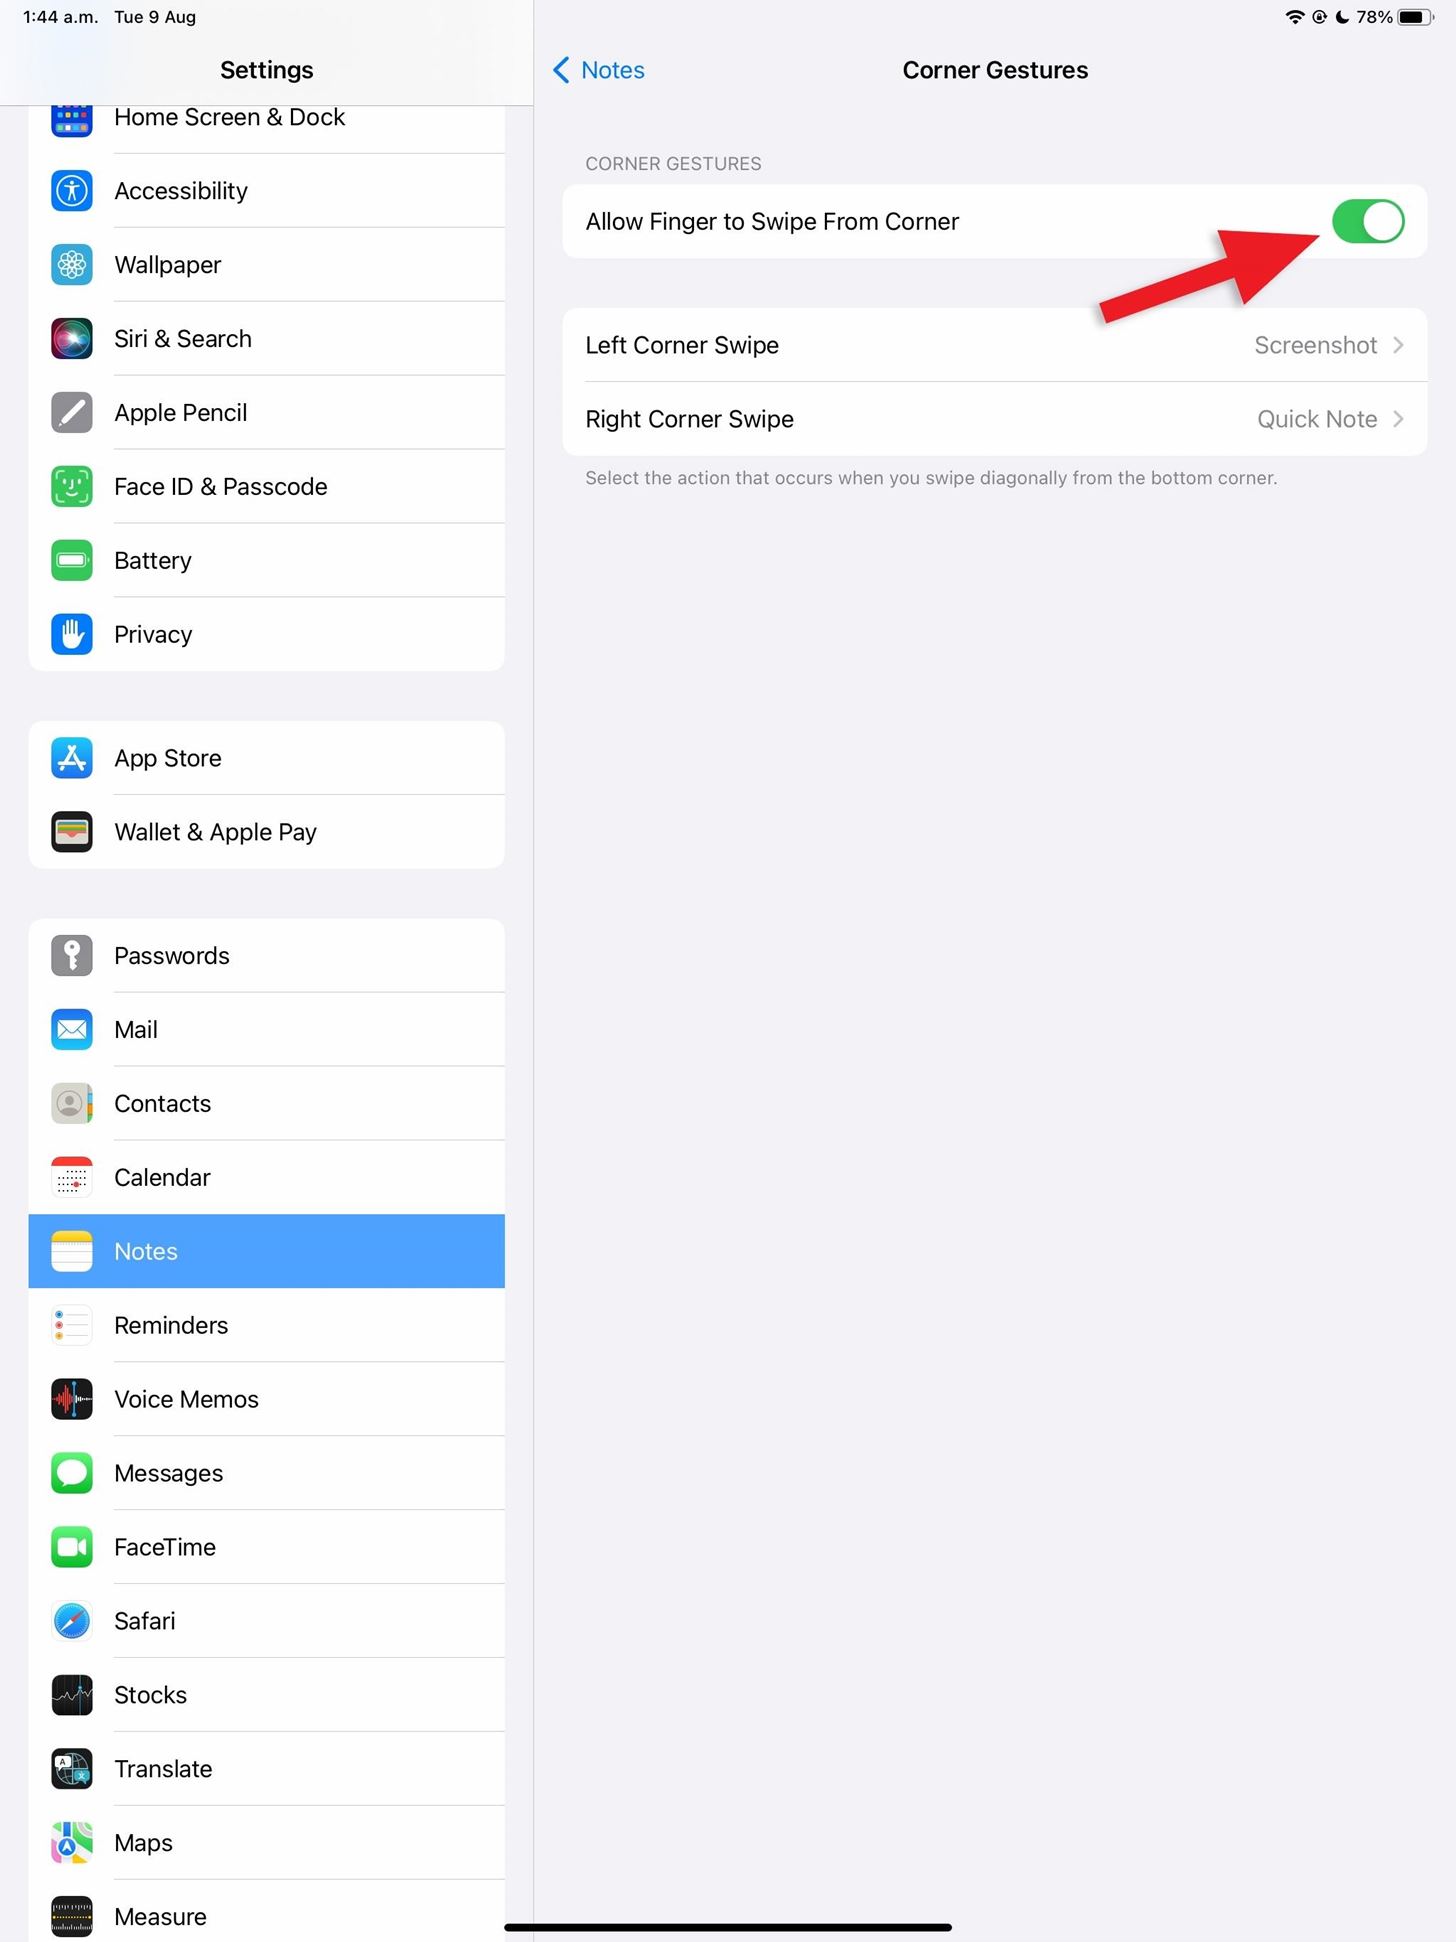
There's also a "Corner Gestures" menu you can open here that lets you switch between Screenshot, Quick Note, or Off actions, just like the menu in Settings –> Apple Pencil. The only difference is that you can also toggle on or off the "Allow Finger to Swipe From Corner" switch. By default, it should be enabled, but you can disable it if you want to keep it an Apple Pencil-only feature.
Tip 6: Auto-Convert Handwriting in Notes to Text
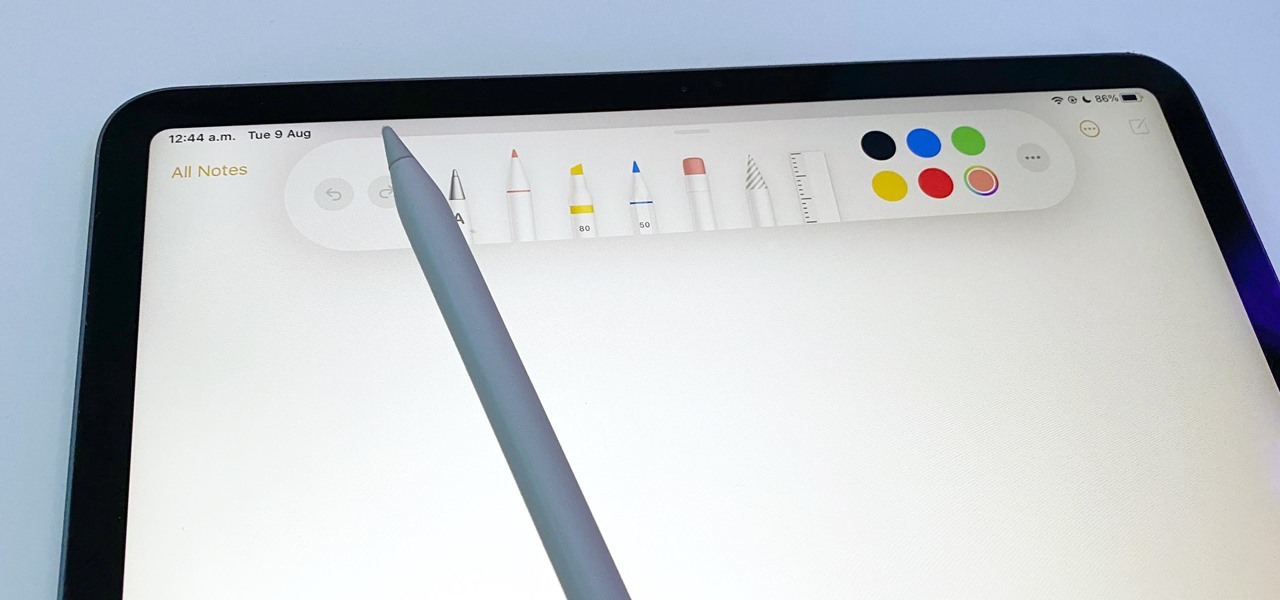
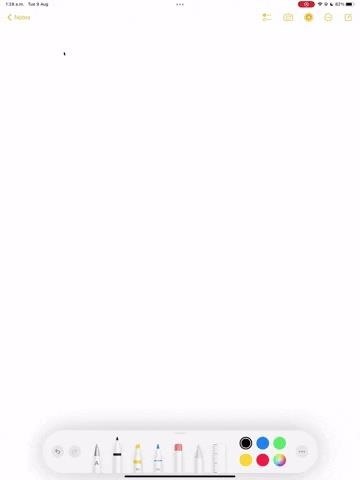
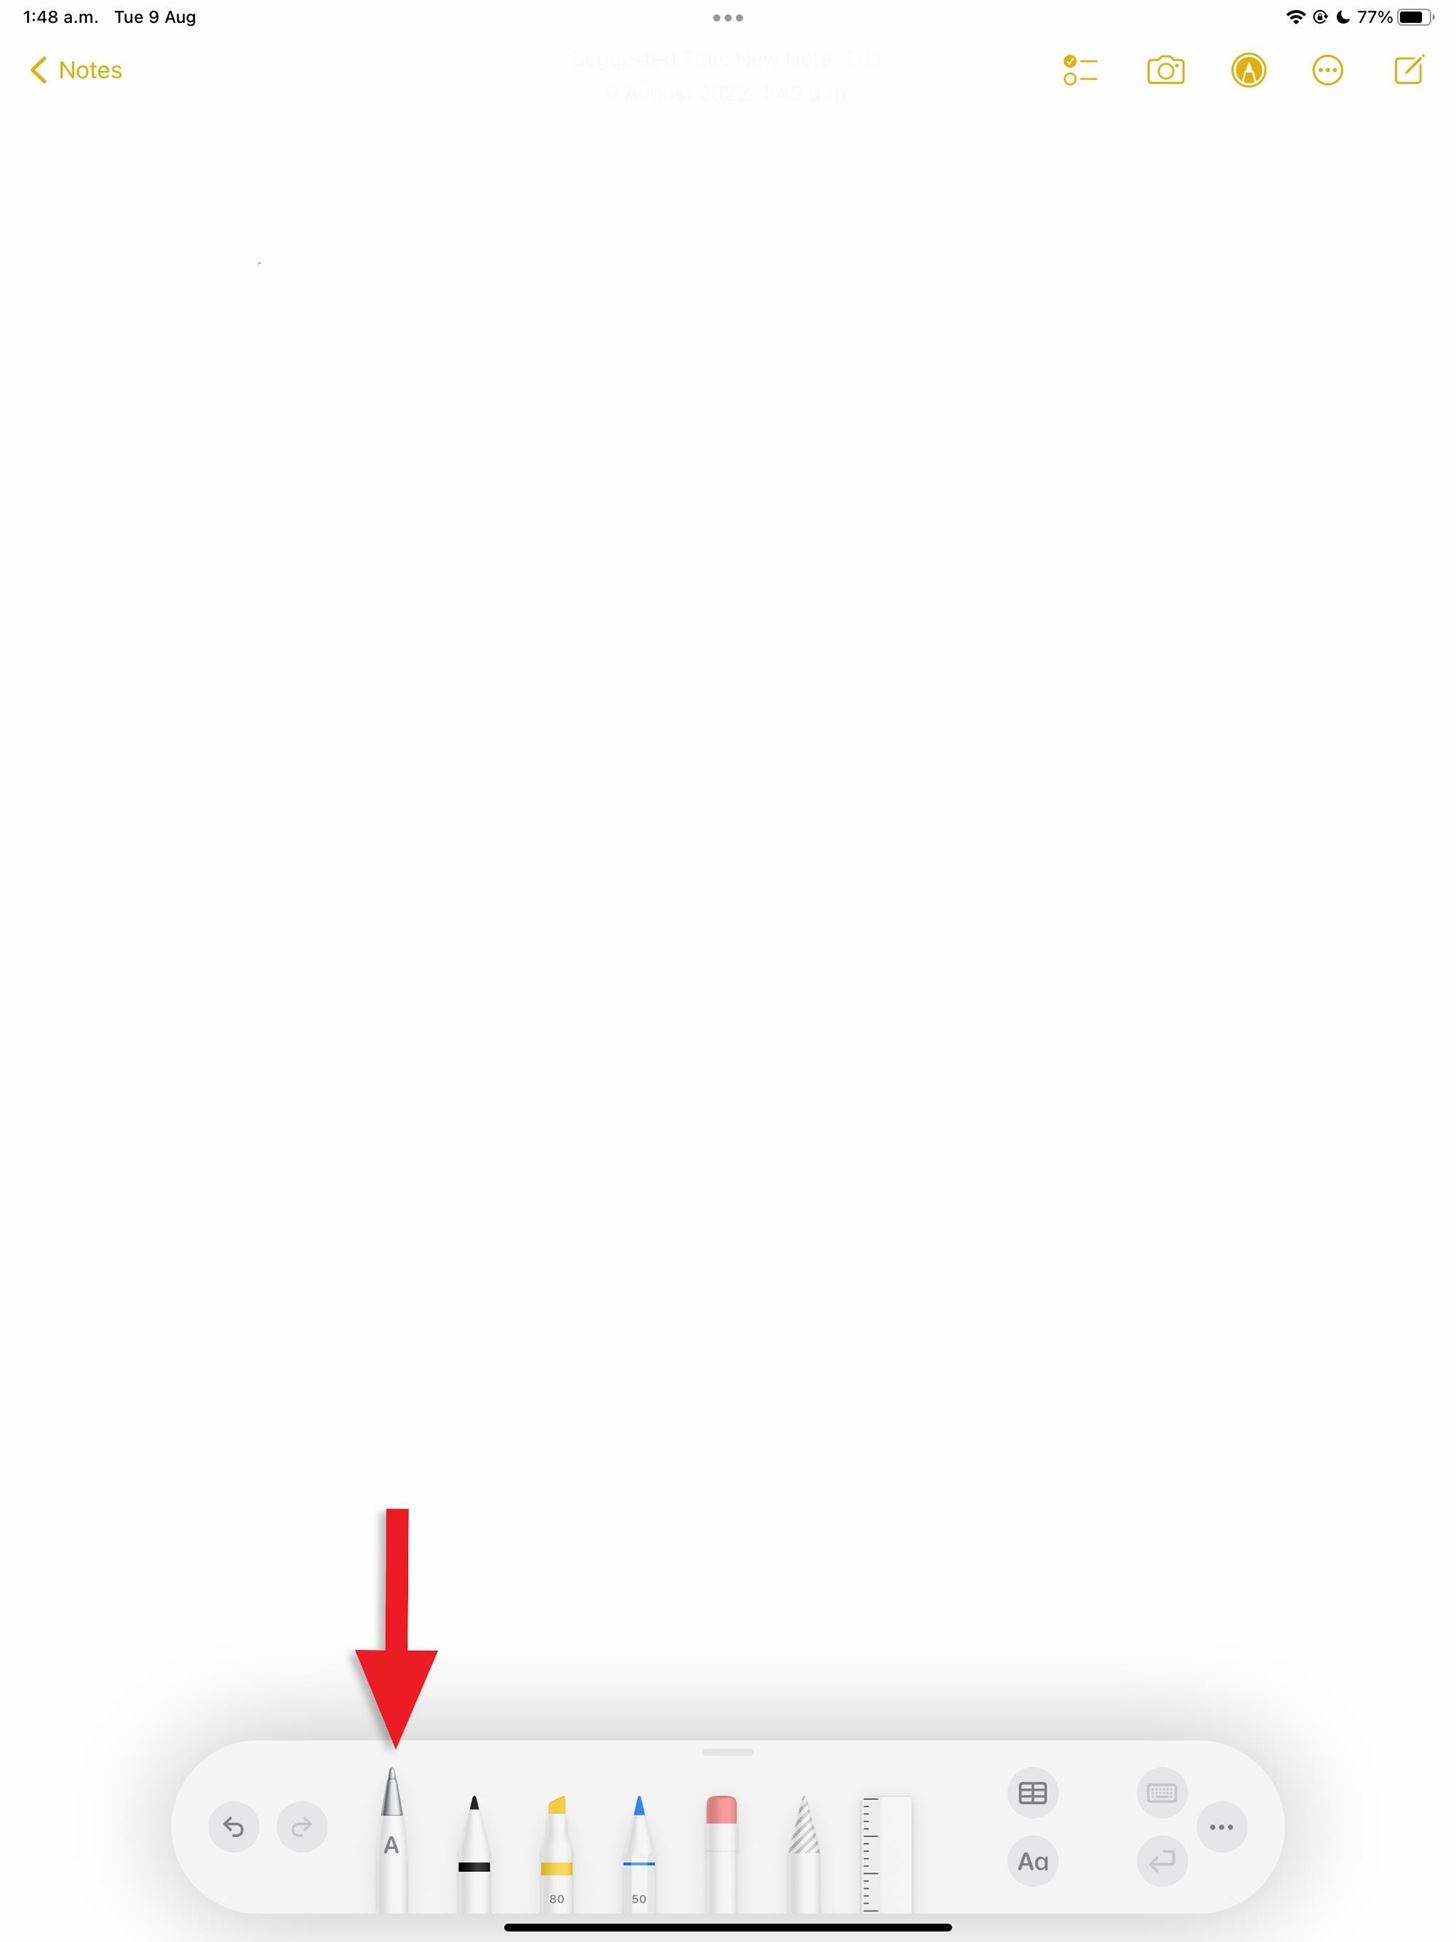
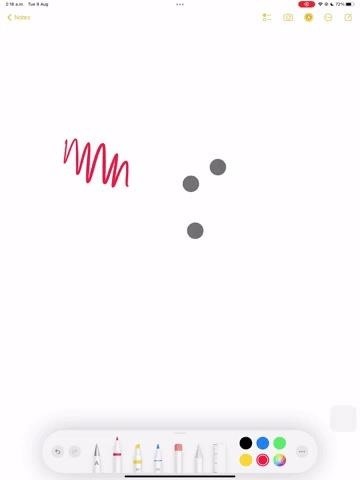
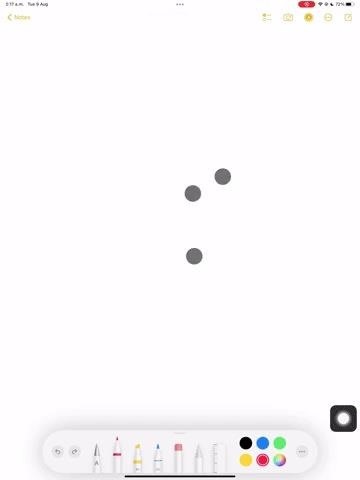
The drawing interface opens instead of the standard Scribble tool when writing a note in the Notes app. If you start handwriting right away, you may notice that it's not auto-converting to typed text. That's because you have to ensure that the correct pen is selected from the Markup tools.
If you don't see the Markup toolbar, tap the Markup icon at the top of the note. When it opens, make sure the pen with the "A" on it is selected. Then, whatever you write in the drawing or sketch will convert to typed text.
Tip 7: Convert Already Handwritten Notes to Text
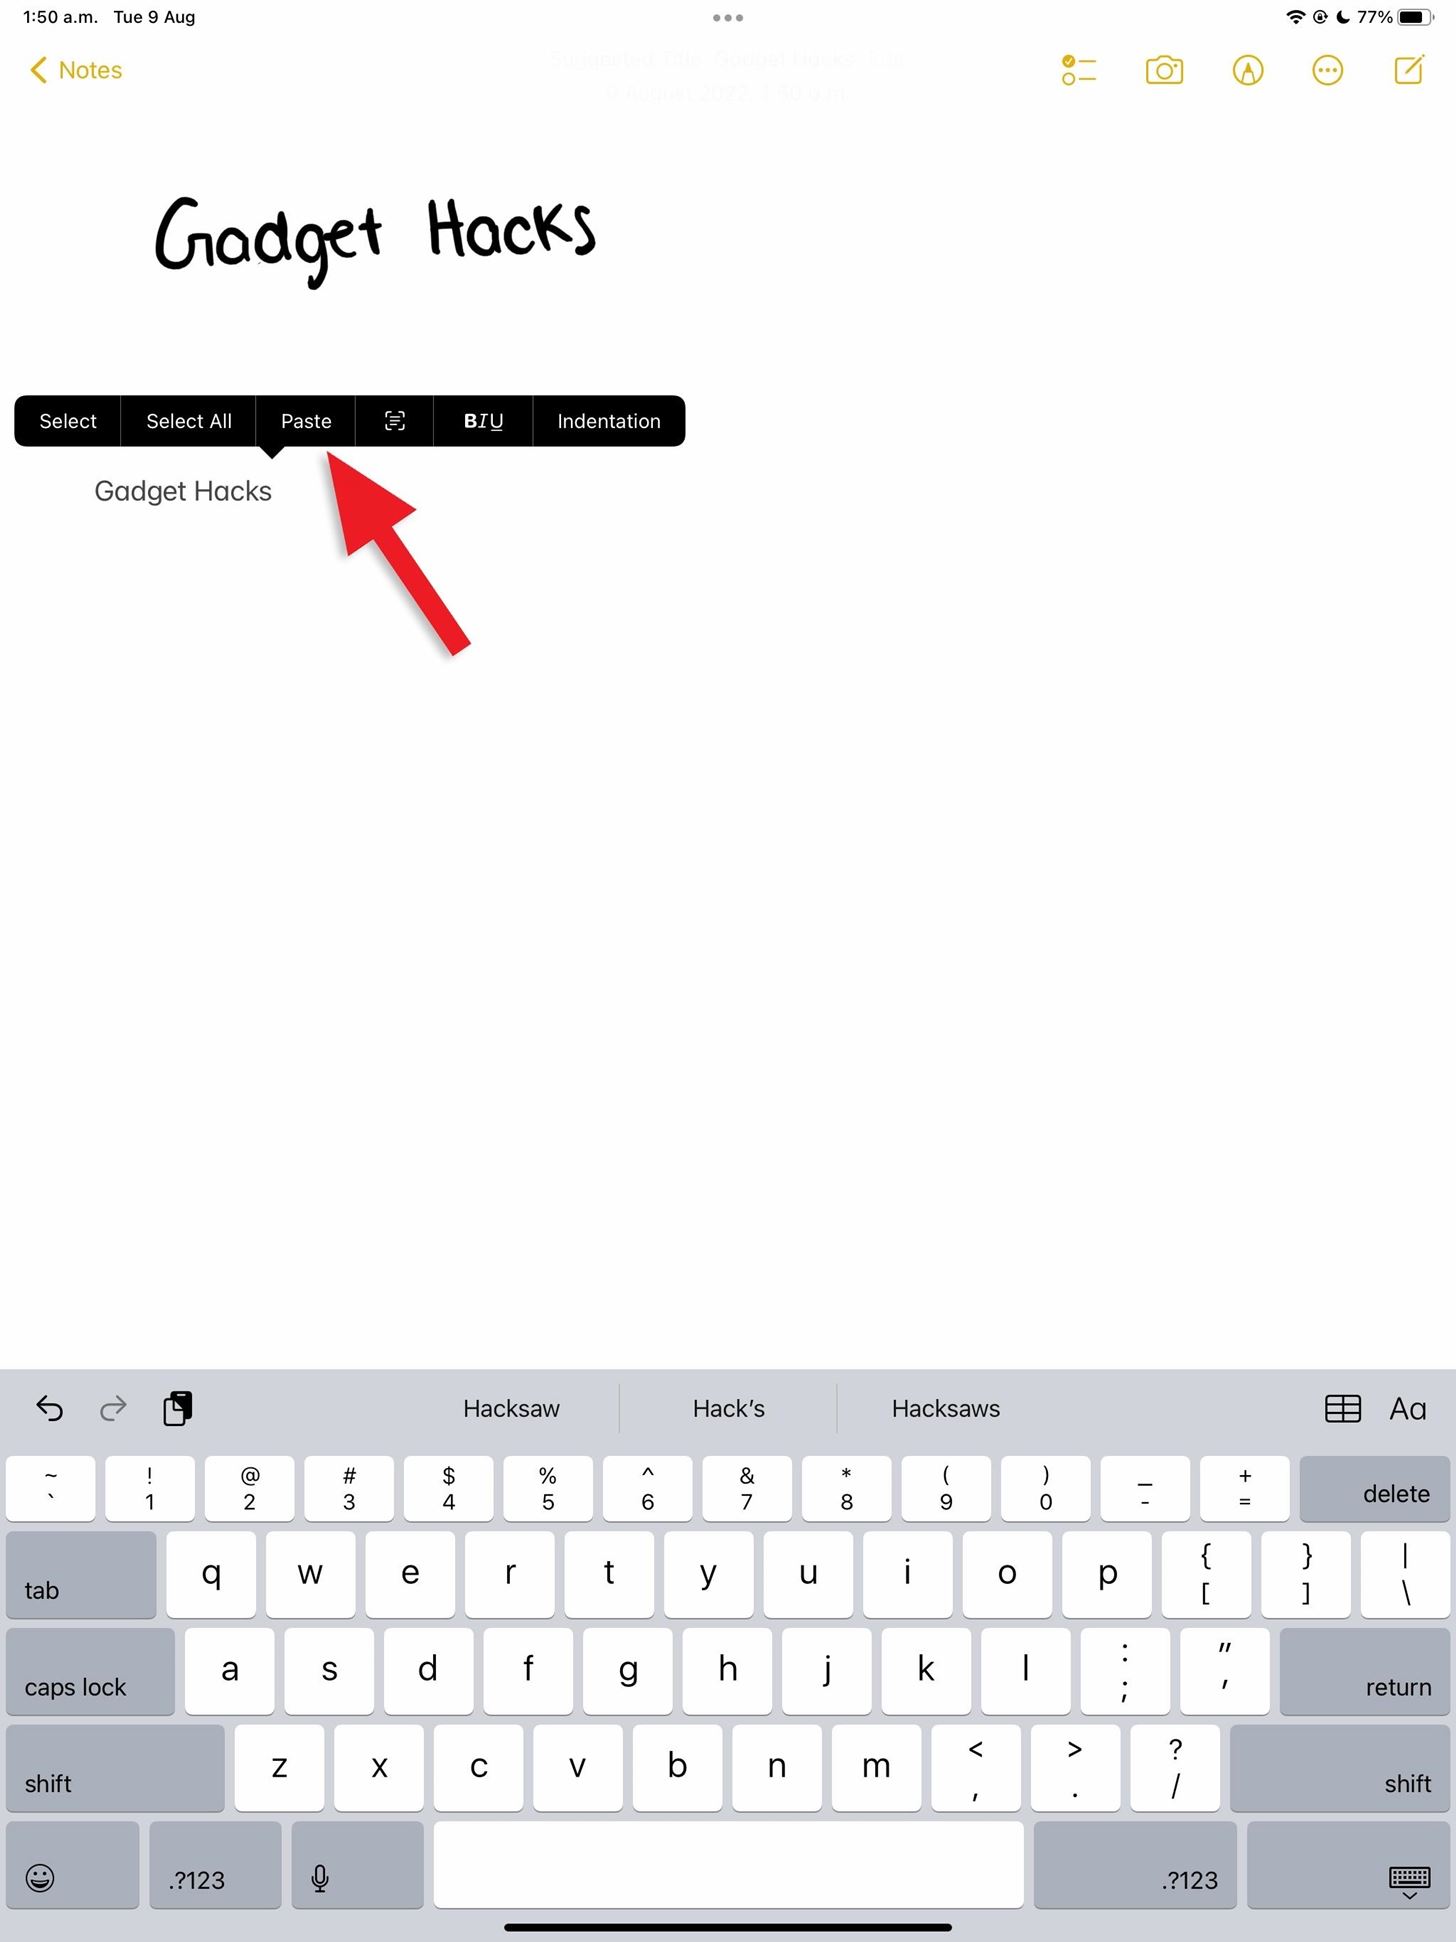
If you already have a lot of handwritten notes in the Notes app and didn't realize you could have your Apple Pencil auto-convert handwriting to typed text, you can change those old notes after the fact. First, select the word, sentence, or paragraph you want to convert. To do so, make sure the Markup toolbar is closed, then:
- Double-tap a word or number with a finger to select it, then drag the selector ends to expand the selection if needed.
- Long-press a word or number with a finger to select it, then drag the selector ends to expand the selection if needed.
- Double-tap and hold a word or number with a finger, then drag your finger to select other text on the screen. This lets you skip certain words in a line, sentence, or paragraph.
- Triple-tap a word or number to select the entire line.
- Quadruple-tap a word or number to select the entire paragraph.
- Drag the ends of selected text to change the selection, if needed.
If the contextual menu doesn't appear right away, tap the selection to force it up, then tap "Copy as Text," which will copy all of the handwritten text as typed text to your clipboard. Finally, paste it wherever you want, and it will show as typed text.

Tip 8: Interact with Underlined Handwritten Data
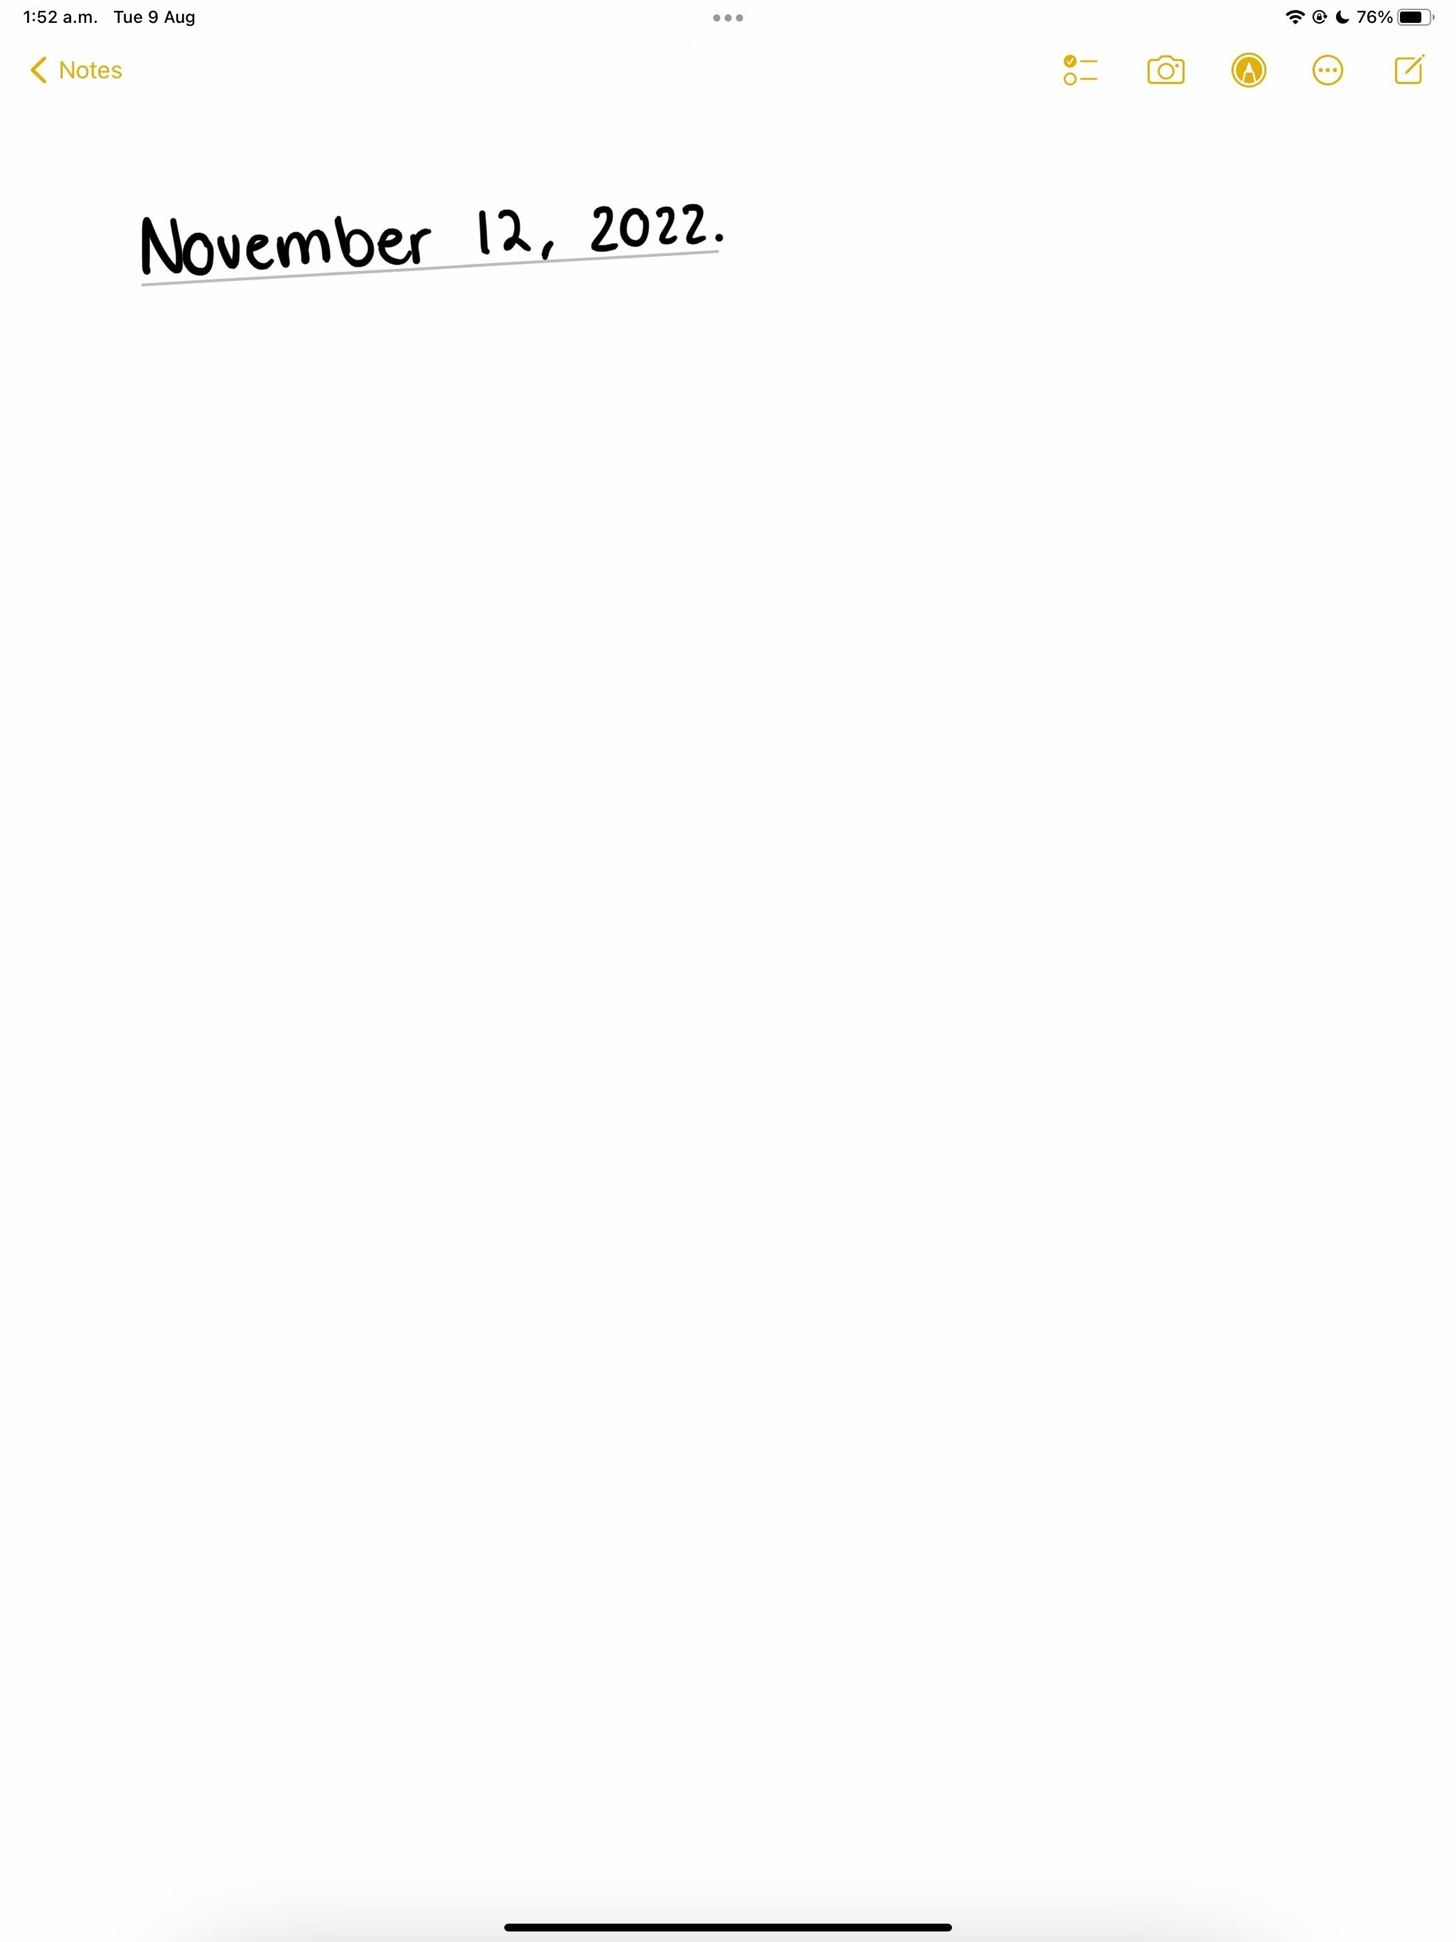
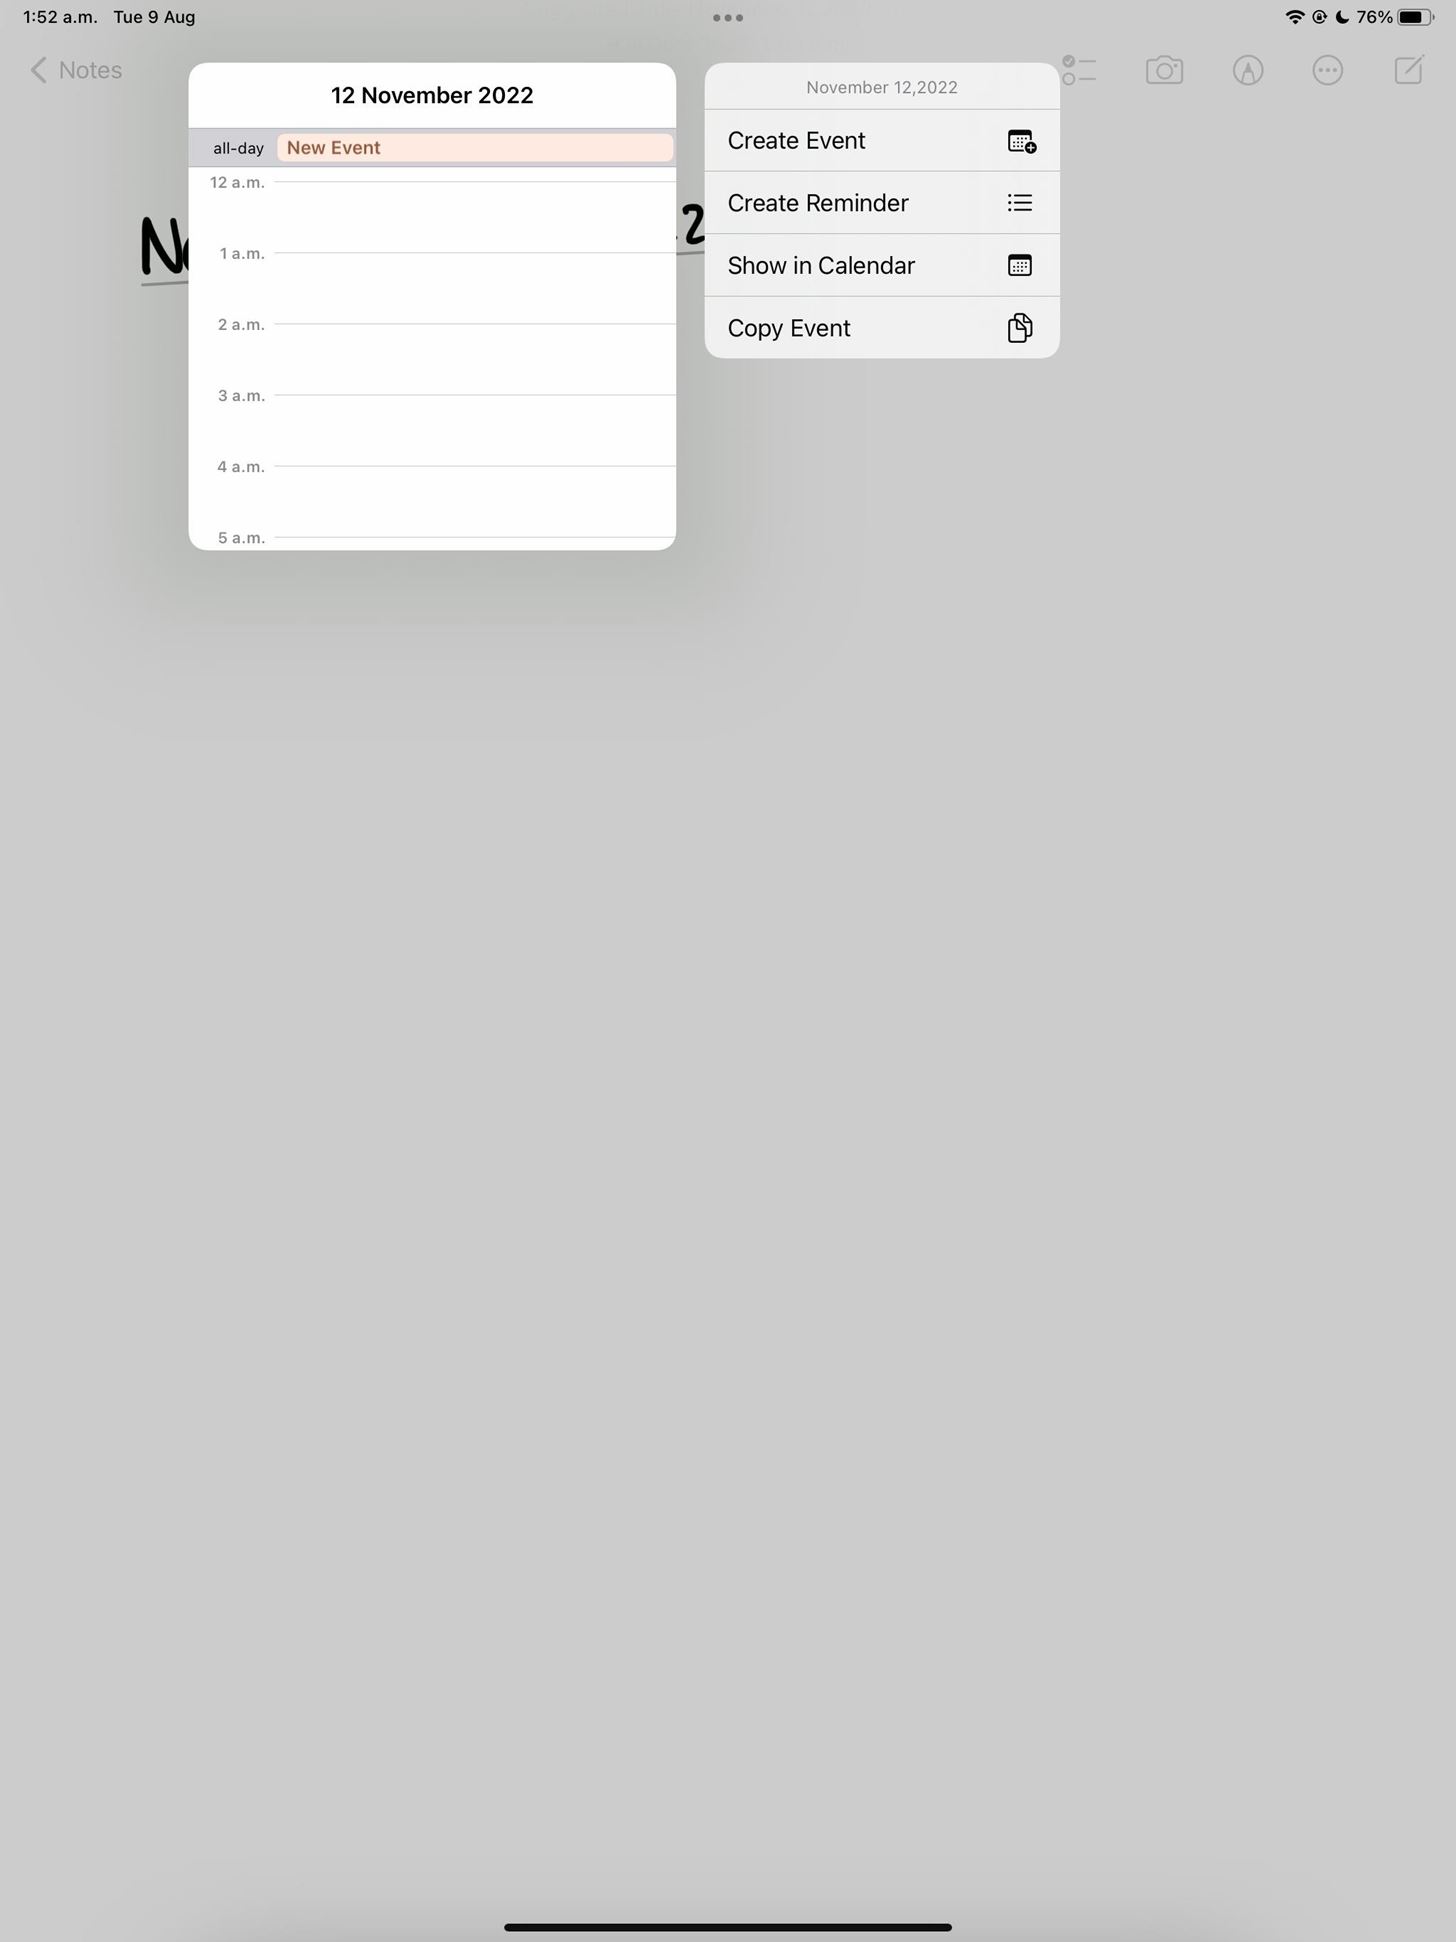
If you have handwritten notes containing identifiable data such as dates, phone numbers, addresses, or email addresses, iPadOS will underline the recognized data.
You can tap or long-press the underlined data with your finger to bring up the menu with quick actions you can take. For a date, you can create an event, reminder, or show it in the Calendar. A phone number will let you call it with your iPhone, add it to Contacts, send a message, or start a FaceTime. And an address enables you to get directions, open it in Maps, and add it to Contacts.
Tip 9: Mark Up a Screenshot Instantly
After taking a screenshot with your Apple Pencil using the corner-swipe gesture, the screenshot editor will open with the Markup toolbar already open, ready for you to annotate the image. If, for some reason, it doesn't appear right away, you can still tap the Markup icon to bring up the toolbar.
You can handwrite immediately, but if you want to convert your handwriting to typed text in the screenshot editor, tap the plus (+) button in the Markup toolbar, then choose "Text" to add a text box to the image. Then, with the box highlighted, start handwriting over the text box. You can also tap the text box and select "Edit" from the contextual menu to add text, so you don't inadvertently overwrite what's in the text box already.

Tip 10: Add a Signature
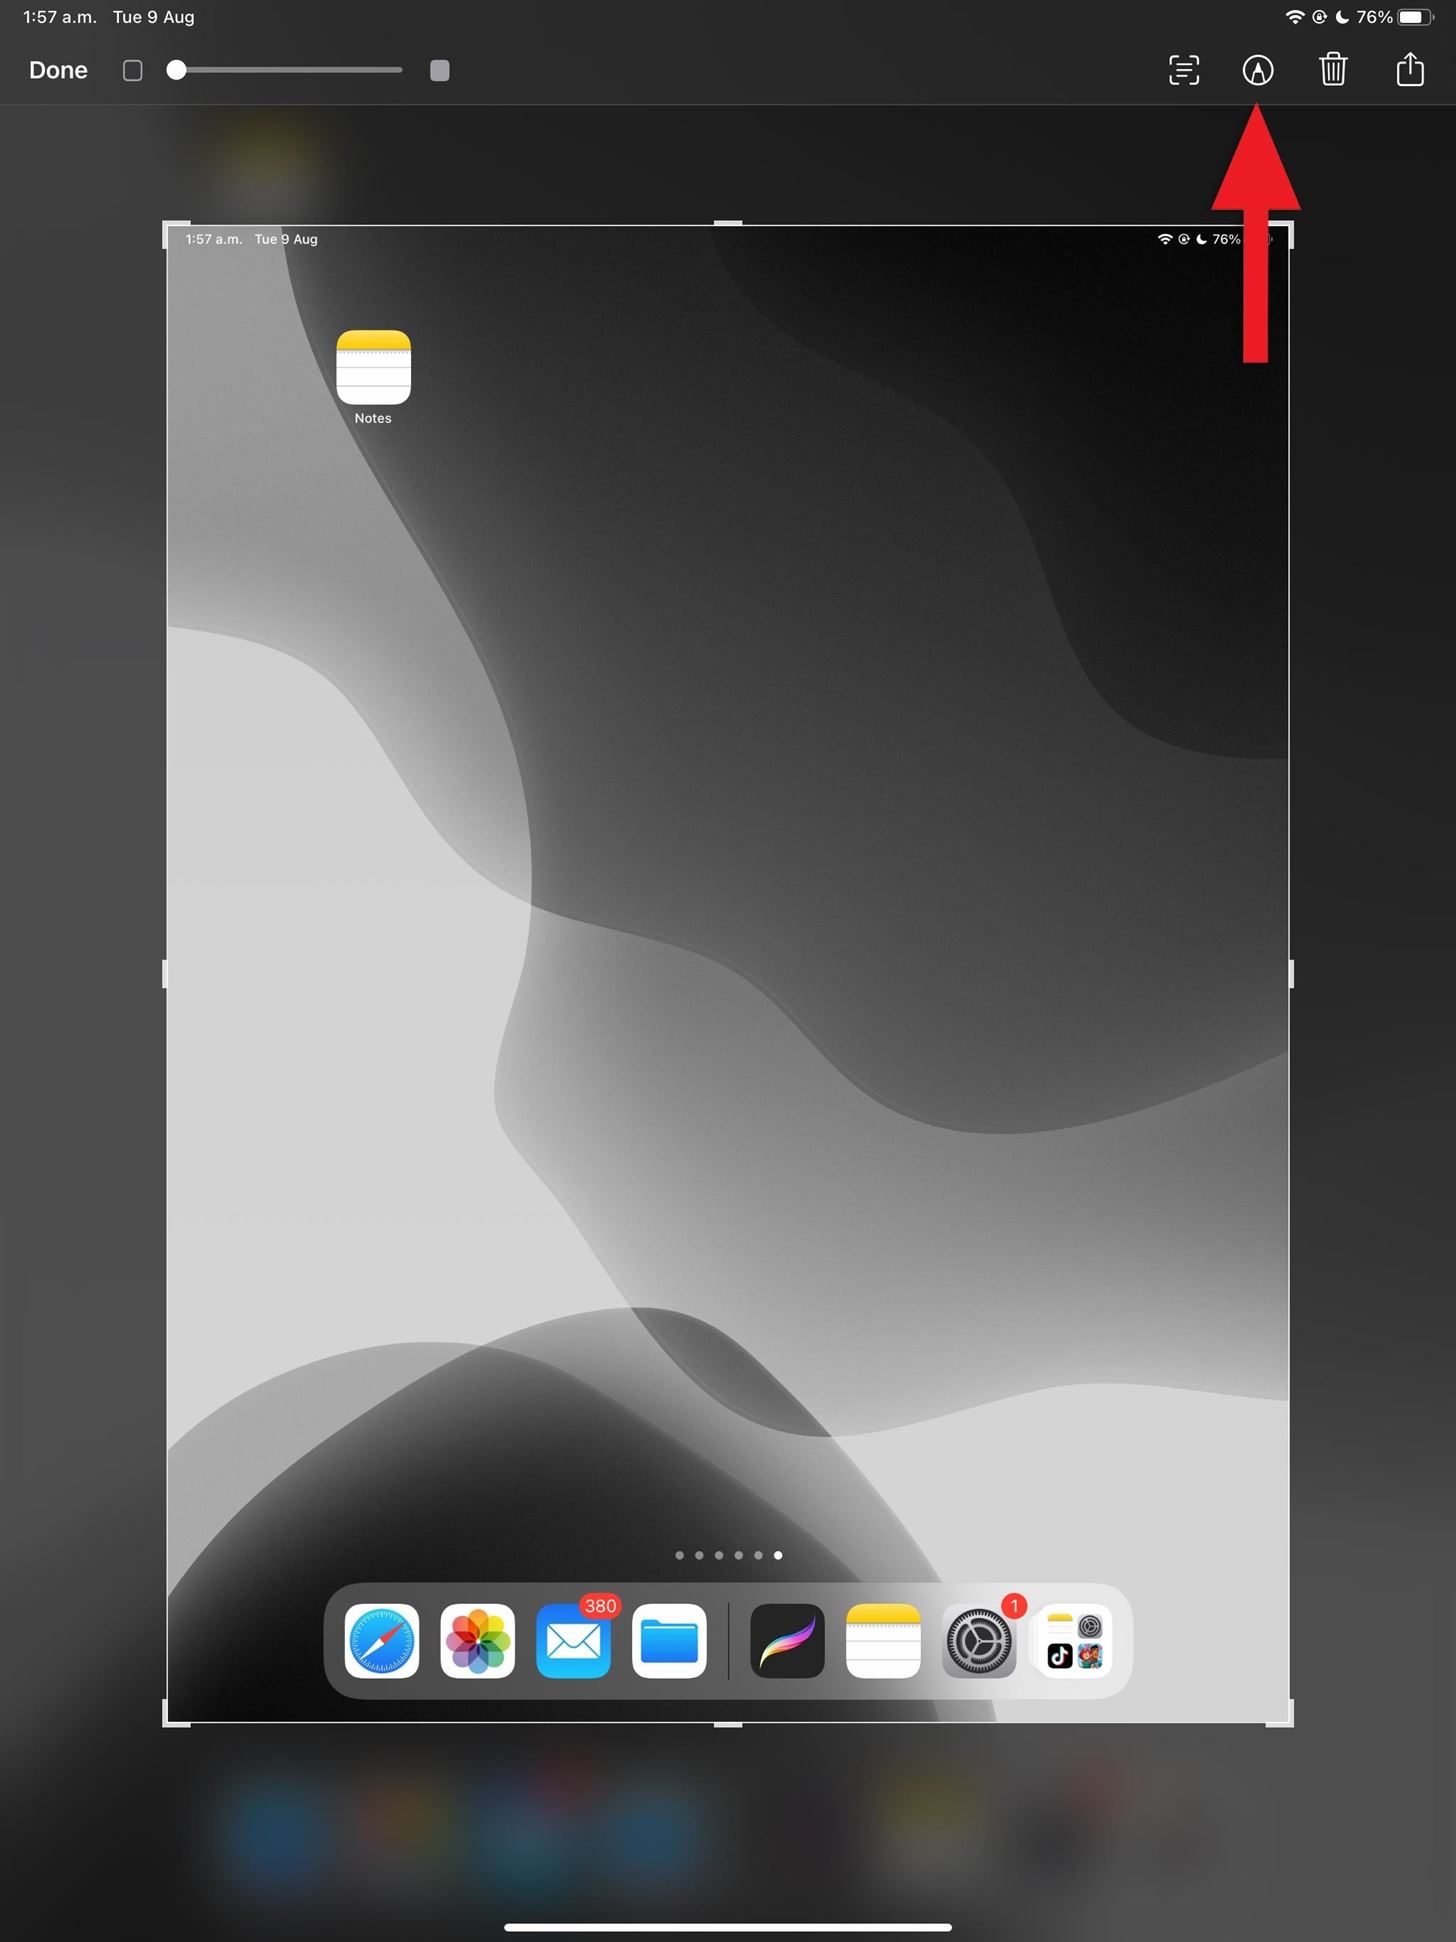
In the Markup toolbar, whether in the screenshot editor, a note, a PDF, or whatever, you can select the plus (+) button next to the color selector, then tap "Signature."
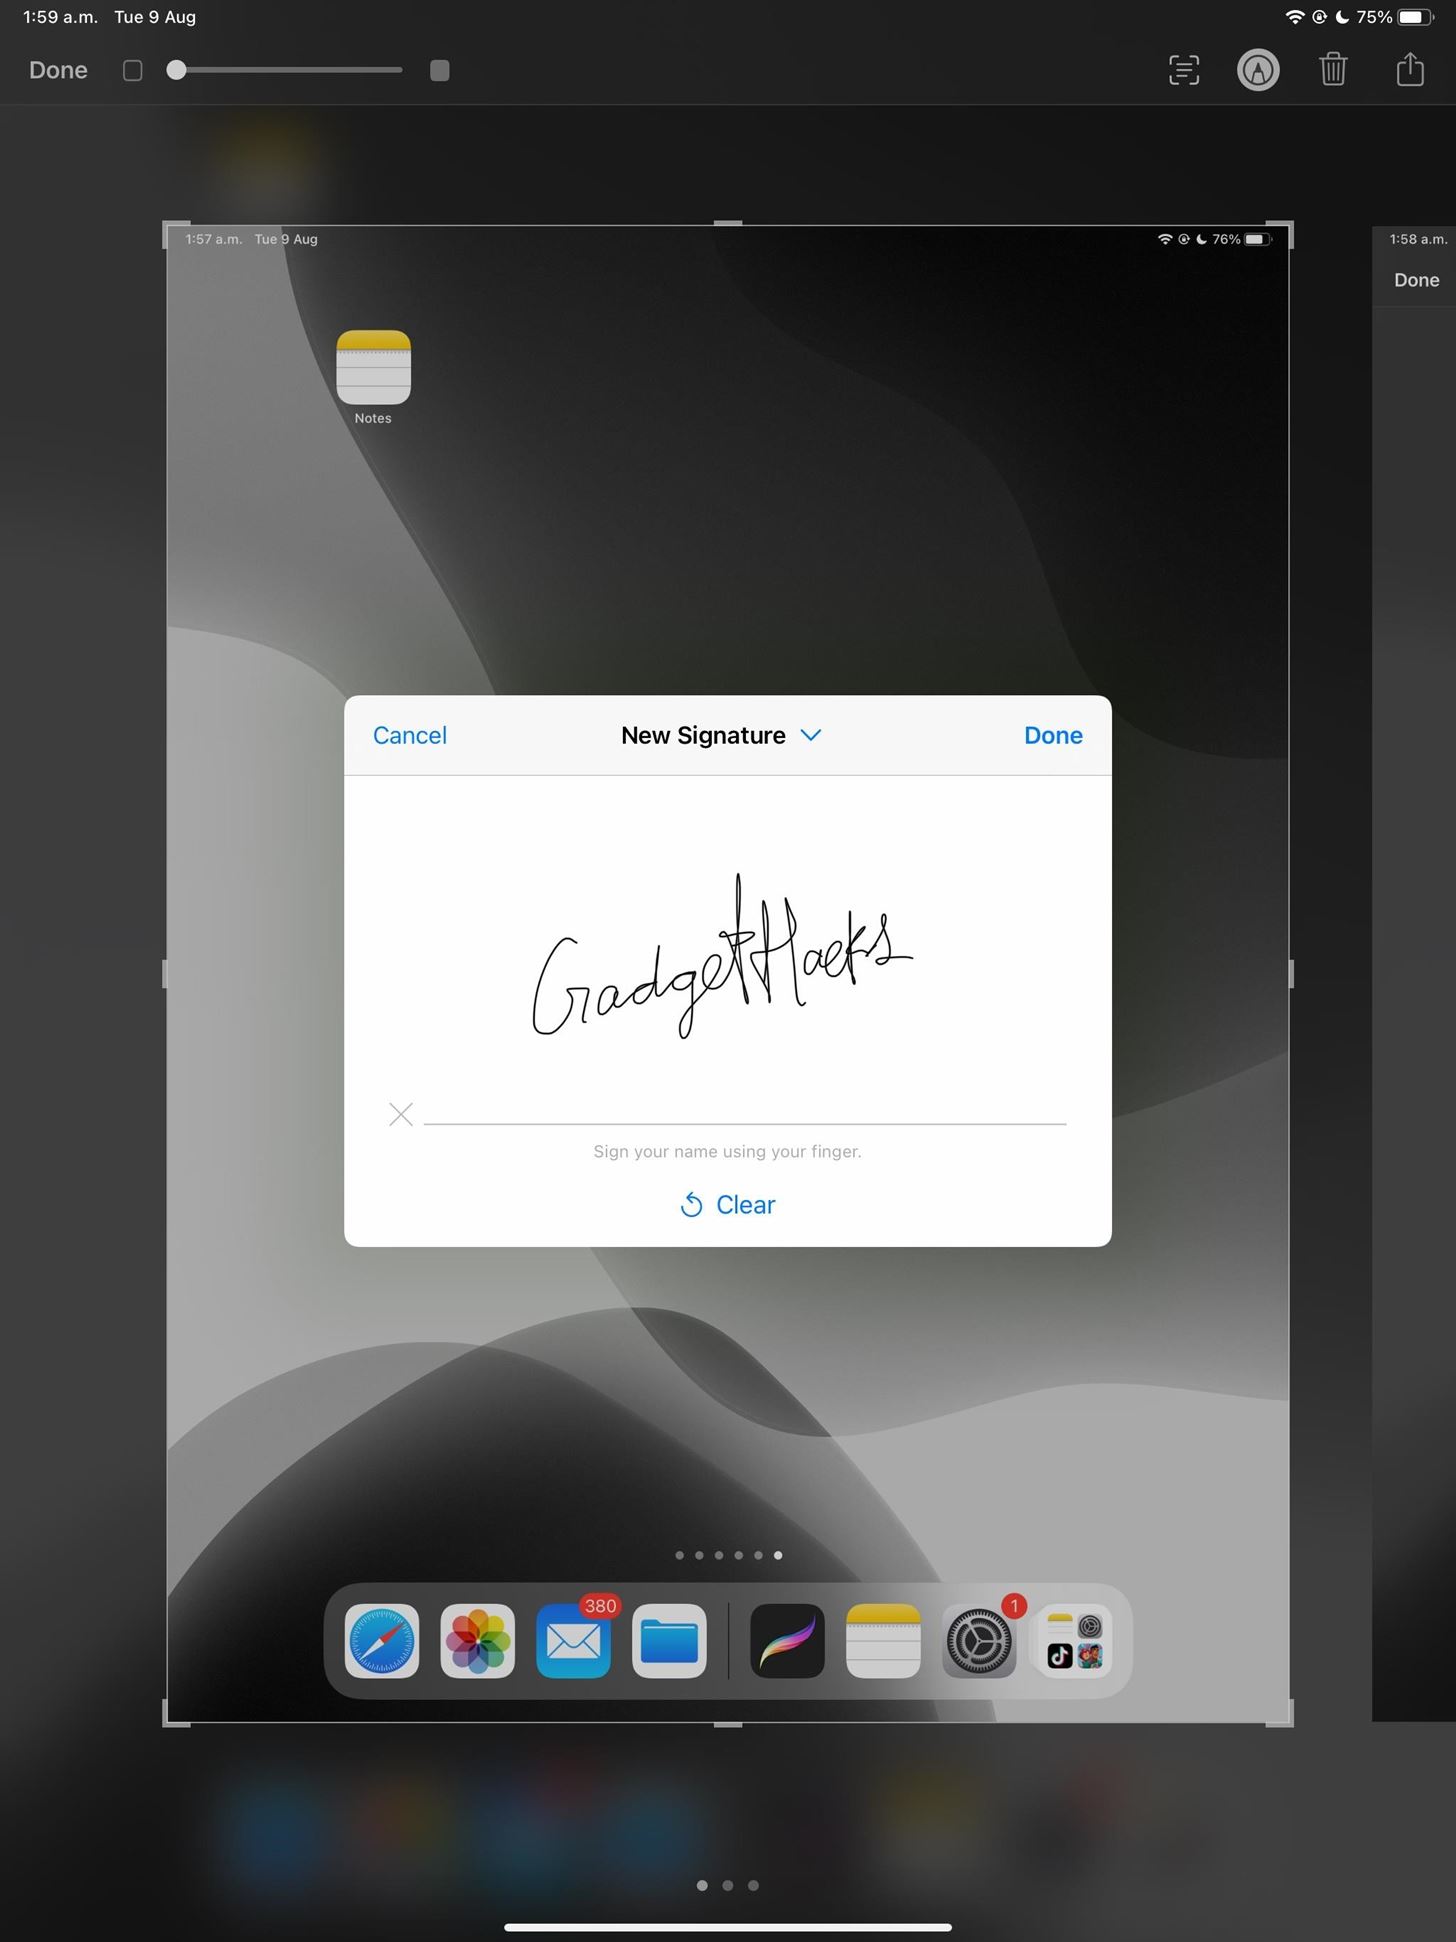
A pop-up window will appear, prompting you to add a new signature if you don't already have one on file; Sign your name with your Apple Pencil, and hit "Done" to save. Now, you can recall this signature anytime in the Markup tools, whether you're using your Apple Pencil or not.

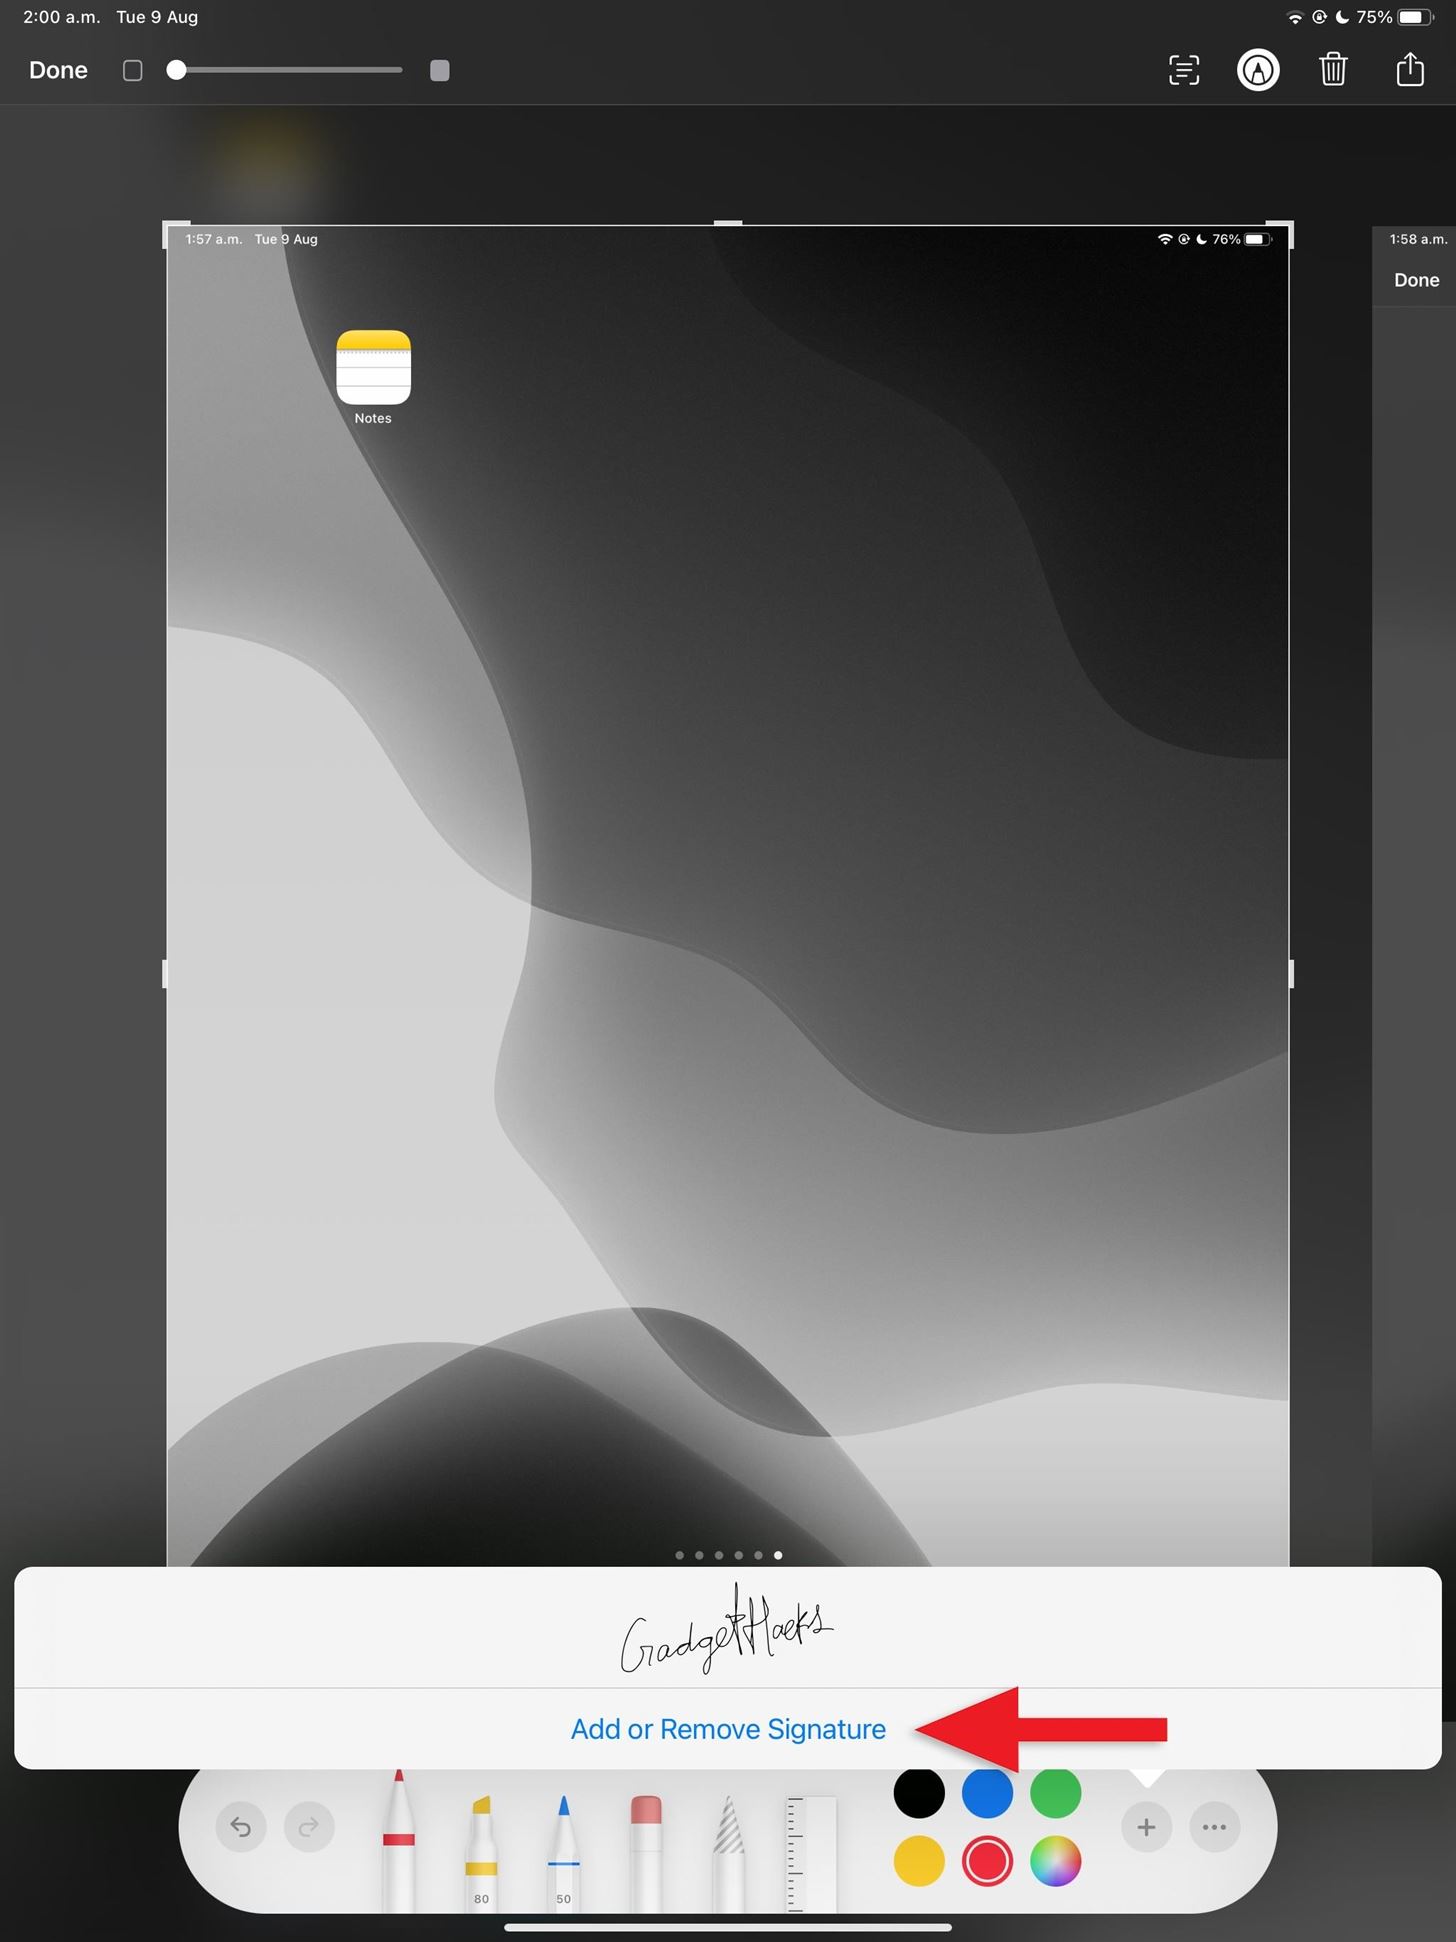
To add or delete signed names, tap "Add or Remove Signature" after opening the "Signature" option in Markup.
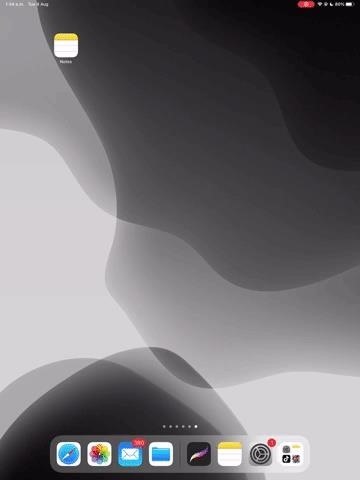
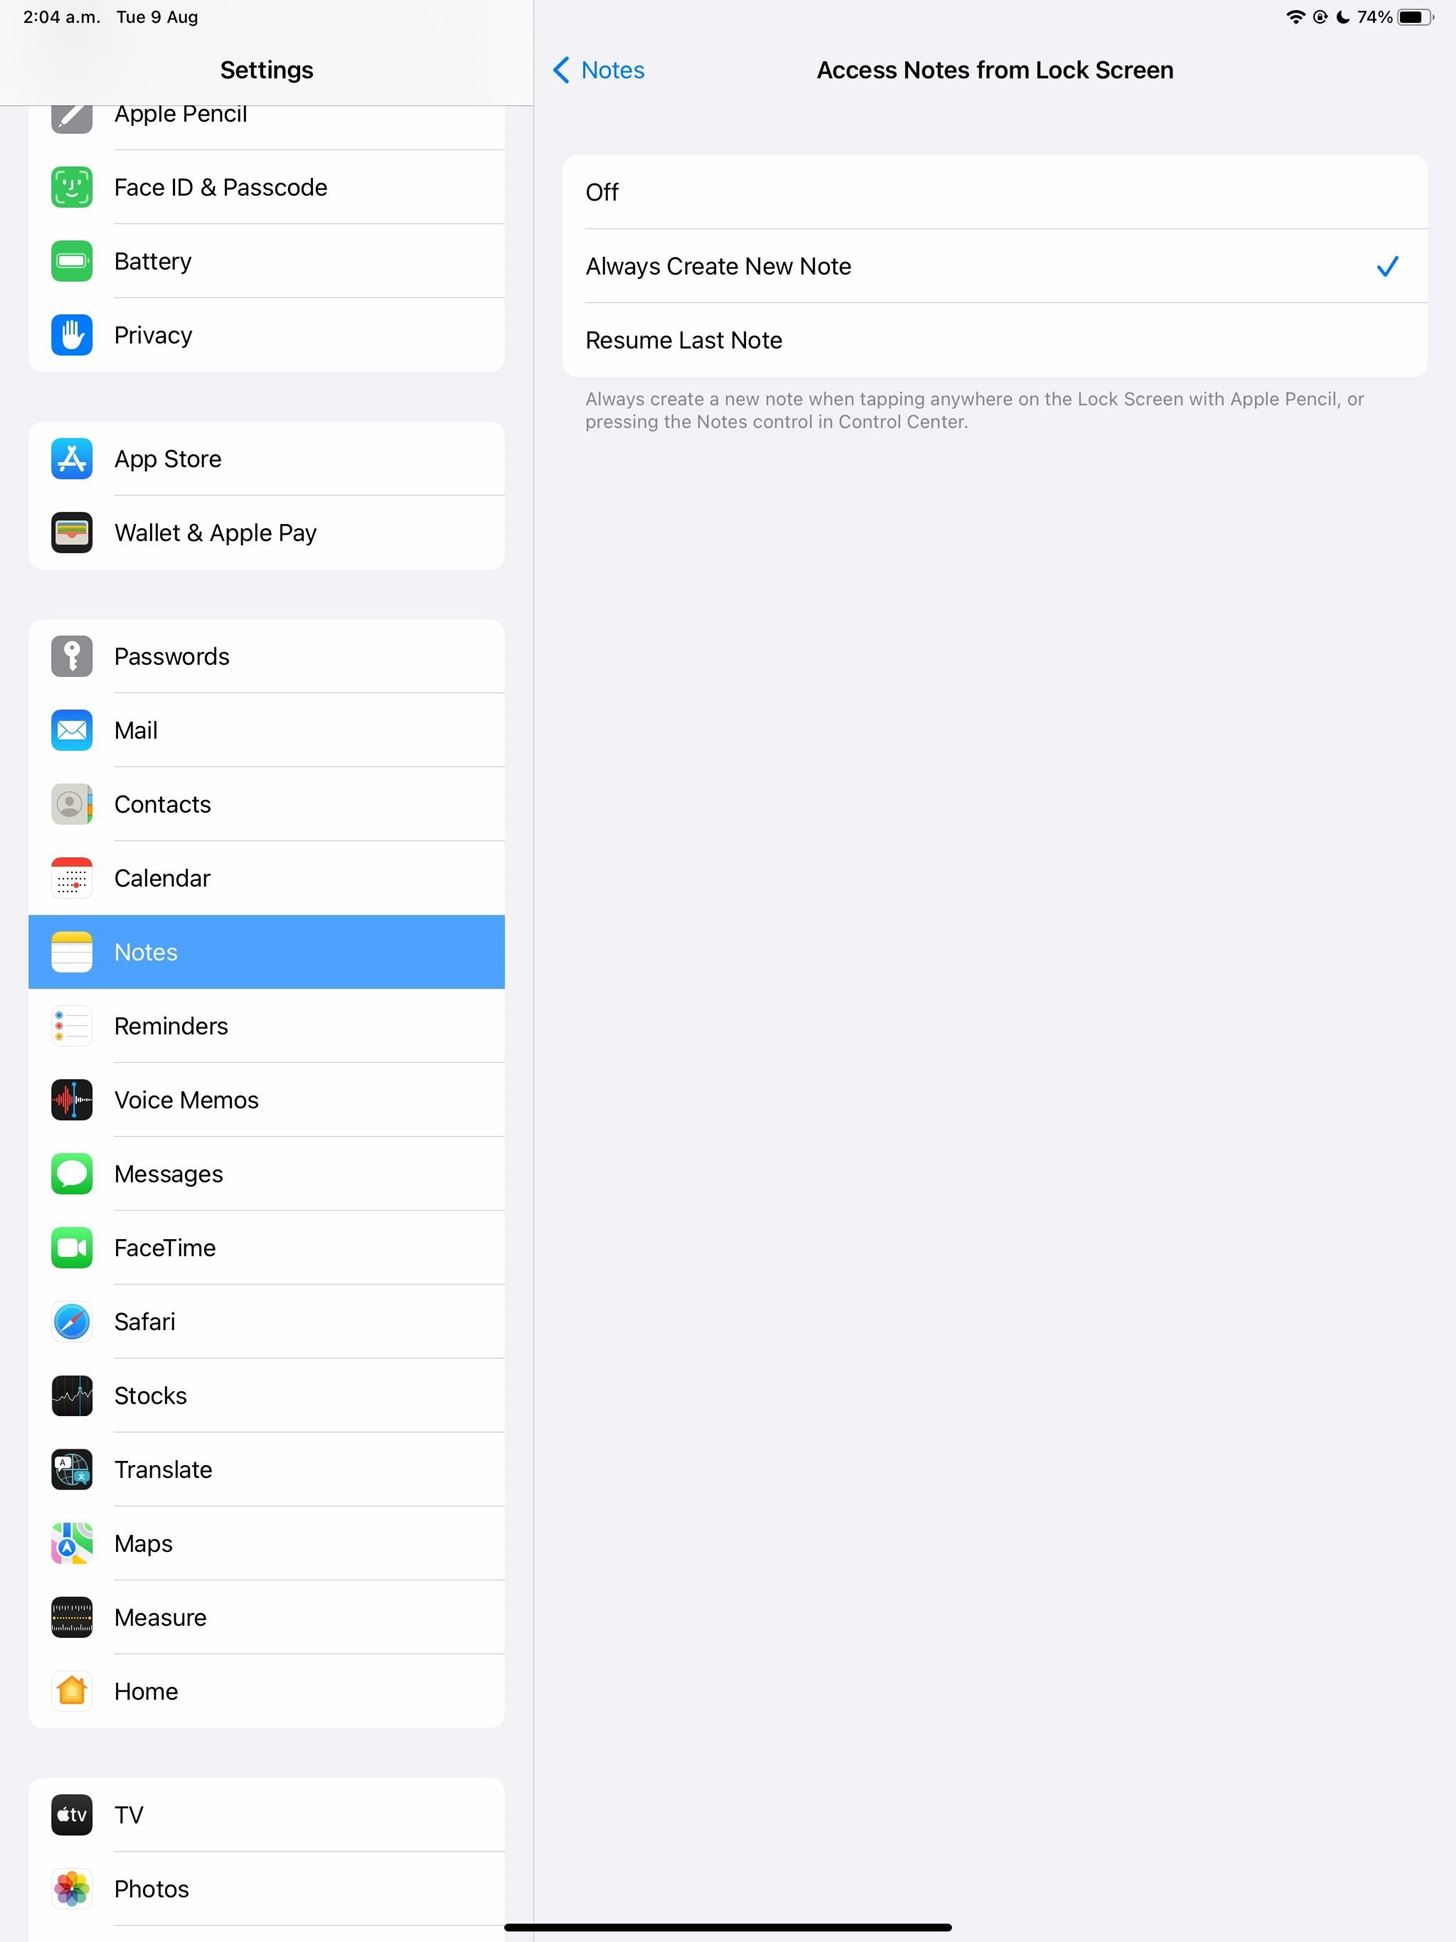
Tip 11: Write a Note from Your Lock Screen
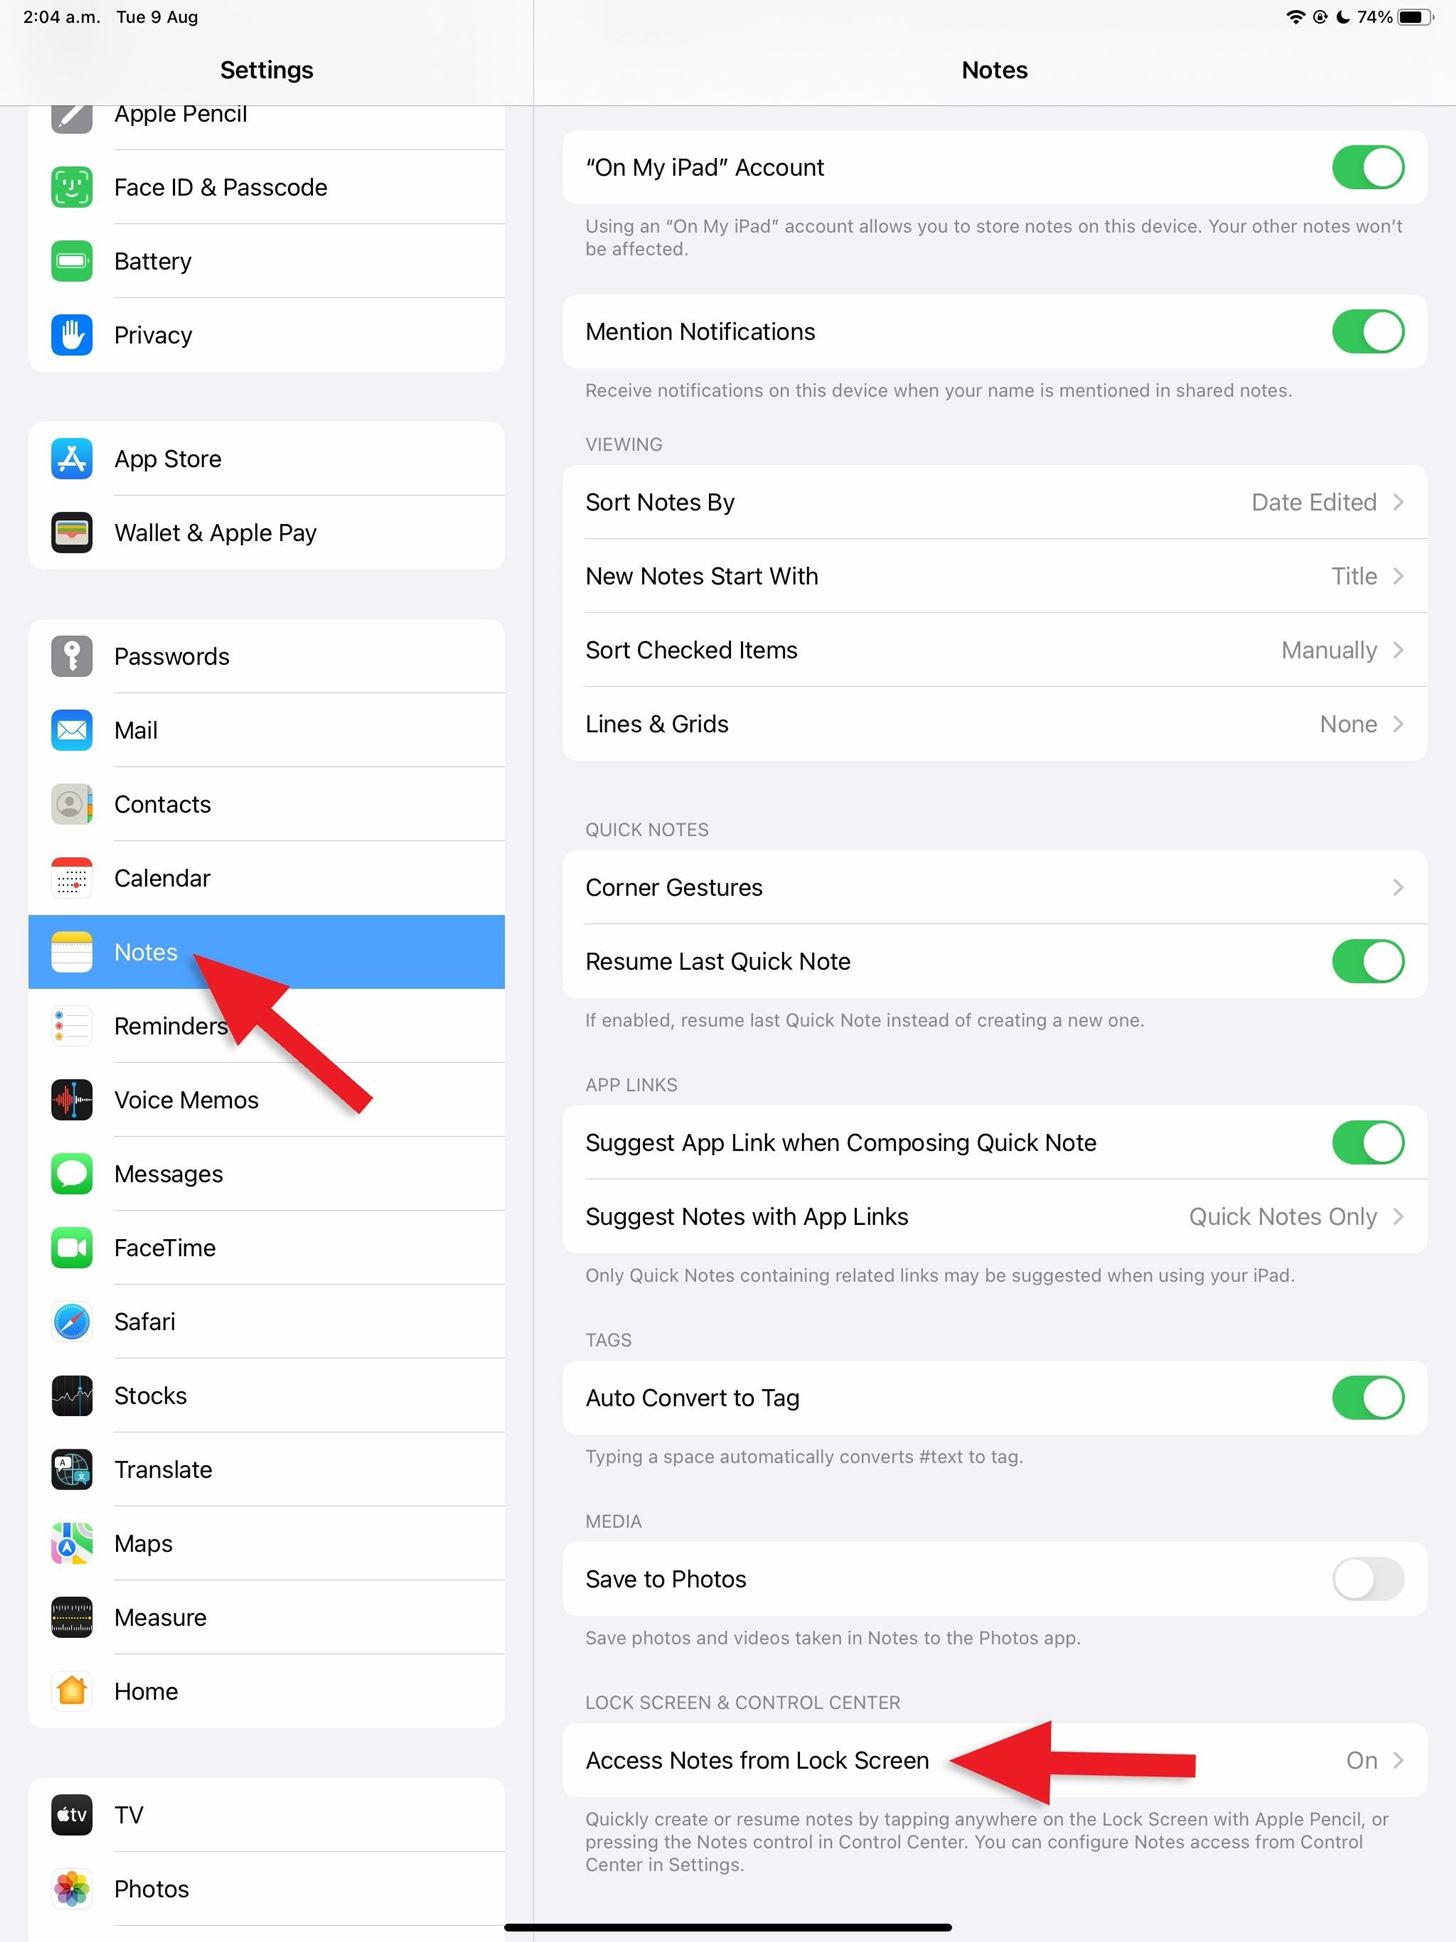
Whether your iPad screen is awake or asleep on the lock screen, you can tap the Apple Pencil on the display and begin writing a note, which will be saved in the Notes app. It always creates a new note by default, but you can customize what it does via Settings –> Notes –> Access Notes from Lock Screen. Here, you can choose between "Off," "Always Create New Note," and "Resume Last Note."
You can also tap the Notes control in Control Center, but the corner-swipe gestures won't open a Quick Note from the lock screen as they would anywhere else.
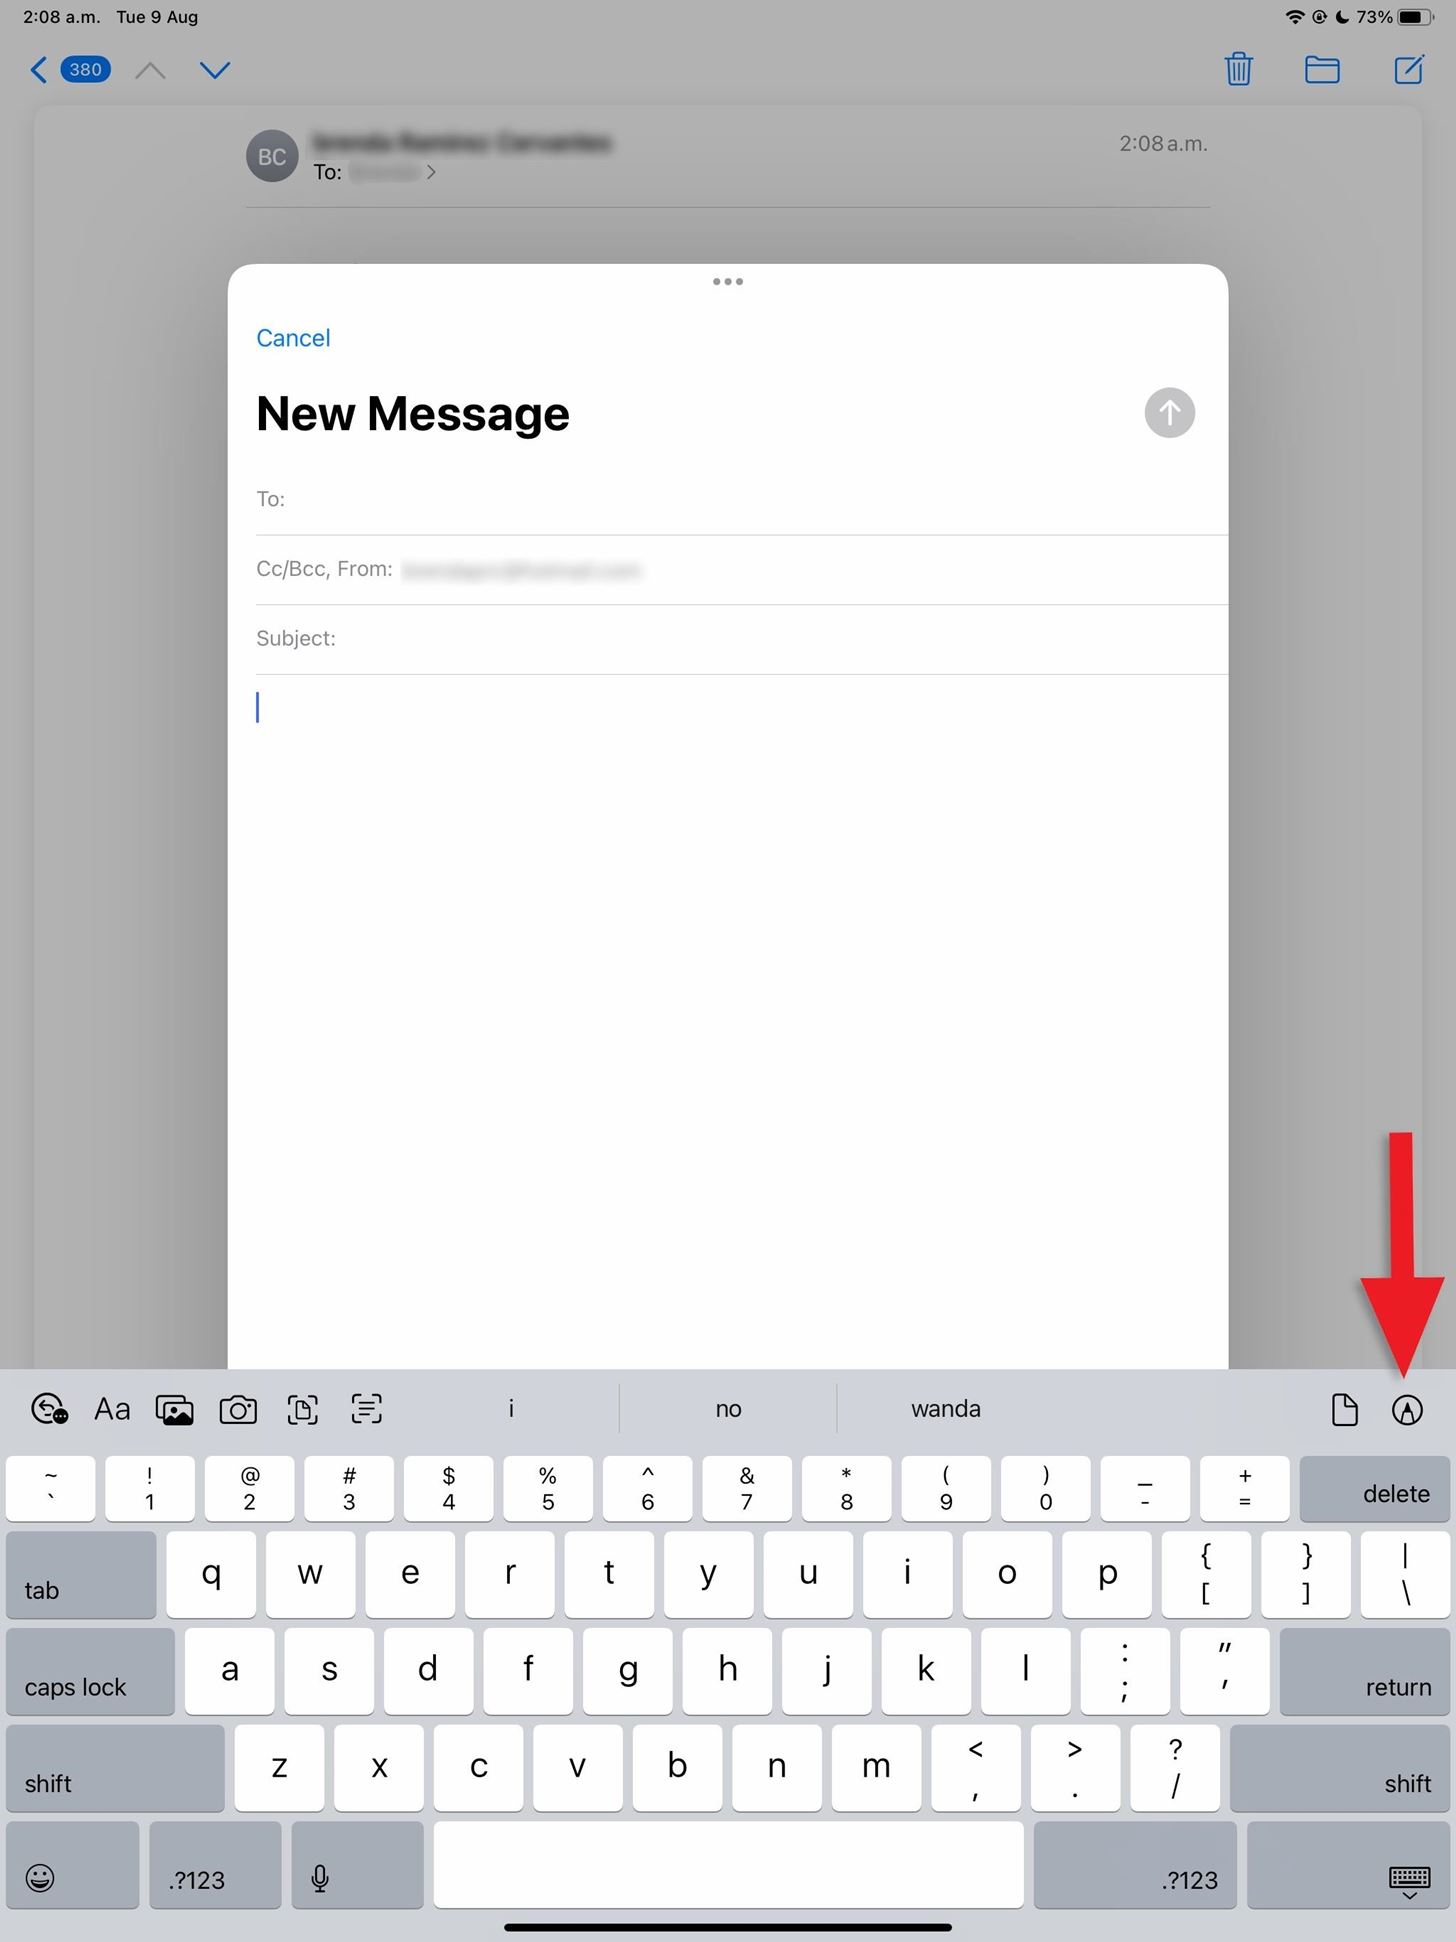
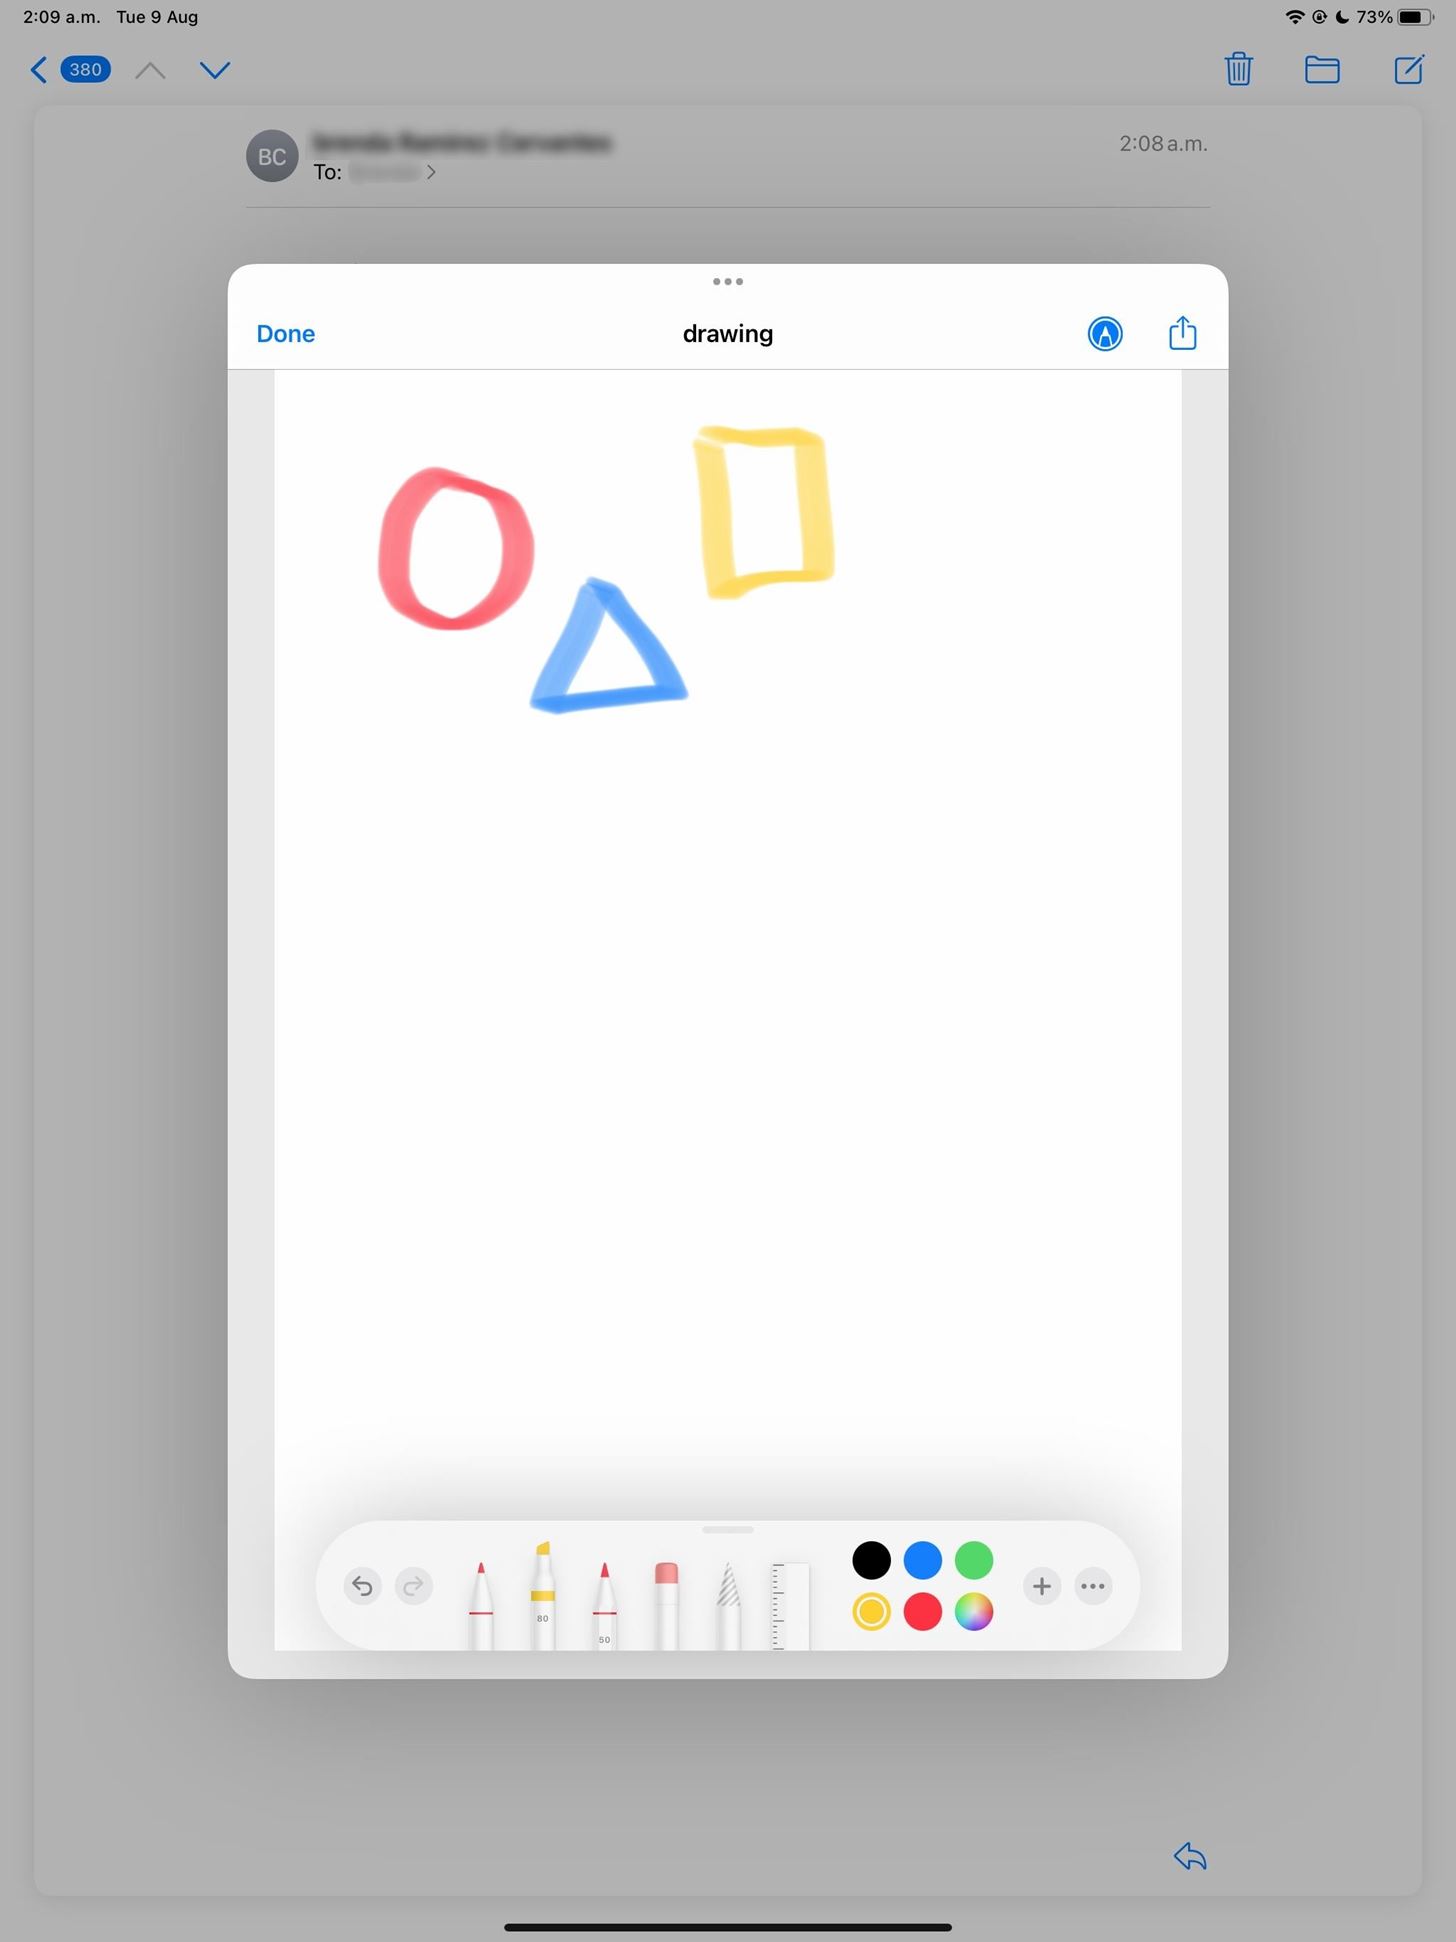
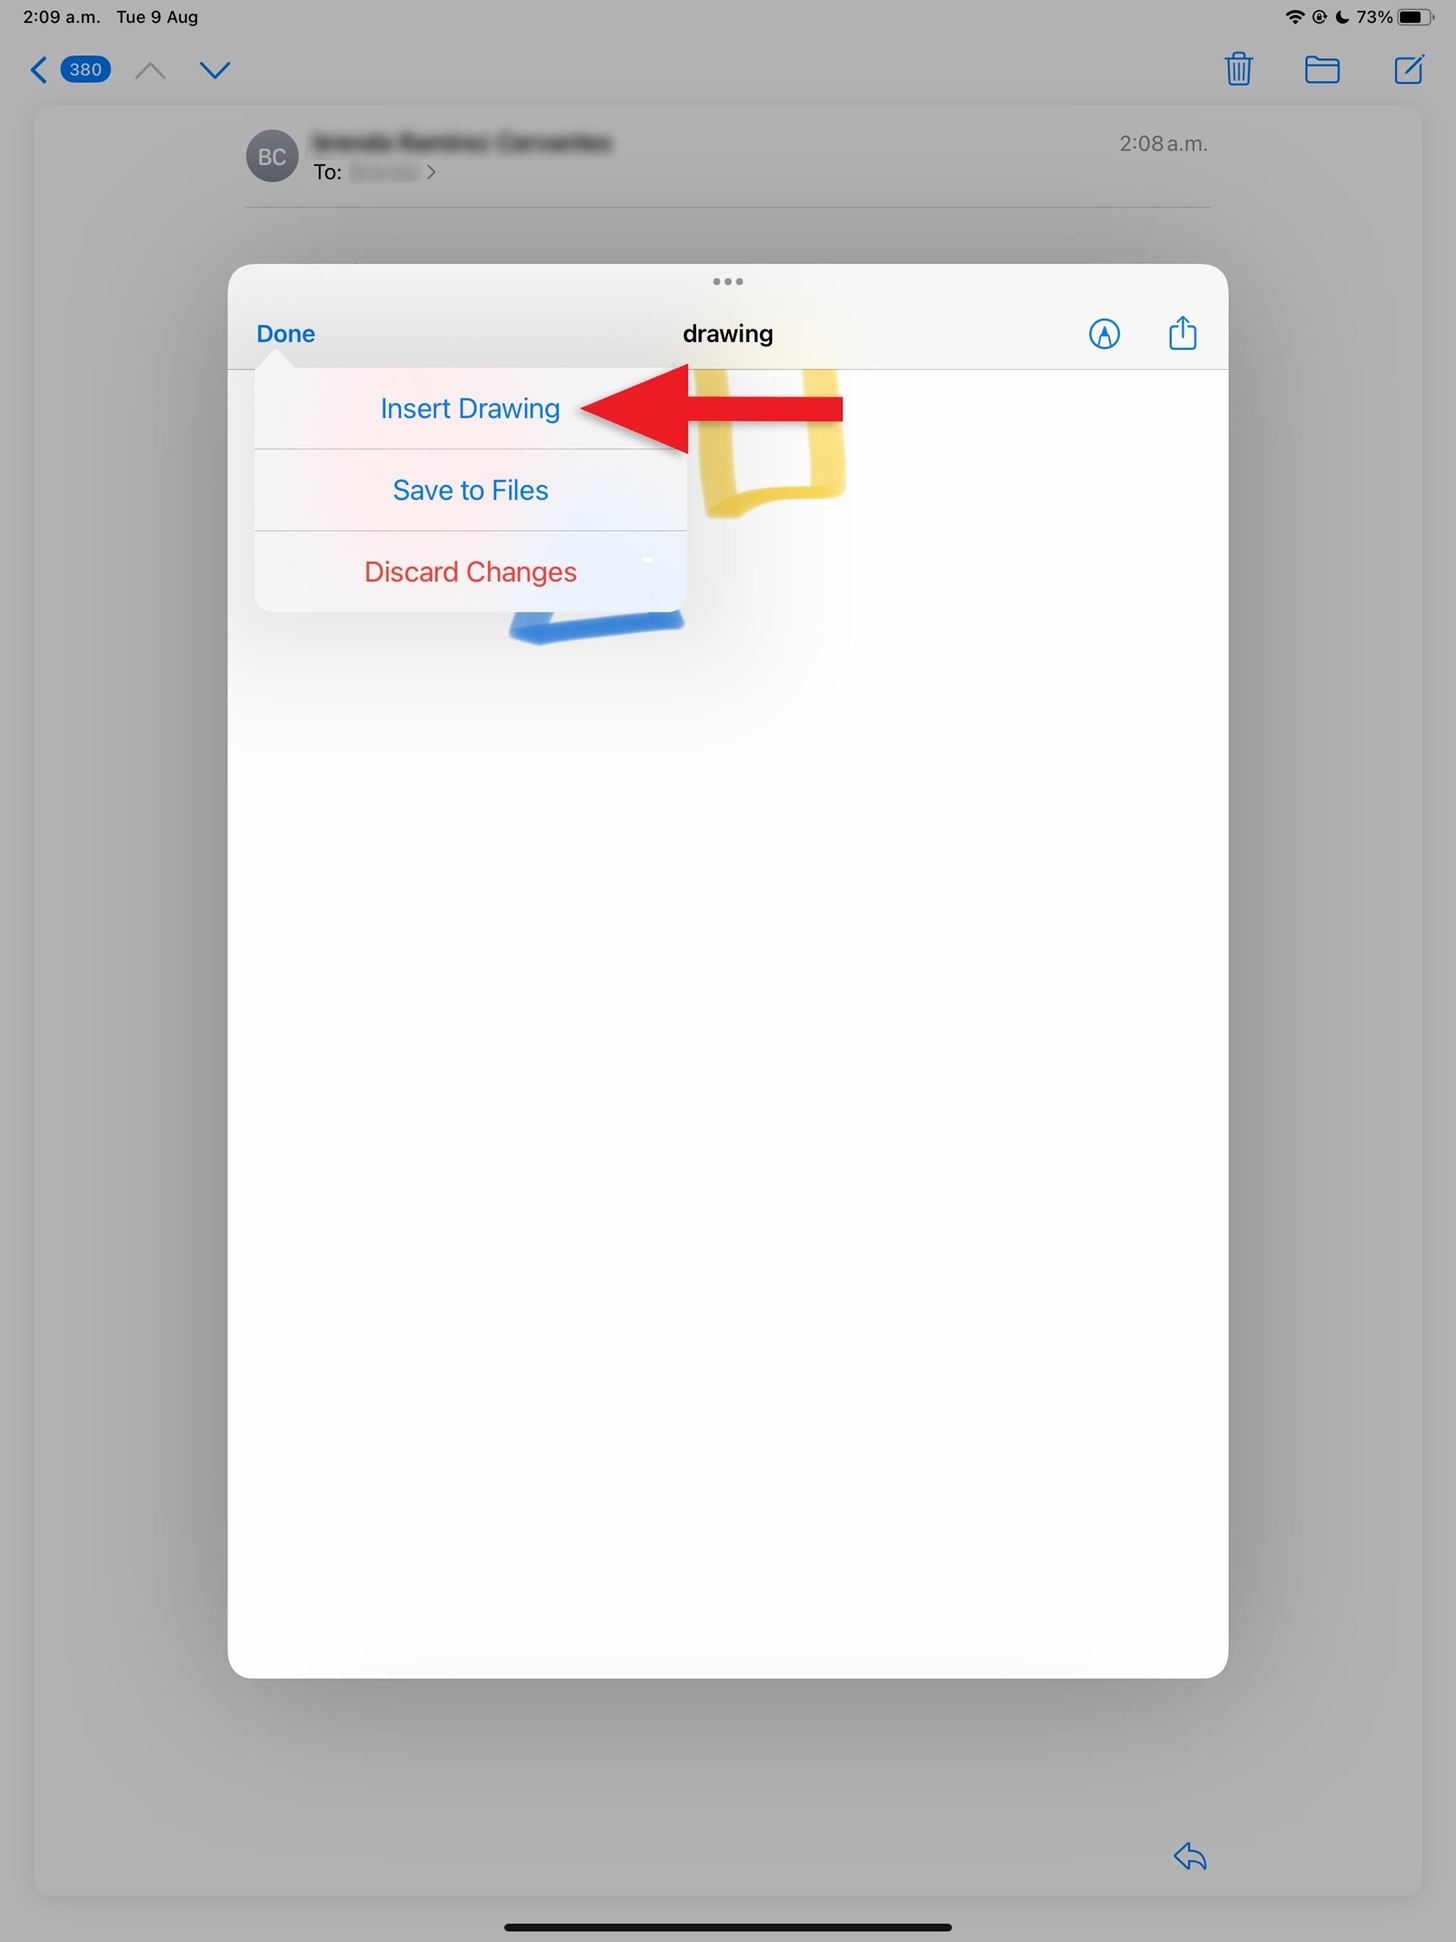
Tip 12: Sketch Drawings in Emails
While you can handwrite with your Apple Pencil in an email draft and have Mail auto-convert it to typed text, you can also sketch drawings in an email draft. In the draft, tap the Markup icon from the toolbar, then draw out your sketch with your Apple Pencil on the canvas. Hit "Done" when ready, then "Insert Drawing" to put it in the draft.
Tip 13: Track How Much Battery Your Pencil Has Left
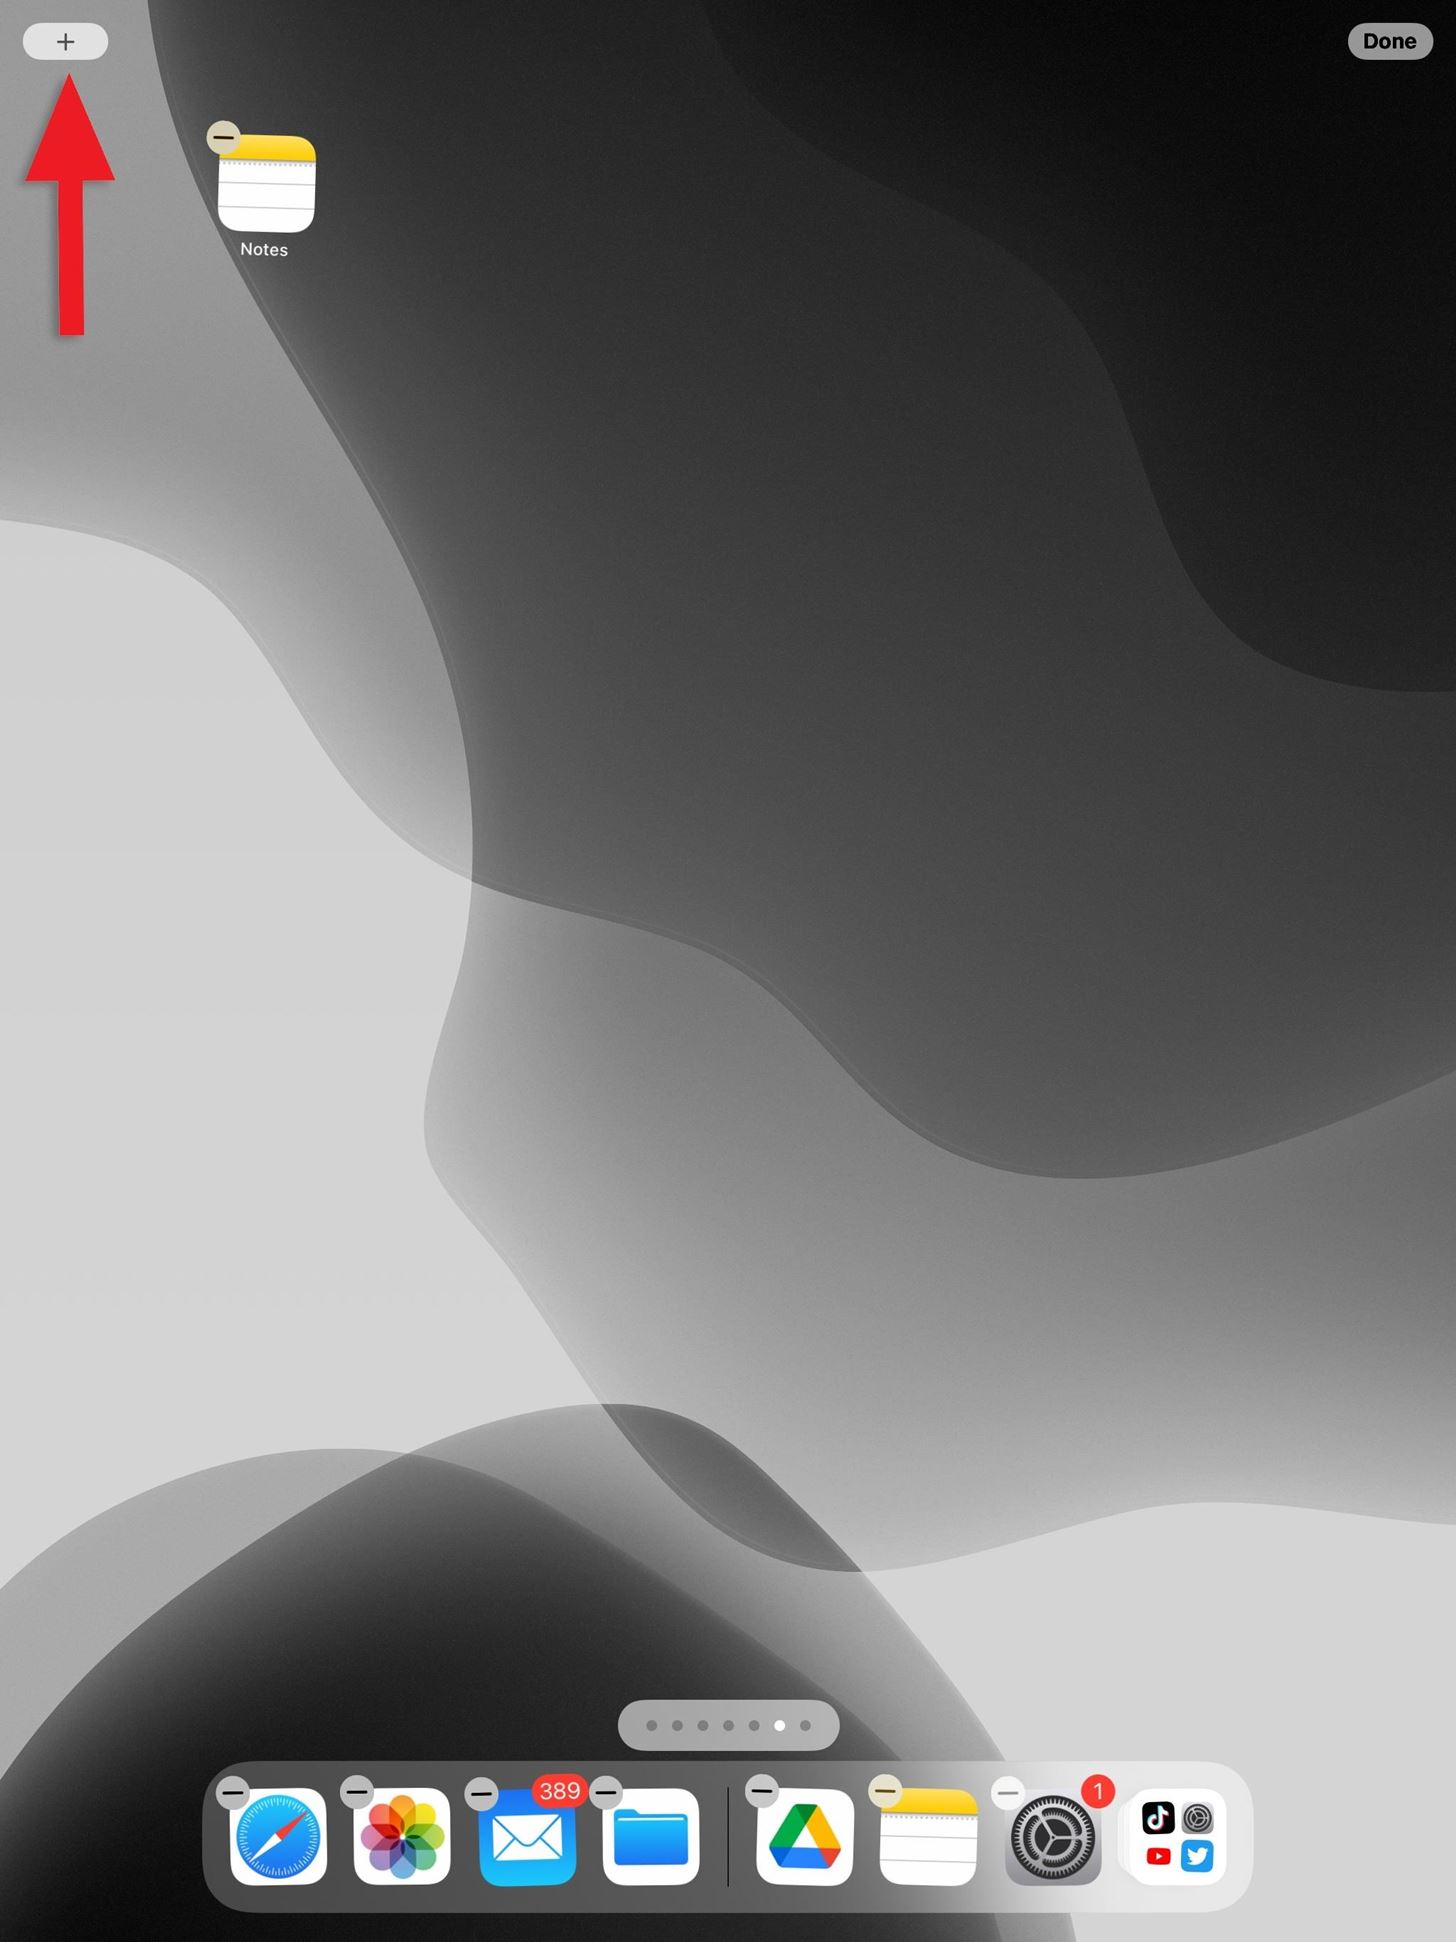
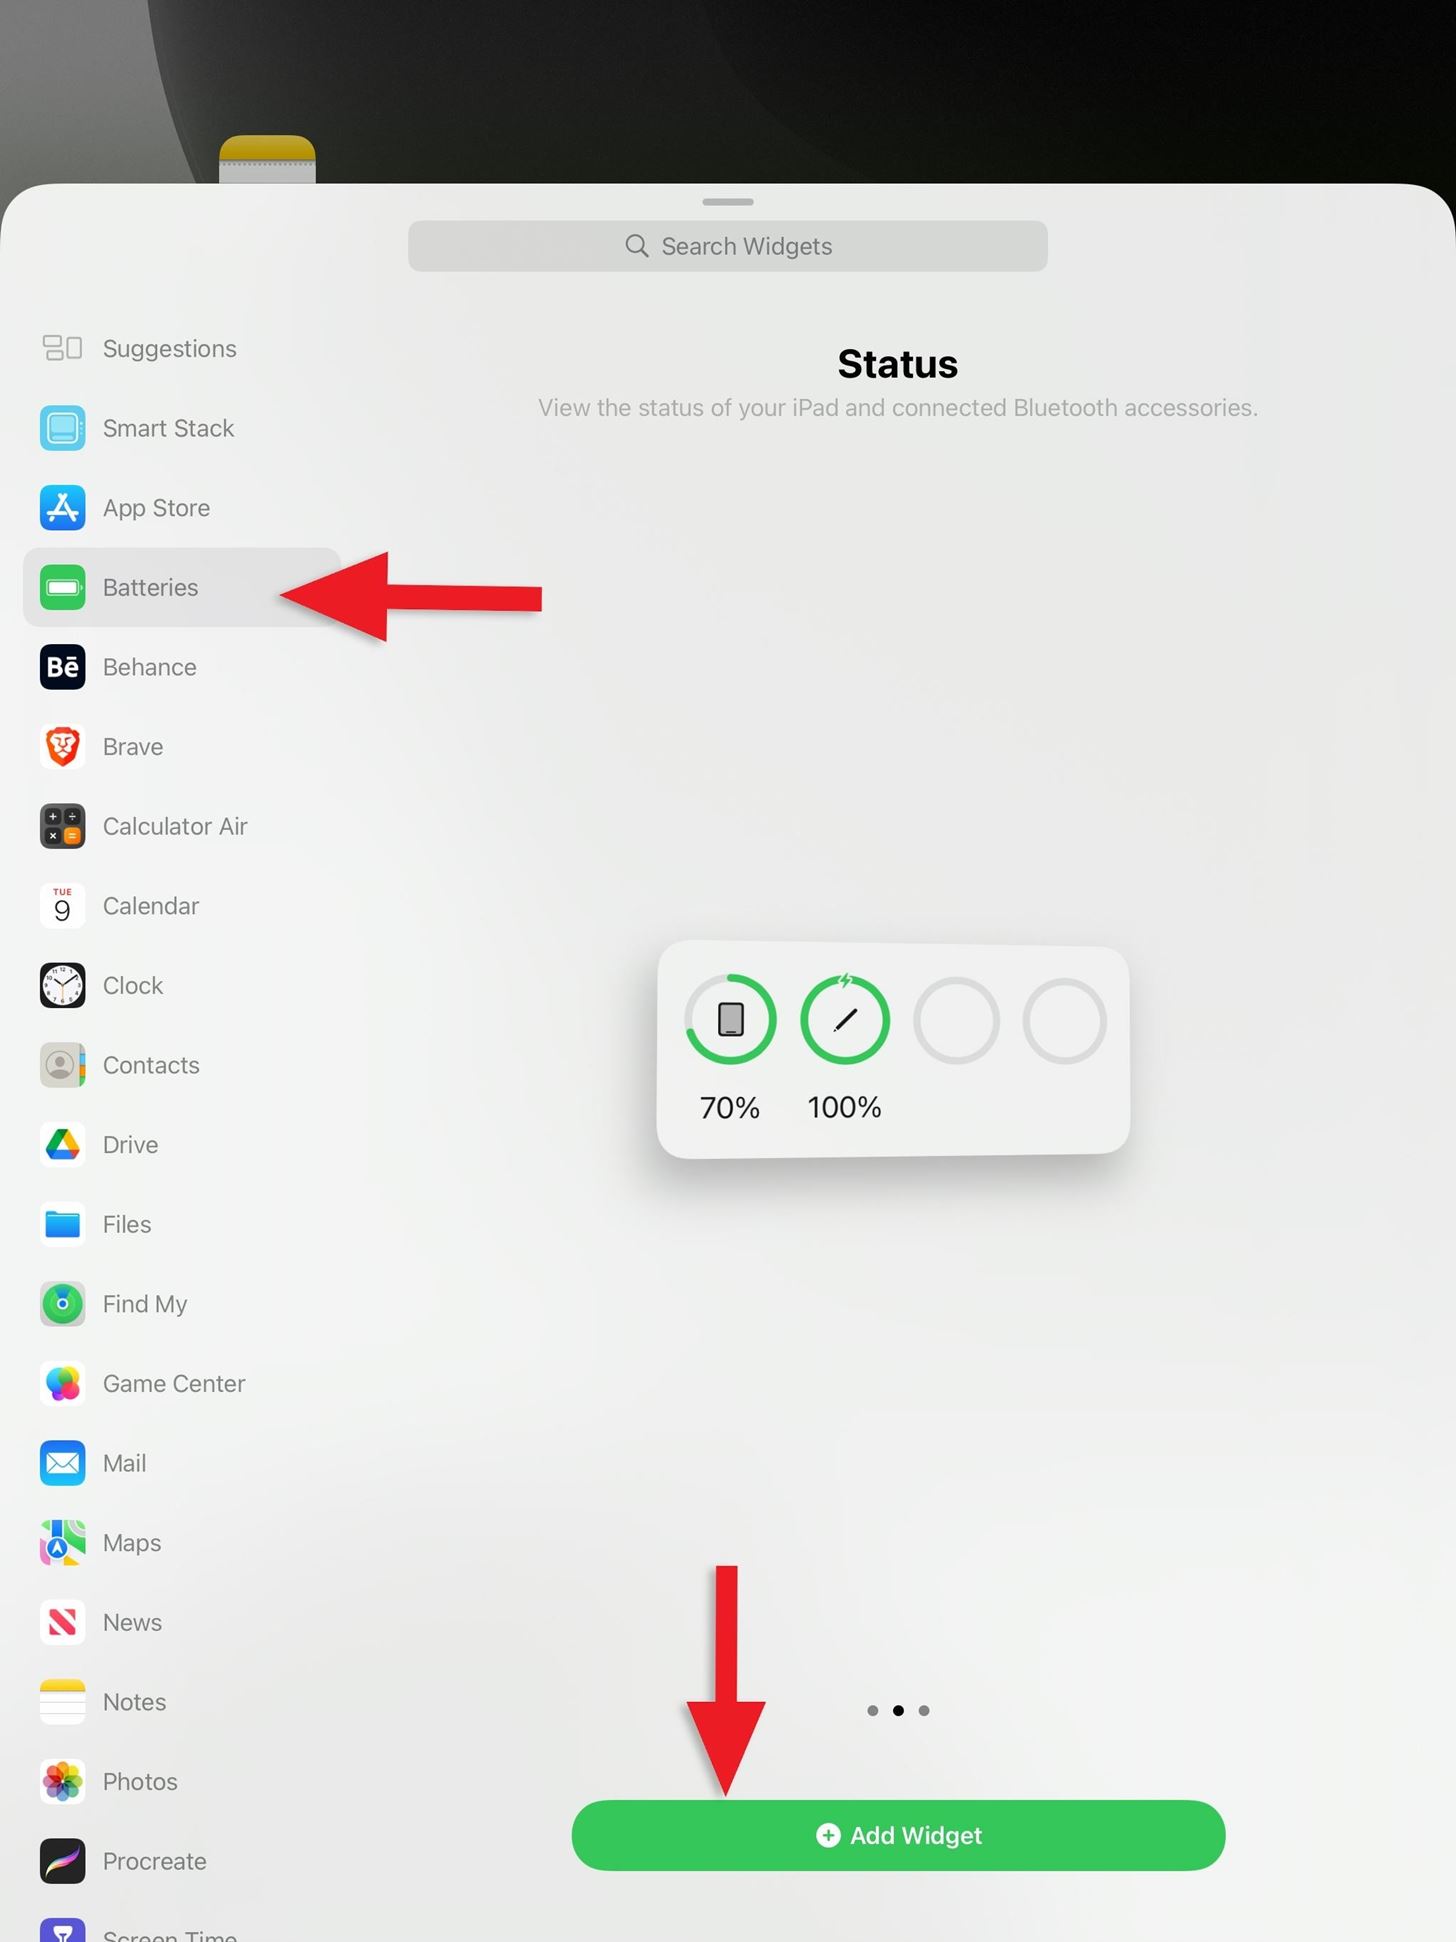
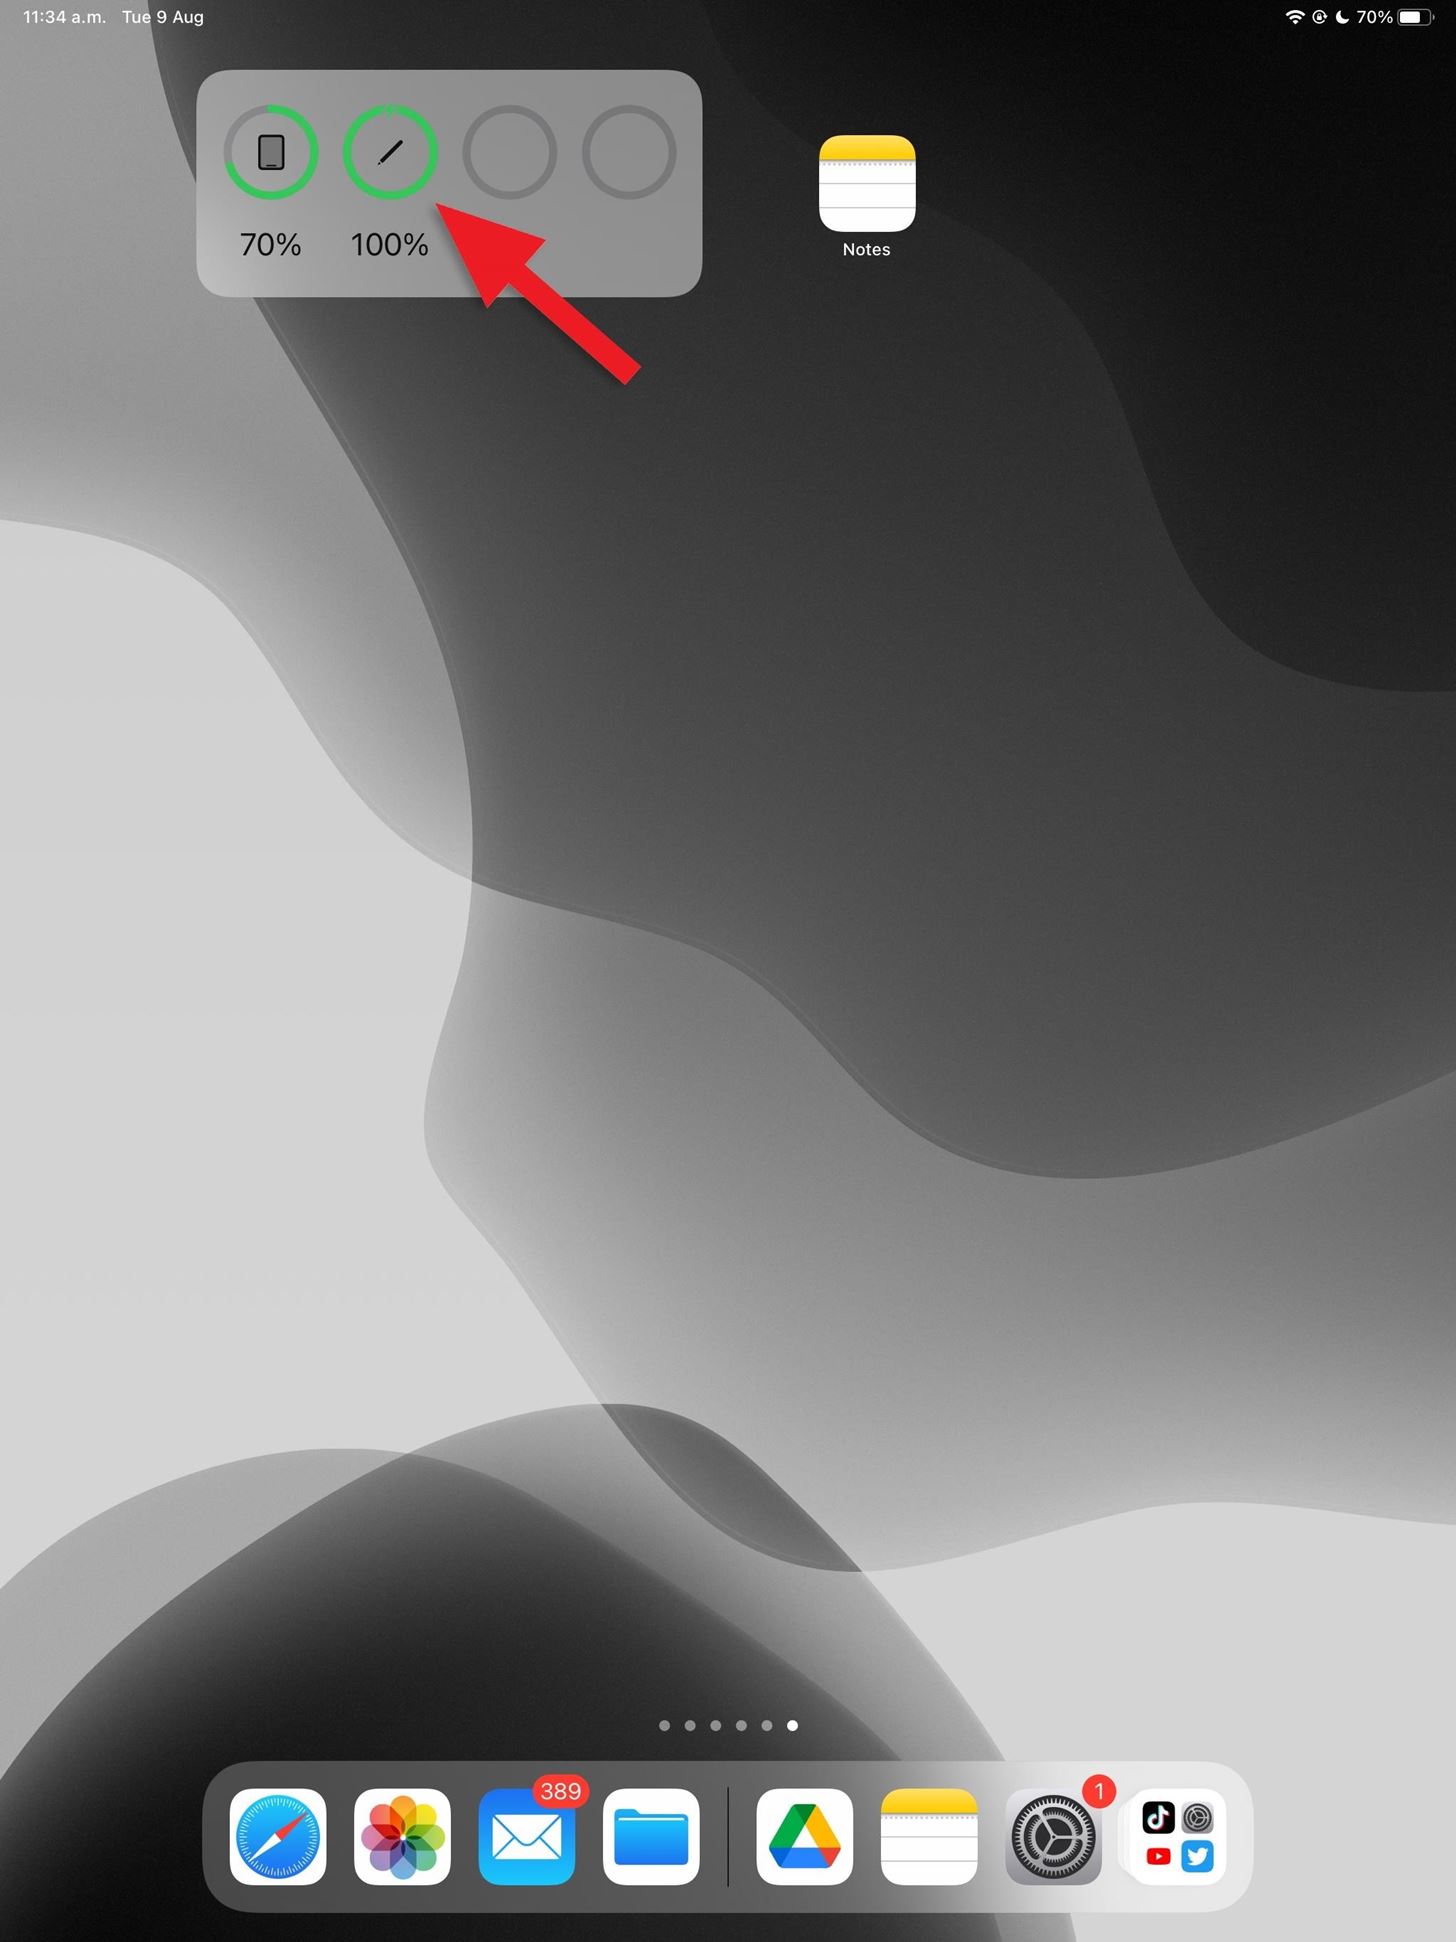
The easiest way to see how much battery your Apple Pencil has left is the "Batteries" widget, which you can add to your home screen or Today View. Long-press anywhere on the home screen; After the home screen editor opens, tap the plus (+) button to see the widgets gallery. From here, select "Batteries" and add the widget you like best.
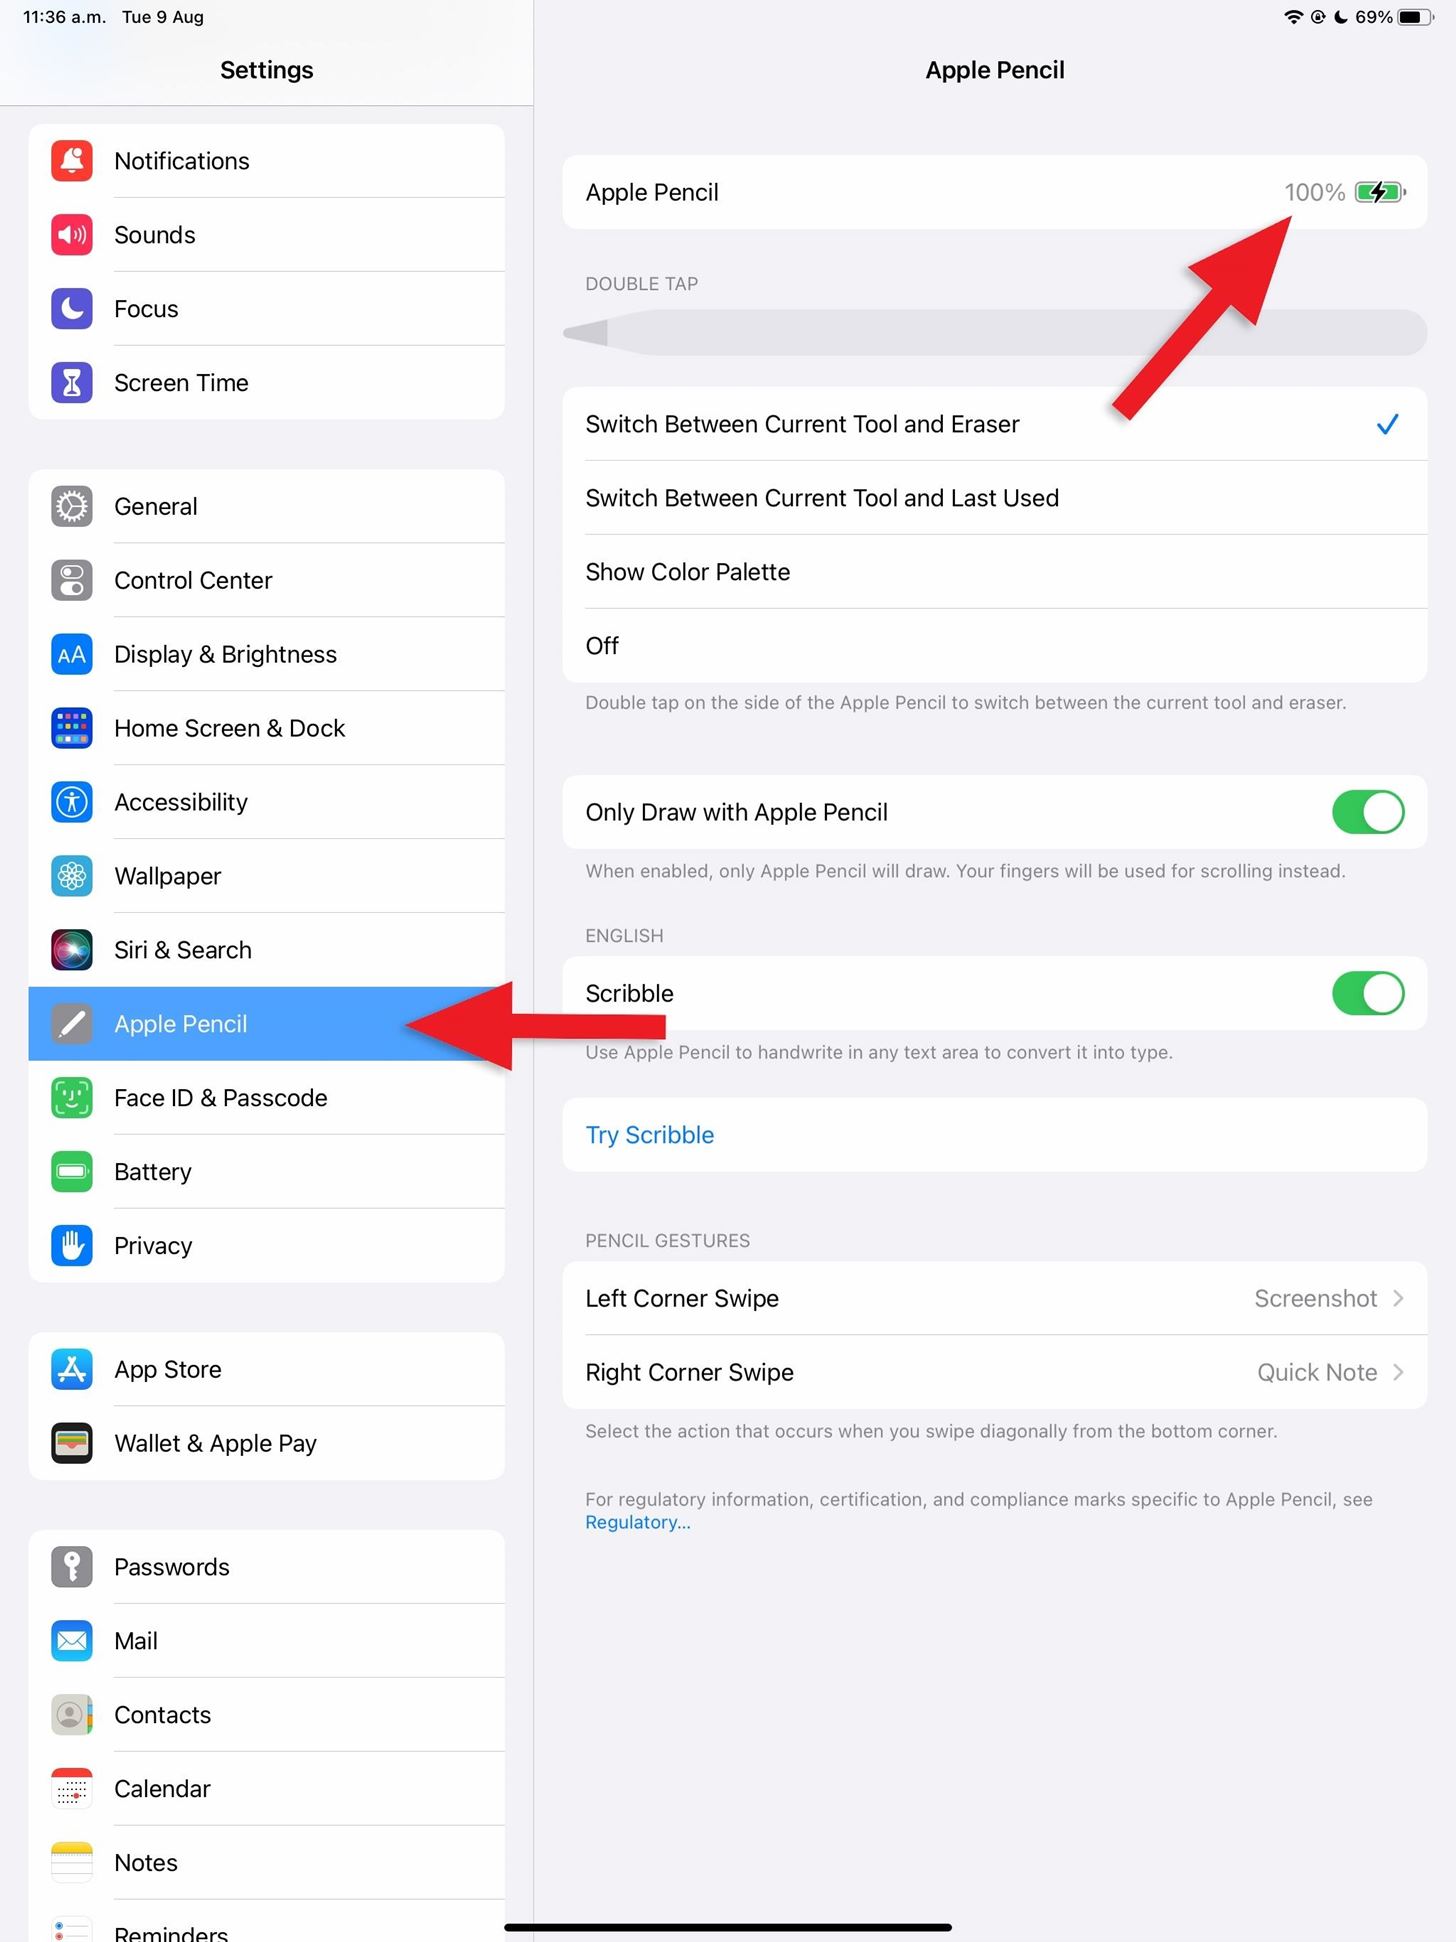
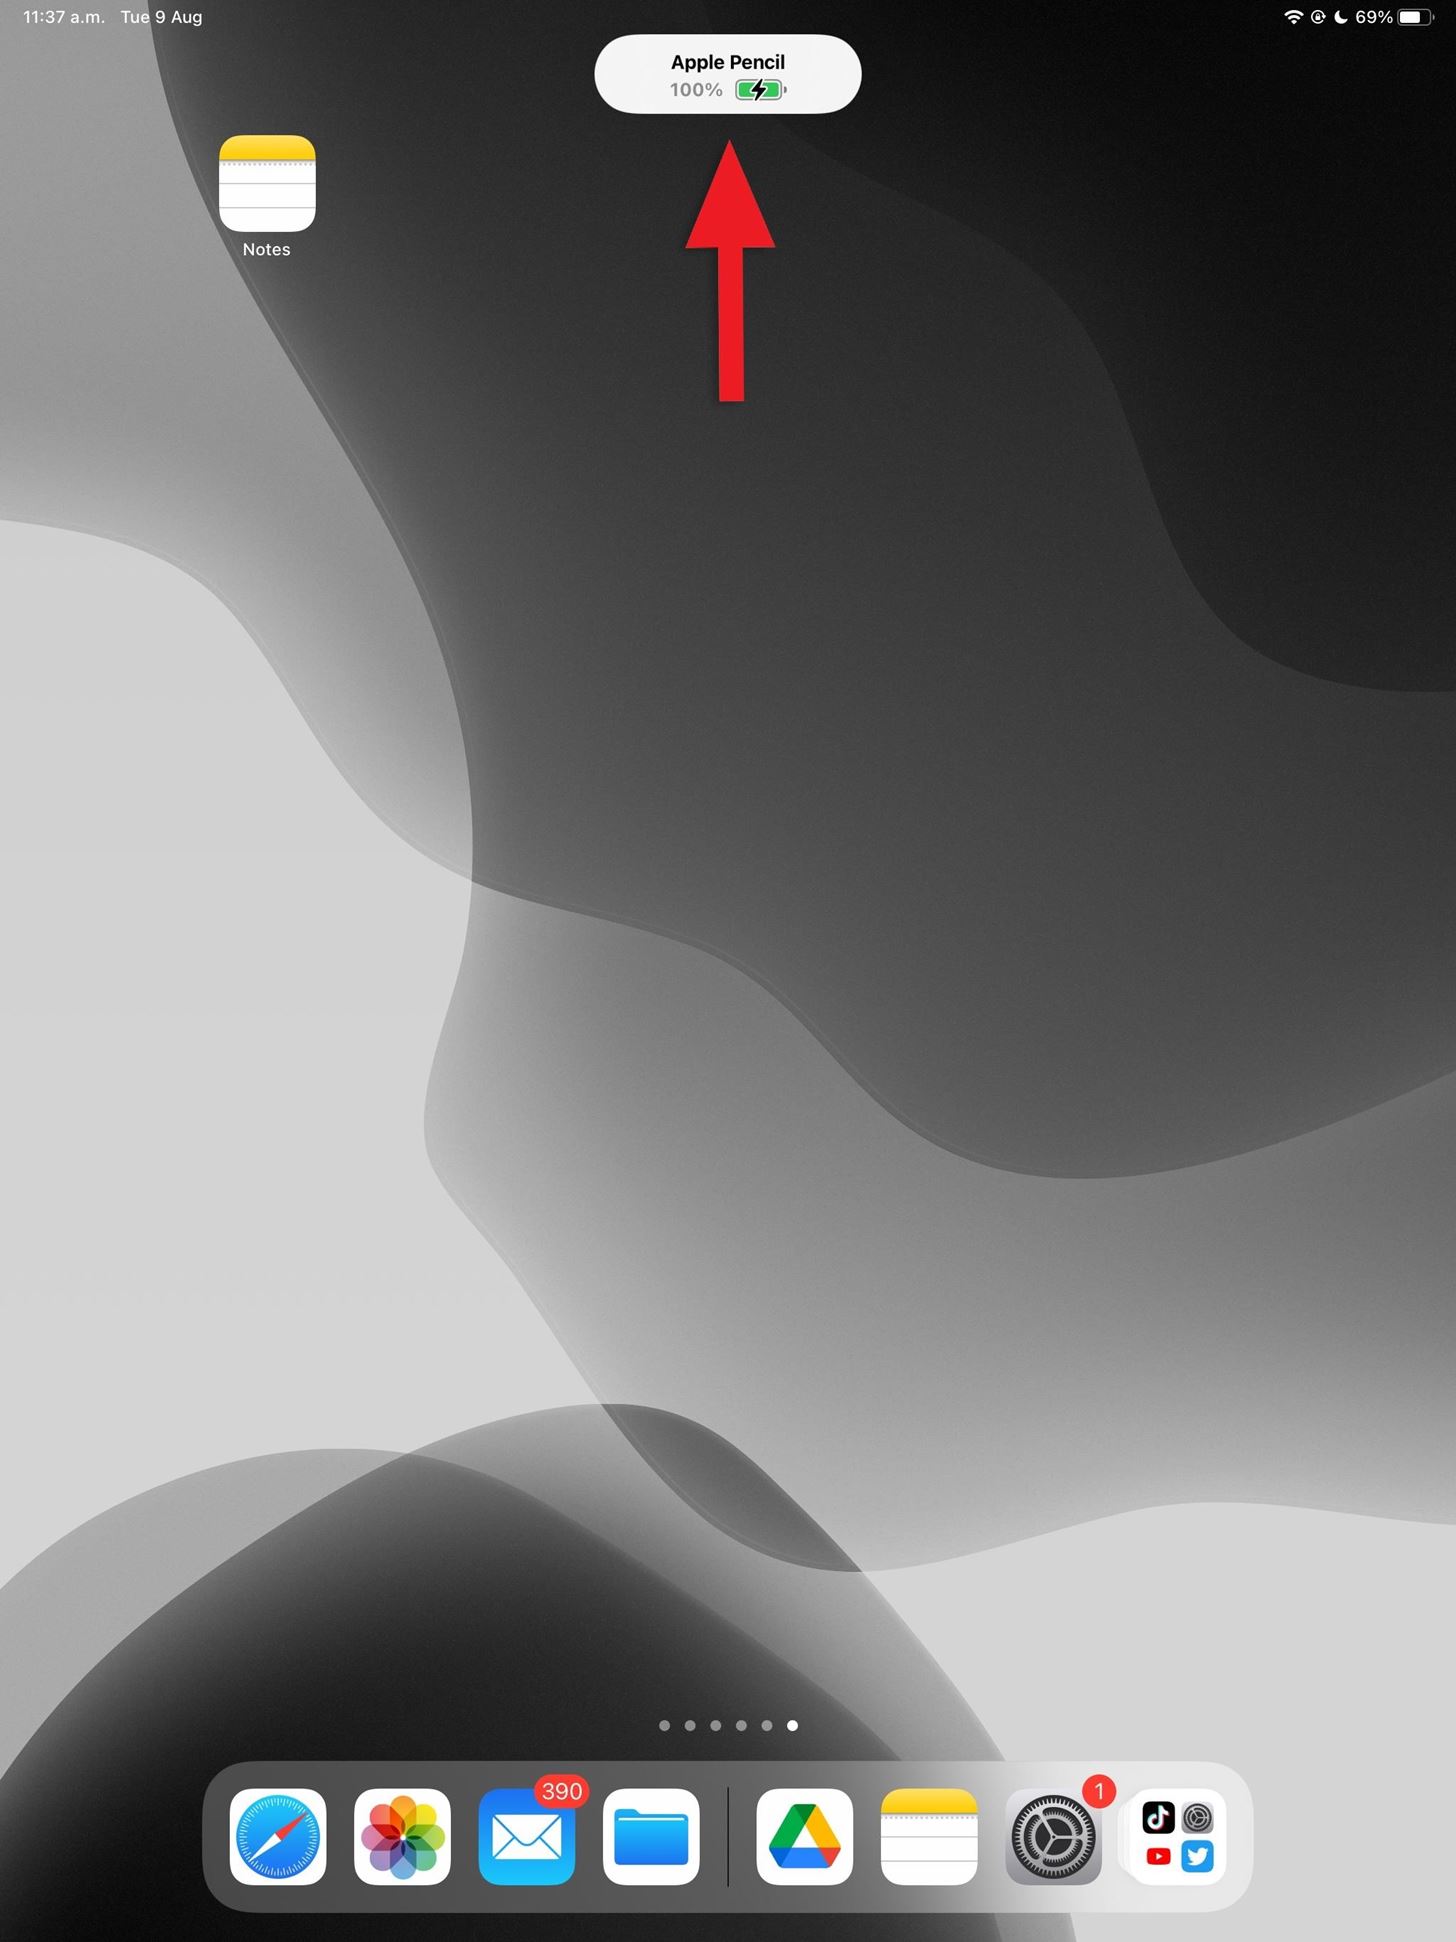
If you don't like widgets, you can go to Settings –> Apple Pencil, and you'll see its current battery percentage at the top of the screen. On top of that, whenever you snap a second-generation Apple Pencil to the side of your iPad for docking and charging, an on-screen alert will show you the current battery percentage of the Apple Pencil.
Bonus Tip: Swipe to Undo or Redo
In most apps, including Notes, Pages, and Numbers, if you mess up with the Apple Pencil, you can tap the undo button in the Markup or Scribble toolbar to go back and try again. However, there are some finger swipes you can use instead that may be quicker.
For example, a three-finger swipe to the left will undo your last strokes, while a three-finger swipe to the right will redo the strokes. And this works for anything — not just for undoing and redoing Apple Pencil strokes — so you can also use these gestures when writing notes with your keyboard.
* Compatible Languages
The following languages are compatible with Scribble, when copying handwriting to text, and when interacting with data detectors.
- English (Australia)
- English (Canada)
- English (India)
- English (Ireland)
- English (New Zealand)
- English (Singapore)
- English (South Africa)
- English (United Kingdom)
- English (United States)
- Cantonese (Traditional)
- Chinese (Simplified)
- Chinese (Traditional)
- French (Belgium)
- French (Canada)
- French (France)
- French (Switzerland)
- German (Austria)
- German (Germany)
- German (Switzerland)
- Italian (Italy)
- Italian (Switzerland)
- Japanese
- Spanish (Chile)
- Spanish (Colombia)
- Spanish (Mexico)
- Spanish (Spain)
- Portuguese (Brazil)
- Portuguese (Portugal)
Just updated your iPhone? You'll find new emoji, enhanced security, podcast transcripts, Apple Cash virtual numbers, and other useful features. There are even new additions hidden within Safari. Find out what's new and changed on your iPhone with the iOS 17.4 update.


Be the First to Comment
Share Your Thoughts