
Whether you use VSCO to take all of your photos or you use it primarily to edit photos you take with others apps on your iOS or Android phone, you're at some point going to want your VSCO pics to end up in your Camera Roll or Gallery. VSCO doesn't add them there by default, but there's a couple of ways to get them there.
Saving individual photos to your Camera Roll or Gallery is pretty straightforward. Plus, you can save all of the photos in your VSCO Studio at once or have photos you take with VSCO automatically be saved. Just follow the instructions in this guide, and your favorite VSCO photos will appear directly on your phone's built-in photos app, offering you much more flexibility with those images than VSCO can alone.
Method 1: Saving Photos Individually
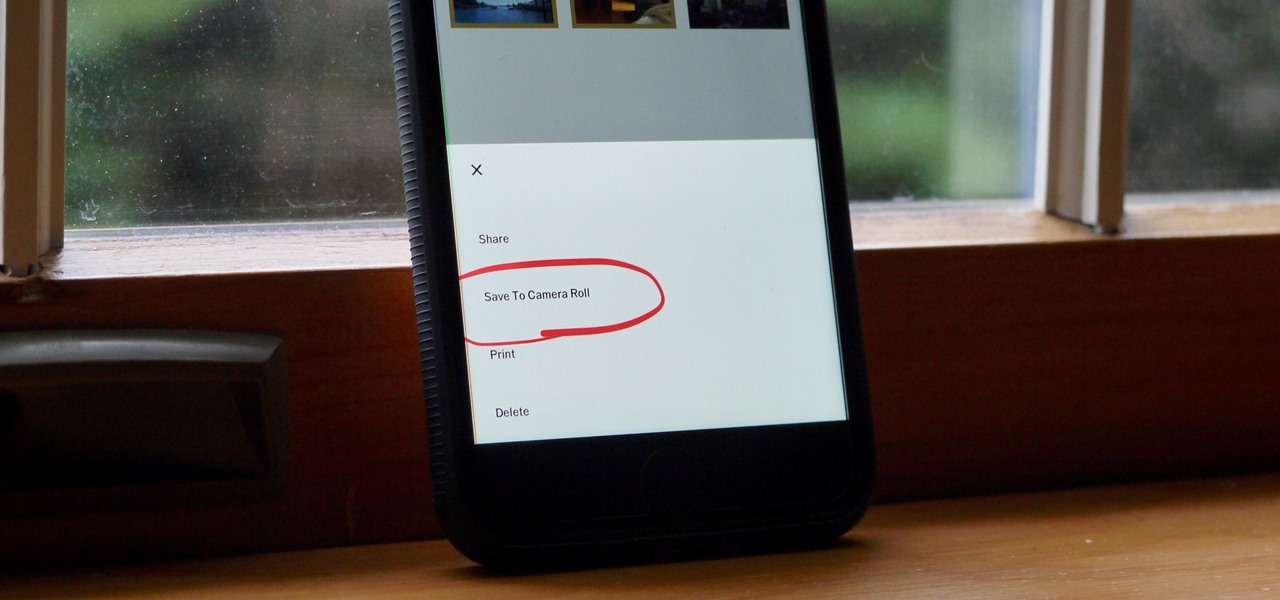
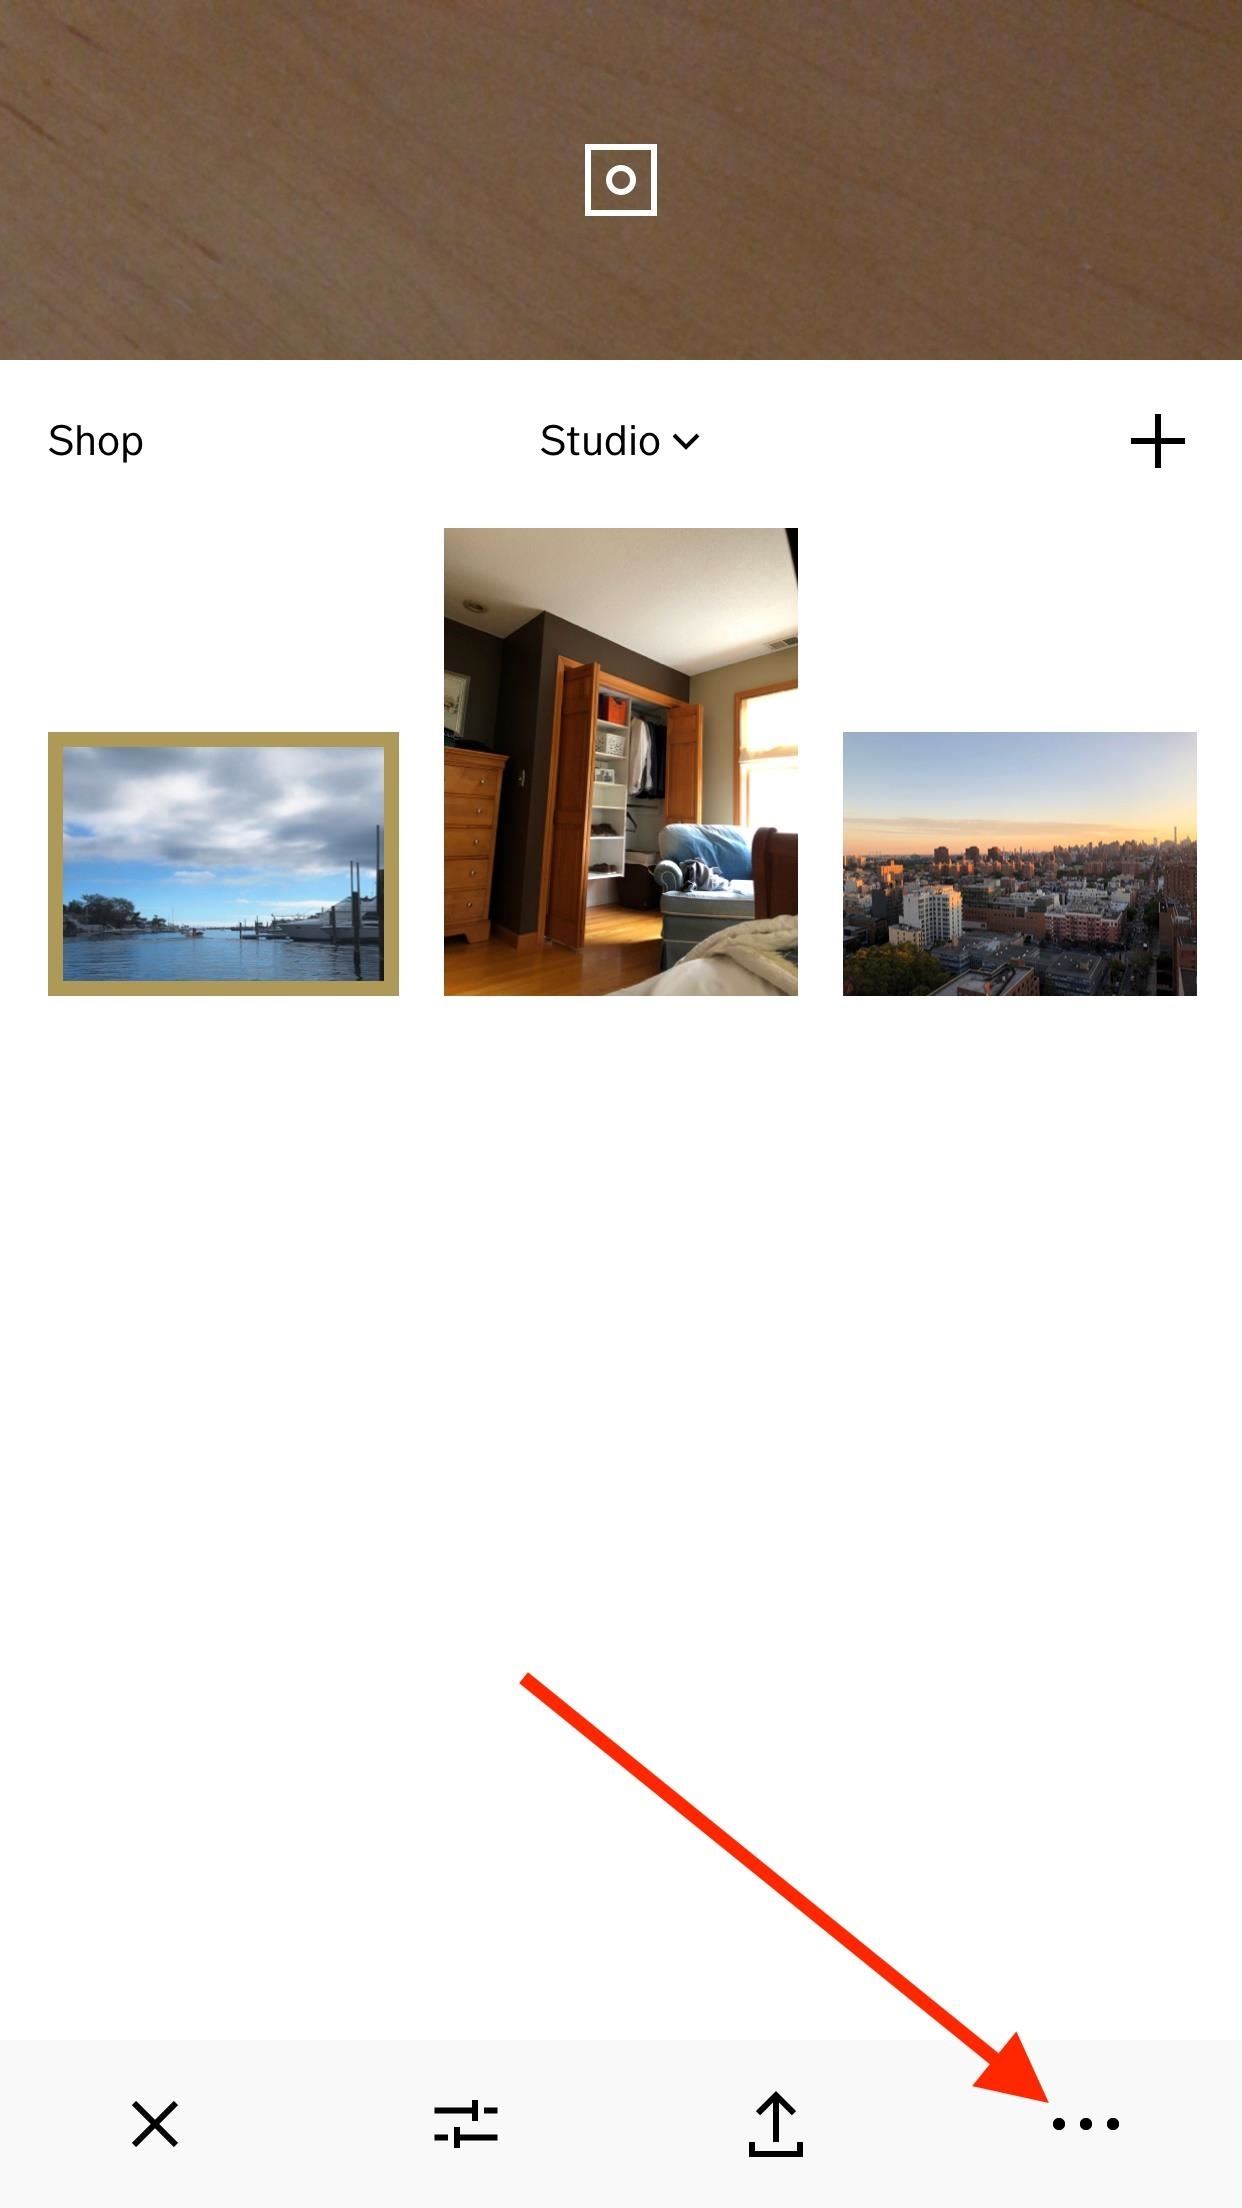
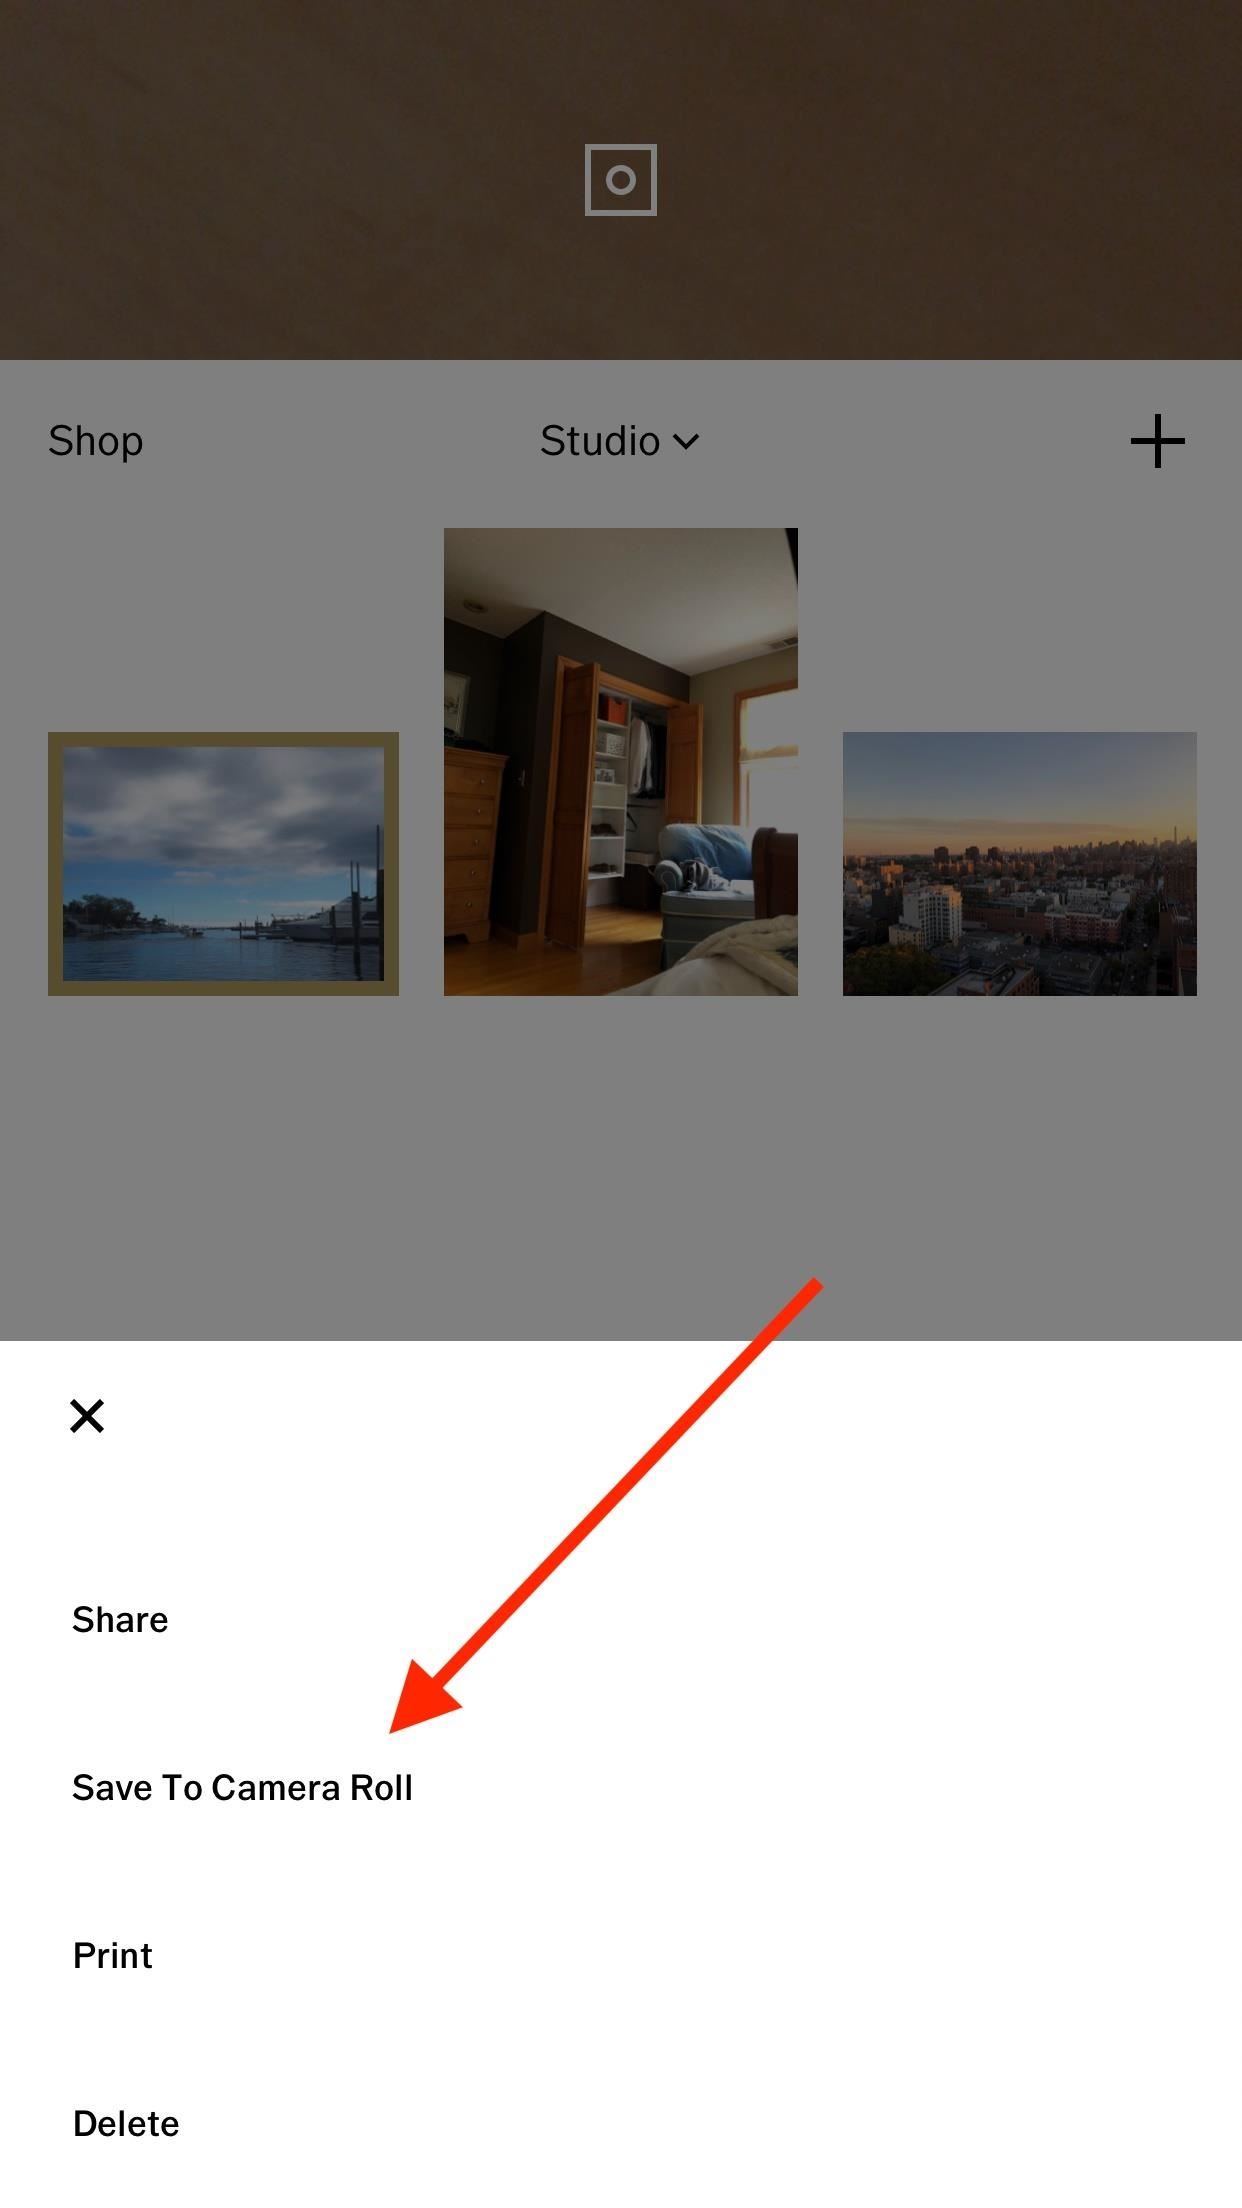
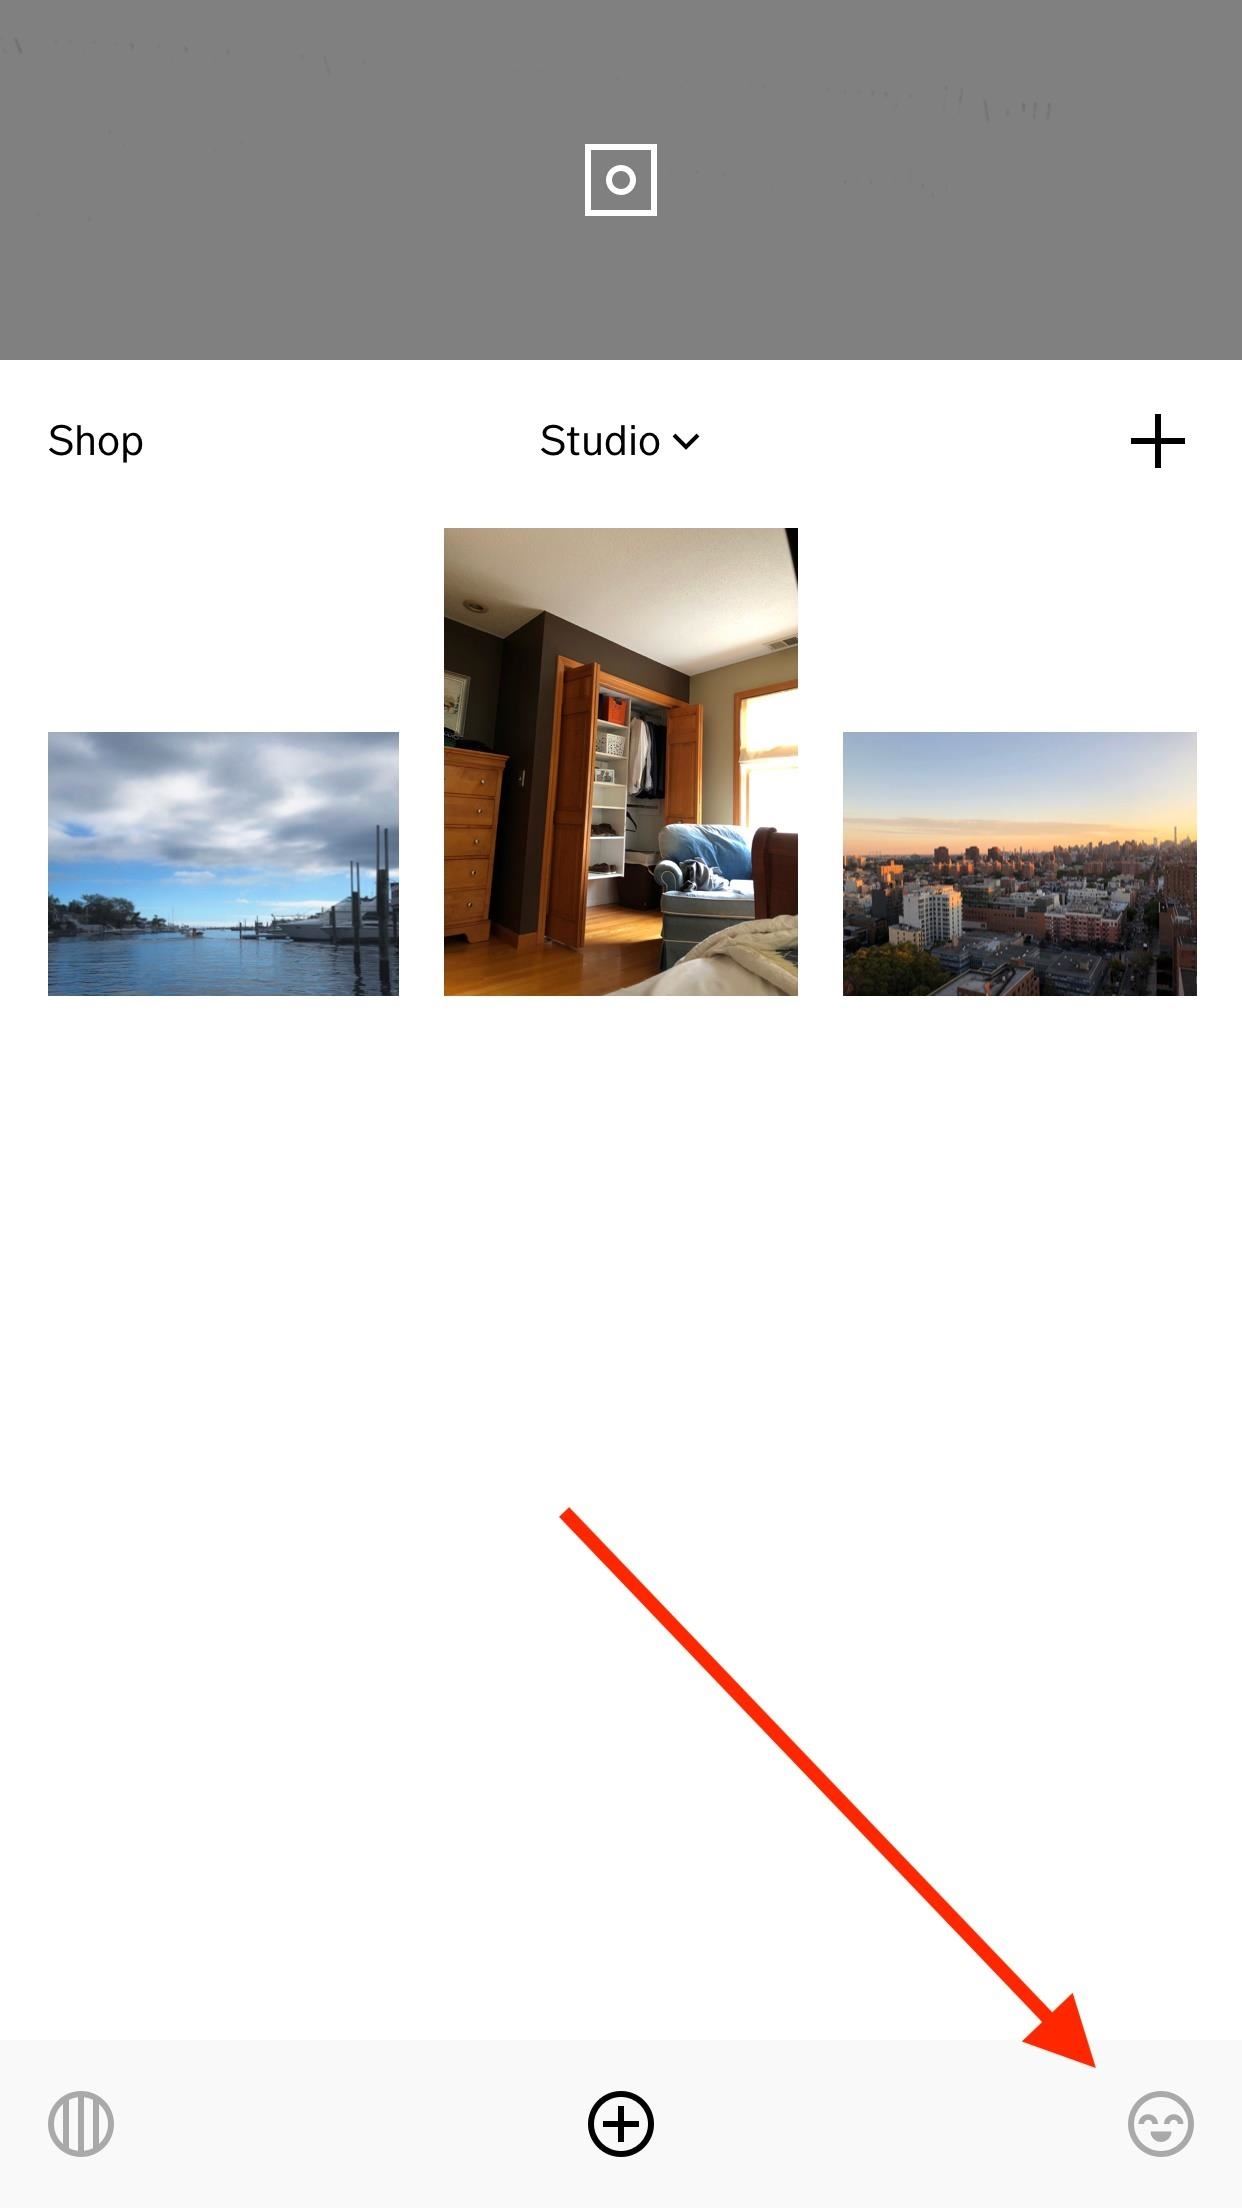
In your Studio, which is basically the main page of the app that holds all of your photos, tap on the photo or photos you'd like to save to your iPhone or Android. Next, tap the ellipsis icon (three dots) in the bottom-right corner of the display, then tap "Save To Camera Roll" or "Save to gallery." If you haven't already granted VSCO access to your built-in photos and media, you'll have to do so before continuing.
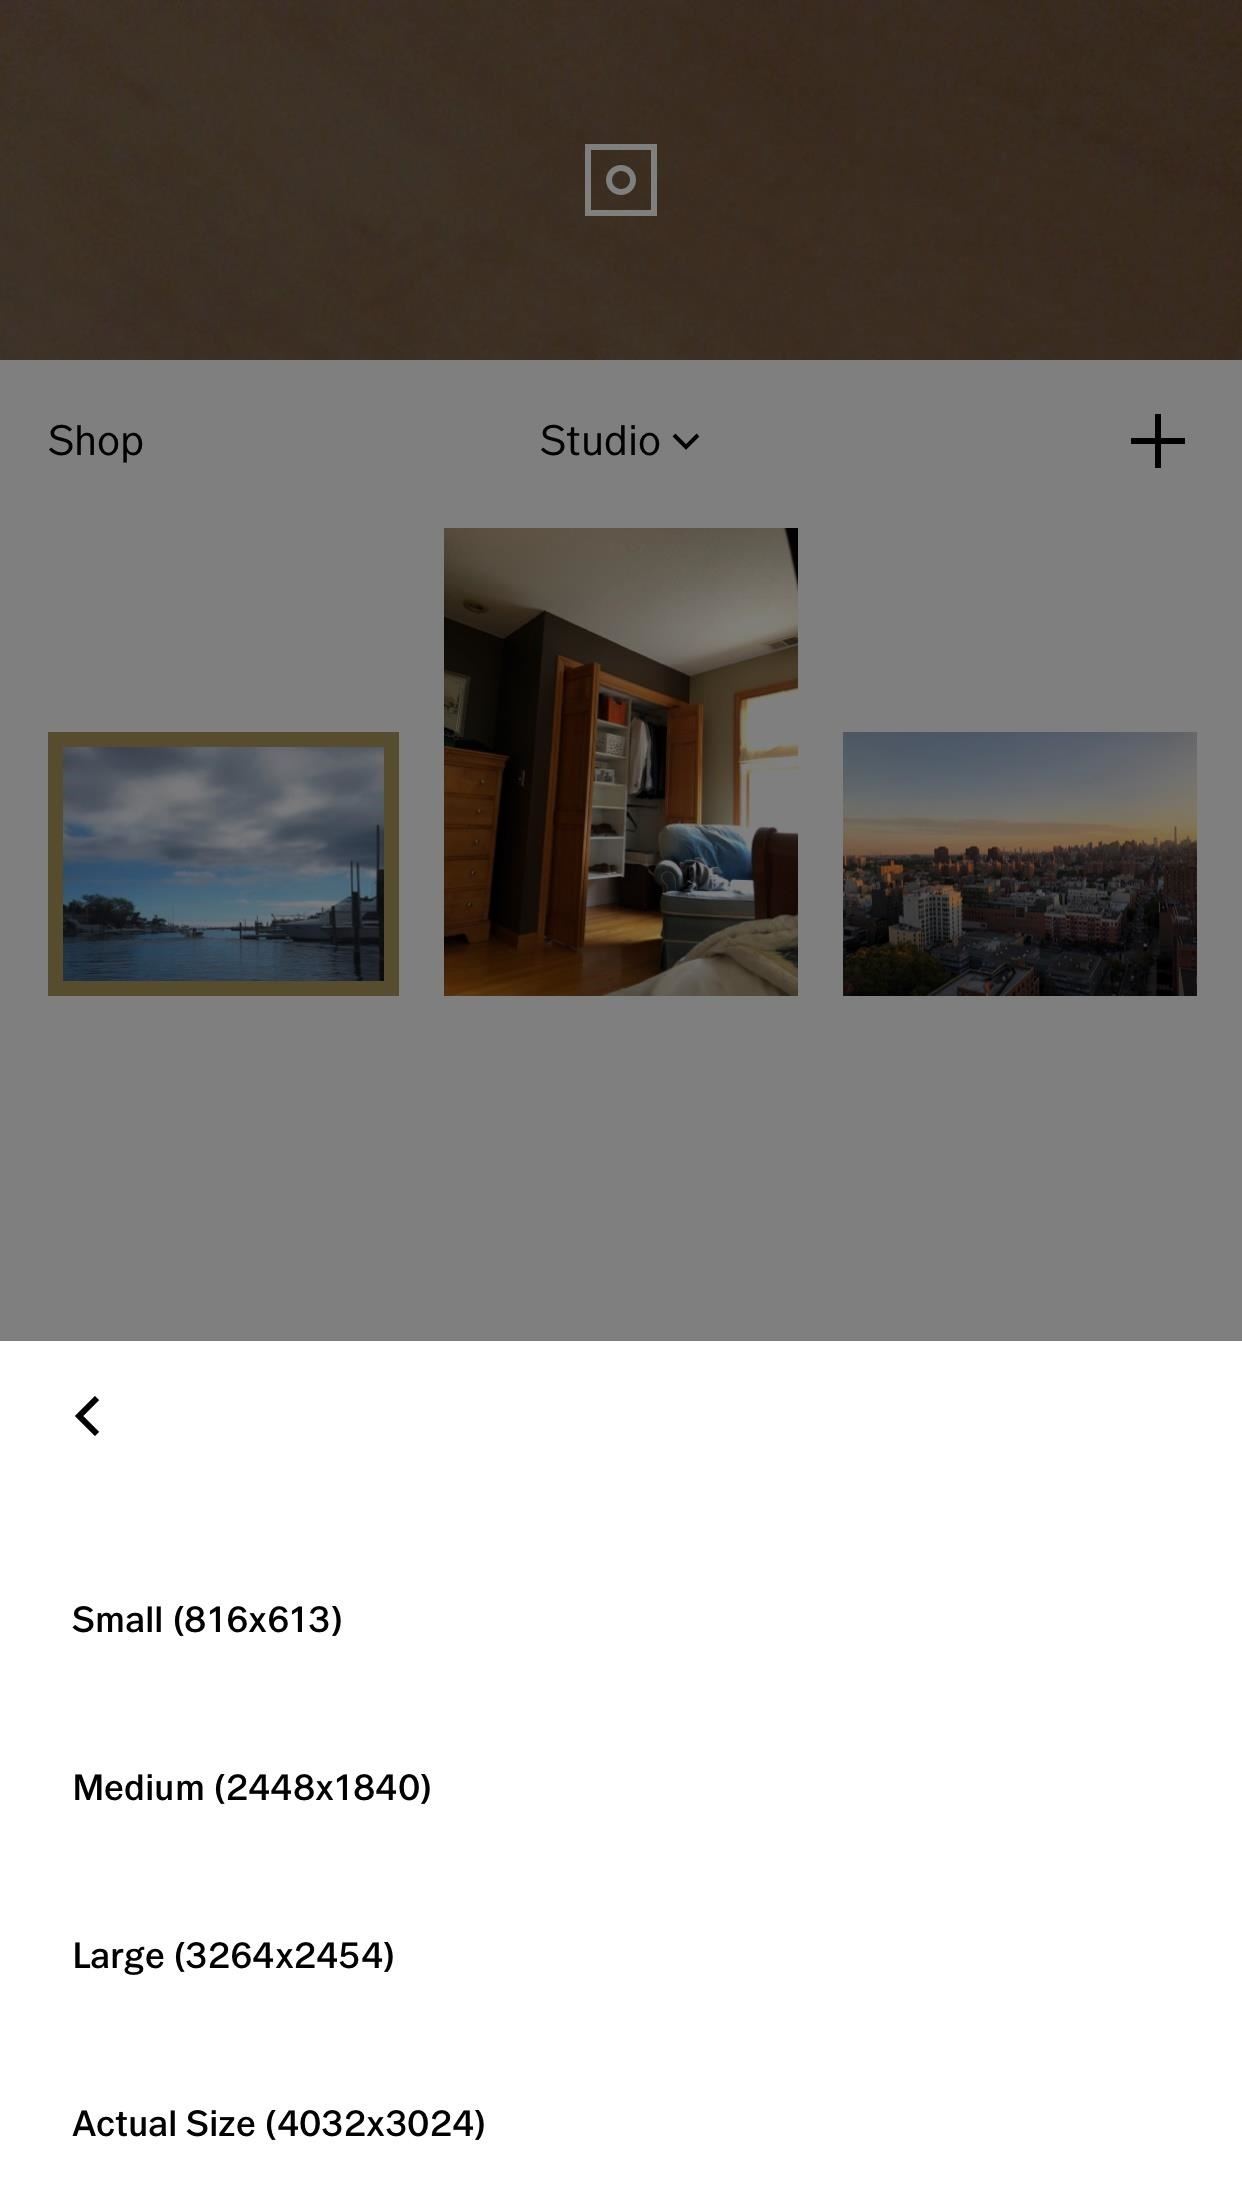
If you're using an Android phone, the image or images should be saved immediately to your Gallery or Google Photos app, whichever is your default. However, if you're on an iPhone, it may ask you to choose the image size you'd like VSCO to export the photo or photos as.
Choosing the "Actual Size" option will make sure the photo or photos stay as large as they are currently. Otherwise, experiment with the other size options to see what ratio of image quality vs. storage size works for you.
To make sure the photos were actually saved to your Camera Roll or Gallery, open up either the Photos app on iOS or the Gallery or Google Photos app up on Android. There should be a dedicated VSCO album as well, so you can easily find all the pics from VSCO without digging around.
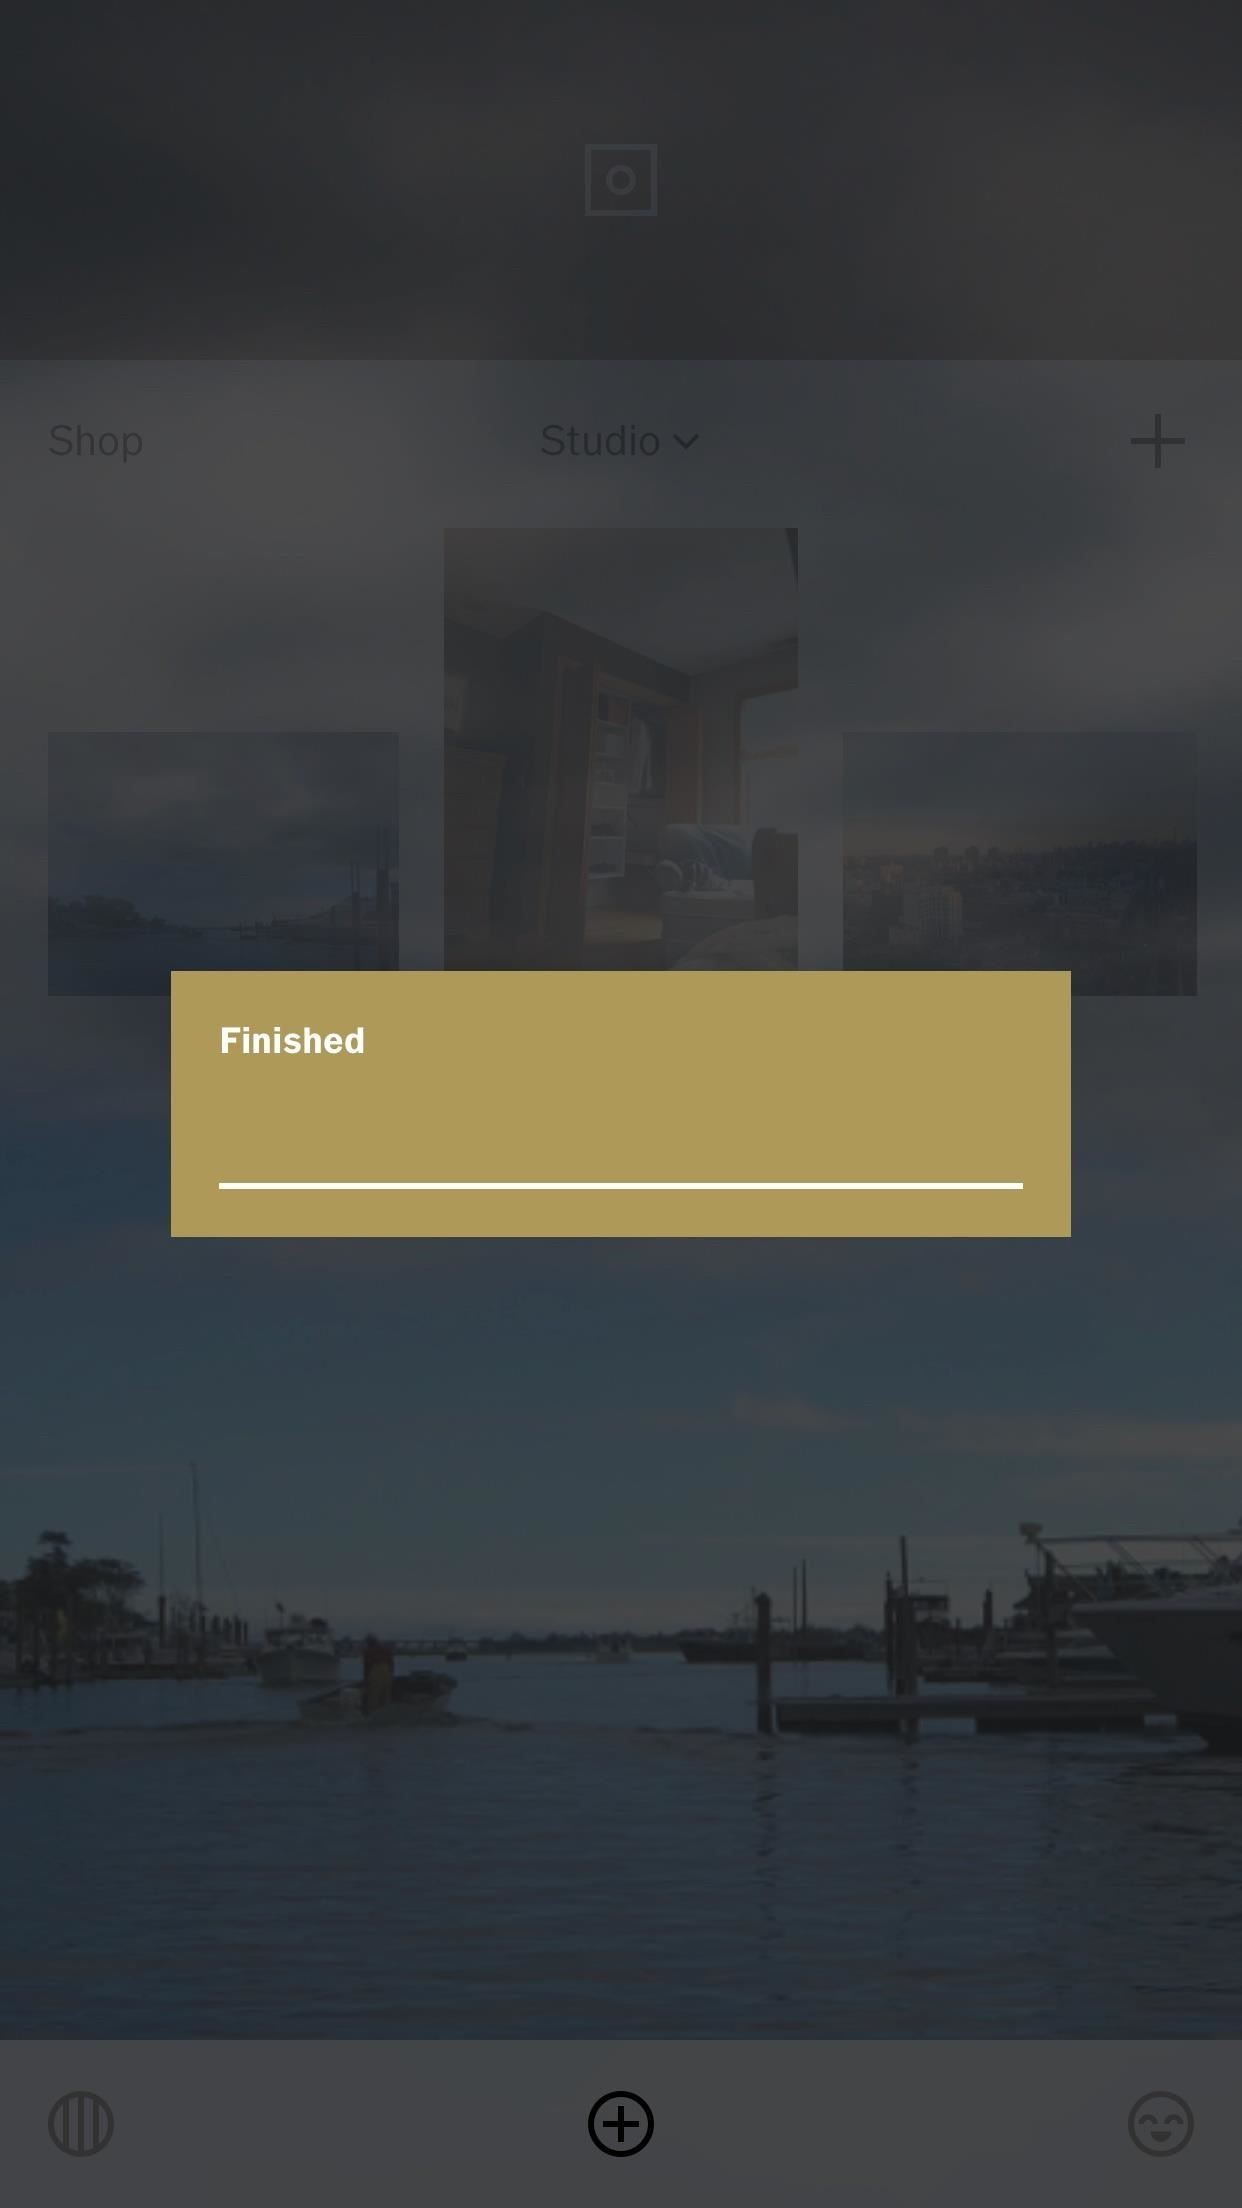
Method 2: Exporting Them All at Once
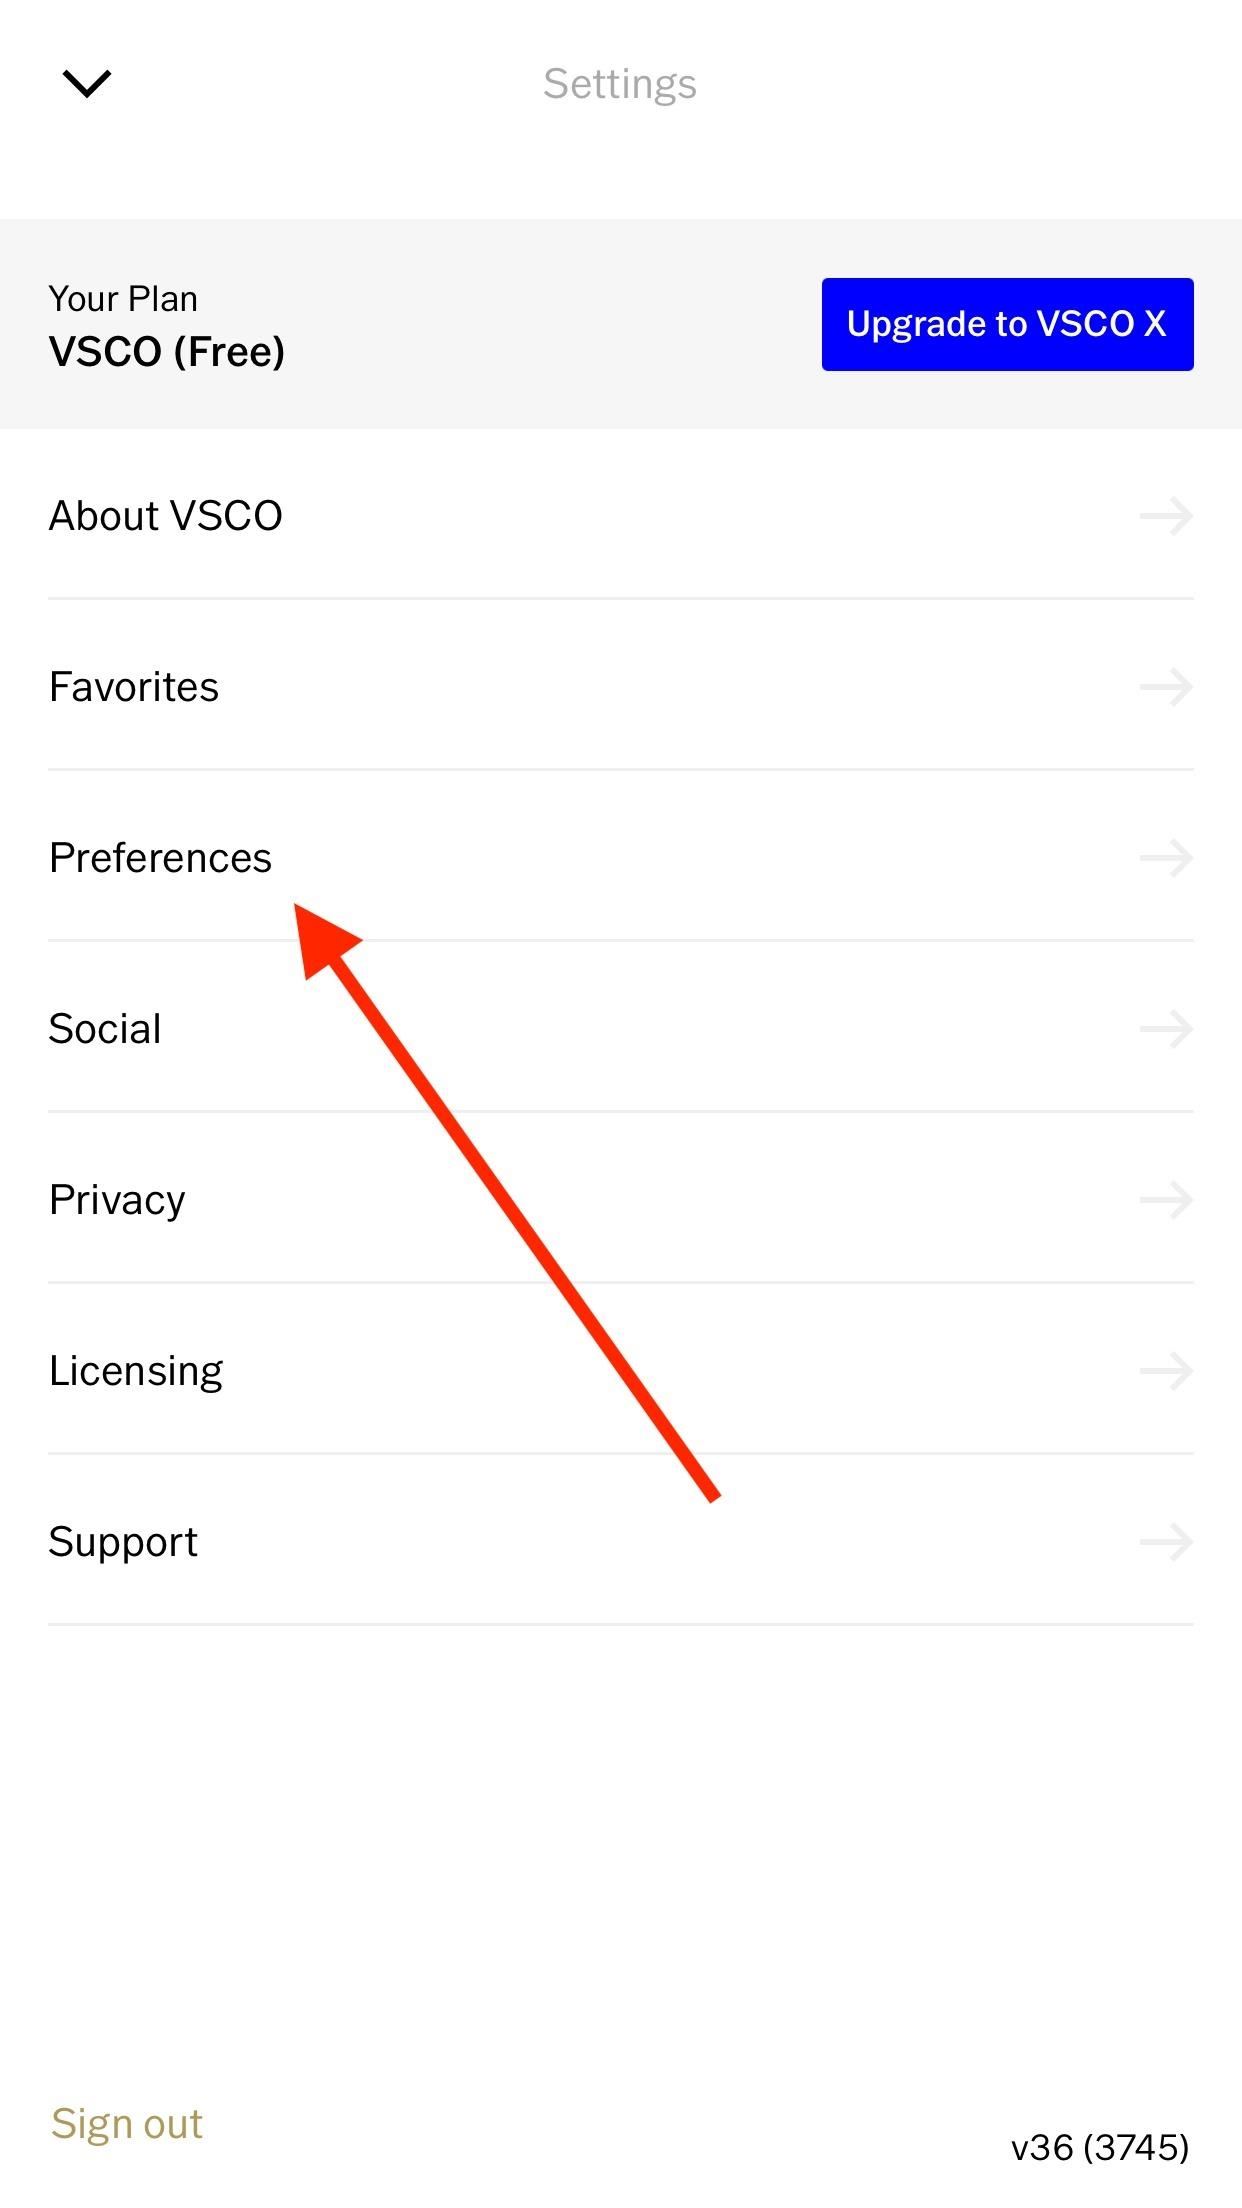
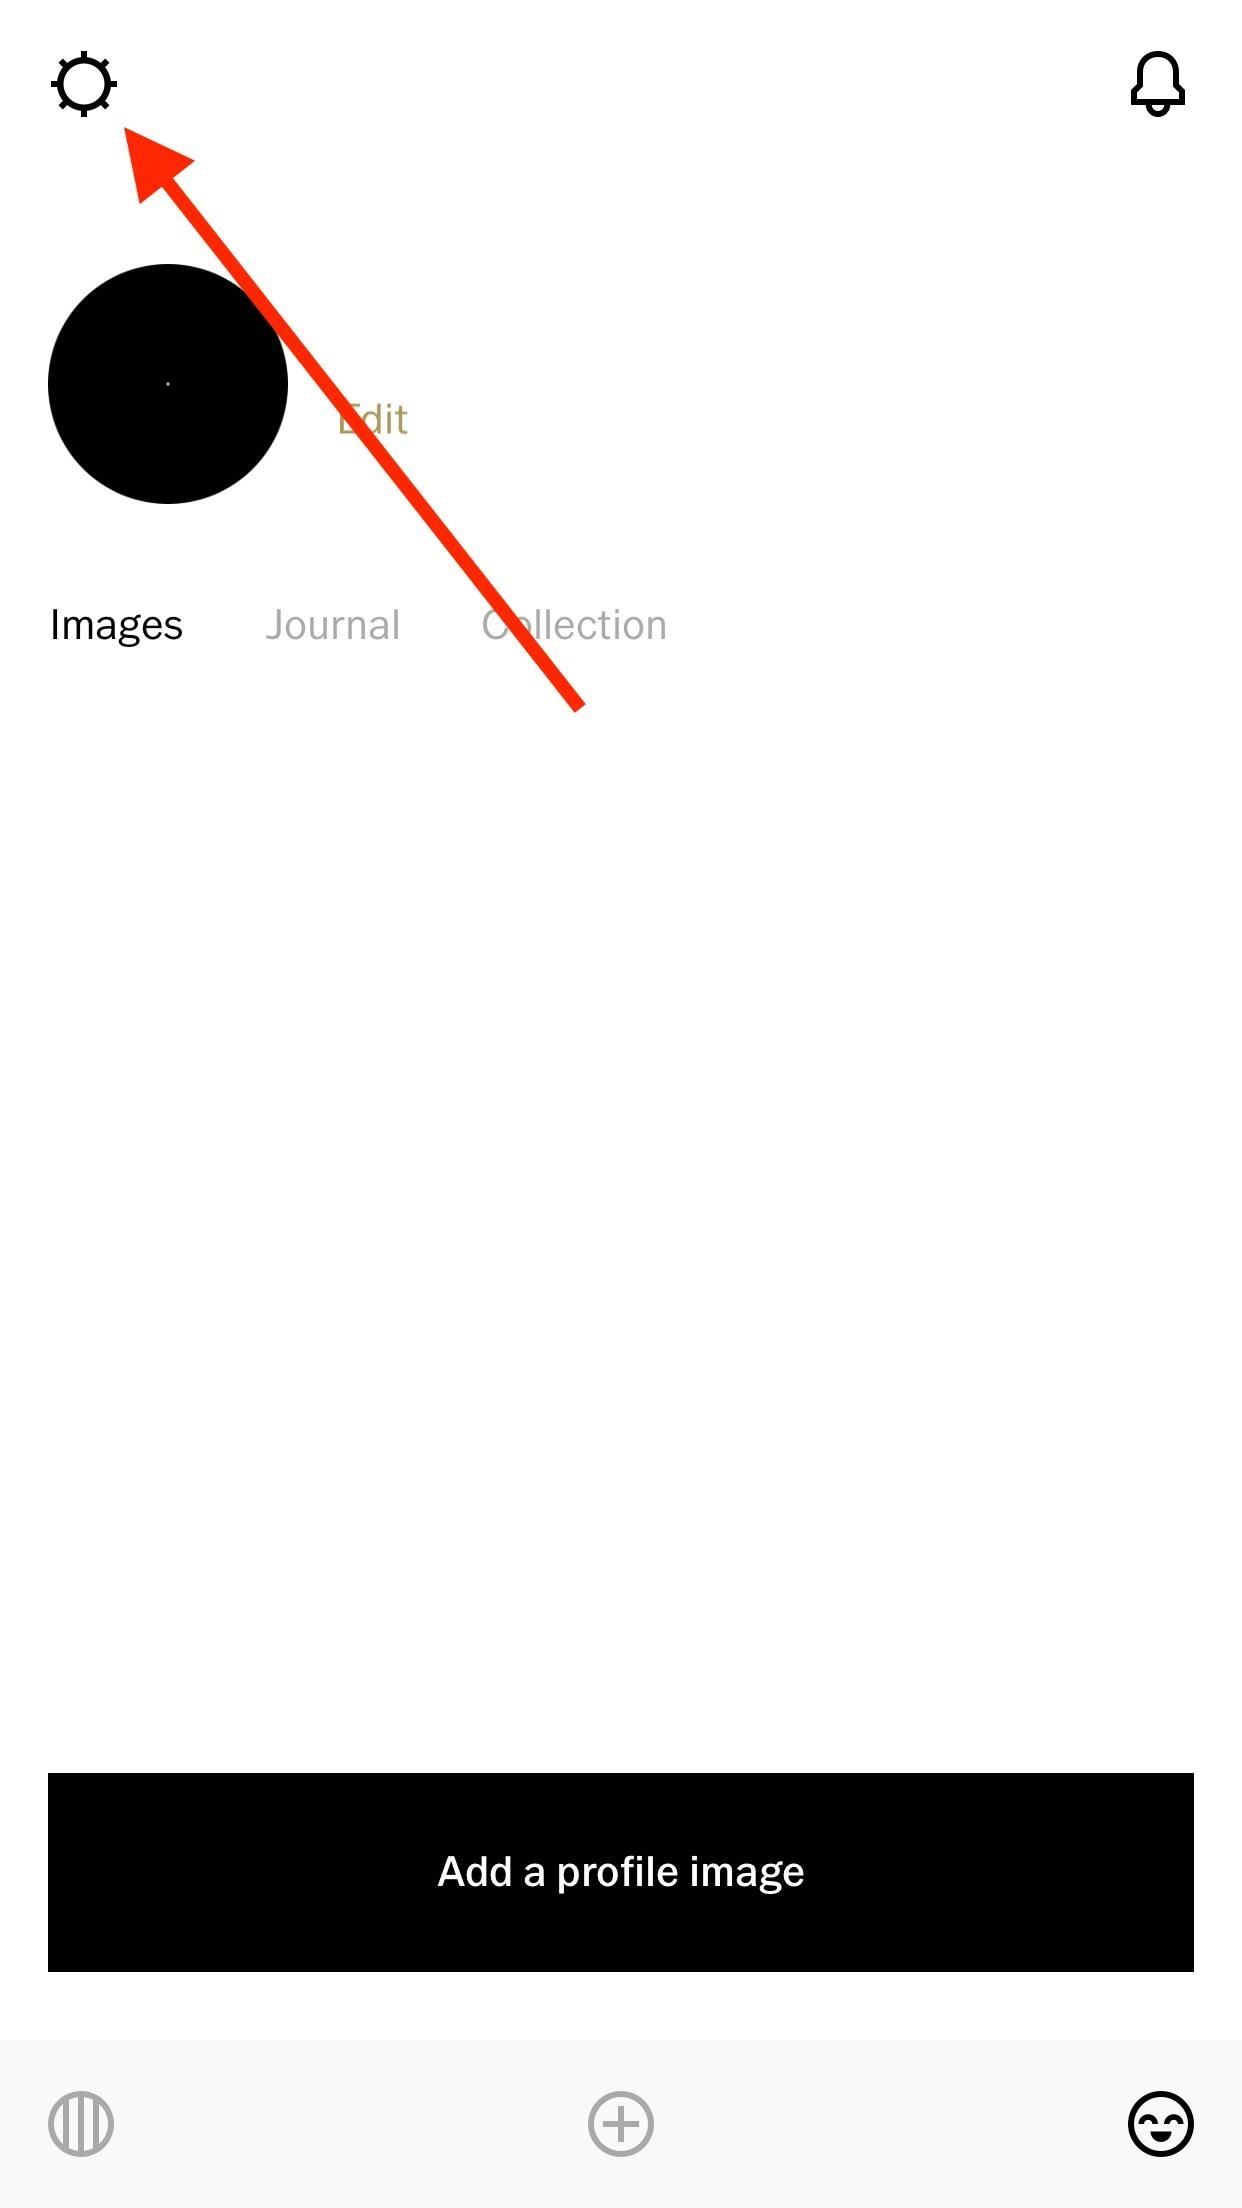
Have so many photos in VSCO that hand-selecting each would be a pain? Then you can export them all at the same time. If you're signed into VSCO, you can tap on the smiley face in the bottom right; otherwise, select the feed icon (the circle with lines in it) in the bottom left. Then, tap the cog icon in the top left to access your settings.


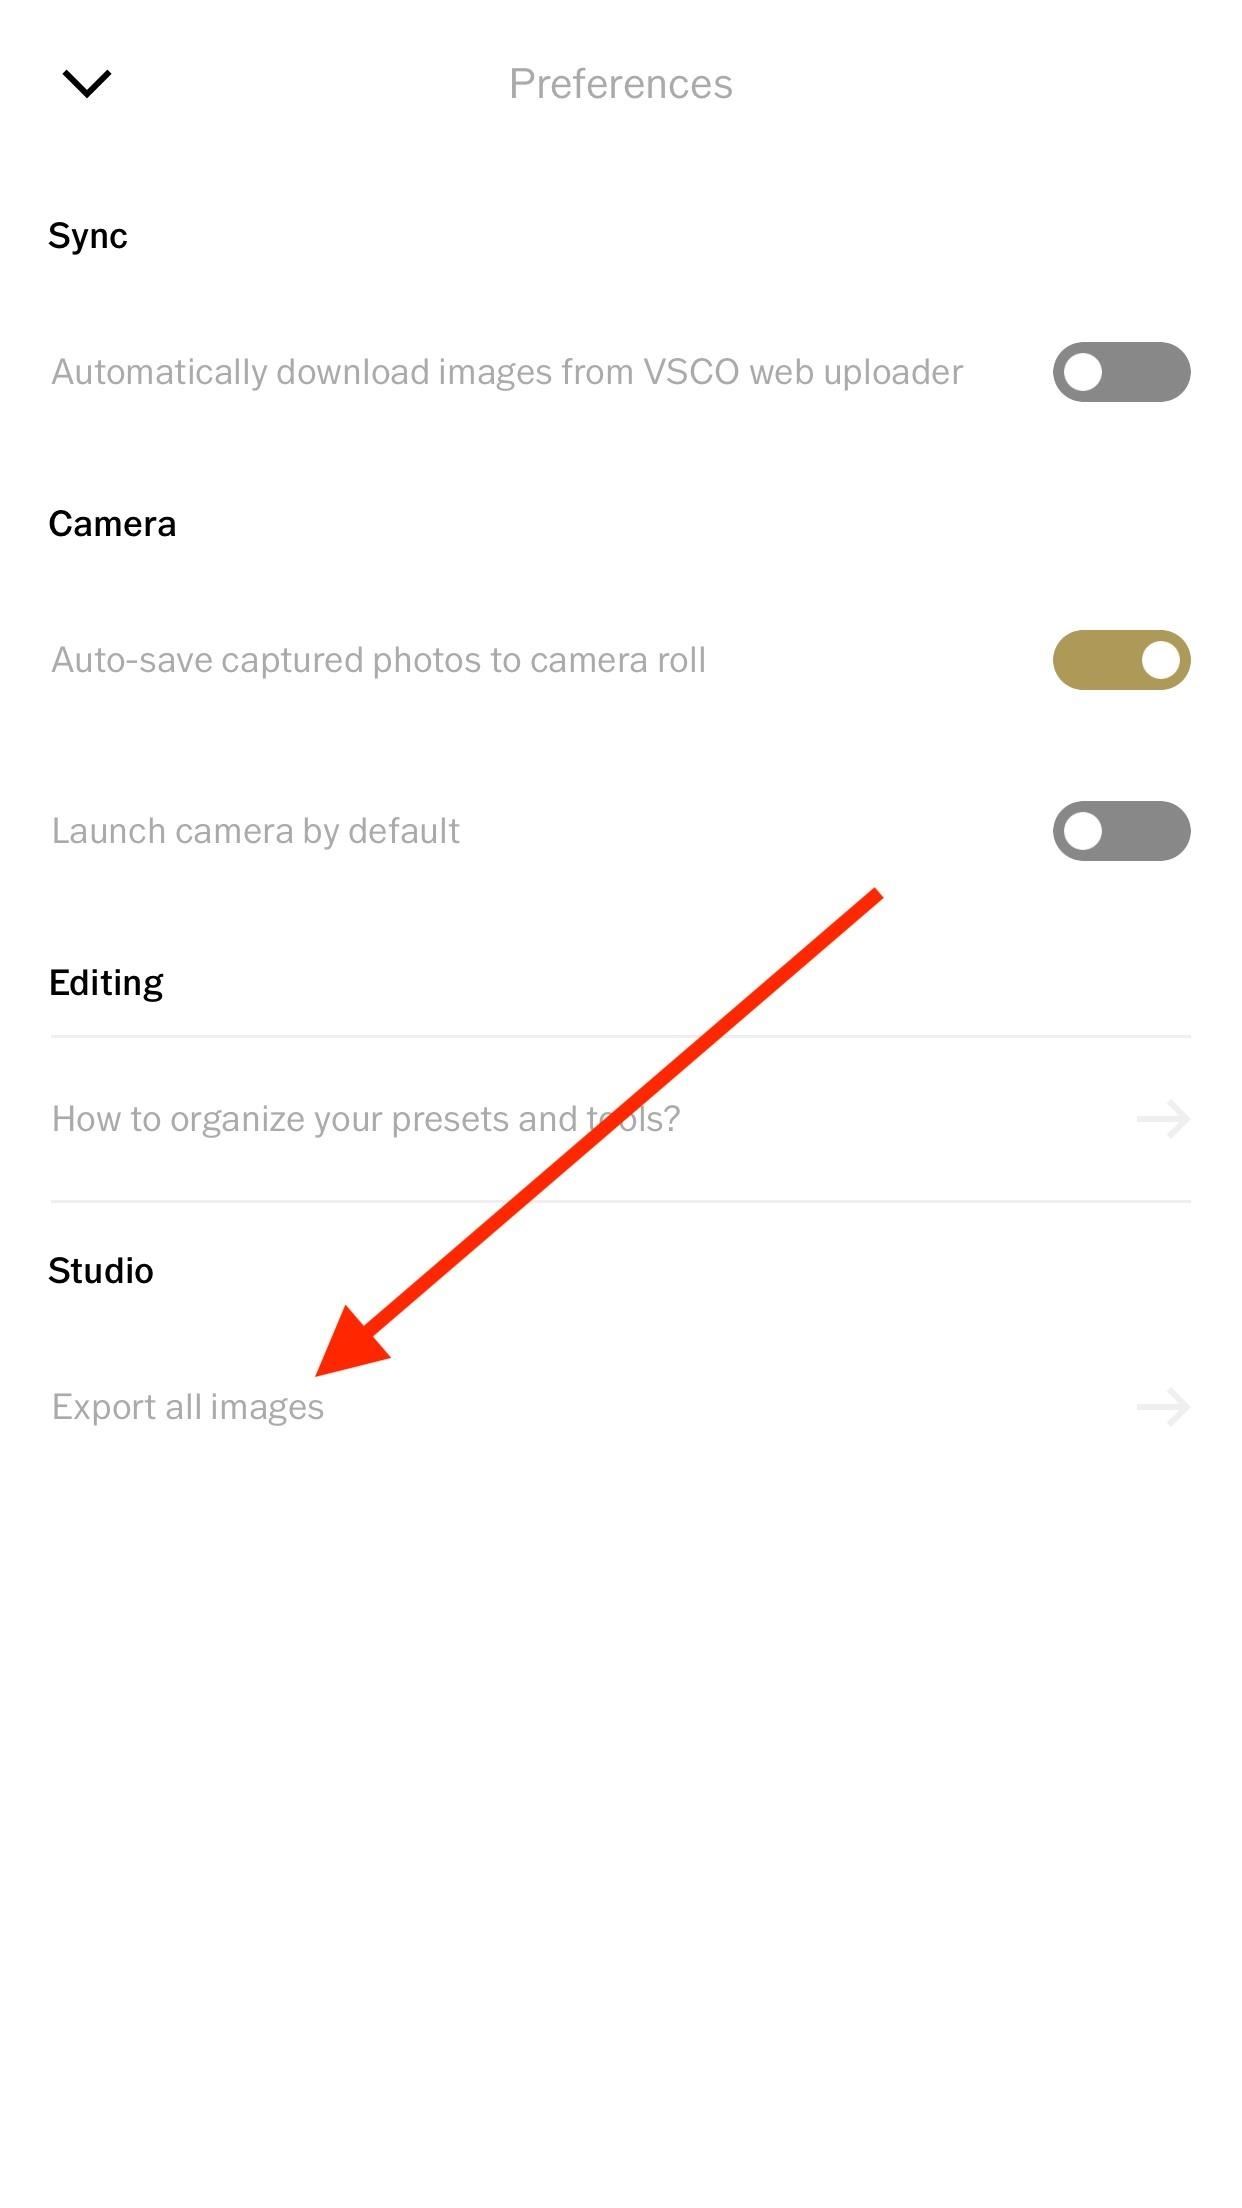
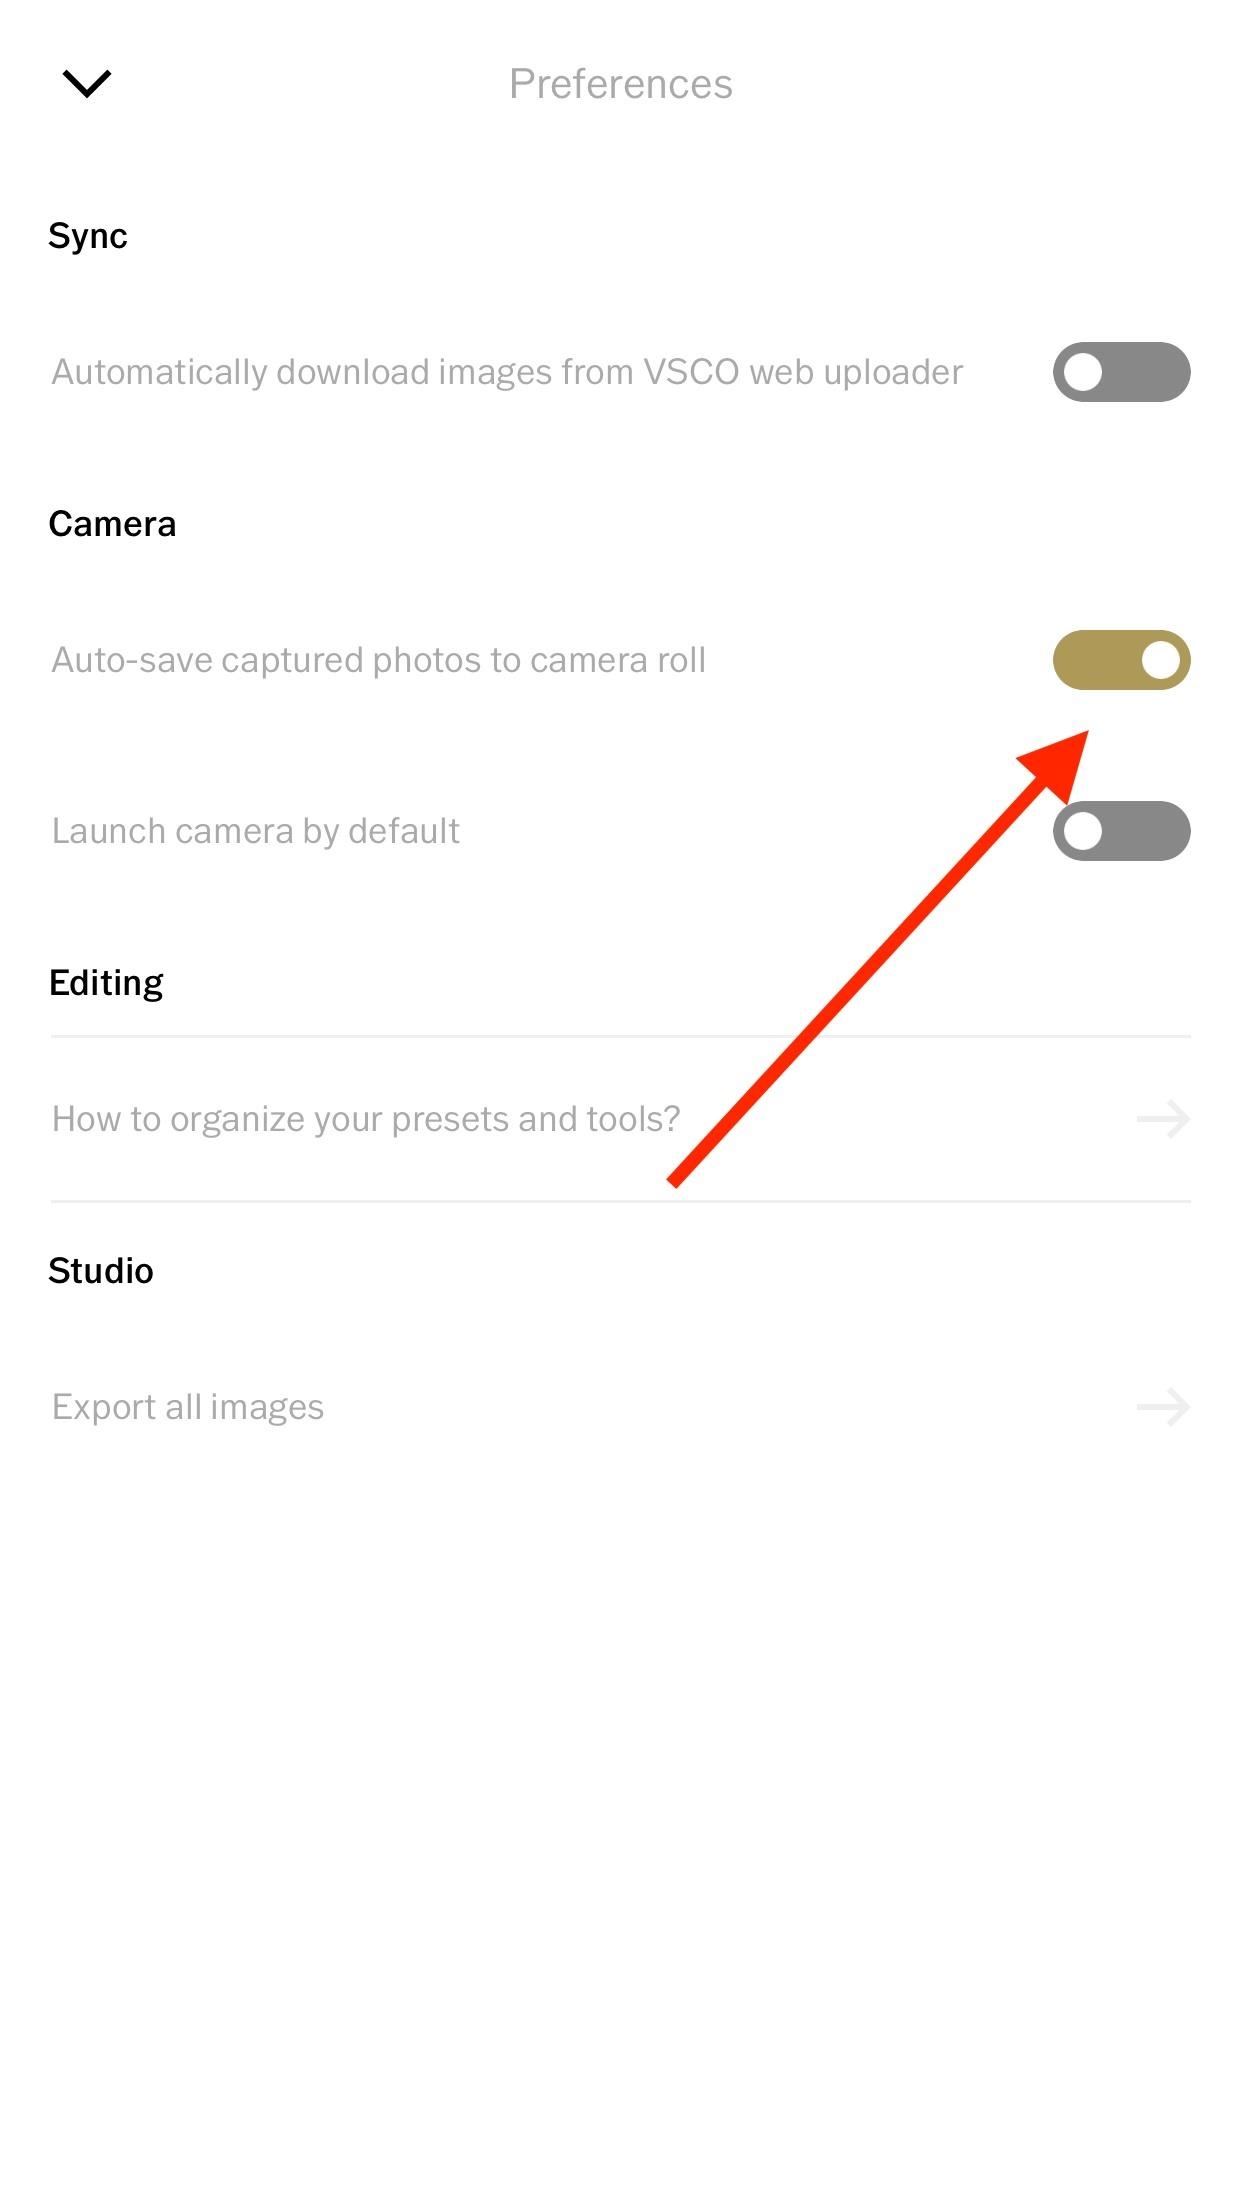
From here, tap "Preferences." At the bottom of the next page, under Studio, tap "Export all images." VSCO handles things from here, automatically saving all photos in your Studio to your Camera Roll or Gallery.
Method 3: Saving to Camera Roll Automatically (iOS Only)
If you want to bypass this process entirely, there's a simple fix for that. Tap the smiley face icon in the bottom right, if you're signed in, or tap the feed icon on the bottom left. On the following screen, tap the cog icon in the top left to access your settings.
Tap on "Preferences," then make sure "Auto-save captured photos to camera roll" is enabled under Camera. Once this setting is turned on, you will no longer need to manually save the photos you take with VSCO to your Camera Roll — only photos you import and edit with VSCO.

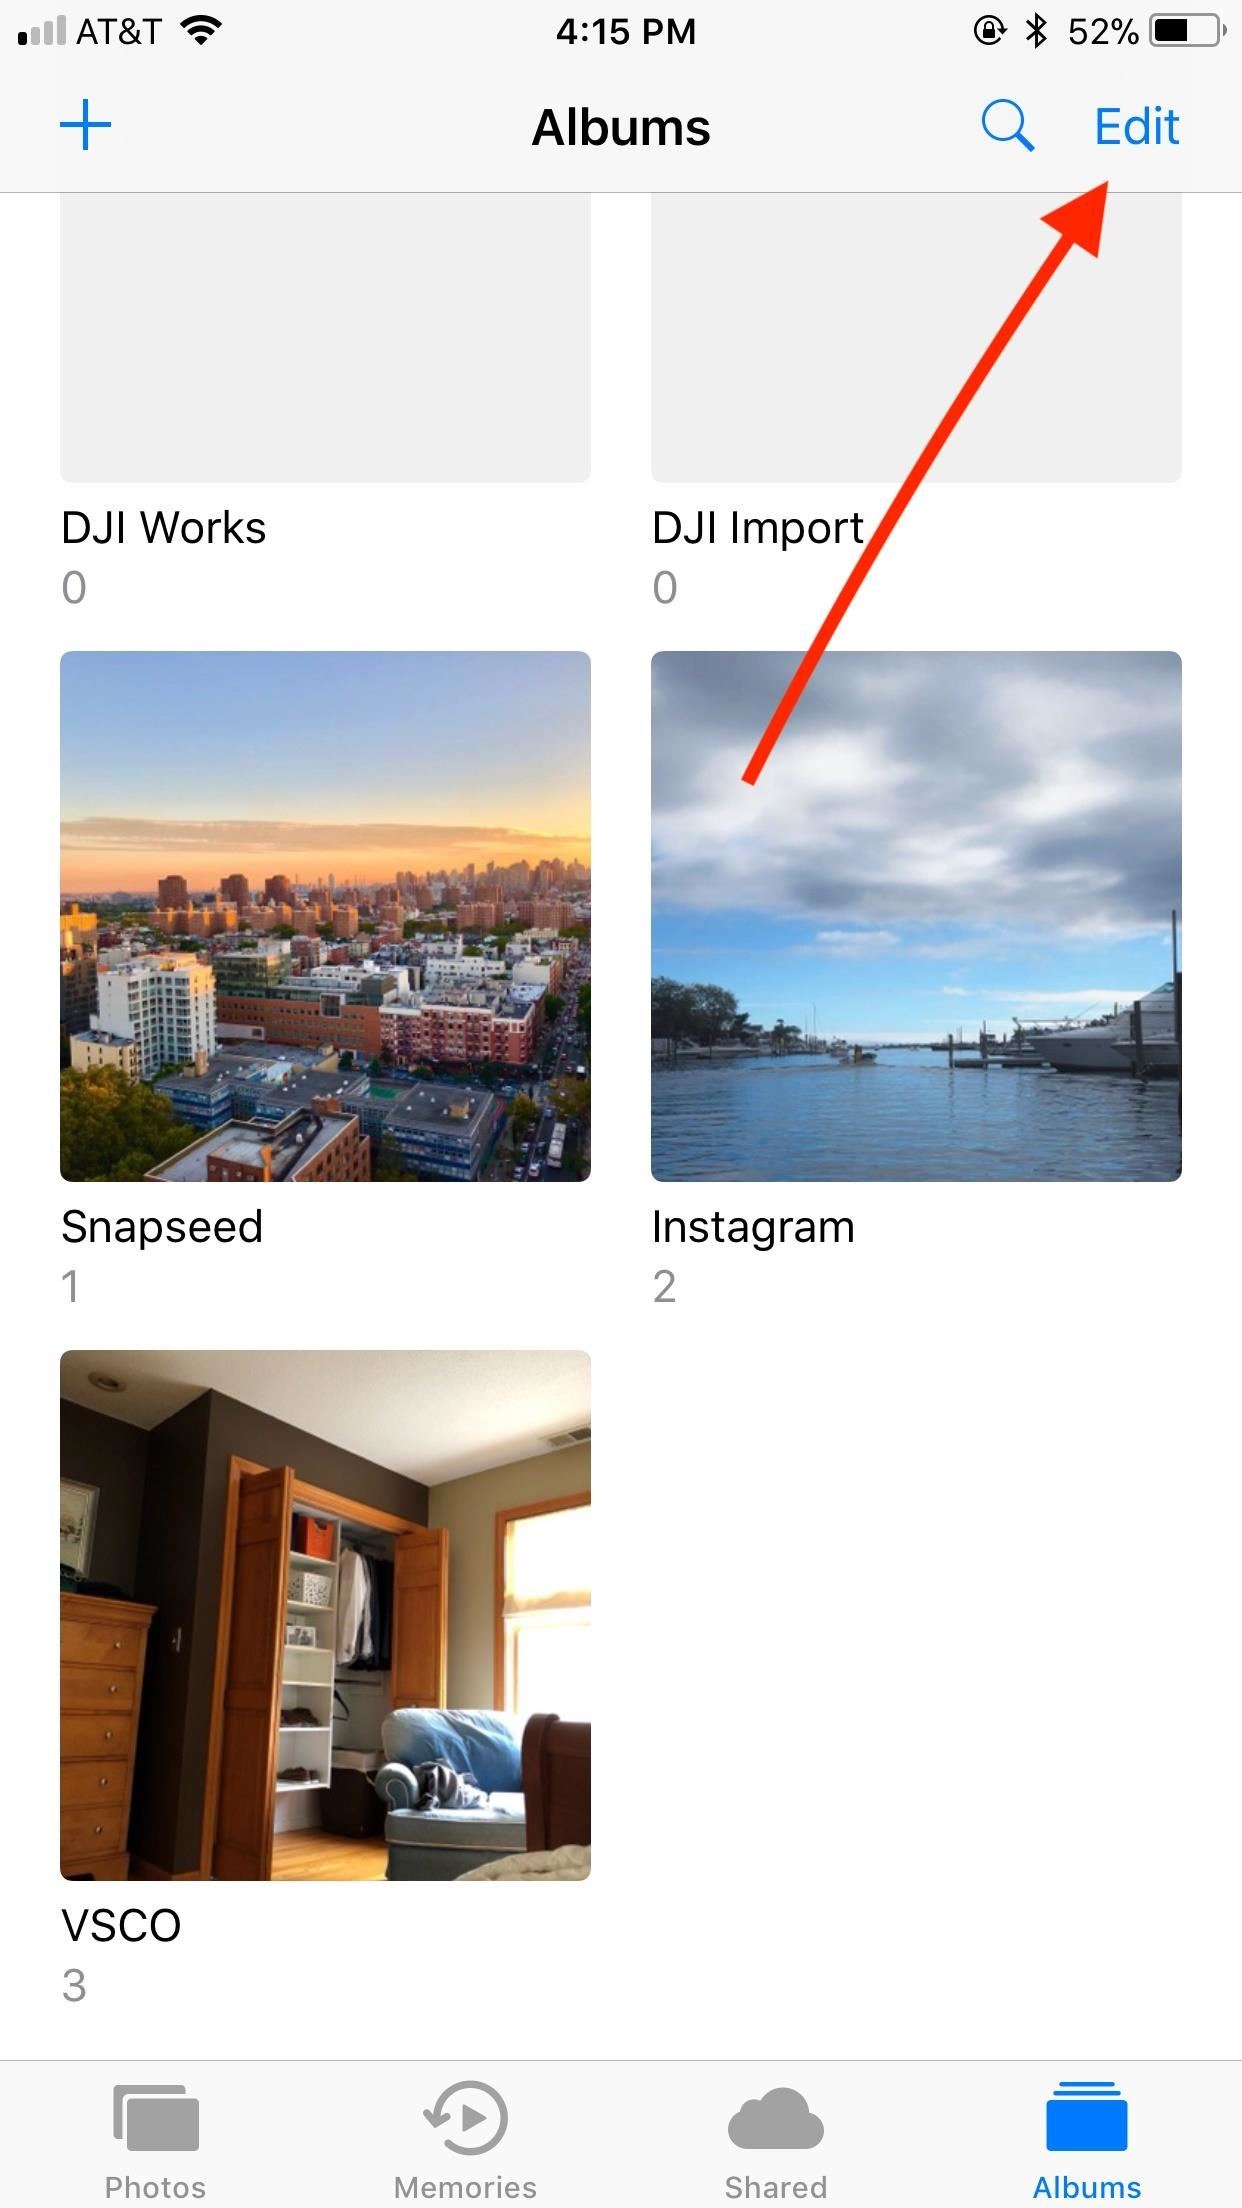
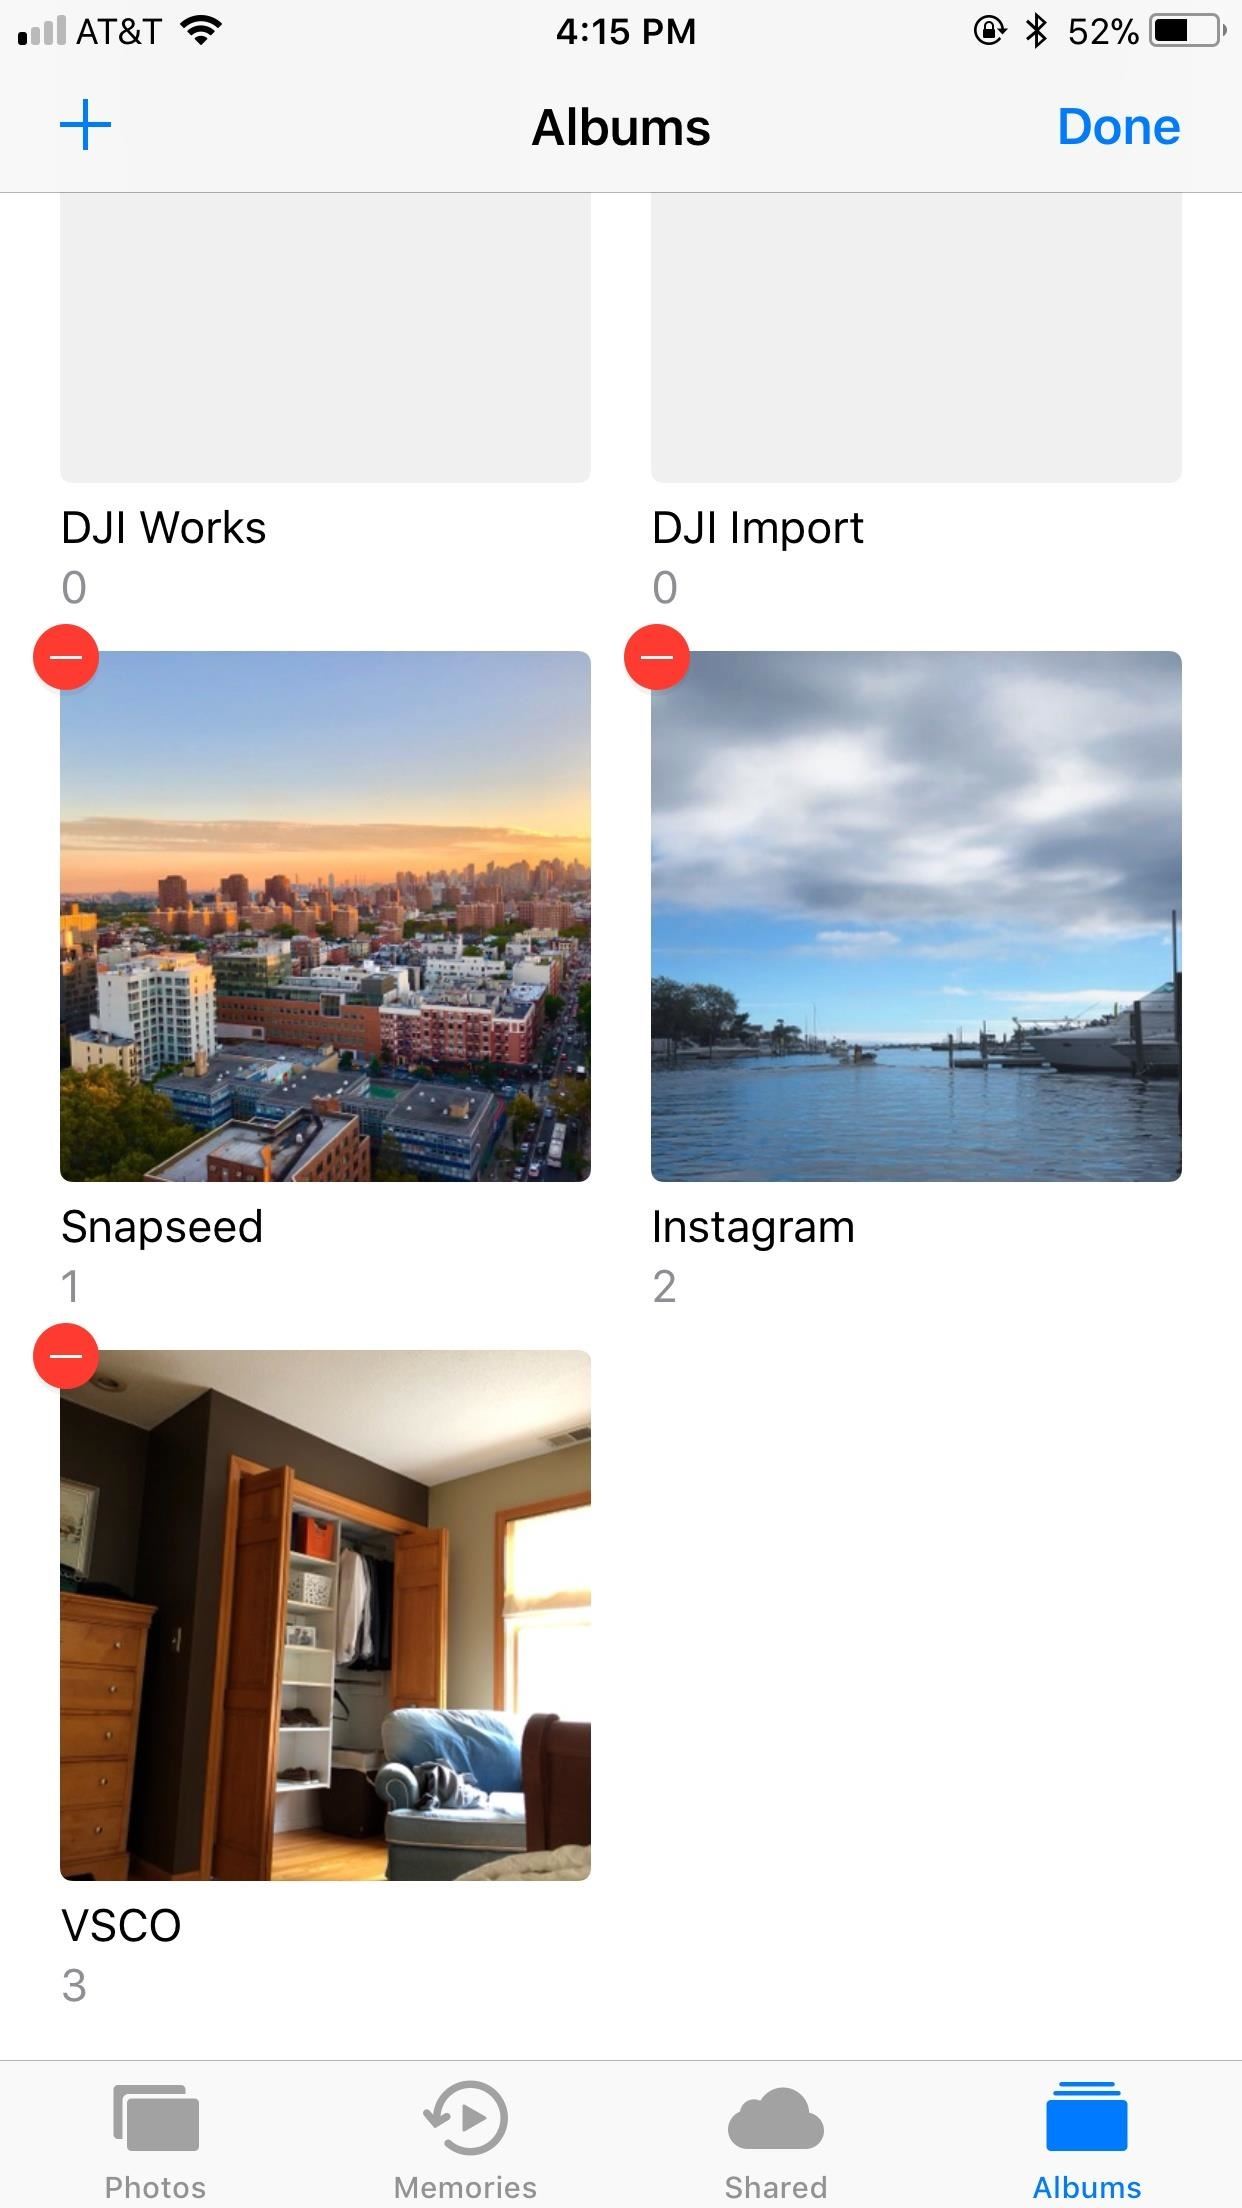
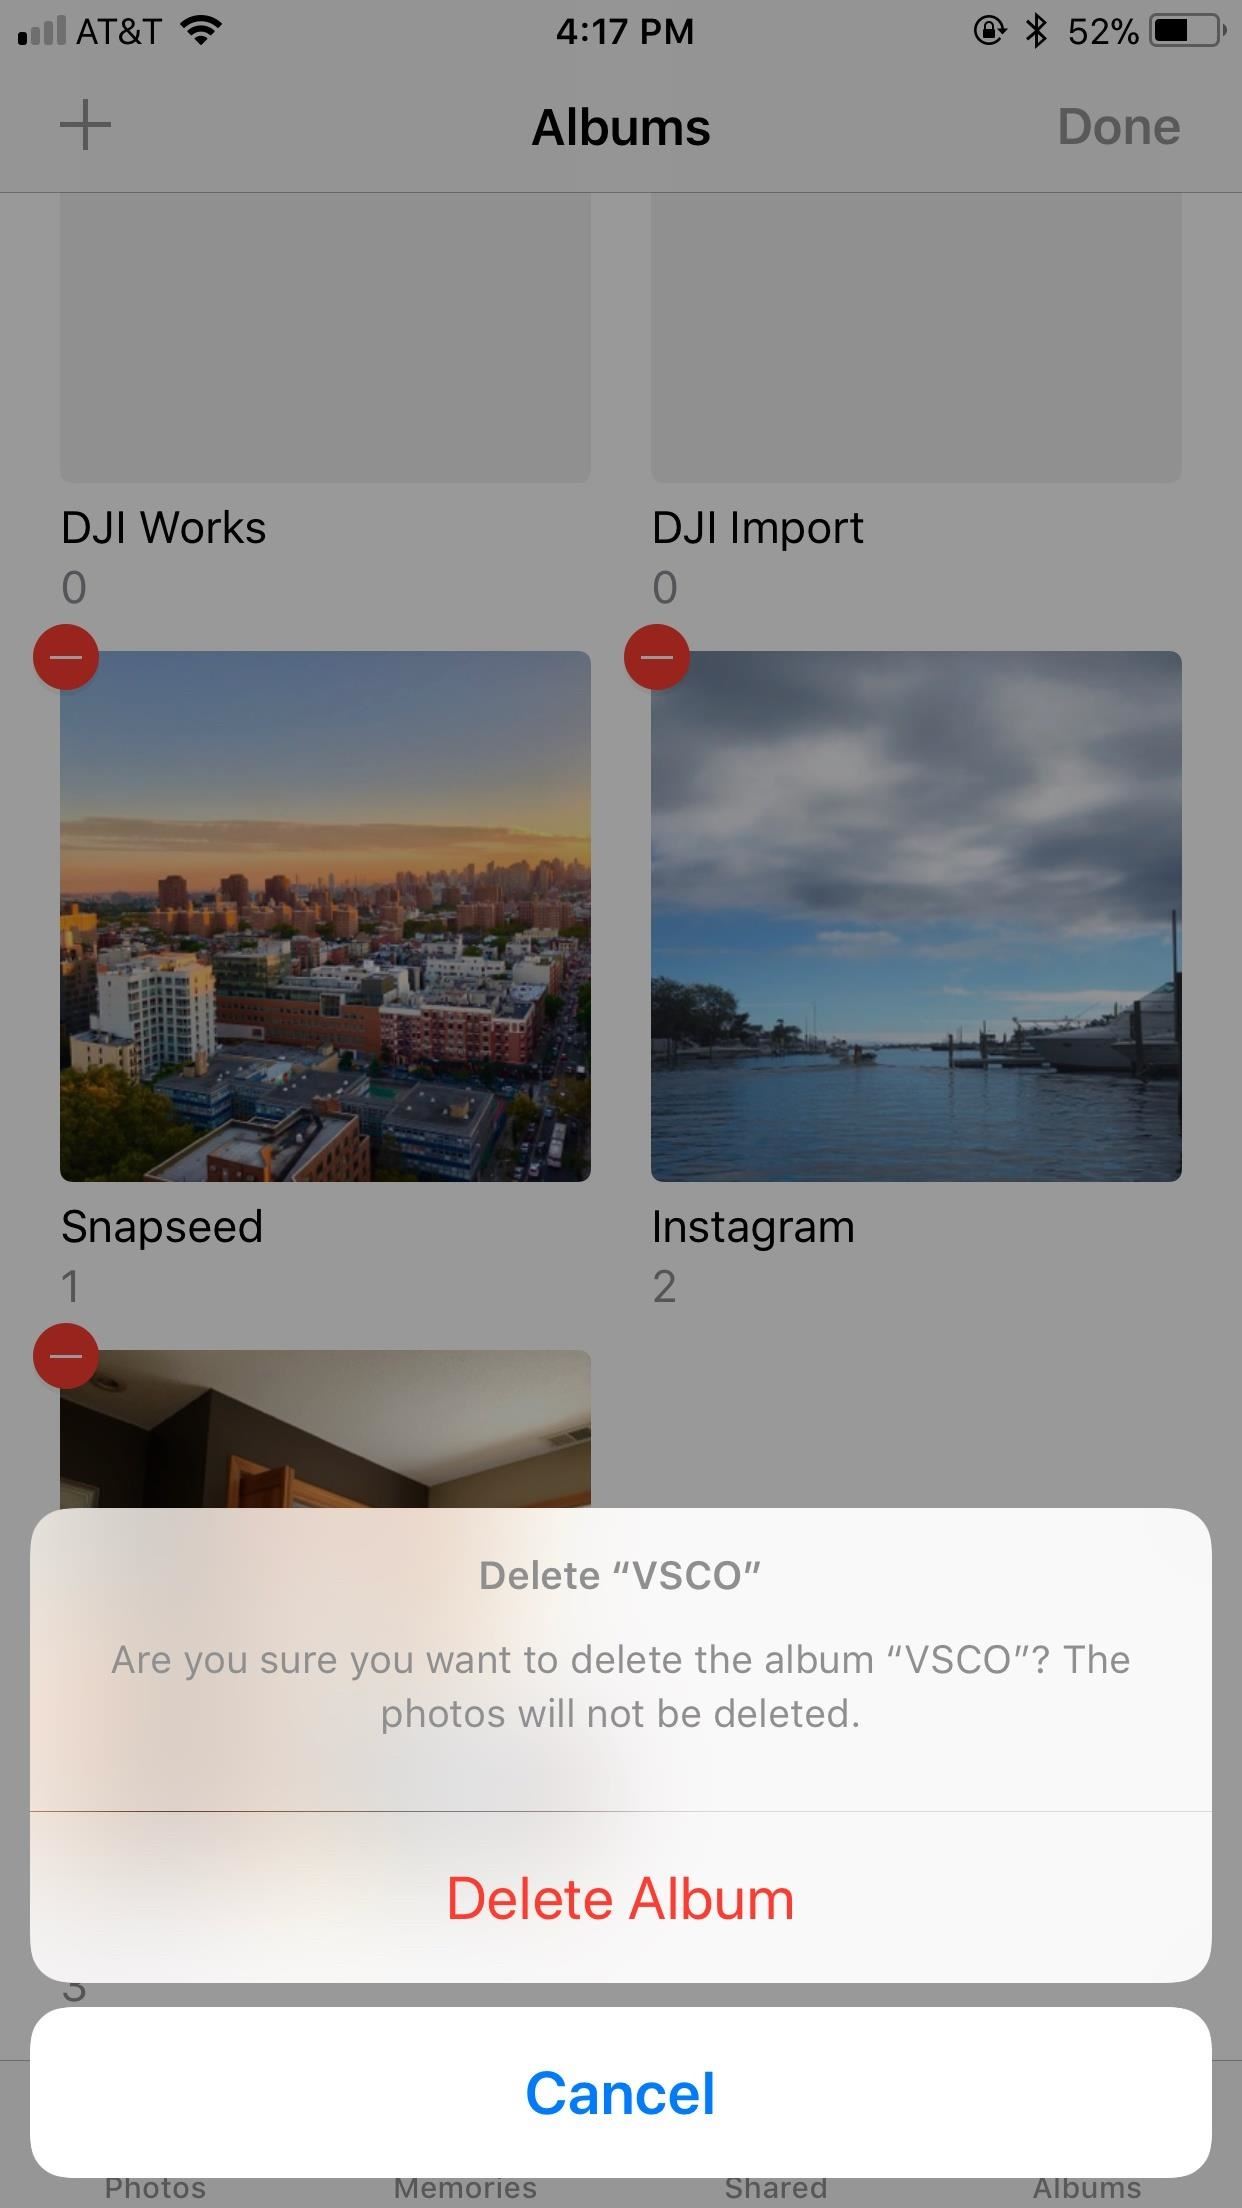
A Note for iPhone Users
VSCO may create its own folder in your Photos app after saving photos to your iPhone for the first time. If you don't want this folder, you can easily delete it. Just tap "Edit," then tap the red button that appears on the VSCO folder. Don't worry — you won't be deleting the actual photos from your Camera Roll.
Just updated your iPhone? You'll find new emoji, enhanced security, podcast transcripts, Apple Cash virtual numbers, and other useful features. There are even new additions hidden within Safari. Find out what's new and changed on your iPhone with the iOS 17.4 update.


Be the First to Comment
Share Your Thoughts