
If you're running iOS 10 or lower, there is no built-in way to make a screen recording on an iPad, iPhone, or iPod touch directly from the device, but that doesn't mean there isn't a way to record your screen at all.
Occasionally, there will be an app in the iOS App Store that offers screen recording, like Vidyo, but Apple removes them just as quickly as they pop up. There was also a hack that let you sideload a screen recording app on iOS, but it doesn't currently work in iOS 9. Besides that, there are a few jailbreak apps, but the safest way is to just use your Mac.
There are third-party Mac apps for recording your iOS device's screen, like Reflector, but Apple introduced a native way to record an iPad, iPhone, or iPod touch's screen in Mac OS X Yosemite for free — as long as the device has iOS 8 or higher.
So whether you just need to share a video of some Settings tweaks for your grandmother in another state, or want to capture some awesome gameplay footage that you'd like to upload to YouTube, here's how it's done.
Requirements
In order to record the screen on your iPad, iPhone, or iPod touch, make sure to meet these requirements before moving on.
- iPad, iPhone, or iPod touch with a Lightning port
- iOS 8 or higher
- Mac running OS X Yosemite (10.10) or higher
- QuickTime Player 10.4 or higher
- USB-to-Lightning cable
Note that this will not work with QuickTime 7 Pro, only the version that comes preinstalled in OS X Yosemite or higher.
Step 1: Connect Your iOS Device to Your Mac
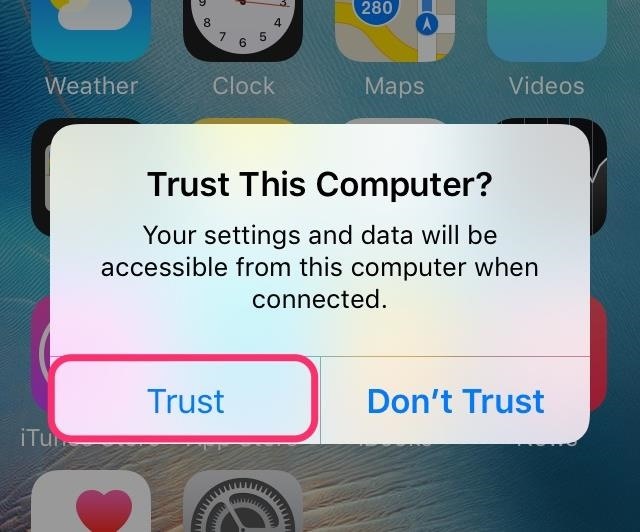
Connect your iPad, iPhone, or iPod touch to your Mac using your USB-to-Lightning cable. Depending on if you've connected your iOS device to your computer before or not, you might get an alert on your iPhone asking if you want to "Trust This Computer?"—just tap on Trust.
Step 2: Launch QuickTime Player
QuickTime Player is the dark magician that is responsible for recording your iOS device's screen. The fastest way to summon QuickTime Player is via Spotlight; click on the magnifying glass icon in the menu bar or use the Command + Spacebar keyboard shortcut, then type in "QuickTime" and hit Enter or double-click on QuickTime Player.
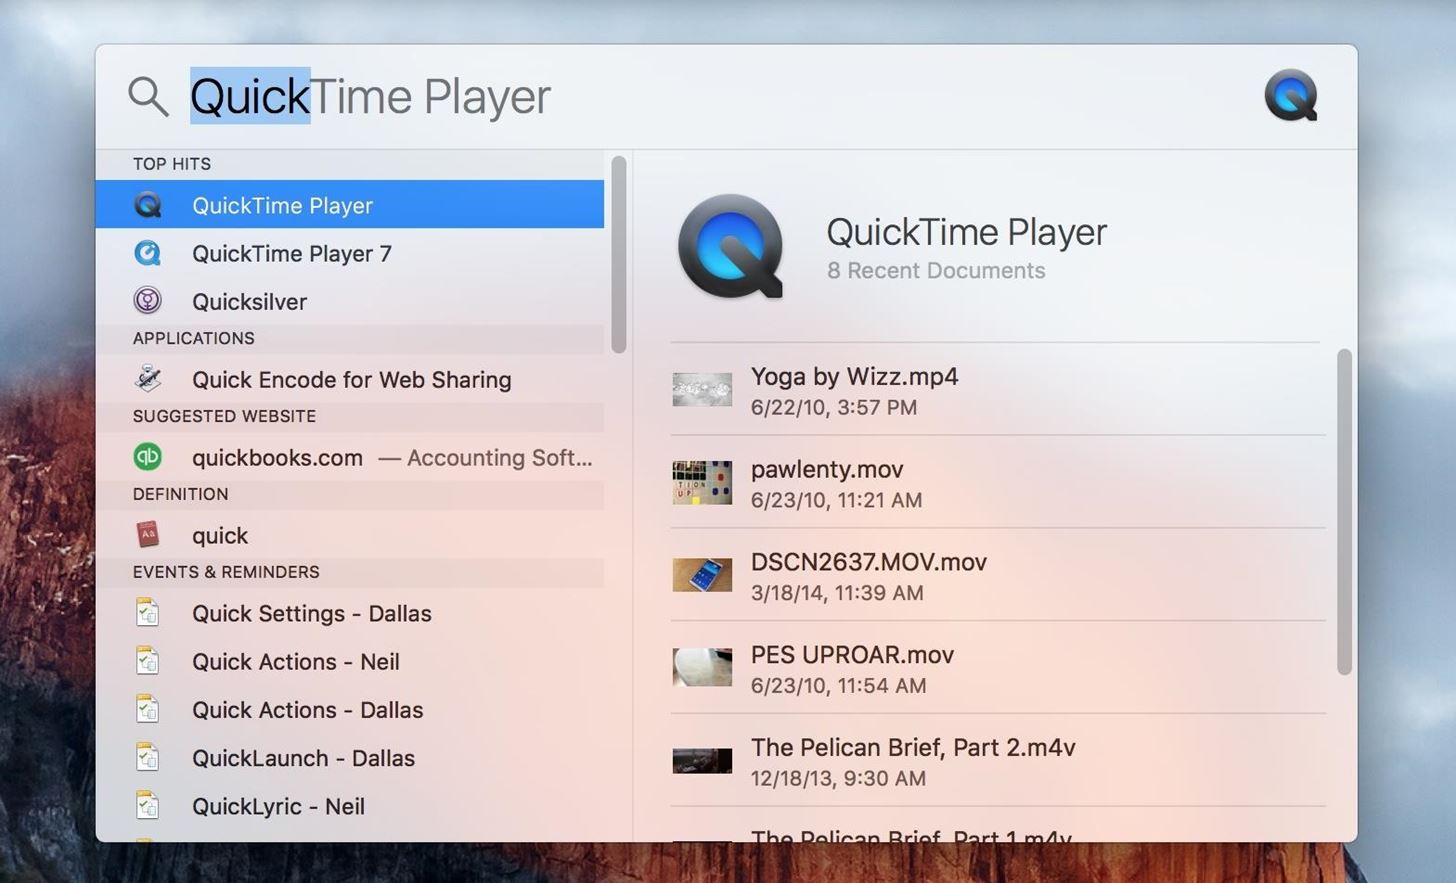
(You can also find QuickTime Player in your Applications folder.)
Step 3: Set Your Options
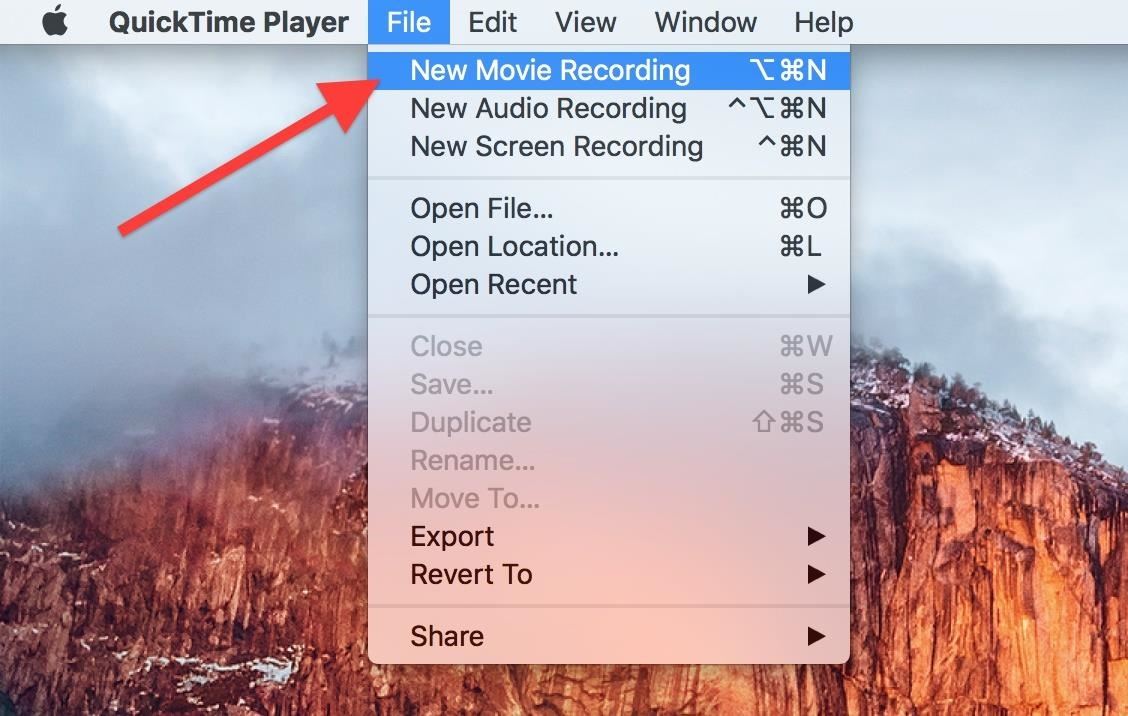
Go to File in the menu bar and choose the New Movie Recording option, or use the Alt + Command + N keyboard shortcut.
Now the Movie Recording screen should pop up, which should also activate your Mac's built-in FaceTime camera—just ignore that for now.
On the right side of the red Record button, click the downward-facing arrow to bring up the options. From this menu, choose iPhone (or whichever iOS device you have connected) in the Camera section.
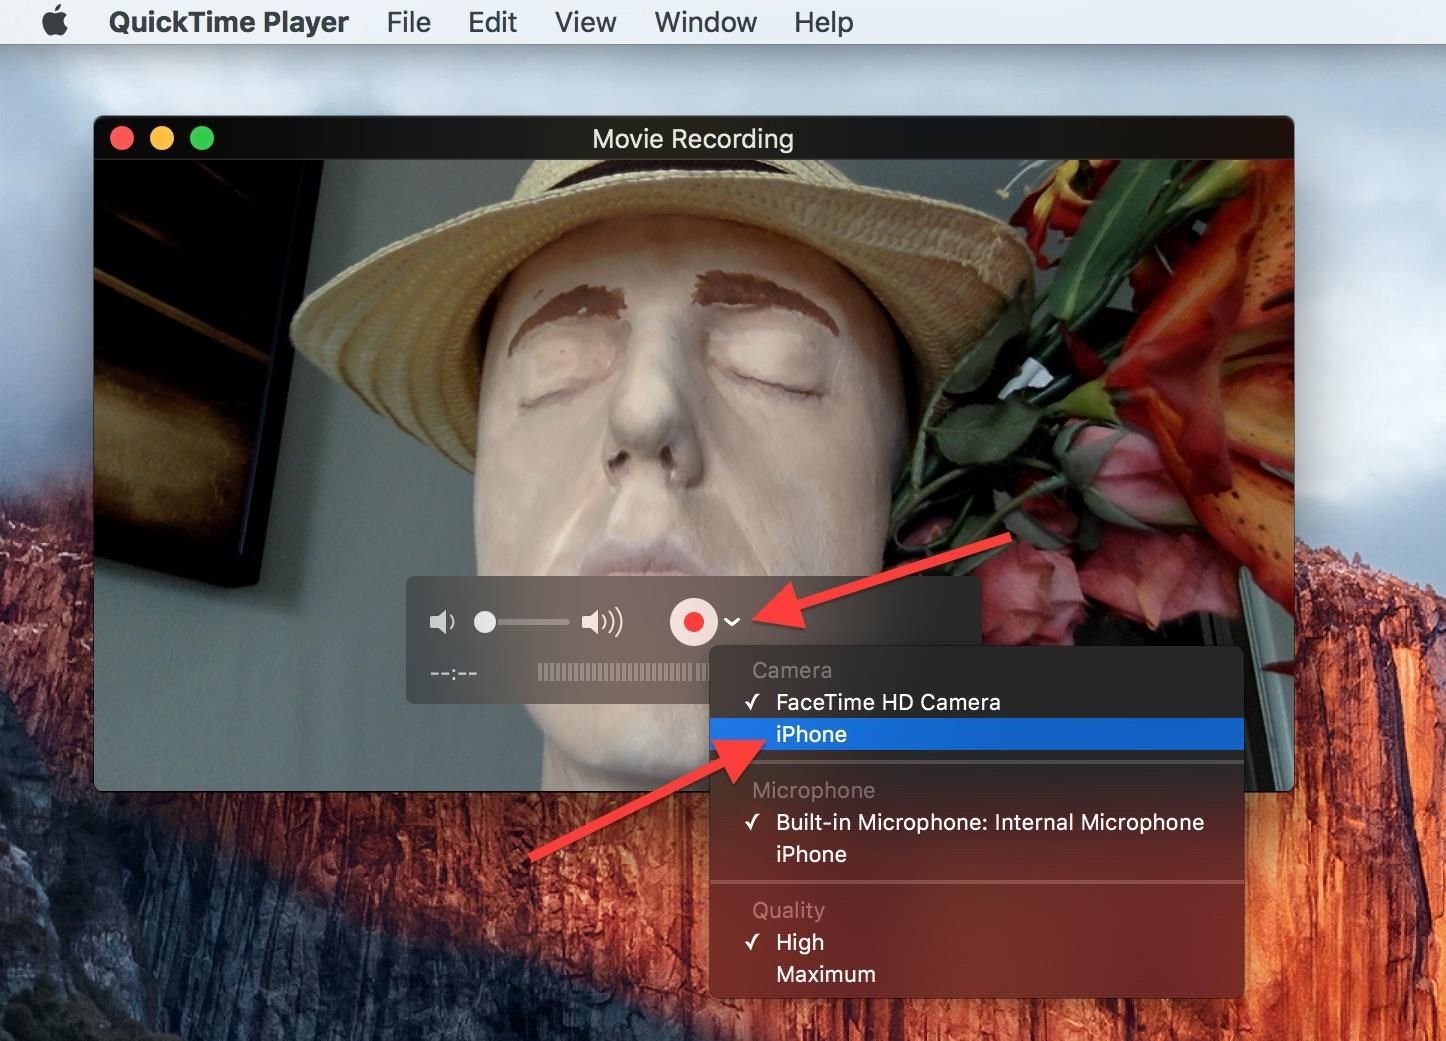
As you can see, you also have the option of narrating or recording from your iPhone's microphone as well as from your Mac's built-in Mic or another microphone input. Plus, you can choose between High or Maximum quality.
Step 4: Record Your Screen
You should now see your iPhone's screen on your Mac's desktop. All that's left for you to do is to hit that nice red record button and the show is on. QuickTime will detect rotation, so as you rotate your device's orientation, the recording will adjust accordingly.
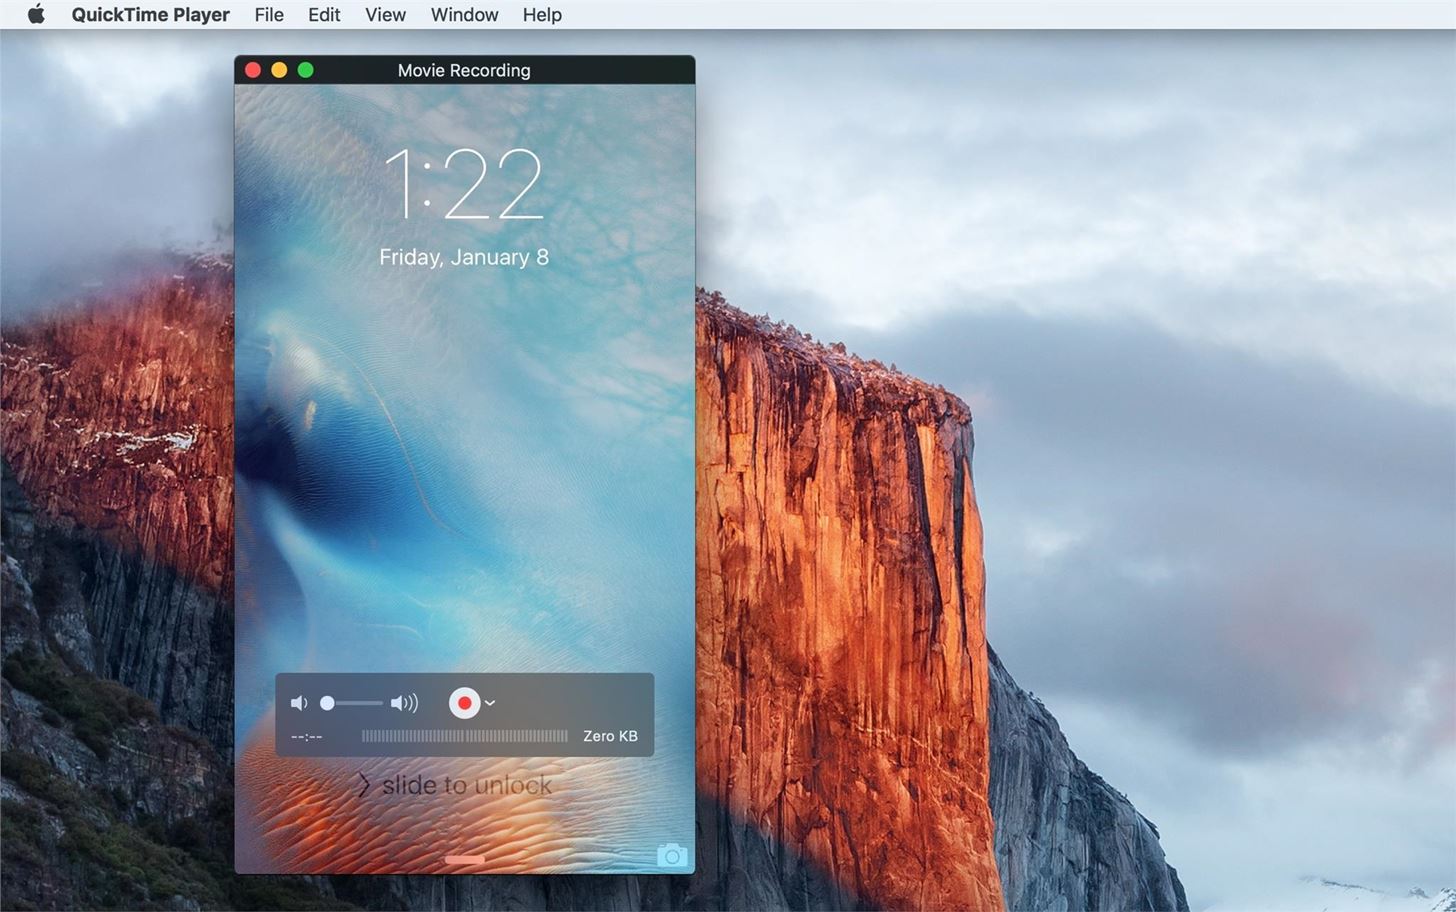
The actual recording is almost live, meaning that there is a slight lag between touching your iOS device's screen and it showing up in QuickTime. For the most part, the delay is almost negligible, though if you're recording a heavy duty 3D-intensive game, results might be less than optimal, especially if you're trying to make a voiceover.
If your iOS device falls asleep for any reason, the recording will be paused, and once you wake the device back up, recording will resume.
What You Can't Change on the Recording
If you haven't already noticed, the time listed on-screen in the recording will always be 9:41 AM, but all other times (on the lock screen, Notification Center, etc. will be their normal times). If you're curious as to why it's 9:41 AM and not another time, check out the reason.
Also, you will also have a full signal strength indicator (no matter what your true cellular signal strength is), a full Wi-Fi icon (even if you have Wi-Fi disabled), a fully charged "green" battery, and the connected Lightning symbol.

Step 5: Stop & Save Recording
When you want to stop recording, hover over the QuickTime recording window to unhide the controls, then click on the stop button. QuickTime Player now shows you what you recorded, and if you like what you see, you can go ahead and save it as a .mov file—select File -> Save from the menu bar, use the Command + S keyboard shortcut, or click on the red X to close the window.
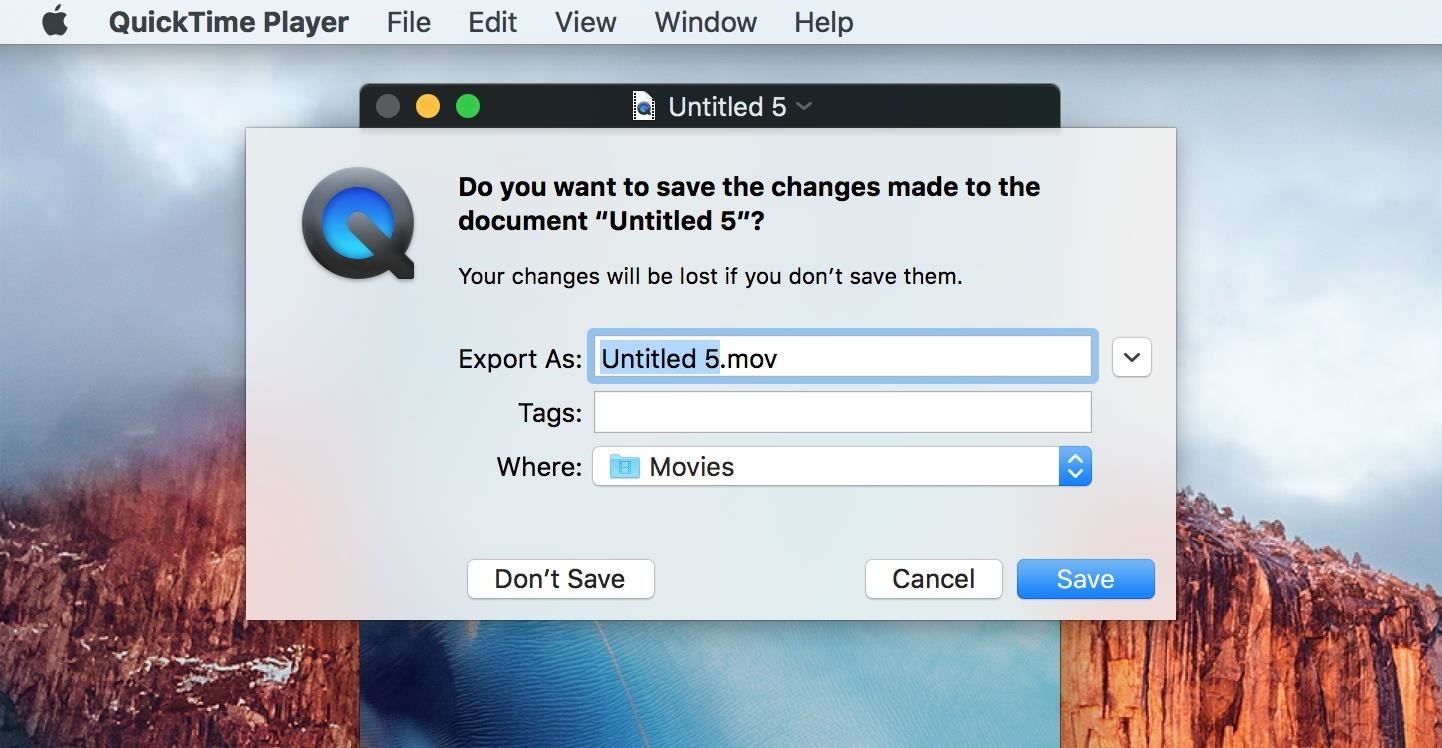
The file will be saved in the directory you had selected, and will be saved in the original dimensions of your iOS device's screen resolution. For instance, for an iPhone 6 Plus, it would be 1080 x 1920 pixels.
Step 6: Sharing the Video
If you want to, you can export or save the video right then and there. Just go to File in the menu bar and select either Export or Share, depending on what you want to do.
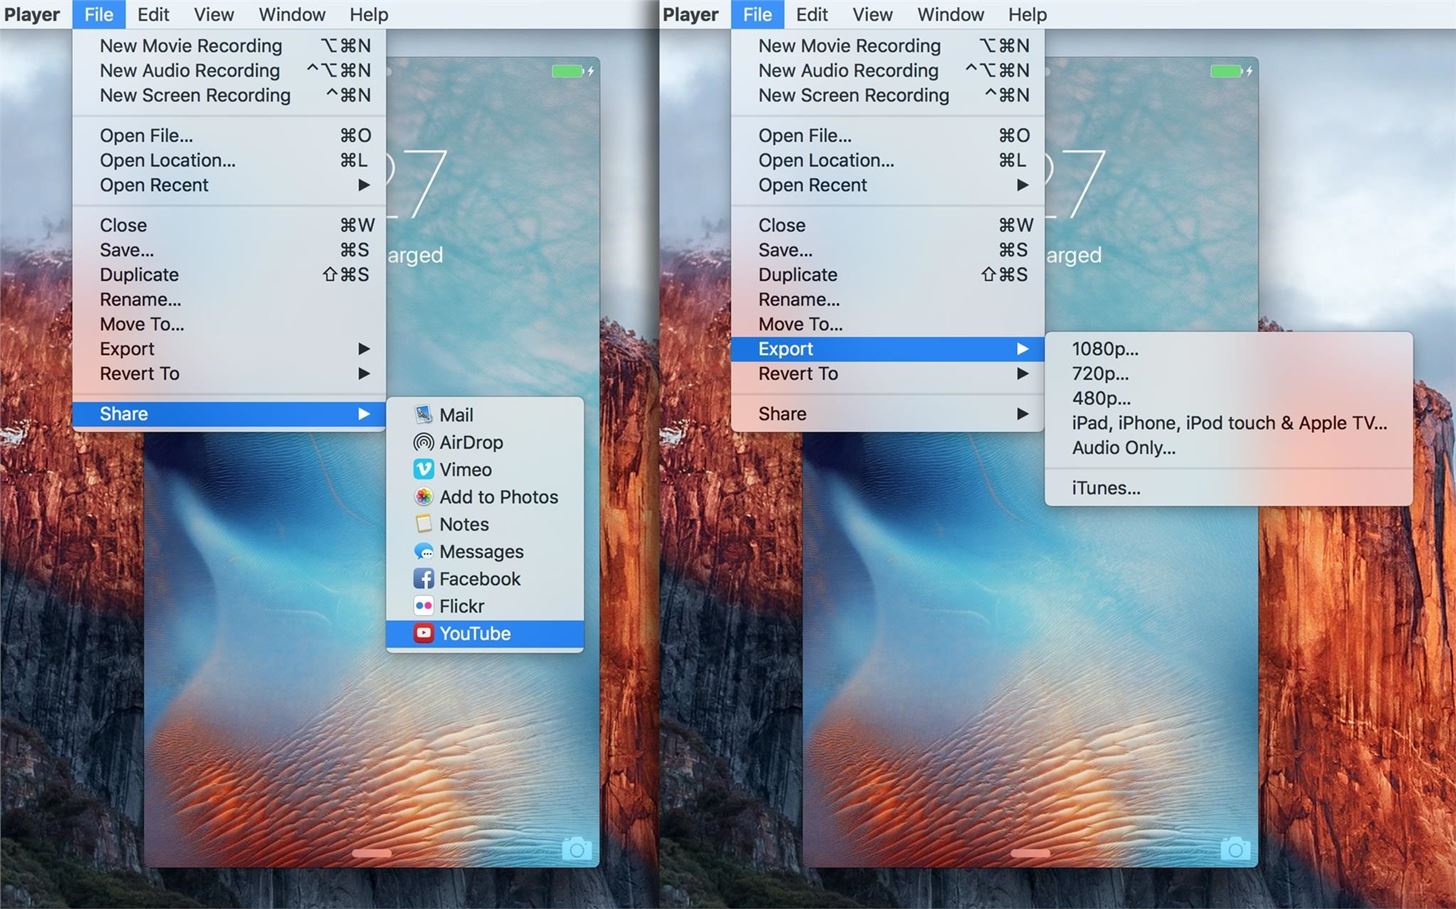
You can export in different sizes, or just the audio only, and you can share via Mail, AirDrop, or Messages, add to a Note or your Photos app, and even upload to Vimeo, Facebook, Flickr, or YouTube.
Just updated your iPhone? You'll find new emoji, enhanced security, podcast transcripts, Apple Cash virtual numbers, and other useful features. There are even new additions hidden within Safari. Find out what's new and changed on your iPhone with the iOS 17.4 update.


2 Comments
Hi. In Sierra 10.4, with QT 10.4 the iPhone screen capture as described is no longer available unfortunately, as evidently apple caught it, disabled it. Another sorrowful reason I wish I never had upgraded to OS X Sierra 10.4. I did it to get the new Photos adjustment tool called Brilliance tho.
Comment retracted. Wasnt plugged in all the way!!!!!
Share Your Thoughts