
With over 10,000 possible combinations, a four-digit passcode may seem secure, but it's fairly easy for someone to crack your code—no matter how clever you think it is. Luckily, there are many other options for securing your iPhone's lock screen—especially if your running iOS 9.
Step 1: Beef Up Your Passcode
Even with Touch ID security in place, you're still required to have a passcode in case the fingerprint scanner is unresponsive or your fingers are too sweaty to read. In iOS 8 and older versions, a four-digit passcode was standard, and chances are you still have one on your iOS 9 device if you transferred all of your settings over.
Option #1: Use a Six-Digit Passcode
This feature was first introduced in iOS 9, and provides up to 1,000,000 possibilities (which is a lot better than 10,000). If you set up your iOS 9 device from scratch, chances are it wanted you to use a six-digit one anyway, though you could have opted for the simple four-digit one instead.
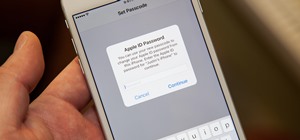
Navigate to Settings -> Touch ID & Passcode, then after entering your current passcode to unlock the preferences, select Change Passcode. You'll need to enter your current passcode in again, then tap on Passcode Options and select 6-Digit Numeric Code.
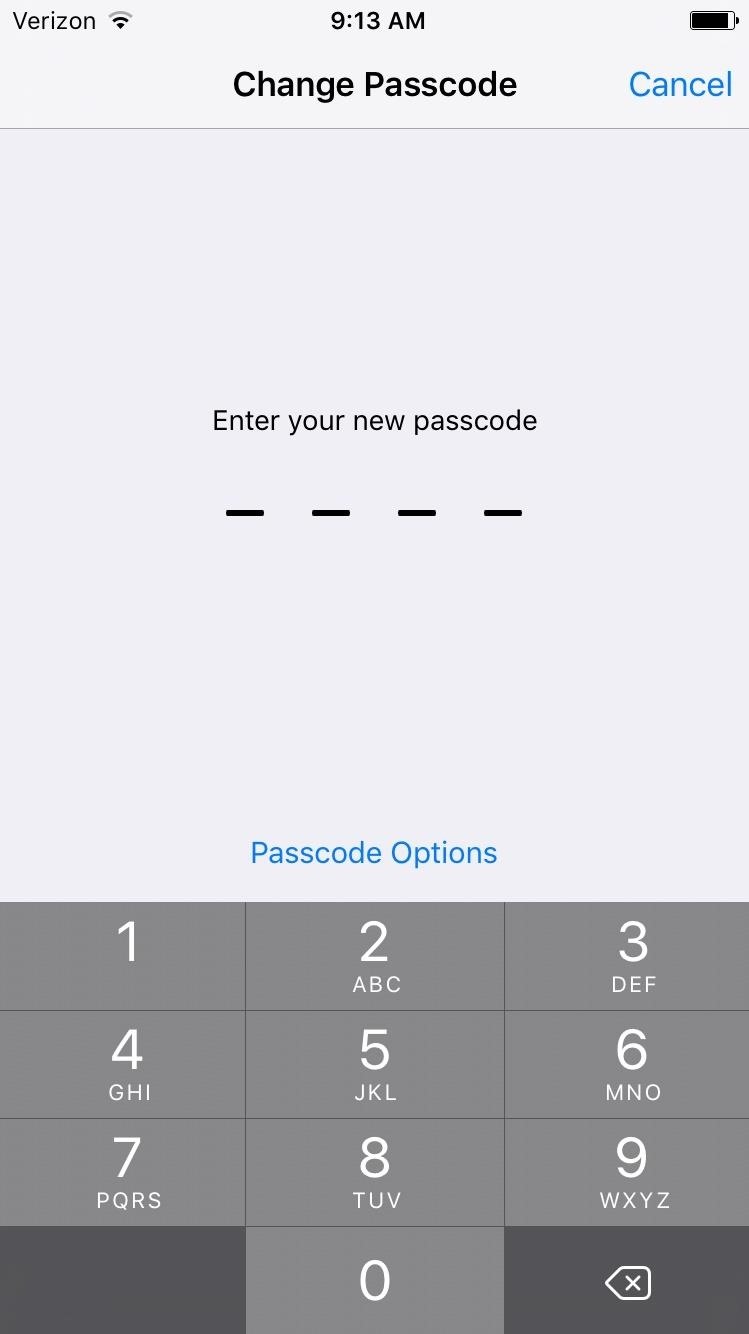

Option #2: Use an Any-Digit Passcode
If four or six digits isn't enough protection for your lock screen, there are a few more options for you. By selecting Custom Numeric Code (iOS 9 only), you can create a numbers-only passcode of any length, which can be crazy difficult to crack (unless, of course, you record a video of it).
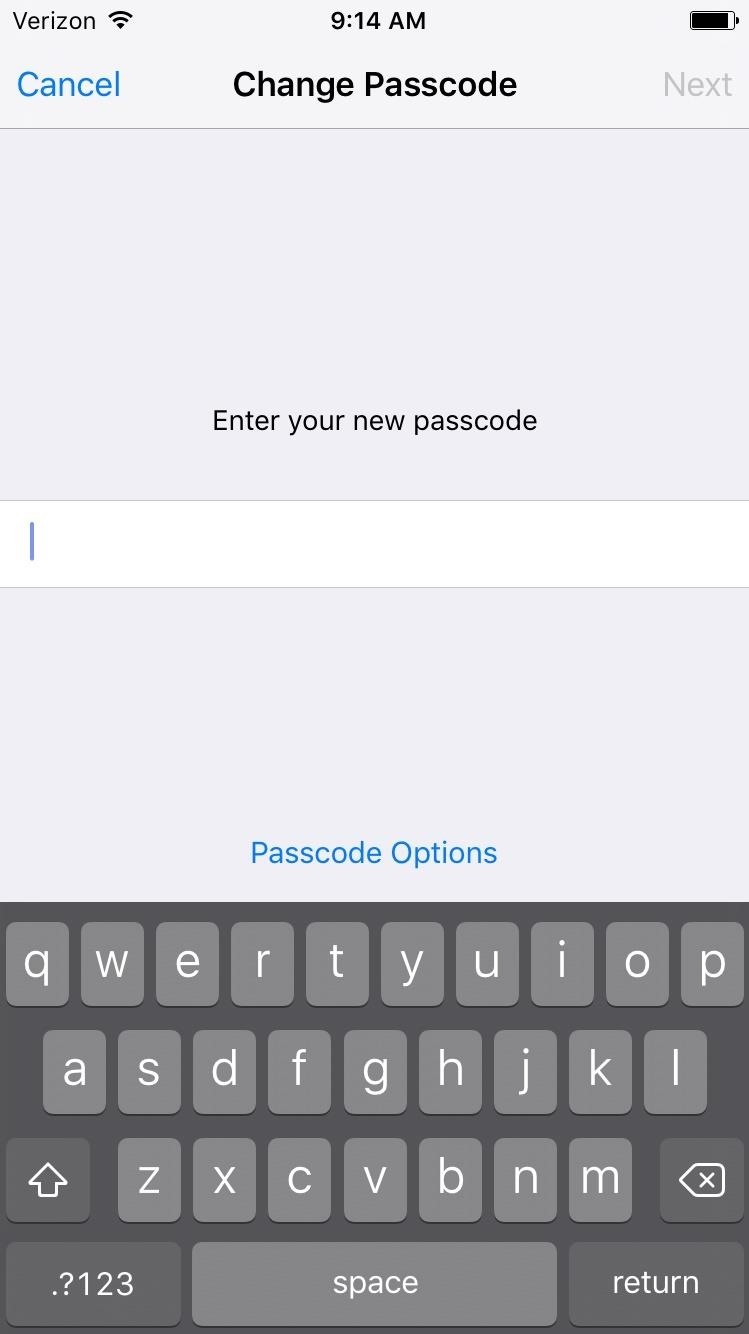
Option #3: Use an Alphanumeric Code (Or Complex Passcode)
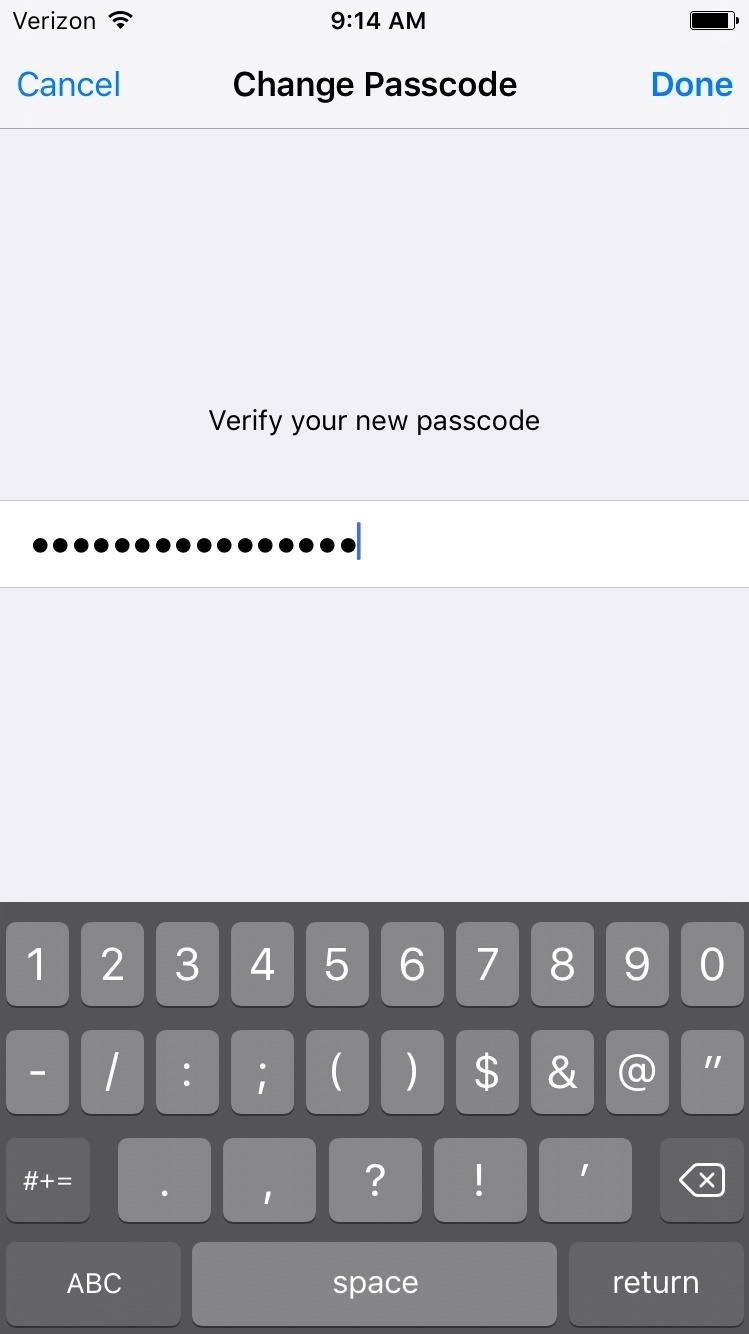
If you'd rather have a password, you can select Custom Alphanumeric Code (in iOS 8, you would un-toggle "Simple Passcode" to create a "Complex Passcode") to make your lock screen even more secure. Alphanumeric codes can be any length, and can include letters, numbers, and/or special characters. With a combination of various types of characters, it'll be a lot more difficult to crack than a four-digit, six-digit, or any-digit passcode.
Step 2: Disable Lock Screen Features
As useful as Siri can be, she's somewhat of a liability when accessible from the lock screen, which was made obvious through an iOS 9 exploit. Luckily, all you have to do is deny lock screen access. In addition to Siri, other sensitive content should be disabled.
To adjust what's accessible from your iPhone's lock screen, head into the "Allow Access When Locked" section in your Touch ID & Passcode preferences. From here, you can disable (un-toggle) Today, Notifications View, Siri, Reply with Messages, and Wallet.
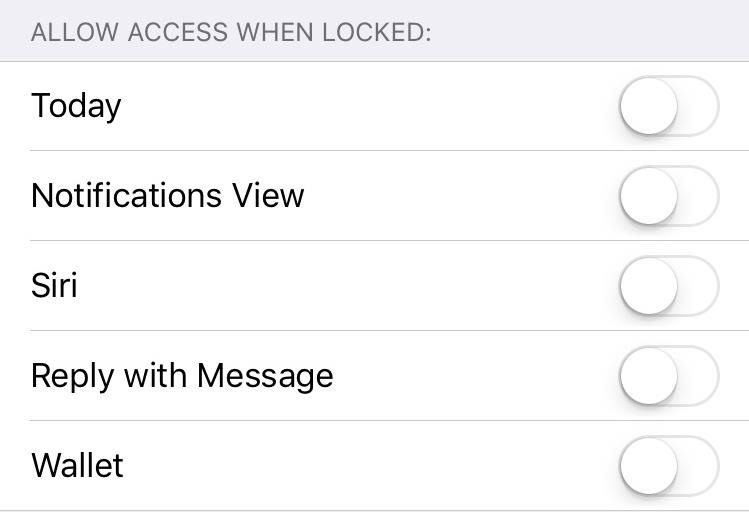
Siri aside, I'm more concerned with a stranger picking up my iPhone and replying to a text with something potentially horrible. And unless you're using Touch ID with Wallet, anyone with your passcode can use Apple Pay. As a precaution, and because unlocking my phone only takes a few seconds, I toggle everything off.
Step 3: Disable the Control Center
When you lose your iPhone, Find My iPhone is there to help track it down. That is unless the person who found it pulls up the Control Center to toggle on Airplane Mode, essentially taking your device off the grid, making it impossible to track or wipe all of its content.
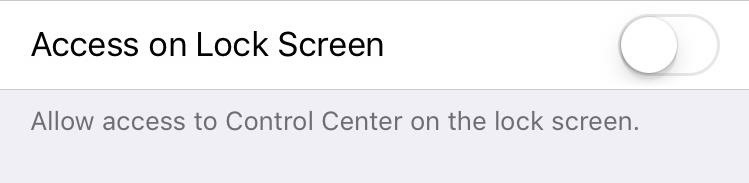
The best way to prevent this from happening is by heading to the Control Center preferences within your iPhone's settings and toggling off "Access on Lock Screen." Although your iPhone can be turned off as a preventive measure, the person who has it won't be getting much use out of it without having the location tracked.
Step 4: Make Your iPhone Lock Sooner
Although it's annoying that my iPhone will automatically lock itself within a short period of time when not actively in use, this precaution can prevent potential scumbags from picking it up and using it right away without needing a passcode or Touch ID. This can be a problem with "snatch-and-run" scenarios, in which your iPhone is literally taken from your hands as you use it, when it's most-likely unlocked.
To get your iPhone to lock faster, you'll need to adjust the Auto-Lock setting and Require Passcode preference.
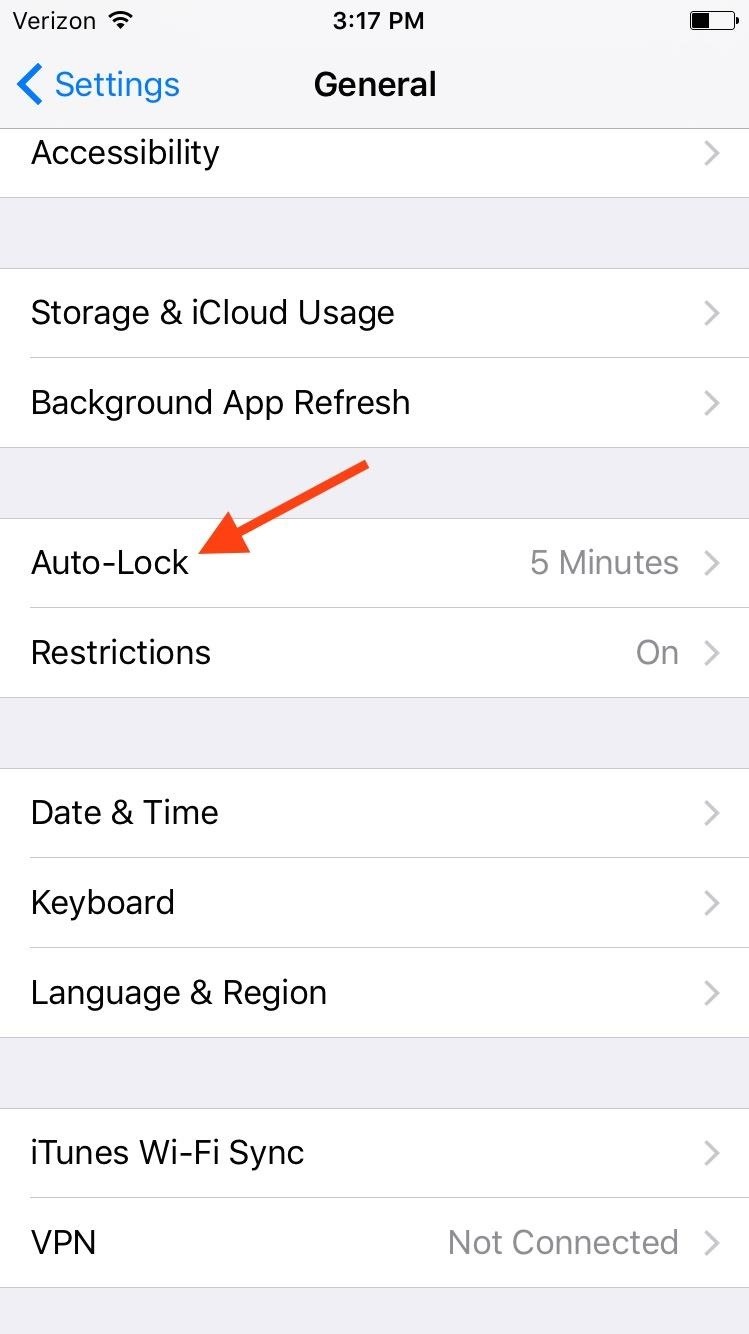
Change the Auto-Lock timer by heading into Settings -> General -> Auto-Lock. From there, I'd suggest using the shortest time available: 30 Seconds. While it's ultimately up to you, the less time there is, the smaller the window of opportunity is for anyone who steals your device.

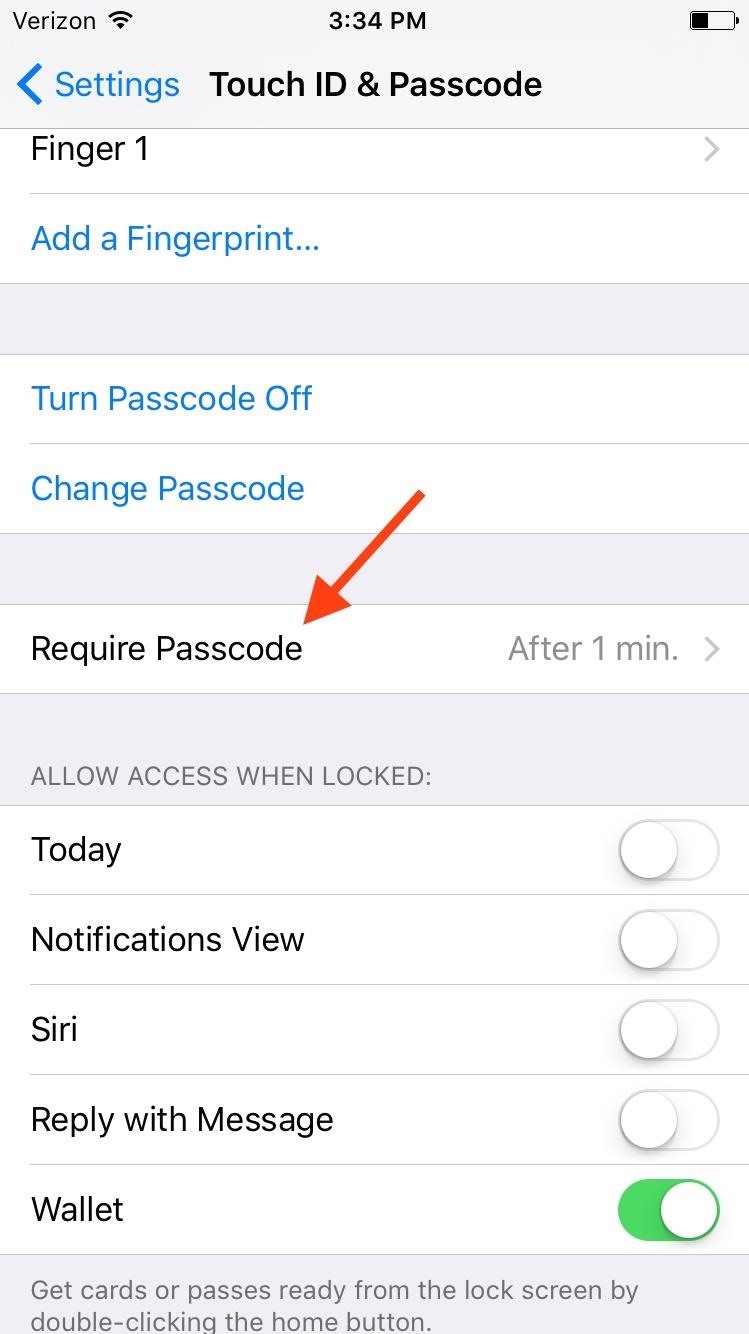
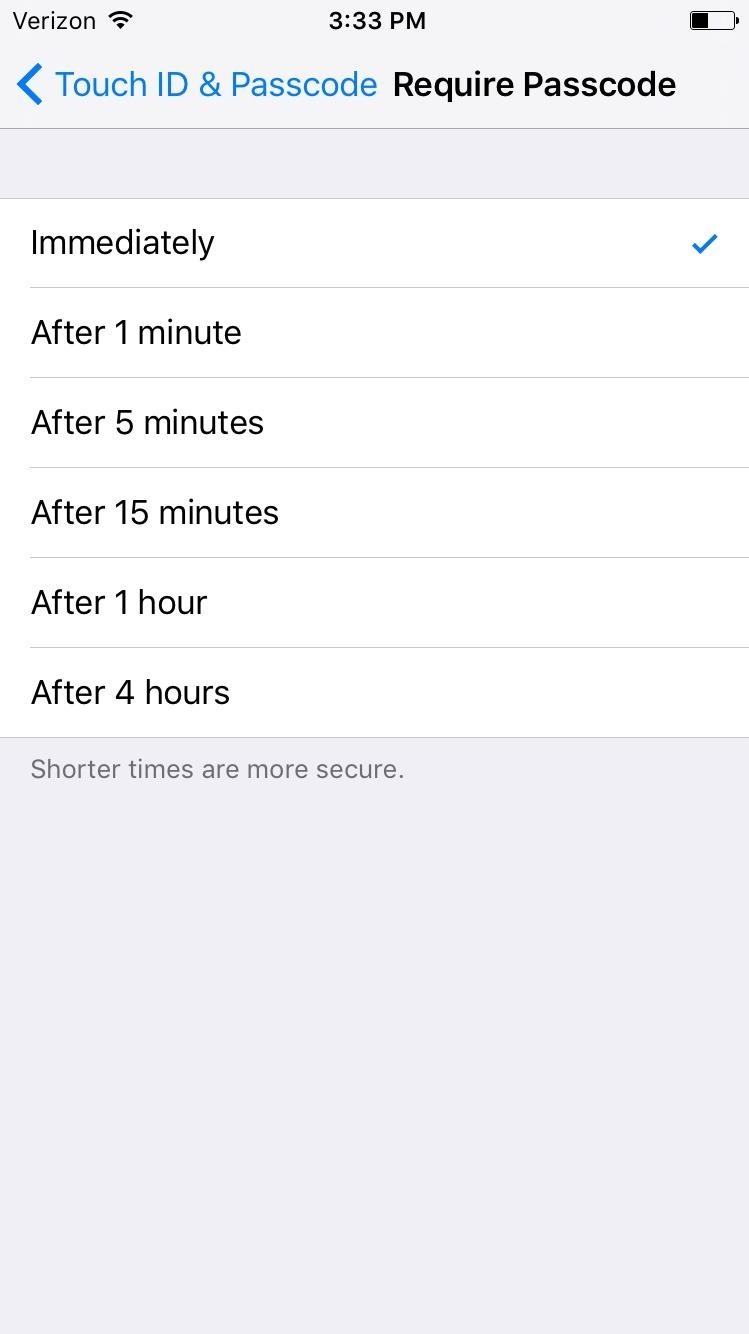
While Auto-Lock will power down the display, it won't lock your iPhone right away (unless Touch ID is enabled). To make your device lock as soon as the display dims, head into the Passcode & Touch ID settings and select the Require Passcode option.
As stated within the preferences itself, "Shorter times are more secure."
Step 5: Hide Notification Content or Remove It Completely
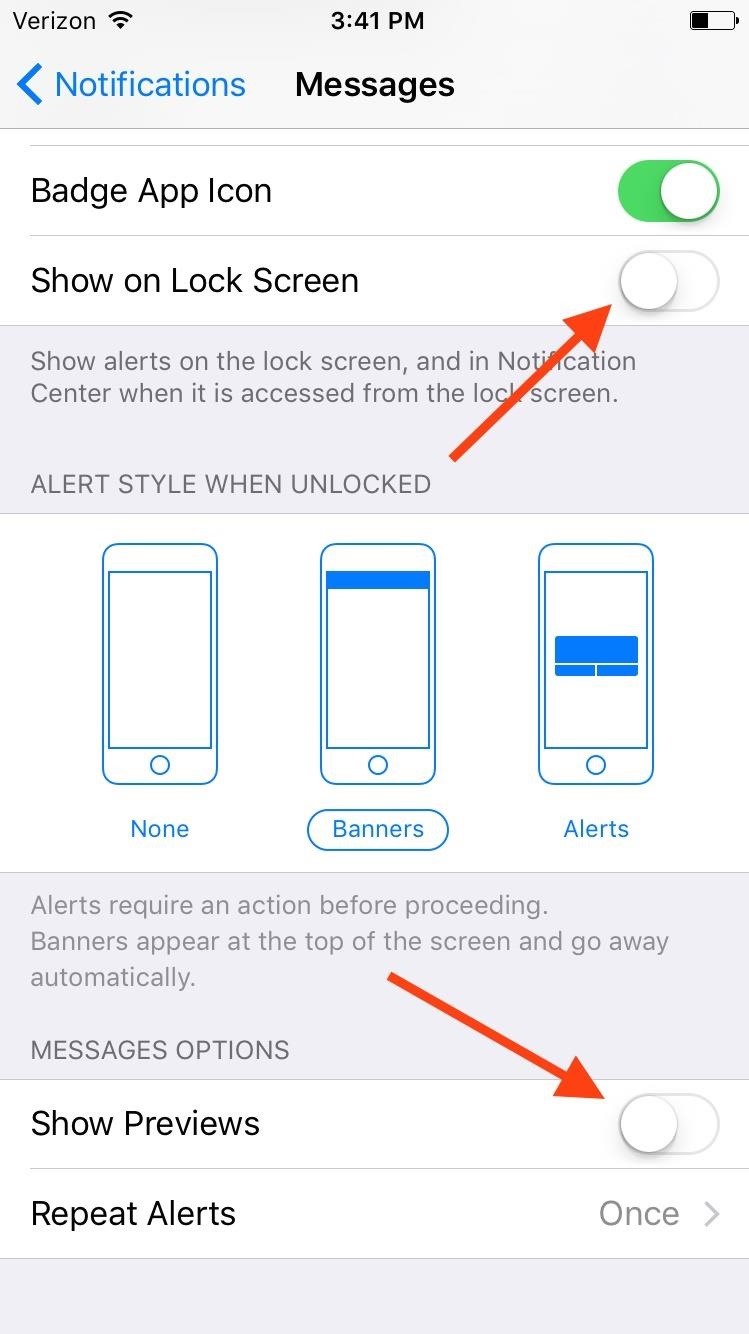
Emails and texts received are previewed on the lock screen, sometimes containing content we don't want visible to wondering eyes. So unless it's vital that you see notification previews on the lock screen, hide or remove them completely.
To adjust the notification preferences of any particular application, go to Settings -> Notifications and select the app whose notification content you wish to change. You can select to disable notifications on the lock screen or just disable previews (this will disable previews when the device is unlocked as well).

From now on, whether someone is trying to look over your shoulder or steal your iPhone, you'll have safeguards in place that won't make it as easy to use. If you have other safety tips you'd like to recommend, drop a comment down below.
More Lock Screen Tips:
- How to Use a Blank Keypad on Your Lock Screen (Jailbreak)
- How to Set a Passcode That Changes Every Minute (Jailbreak)
- Noseprint Security: How to Unlock Your iPhone with Your Nose
- Lock Screen Speed Dial with Custom Passcode Contacts (Jailbreak)
- Disable Security Lockouts from Failed Passcode Attempts (Jailbreak)
Keep up with Apple Hacks over on Facebook and Twitter, or Gadget Hacks over on Facebook, Google+, and Twitter, for more Apple fun.
Just updated your iPhone? You'll find new emoji, enhanced security, podcast transcripts, Apple Cash virtual numbers, and other useful features. There are even new additions hidden within Safari. Find out what's new and changed on your iPhone with the iOS 17.4 update.


Be the First to Comment
Share Your Thoughts